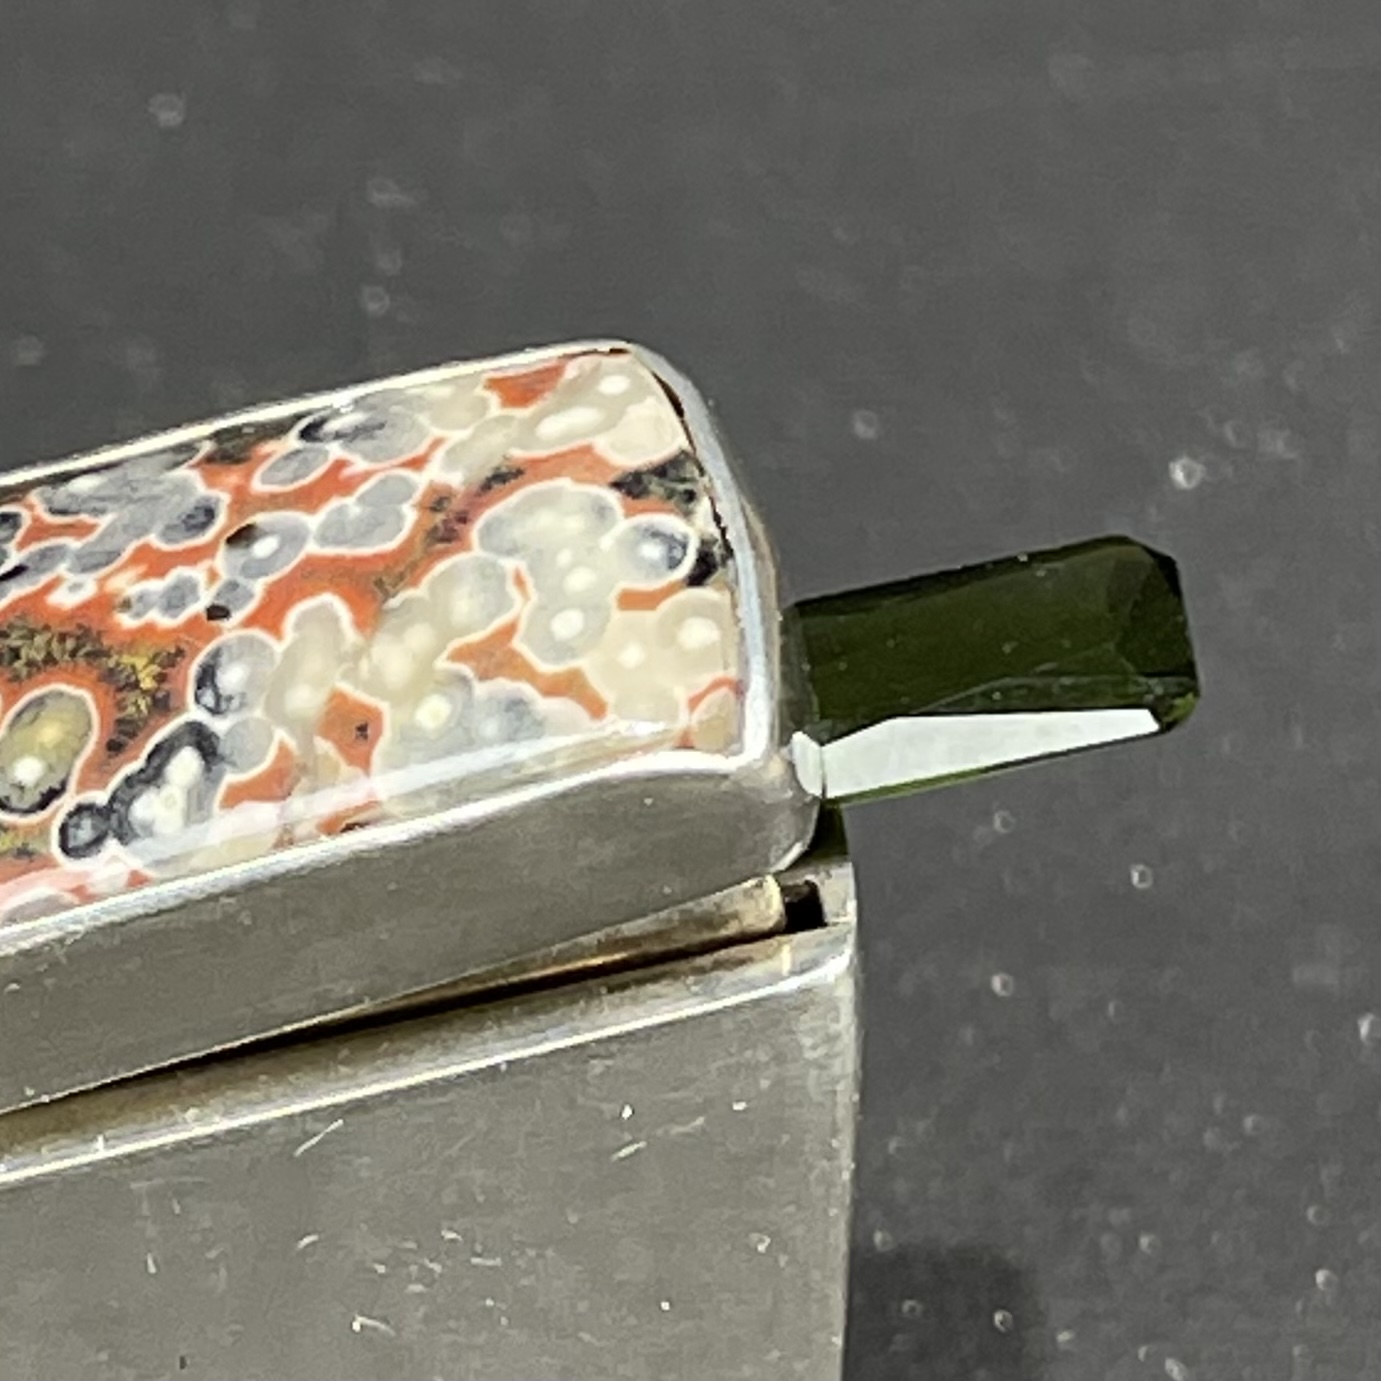
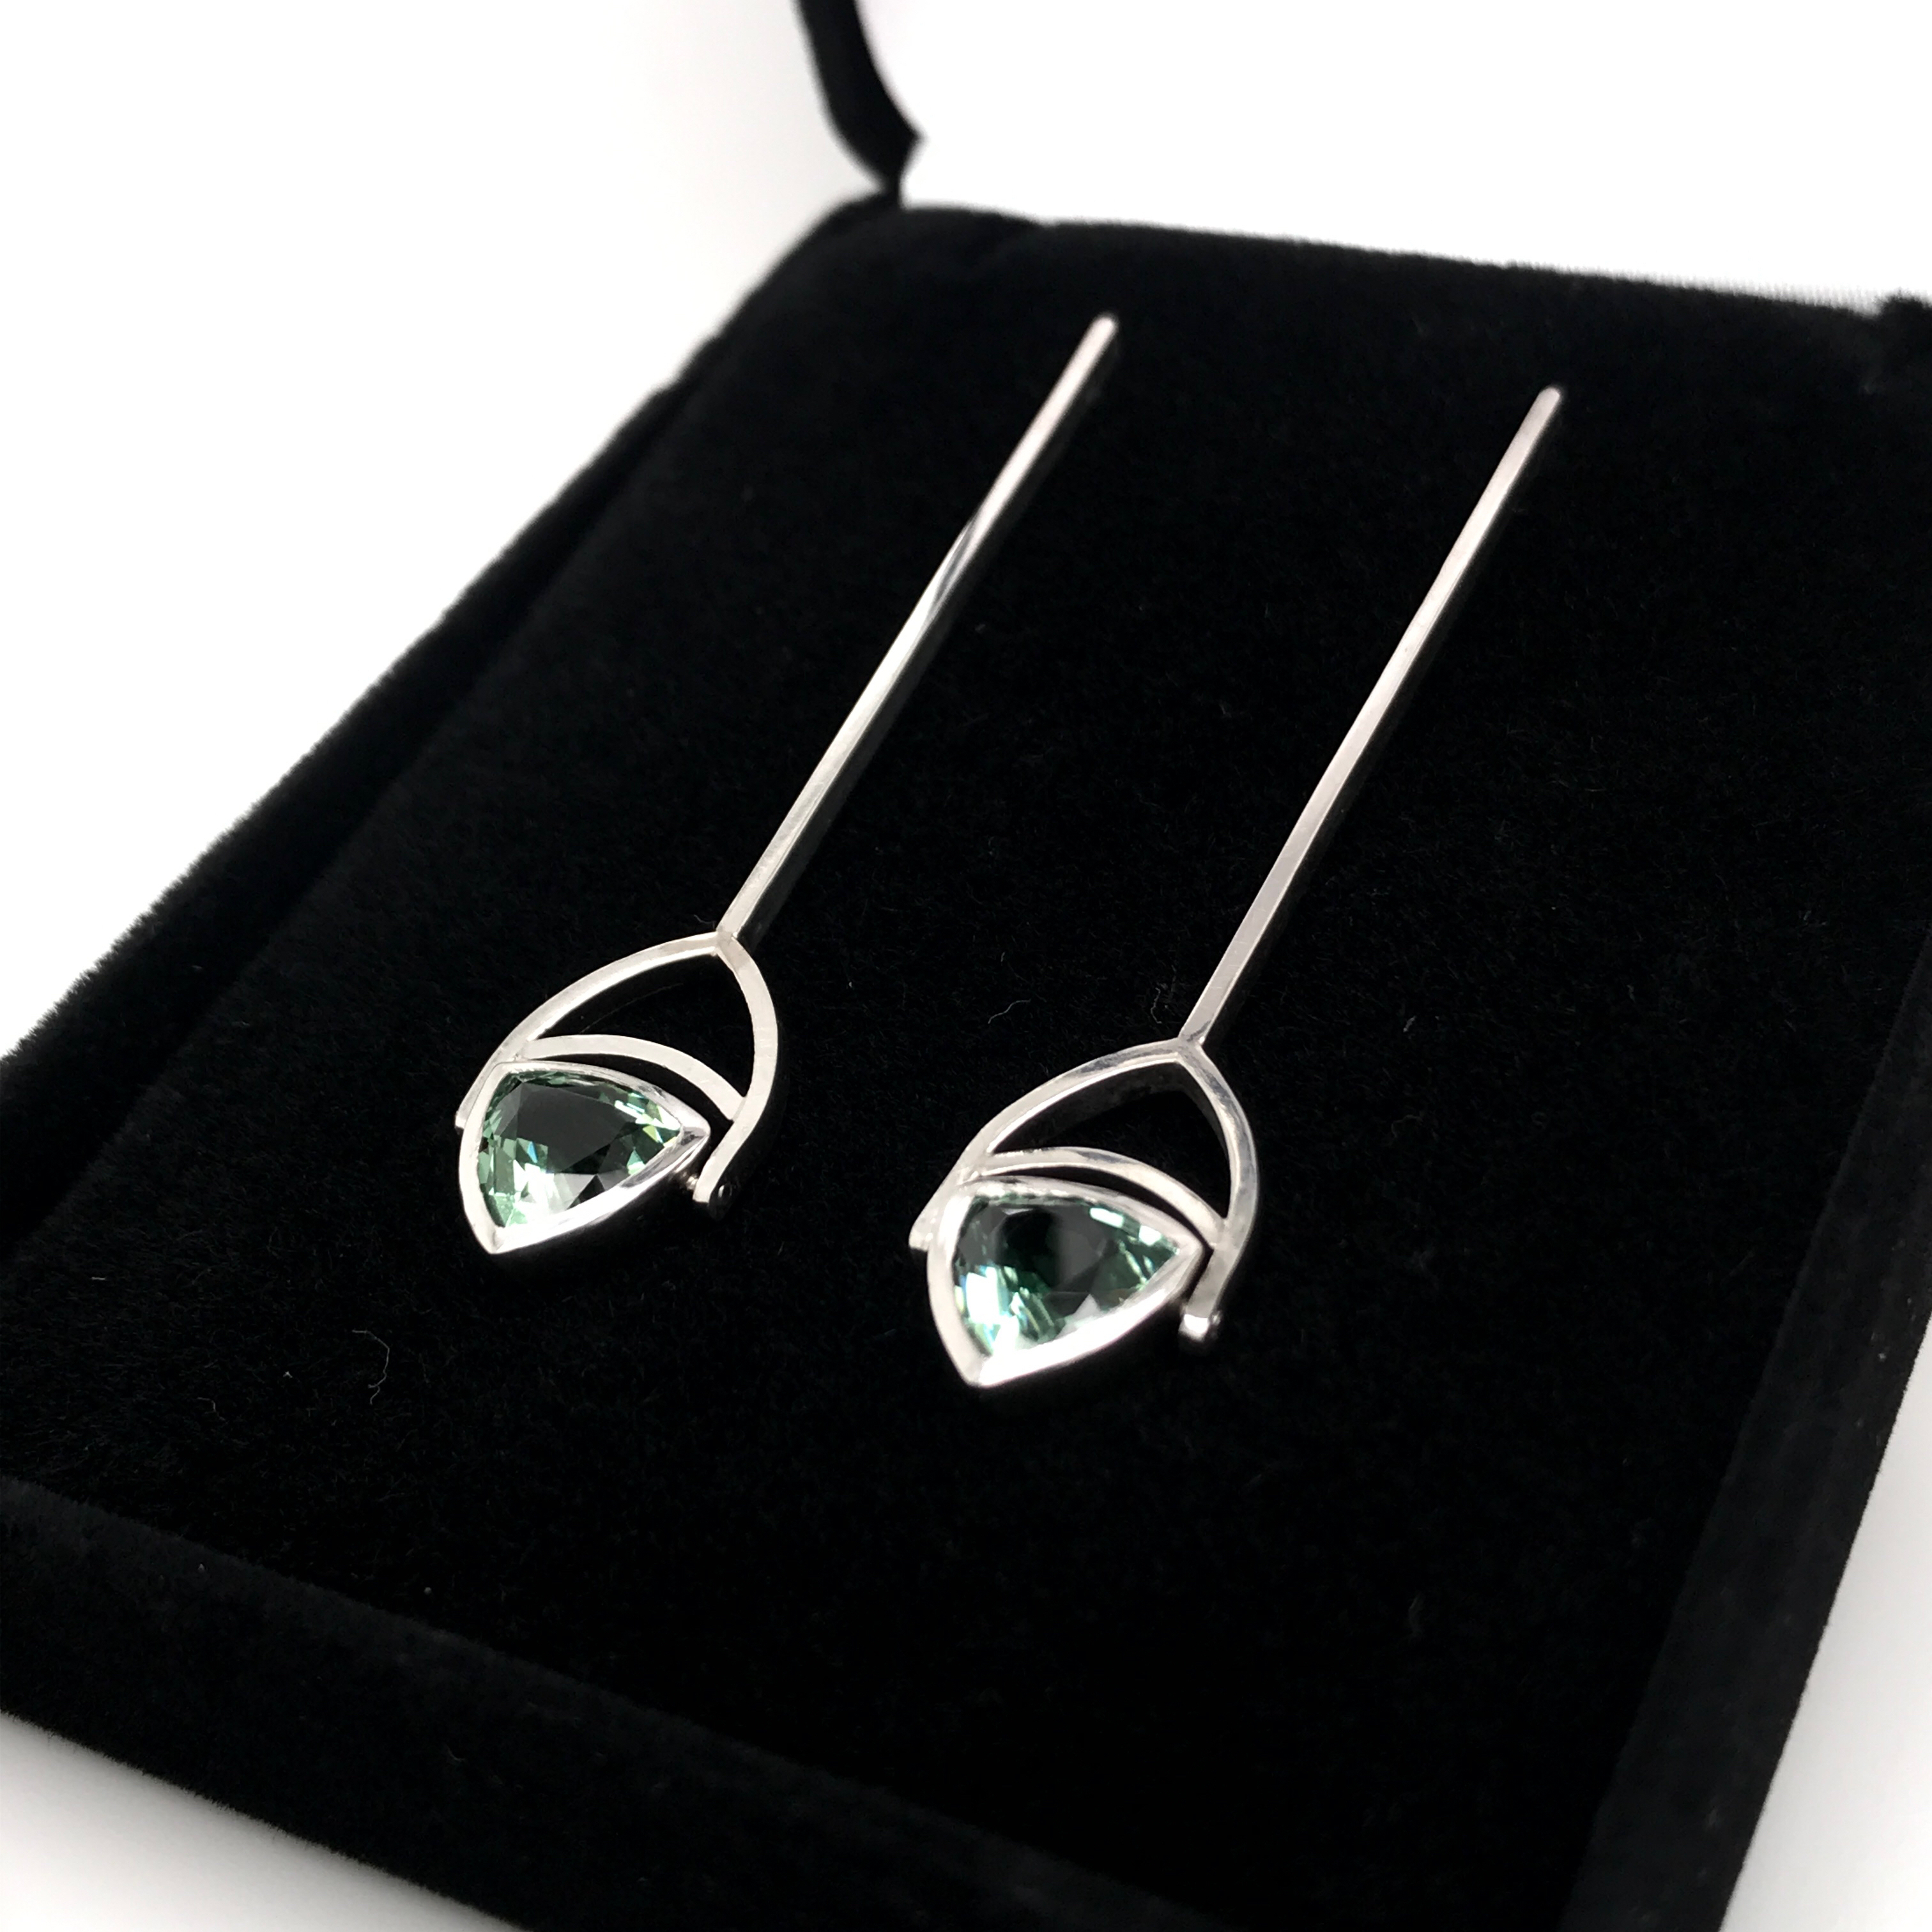
Apple Green tourmalines in platinum, fabricated entirely from ingot. See here for a video showing how the bezels pivot in their hangers to give the stones a little more movement and sparkle.
Though the design is clean and simple, the project itself was challenging in a number of ways, not the least of which was holding the bezels securely while setting the stones.
Alec - well done! Those stones have been beautiful set and the pieces are beautiful. My mother, when I said I wanted to go to art school, asked me if I wanted to draw Campbell Soup cans all my life. I thought no, I don’t want to do that. But now, I realize someone else did that and he made out ok - except for surgery. Keep on keeping on.
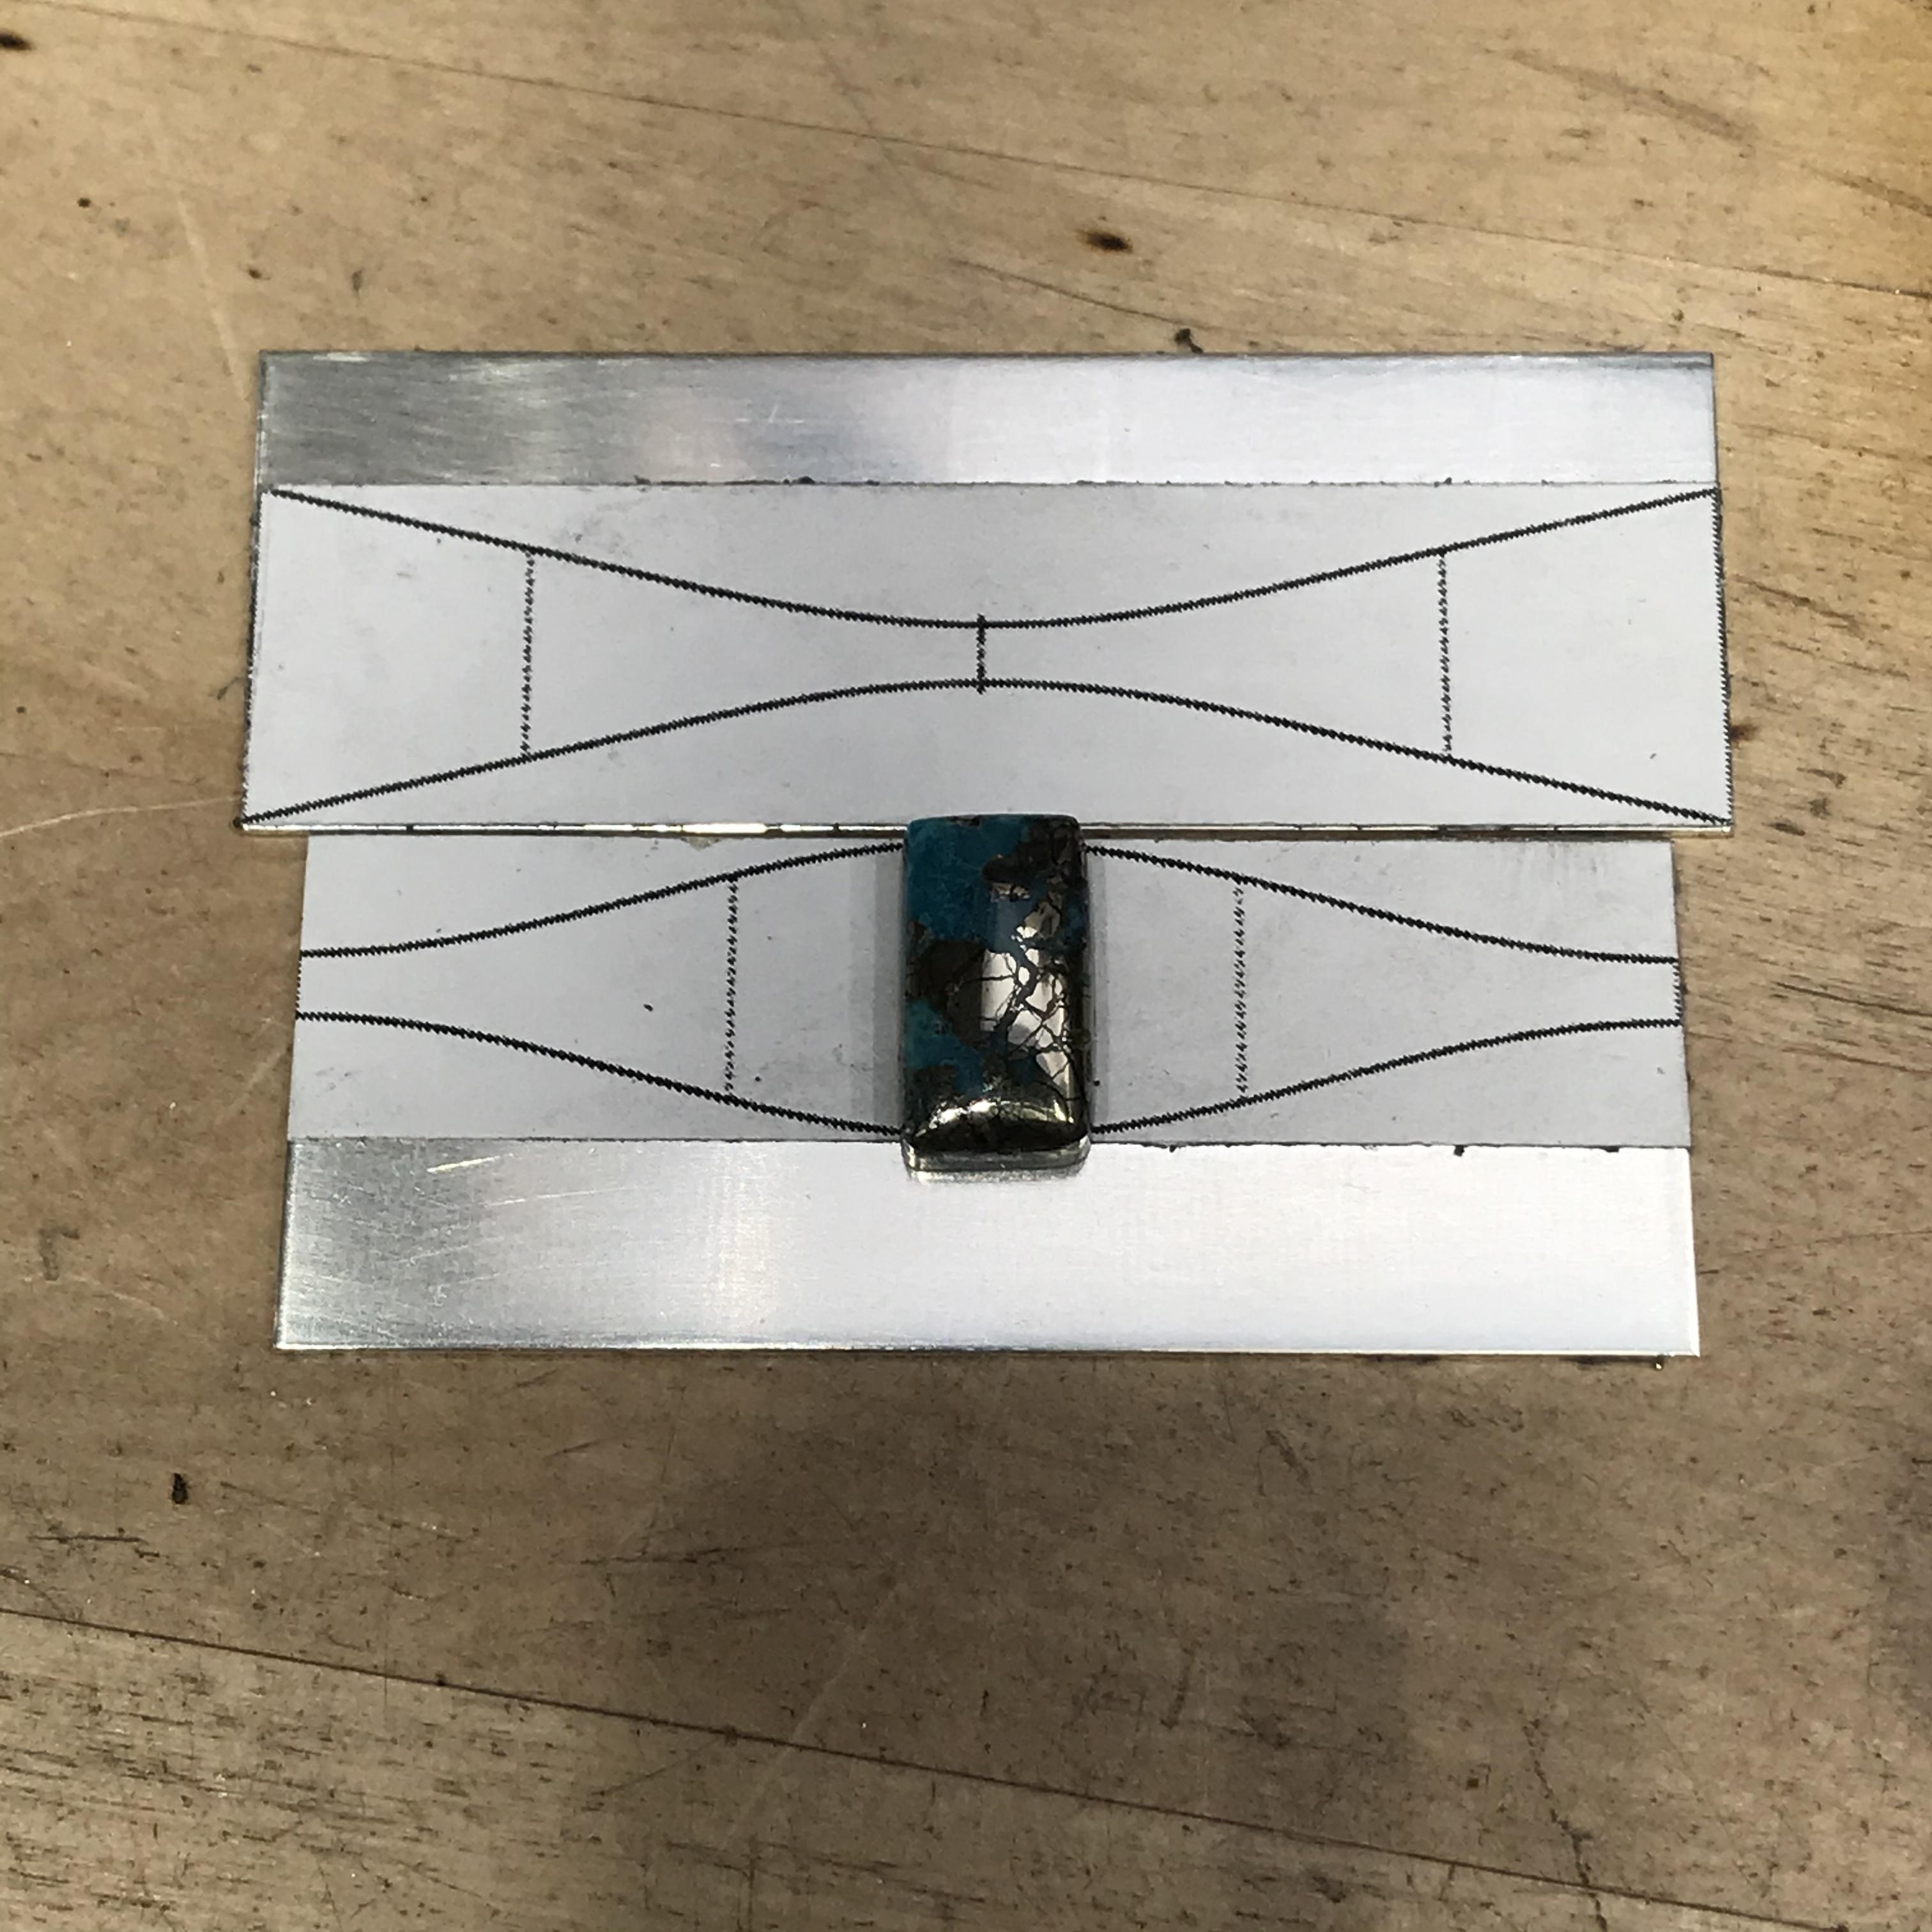
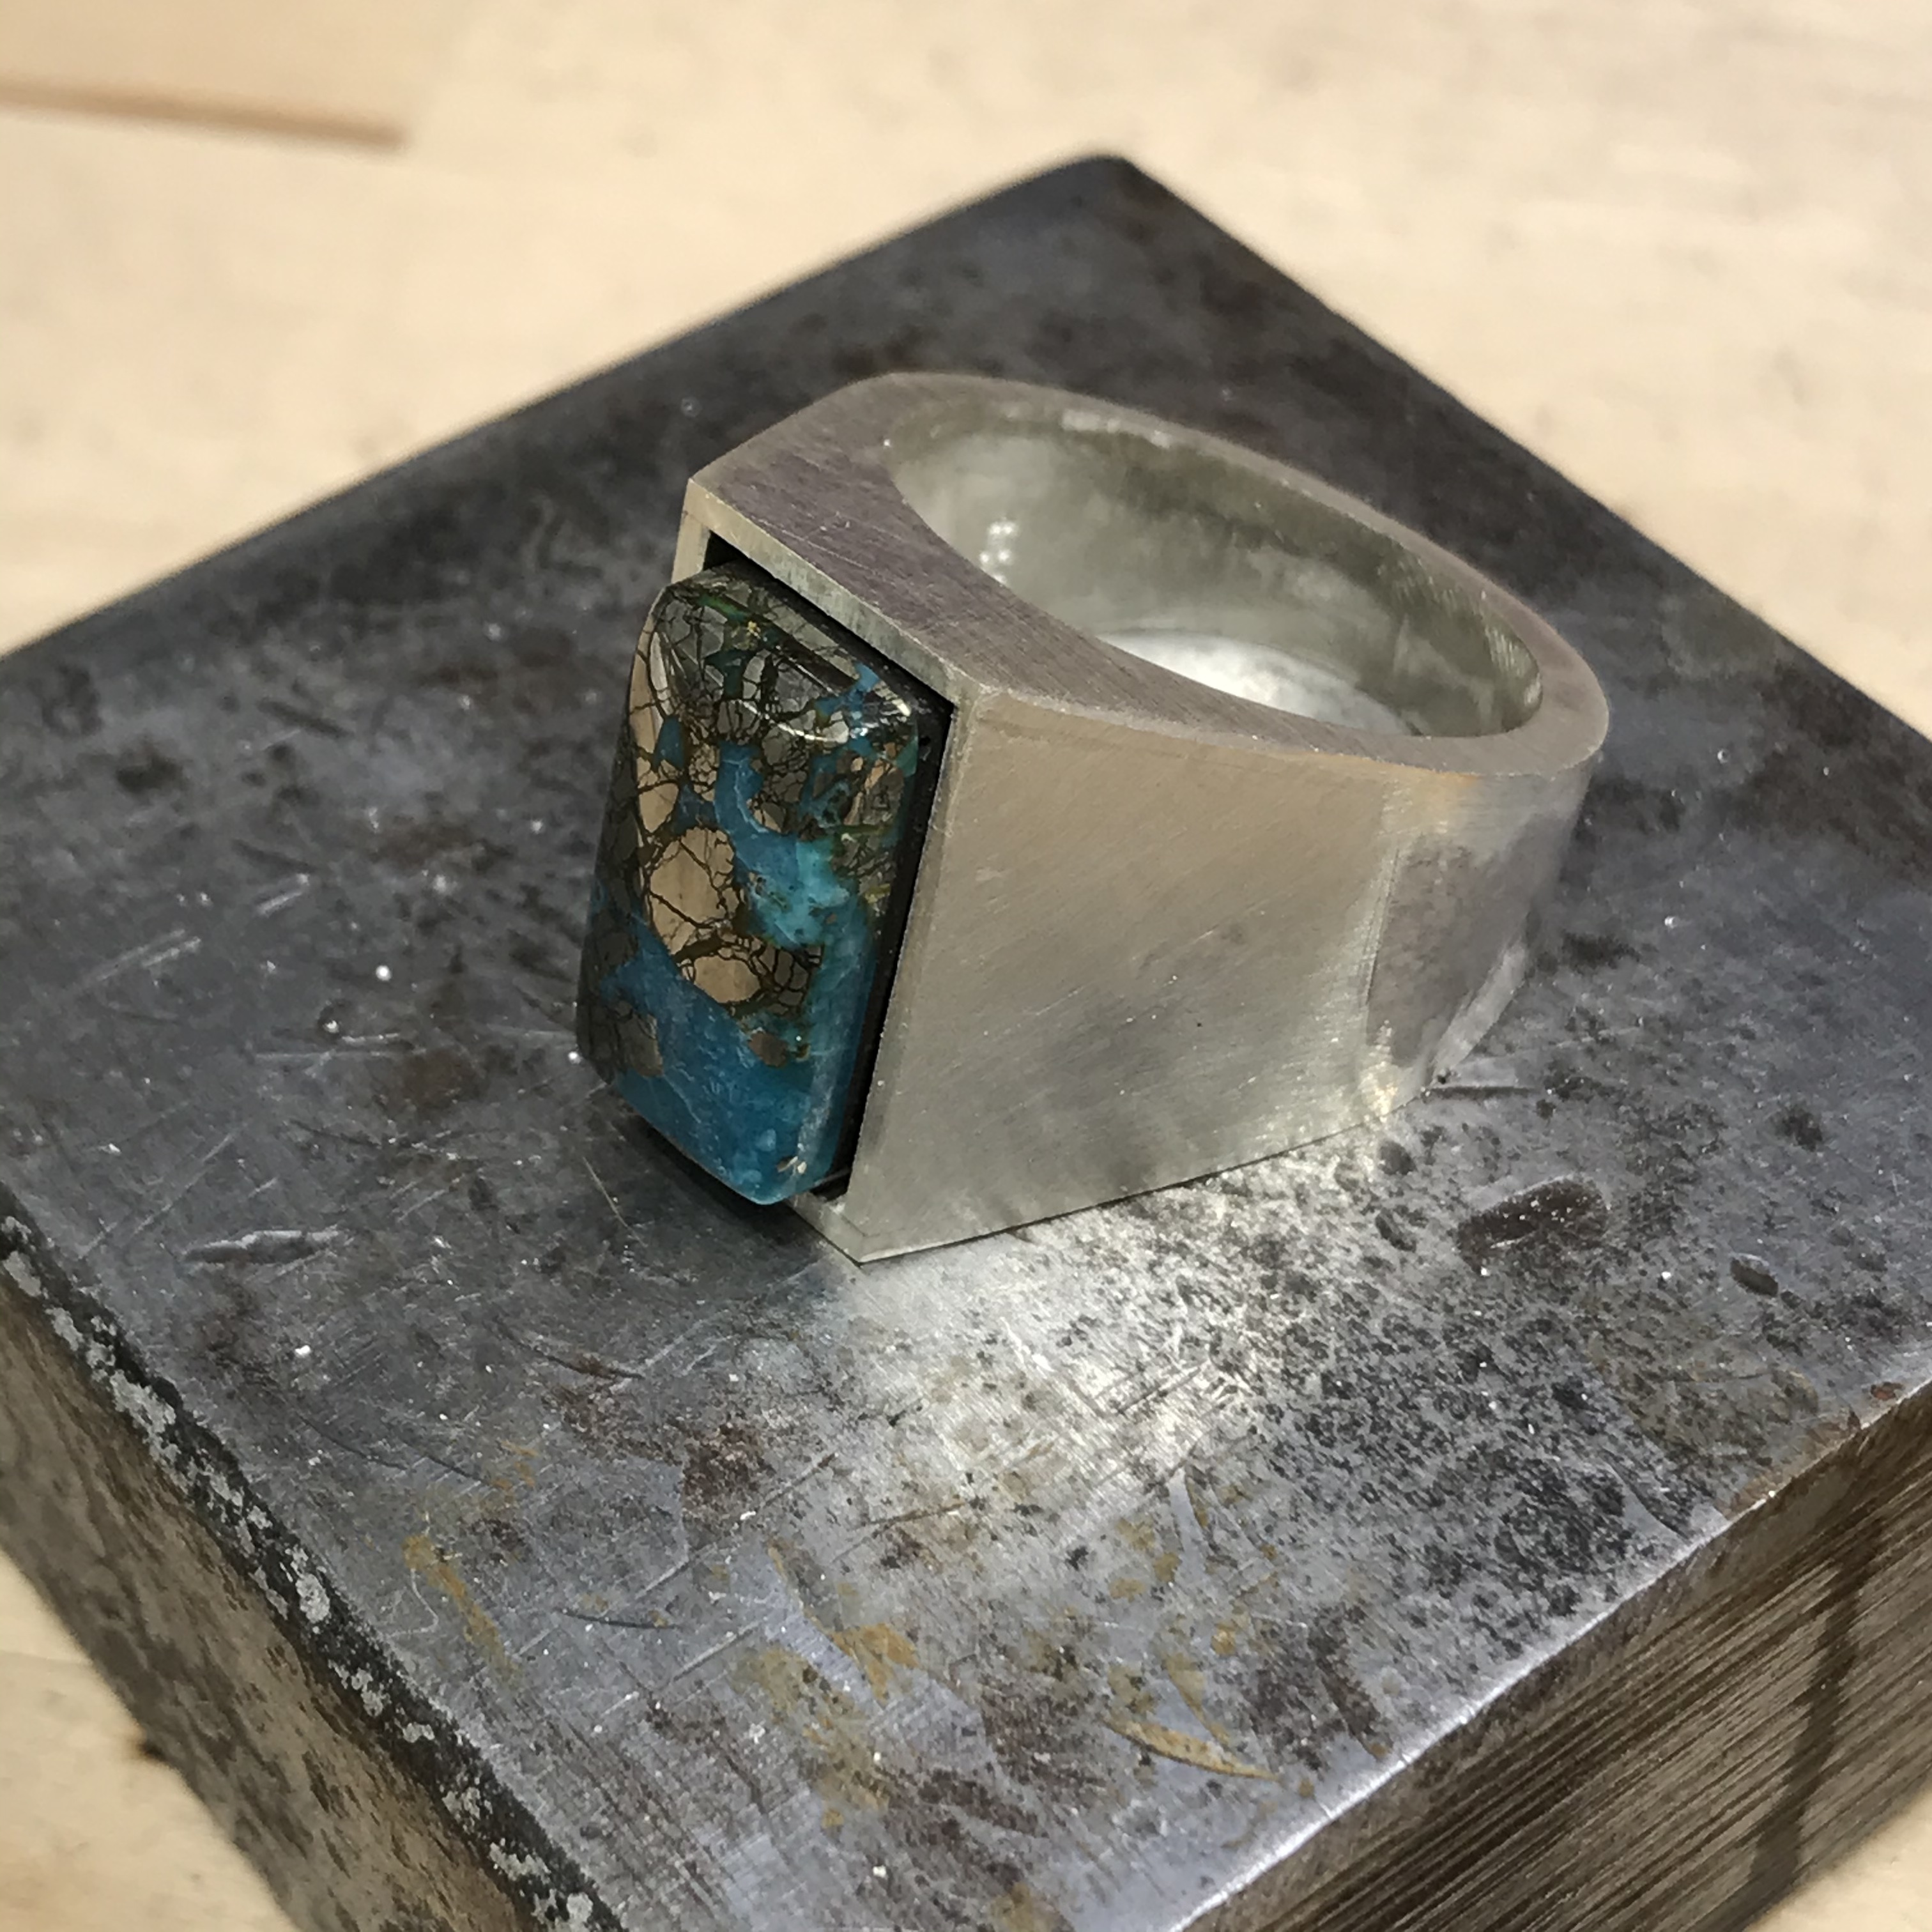
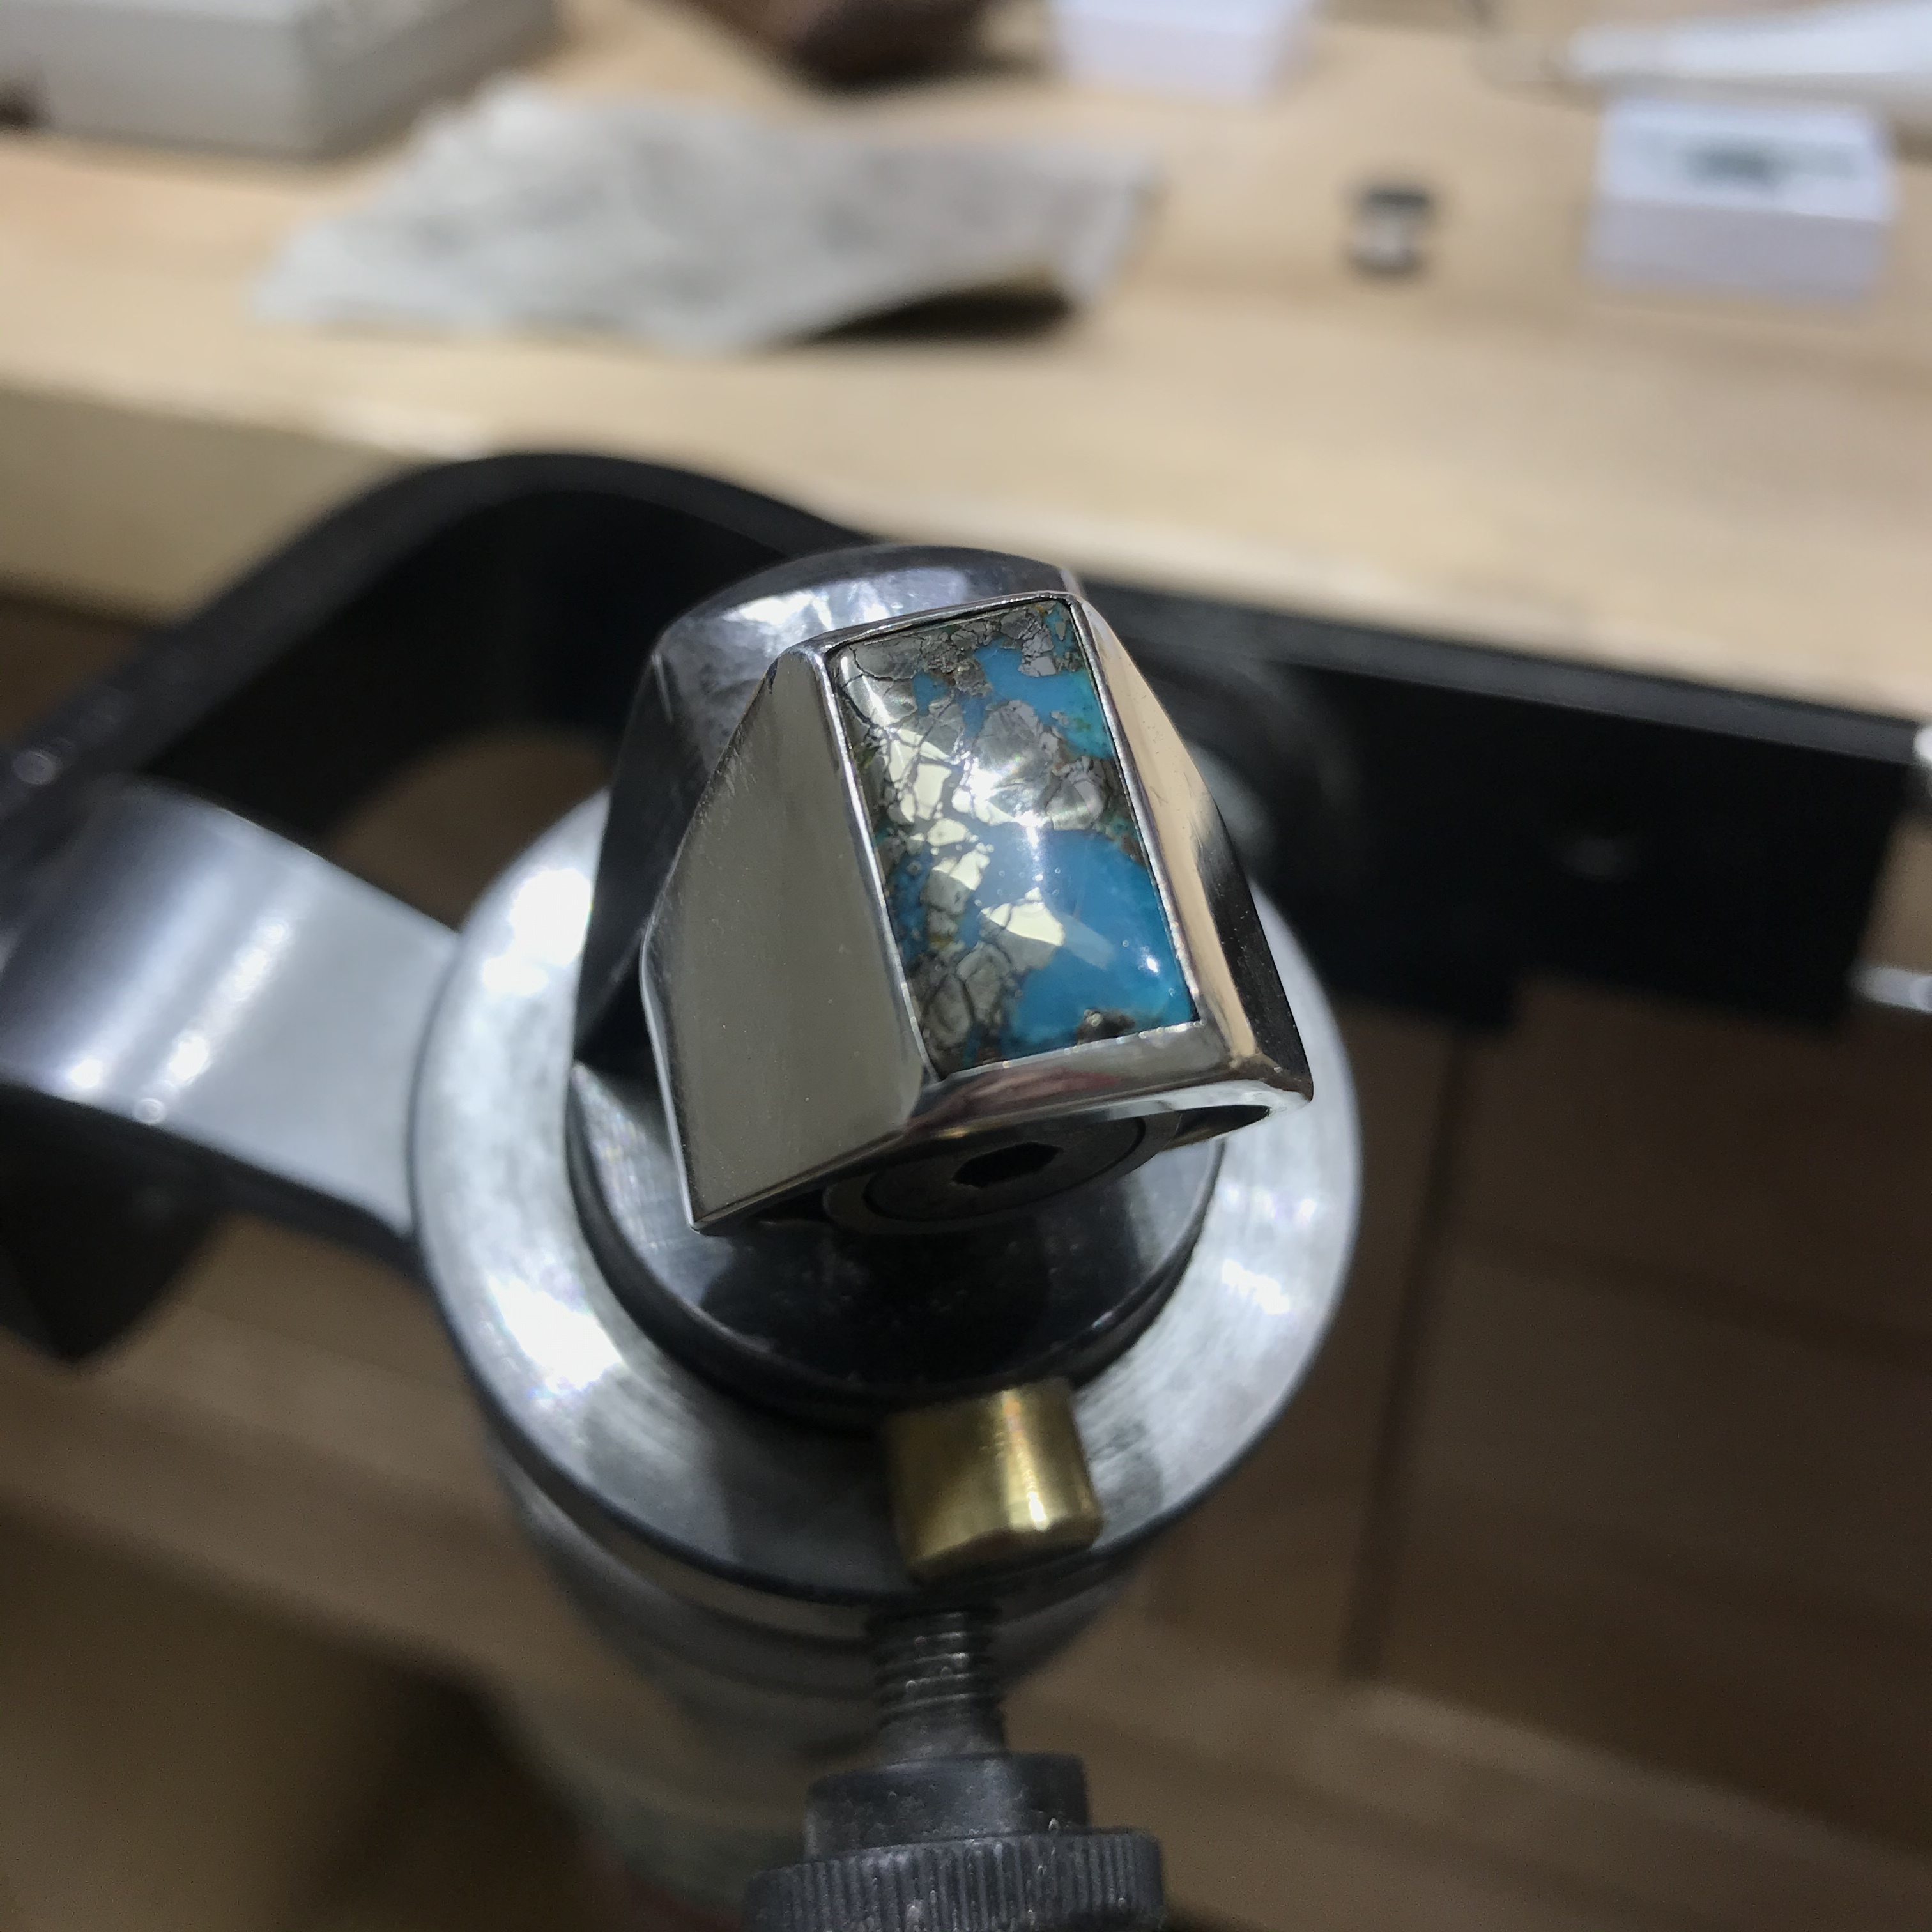
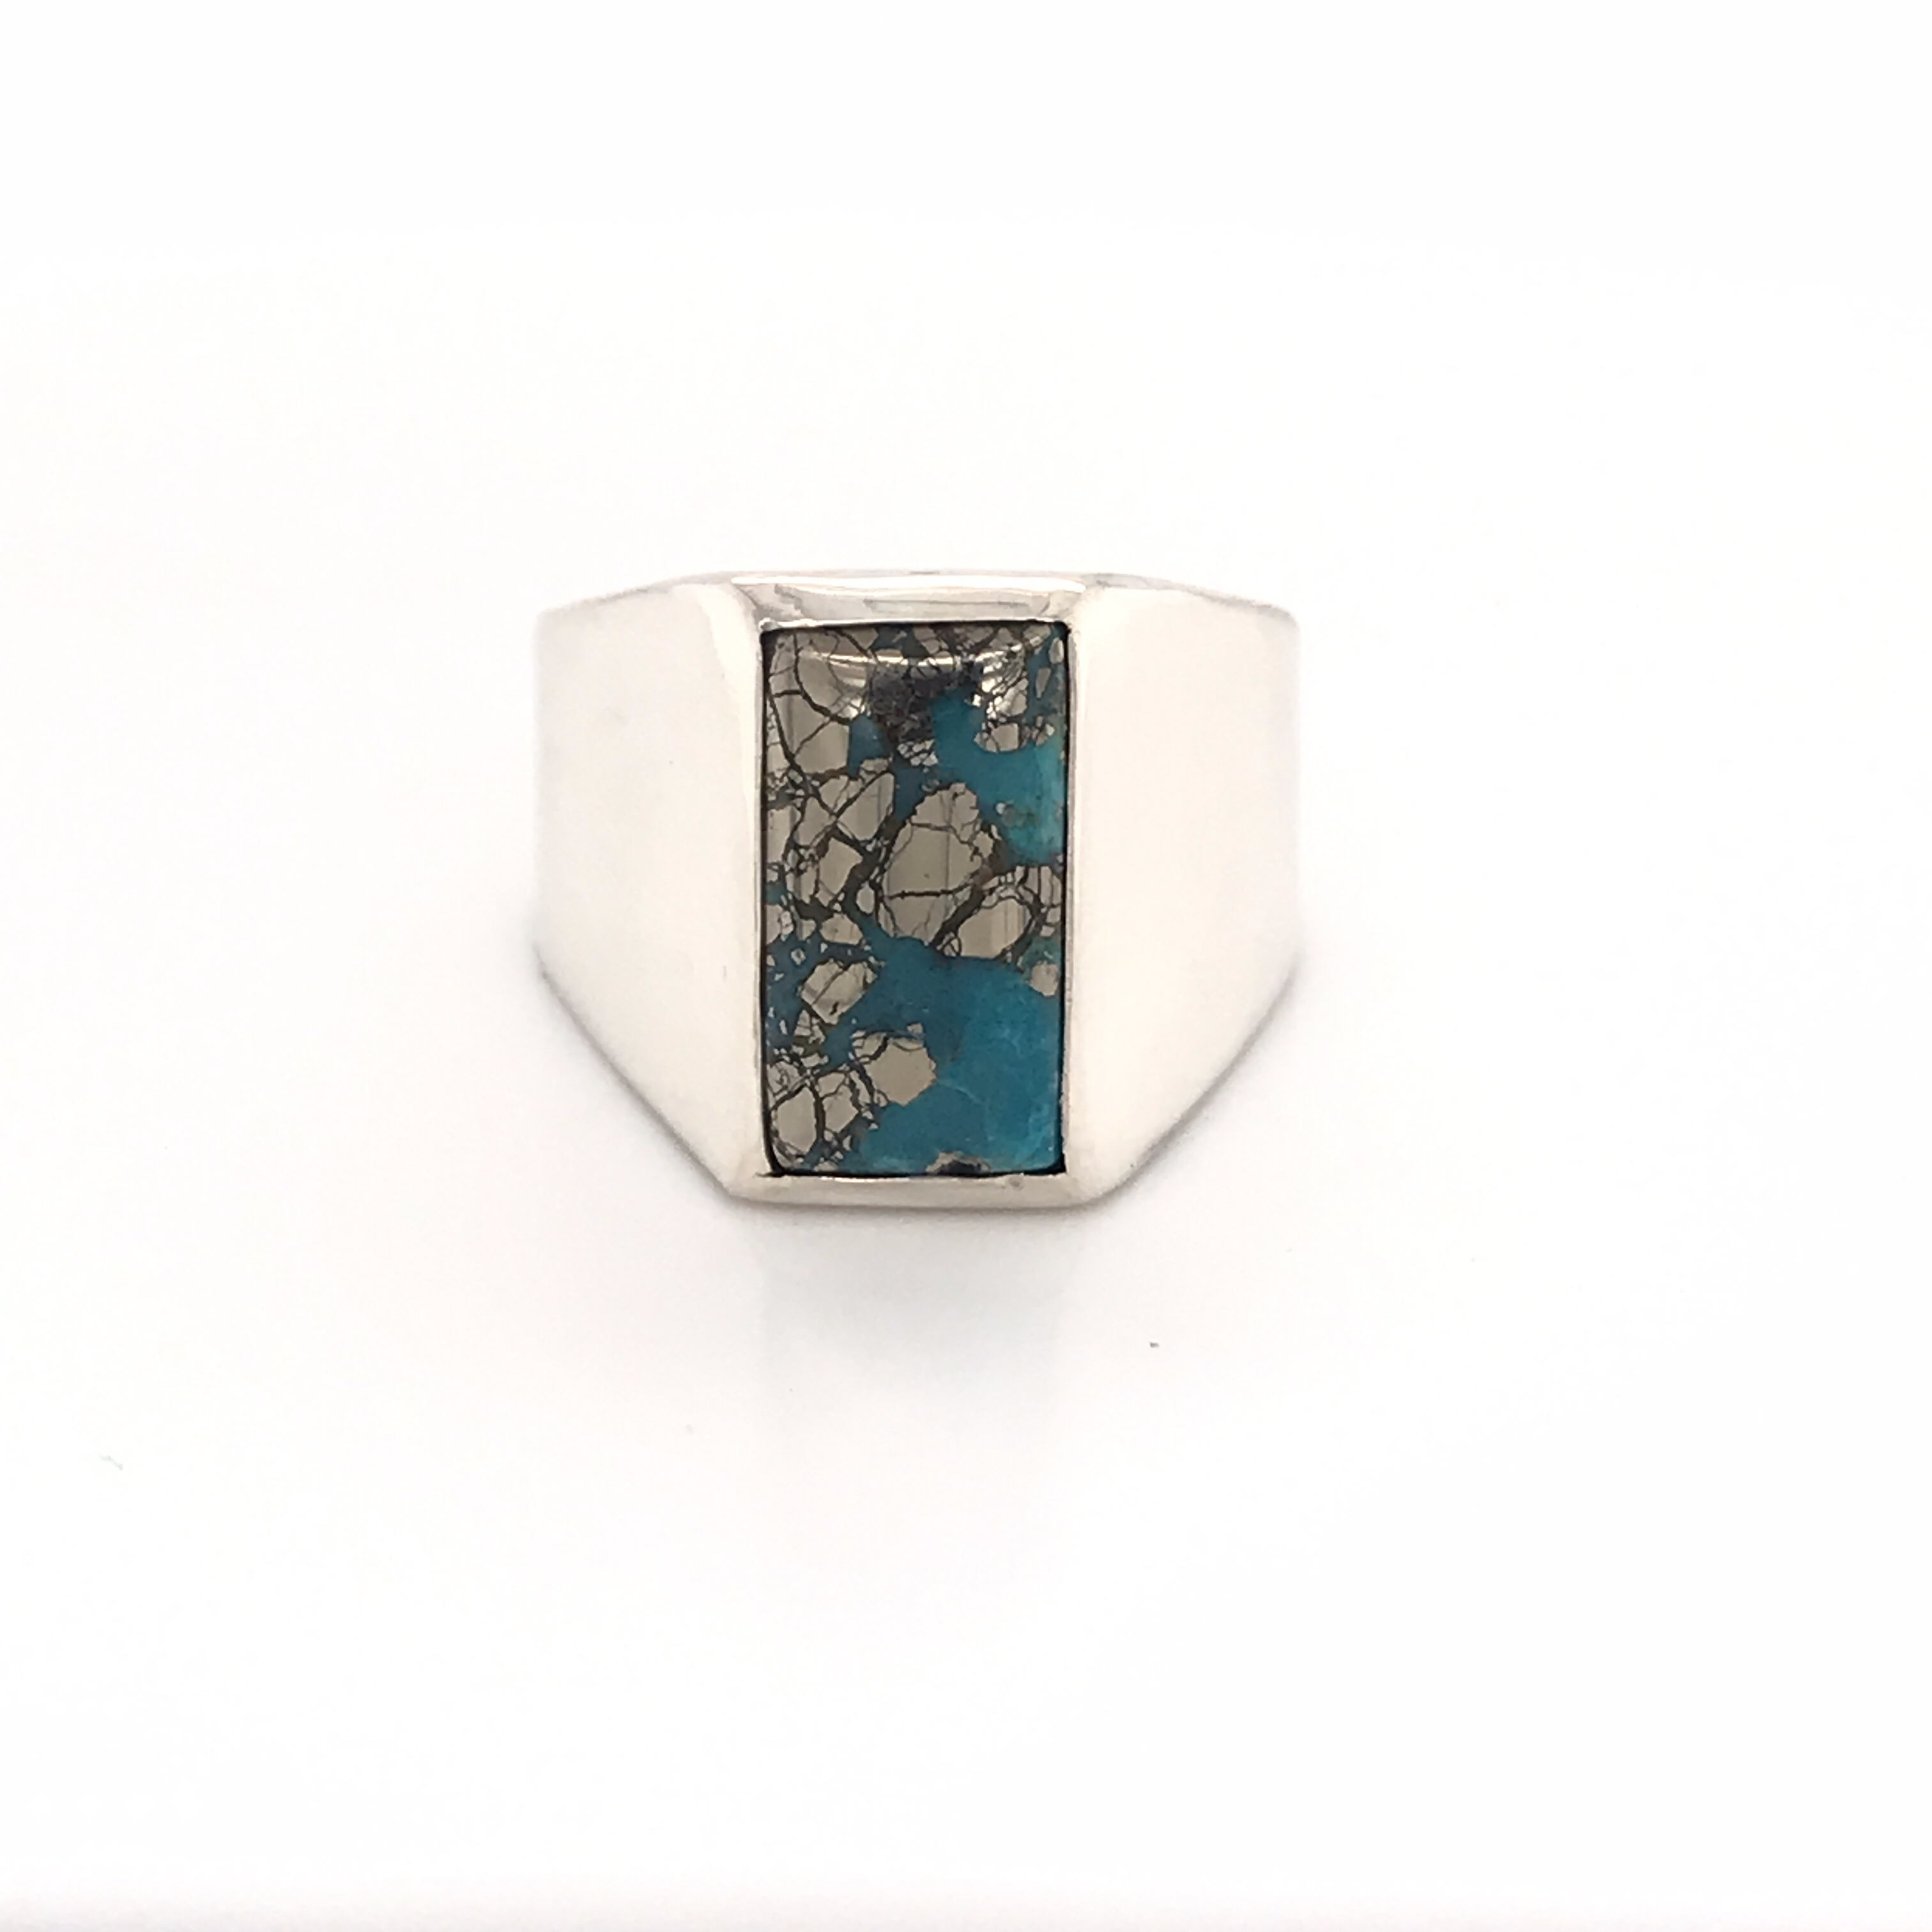
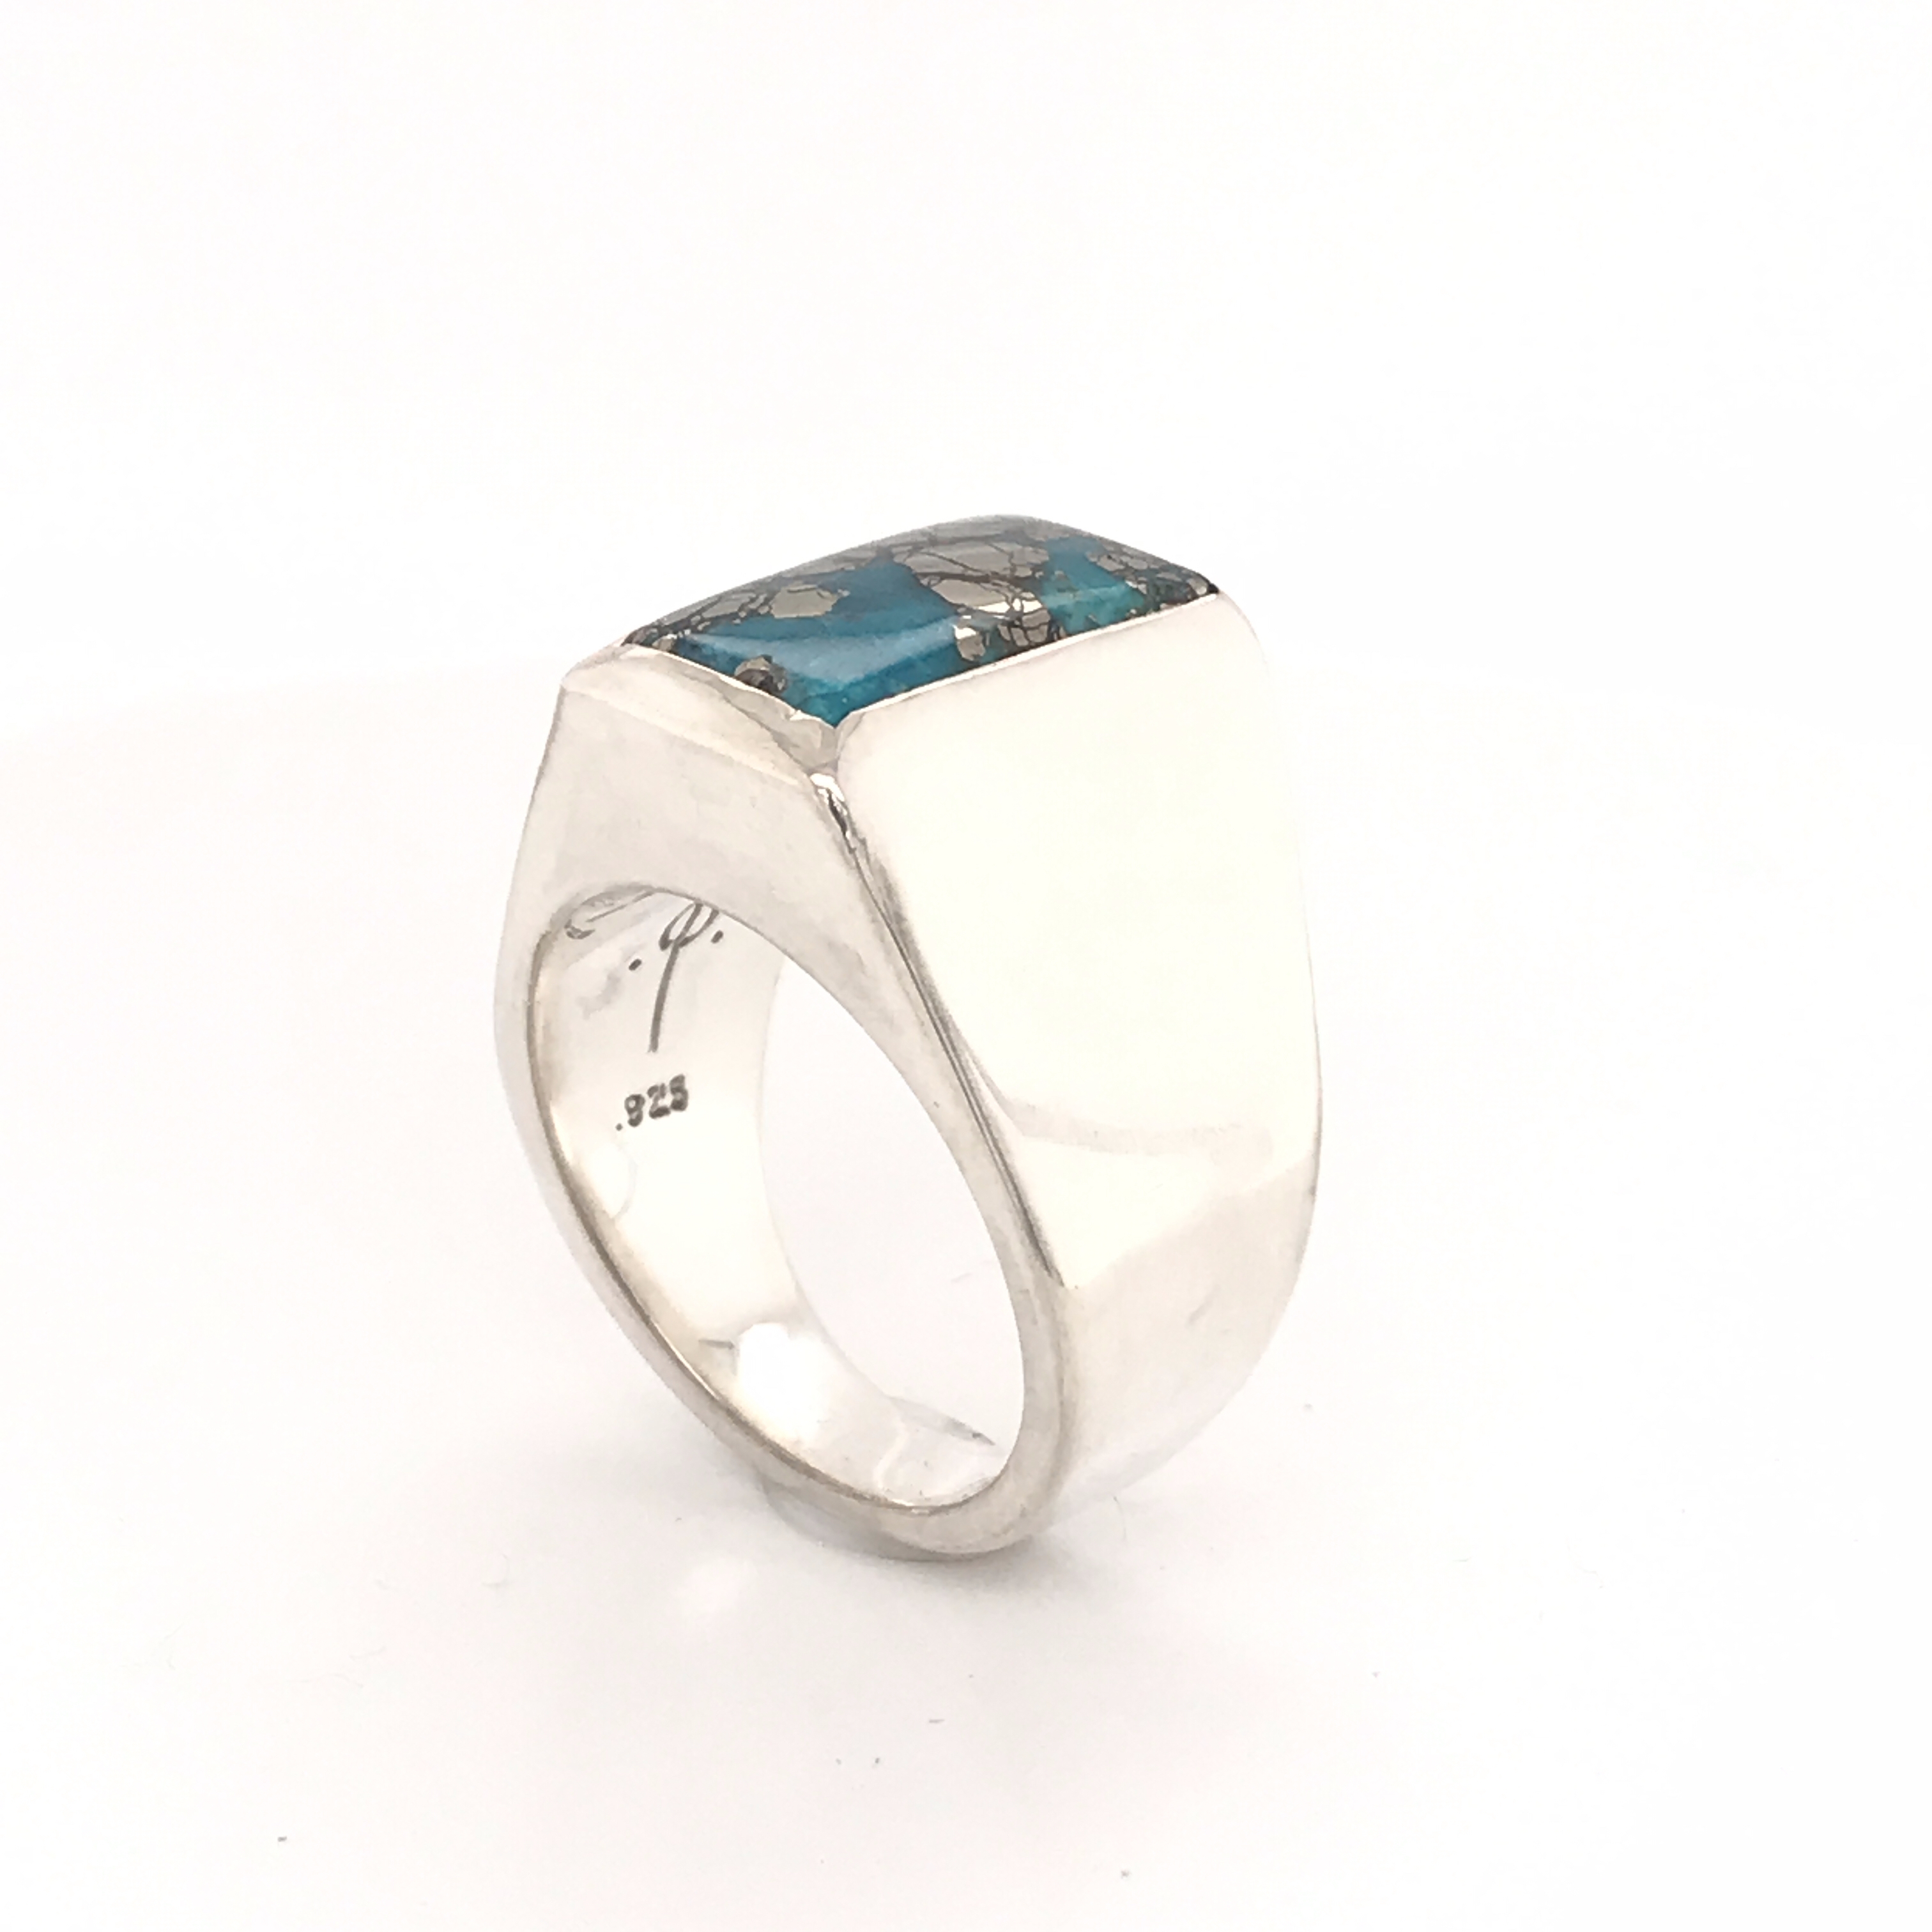
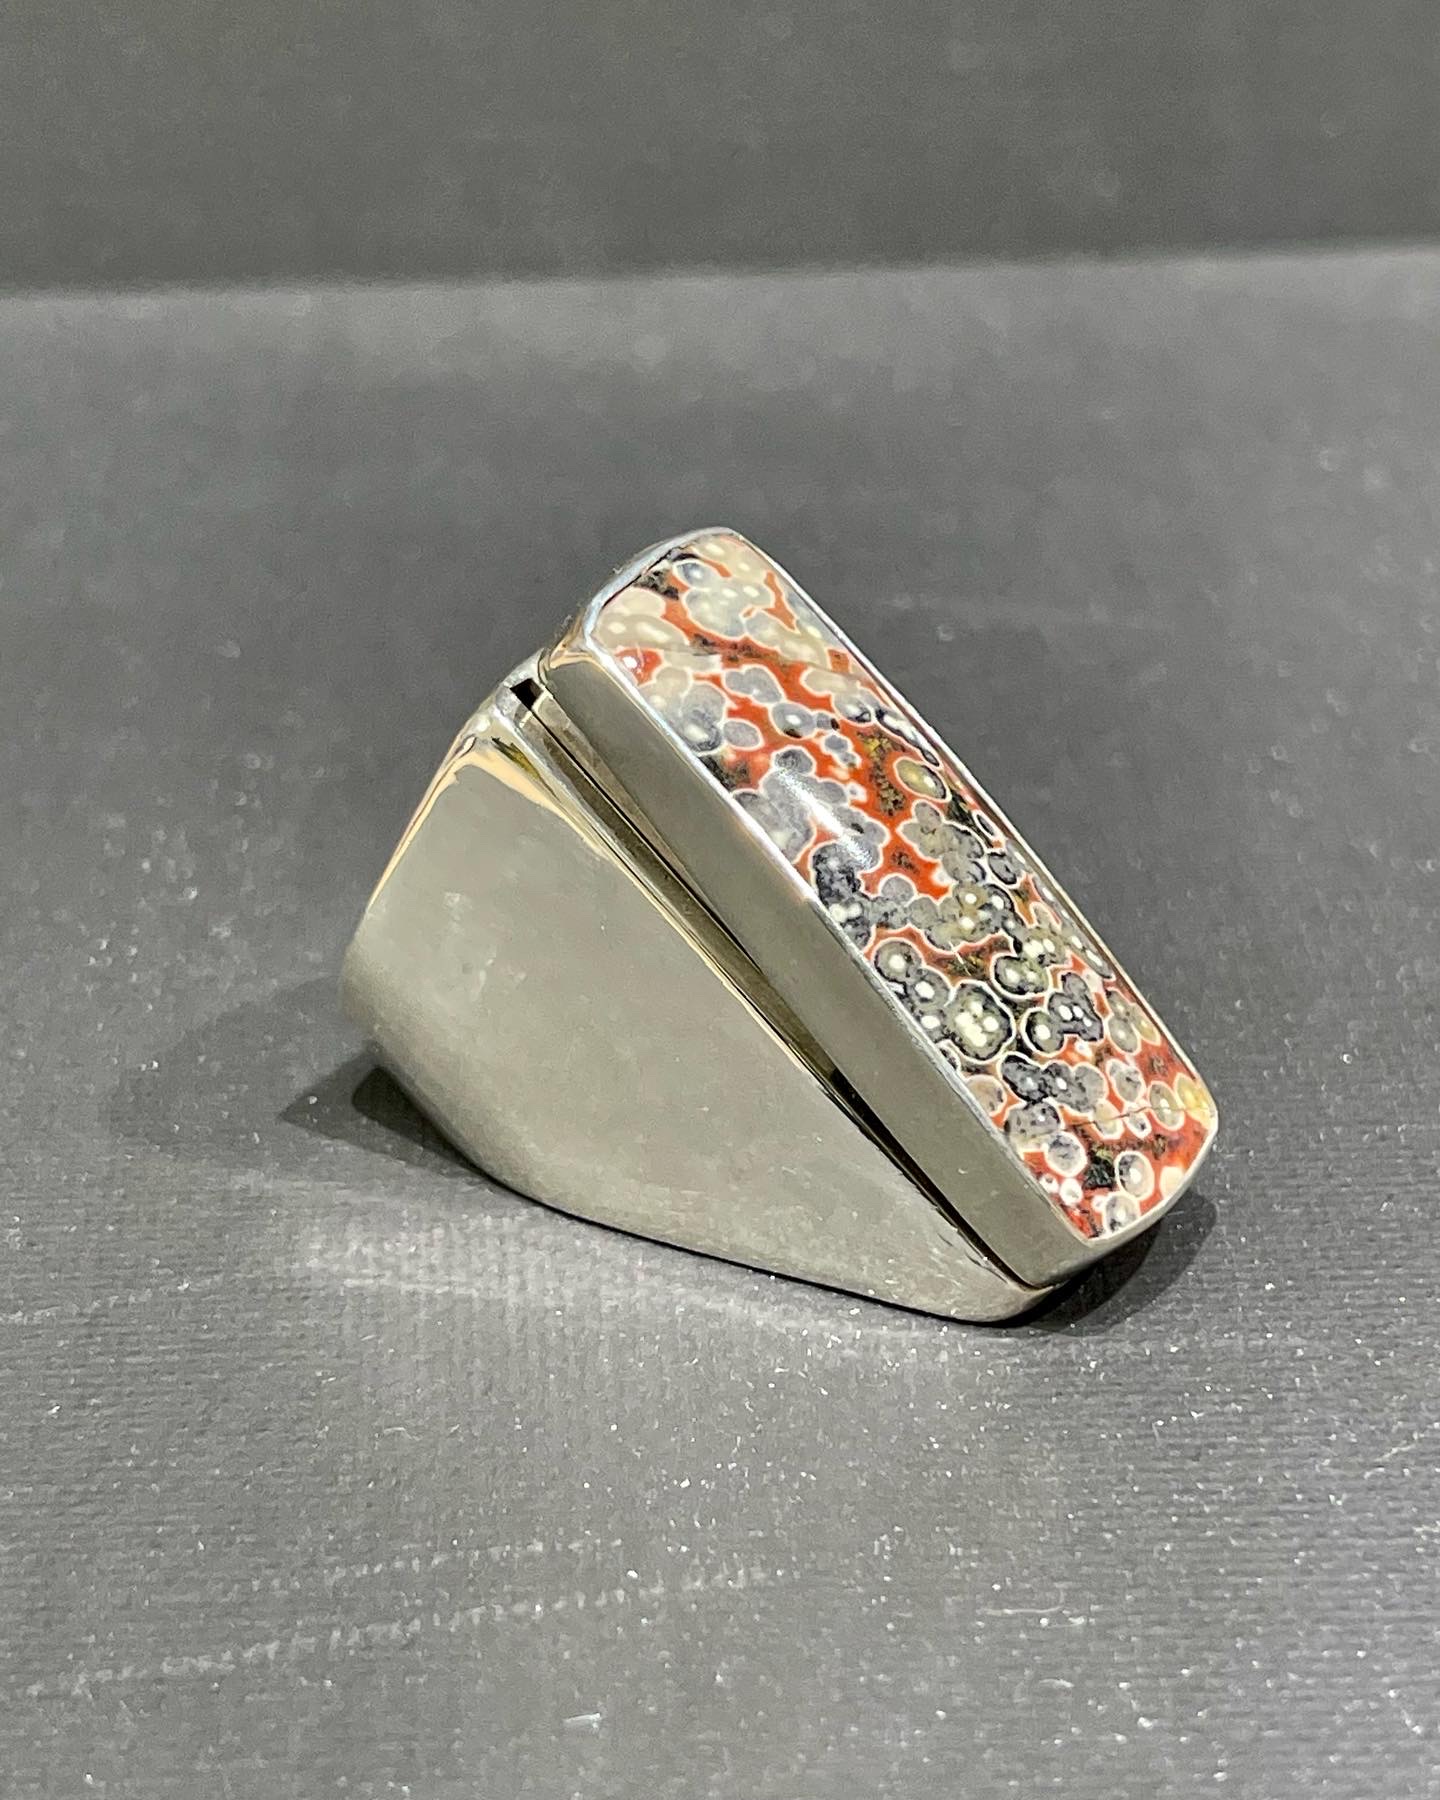
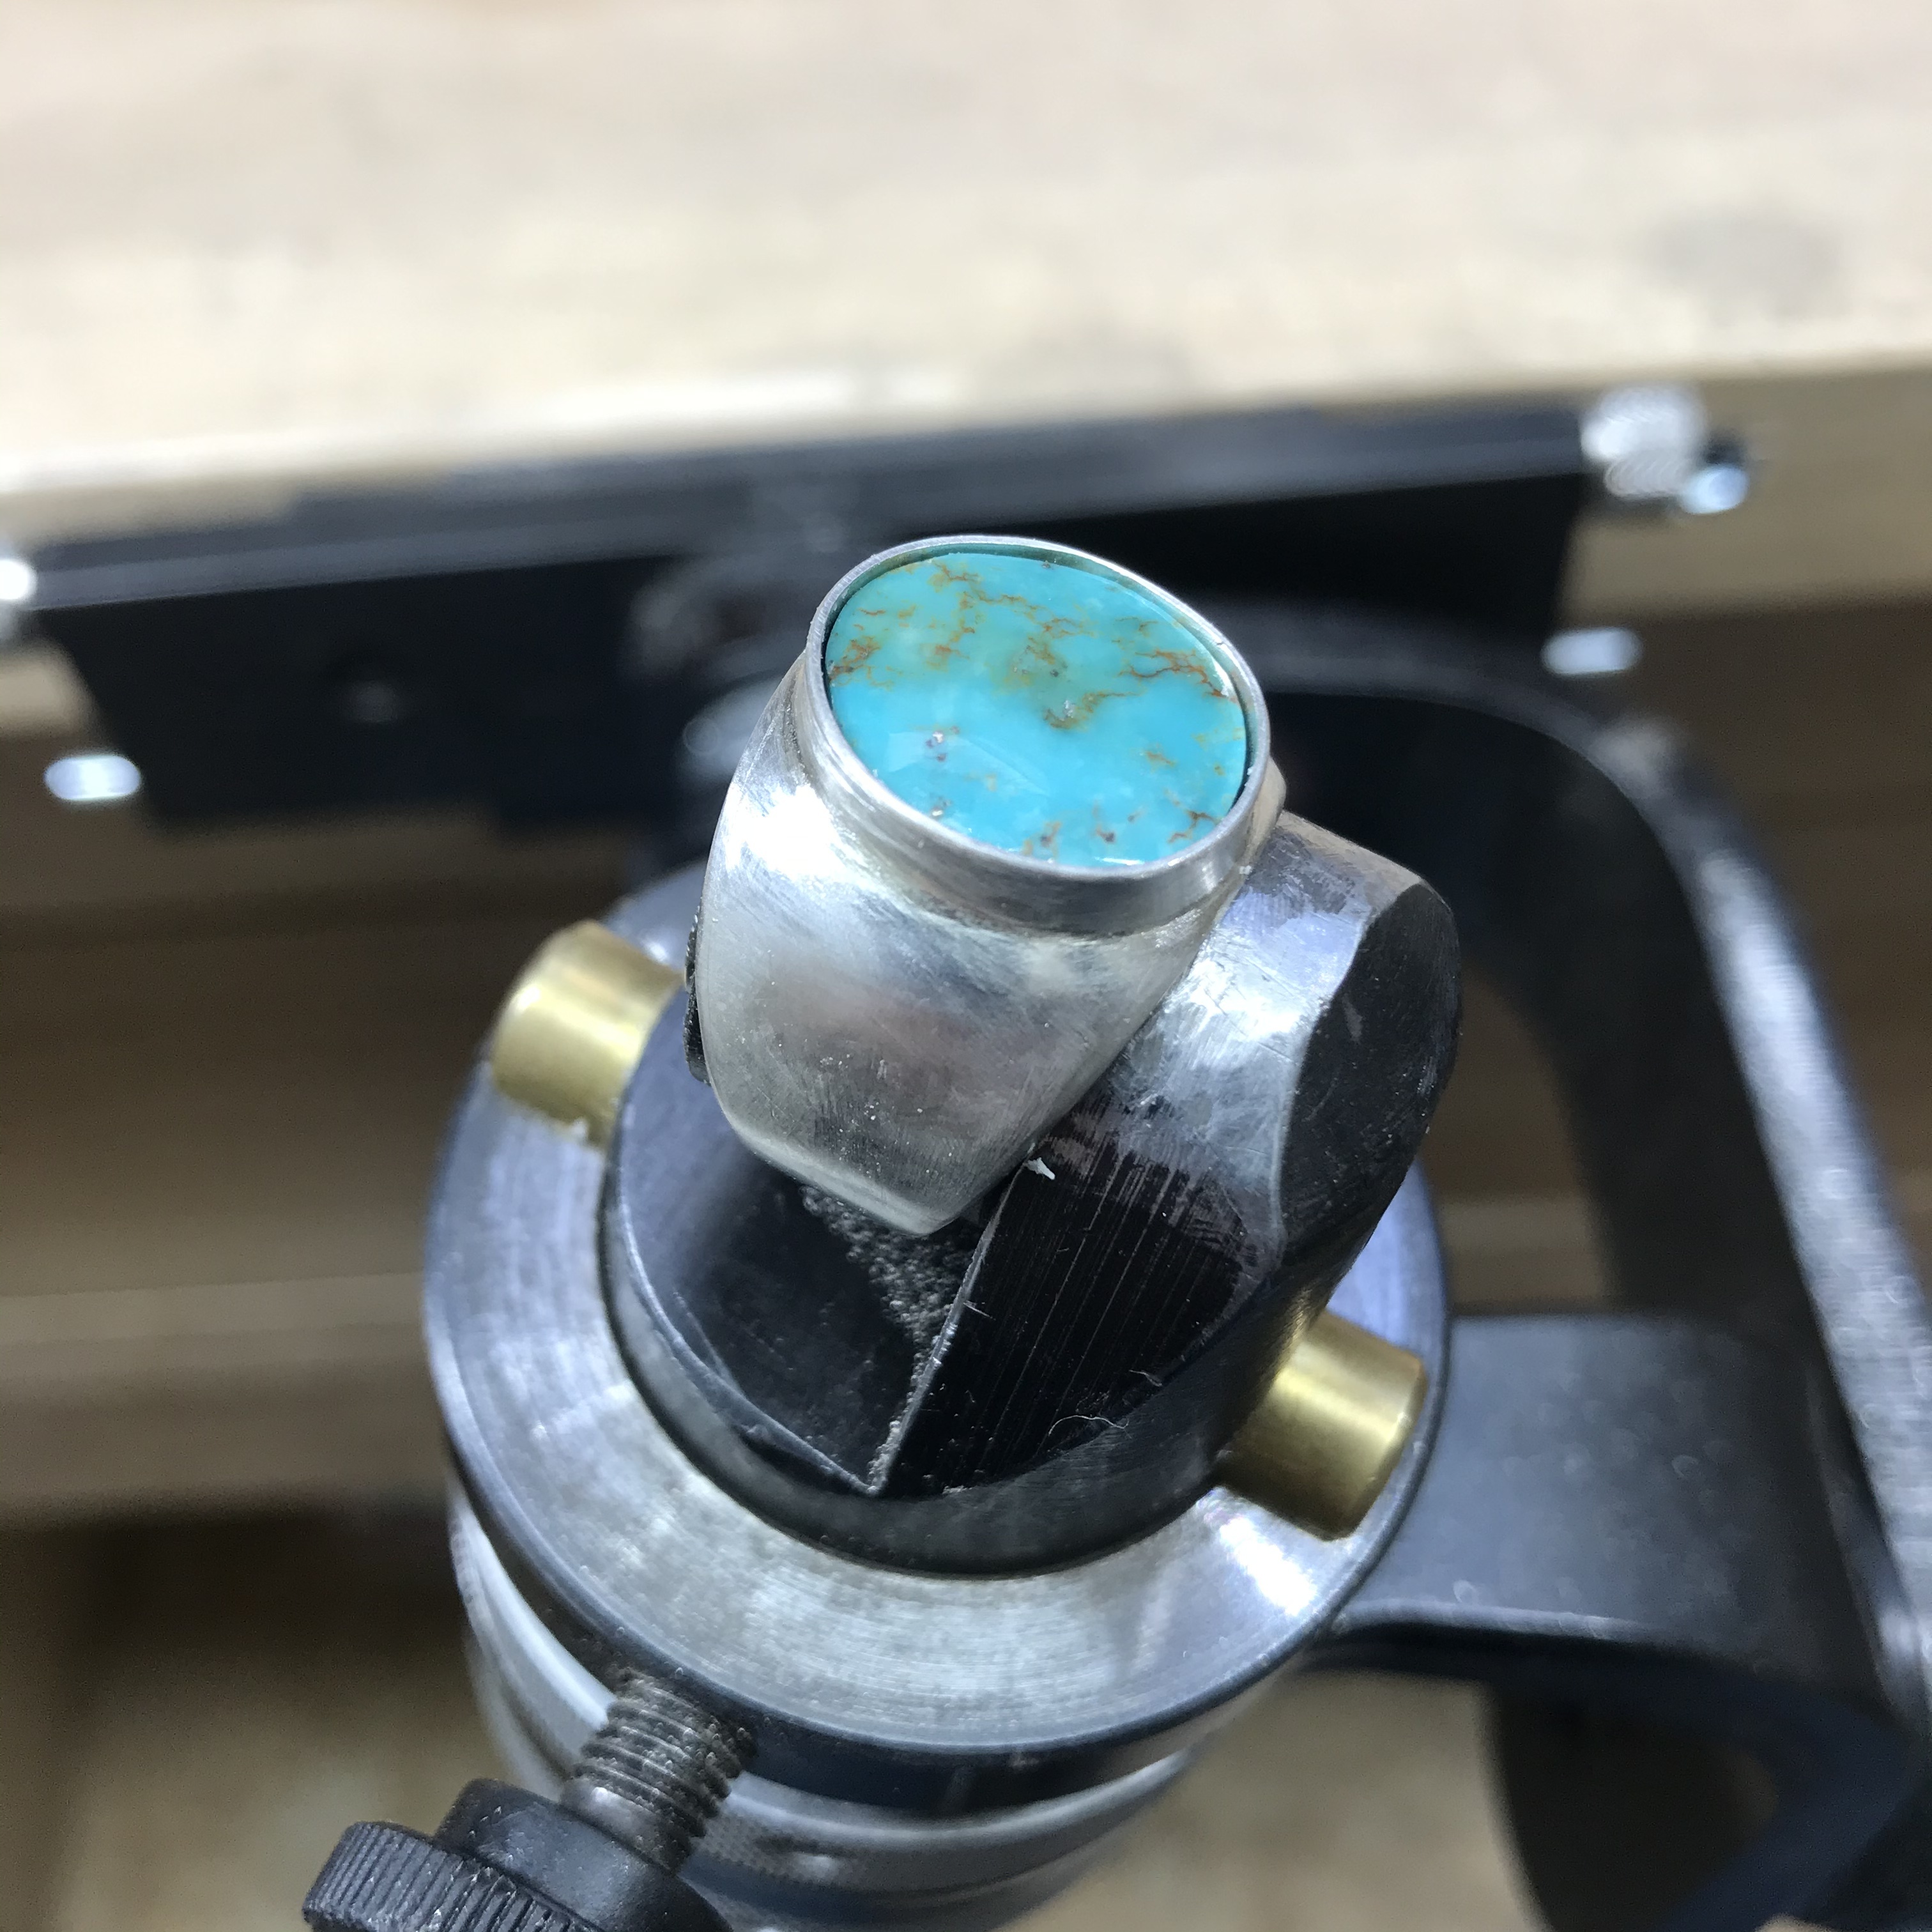
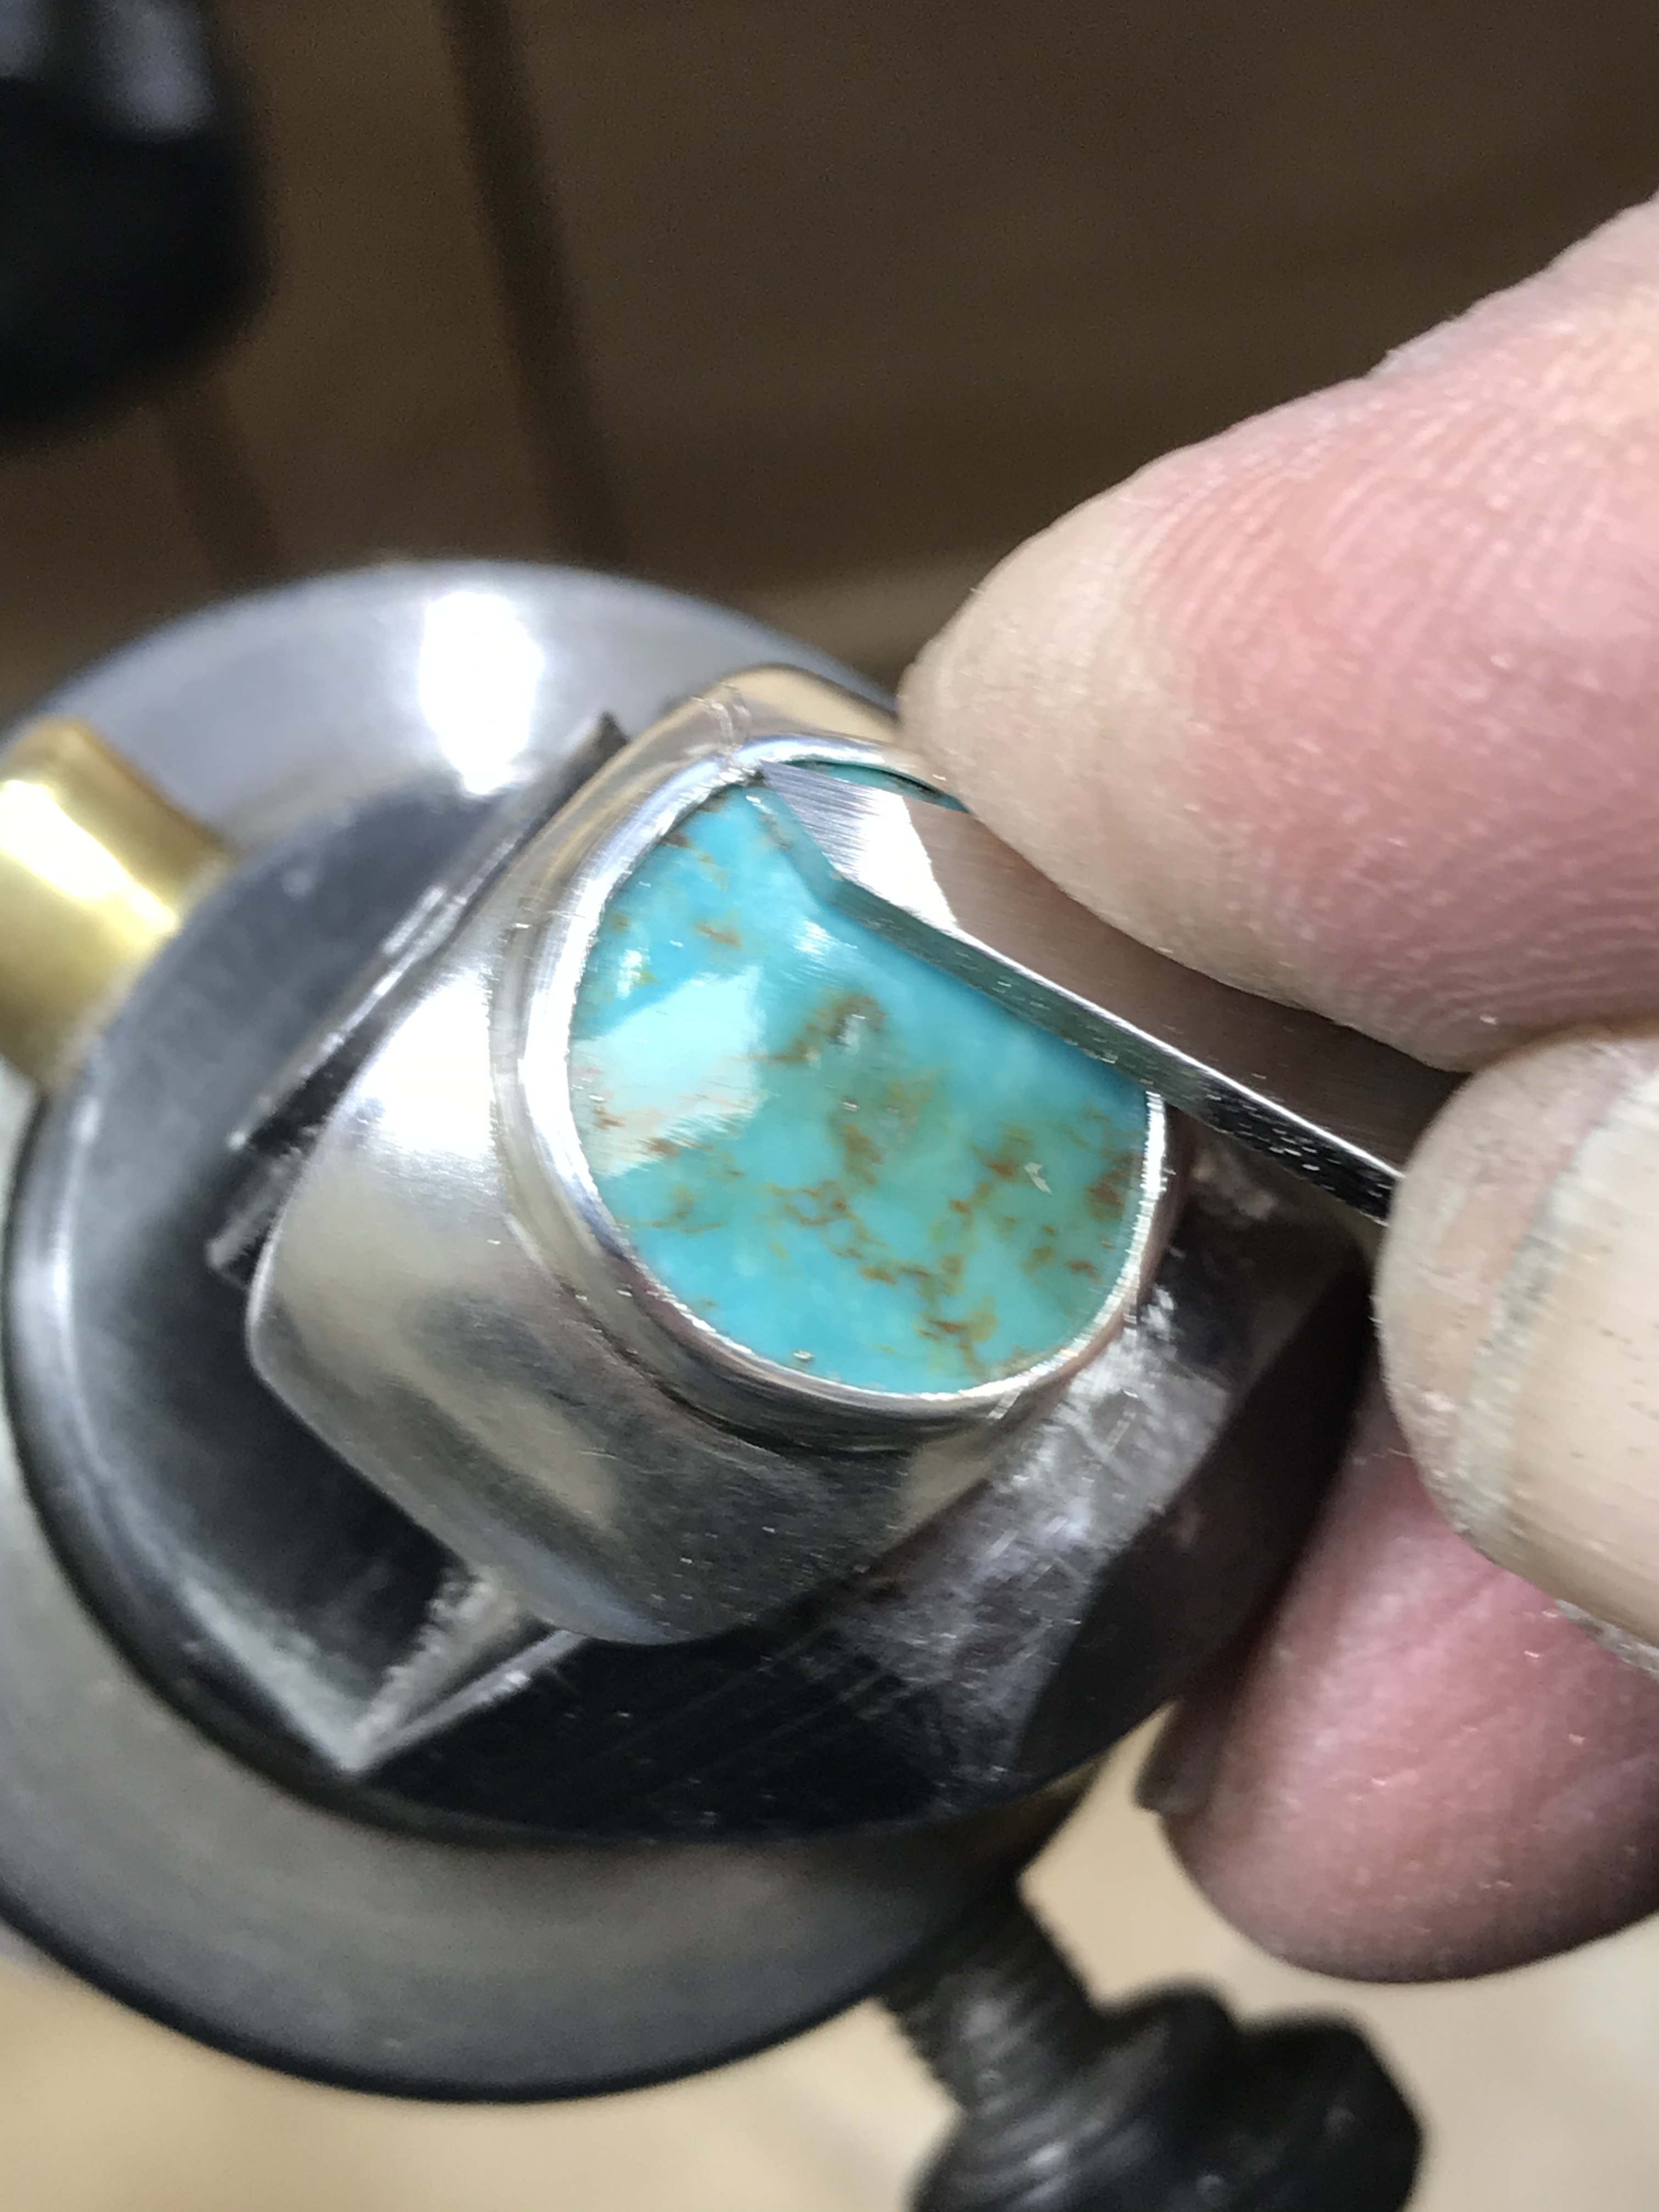
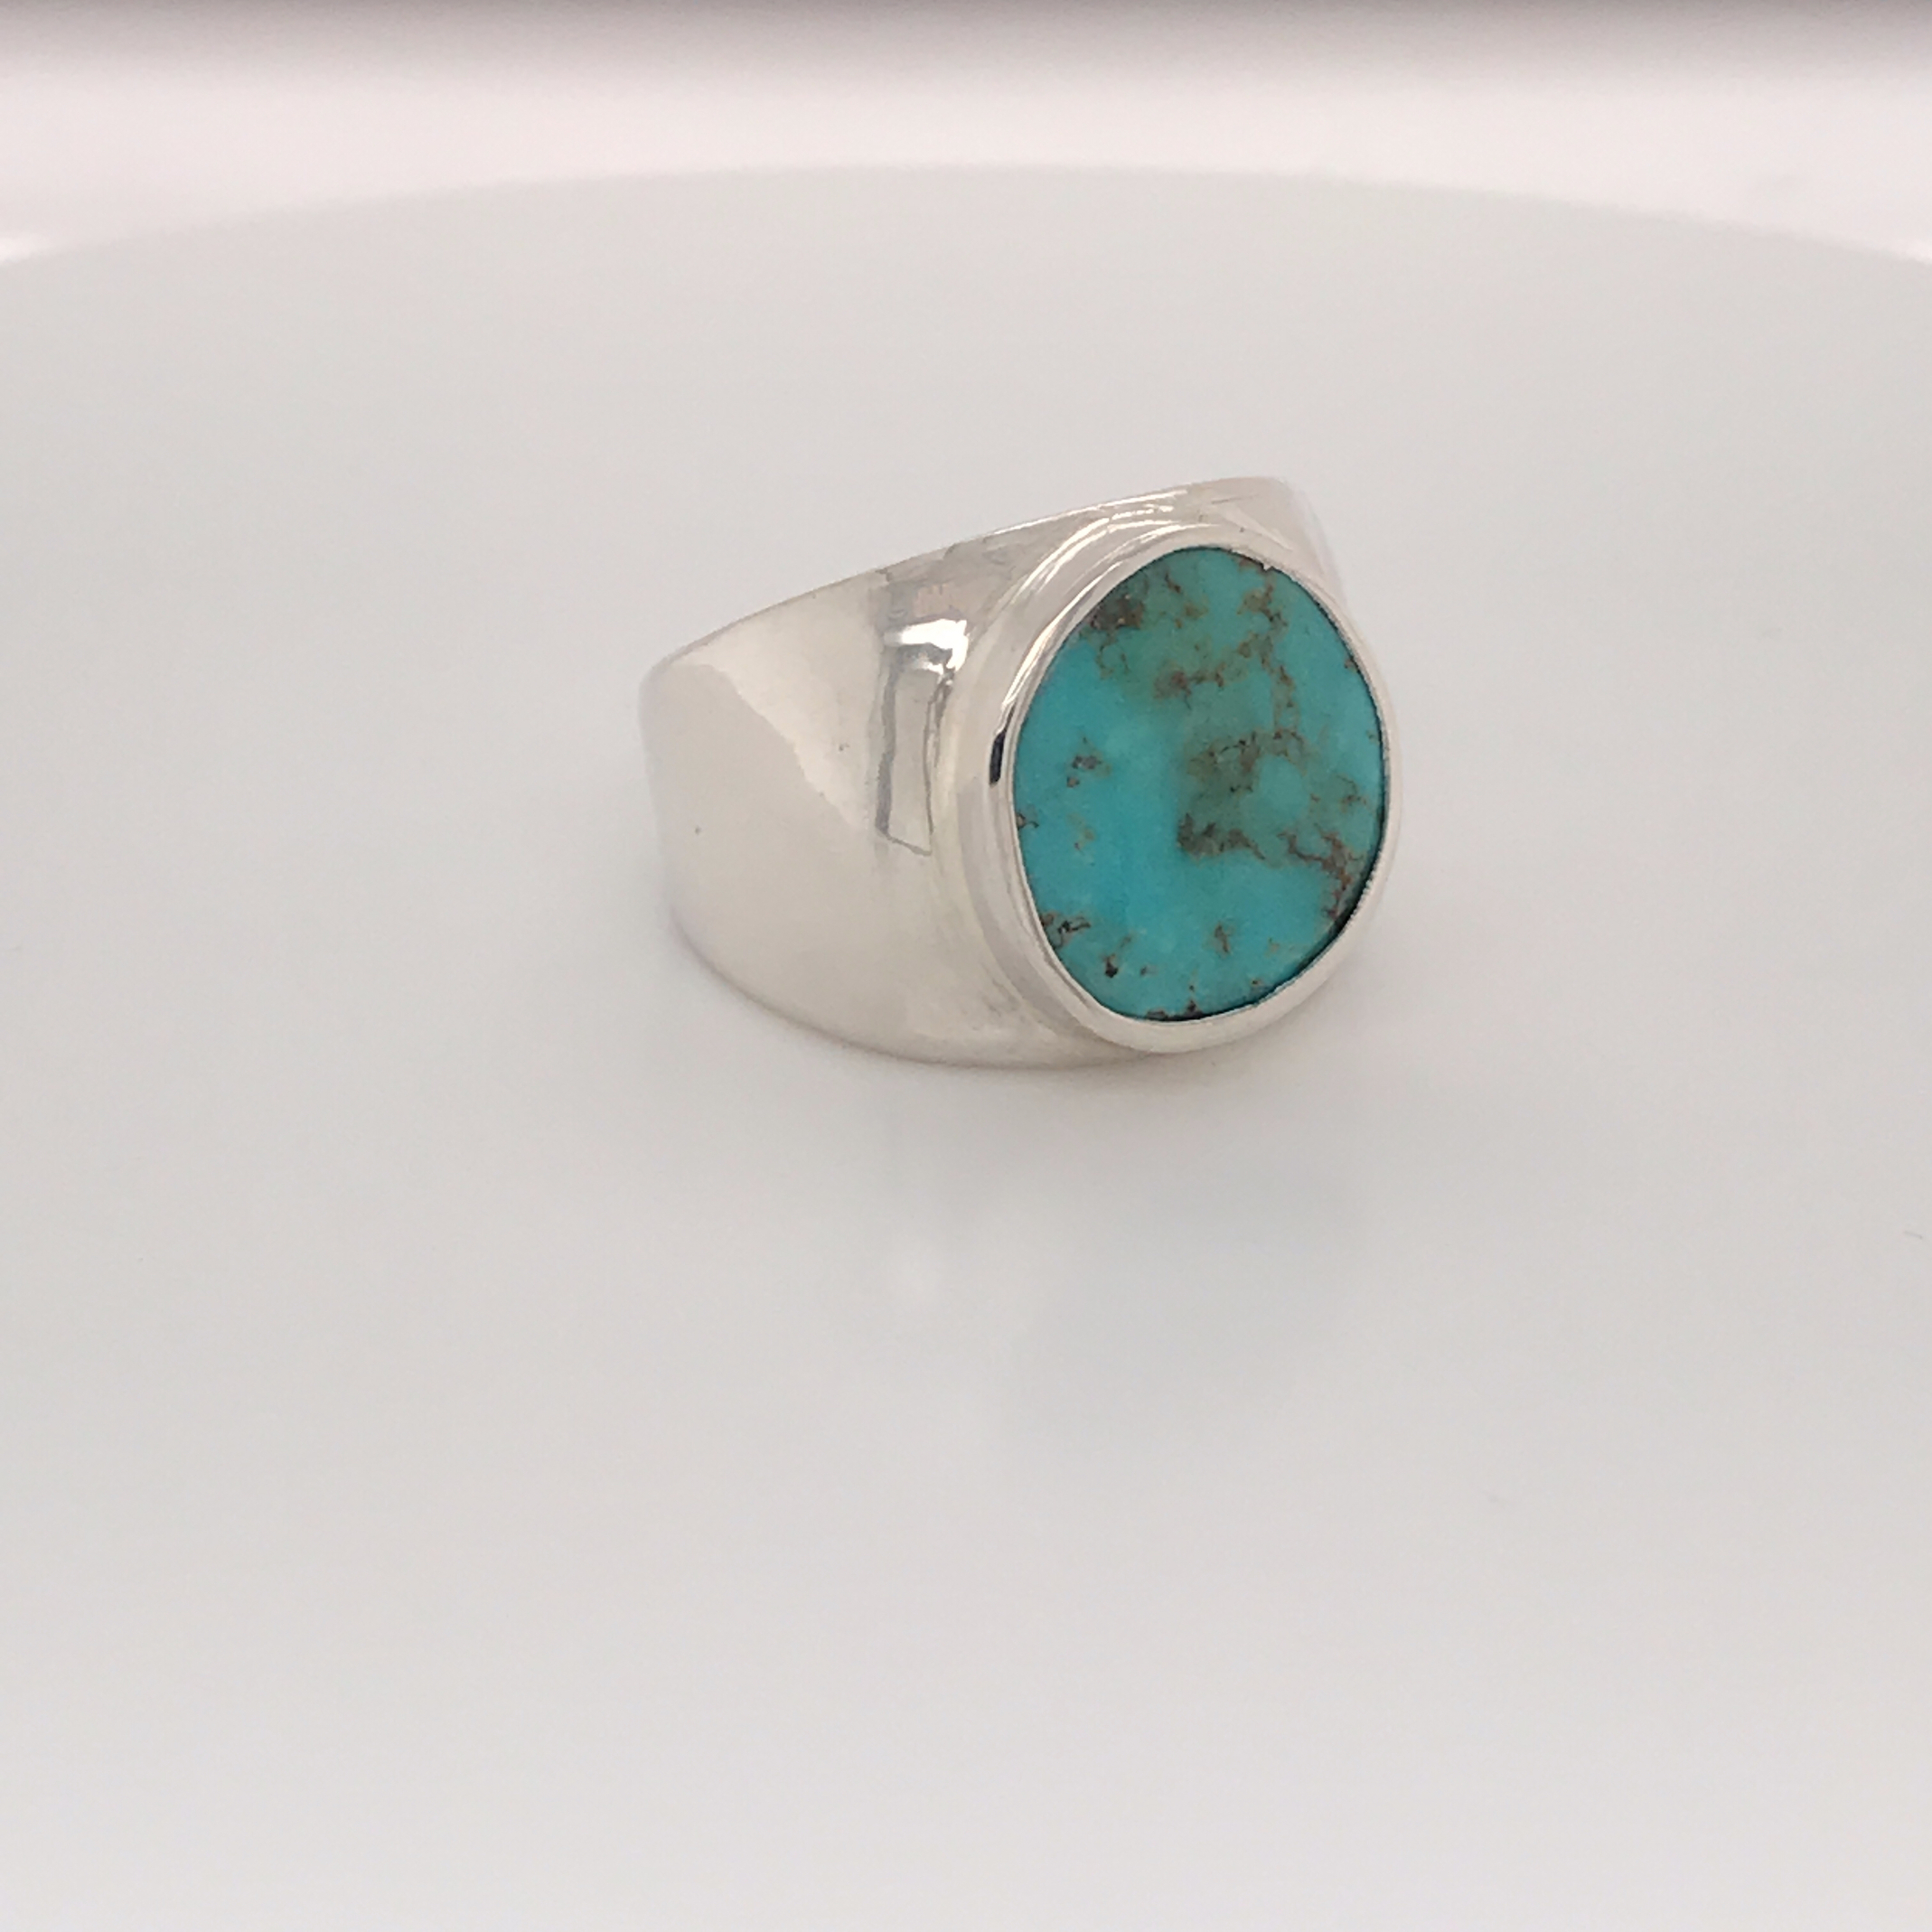
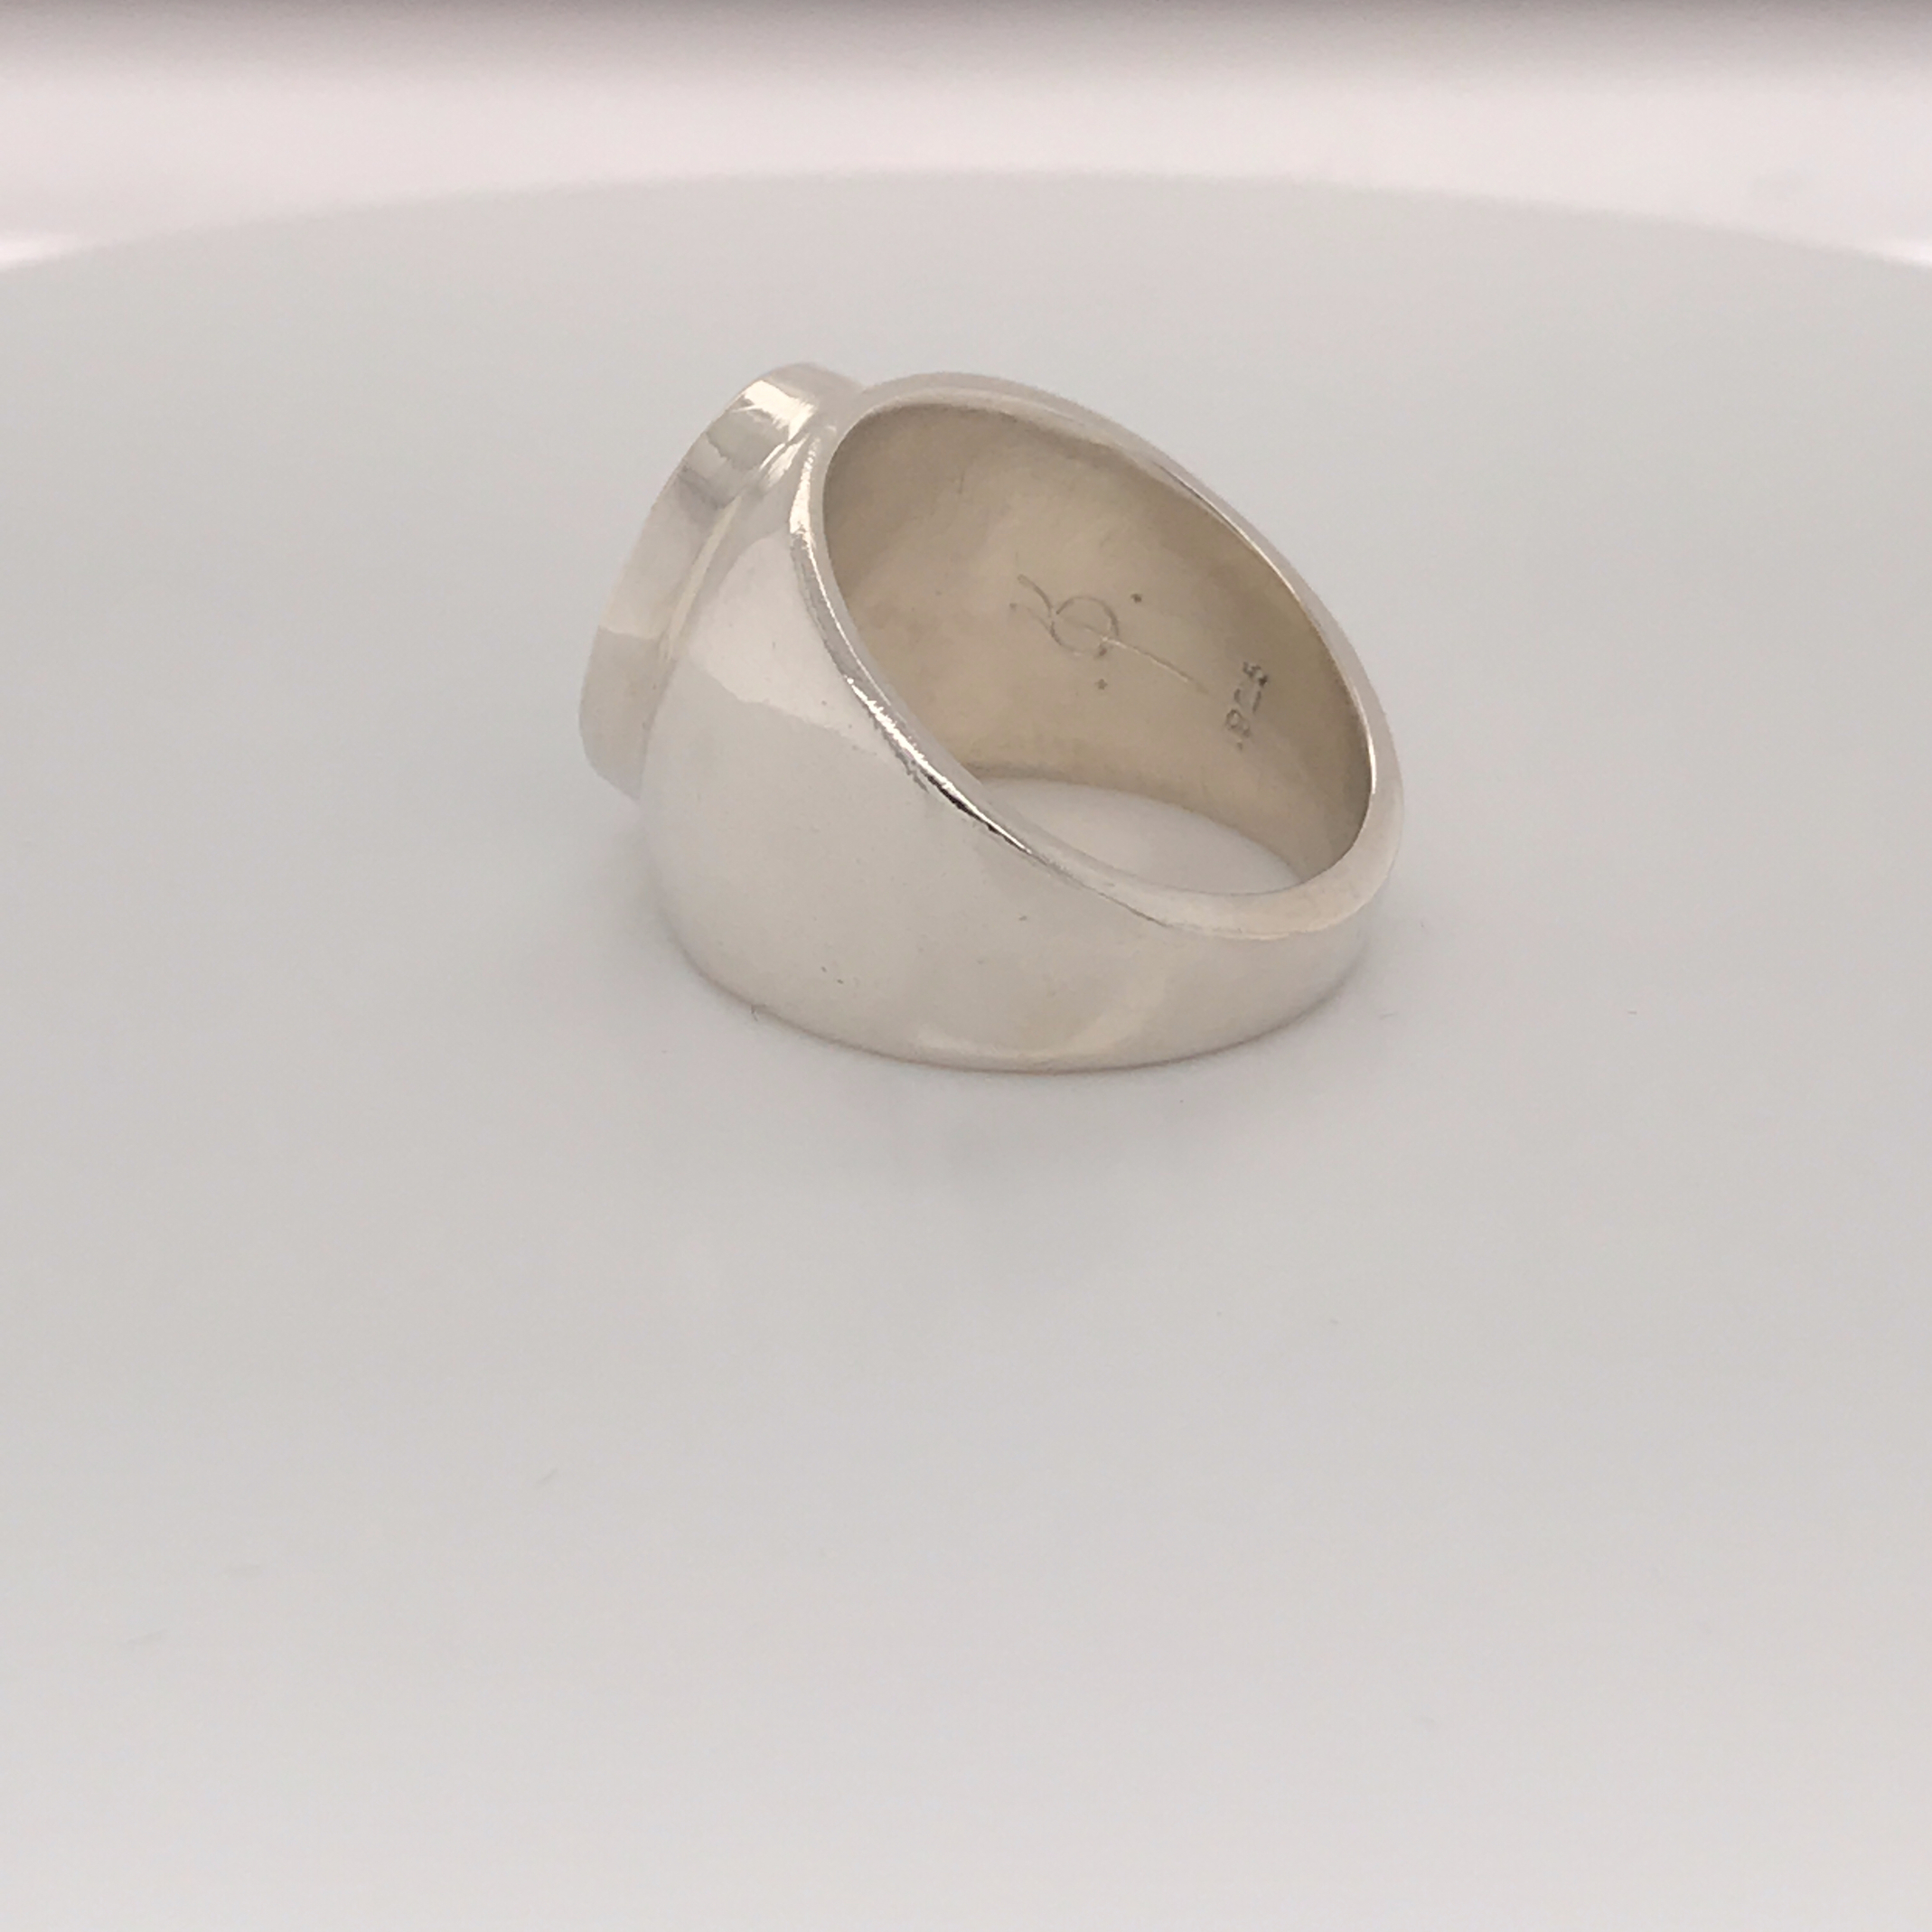
When you live in the Southwest, sometimes only sterling and turquoise satisfies. I’ve had this little turquoise disc sitting on my bench for a few months. I knew it was destined for a ring, but wasn’t sure about the final design. Now I am — this is a pair of eccentric sinusoidal circles. The outer one was domed before assembly, and then its face filed flat before the bezel and cab were attached.
Hey Alec,
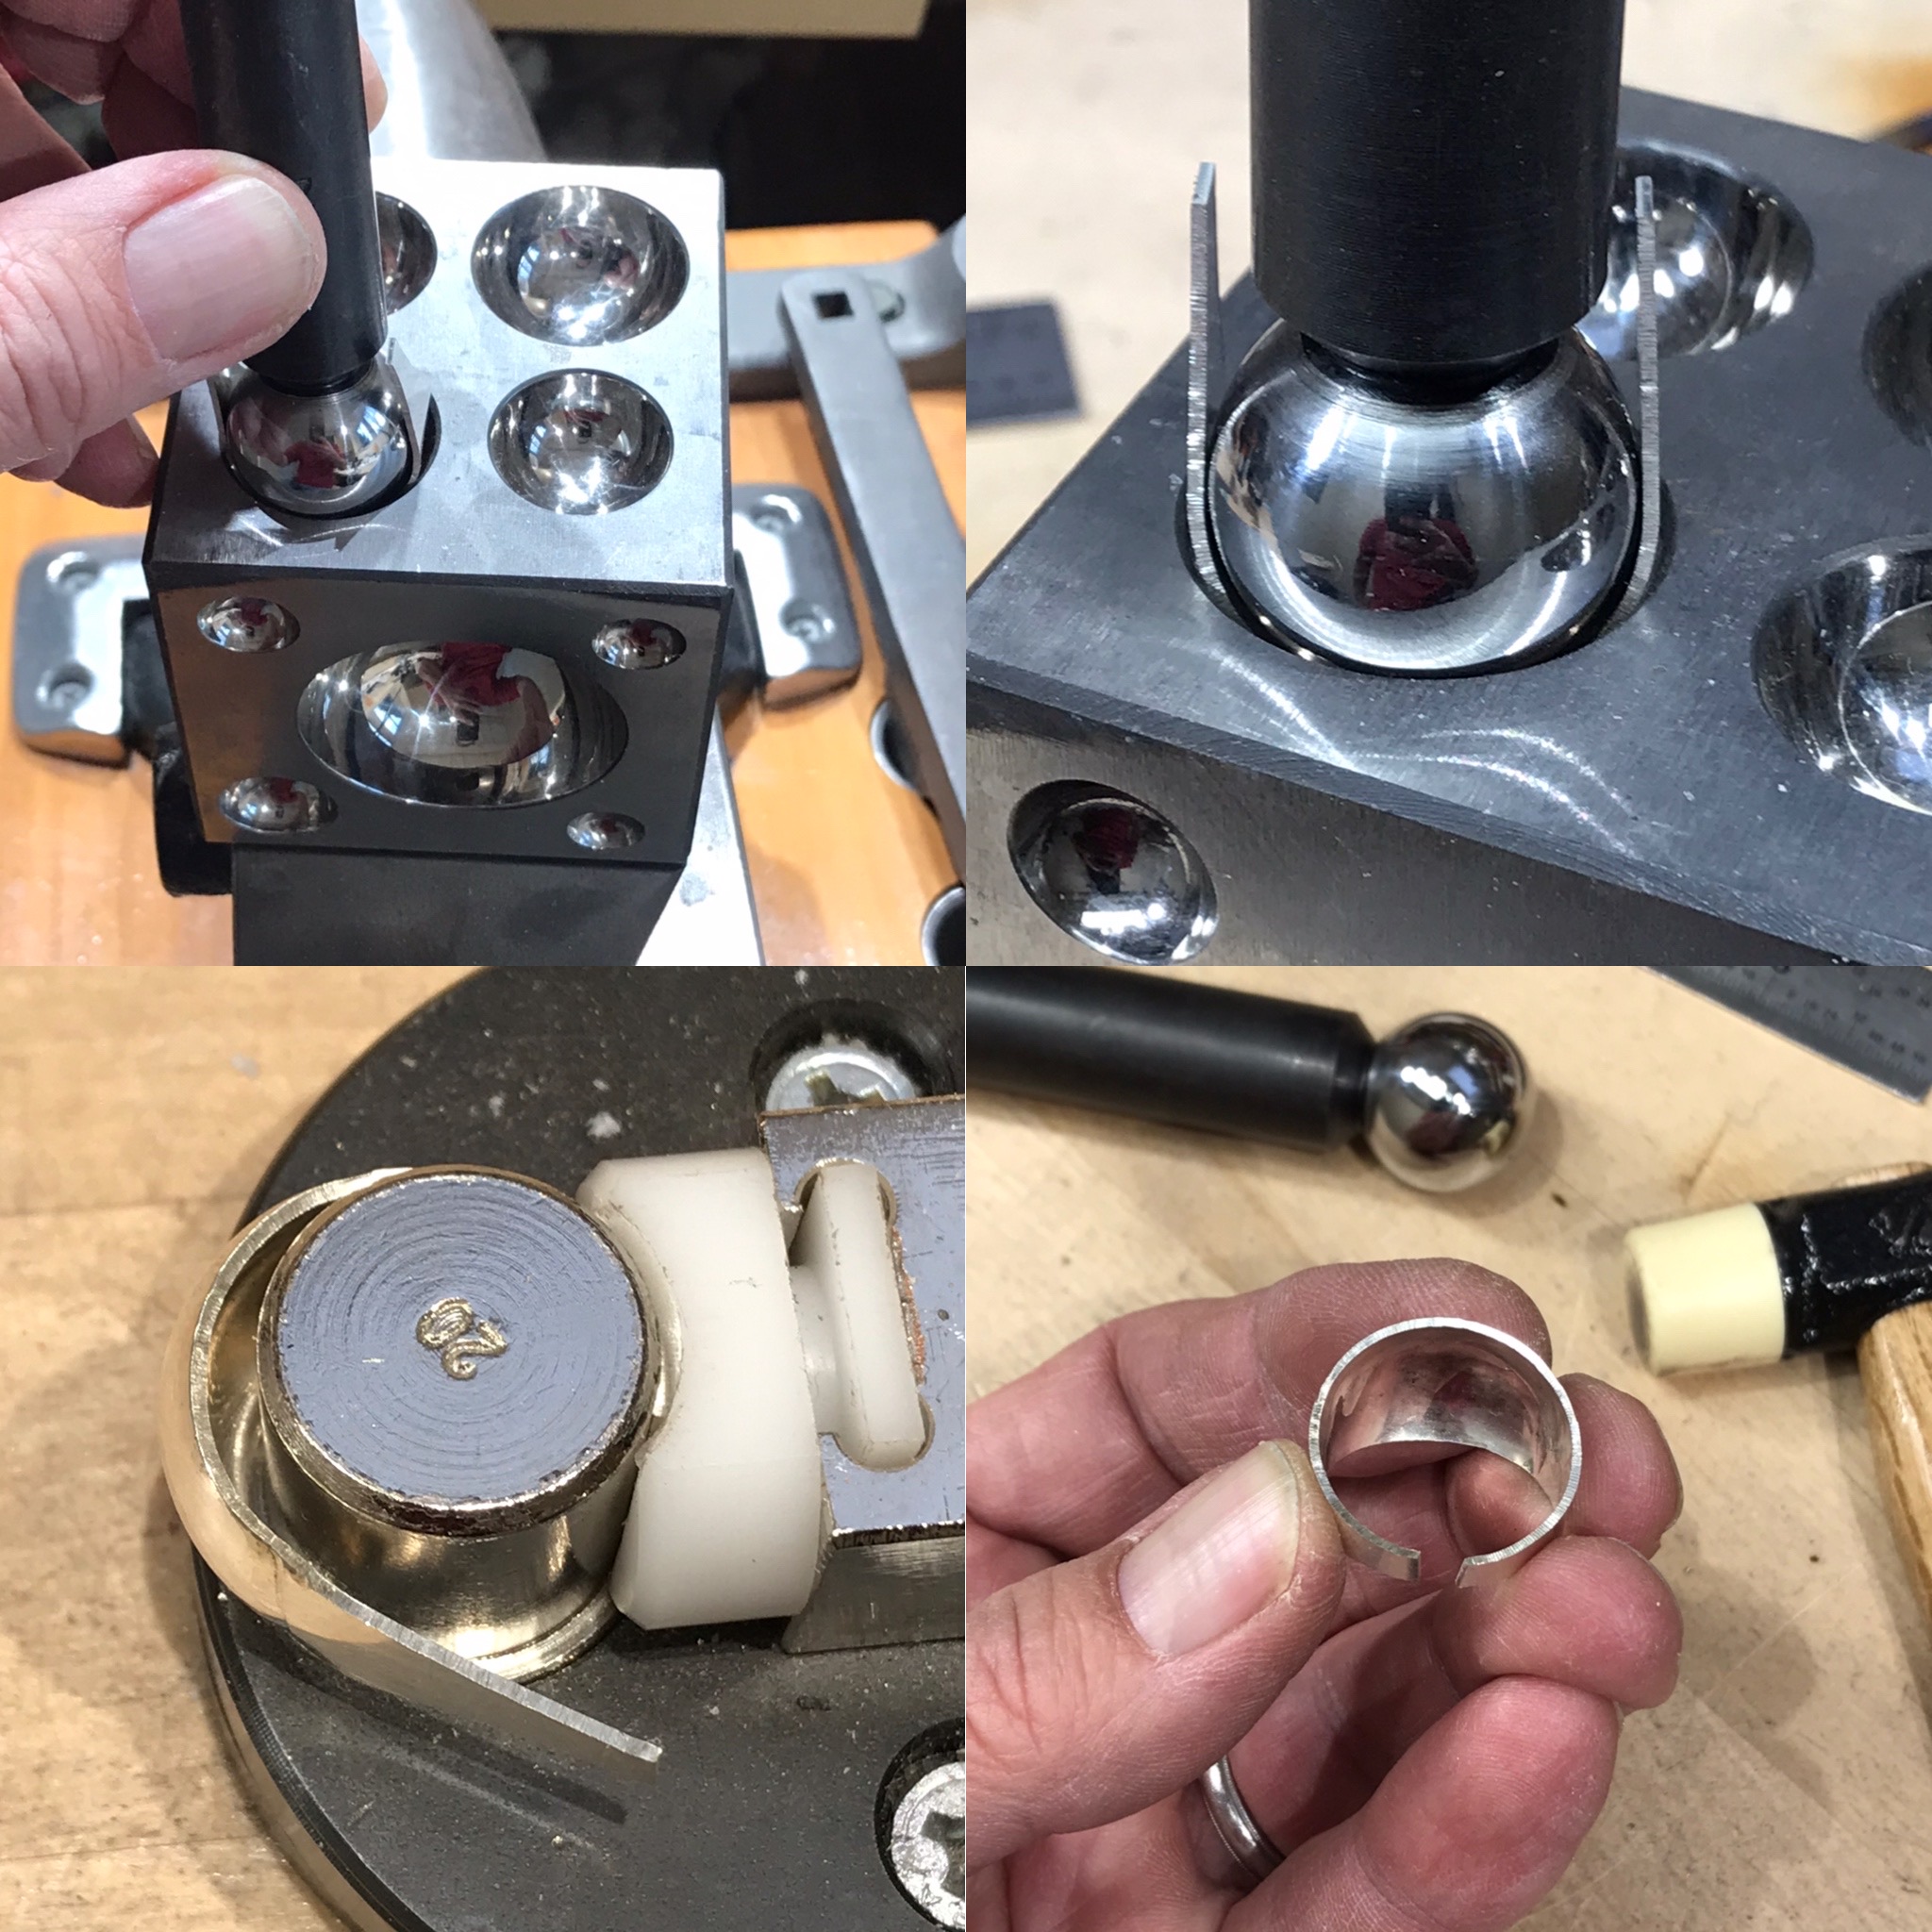
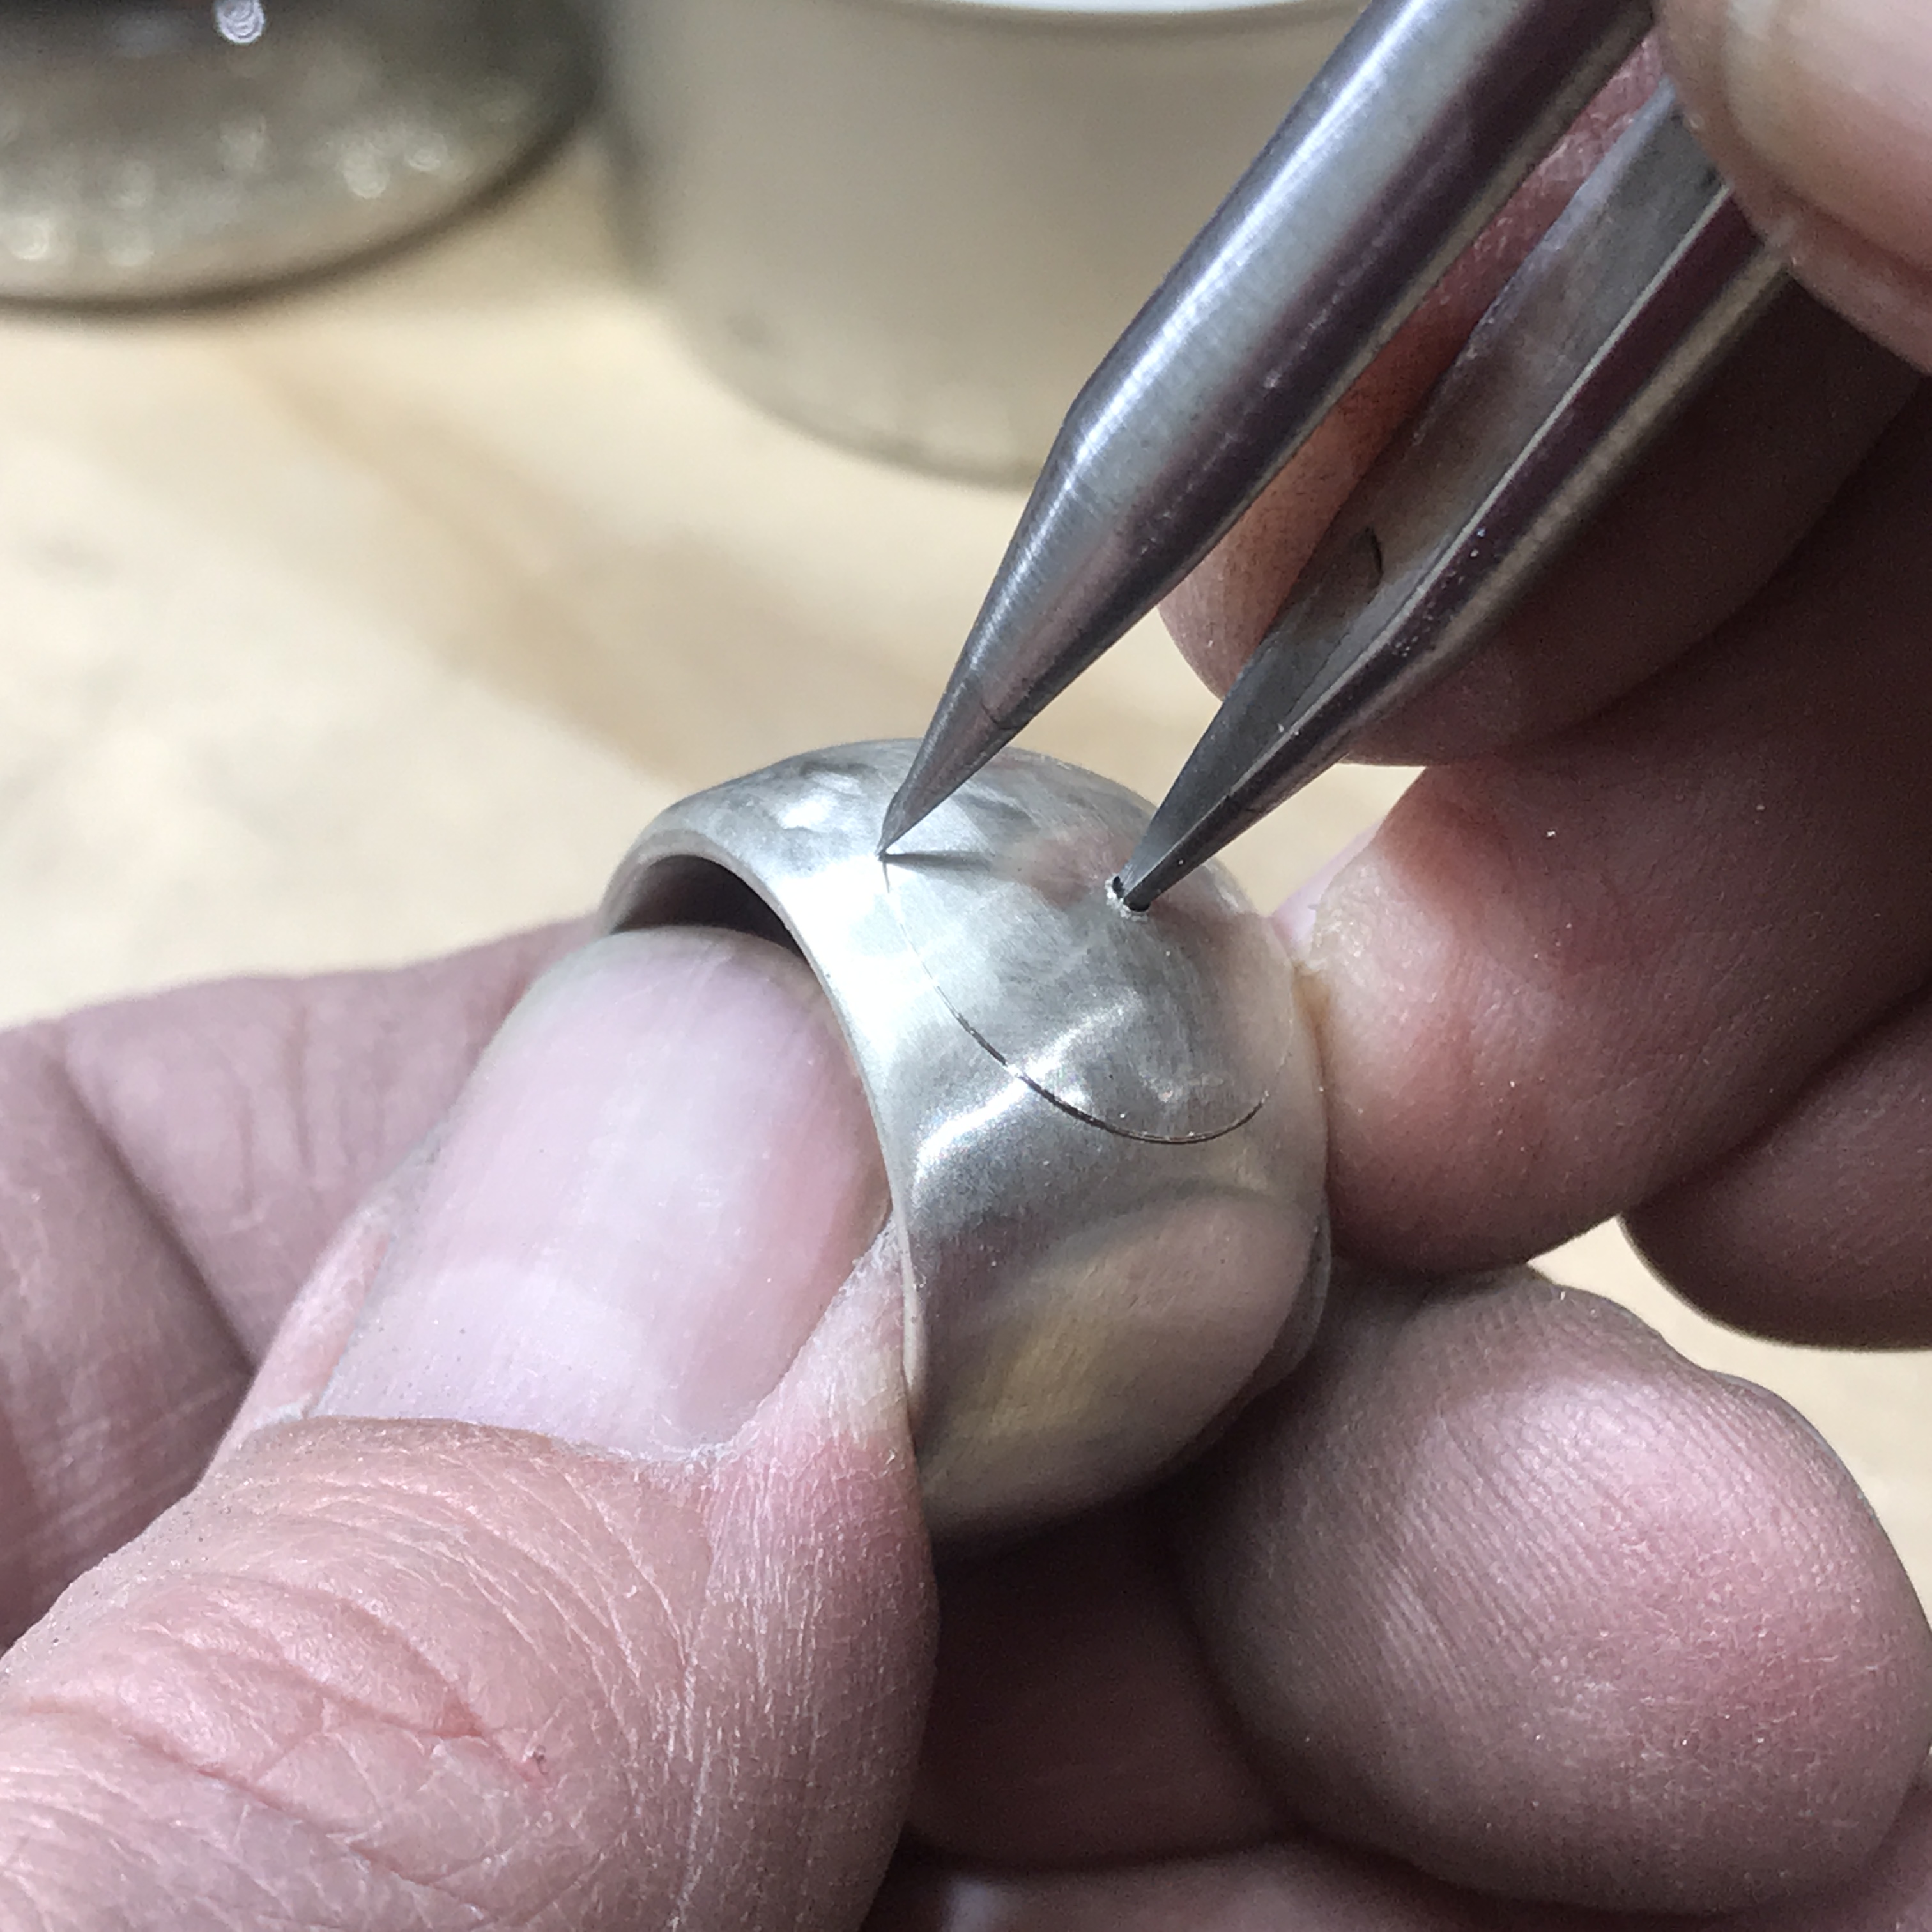
Thanks for the very nice pictures of your very graceful ring’s construction! In the second picture there is a delrin or nylon jaw being used to round out the bottom of the shank, but I’m unfamiliar with this tool. Could you give a reference for this? Thx, royjohn
Thank you for the kind words, Royjohn. That’s a Pepe Tools Mark II ring bending tool. I think the original (Mark I?) may have included just steel inserts, but this version comes with the nylon inserts as well.
Karen, Sharron,
Thank you. These are good questions. To prevent or at least minimize water intrusion, I could have soldered a plate inside or beneath the bezel before setting the stone. My intent, however, was to seat the stone as close to the shank as possible. I guess I could have spent more time on the design and fabrication to reduce this possibility. If I were working with something like Landers, maybe I would have.
As far as what happens when one washes their hands, with a stone like turquoise, take the ring off first. This isn’t a cop out on design, but rather my opinion on how to treat the stone. Even backed, water and soap can seep beneath the stone. Turquoise at 5-6 on the mohs scale scratches easily; I’ve also seen it discolored when it was exposed to oil or other chemicals. You wouldn’t subject a fine pearl or opal to such treatment, so why turquoise?
Lastly, an aside, a common practice in some vintage pieces was to pad the underside of a turquoise cab with cardboard or similar material, either to shim the stone or to make it appear larger/thicker. That’s just another reason to avoid exposing it to water as the backing material would really absorb water.
-Alec
As Alec rightly says, turquoise should not be exposed to oils, soap, or mild acids like vinegar or lemon juice. Turquoise is a porous stone, as stones go, and will readily absorb all sorts of chemicals and change color from them. You can see this effect in antique strands of turquoise beads. Antique necklaces of turquoise beads will be blue where the beads are knotted, but will have a green band around their middles where the beads touched the wearer’s skin, the skin’s natural oils having been absorbed by the beads and caused the stone to turn color.
Hi Alec, Karen, Sharron…
As you all may know, there are all kinds of turquoise…hard and impervious to soft and porous, natural and stabilized and even pulverized and reconstituted (ugh!). So how you treat it may depend somewhat on exactly what you have, altho’ it is never really hard (above Mohs 6). When hard and well polished it may not take up any water. Some folks will actually wax the softer turquoise. Over time the more porous stones may take up skin oils and change color, which may be why you see more old greenish stones than new ones. Ben Hunt’s book on Indian [his word, not mine] Silversmithing says that the old Native American silversmiths would back turquoise with pieces of old 78 RPM records, but sawdust was also used. Besides the reasons mentioned, the backing may have been a way to cushion the turquoise during setting to avoid cracking it. I suppose the decorative teeth on some of the bezels may have been for that purpose as well as ornament. Can you tell I like turquoise? I have a couple of pounds of it to cut, but so far I’ve been too lazy to change the oil in my trim saw out for water so I can start slitting some of it. Maybe posting this will shame me into it! -royjohn
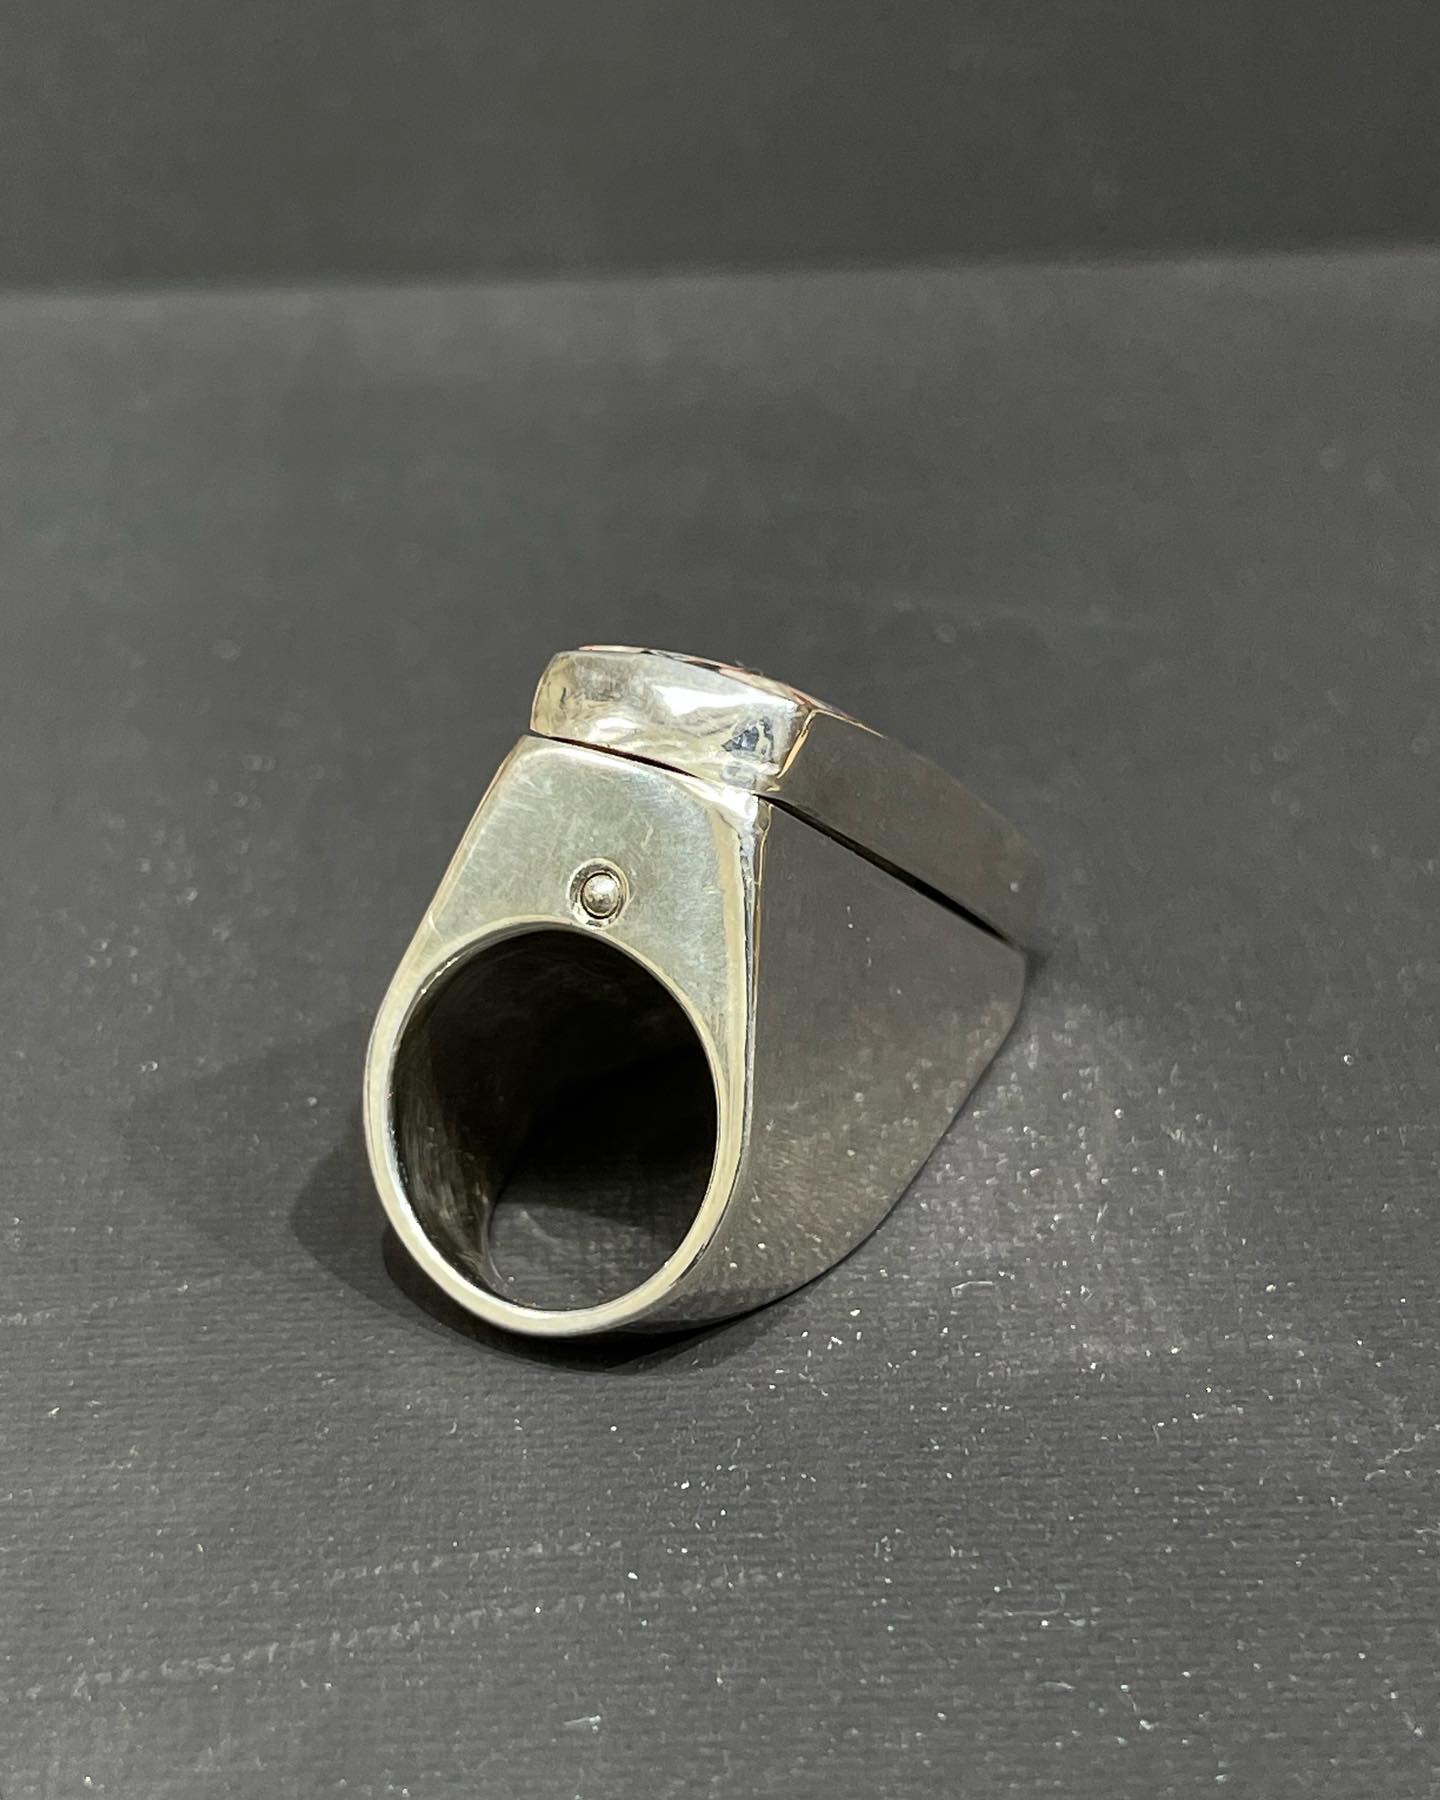
I guess I’ve been feeling a little blue lately… well, a little turquoise. I found this cab recently, and knew at once how I’d set it. Anyway, it arrived in yesterday’s mail, and the ring is done.
The cab is fairly thick at 5mm, and I wanted to set it deeply into the crown. I also wanted the cab close to the edges. So I beveled the cab base on the long ends to match the angle of the shank. The sides of the ring then effectively become the seat, and the bezel holds it down.
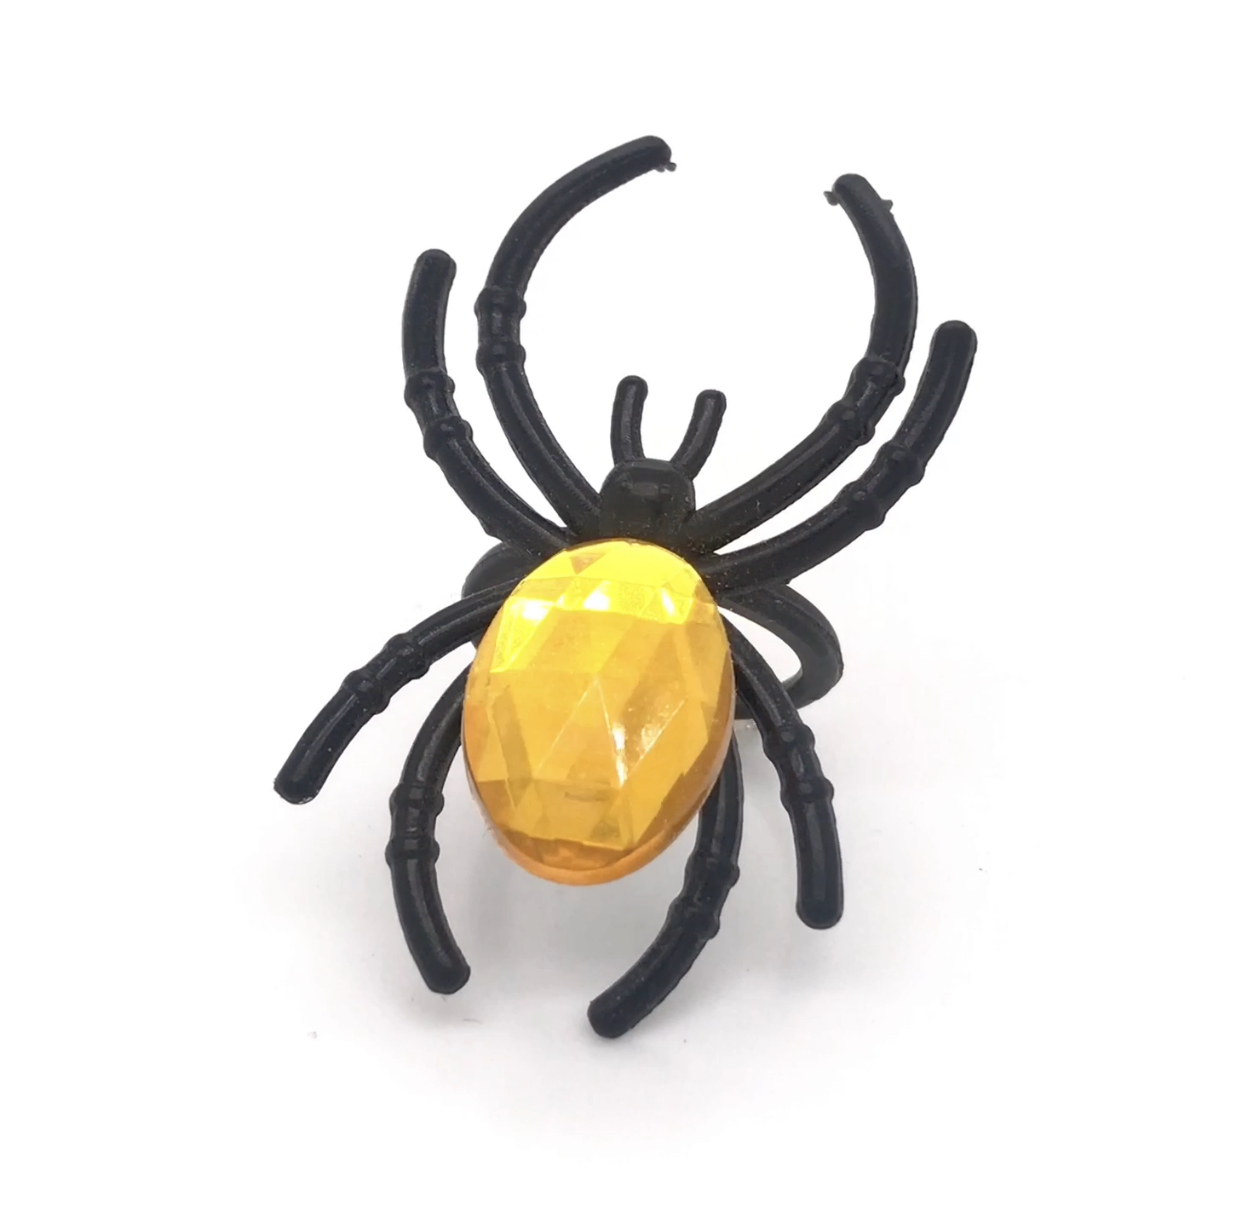
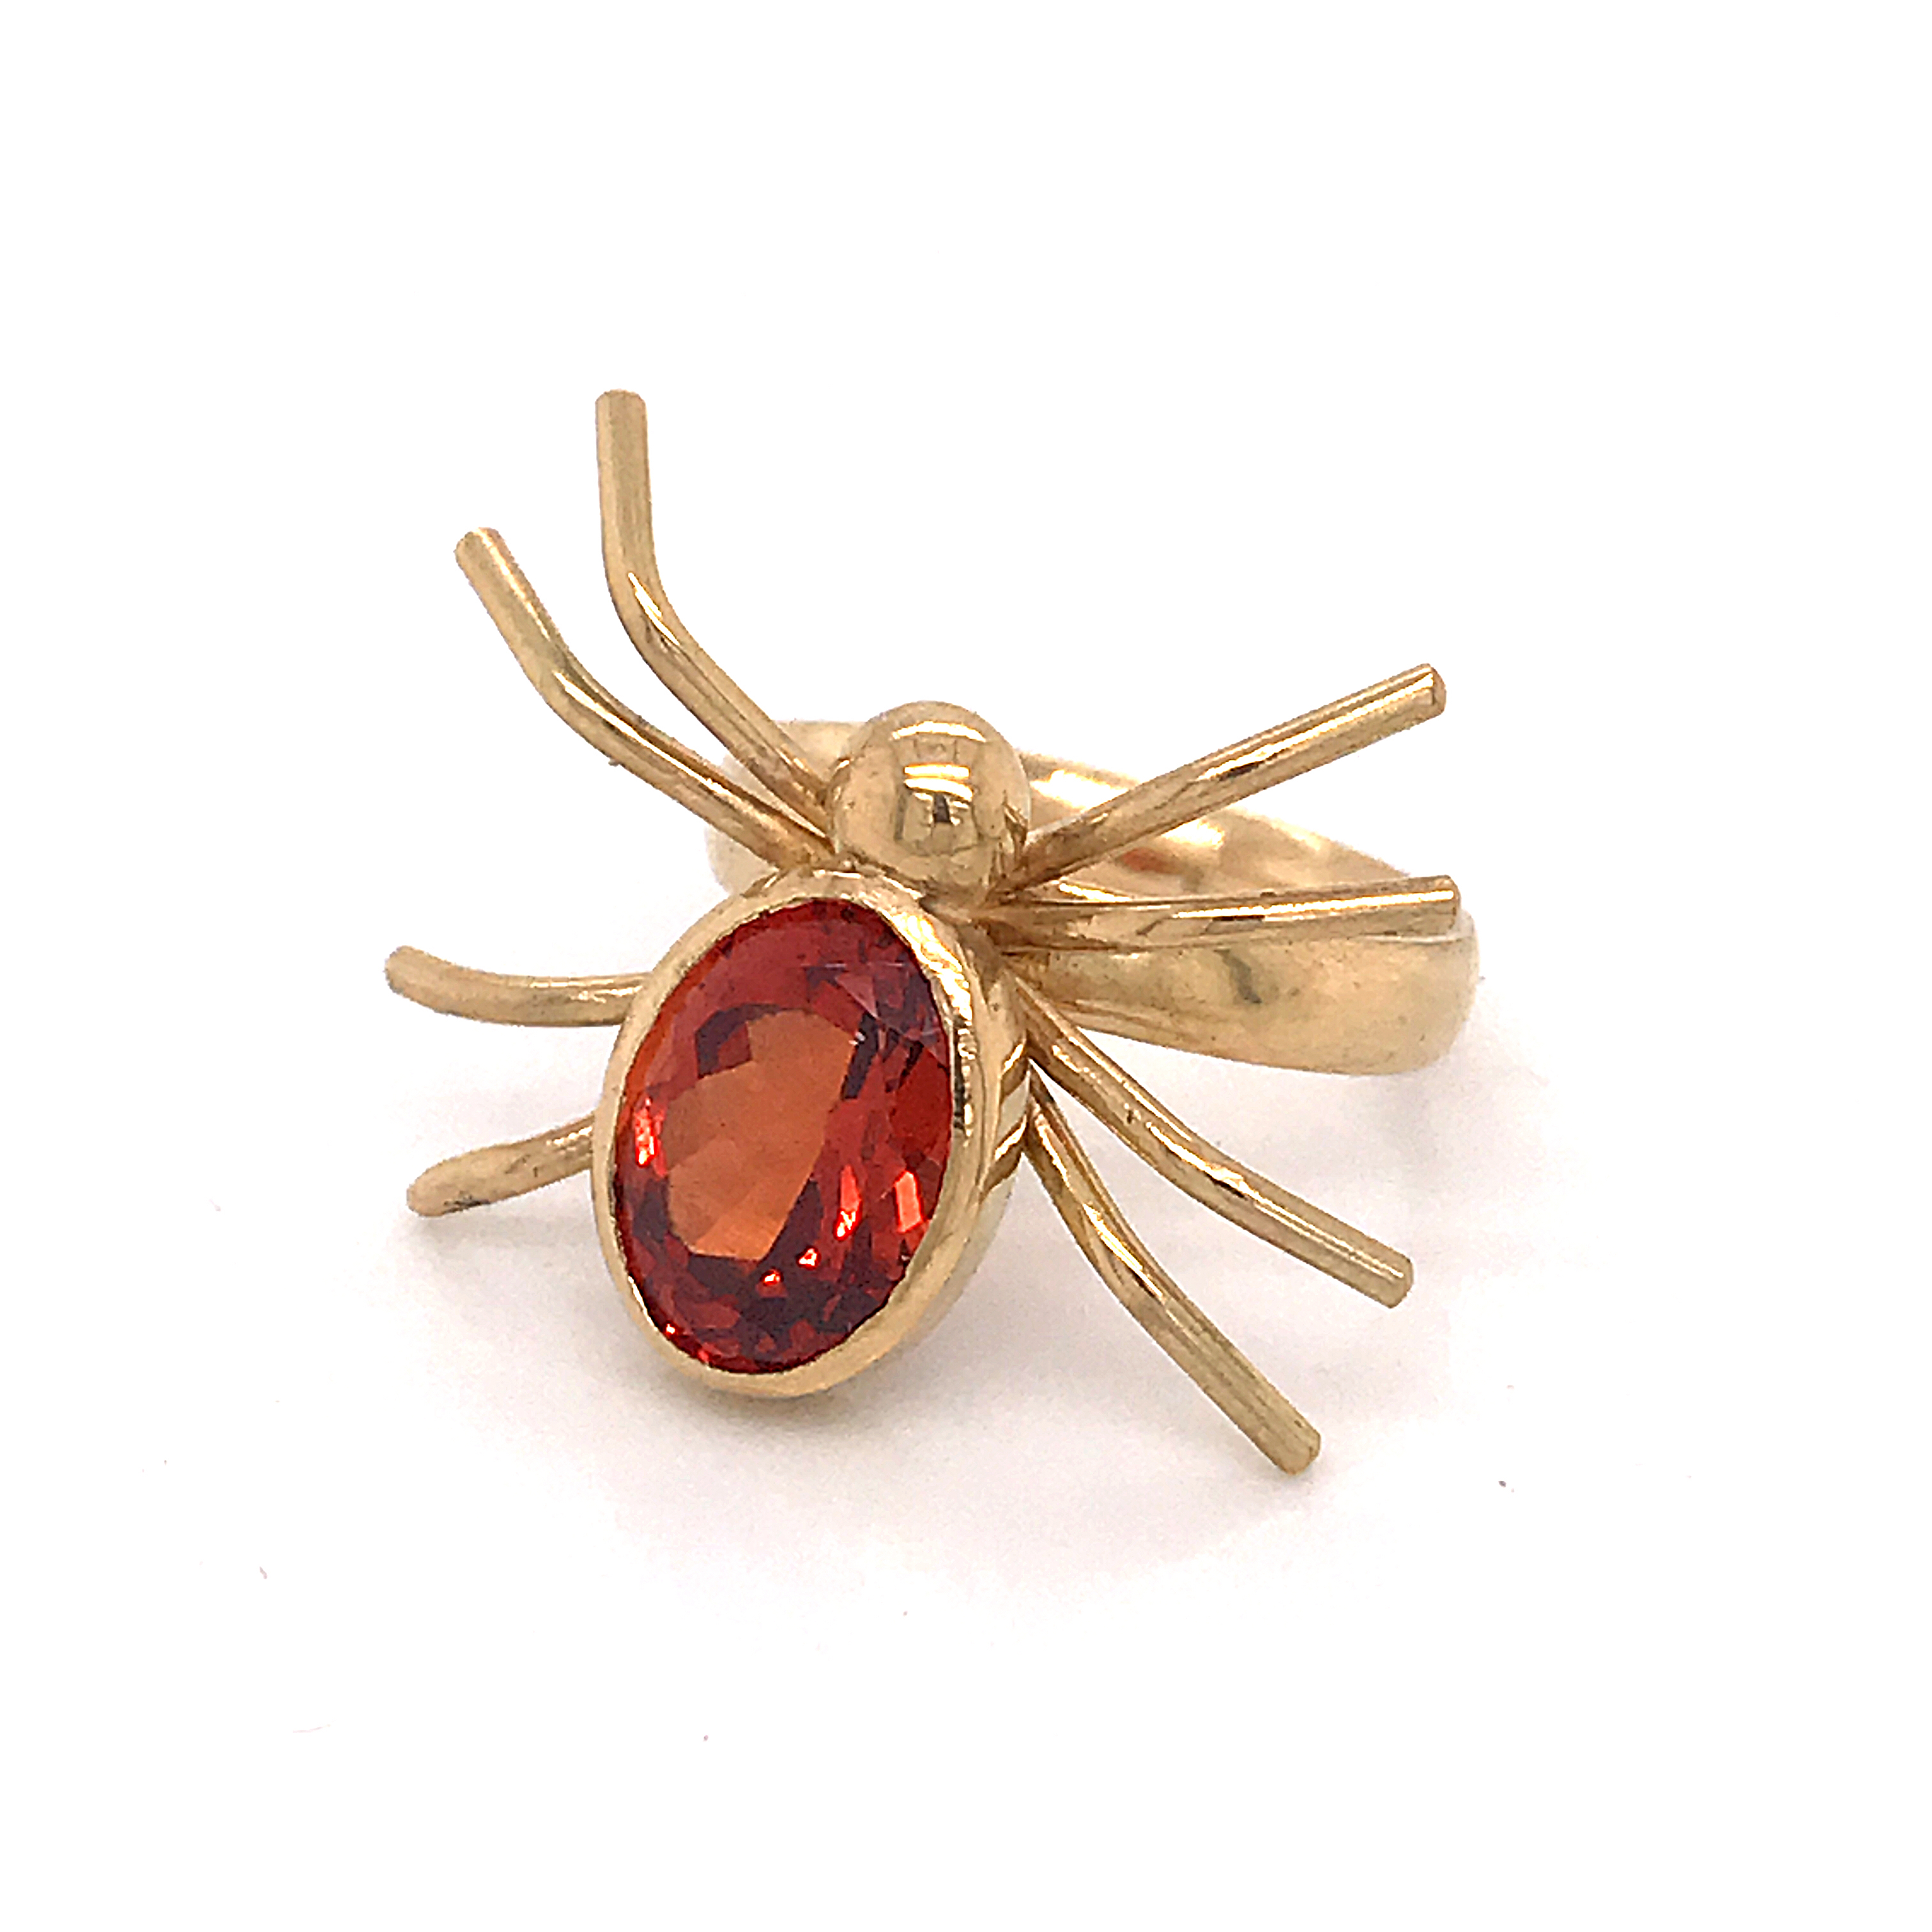
My wife asked me for a spider ring a couple of years ago after getting a toy ring with a plastic “gemstone” in a little Halloween candy gift bag. I wasn’t sure I’d be able to accomplish what I wanted to make the idea a reality until just recently.
So here it is, in 18K yellow gold with a 5.8 ct spessartine garnet:
You probably know my love of the box ring model (I do make other things too, promise). Part of my attraction is how it lends itself to the idea of secret compartments, something I’ve been fascinated by since I was a child.
The following is part careful planning, and part figure-it-out-as-I-go…
Have you ever looked at the stone paintings from the Ancient Archives website? They have a collection of incredible photos by a National Geographic photographer from stone carvings, petrographs from all over the world. You might enjoy.


 We’ll be waiting when you’re ready to show us.