Box Ring Obsessions

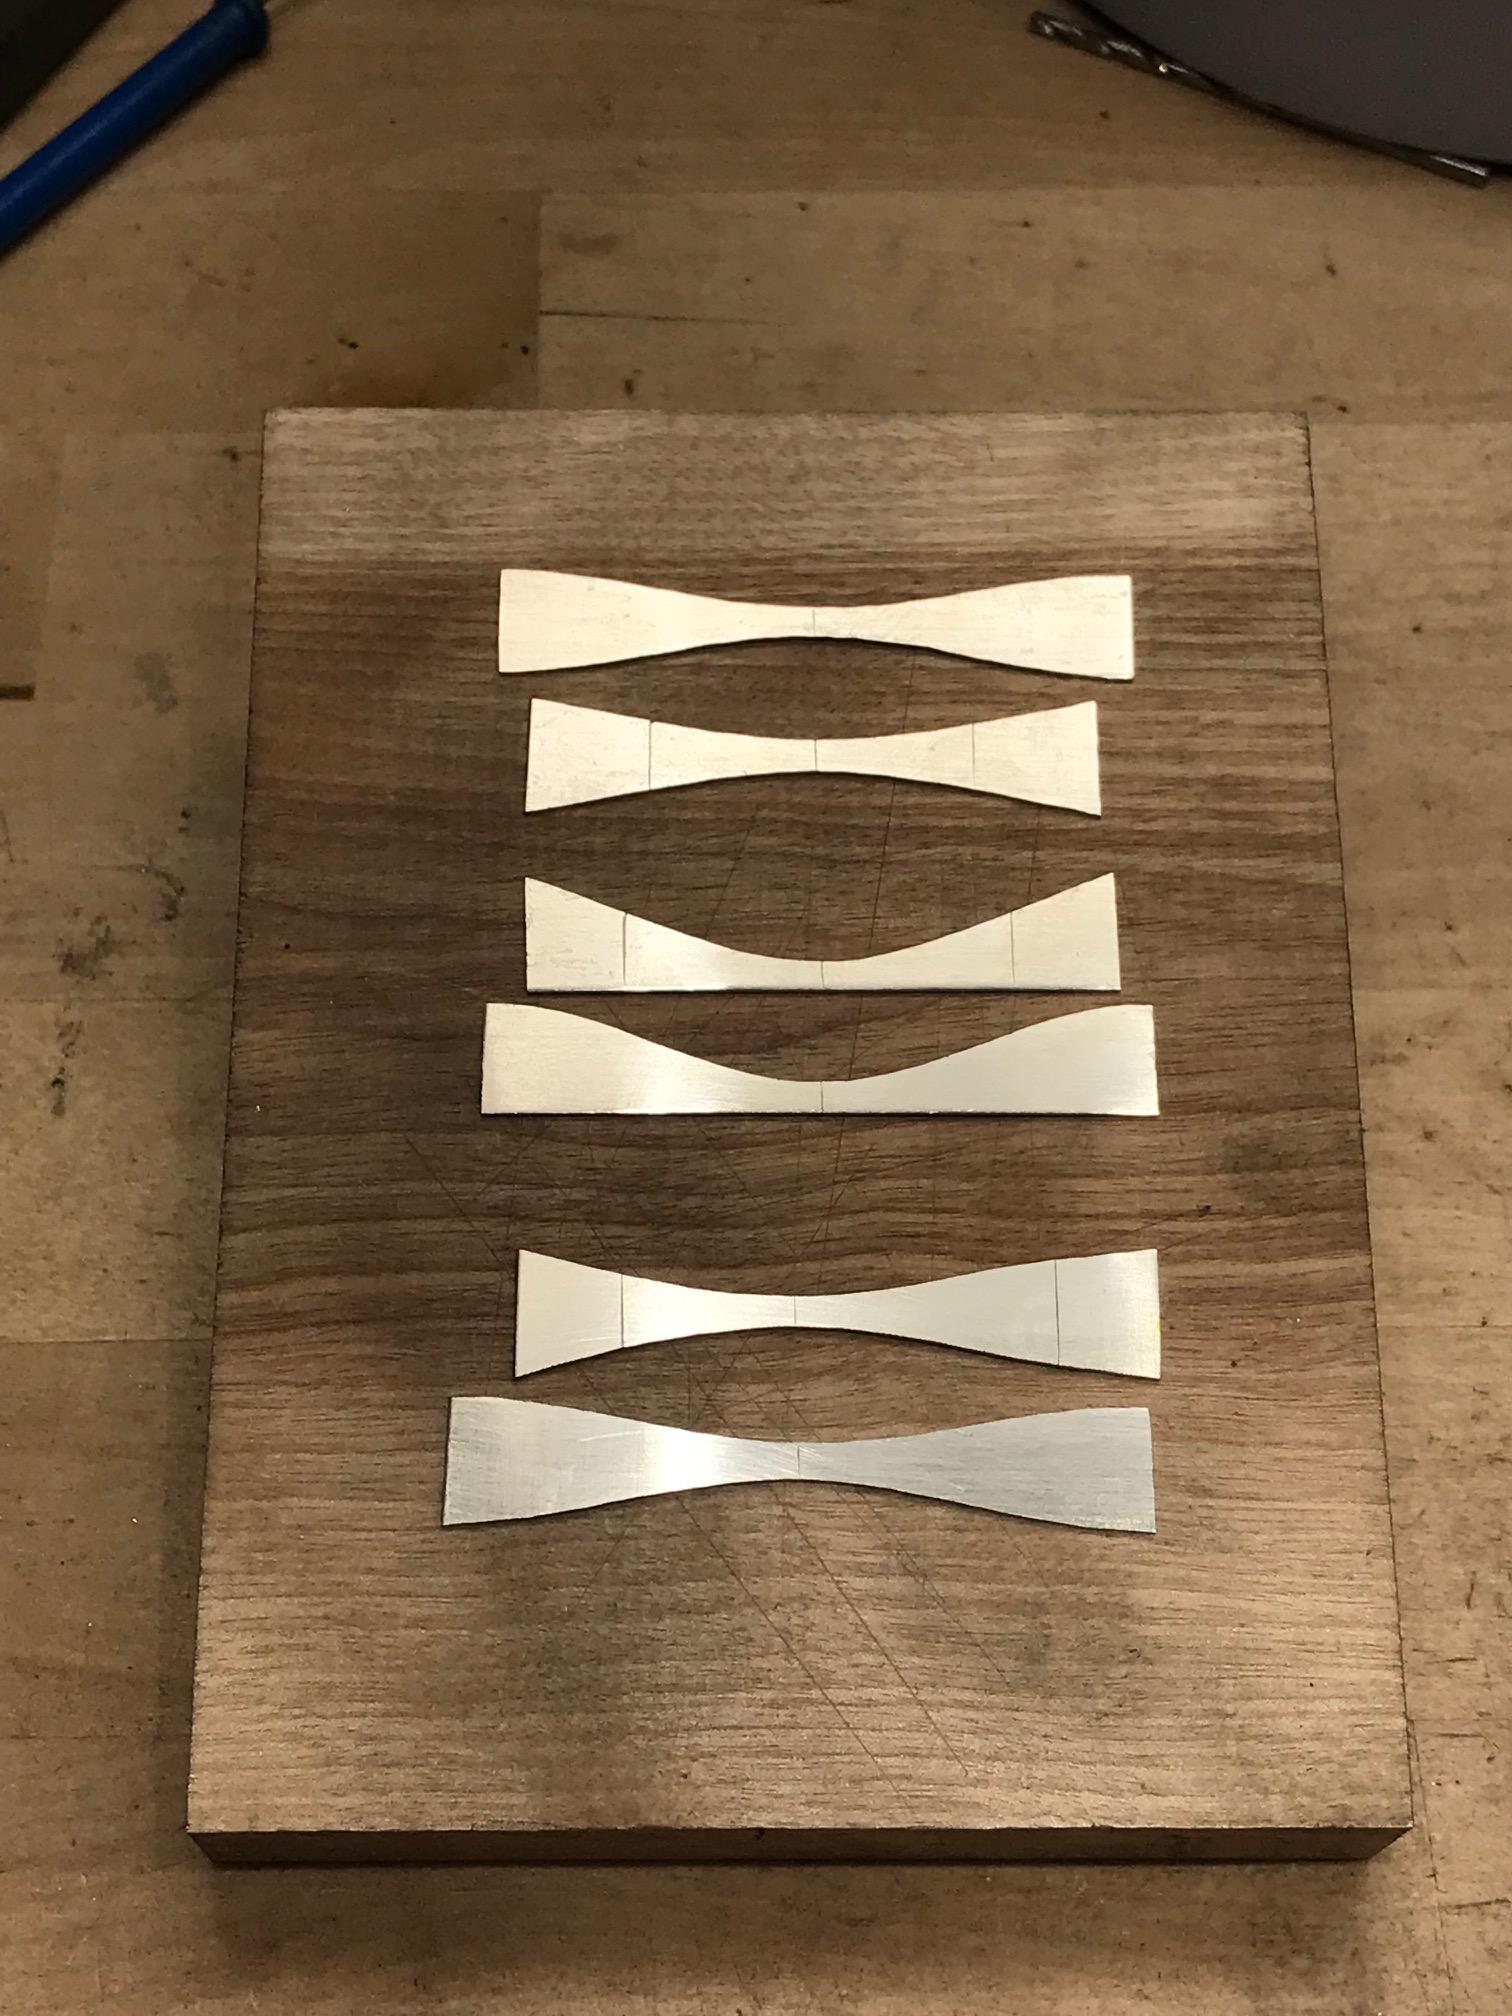
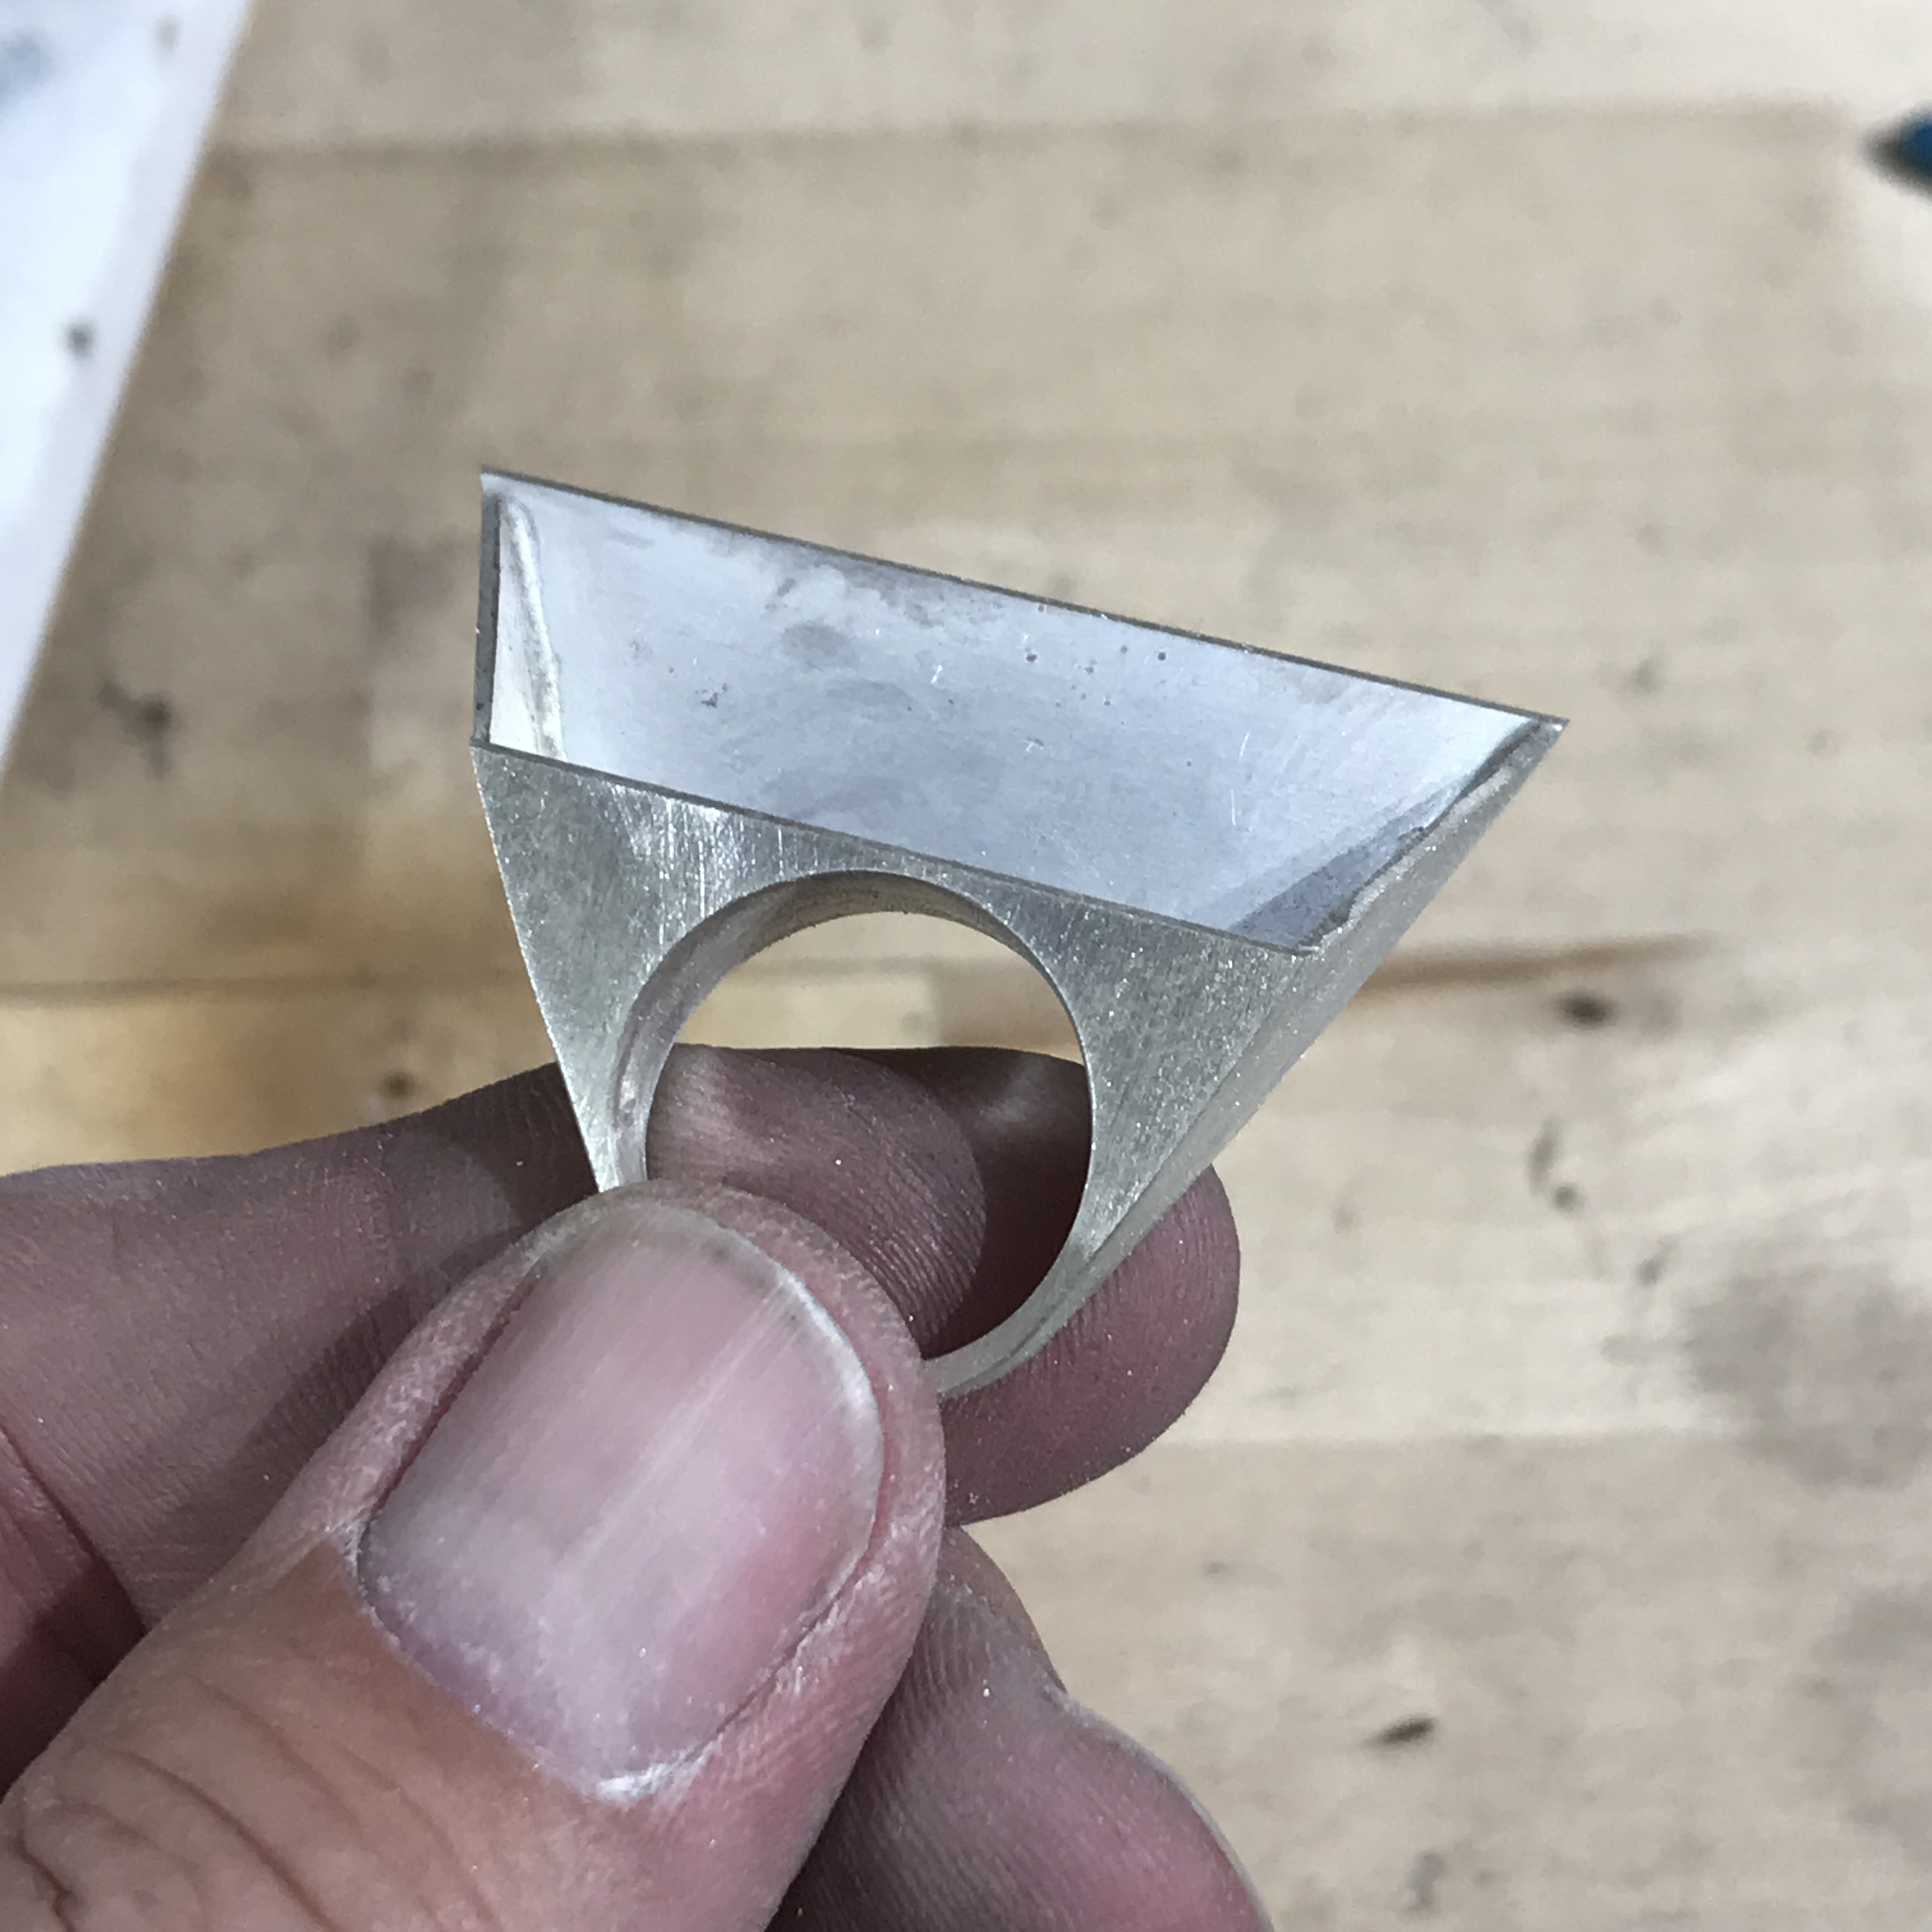
Just over a year ago, I began a topic discussing box rings (Box Rings and Modifications). I was truly fascinated by this form. I still am. From an intuitive perspective and with just a little math thrown in, I presented a template that enhanced the one found in Alan Revere’s book, Professional Jewelry Making. From there, I offered a number of modifications that could be applied to that template to achieve various results, including moving the solder joint on the shank, and shifting the basic curves to make asymmetric rings.

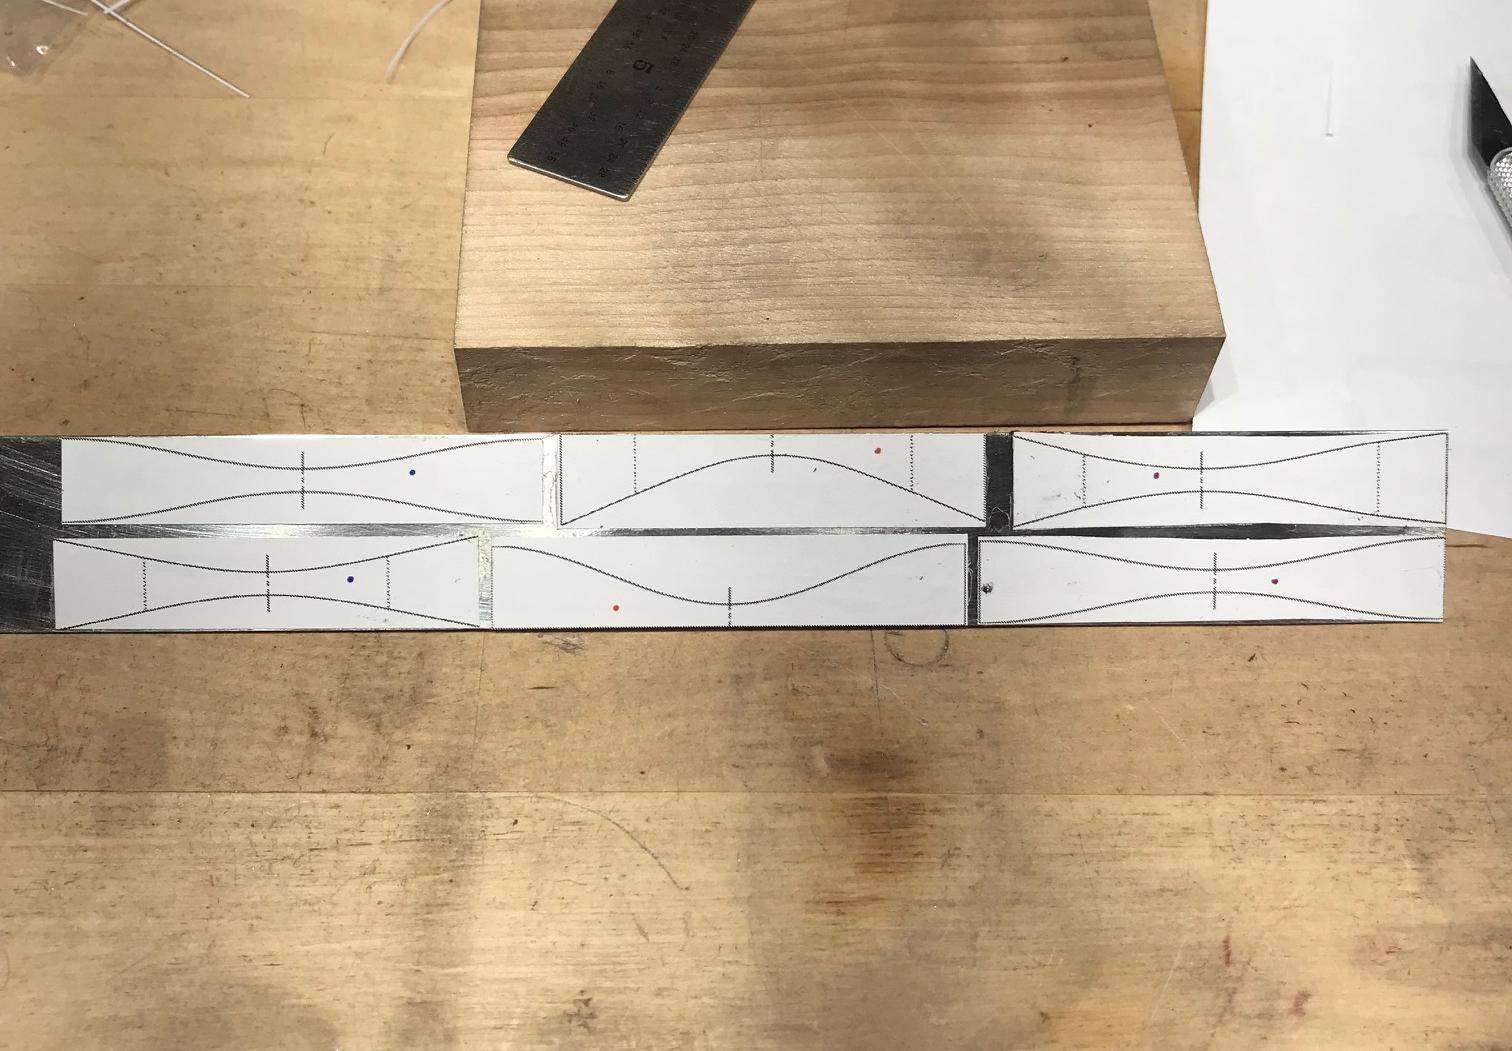
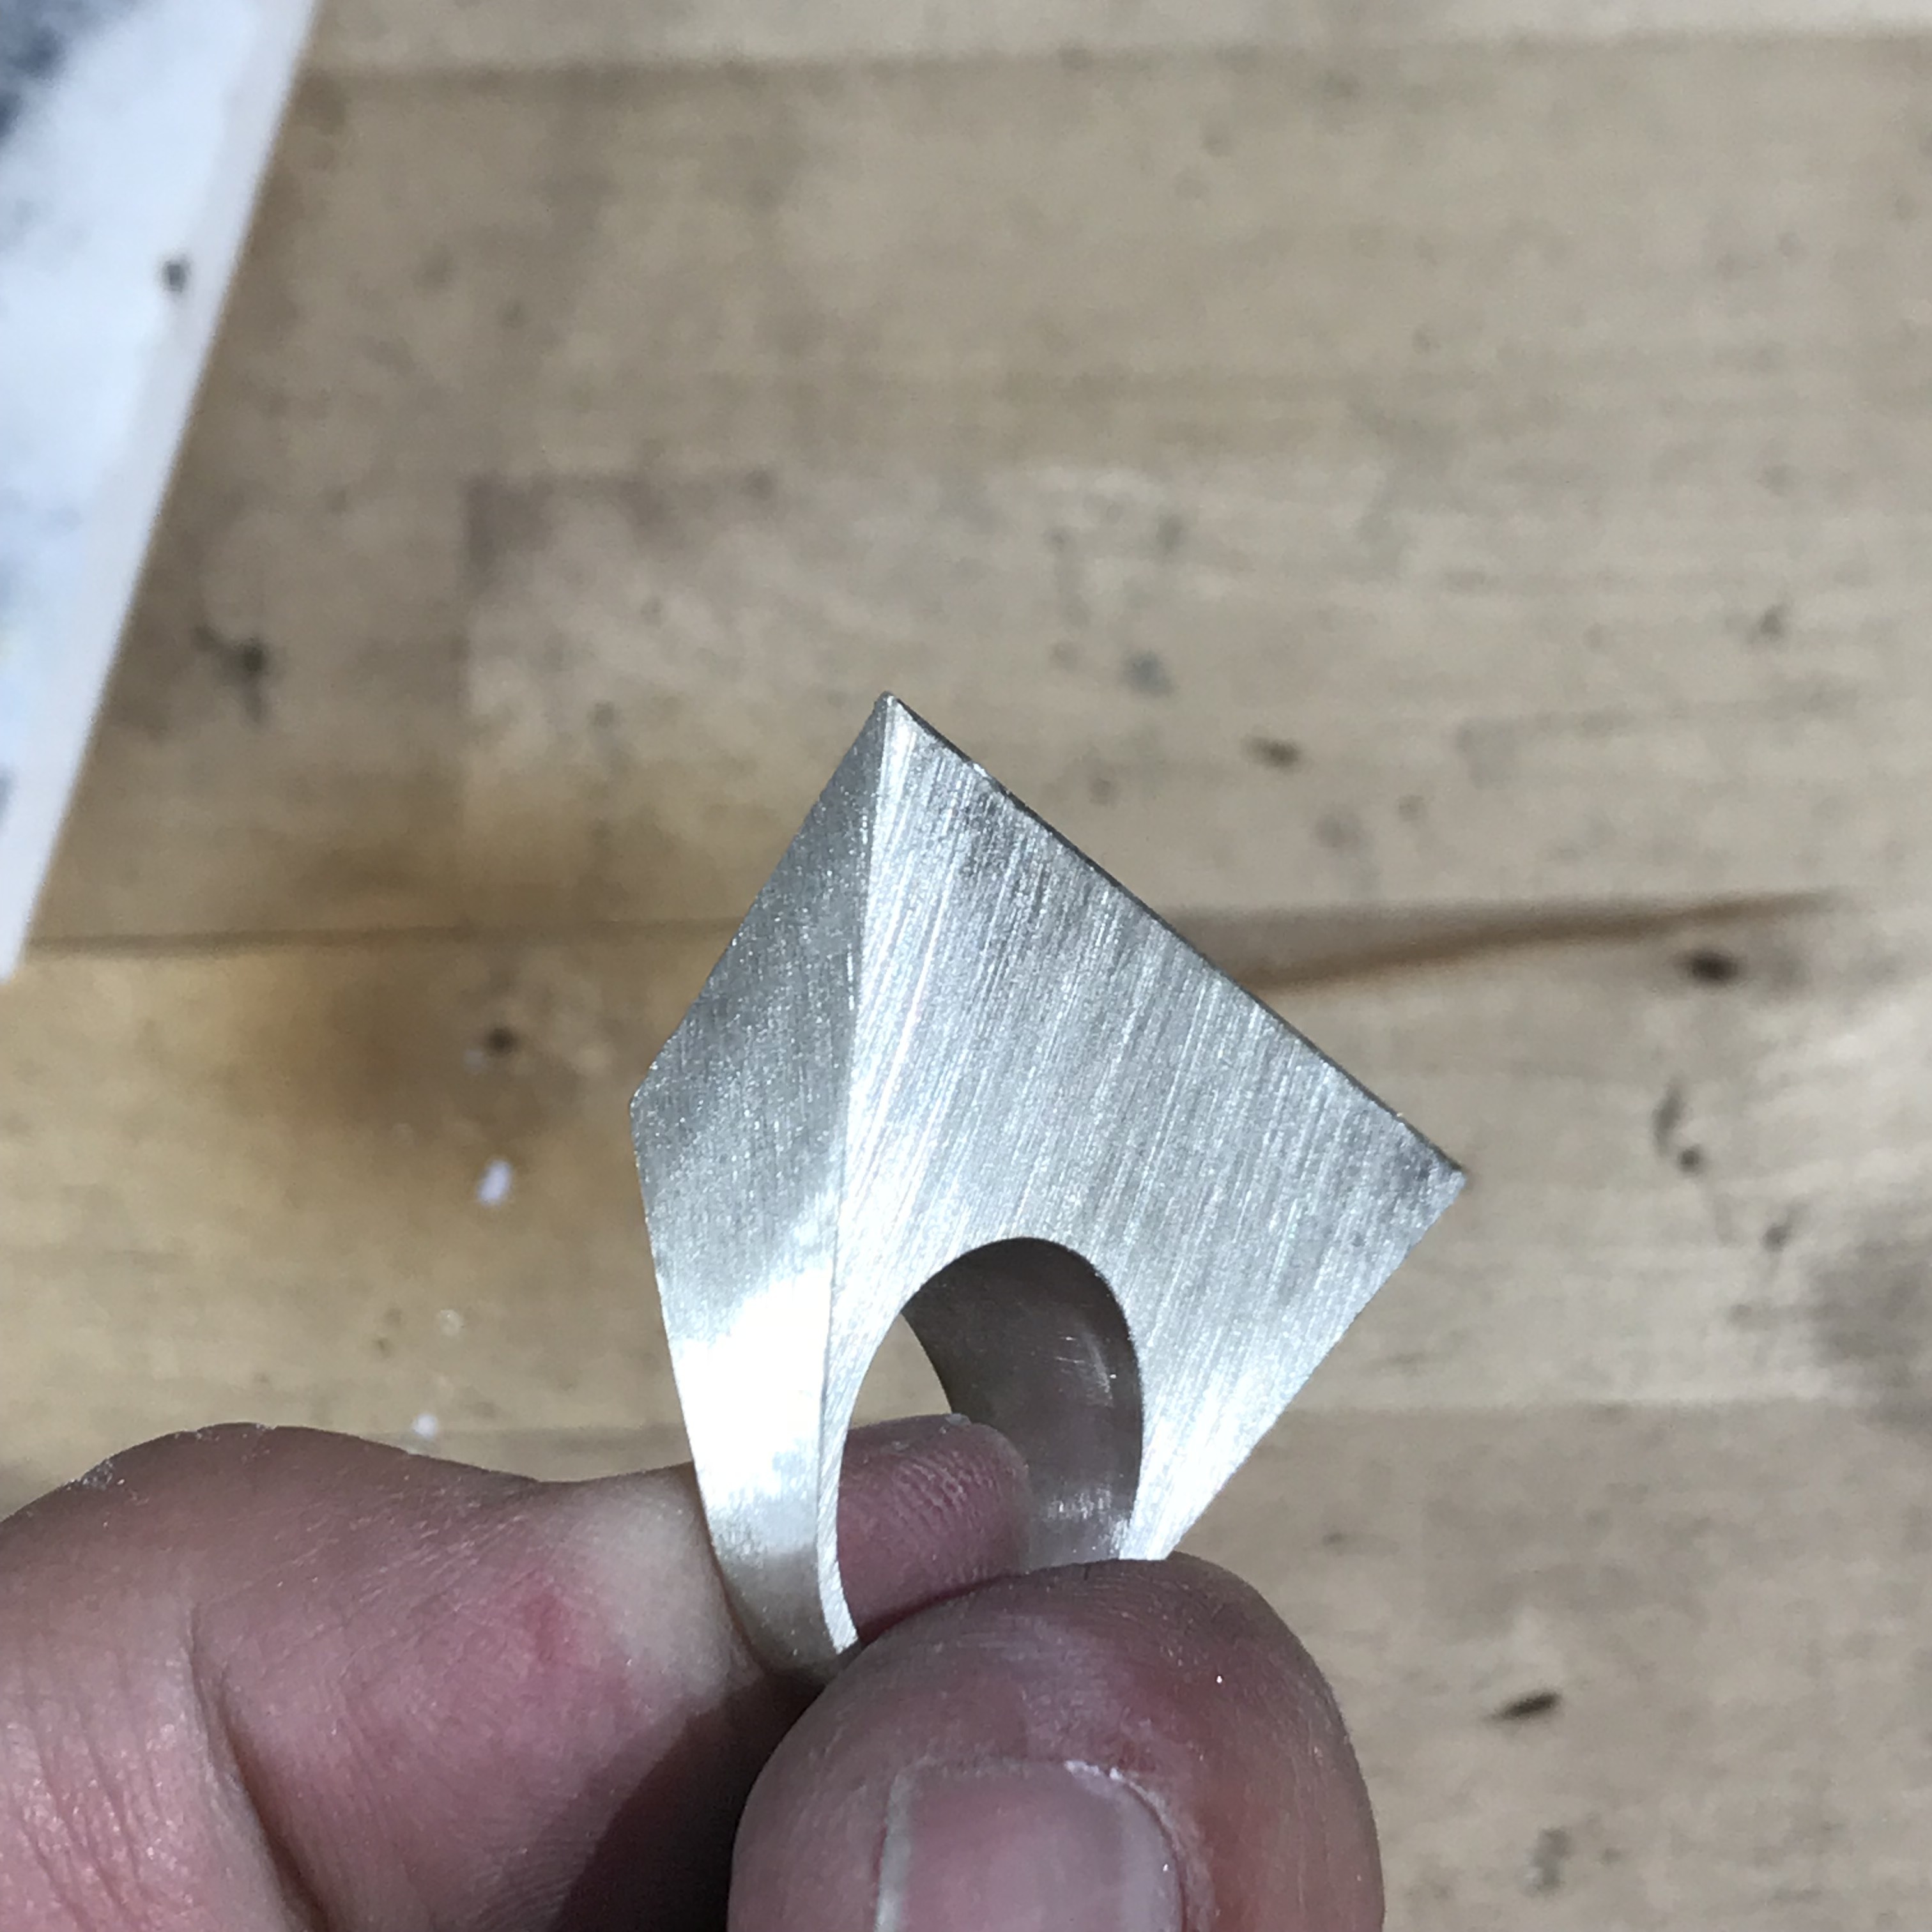
The problem with my approach at that time was that it took a lot of work (relatively speaking) to create the right size or proportion for some ring features. This is particularly important when you want to, for example, add an embellishment like a particular stone. I’ve made my share of rings with faces too small to accommodate my original needs. It’s frustrating to say the least.

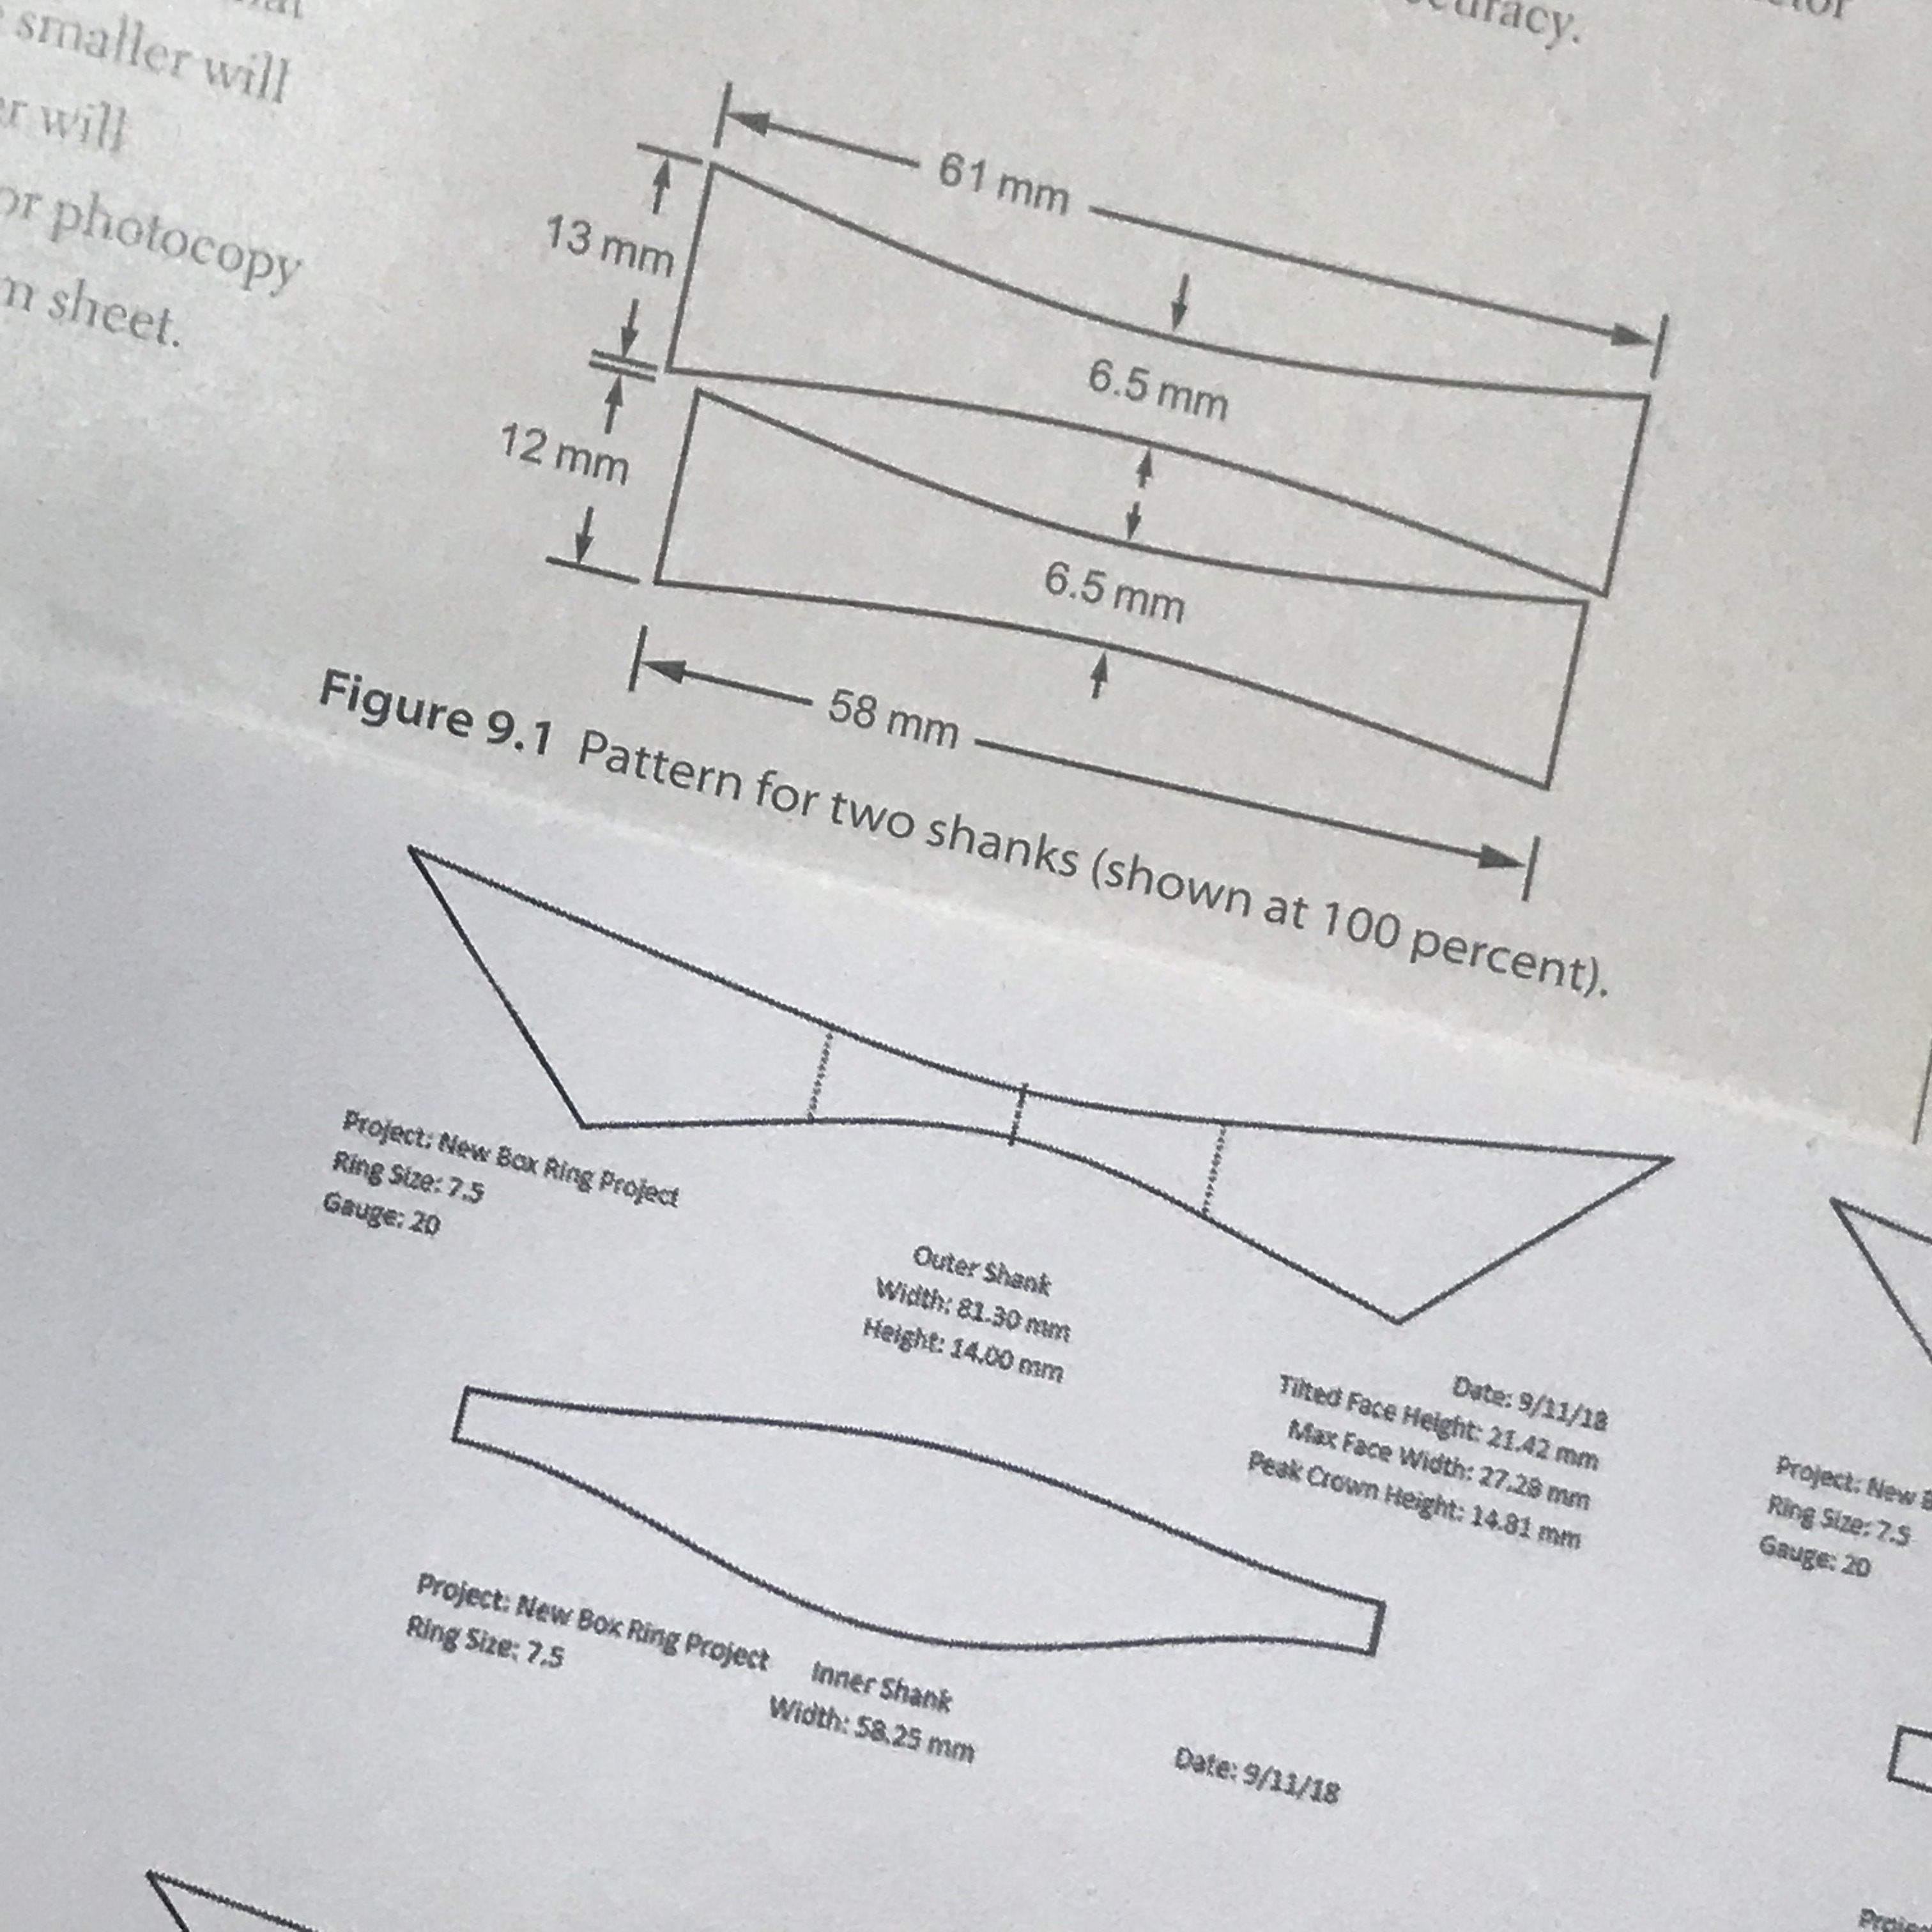
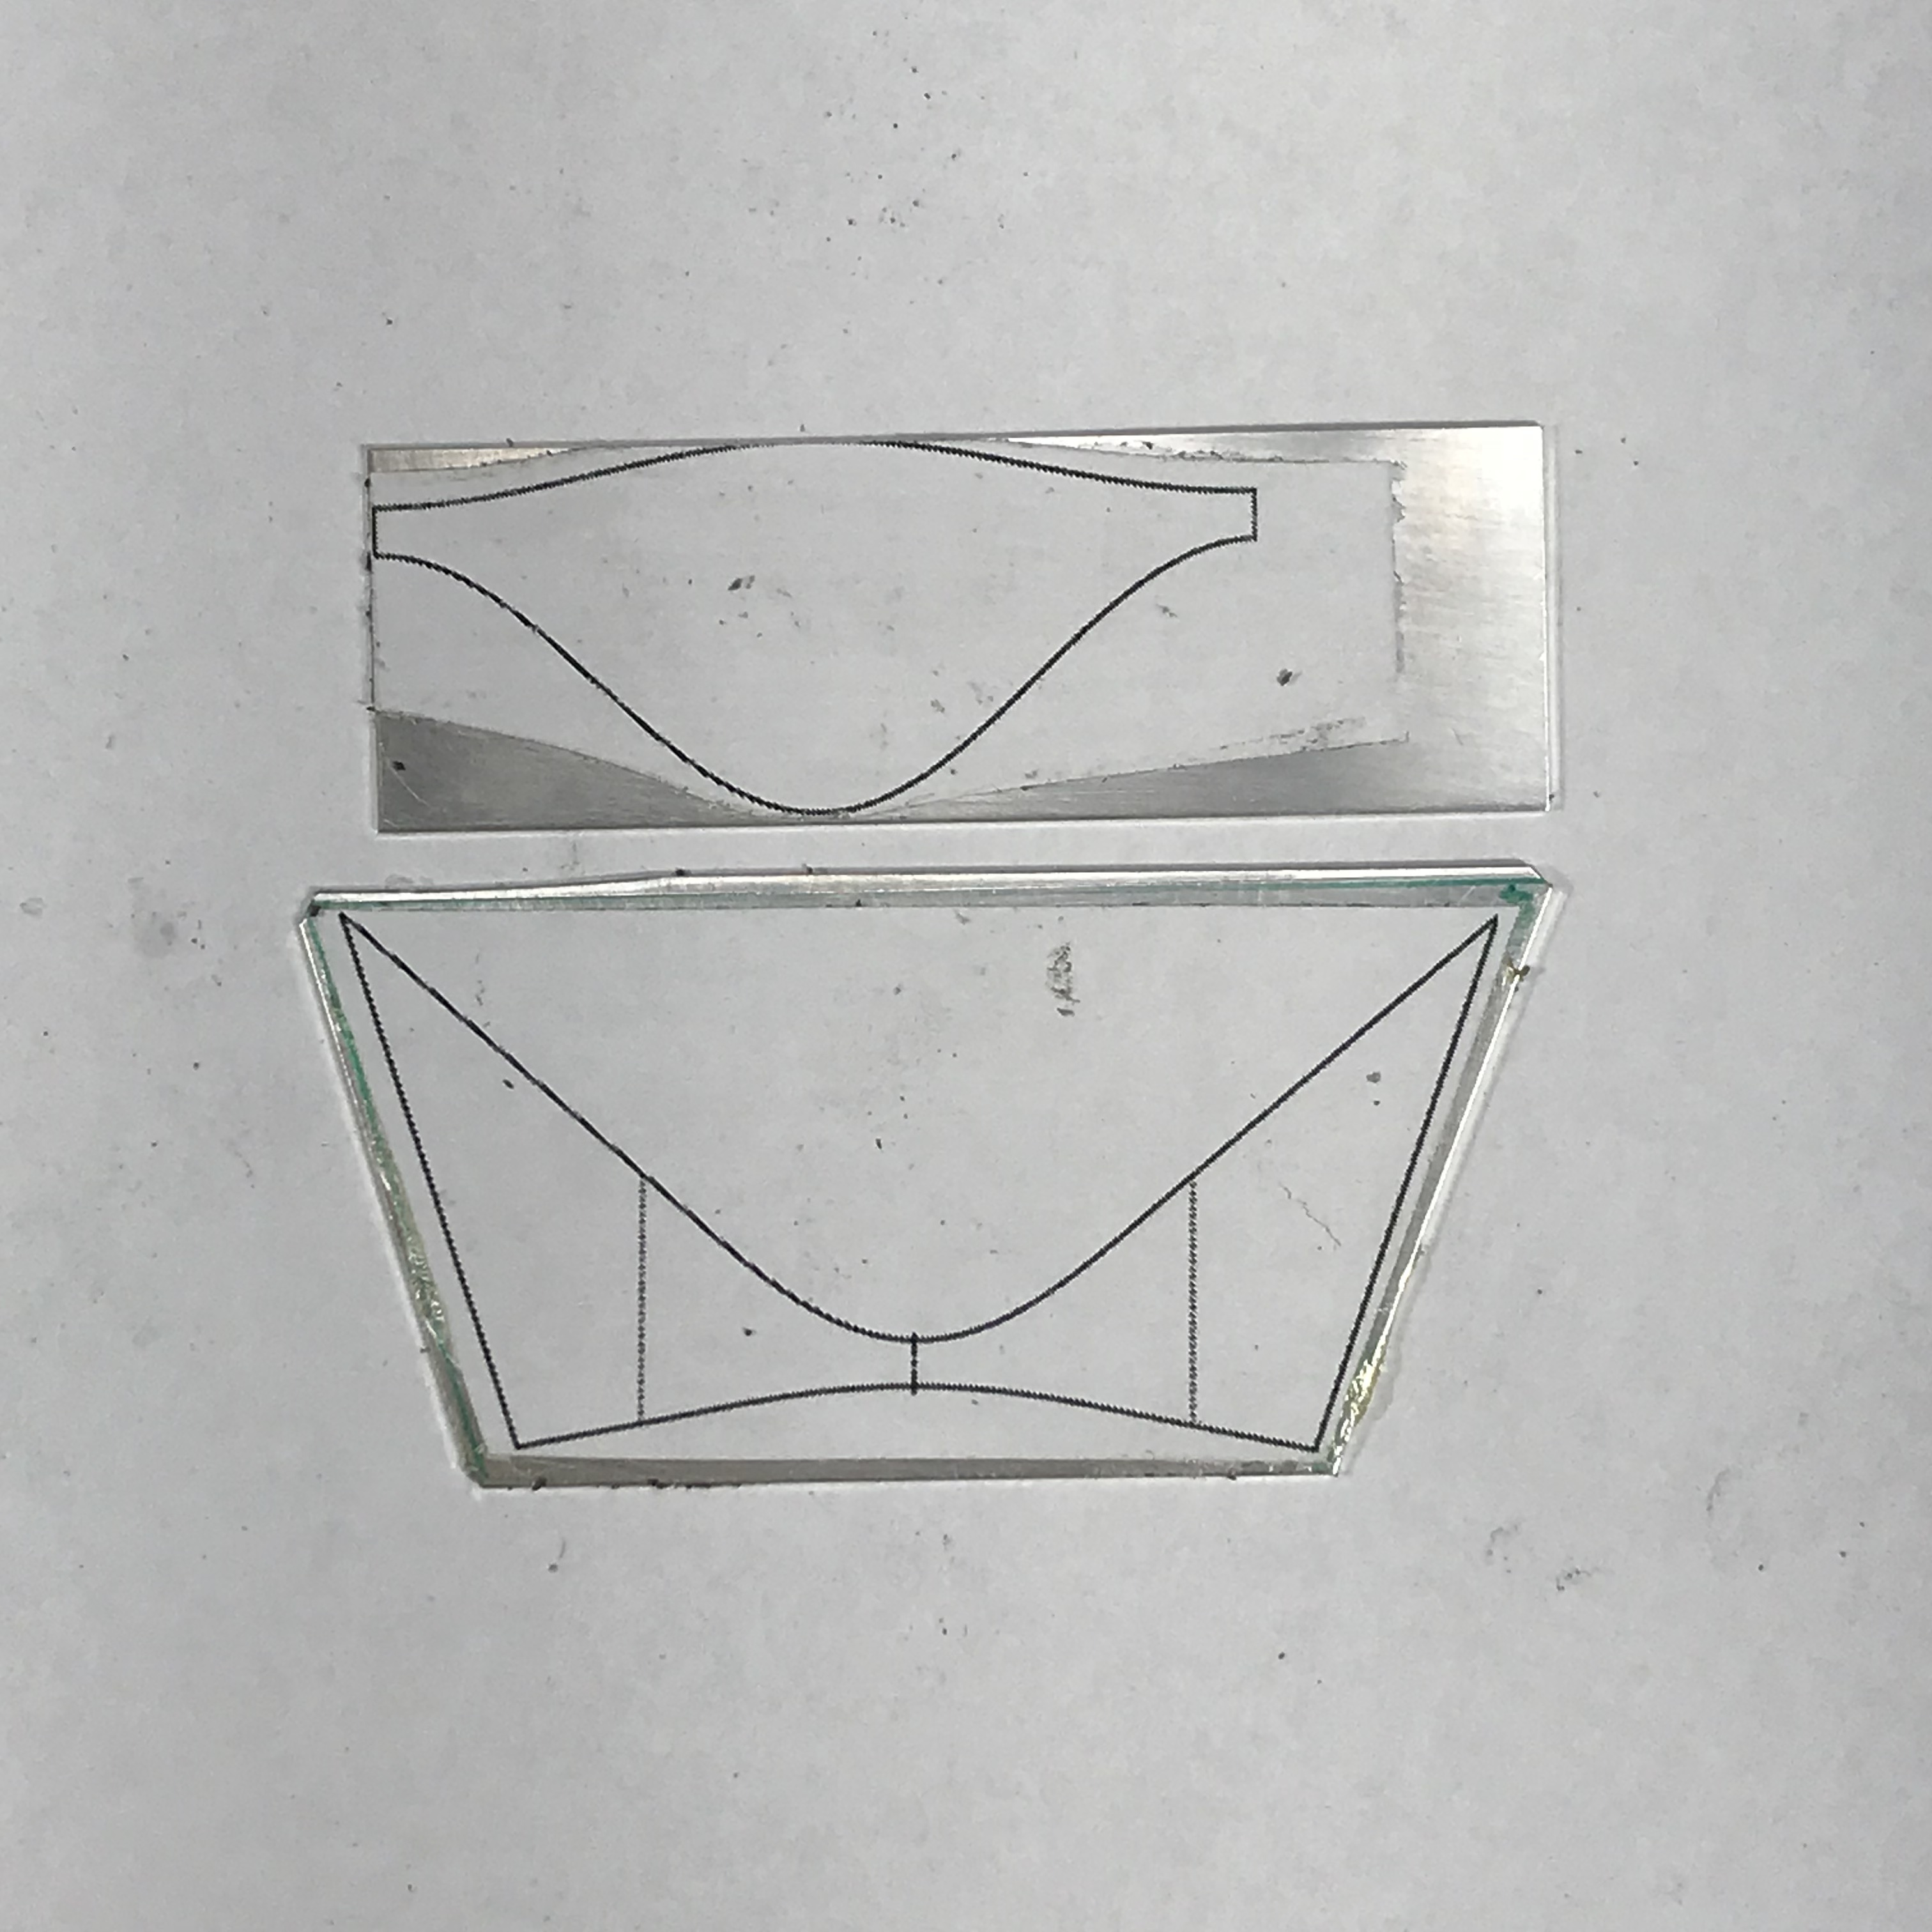
So this all brings me to the present. My box ring “obsession” led me to develop a layout tool that handles all the fun trigonometric calculations (and there are a lot of them) and template drawing automatically.

To use it, all you have to do is enter your design parameters, save and scale a couple of images, and print them out to transfer to your stock.

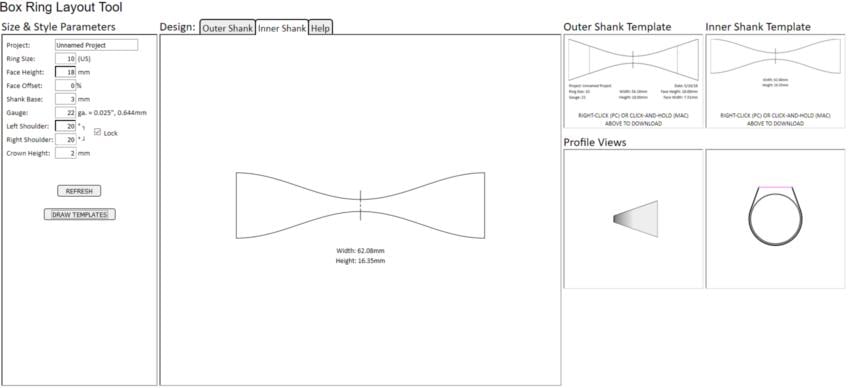
Before someone says I could just have used a CAD program, yeah, I could have, but where’s the fun in that? Seriously, I undertook this project to gain a full understanding of this form. I’m still working toward that, by the way. The original program was very simple. It kept growing. It keeps growing. There’s more coming. (I have a list: international ring size standards, more face modifications, a top-down profile view, etc.)

In the meantime, if you want to play with it yourself: tools.easilydistractedbyshinyobjects.com

It’s password protected (primarily to keep out badly behaved robots), but just enter “orchid” and “ganoksin” for the username and password.

There’s not full documentation yet. There will be. There are bugs. There always are. Some things I just haven’t gotten to. Some things I’ve missed. I’ll get to them. Both. This is not intended for use on small mobile devices. I’ve only tested it myself on a PC running Windows. Your results may vary.

-Alec

5 Likes

Hi Alec,

Good work with your box ring interest.
Here in the UK, from a historical point of view the B/ham jewellery quarter from around 1880 to 1920 mechanised this design as follows.
They had,

  1. A punch and die that made the shape the other way round, that is the narrow part of the shank was each end of the blanked sheet stock, not in the middle like you.

  2. then they stamped this blank into a shaped die, ive several here in my collection, that formed the box ring in one operation. Then they just cut and soldered up the shank to what ever size the jewellery store wanted.
    So here in the industry speed of production was and still is everything.
    They called them signet rings, tho they were set with many different stones., both round and rectangular, obviously with stamping dies to suit.

Youll need some bigger kit than what a bench jeweller has to make them this way

Ted…

1 Like

Hi Ted,

Thanks. I always appreciate the historical perspective you add to conversations.

Mr. Revere’s original template was drawn with the wide end of the shank free. I don’t know why, except that it makes the inner and outer shanks similar shapes, and is perhaps easier for teaching. If you go back to my original topic from last year, you’ll see I presented a “phase-shifted” version of the sine curve that does just what you’re talking about, setting up the solder joint at the narrow part of the band. Personally, I prefer this approach as well, and that feature is already partially programmed in the application.

-Alec

1 Like

From the virtual to the physical, three templates created with my layout tool. All are size 10 (US), with a 12mm tall face. The differences are in the symmetry; one is a normal, symmetric ring, the other two are asymmetric, each on a different axis.


Three Paper Template Pairs
Note how the shank center line on the bottom pair’s outer shank is not in the center of the template. This ring will be asymmetric along the x-axis.


Templates Applied to Stock


Cut to Shape
The outer scribed marks indicate the start of the shoulders. The center marks are make it possible to perfectly line up the inner and outer shanks before soldering them together.

Hi Alec
this looks very interesting but I can’t get into the site - it keeps asking for my user name and password. any help much appreciated as i would love to read more about this

So sorry Alec. Jumped the gun a bit there!

No worries Jane. The software is still under development. More coming soon. Enjoy.

Alec

Link didn’t work. Darn, I wish I had paid attention in trig class. It seemed to have no useful application at the time.

I have been absent on this topic for awhile, but will be coming back to it shortly. I’ve been working on both bug fixes and new features (which always mean more bug fixes). I am, however, overjoyed at my latest design-to-practice results:


Alan Revere’s Original Template and My Latest (Radical) Template


Two Views of the Assembled Design

Alec

3 Likes

That is an awesome ring. Very clever of you. One day I’ll get there.

Wish I had paid attention in trig class…

Thank you, Suzy. I hope it will be even more awesome when I add a real face. You’ll get there; just keep making stuff.

Esta Jo, that’s a big part of this. You don’t have to know the trig. The program does it for you.

My internal version is at 1.5.2 which includes a couple of minor changes to what’s at the link right now. I plan on updating the documentation file and pushing the latest out for Orchidians on Monday. it won’t be perfect, but it’ll be better. My goal is to do a general release in early October.

Alec

1 Like

Love box rings. How does that most recent one wear?

It’s more comfortable than it looks, but it’s not really done yet. I have to figure out what kind of face to put on it.

I’ll have something a little more exciting to show shortly.

2 Likes

I’ve just pushed out version 1.5.2 of my program. It’s still under the orchid/ganoksin username & password. There are still a couple of cosmetic errors, but everything else is pretty solid at this point.

Here’s an example of a ring (and a fairly dramatic shape at that) I designed for a trapezoidal cab of rutilated quartz. The key here, of course, is there’s little room for error; the design must accommodate the cab.

image
Rutilated Quartz Cabochon


The Templates

And…


The Finished Ring

3 Likes

Link worked. The program looks great! I understand about why I don’t need trig. Phew. Will you address how a design I want will translate into 2 dimensions? I learned from John Cogswell to make paper mock-ups with file folders but I wasn’t very good at that.

If you’ll tell me about the design, I’ll try.

-Alec

I love this!! Thank you so much for sharing this with us.

Allison

1 Like