Swiss Hammer handpiece for Foredom

Greetings metal enthusiasts! I recently bought a Swiss hammer handpiece (with the spring) that I have been debating for years. I set (or have in past) set many bezels and finally broke out of the stone age I believe with this tool. My bezels were always set using a combination of small dapping punches and burnishers all by hand… But the fingers are not what they once were…so)
I had contemplated purchasing a small air unit that could also incorporate engraving but business is so poor nowadays I figure it would never get paid for.
The Swiss spring unit was costly enough but at $430 US I relented. Mind you I will likely have to buy another low speed Foredom to run it correctly. Along with it I purchased a set of 6 anvil shapes so thinking I might be set. (Hopefully customs releases my package soon… They seem to sit in Montreal for 30 days or more like my last order from Stuller and many others)
If anyone has any suggestions on how to properly use this gadget, I would love to hear!
Cheers and all the best from Canadahhh eh

TerryV

2 Likes

Hi!
yay for you!

i would suggest getting a thick piece of sheet or square wire (maybe 1mm- 2mm) and experimenting with the settings…hammering on the edge of the metal… to become familiar with the settings…the “stroke”…ie: how fast (strokes per minute- spm), and how forceful…

also experimenting with a few anvil face shapes…

julie

1 Like

Thats a terrific idea … No point in jumping straight into a bezel setting and risking damage!!!

Thank you for this

cheers

TerryV

I got one quite recently and haven’t used it a great deal, but I’ll add my two cents (which maybe you already know) - you have to be a bit careful about which stones you are using. All my pieces were fine except for a lovely green apatite cab which shattered into smithereens :frowning: Live and learn!

2 Likes

These days I use a GRS Gravermax with an assortment of sizes and shapes of home made “hammer” shapes, but the older flexshaft hammer handpiece does a similar job.
You can also customize the hammer anvils for the flex shaft, as sometimes you want narrow, more aggressive strikes, and sometimes you will wish to plannish with a wider faced anvil.

Practice on scrap, and especially focus on hammering down the edge of your scrap, as if it was a bezel. You can even curve your scrap, and then practice uniformly working over the top edge of your pretend bezel.

It helps to be able to see VERY well. At my age that meant acquiring and learning to use a Meiji Acrobat jeweler’s microscope. You want to see very, very clearly the exact moment that metal begins to contact gemstone, and adjust your angle and power.
But I am old, and there was a time when I did not need so much magnification, to set gemstones.

5 Likes

Hi Terry,

Congrats on the new tool! I purchased the hammer attachment and LX Foredom about 15 months ago and used it exclusively for about 5 months to get used to it. I also thought that it would make hand setting a thing of the past…not so. I think that you will find through use that there are situations for both. Like others have already said, practice a lot. This thing on the wrong power setting has the potential to knock settings sideways! I was once setting a heavy bezel on a ring mounted in my vise; it actually pushed the whole backplate over on the ring shank caddywompous! To make things worse, it didn’t move the bezel they way I had anticipated. What I did learn through that experience though was that by increasing the angle of the hammer anvil on the top corner of the bezel, I was able to “forge” the top portion of the bezel over the stone and I finished by hand. Another suggestion is to buy the best foot control you can. Most of the time you don’t want that thing running like a buzz saw, you’re shooting for maximum control which takes a delicate touch on the foot control…sometimes it’s only like two “clicks” a second but provides great control. One other really fun use I found for it is creating decorative impressions like stippling on various surfaces, even on the the bezels themselves before soldering on to the backplate. I’ve purchased several additional tips and fashioned them to fit whatever I’m trying to accomplish at the time. I like keeping a few extra on hand for that. Every new tool you buy presents a lot of fun opportunities for learning and creative possibilities beyond the day before…you made a great choice in buying it.

Bruce

4 Likes

I have both a flex shaft hammer piece with different anvils and a Lindsay Classic pneumatic engraver. I have tried them both to move bezels. My bezels are usually fairly thick and in the .5 - 1.5 mm range. I still almost always go back to using a bezel pusher and a light hammer. I have a number of brass and steel pushers in different end shapes to fit the bezels that I am pushing. I try to keep them polished. It is almost like a slow motion movie to watch the bezel move up against the stone right where you want it. I always do this type of work under low magnification with either an Optivisor or a large lighted magnifying glass. I would love to try a true microscope type magnifier, but the expense is something that takes some planning. Working under magnification and good LED lighting has made a big difference in my work.This is just my 2 cents. If you find something that works, use it. This is what works for me. Good luck…Rob

3 Likes

Hi

regarding footpedals…i highly recommend Lucas Lowboy footpedals…i have 2…!

they are extremely sensitive/ responsive…especially at the low end…

i know Richard Lucas has one model for universal motors (at top of page), and one for TX motors (near bottom of page) …i am not sure if he has one for LX motors…you can email him and ask…he is awesome!

https://lucasdentalcompany.com/photos

Julie

6 Likes

Hi,

I was just recalling in my mind’s eye, using a hammer handpiece…

perhaps weirdly…i tend to sort of rest my finger against the anvil rod, while also making a supporting connection by pointing my other finger down and in contact with the bezel…

oftentimes…having both hands fingers in contact with each other seems to help me be stable…

i sort of hover/ float the anvil over the bezel, and it makes contact on the down stroke…rather than my resting the anvil on the bezel…also, i seem to sort of use a gliding motion along the bezel…

generally speaking, for thick bezels…the goal is not so much to “push over” a thick mass of metal, but rather to “spread” edge metal over the stone…it does not take much metal to captivate a stone…

for fine bezel wire though… the wire would be compressed/ pushed against the stone, since it is not a thick mass…

julie

3 Likes

Hi Bruce,
regarding your foredom LX motor (low speed, high torque)…have you also tried your hammer handpiece on a regular Foredom SR motor?,I am curious as to how the 2 motors compare…

thoughts?

Julie

Hi Julie, I have and you can, I just found that i have better control with the slower motor. I also found myself trying to compensate for the lack of power in the SR by speeding up the reciprocation to try and beat things into submission…not smart :laughing: Good question!

2 Likes

Years ago Foredom cautioned us about using higher speeds with a hammer piece. I don’t know if that caution is still in place. My older flexshaft (maybe 45 years old), has two sets of gears for different speed ranges. This may not be necessary with newer electronic controls. I am rapidly leaving the realm of knowing what I am talking about, so it would be interesting to hear from others who might know more…Rob

4 Likes

Interesting commentary here … I was hesitant to start this thread as I thought it may be redundant (since I am so late to the hammer handpiece party) From everyones suggestions, it may not quite work out as I had imagined… Tools over the years that I purchased with great anticipation rarely worked out the way I had hoped.
I like the idea of using this device tho for texturing and this alone may be worth having it. As for the bezel work, I can certainly see its a slippery slope or angle :slight_smile: Most of us who do this work spend an incredible amount of time practising and learning. Its a never ending cycle. Even an old dog with fading vision and achy hands can learn a new trick … Thanks to all and cheers from the pacfic NW (stuck on an Island)
TerryV

4 Likes

Hi Terry,

you mentioned that it may not work out as you anticipated…
may i ask what you anticipated using it for?

perhaps you can use it for that, and i have just confused the issue…!?.

it is a great tool and perhaps if i know what type of bezels you were thinking of using it for, i/ we can add better commentary…?

with thick bezels, there is often accompanying strategies implemented…

ie: making it easier to move the metal, while maintaining a “thick” appearance…

it you think about it…you want to move the metal near the hole edge, over the girdle of a faceted stone/ against the curved side of s cabochons stone…

so, how can you thin out…or…”separate” that edge from the rest of the bezel to more easily move the metal over the stone, while still being able to file/ sand/ smooth the top of the bezel, after moving/ hammering/ marring the metal…to get the final look you are after…

i call this separating of metal “relief cuts”…probably not the correct terminology…

or, rather than a relief cut, you can bevel the top surface, which in effect thins out the metal leading up to that hole edge

you can even use a hart bur on the inside bezel wall, to create a relief cut which will allow the hole edge space to collapse down into, in a sense…

so…you can mash thick metal, to move it/ spread it…or you can physically create a situation where just the part of the metal you need to move, will move more easily and freely…having been “released” from its neighboring metal…

the side contour of the stone dictates alot…

determining a proper height for the bezel, to adequately capture the stone, yet not requiring too much mass to be moved, is important as well

for thin fine silver bezel strip wire, i would venture to guess that hand burnishing would be the way to go…

burnishers can be custom shaped or finished to resolve problems like slippage, etc…identify the problem, then solve it…i have a bad habit of not doing this (haha) but rather get caught up in my frustration and barreling thru…not paying attention!

i hope i am making sense…

julie

2 Likes

After re-visiting this thread earlier today, I suddenly got a Go Ahead from a customer to proceed with repairing their customer’s heavy Sterling Silver, large, squar(ish) bezel set Snowflake Obsidian ring, a job on Hold since early December.
This gave me a chance to practice, and think about the ongoing discussion.
The stone had worked loose during heavy wear, so removing that stone before I could resolder the heavy bezel onto the shank where it had broken, was simplified.
This was definitely a torch and not a laser repair, so pulling the stone first was required.
After the repair I clamped the ring into a GRS ball vise, and then set the stone correctly, using the air impact tool on the GraverMax. Unlike the condition it arrived here, the stone is now secure, without any cement.
The technique for working the bezel over, and down onto the stone is exactly the same with the air tool as when using a flexshaft hammer hand piece, but at my age my eyes require working under the microscopic, so I can see in detail what the anvil point is doing, and exactly when metal and gemstone first touch.
I was only in my late 40s or maybe early 50s when I first sat down at a Meiji microscope set up at a Bench Jewelers show in Buffalo, NY, and instantly realized that I was seeing everything with a clarity I never dreamed possible, even when my eyes were young. I had discovered a new “must have” tool, and I instantly saw major improvements in fine detail work.
Even with over 45 years riding the bench full time, I love it when I can learn a new skill, or refine and improve on a technique.

6 Likes

Hi ringdoctor!

i agree with you totally!

i finally saved enough beans to get a microscope and it is a great help in seeing what you are doing!

when i started to use a #10 optivisor AND a loupe…i knew i was in trouble! haha!

julie

6 Likes

:smile: Oh yes!

3 Likes

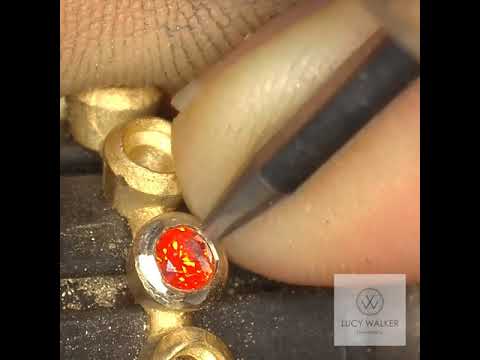
Here is a link to Lucy Walker hammer setting stone. Notice the placement of her fingers. It’s important to keep that contact with the handpiece. Next notice that she doesn’t start with the hammer hand piece sitting on the metal. It is a couple of mm above it so that it bounces off the metal instead of smashing hard into it. The same thing can be achieved with the thin bezel metal of about 26 to 30 gauge.

I learned decades ago at the Revere Academy to hammer set stones. We made our own punches and used a chasing hammer. I find Lucy’s method much easier to control. Practice on some copper making the thicker bezels. Or purchase some brass practice rings to experiment with. Once you get it right, and understand your finger placements for the control, you’ll swear by it.

5 Likes

Hi,

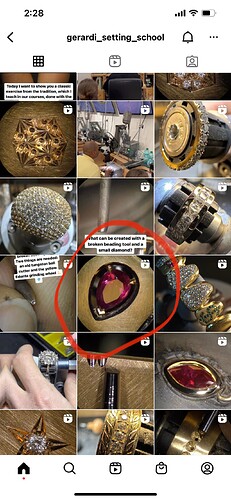
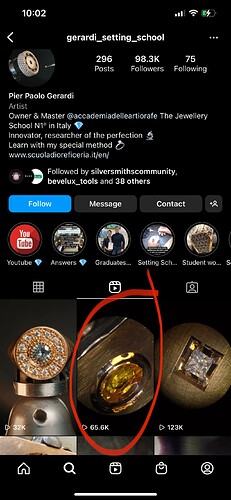
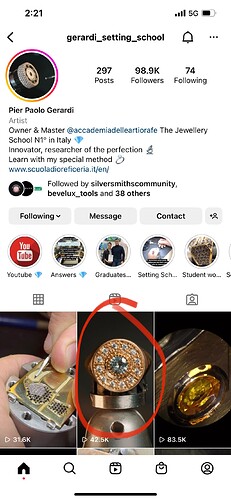
also, here is a short clip video on instagram, which kinda shows what i mean when i discussed making a “relief cut” to separate/ isolate metal to be pushed over the stone…as well as creating a decorative design statement…

i have not been able to post instagram links for some reason, so here is a photo of the account, with the video circled in red.

Pier Paolo Girardi’s website:

instagram account:

julie

1 Like

Hi,

and!

here is another great little video clip…similar concept to previous one, but! cutting prongs into the bezel…!…

again, Pier Paolo Gerardi instagram account

i “think” it will let me post the account link, even though not the video link…

https://instagram.com/gerardi_setting_school?igshid=YmMyMTA2M2Y=

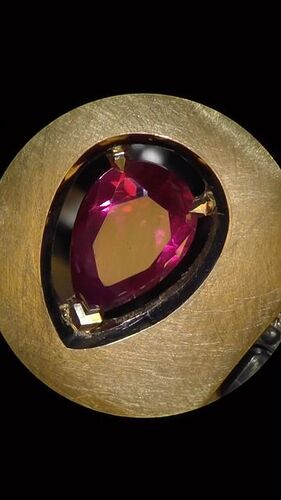
oh, and here is another variation, revealing 3 prongs for a pear!
beautiful work from this account!!!

26K Likes, 277 Comments - Pier Paolo Gerardi (@gerardi_setting_school) on Instagram: "Today, let’s look at an incredible one-of-a-kind technique, how to set a drop-cut suspended stone 💎
-
-
-
-
-
-
-
-
-
-
-
-
-
-
-
-
-
-
-
-
-
-
#stonesetting...

julie

2 Likes