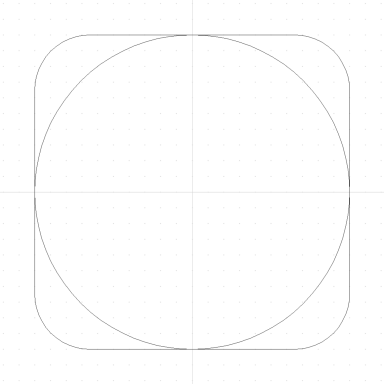
How do you size a ring with a comfort profile against a ring gauge that is round? As best I can draw it…
The recipient is 3,000 miles away. I sent him a plastic ring gauge set you can buy in bunches of 6 and he selected size 10. To complicate things, the plastic gauges are very thin and this will be a wide ring.
Due to the design the top needs to be relatively flat, and so do the sides, so I do need to forge the ring on a comfort-fit mandrel, not exactly like the square in the drawing, but along that line. A round mandrel will not work.
Do I go by where the ring gauge makes contact with the mandrel in the four places as above? Or should the ring be a little smaller?
Good luck is needed. I may keep you posted. If you don’t hear from me in about a week you’ll know things went sideways.
They say the elderly should do puzzles to keep one’s mind sharp. Nothing I’ve found is more puzzling than 3D CAD software. This ring is an attempt in applying that.
I’ve already learned a thing or two to not do in the future.
As an aside, charts say a size 10 ring should have an inside circumference of about 61mm. The copper mock-up I made that fit the previously mentioned chubby pinkie was closer to 69mm when laid flat, which makes sense.
…i am kinda envisioning forging the ring flat on the anvil…moving the metal to create the corners…?
…or…piercing the shape out of thick stock…?
or…as a hollow ring…make the inside band to fit, then create the outside rounded square shape…then solder one flat side on…, drill a hole…solder the other flat side on…saw off the excess…?
Neil,
Just to help clarify, is the Ring the Rounded-Square Style (like in your illustration) or is it more of the Finger-Shaped Style (with the Top of the Shank being a little Wider than the Bottom - looking at it from the Side View as in your illustration) of Comfort Fit? Also, is the Ring being Sized Up or Down and has the person that you’re Sizing it for told you How Loose or How Tight it is? Lastly, are there Any Stones in the Ring and if so, How are they Mounted (Heads, Bezels, Gipsy, etc.)?
Typically when I have Sized these style of Comfort Fit Rings, especially if you are using a Round Ring Mandrel to Gauge the Size, the Ring will Need to be Sized a little Smaller than what a Round Ring would be Sized to - this is due to the Extra Room that that “Corners” provide, otherwise it will be Loose on the Finger - the only exception to this is, if the person has Arthritic or Swollen Joints, which will then cause a whole lot of other problems.
Jonathan
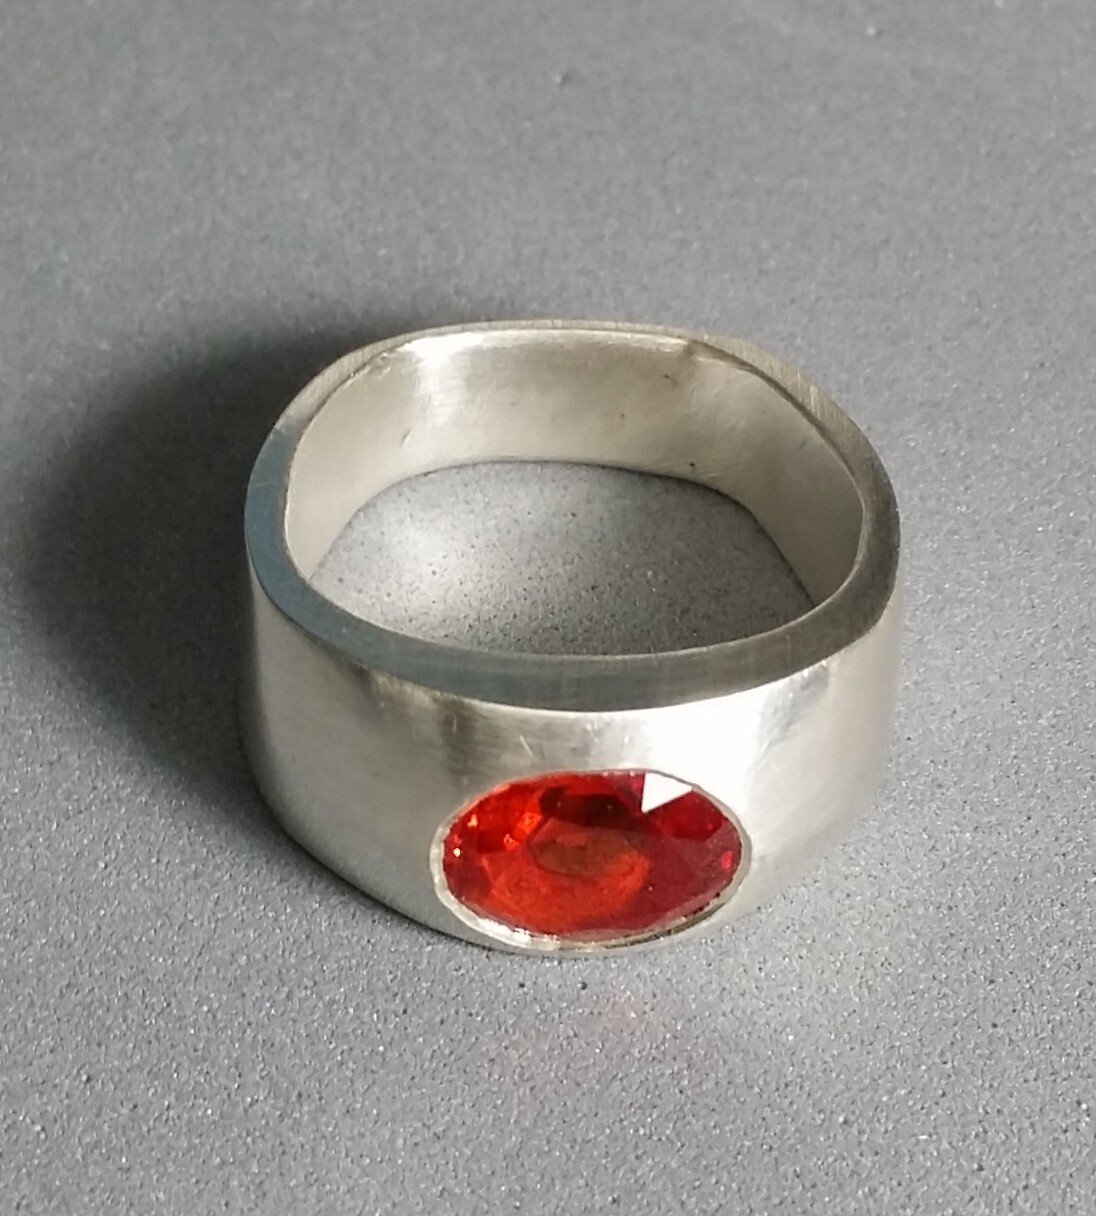
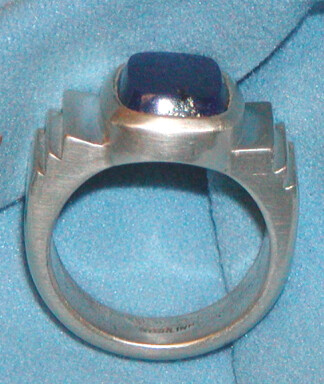
Julie, the ring will take a 14x10 chrome diopside cab, so is 16mm at its widest on top, and will taper down to 8mm at the bottom. There is room for me to file it down a bit once formed, if it is too large.
I don’t make rings, so the proportions may be atypical / not workable, especially for a size 10. I think it is o.k. for a signet style ring…
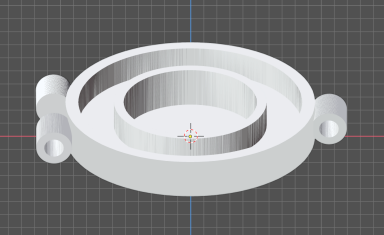
No forging, piercing, etc. I CNC-milled several copies in wax (wax mills quickly!) for a practice first lost wax casting - my first in casting years, but I’m still working on the homemade fume extractor for the burnout. I wanted to have one ring made soon so I milled this copy in a 4mm thick silver ingot. That took about 20 hours. Since this was milled flat I need to shape it on a ring mandrel.
It took me more than a few years to figure out the CNC CAD software, especially the 3D modeling part, and even so all I can do is simple things. So far I design with a CNC CAD program (flat milling). I am just learning how to move CNC / flat designs over to Blender to design in the round for 3D printing. Very frustrating learning curve!
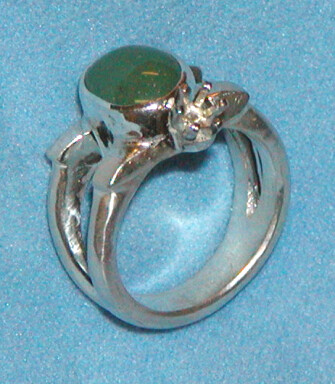
This is all on the path to learning how to 3D print and cast multiple parts for bracelets and necklaces, my first Blender rendition for cab-set links is like so:
Given the work one sees on Orchid this is all very basic stuff, but a lot to take on for me.
Rob wisely got me to move from the theoretical to the practical by finding a size 10 finger (the previously mentioned chubby pinkie) that I could fit a practice ring on. The mandrel I’m using is sort of rounded square, but narrower at the bottom. That got me into the ballpark.
There will be a 14x10mm cab-set chrome diopside stone.
As to how the ring will actually fit the user, he settled on a size 10. It is a starting point. If it needs resizing I can do that. This is all a just an intermediate project for my trying to learn 3D printing and getting back into casting. So far the emphasis is on ‘trying’.
Neil,
Good, that “theoretical” stuff can sometimes get you into all kinds of trouble!
Even better, the Rounded-Square Comfort Fits are much more difficult to Size and have it turn out looking nice, than the Finger-Shaped Comfort Fits, which sounds like what you’re using…
Sounds like an interesting project, your 3D Rendering of the Bracelet Link looks really good, well done!
Good luck, we can’t wait to see it finished!
Jonathan
In such cases I recommend that the client go to a jewelry store and ask to have their ring size measured there. If using a narrow ring sizer always add 1/2 size.
I have made only 3 rings, about 18 years ago in a class. The first was a cab-set Aventurine turtle ring and the instructor had to set the prong-set Moissanite turtle head for me. The second was a cast-in-place that didn’t fill and the stone cracked. The third, also cast in place came out well enough so I quit when I was ahead.
I’m curious how your project turned out. If you’re still working on sizing, I can share how Ira Sherman, a jeweler is worked with decades ago, successfully dealt with it. Test the ring sizer on a finger that is large enough, then make sure the ring you make has the same feel in terms of looseness/tightness. That always seems to work!
Thanks Sam, your description makes good sense and I’ll do that.
The ring is on hold for a while. I may be on hold for a while, having just unloaded 1800 lbs. of flooring from Home Depot. They used a forklift to put it into my pickup, but wouldn’t follow me home with it to unload for me.
I did make a sheet copper test piece. The fit seemed o.k. I’ll 3D print multiple waxes, a bit thick, so I can manually adjust the fit before casting. Maybe in a few weeks.
Hi Neil,
Sorry about your Home Depot headaches. Last summer, I took three Rhino 3D courses, which included SubD, and have since enjoyed 3D printing some of my work. What printer do you use? I have an Elegoo Mars3 4K for the last 18 months ago. I use Power Resins Zero castable resin and R&R Plasticast casting investment. Which printer and resins do you prefer? How about the investment?
Sam, I don’t have a Home Depot headache, I have a Neil headache. I’m too old for what I’m doing.
There’s a Pennsylvania Dutch saying, “Ve get too soon oldt, und too late smardt.” I have the first part down pat, but the second part is really eluding me.
I’m using a Phrozen Sonic Mini 8K S. Just one test printing so far, using their Gray 4K resin. I have yet to try the Castable W20 Green.
I bought PlastiCast, haven’t used it yet. I am way over-committed. In addition to a whole-house renovation I’m trying to build a fume extractor for the burnout (semi-successful so far, it needs tweaking). I also need to learn how to program the kiln controller (rant to follow). And there must be a good reason for it, but a thirteen hour burnout? Seriously, they couldn’t get that down a bit?
{begin rant:
You can say ‘ok google’ into the air and stuff happens, or Siri, other words. AI can make artwork, fake but real-looking photos of a politician taking a bribe, or write a computer program in C++, but digital controllers stick you with just three buttons to work through a complex burnout menu, with no go-back to fix a mistake? No controllers I’ve seen even have a USB hookup so you can program one with user-friendly software. We’re stuck with the most primitive controller interface dating back to maybe 1970? It is simpler to just manually control the kiln with the dial, except for the absurd 13 hours!
Sorry. But controller-makers and investment makers really need to up their game.