Pitting and Defects in Silver Casted Pieces (LOSING HOPE!)

Hi,

My name’s Aaron. I’m new here and glad to be joining this community.

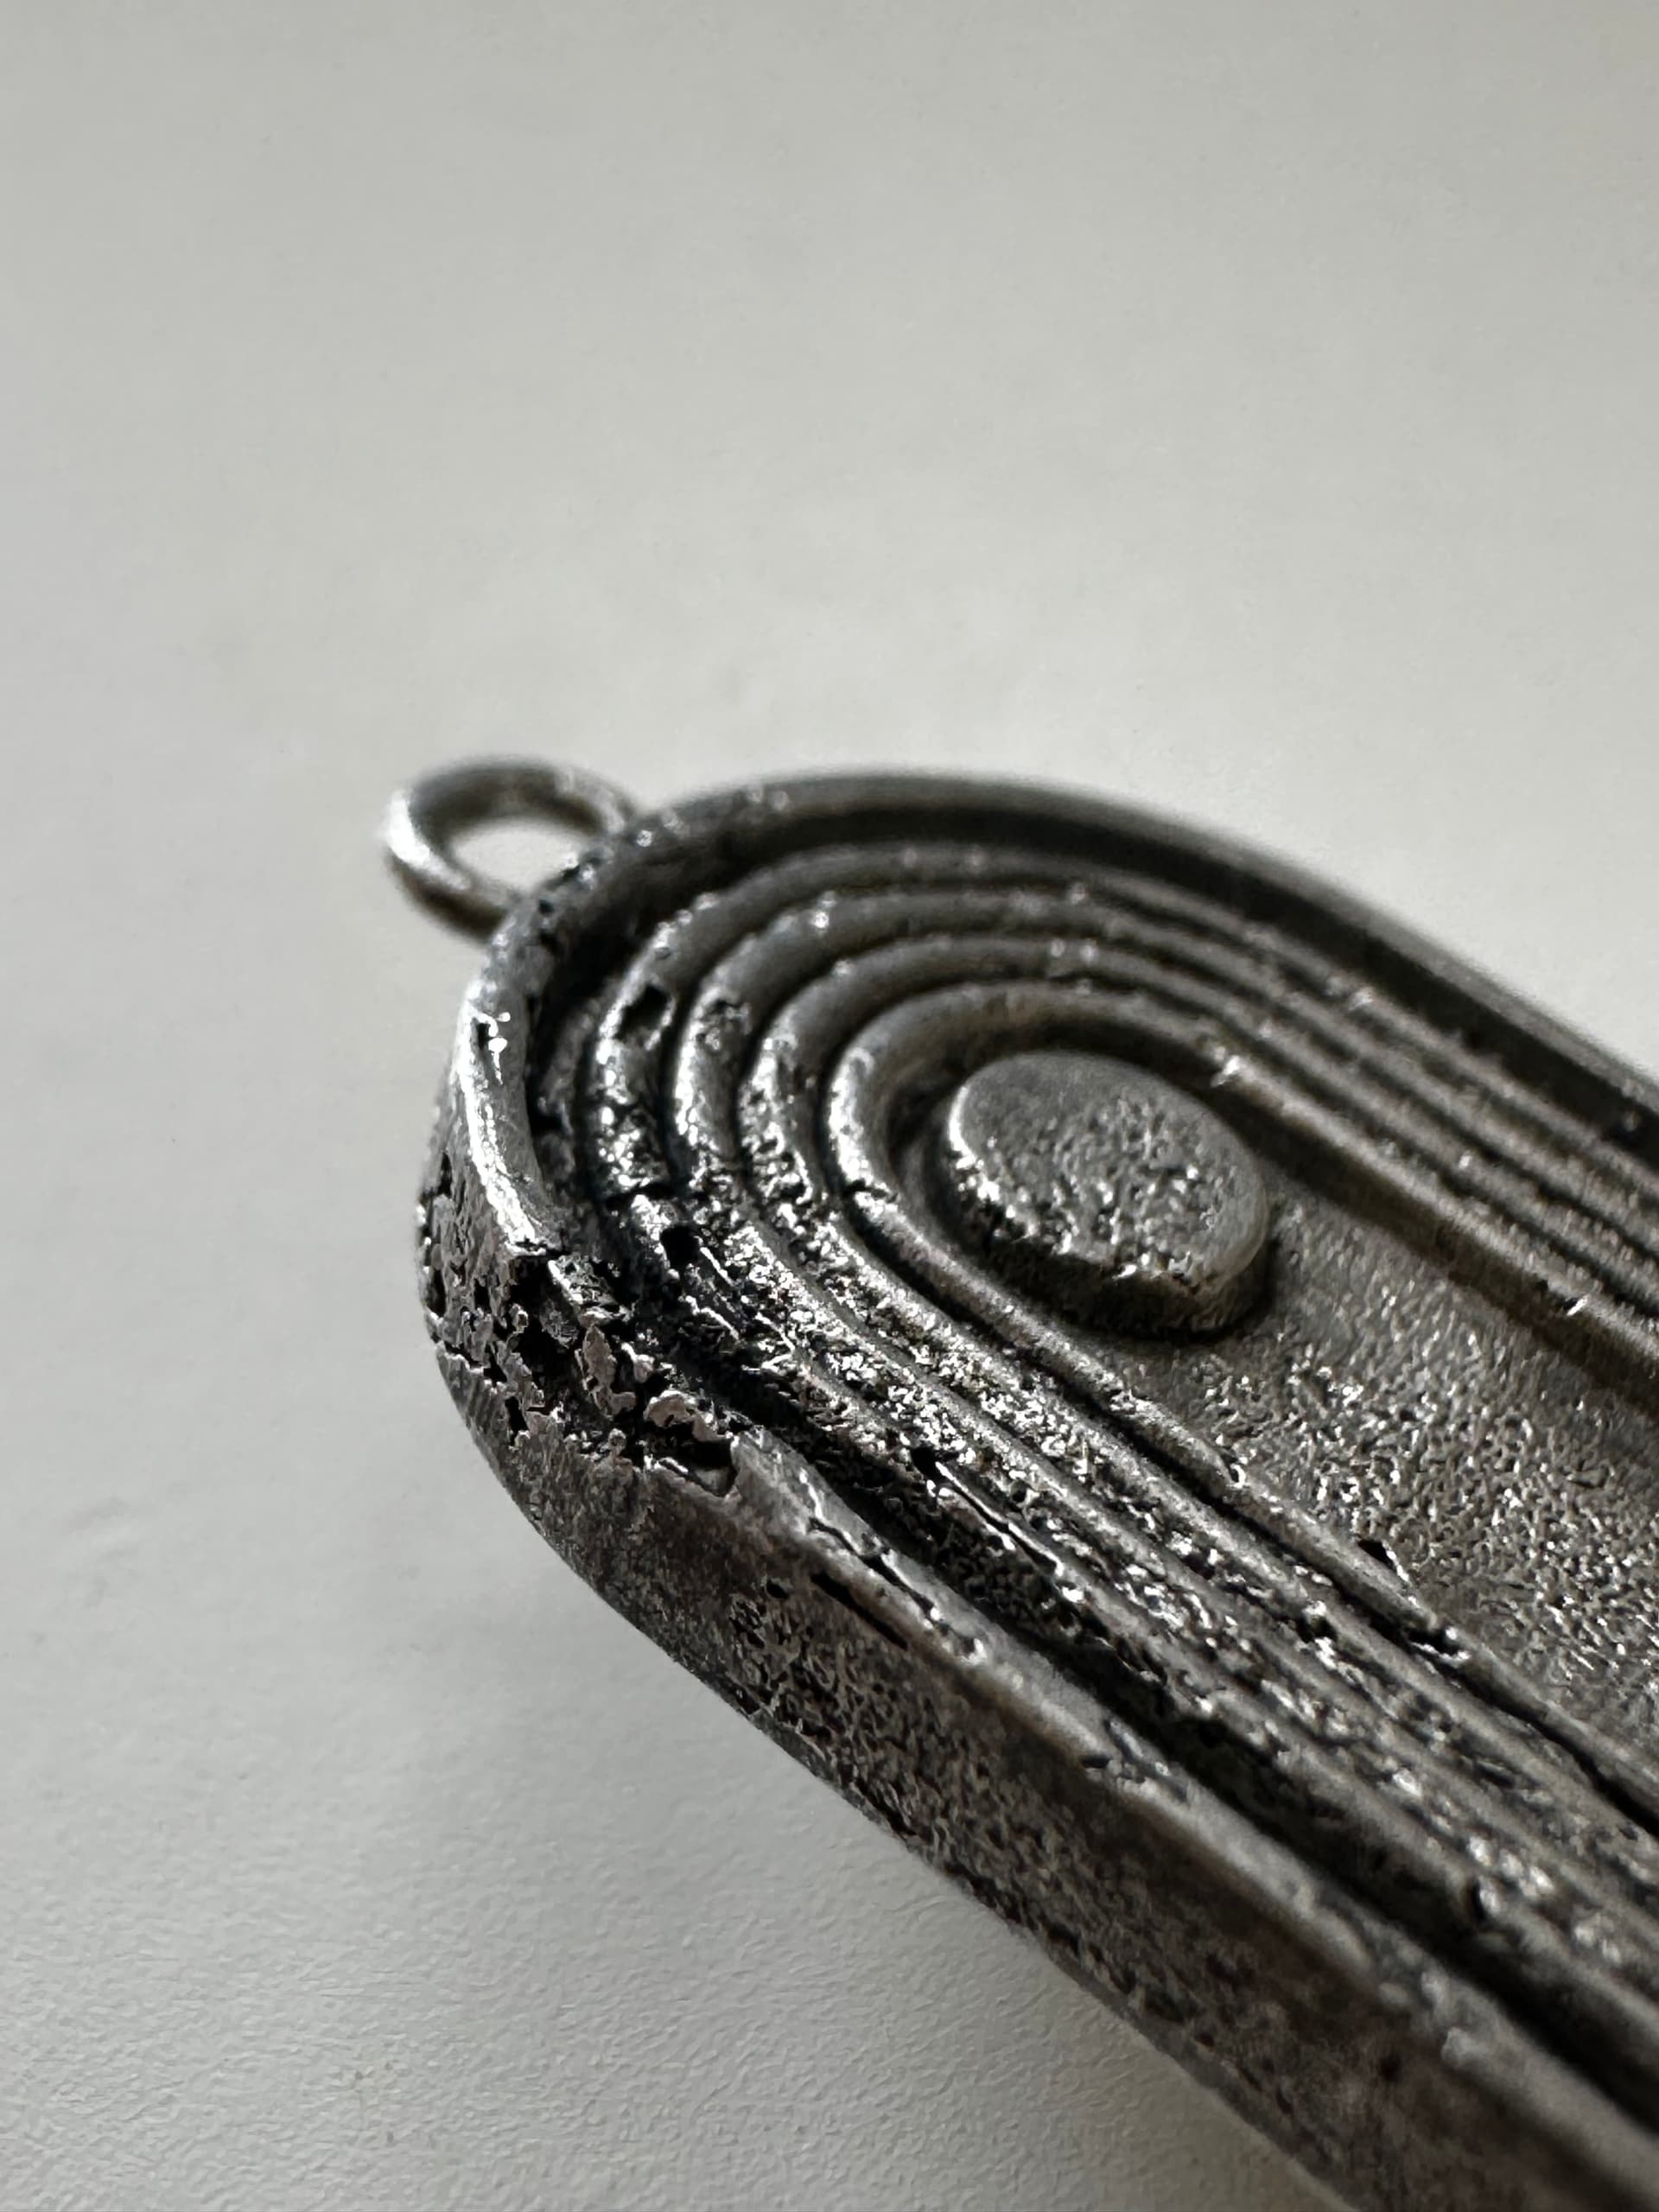
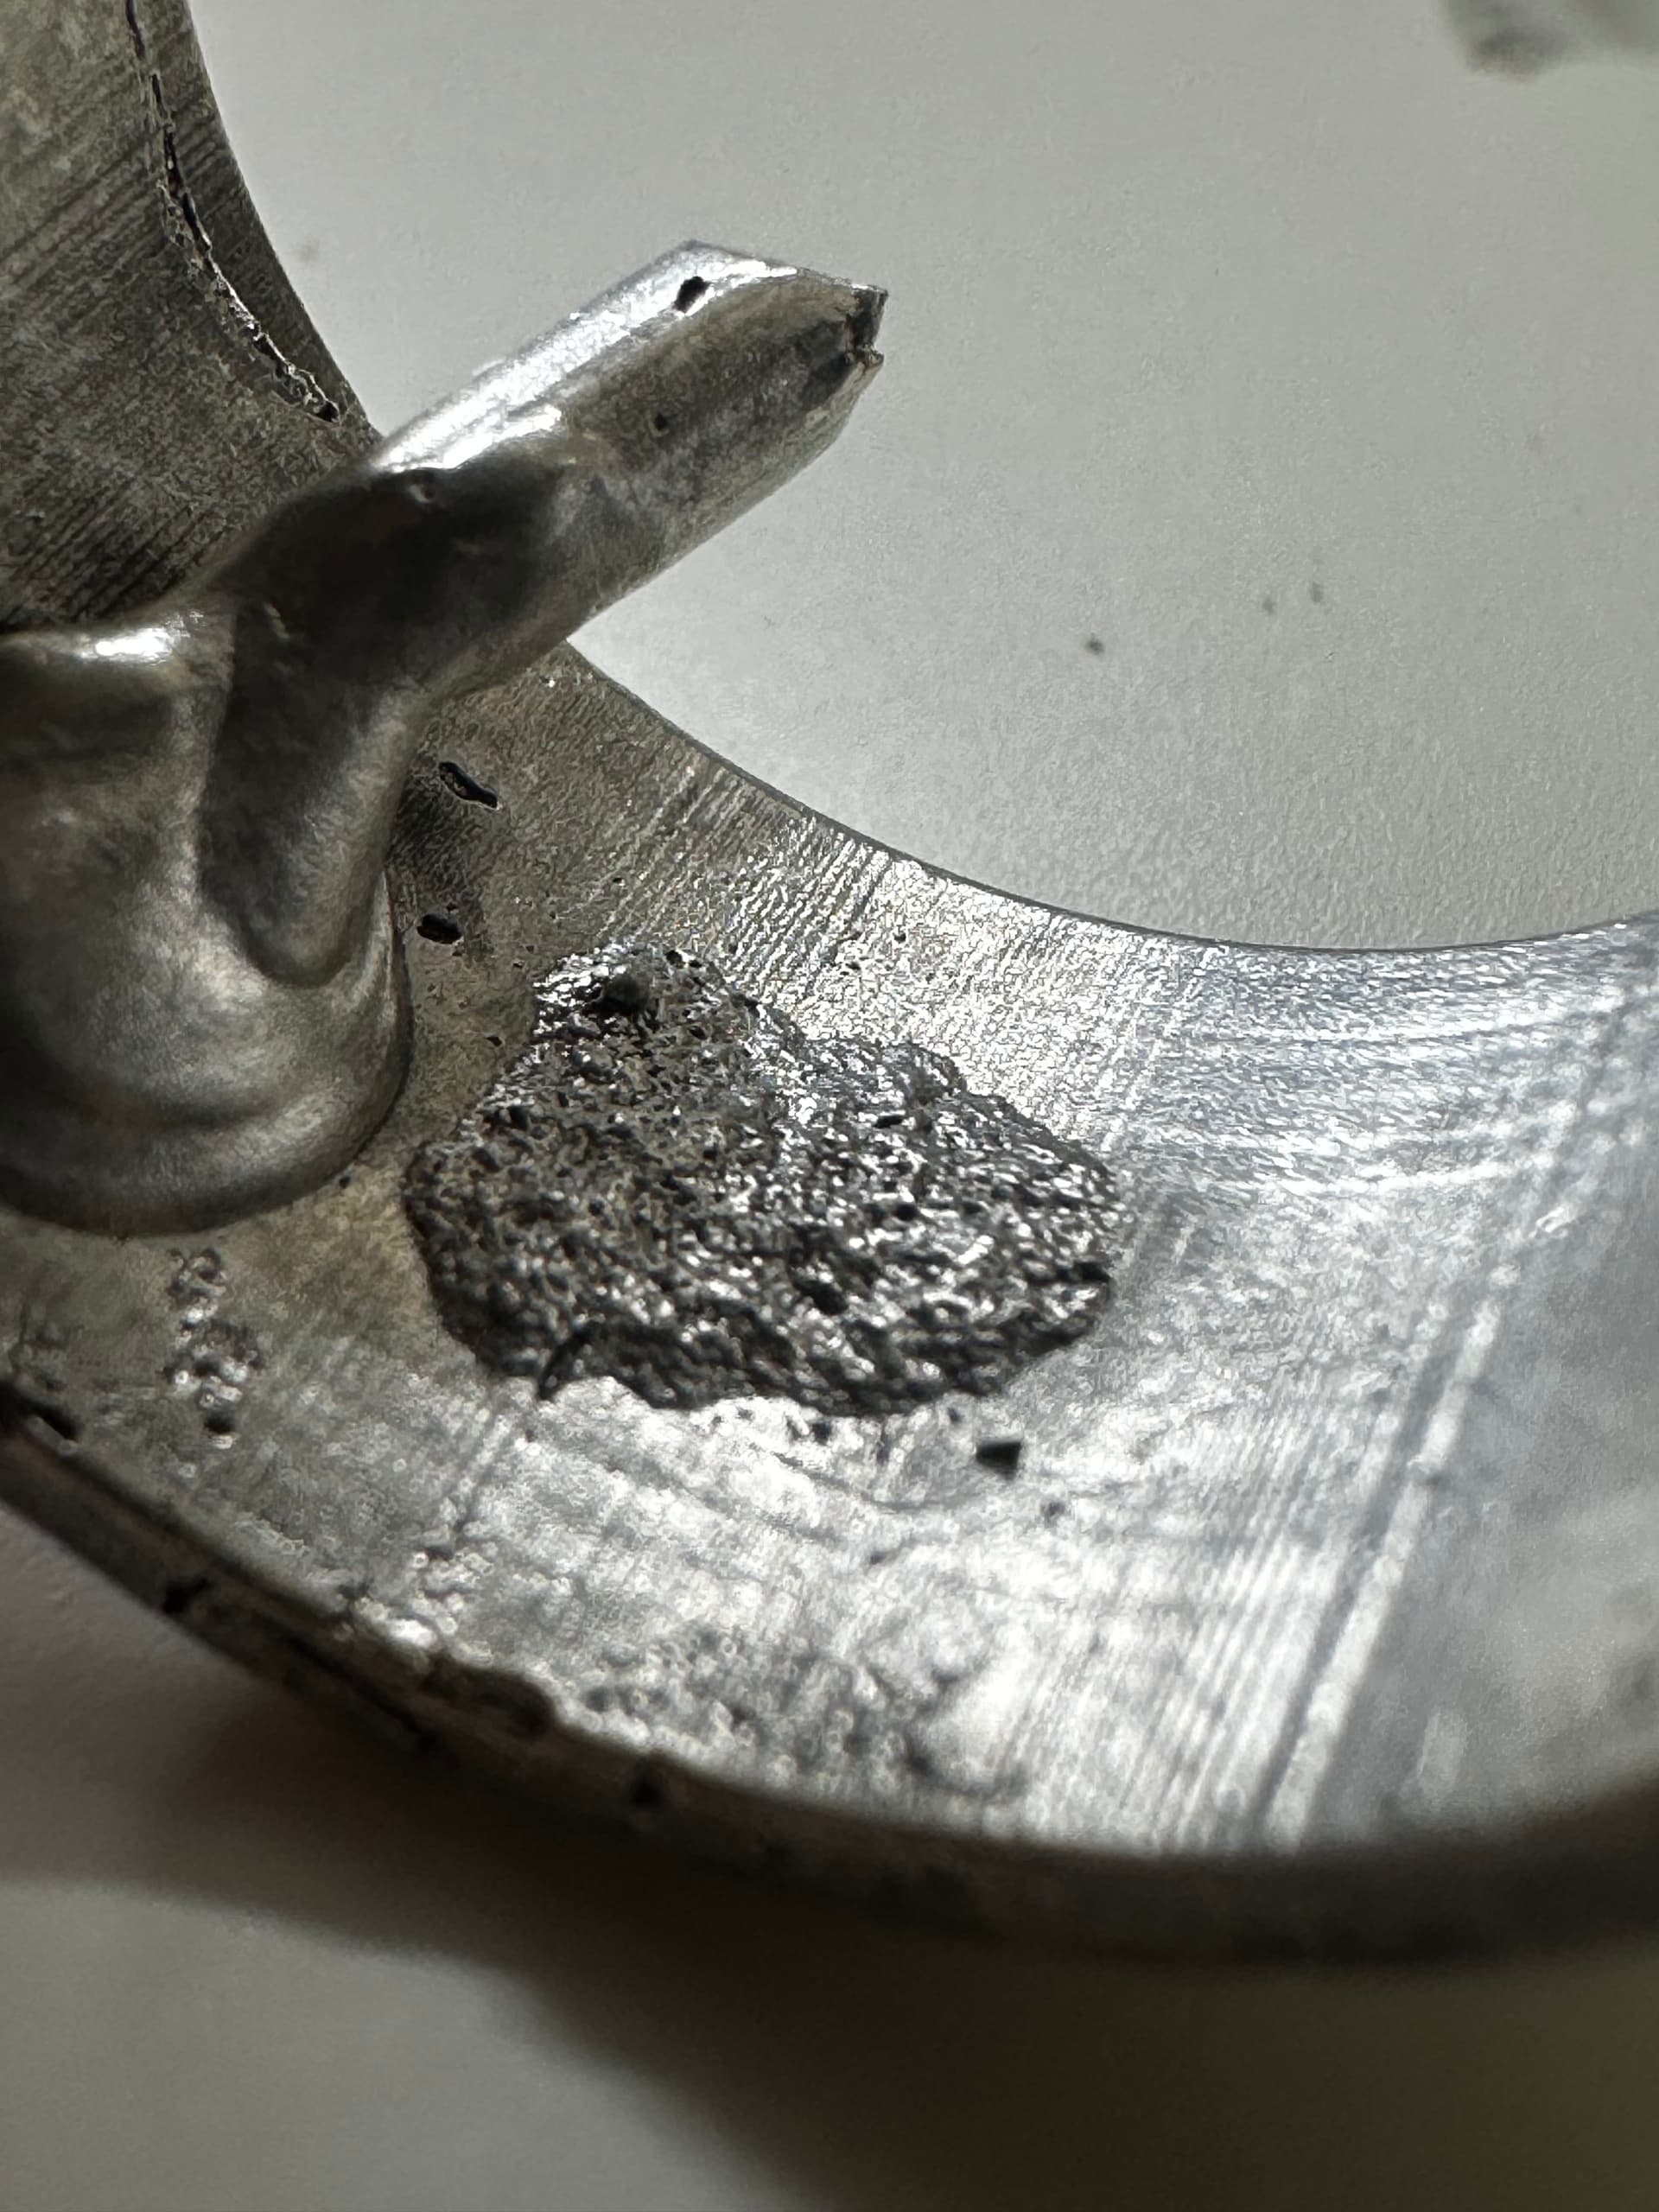
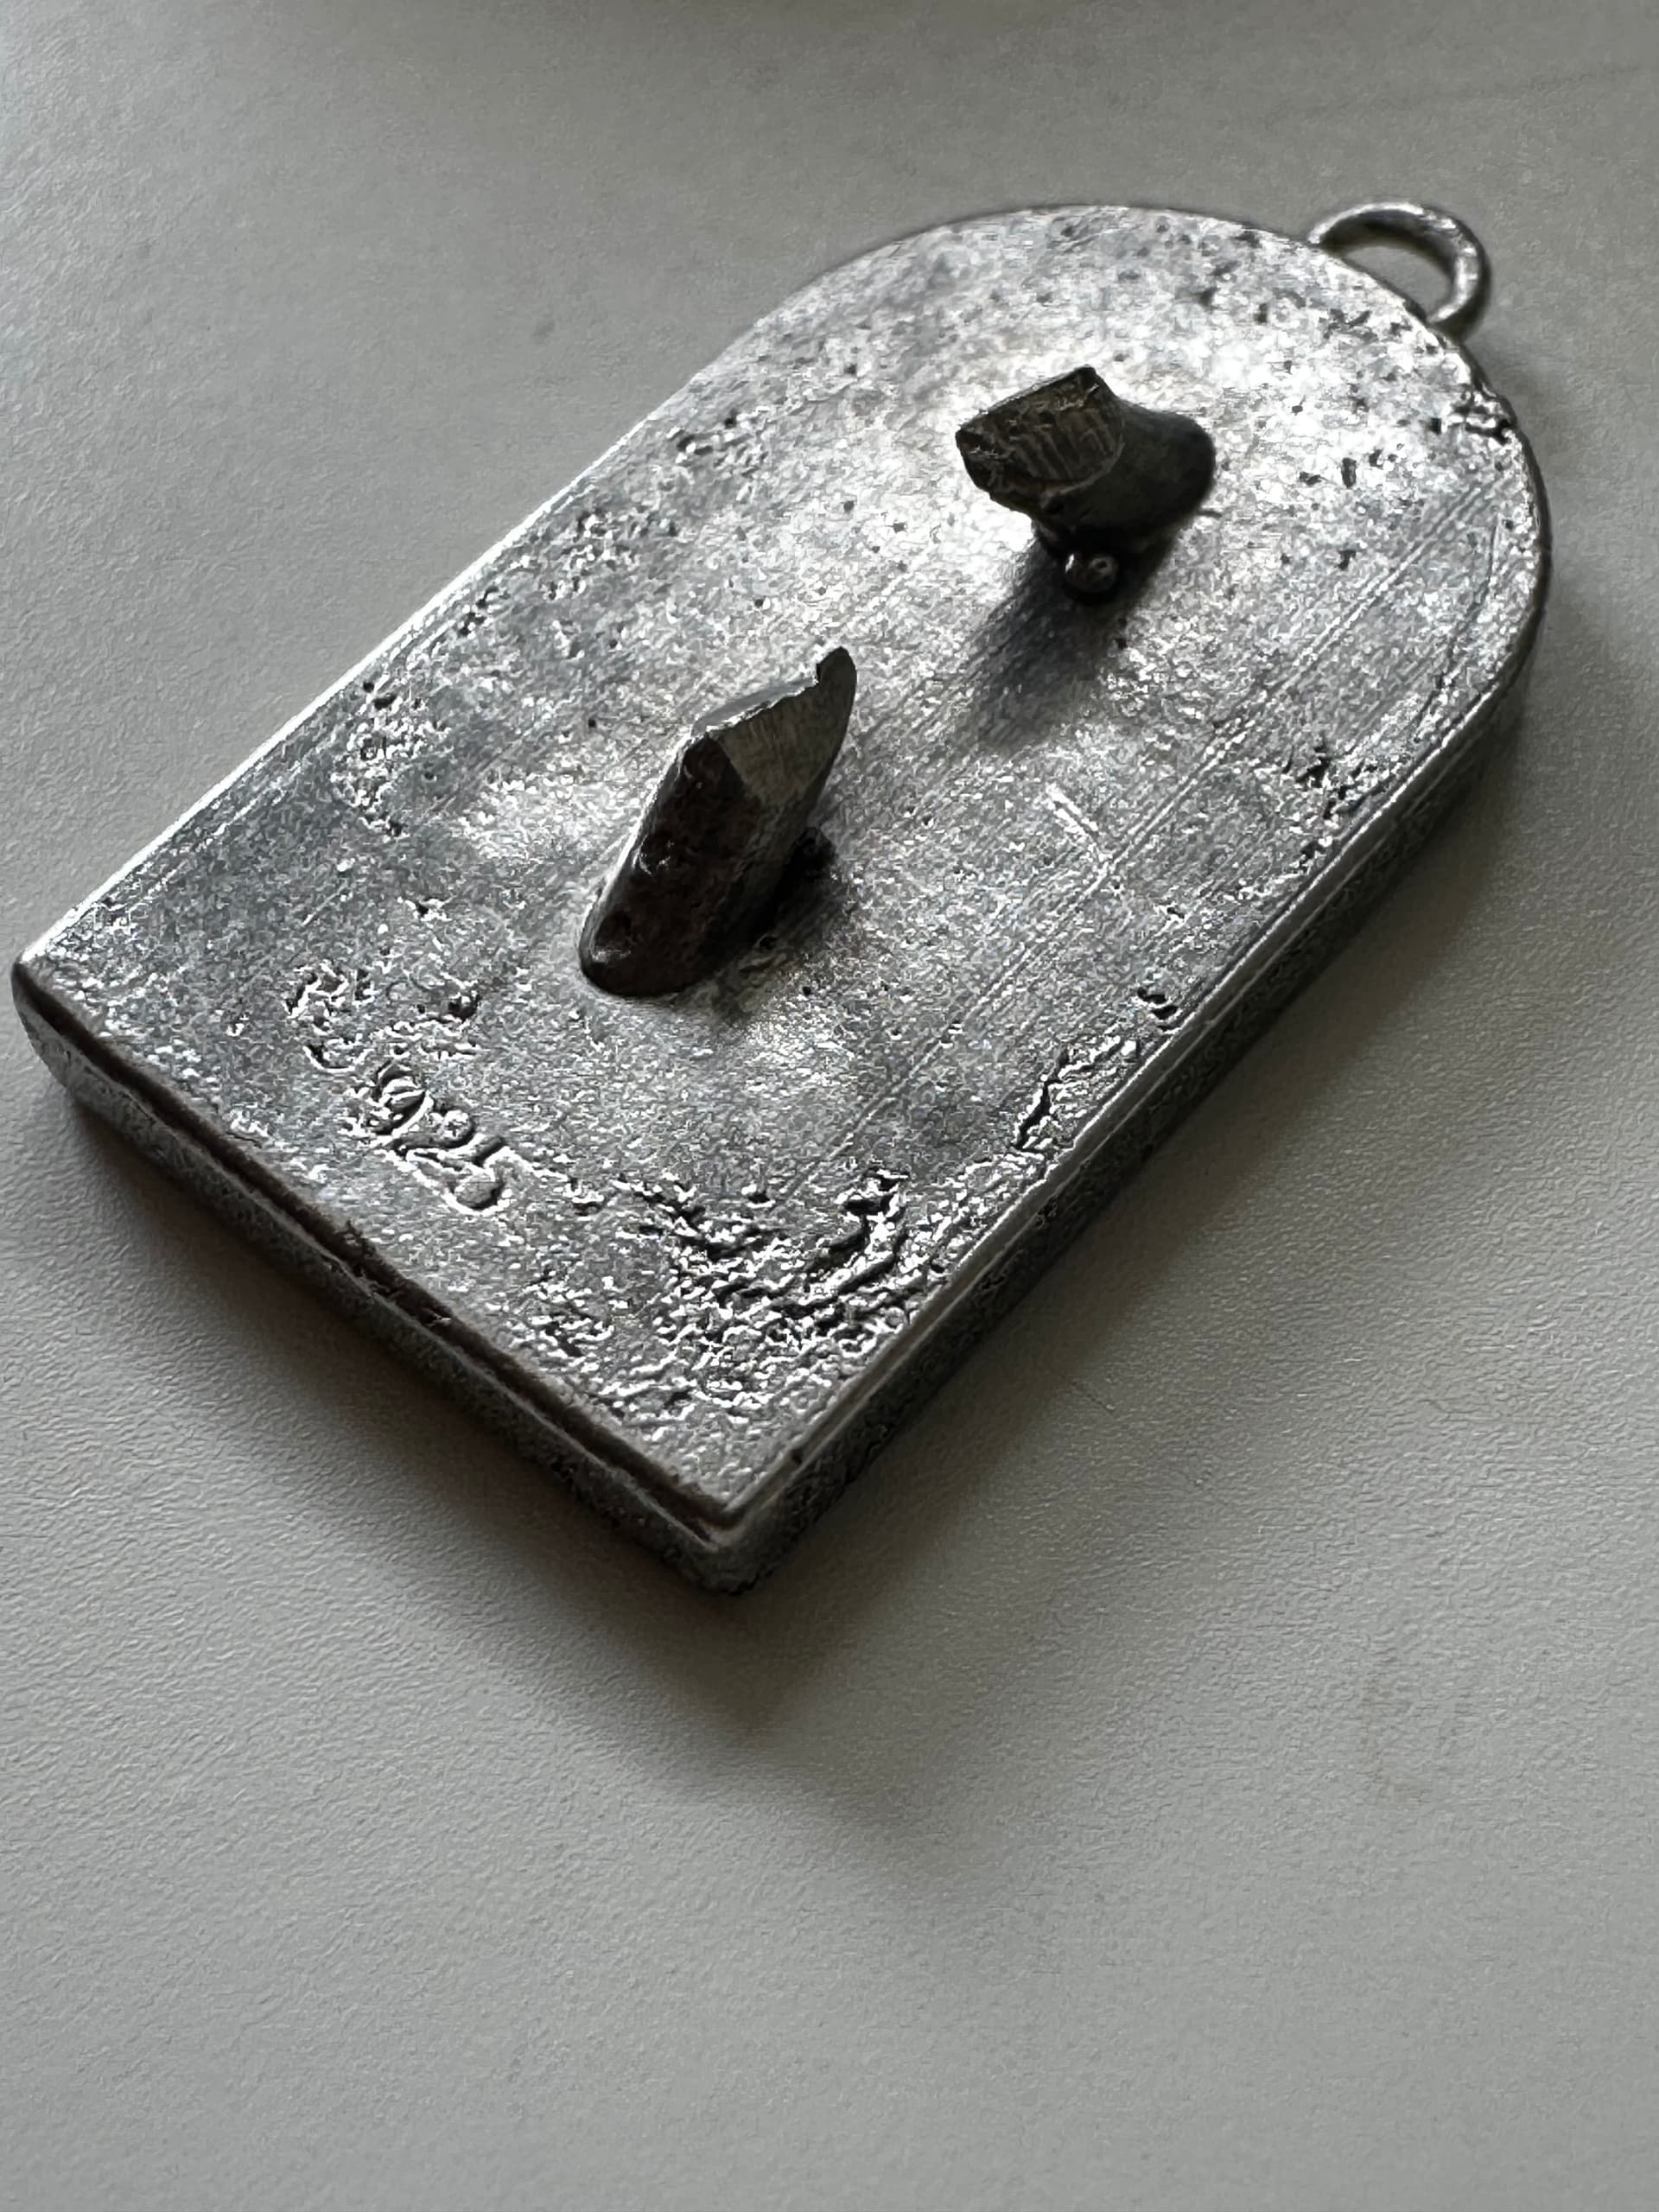
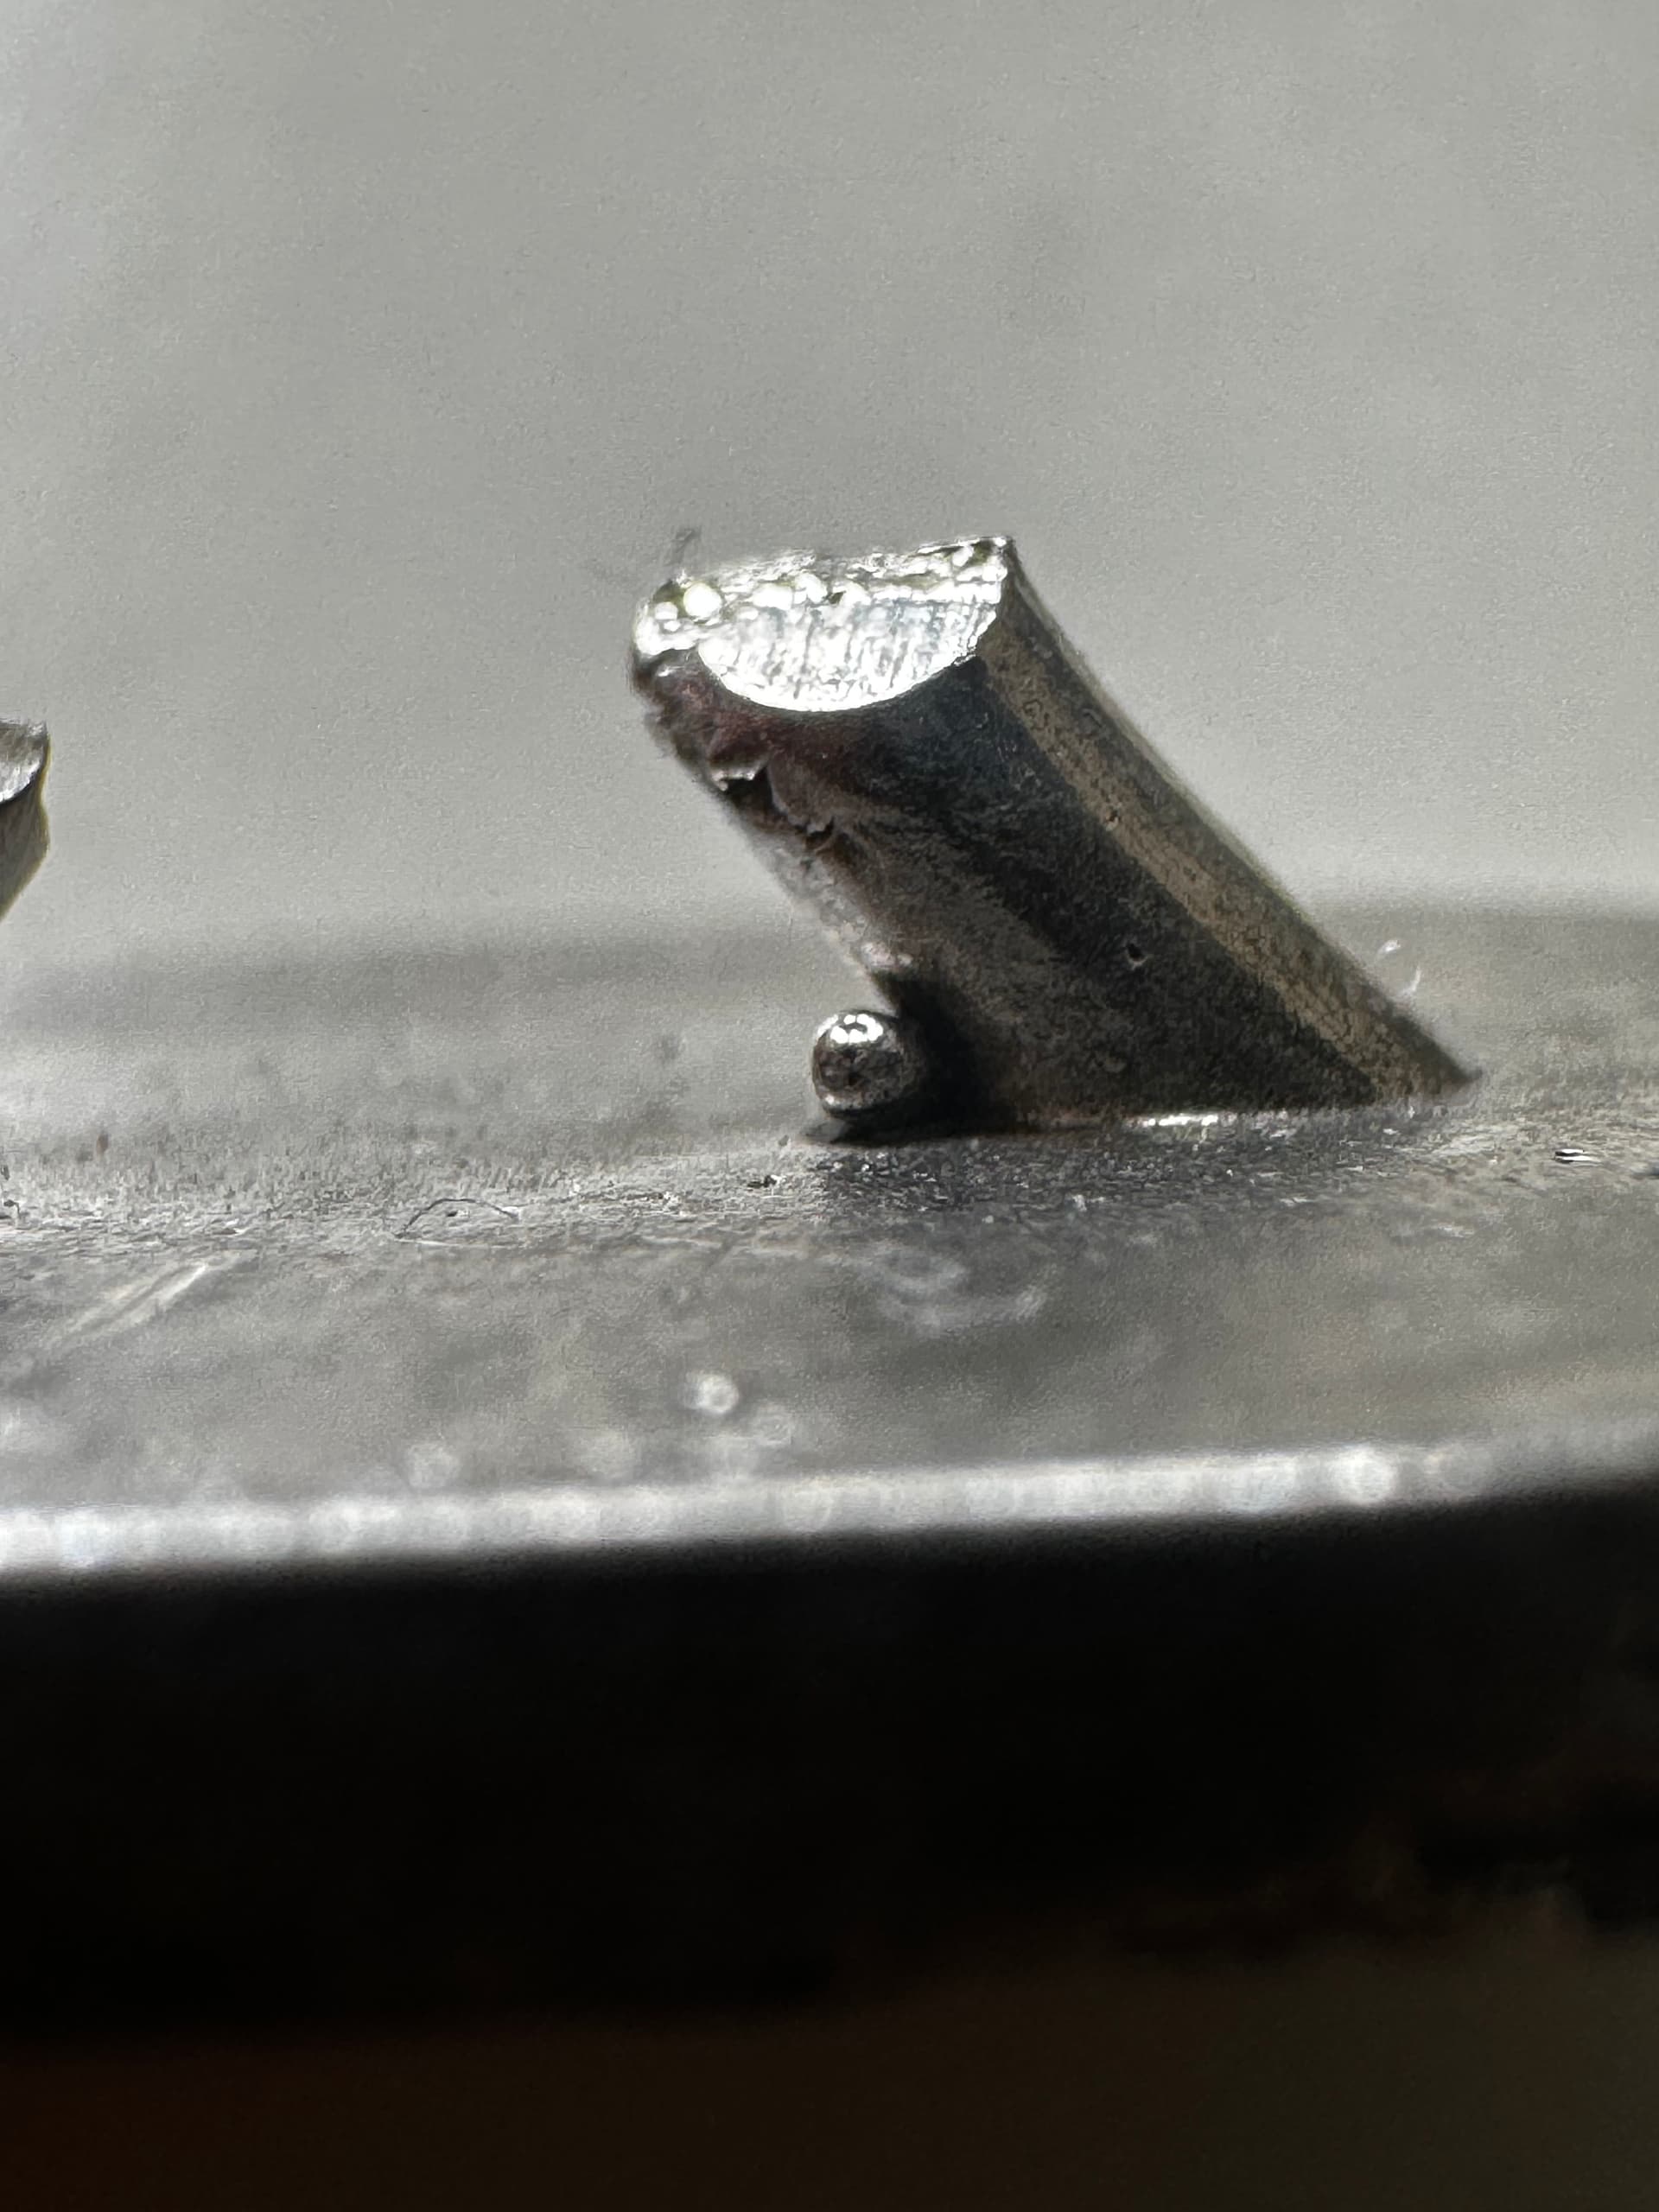
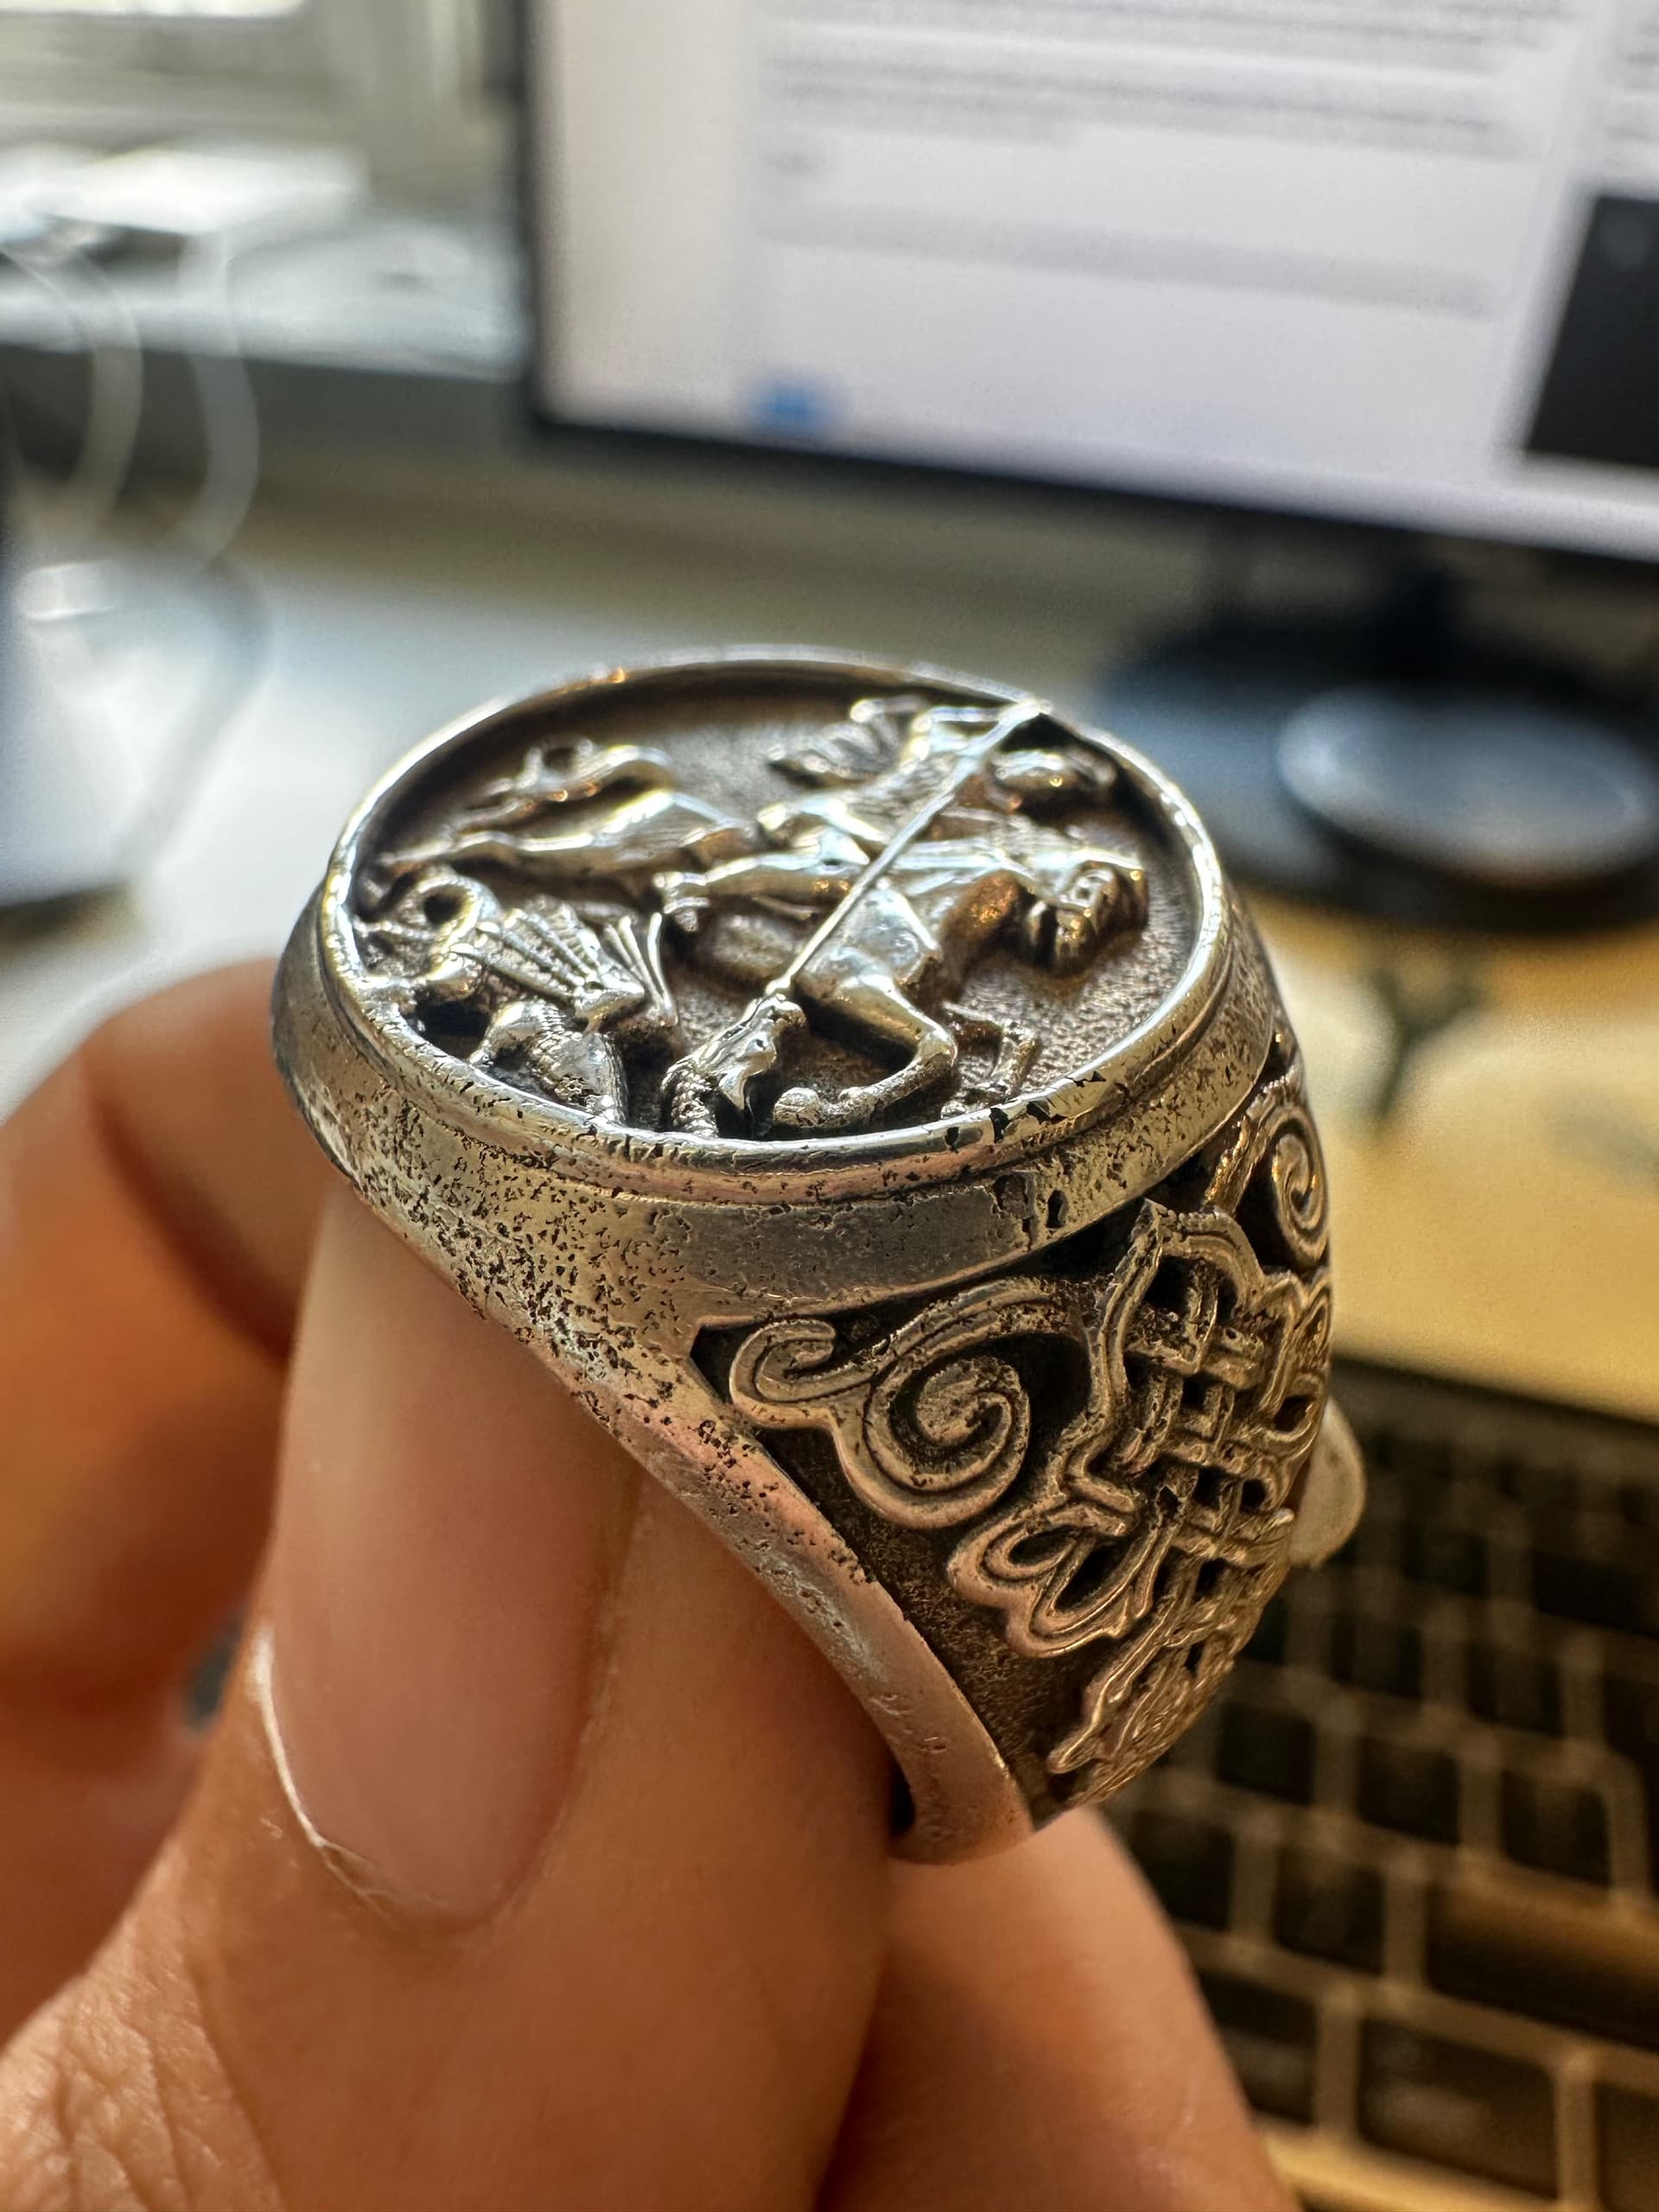
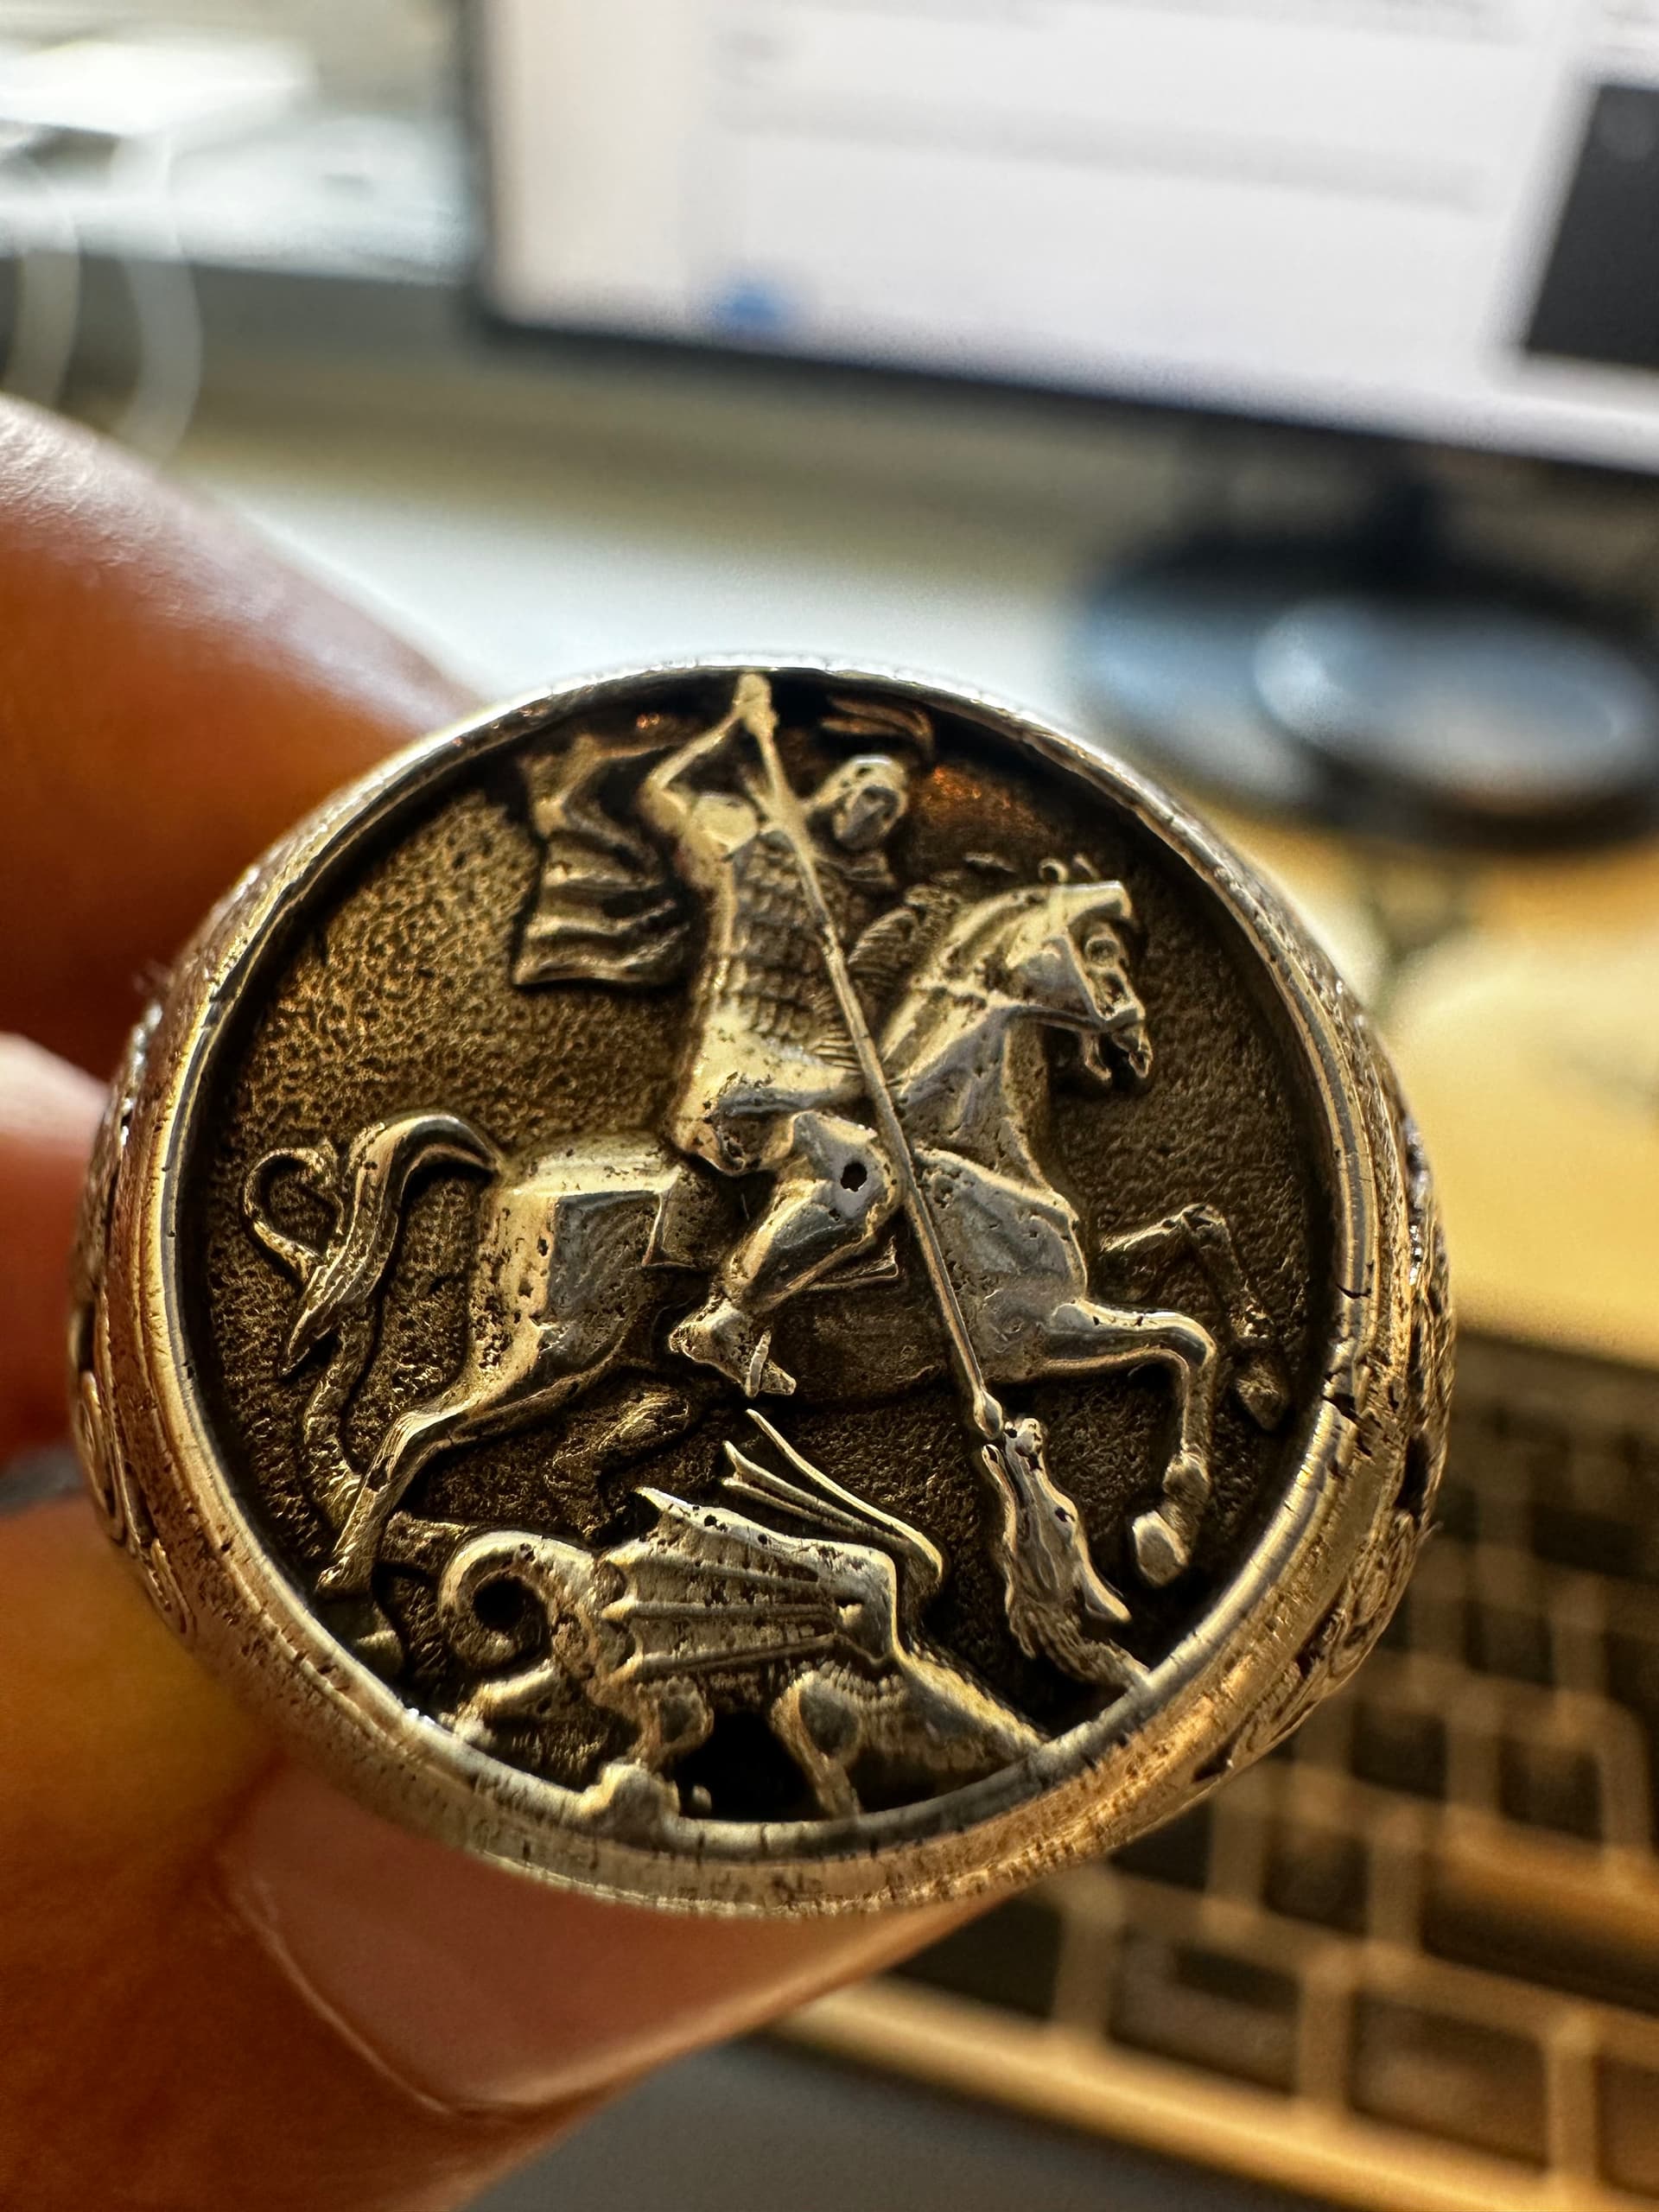
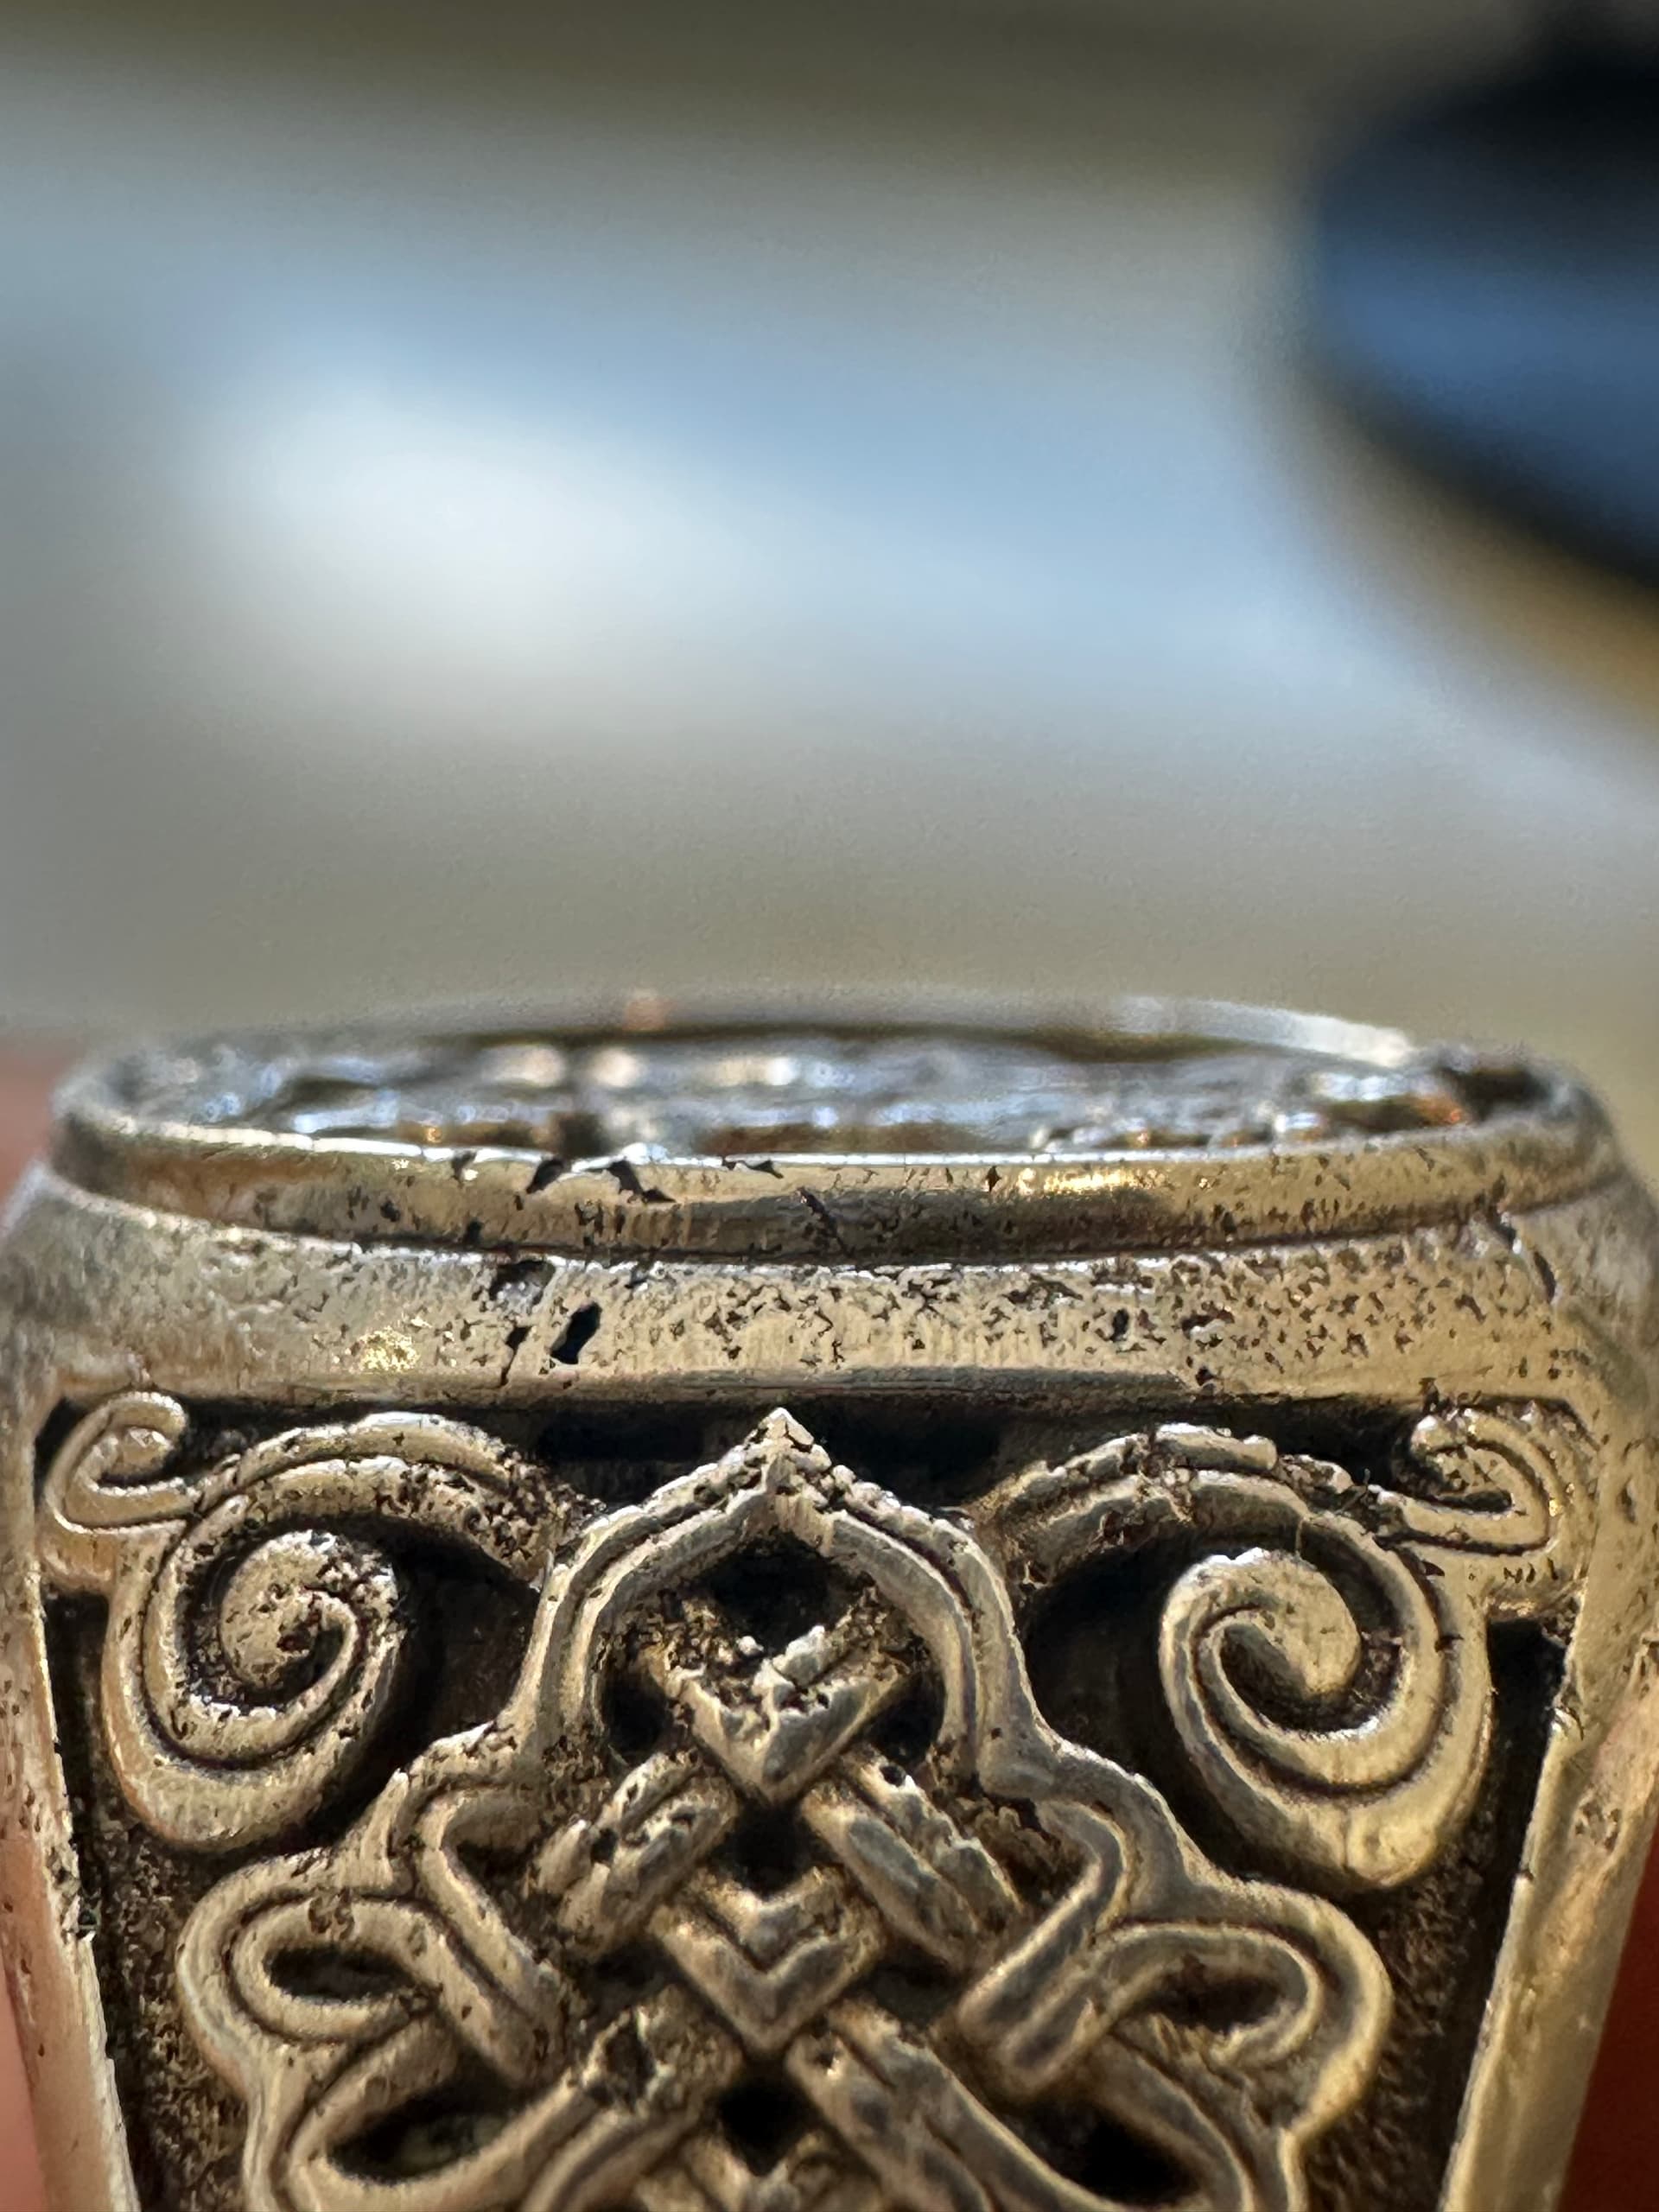
I need some help in terms of the defects I am getting from casting sterling silver. I have been working on this for just over a year and a half now and have learned a lot, but one thing that I can’t seem to get to the bottom of is the defects and pitting issues I have within my castings. The defects and pitting isn’t always as bad as seen in the images below, but it always seems to be prevalent never the less.

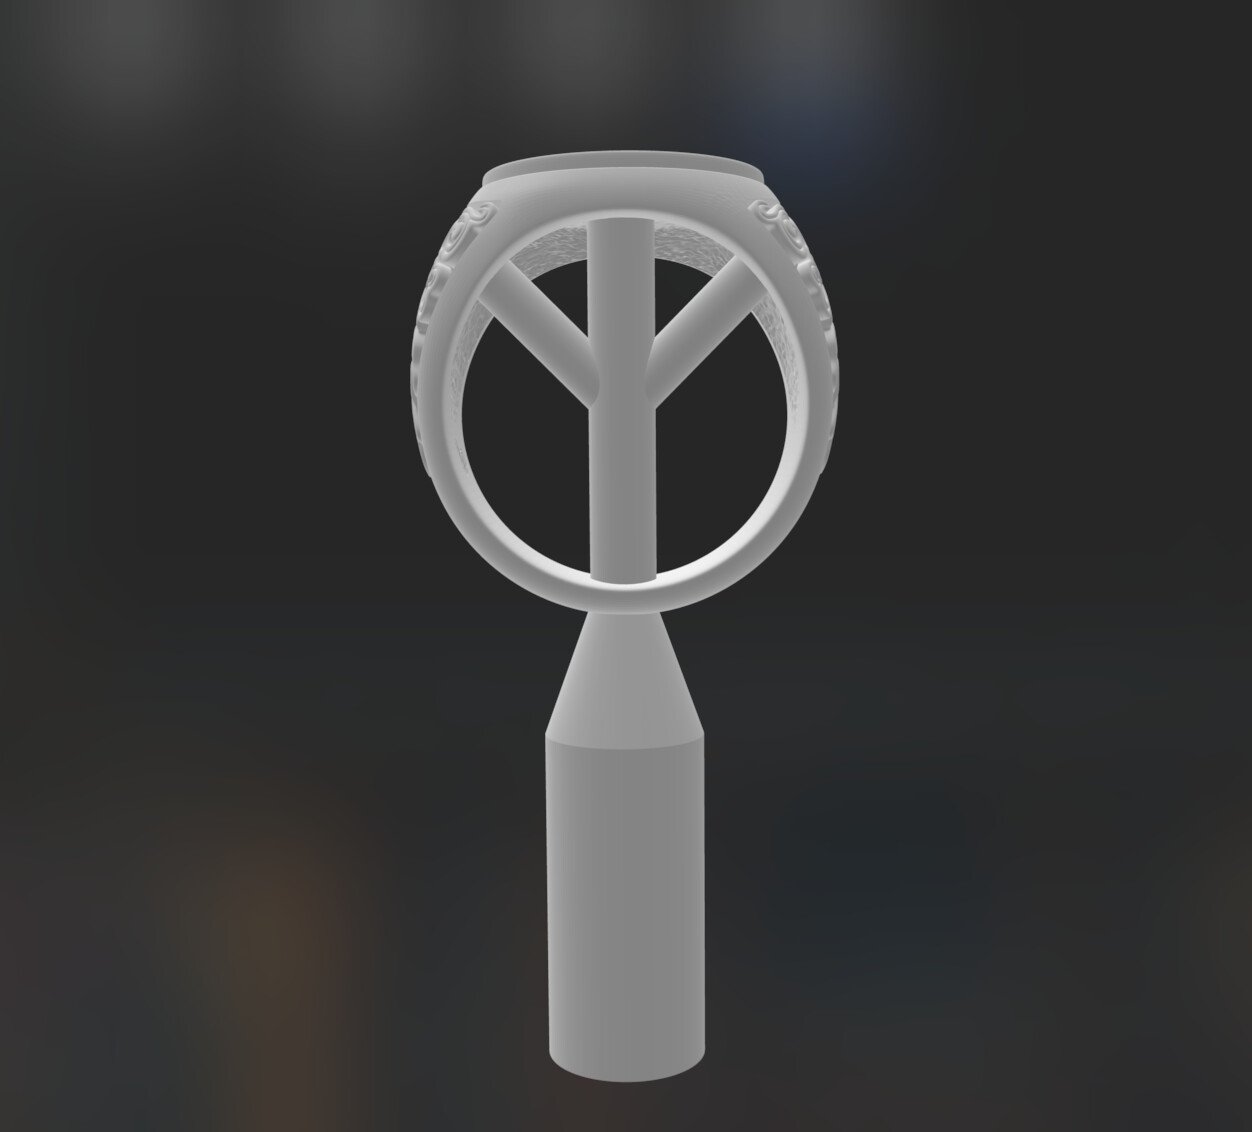
Just as a quick rundown of my production process, I first print my models through Lychee on the Phrozen Sonic Mini 8K. I use BlueCast X One resin and ensure they are fully cured and cleaned using bioethanol. Once all my models have gone completely white (which ensures they are cured properly), I then sprue them on a wax tree making sure there are no harsh edges between the sprues and the models. To create the mould, I use SRS Silk at a ratio of 100 investment to 38 water, and follow the mixing instructions as seen in the image below. I leave the investment to solidify and dry for 90 minutes before putting it in the Kiln. For my burnout times, I use SRS’s recommended times as also seen in the image below. I hold the flask temperature at 600°C for an hour and start melting my sterling silver at 980°C and hour before pouring. I use the Kaya Cast casting machine and ensure I have a full vacuum before pouring.

As you can see in the images, the pitting seems to be really bad in this instance, and I also have some protruding defects which I have never seen in previous casts before. The sterling silver I used had been used before but was thoroughly cleaned before using it in this instance. The bag of SRS silk is about 6 months old but was tightly tied for that period whilst I was away to ensure no moisture got into the investment.

I would be very grateful if anyone could help me in solving this issue as it is holding me back from starting my jewellery business journey.

Thanks,
Aaron


I’ve never used this printer and printing medium, but I would switch your investment to one that’s designed for casting 3/D printed objects. The investment that you’re using isn’t holding up to the stress and expansion of burning out 3/D printed models.

I’ve never used this investment, but SRS makes an investment designed for casting 3/D printed objects.

R&R Plasticast is another investment that is designed for casting 3/D printed objects.

Try switching out your investment to one specifically designed for 3/D printed objects and see if that helps. I’ll bet it will!

Jeff

2 Likes

I would definitely let your investment rest for 2-2.5 hours and let it sit at 300 for a couple hours before going up to 600.

Hit me up if you want to chat. I’m also doing silver casting and have negotiated a lot of challenges.

JeffG,
In your post on Cadcast-SRS, the description says: “It is designed primarily for non-precious metal casting in brass, silver and gold” but isn’t that a non sequitur? Didn’t they mean “It is designed primarily for non-ferrous metal casting in brass, silver and gold”? -royjohn

1 Like

Hi Jeff,

I have considered using SRS cadcast before but I believe it is designed to be used with standard resins, meaning a resin that is not designed to be used for lost wax casting.

The resin I am using (Bluecast X One) is specifically designed for lost wax casting, meaning it has no expansion and can be used with any standard investment powders. It is also wax based so should burn out with no residue or ash.

Thanks,
Aaron

Like I said, I’ve never used Bluecast printing media (or any SRS investment, I have used R&R plasticast though). From the pictures you showed I think your castings are showing signs of investment damage during the burnout process. I was just suggesting that you give an investment designed for 3/D printed models a try.

From what I’ve been told it’s fairly common that some 3/D printing medias say that they are castable, but they don’t actually burn out like conventional jeweler’s wax.

I still think it’s a good suggestion for you to try. But other folks might have different suggestions.

Best of luck!!

Jeff

royjohn, I saw that too!

Jeff

Hi Brennan,

I will definitely try and let it sit for longer.

I don’t know whether you saw the image of my burnout cycle but it does sit at 230c for 3 hours. Do you think I should try 300c instead?

I then ramp it up to 730c instead of your suggested 600c. should I change that as well?

I do feel like it is best to stick with the recommended burnout times from the investment manufacturer.

Thanks,
Aaron

1 Like

Ok, thank you for your help Jeff.

It is definitely worth giving it a try so I will definitely buy some at some point.

Thanks,
Aaron

Hopefully you can just buy a little bit of that special 3/D printing investment to experiment with! I also see that SDS offers a stone cast in place investment. That kind of investment is a little stronger than regular investment. It usually includes boric acid (the prime ingredient of soldering flux) mixed in. You could try that too.

What you’re currently doing isn’t working, so you have to get into the mindset of inventor and experiment with new & different things.

Have you reached out Bluecast? Their tech support team should have advice for you. I’m guessing that you’re not the only person to have experienced this problem with Bluecast.

Cheers!

Jeff

Ah! I’m in the states so I thought you were using Fahrenheit.

I let my investment rest for 2.5 hours and then cook off all the moisture at 300F for a few hours. This is what the casting tech at Rio suggested.

Because your voids are on the outside of your pieces, you might want to get some wax and do a casting with both 3D print and wax to see if it’s an issue with the model material.

2 Likes

That’s a great idea for a test! In the same flask cast a conventional jeweler’s wax object and a 3/D printed object with the Bluecast resin. Good thinking Brennan-AG!

2 Likes

Hi everyone,

I’ve been a lurker for years, but I thought I’d try and help if possible. I’ve been commercially casting resin since 2011 and have experience using the Phrozen Mini 8K printer. It’s an excellent printer for the money. However, I haven’t used BlueCast X1, even though we’ve tried many different types.

Currently, we use Siraya Tech Purple Cast resin with approximately a 10% mixture of their Blue Cast resin, which we shake well together. The print exposure time is set to 5.7 seconds on the Phrozen Mini 8K, and the rest of the settings are pretty standard. After printing, we go through three rounds of cleaning with 99% isopropyl alcohol, each lasting 6 minutes (using AnyCubic cleaners). We then blow off to dry any excess alcohol with an air compressor(important step).

The crucial step is the curing process, which lasts for 40 minutes in a high-power UV curing box. We make sure to turn the rings over after the first 20 minutes. You can use any manufactured UV curing and cleaning box, you might need to extend the curing time accordingly. Following this, we arrange the items on a tree (printing the sprues on the pieces) to expedite the process.

For investing, we use Ultra-Vest with boric acid mixed in the water. The ratio we use is approximately 3 level teaspoons of boric acid per gallon of water. Unfortunately, I can’t provide an exact water-to-investment ratio, as I’ve been doing this for a long time and gauge it by sight.

After vacuuming, we let the investment set for at least 2 hours for a 4" flask. We utilize two ramp speeds on our Paragon ovens: full speed and a hold at 645°F for 2 hours, followed by an increase to 1325°F for 3 hours, and then a decrease to 1050°F for casting. We currently use an enclosed unit but have used both torch and electronic melter for casting, achieving the same results.

It’s crucial to maintain the vacuum for a minimum of 80 seconds after pouring, and using fresh metal is vital to prevent pits in your castings. Currently, we’re using S88 from United and haven’t encountered any issues.

I hope I’ve explained the process thoroughly. If you have any questions, feel free to ask.
Randy

2 Likes

Hi Randy,

Thank you for your response, It is definitely a big help already! Some of the tips and methods you have mentioned I’ve never tried before, so I’ll be sure to give them a go.

I just have a few questions which I’d be very grateful if you could answer?

  1. Have you always added boric acid to your water mixture and does it make a drastic difference to castings? I’m guessing it helps in preventing oxidisation and minimise pitting, but I haven’t heard of anyone else use this method before.

  2. We use a graphite crucible in an electric furnace. From what I’ve read online, I understand that the graphite crucible creates an atmosphere which prevents the introduction of oxygen and therefore minimises pitting. I just wondered firstly if you should use boric acid or borax powder in a graphite crucible or does it damage it? Secondly, does opening the furnace lid introduce oxygen and alleviate the atmosphere it has created? And finally, is it always essential to stir the metal before pouring using a carbon rod?

  3. Do you always use the same flask casting temperature depending on the size and shape of the piece you are casting? And what is the temperature you would melt sterling silver to for that flask temperature?

I appreciate your help!

Thanks,
Aaron

1 Like

Hi Aaron,

I’m glad I could be of some help. Please understand that this is a production process involving thousands of items each week, and the process remains consistent throughout. When using a graphite crucible, you don’t need any flux. The boric acid water is essential as it hardens the investment, preventing any damage to the cast due to resin. We typically mix the boric acid water and investment for about 2 minutes. Try not to exceed this time, as the boric acid can cause the investment to set faster. Please note that using boric acid water can make it slightly more challenging to remove the pieces from the flask during quenching.

The quenching time will vary depending on the type of sterling silver you’re using. We use a deox sterling. Our current practice involves a quenching time of approximately 14-15 minutes. We begin quenching after starting the fourth cast, which results in around 5 minutes between each cast. It’s advisable to gently skim off the top using a quartz rod and to avoid touching the crucible’s sides to prevent any contamination.

We use a closed cast bottom pour system, and the metal’s temperature during casting is approximately 930°F. I maintain this temperature consistently, regardless of the size of the pieces being cast. This temperature has proven effective for various items, including large and small pieces like 30x22mm cab pendants and 5mm round heads. Additionally, I use the same temperature for casting gold, including 14kt, 10kt white (nickel-free), and yellow gold. It’s worth mentioning that achieving this temperature was the result of extensive trial and error and could vary slightly based on the specific machine and thermocouples being used.

We’ve had great results with the Siraya Tech Purple Cast resin. Notably, it costs only a third of the price of other castable resins. However, each resin has its own unique characteristics, and our approach often contradicts Siraya Tech’s suggestions. Years ago, we used to cure in water under UV with other castable resins, but this led to pitting due to water accumulation within the resin, which wasn’t visible until cast. Now, we avoid getting any water near the resin after printing. We solely use 99% isopropyl alcohol for cleaning and promptly dry it using compressed air. In my opinion, this resin is the best available for casting, and it’s reasonably priced. We mix a small amount of their Blue Cast resin with it, resulting in smoother pieces that require less polishing time. If you’d like images of the printed or cast pieces before finishing, please let me know.

Randy

2 Likes

Aaron,
I made a typo on the crucible melting temp for the sterling should have read 930C not Fahrenheit. Sorry about that.
Regards
Randy

1 Like

Randy,
Thanks for the thorough explanation! Have you ever used stone cast in place investment with 3/d printed waxes? I’ve been told that it’s just standard investment with boric acid added.

I’ve always messed up mixing the boric acid and water somehow when I add it to investment. When you mix up the boric acid and water do you heat up the water first or add the boric acid to cold water? I’ve also heard that the water has to be hot for the boric acid to truly dissolve. Then you have to cool it down before investing which means that you have to prepare it at least a day ahead of time.

One last question do you chill the boric acid and water mixture or do you use it at room temperature.

Thanks again for your suggestions!!

Jeff

Hi Jeff,
Glad to help. Funny you should ask about stone in place as I was thinking of trying it on a couple of mountings this morning. I’ll let you know how it turns out. As far as boric acid and water mixture, we keep 4 separate gal water botttles and just fill it with tap water (it is filtered) and it disolves within a day. Used at room temp. Always shake a little prior to using. As I stated before I don’t measure, it’s all by site and based on the amount of investment I’m mixing. Of course you can follow the manufacturers suggestions. Secret to using it is not to mix more than 2 min before you vacuum and pour as it sets faster with the boric acid.
Hope this helps,
Randy

1 Like

It’s been a while since I’ve used it, but I think that’s where I’ve messed up the boric acid investment in the past. That I didn’t factor in that it sets up faster than regular investment. I think that I assumed that I mixed it incorrectly. Thanks for that reminder.

I think before I ever try it again, I’ll do a test run without pouring it into a flask to to get a hands on idea of how quickly it sets up.

Thanks again for all of these tips!

Jeff

Hi @jeffg-moderator @Brennan-AG @RandyD94922

I appreciate everyone’s support so far, it has helped a great deal!

So I recently made a few changes to my casting process which has made a big difference and improved the castings a lot, but I am still getting porosity.

Firstly I bought some new 925 sterling silver casting grain and a new graphite crucible to eliminate those factors being an issue. I then also bought SRS Cadcast and followed their recommended burnout cycle. The burnout cycle is as follows:

  1. Ramp at 150c/hr and hold at 220c for 3 hours.
  2. Ramp at 150c/hr and hold at 450c for 1 hour.
  3. Ramp at 150c/hr and hold at 750c for 4 hours.
  4. Ramp at 150c/hr and hold at (desired casting temperature) for 1 hour.

For this particular cast, I decided to lower the temperatures of both the flask and the metal. I held the flask at 580c for an hour before pouring and melted the sterling silver at 960c. I didn’t stir the metal at all before casting due to having new sterling silver and crucible. Other than this, I hadn’t changed anything else. I ensured that the singular ring I was casting had sufficient and correct sprueing as seen in the image below and also that the 3D print was fully cured and dried before pouring the investment.

If anyone could suggest any changes I should make to achieve greater results, it would be much appreciated? I’m not sure whether I have unrealistic expectations or not, but I am starting to wonder if I am able to achieve better results than this.

Thanks,
Aaron