Hi, I had originally wanted to post an article with alternating
pictures and commentary regarding my remodelling, but instead I’m
going to have to provide the commentary here regarding the various
JPEGS which Hunaman graciouslylinked to for me via a prior post. I
want to express my appreciation toeveryone on Ganoksin who donated
to me their castoff supplies and tools. I have done my level best to
provide nearly all of them with agiven place. The rest, I had done
either through some smart second-handshopping in Craigslist,
scrounging from flea markets for tools, some jury rigging and
improvisation, occasional Christmas andbirthday presence, and some
birthday and Christmas cashsaved up over the past year or two. I
also said farewell to my amateur radio hobby, and wasable to
generate a few hundred dollars more than way forconsumeables. It was
time for it to go, anyway. Come along for the guided tour…
shed side view
This is the side view of my crafting shed. It measures 16 feet long,
10 feetwide, and 14 feet high. I asked the installers to customize
it for me withan upper level reachable by ladder. When my wife and I
first moved to where we live now and bought our house, she made a
bargain with me that I could have an outdoor shed costing up to
$5000 in exchange for one of the bedrooms inside the house being the
crafting area.
I’ve had some fun in it so far. This year, I’ve done extensive
remodelling because I ran a dedicated power line from the house so I
could have heat, light, and tools all at the same time. Note cable
conduit on right hand side. Oh, yes, it’s all up to codeand
inspected. Rough inspection went well, and I have a few more months
to havea final inspection done, in the meantime the inspector gave
me permission to energizethe circuit. I made an exterior shelf to
hold all my aluminum bar stock, which freed up two shelves, which in
turn I was able to get many things off the floor and onto them, and
so on. Just below the window, on the right, is a door I made to open
from the inside so I can pickle annealed or soldered sterling.
front door
This is the view through the front door. Seems larger on the inside
than the outside, huh?
apprentice station
A small table for my daughter, with a space heater to keep her warm.
atelier1
The auxilliary crafting area is on the upper level, intended for
shaping clay and porcelain, glazimg them, and torching enamel.
benchpin
Standard bench pin. White bar across center is a wrist support. The
wooden beams on either side are arm supports. Note that the arms and
wrists support system is moveable and not attached to the desk.
cabinets1
An additional section for shelves and cabinets. Generally holds
miscellaneous hardware needed for creating fixtures, also some
jewlery related materiel not of currently relevant use. Note second
clock, so I can keep track of time while I’m using the milling
machine.
cnc
Area for Taig tabletop milling machine, along with machining
supplies, torch gases, and other dangerous chemicals.
electrical
Closer view of new electrical power-up, which made the entire"ship
refit" possible. A 240 volt, 40 amp line was rununderground from my
house to the subpanel which you see here. Itis divided into a pair of
120 vold, 20 amp lines. I split the current electrical into overhead
(lights) and floor level (kiln), and routed aline to each system
through a GFCI socket. Ground rodis outside.
desk ctr
Bottom view of jeweler’s desk. Everything is labeled. Note also
felt-covered board in front of desk to help catch bounces and sweeps.
The center drawer has a jar lid mounted into which sweeps can be
placed into a jar for either recycling or reuse.
desk high
Top view of jeweler’s desk. Note that bench pin is on right hand side
arm support and a long hardwood block is in place. I’ve found this
useful for when I have to use the Dremel rather than a jeweler’s saw.
Note rolling mill to right hand side, quench bucket to left, and a
set of shelves mounted to the arm and wrist support system.
desk lhs
Close-up view of wall immediately to the left of jeweler’s desk. Note
drawer for storing fine silver (top nine drawers), and sterling
(bottom drawer). Solders are kept in thier own drawer in the desk. I
made a door to open to an outside crock-pot filled with Sparex. I
placed a Lexan shelf just in front of the door to serve as a drip
guard to protect the files and other rotary bits underneath. Note a
small glimpse of 18 inch rail anvil to the left of picture.
drill press
Same location, just as before, for the drill press to the left hand
side of wet alcove in rear. Note space heater on its own platform.
Drill bits are just below the platform. Hand held power tools such as
electric drill or skil-saw are store in a table underneath.
files
Close-up view of organizer mounted above bench pin. We can keep a
lot of files and other tools here.
kiln
Same location, just as before, for minature Paragon programmable
kiln. It rests on top of a piece of antique radio gear, a spectrum
analyser, which now is used no more than a table. Fluxes and polishes
are store in shelves above it. I also keep respirators here for both
myself and my daughter. Some appliances on polishing table to the
left.
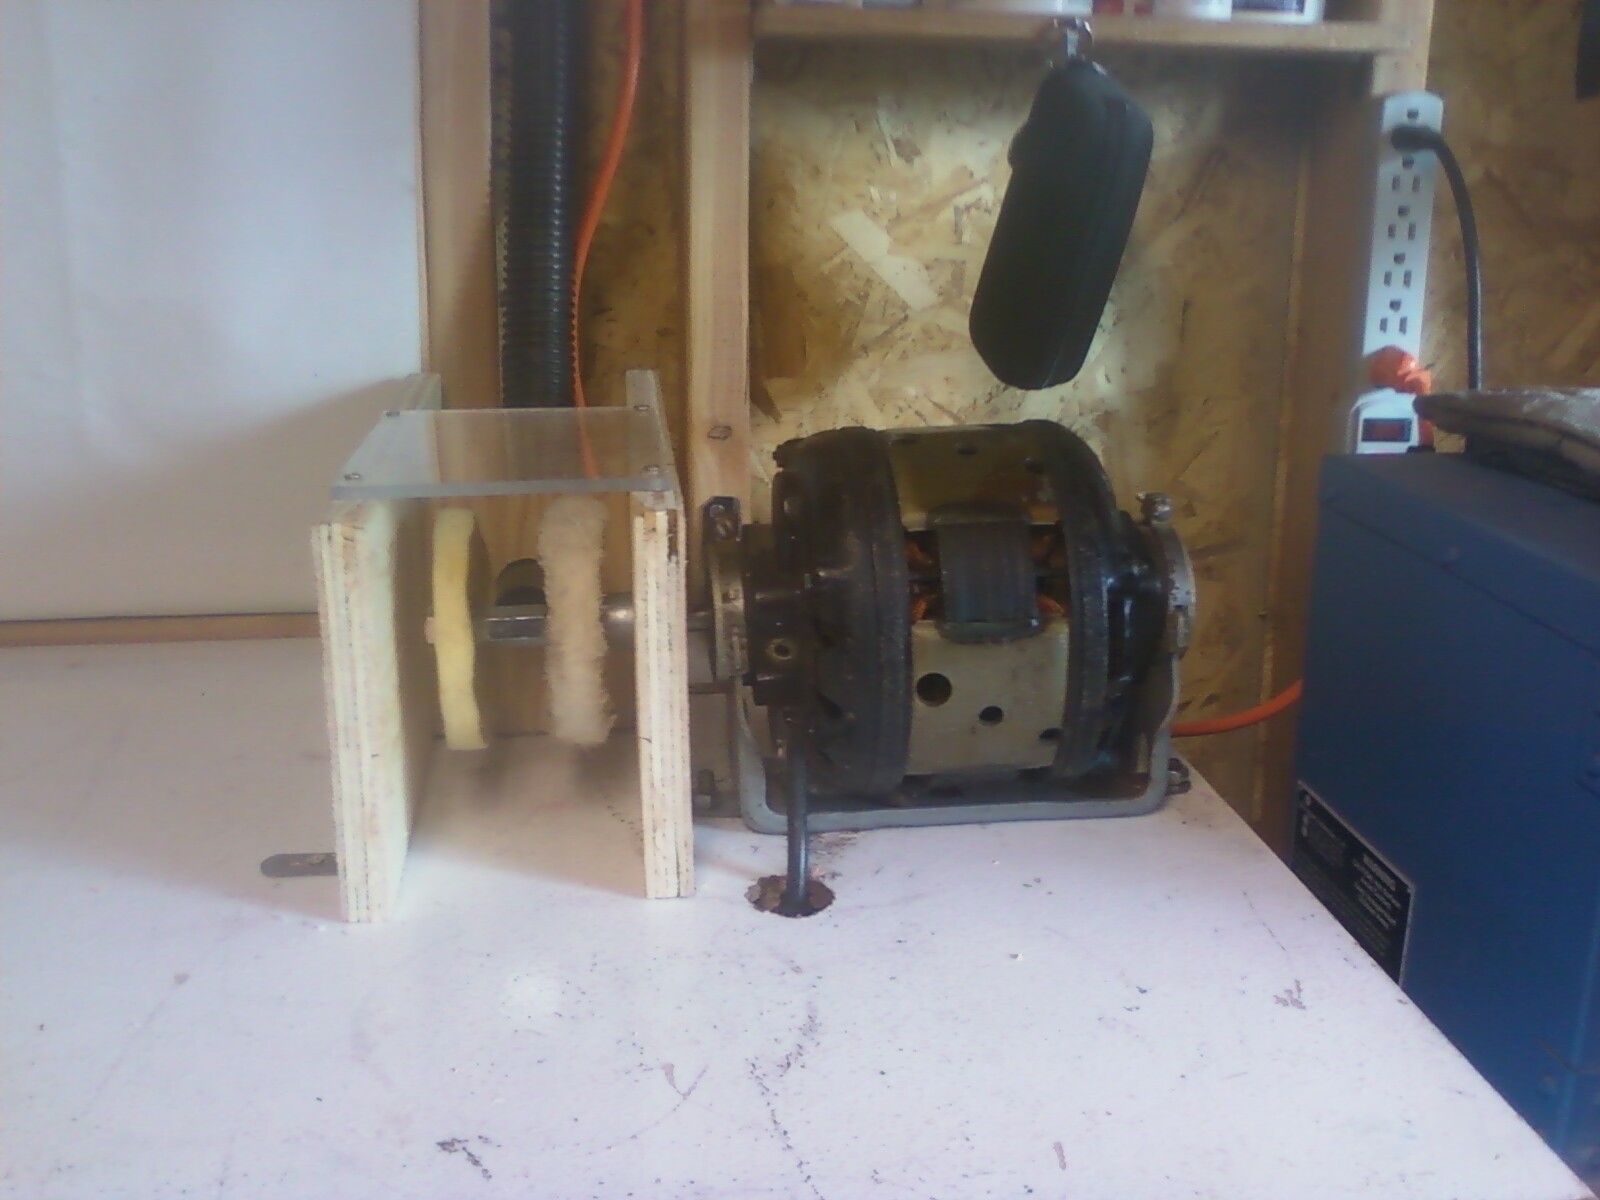
Polishing
Moving lots of things to cabinets and shelves opened up considerable
room under the polishing table for power tools such as a belt
sander, 9 inch wood bandsaw, air compressor, and Lortone tumbler.
wet alcove
Wet alcove at rear of cracting shed. The entire inside of the box is
waterproofed. Last year, I didn’t really have a good forceful source
of recirculating water. This year, when I get around to it, I will,
and I will be able to not have to worry about getting water either
for the Inland lapidary all-in-one tool or the Gryphon diamond
bandsaw.
why I have to watch time carefully, I don’t have much of it, perhaps
only 9 to 12 hours per week, so I have to make every minute count. To
the left, a big reason why I want to learn to make really good
jewelery… so I can make pretty things for her to wear!
Cheers, Andrew Jonathan Fine