That is correct, but it might not necessarily be ash or investment creating these imperfections, it can also be gas or shrinkage porosity which can be caused by a magnitude of things from my understanding. I still think that the issue I am facing could be ash from the resin though.
It’s hard to say what exactly is going on here, since there are so many variables. The rule I like to follow when troubleshooting is to only change one thing at a time, and note the results. I think it’s a good idea, when trying to figure out if your problem is related to casting from a resin model, to include a wax model in the flask as a control. That way, if you see the same problems in the wax as in the resin, you can eliminate the resin burnout as the cause of your problems.
I disagree with your reasoning about the thickness of the sprues. The investment should be tough enough to handle metal rushing through it without eroding significantly. But by using such long, skinny sprues on a relatively thick piece, you’ve created a situation where the sprue is the first thing in the mold to solidify. All metals shrink as they go from a liquid to a solid state, and silver shrinks quite a bit. By isolating the ring from the button, which is usually the last thing to solidify, you’ve forced all that shrinkage to happen within the ring itself. This, all by itself, will cause pitting to occur, since the metal doesn’t solidify evenly, but forms a spongy mass in the mold cavity, consisting of liquid metal interspersed with metal that is nearly solid. As cooling and shrinkage proceed, the shrinking liquid will pull cooling metal in from the surface, causing softness of detail and distortion. It will also create voids which go deep into the piece, so no amount of surface removal can eliminate them. You need to assure that your ring cools and solidifies first, and that it can continue to draw liquid metal from hotter parts of the mold cavity as it does so. So a shorter and fatter sprue would be the first thing I’d recommend, connected to a central button that’s significantly more massive than the ring itself. Try that, leaving everything else the same, see if your results differ, and post them back to this group.
At this point, you’ve done so many tests, none of which have worked out very well, that I think the goal should be to get one 3/D printed model casting that is perfect, even if this model isn’t the style that you’re shooting for. Then from there you/we can figure out how to expand on what worked.
I definitely suggest creating a model that is similar in thickness to some of Randy’s work. He is successfully casting hundreds of 3/D printed models on a regular basis. Also Randy is following the burnout logic that I’ve been taught. Quote from Randy’s post: “We don’t go above 1325f 720c. for 4x6” flasks. We’ve experimented with temps all the way up to 746c 1375f and our results were similar to yours."
If you don’t go above 675C to 720C you won’t degrade your investment as easily.
If you can, try a test with a thinner model, sprue with sprue wax, burnout at a 675C to 720C.
I still think that you should cast a wax model. It will immediately eliminate or confirm whether it is a model or investment issue. The goal here should be to isolate and eliminate variables.
Hi Aaron,
I still believe your issue is heat related. I took this from the bluecast Xone website
Perfect casting results with any kind of investments and burnout cycles. Low
temperature burnout compatibility (even if we recommend 750°C last stage, everything is burned out at 680°C).
I would try a lower burnout (high temp) The fact that the wax ring didn’t cast without what looks like pitting leads me to this conclusion. I don’t go above 1325F for Siraya tech and it burns out completely at this temp with no pitting. Since you’ve also tried this resin with I assume the same results your having, it’s got to be heat related as I haven’t see the issues your having and we cast heavier 12-14gram men’s rings. On a side note, you want the lowest workable tempuratures when casting. Just keep adjusting your temps downward 10C-20C until you get a good cast.
Hope this helps,
Randy
Sometimes the simplest solutions are the right ones.
After removing the flask from burnout, before you put it into the vacuum chamber, spray some compressed air down the hole and blast out any residual ash or particulates. Since I started doing this all my pitting went away.
I also highly recommend using a plastic-rated investment and burning out at the highest recommended temperature. I use R&R Plasticast and my de-ash temp is 730⁰-750⁰C.
Yeah, the unfortunate thing about using resin models instead of wax, is that resin slightly expands before it burns out so it destroys all but the very best investments that are made just for resin casting.
You HAVE to use Plasticast or some other extremely resilient investment.
Wax does not expand before it burns out so you can get away with plain/normal investment.
Wow, would you consider a follow up question from a fool? Well maybe that’s a harsh assessment but my skills are limited to what overcharged in 3+ years after self learning and several metal smith/gold smith courses. I was reading this thread and since I’m starting out in wax casting, and doubt I’ll ever buy the computer system necessary to make CAD jewelry. I am working with wax. I have yet to send anything in for casting. First because I am saving up for it. But this did scare me a lot. If I file and smooth a piece to what looks like perfect smoothness (say a ring) then finally hit it with a lighter fluid dished buffer by hand. Am I deluded in thinking I could send the piece for casting and it will come back looking like the original? Should I be inspecting the piece under a scope. I don’t actually have one but I could possibly use one at a jewelers. Is there an issue with thin spots on a piece burning out and leaving pits or holes? I’m leaving a minute space in my ring bezels say 1mm for shrinkage. Same for borders. I’ve found that getting a high bezel to adhere to a ring (I make a lot of big bezel rings) attaching wax to wax is impossible without using the pink thin sheets as an “adhesive” as attempts to use more of the blue Ferris wax just results in wax bobs that are brittle and slough off. Will the pink wax affixed bezels stay put? Any criticism, advice, critique, and help will be welcome . Thank you!!!
My opinion is that you should reach out to a casting house now. The one that we are working with now has been wonderful to communicate with and they will help you a lot to develop your wax model. We are going to move away from casting in house as it takes too much time and space in our small studio.
I would also consider having a non-critical piece cast before you send in pieces that you are deeply attached to. Maybe you could mirror some of the form factors in your final piece with the test casting? Having similar thickness and detail and finishes will give you a lot of information and a casting in Sterling is not very expensive considering the amount of information you will get back.
There are a lot of people on here that have more experience than eyes so hopefully they will add to this conversation!
if you are getting wax blobs that just slough off, then perhaps you are not getting (enough heat/ penetration into the surface…your wax pen tip should go into or close enough to the surface to melt the interface…?
wax that has been melted and has a different “structure” than the original surface, and it needs time
Thank you. Of course! What a simple solution that I should’ve thought of. Cast in silver first. Oi! Shot, I could’ve sent them pieces months ago…ai chihuahua…live and learn. Perhaps if I stated down this path 20 years ago. Never too late. I know a veteran goldsmith who recommended the carting company he uses when he does white gold or platinum-Platina Casting in NY. I’ll reach out to them. Thanks again!
I have replied on other threads about this. Been casting B9 resigns for a decade. Use to add boric acid and fertilized to satin cast 20. Worked ok. Now use Optimal Prestige and modified recommended burn out from top hold temp of 1541 for 7 hrs to 2. Do a post cure after light box with sun light for as long as i got. Would never attempt to to directly cast any prints as pictured. Either get milled in wax or make RTV mold.
Hope this helps
Franz
Hi Randy, I was curious to ask, what color does your S88 metal come out of the flask like. Mine ends up being brown and does NOT come off in a vinegar salt solution.
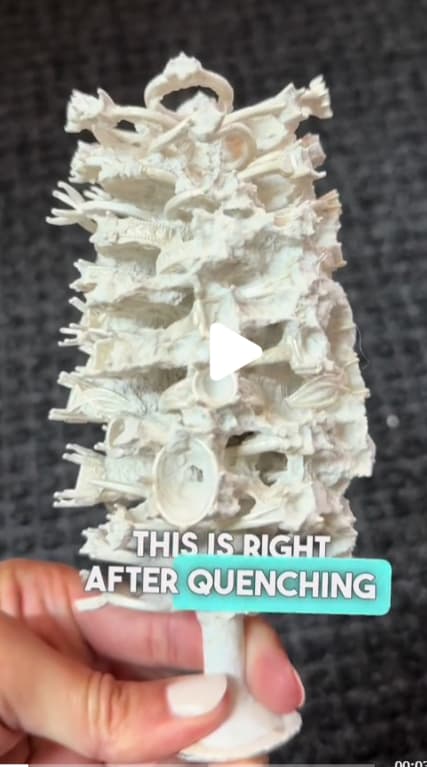
Hi Mark, Here’s a pic of the cast right after quench, using S88 , ultravest investment (and a pic after pressure wash. We have never had to do any kind of acid bath etc.
Unfortunately there are a lot of variables that may be causing your cast
to come out like standard silver. This particular cast was done by torch, as our machine was down for maintenance that day. If you give me more info on your procedure I may be able to offer more assistance.
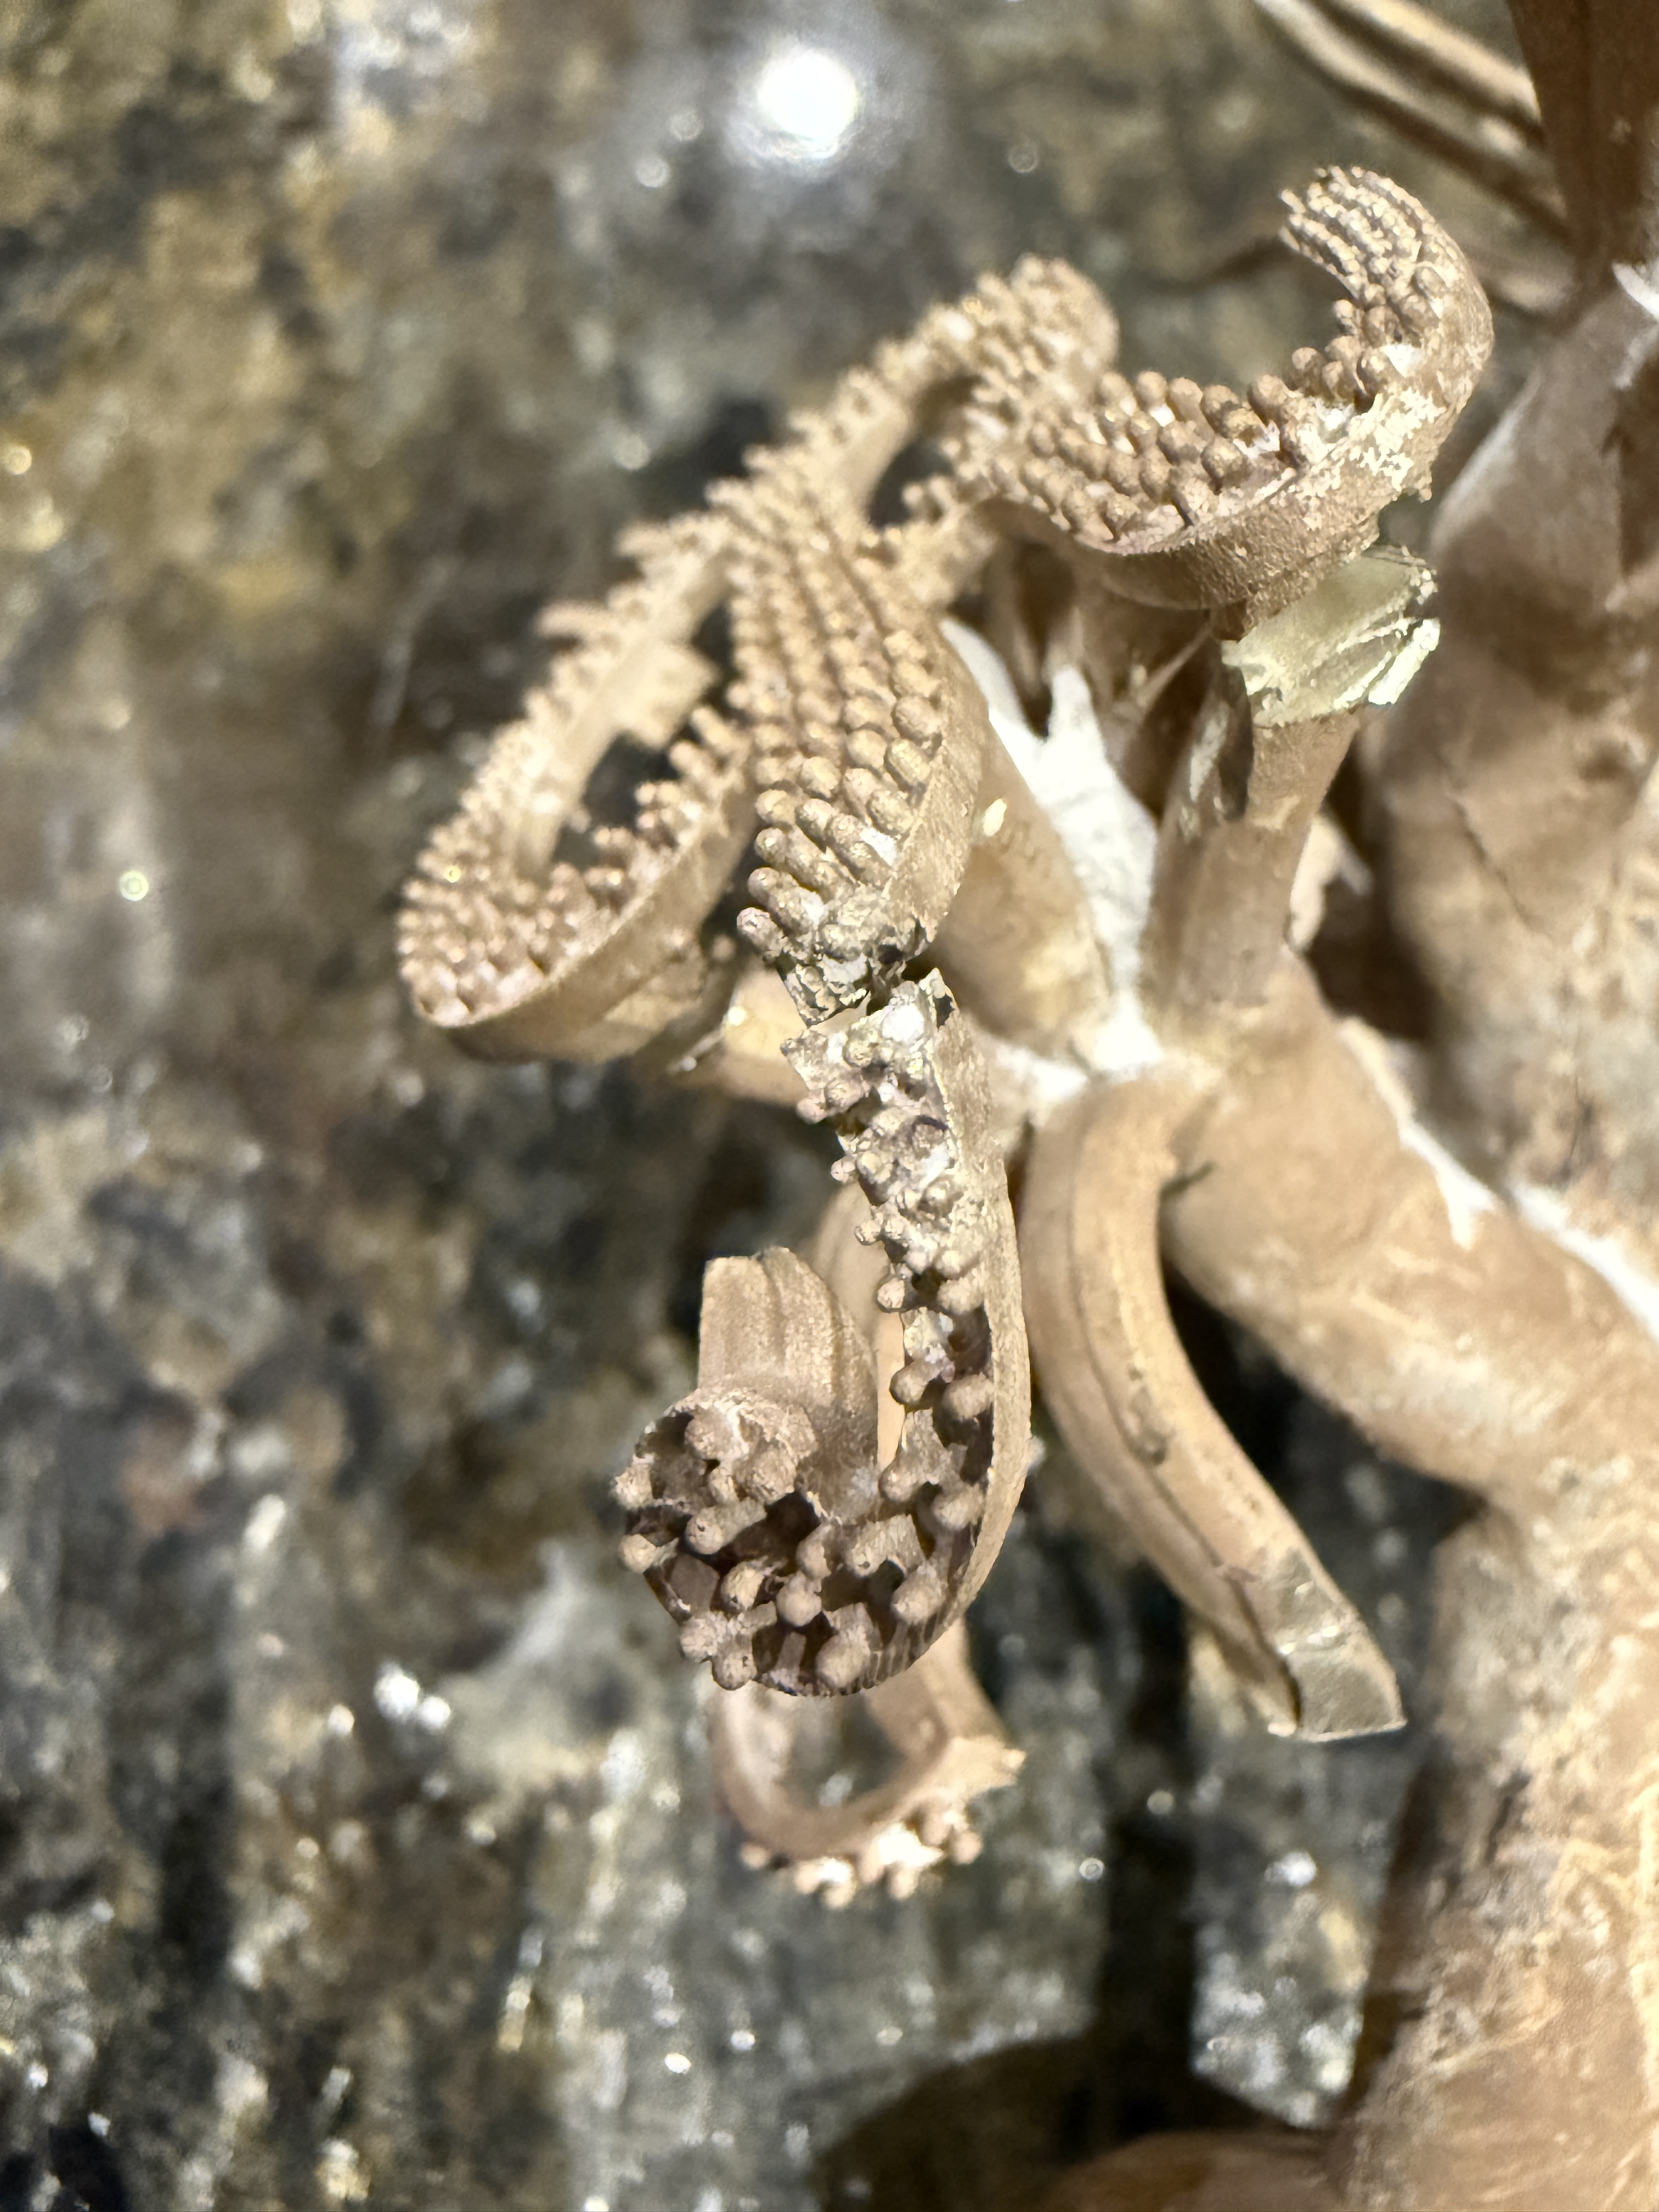
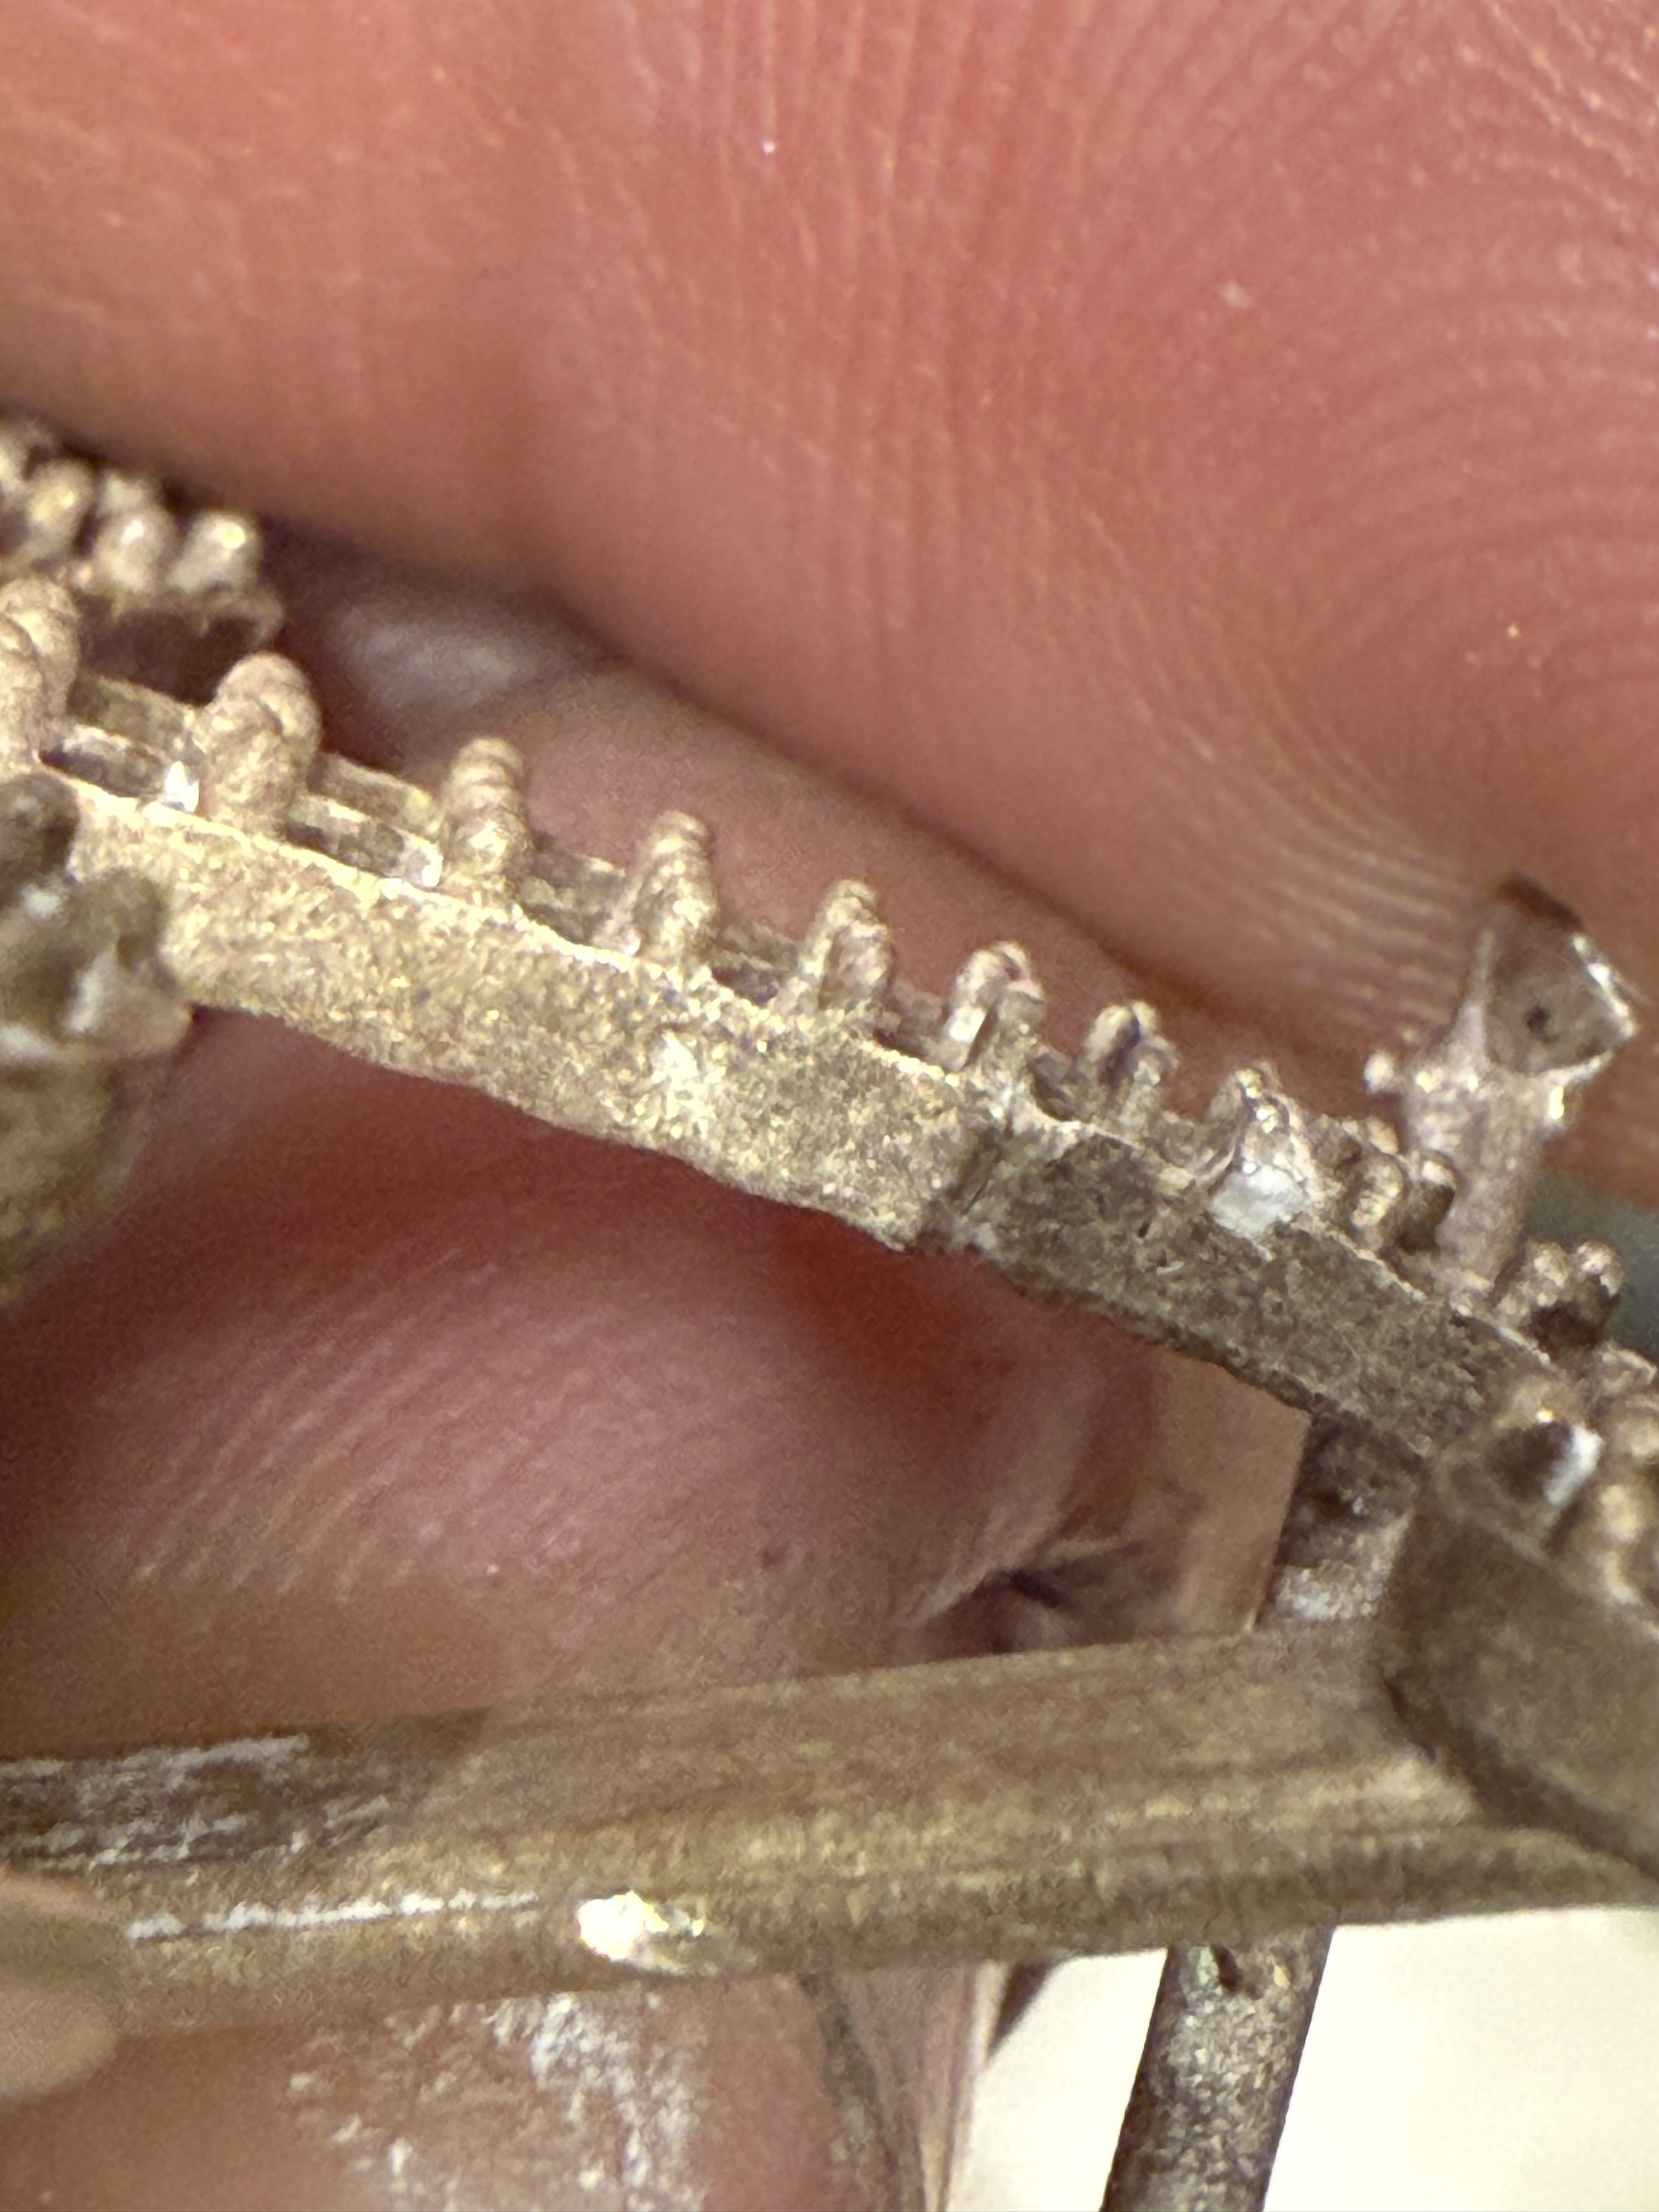
Mine is coming out WAY worse than that. I’d fall over if I saw a cast come out like that. I’ve included two pictures of the color from a cast that failed, but the color is the same even on good casts. My process is as follows
Castable 3d resin “applylabs castable cyan” cured thoroughly. Investment is R&R plasticast investment
3.5 hours at 392 1.5 hour ramp to 1350 Hold 1350 for 3.5 hours Come down to 950 flask temp over 30 mins and hold for 45 mins
My S88.925 silver was 60% old and 40% new as im not super topped up on silver, but I researched that I would just need to add more flux. The new 925 silver was silver I alloyed myself using pure shot with S88 Alloy. I brought the mix of silver up to 1030C as the Pre Alloy temp and stirred. I then brought it down to 1010C to pour. I poured it in and then waited about 8-10 minutes to quench and blow out investment.
I’m not familiar with your resin, but I don’t believe it should be an issue. We use Ultravest, though I don’t think the investment material plays a significant role—I’ve also used Plasticast with the same results, though it’s more difficult to remove from the flask.
Most castable resins recommend a burnout temperature of 1350°F, including the one we use. However, our burnout schedule for 4" x 8" or 9" flasks (up to three at a time) is as follows, with slight adjustments if we add more than three flasks. All ramps are set to full:
Ramp to 350°F for 30 minutes
Ramp to 700°F and hold for 1.5 hours
Ramp to 1325°F and hold for 2.5 hours (we don’t go to 1350°F, as it’s not necessary for our resin)
Lower to 1060°F (960°F is also fine) and hold until casting
We cast at a slightly higher temperature since our flasks contain a variety of styles, including pendants, heads, etc. Additionally, we allow the flask to hold at 1060°F for at least two hours before casting. We’ve found that shortening this step can increase surface imperfections.
Based on what I see, it seems like you may be overheating your metal or reusing too much of it. If you’ve experienced the same results when using fresh metal, I would lean toward the metal temperature being a little too high and burning off too much of the deox alloy. Hope this helps.
Sounds great I’m gonna go ahead and try that. I think it’s gonna be playing with variables untill I get it right. Thank you so much I’ll try the temperature of the metal first