Okay, I just went for a long bike ride and couldn’t get your post out of my head. I do my best thinking on my bike.
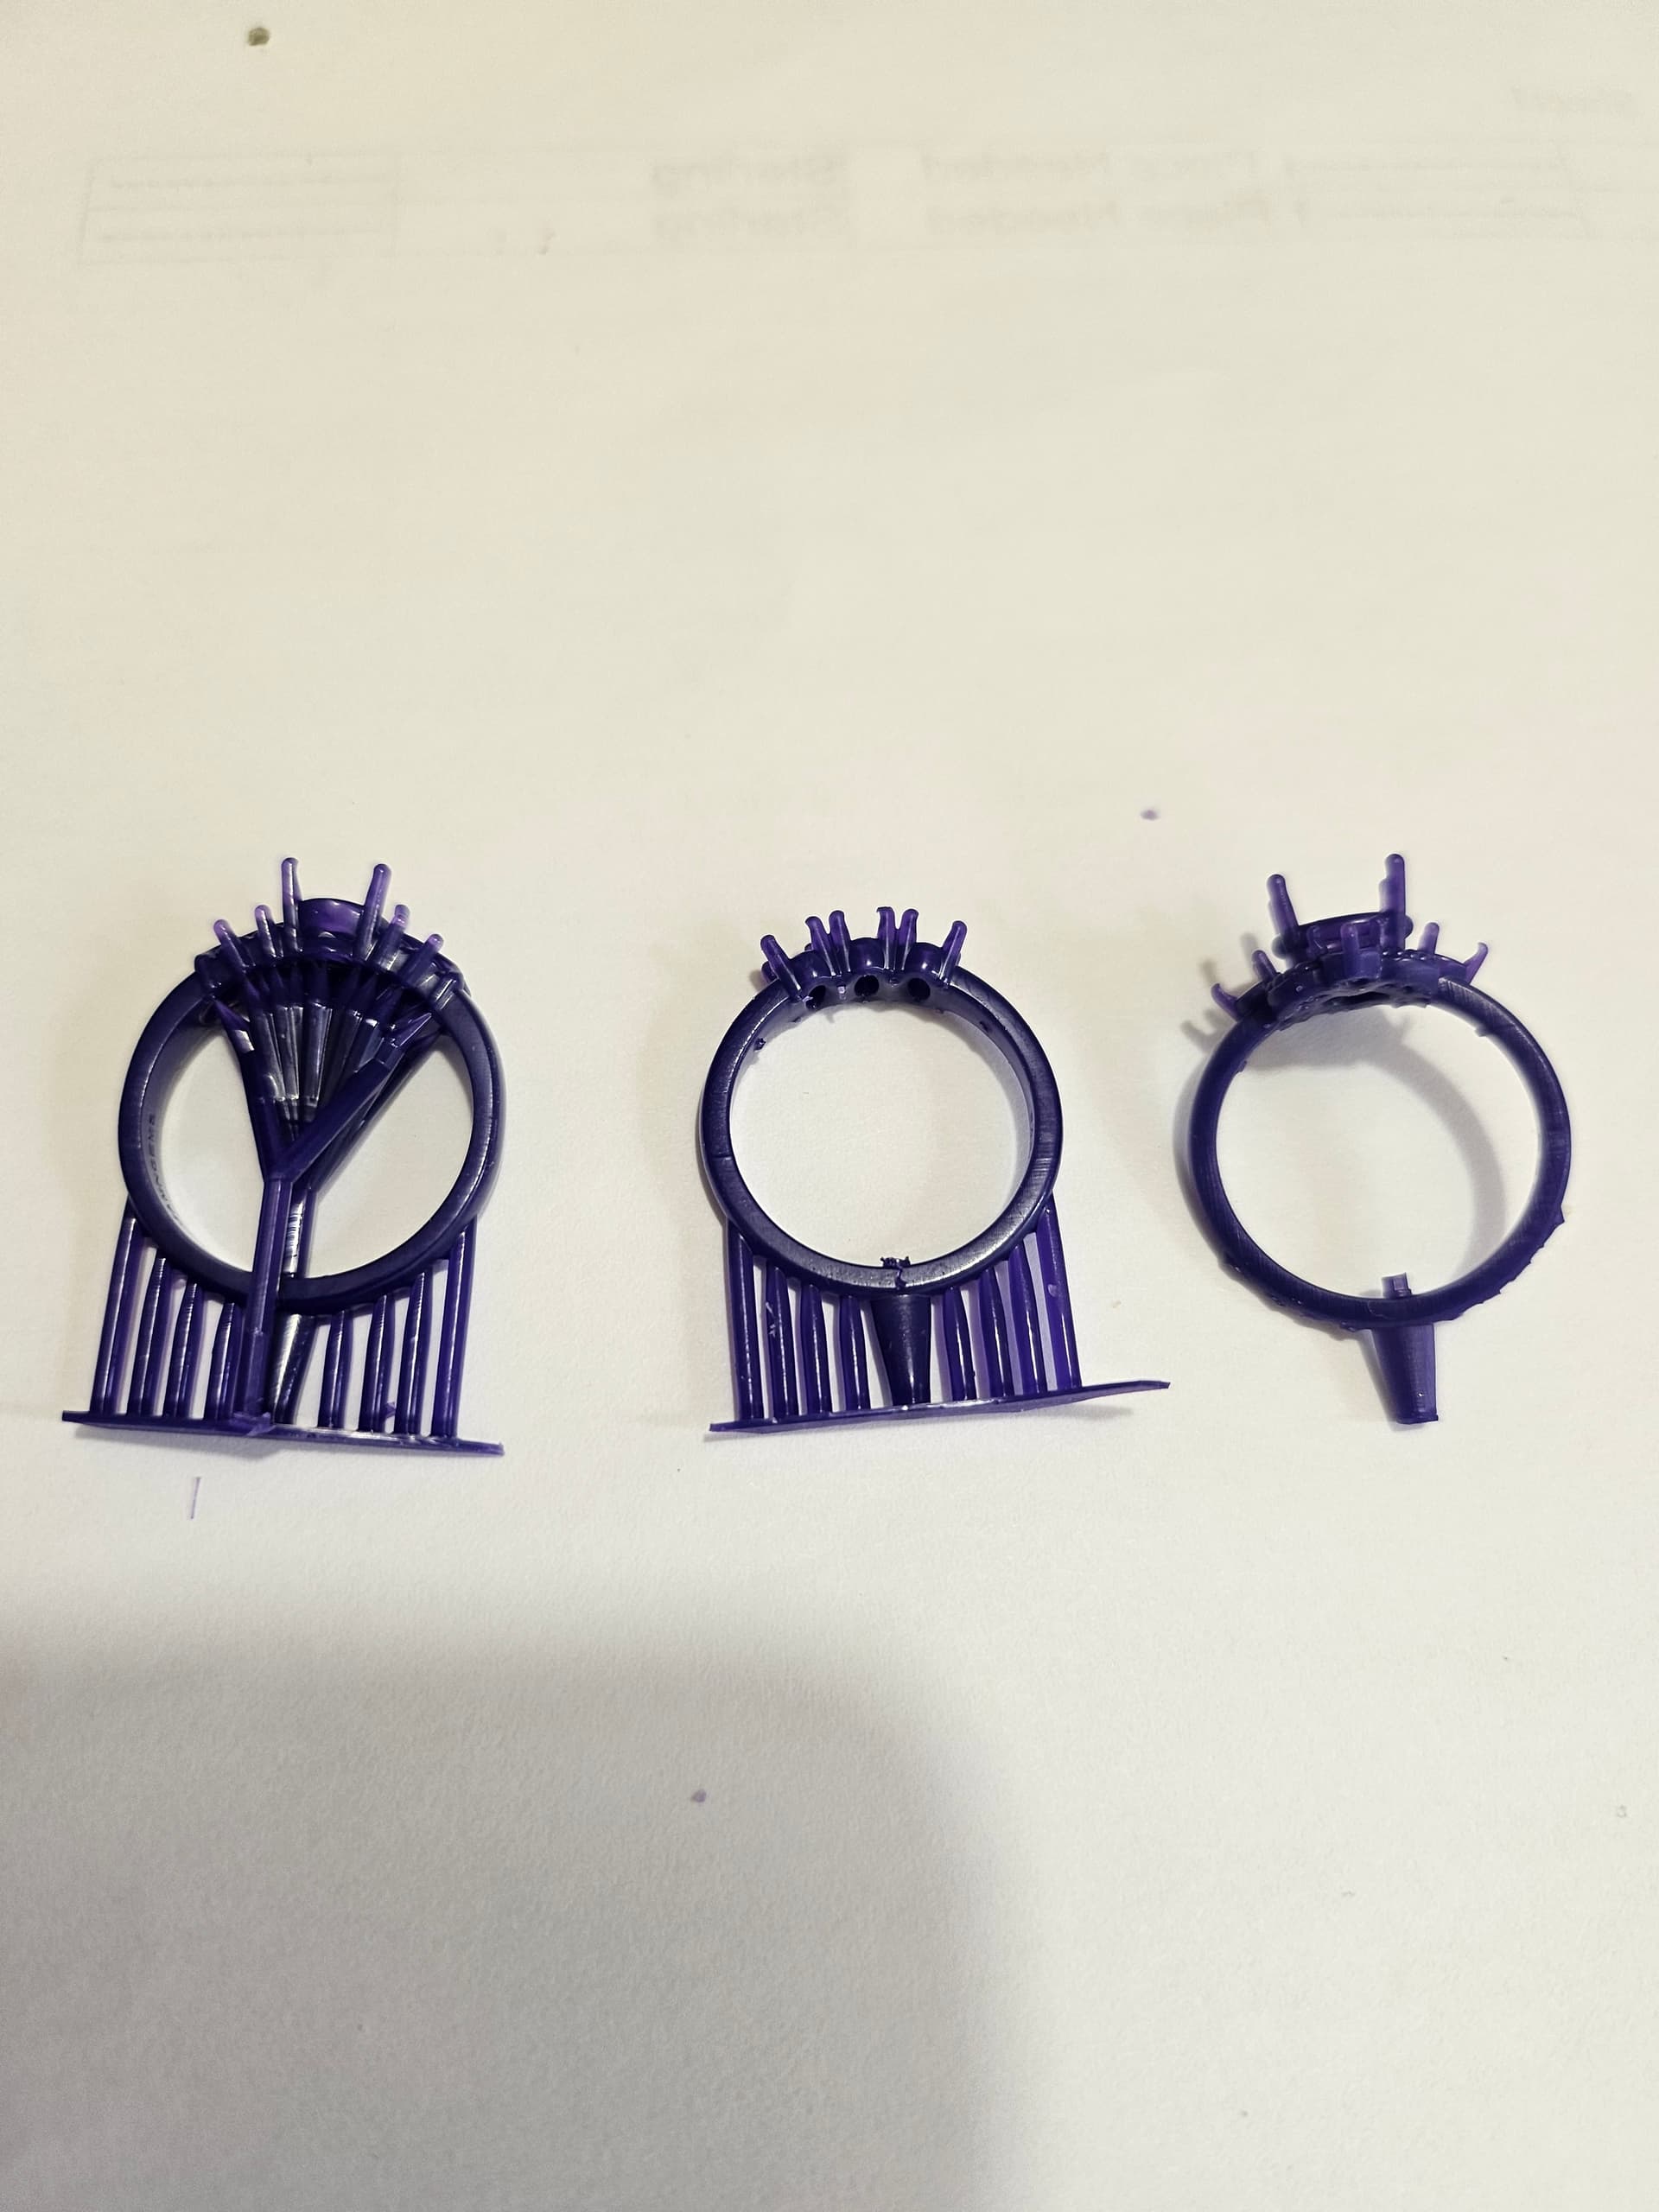
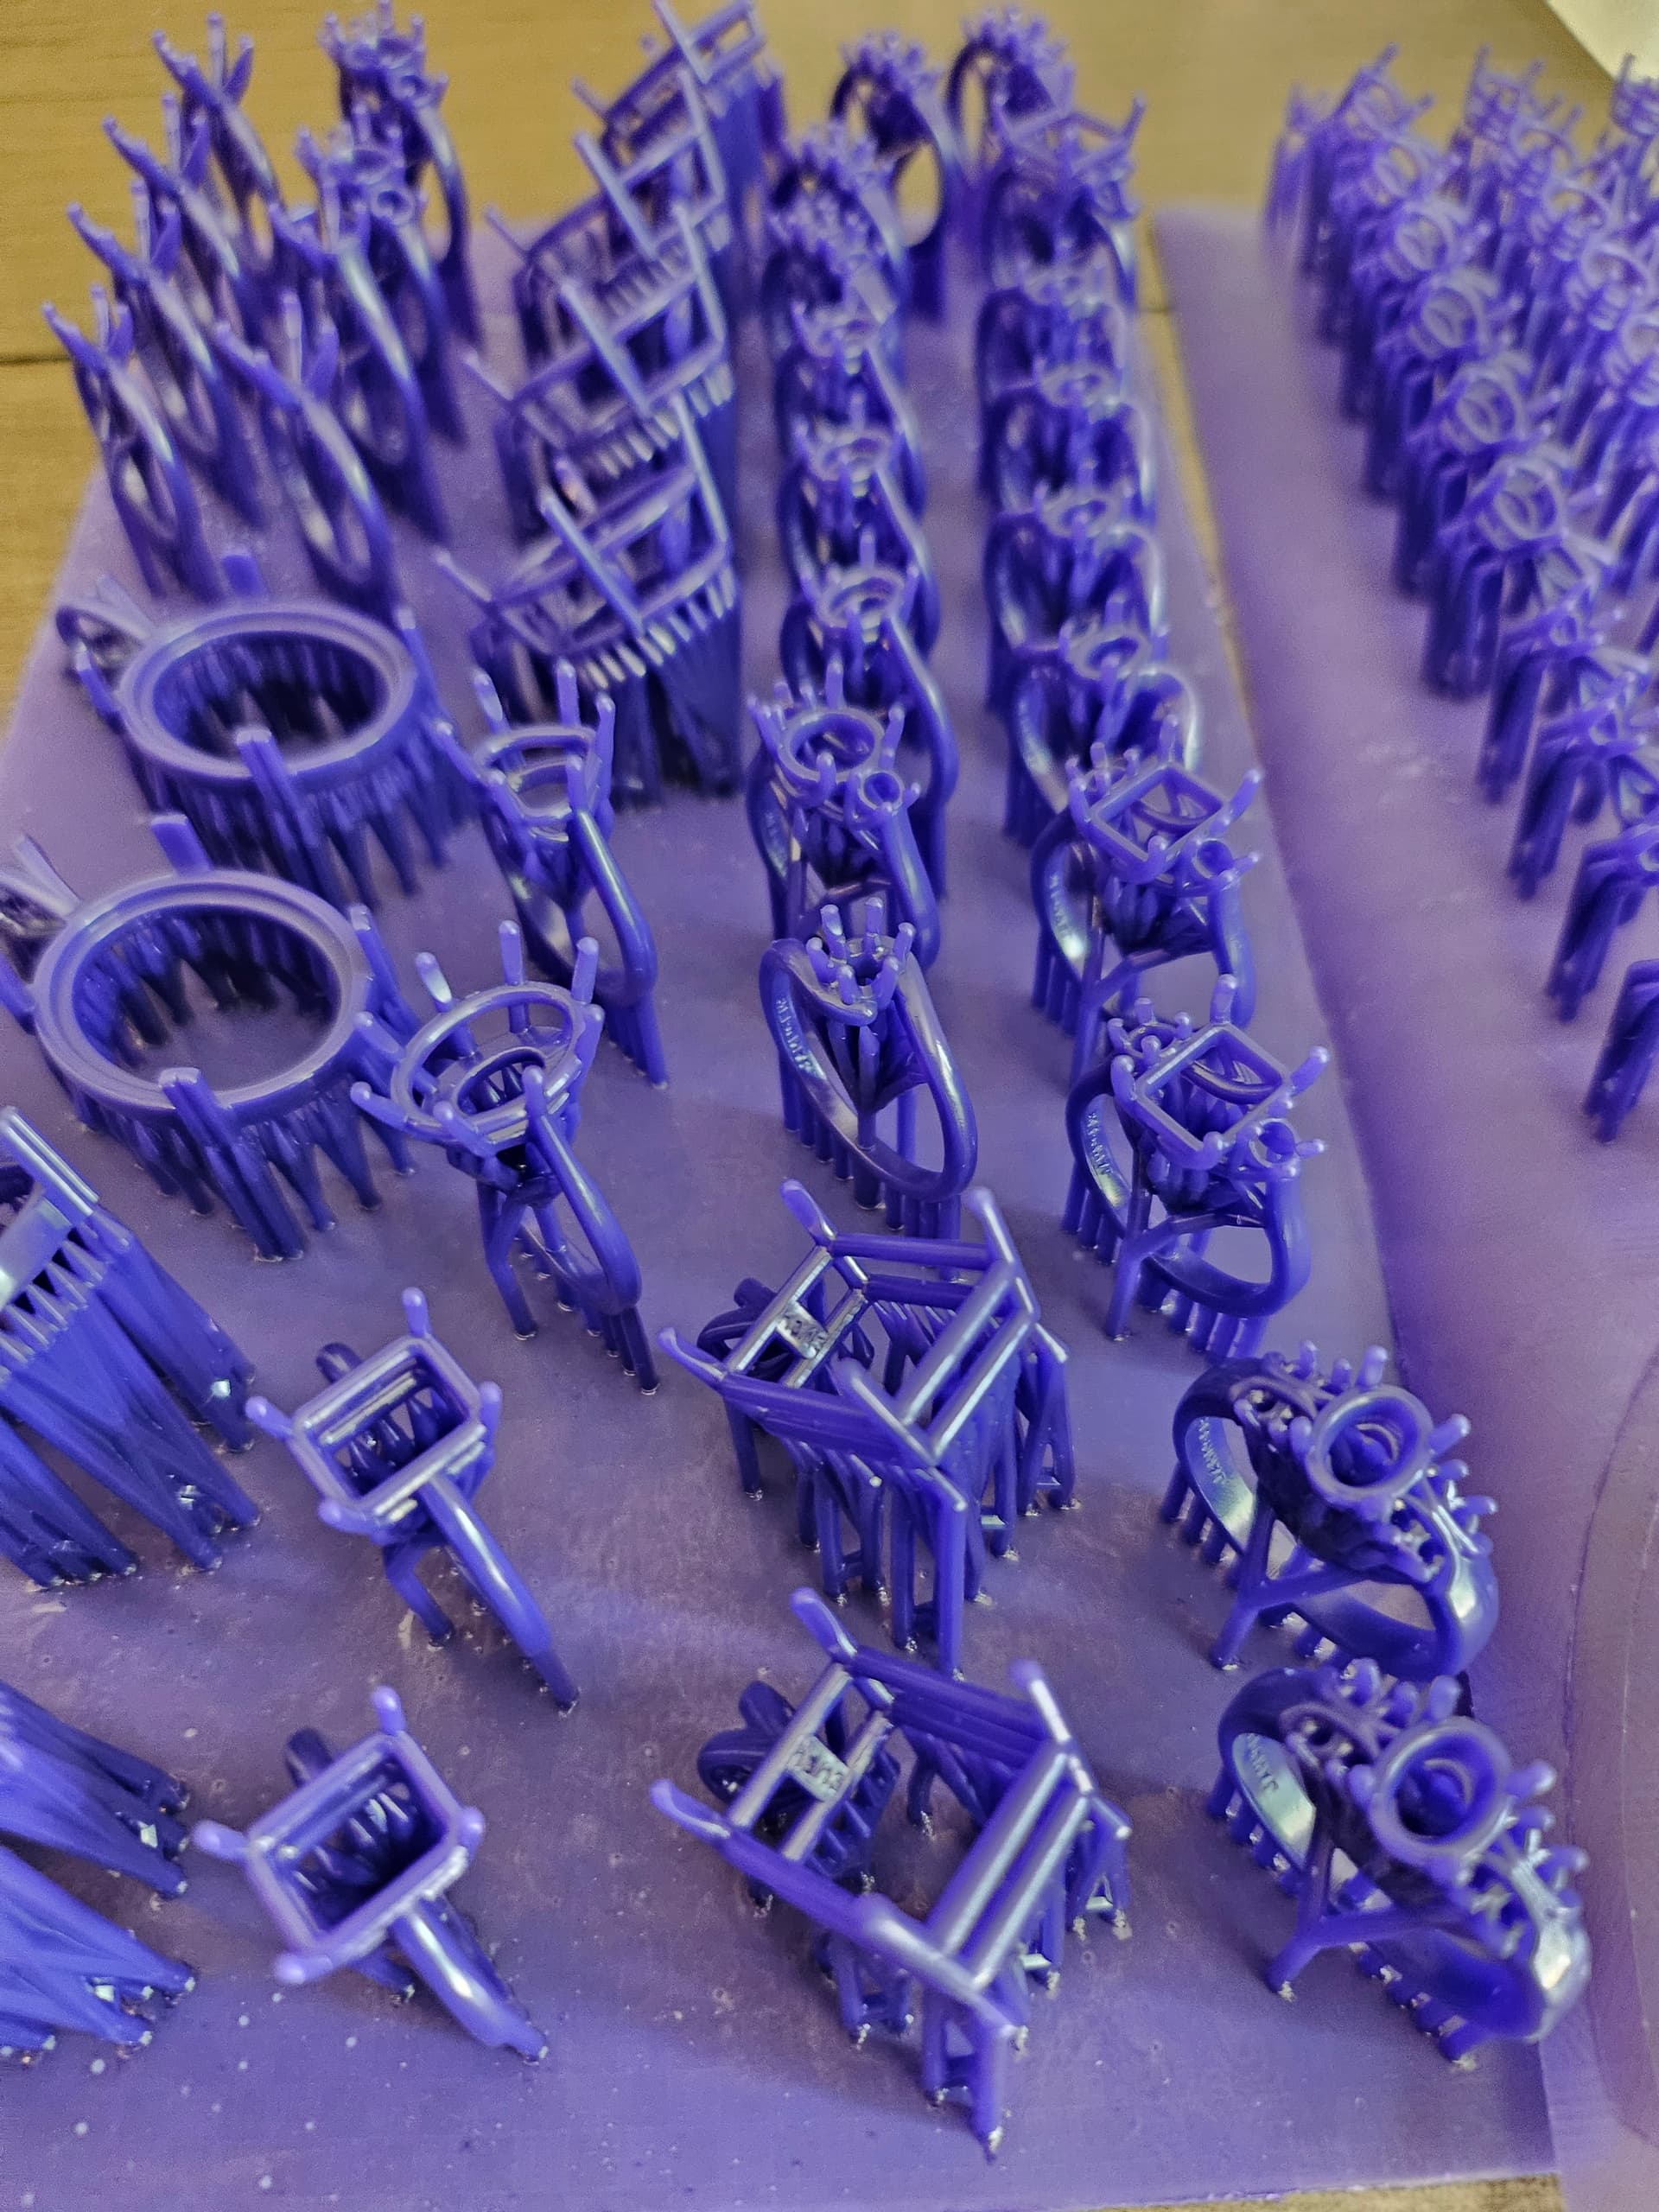
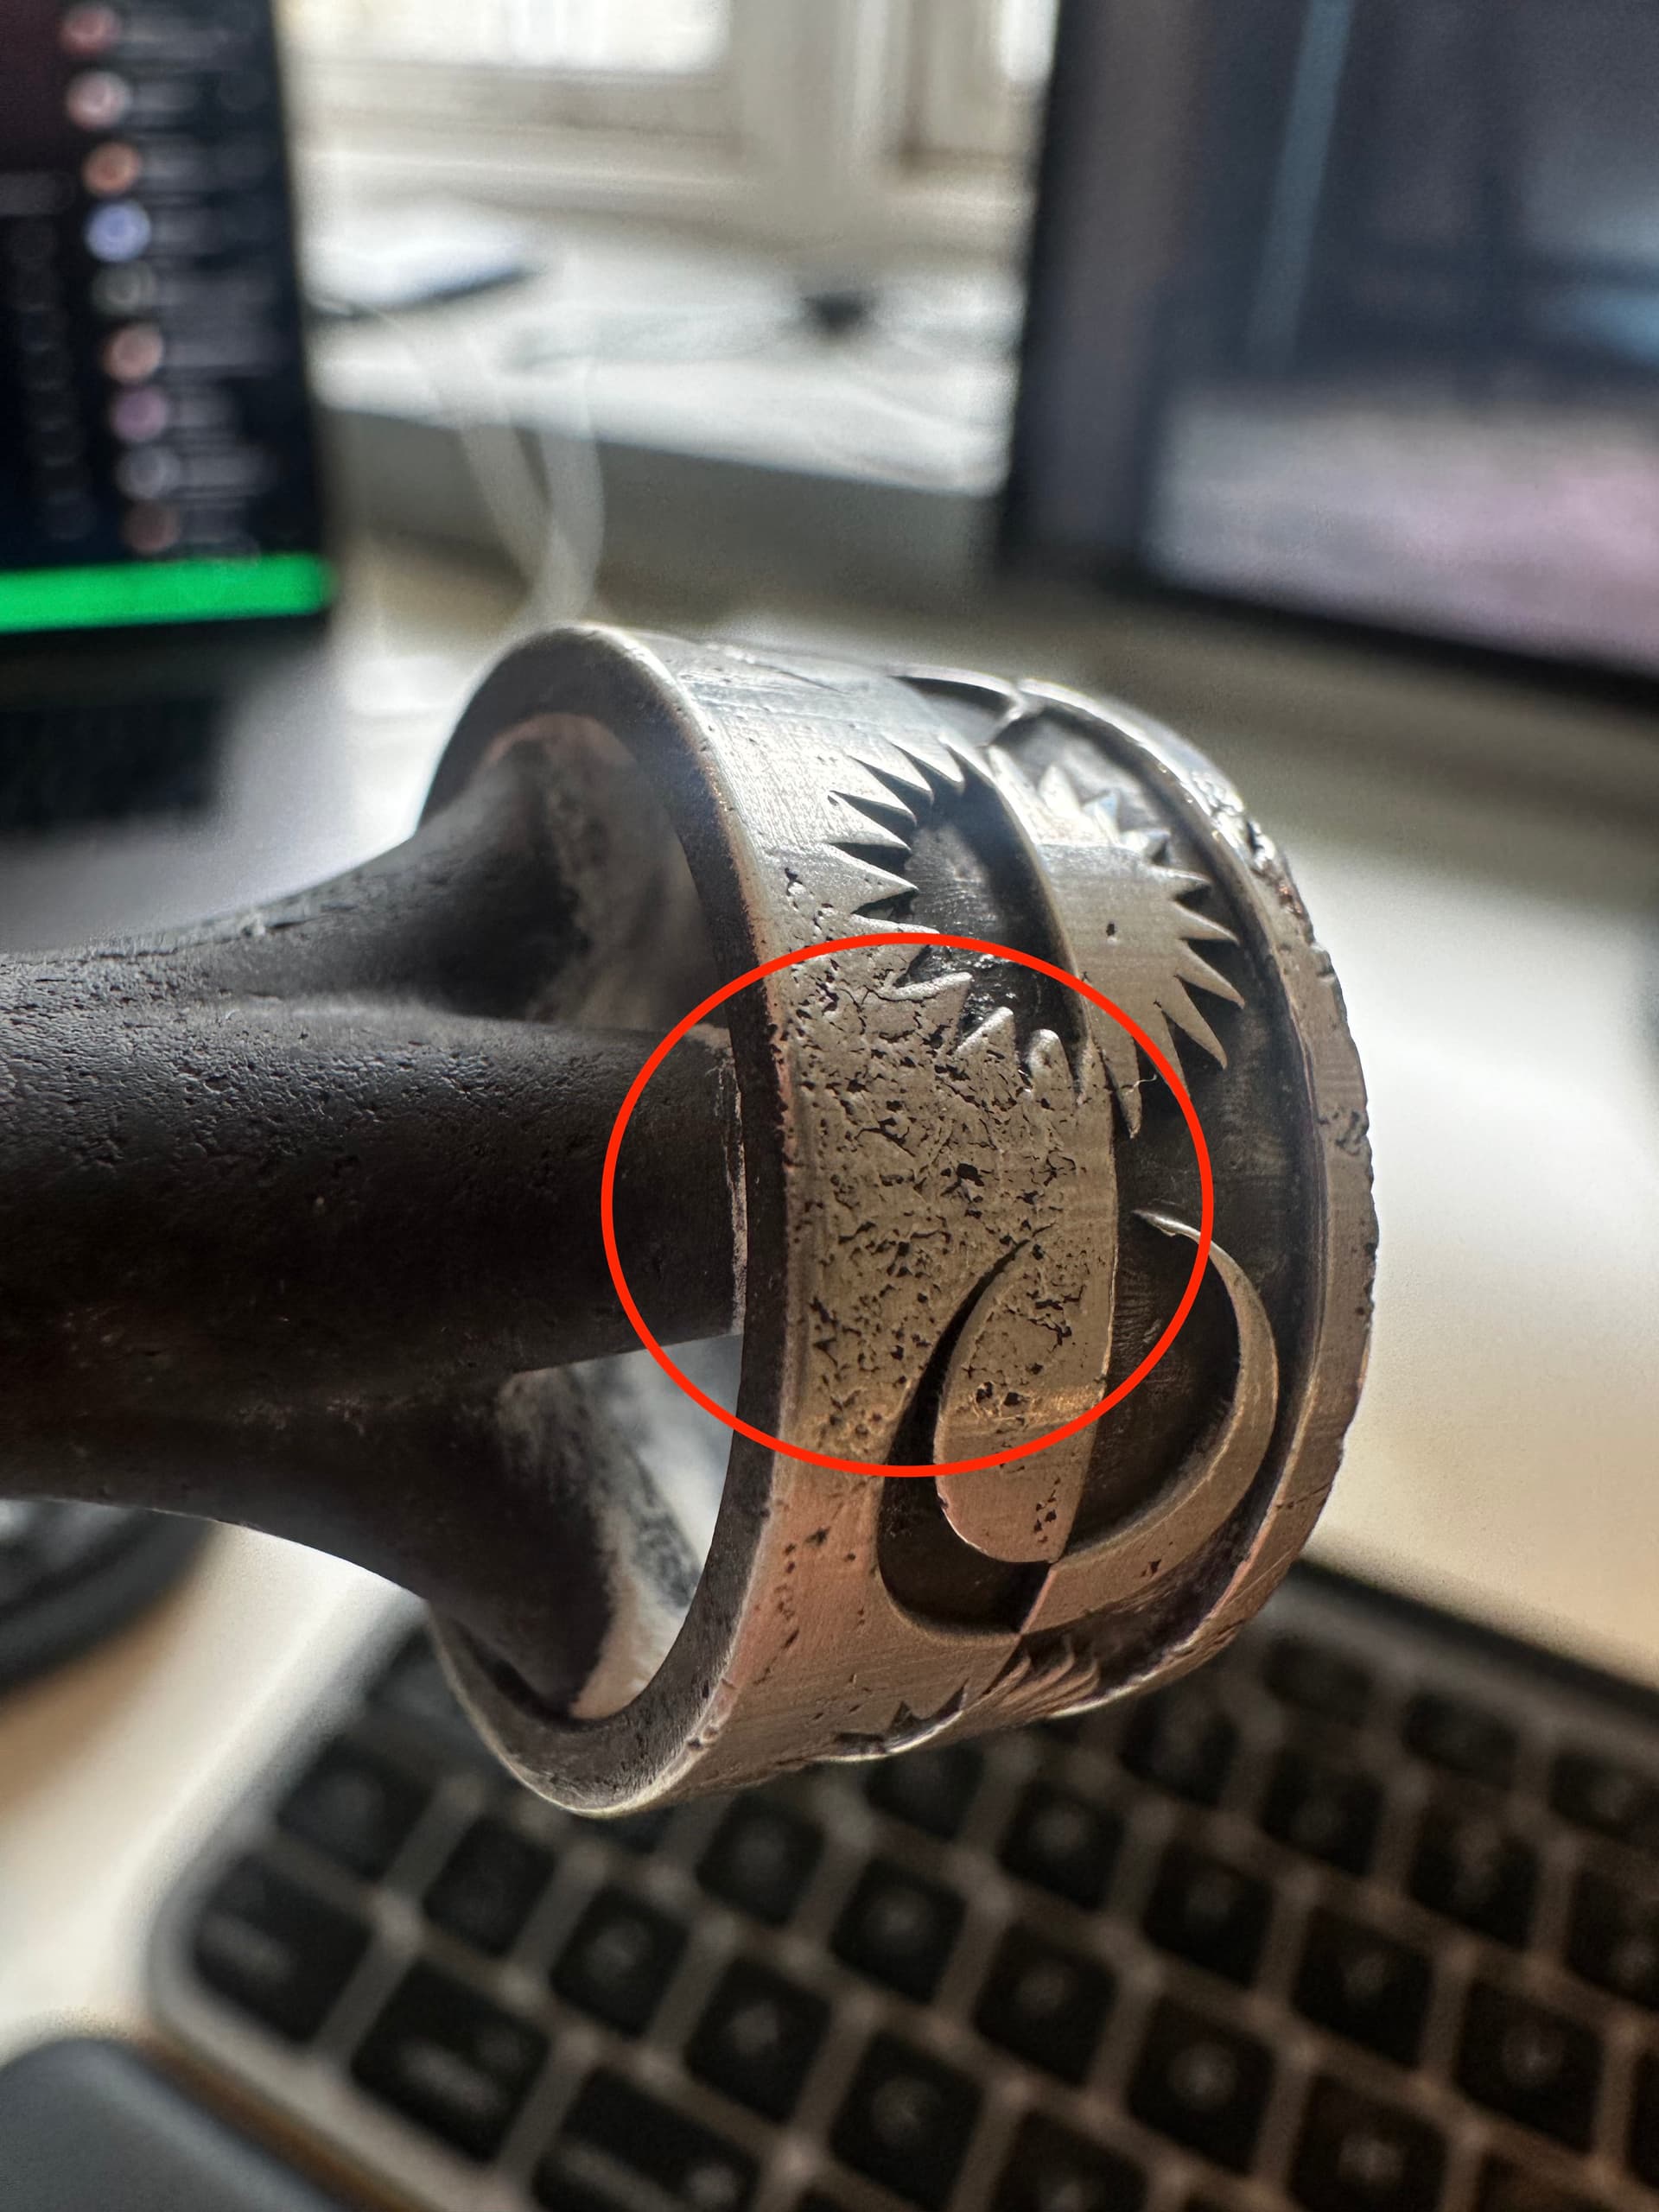
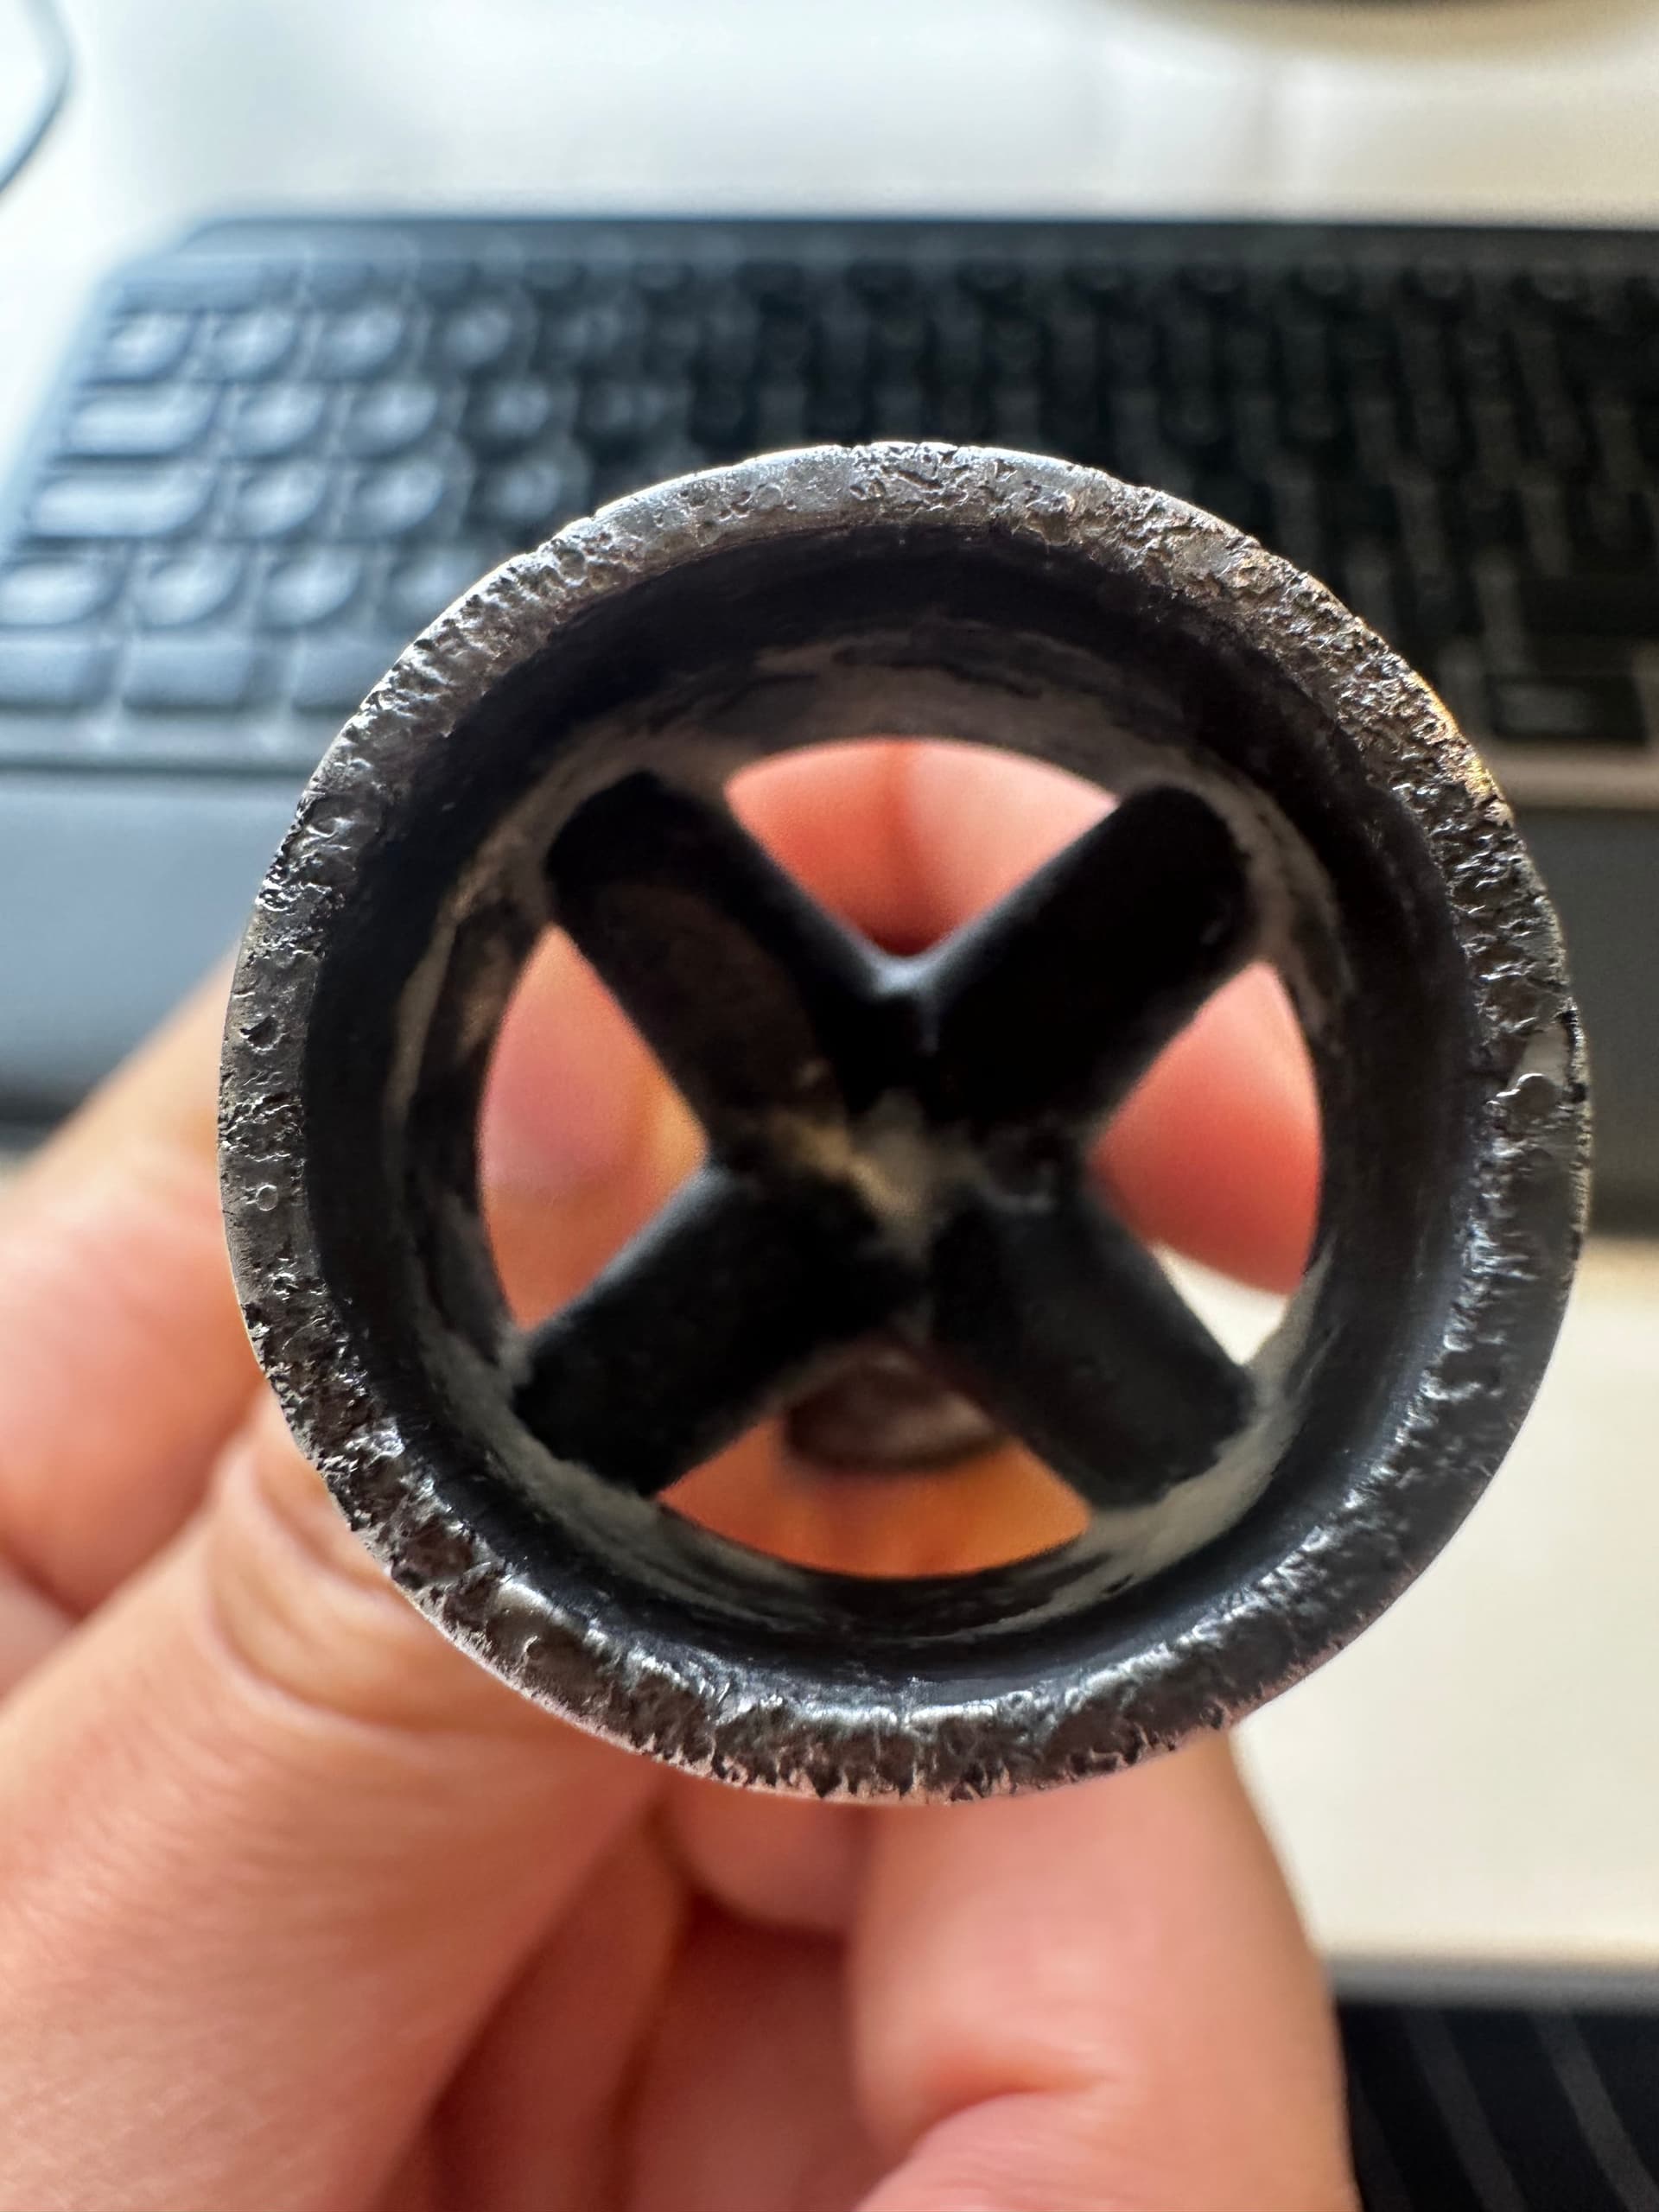
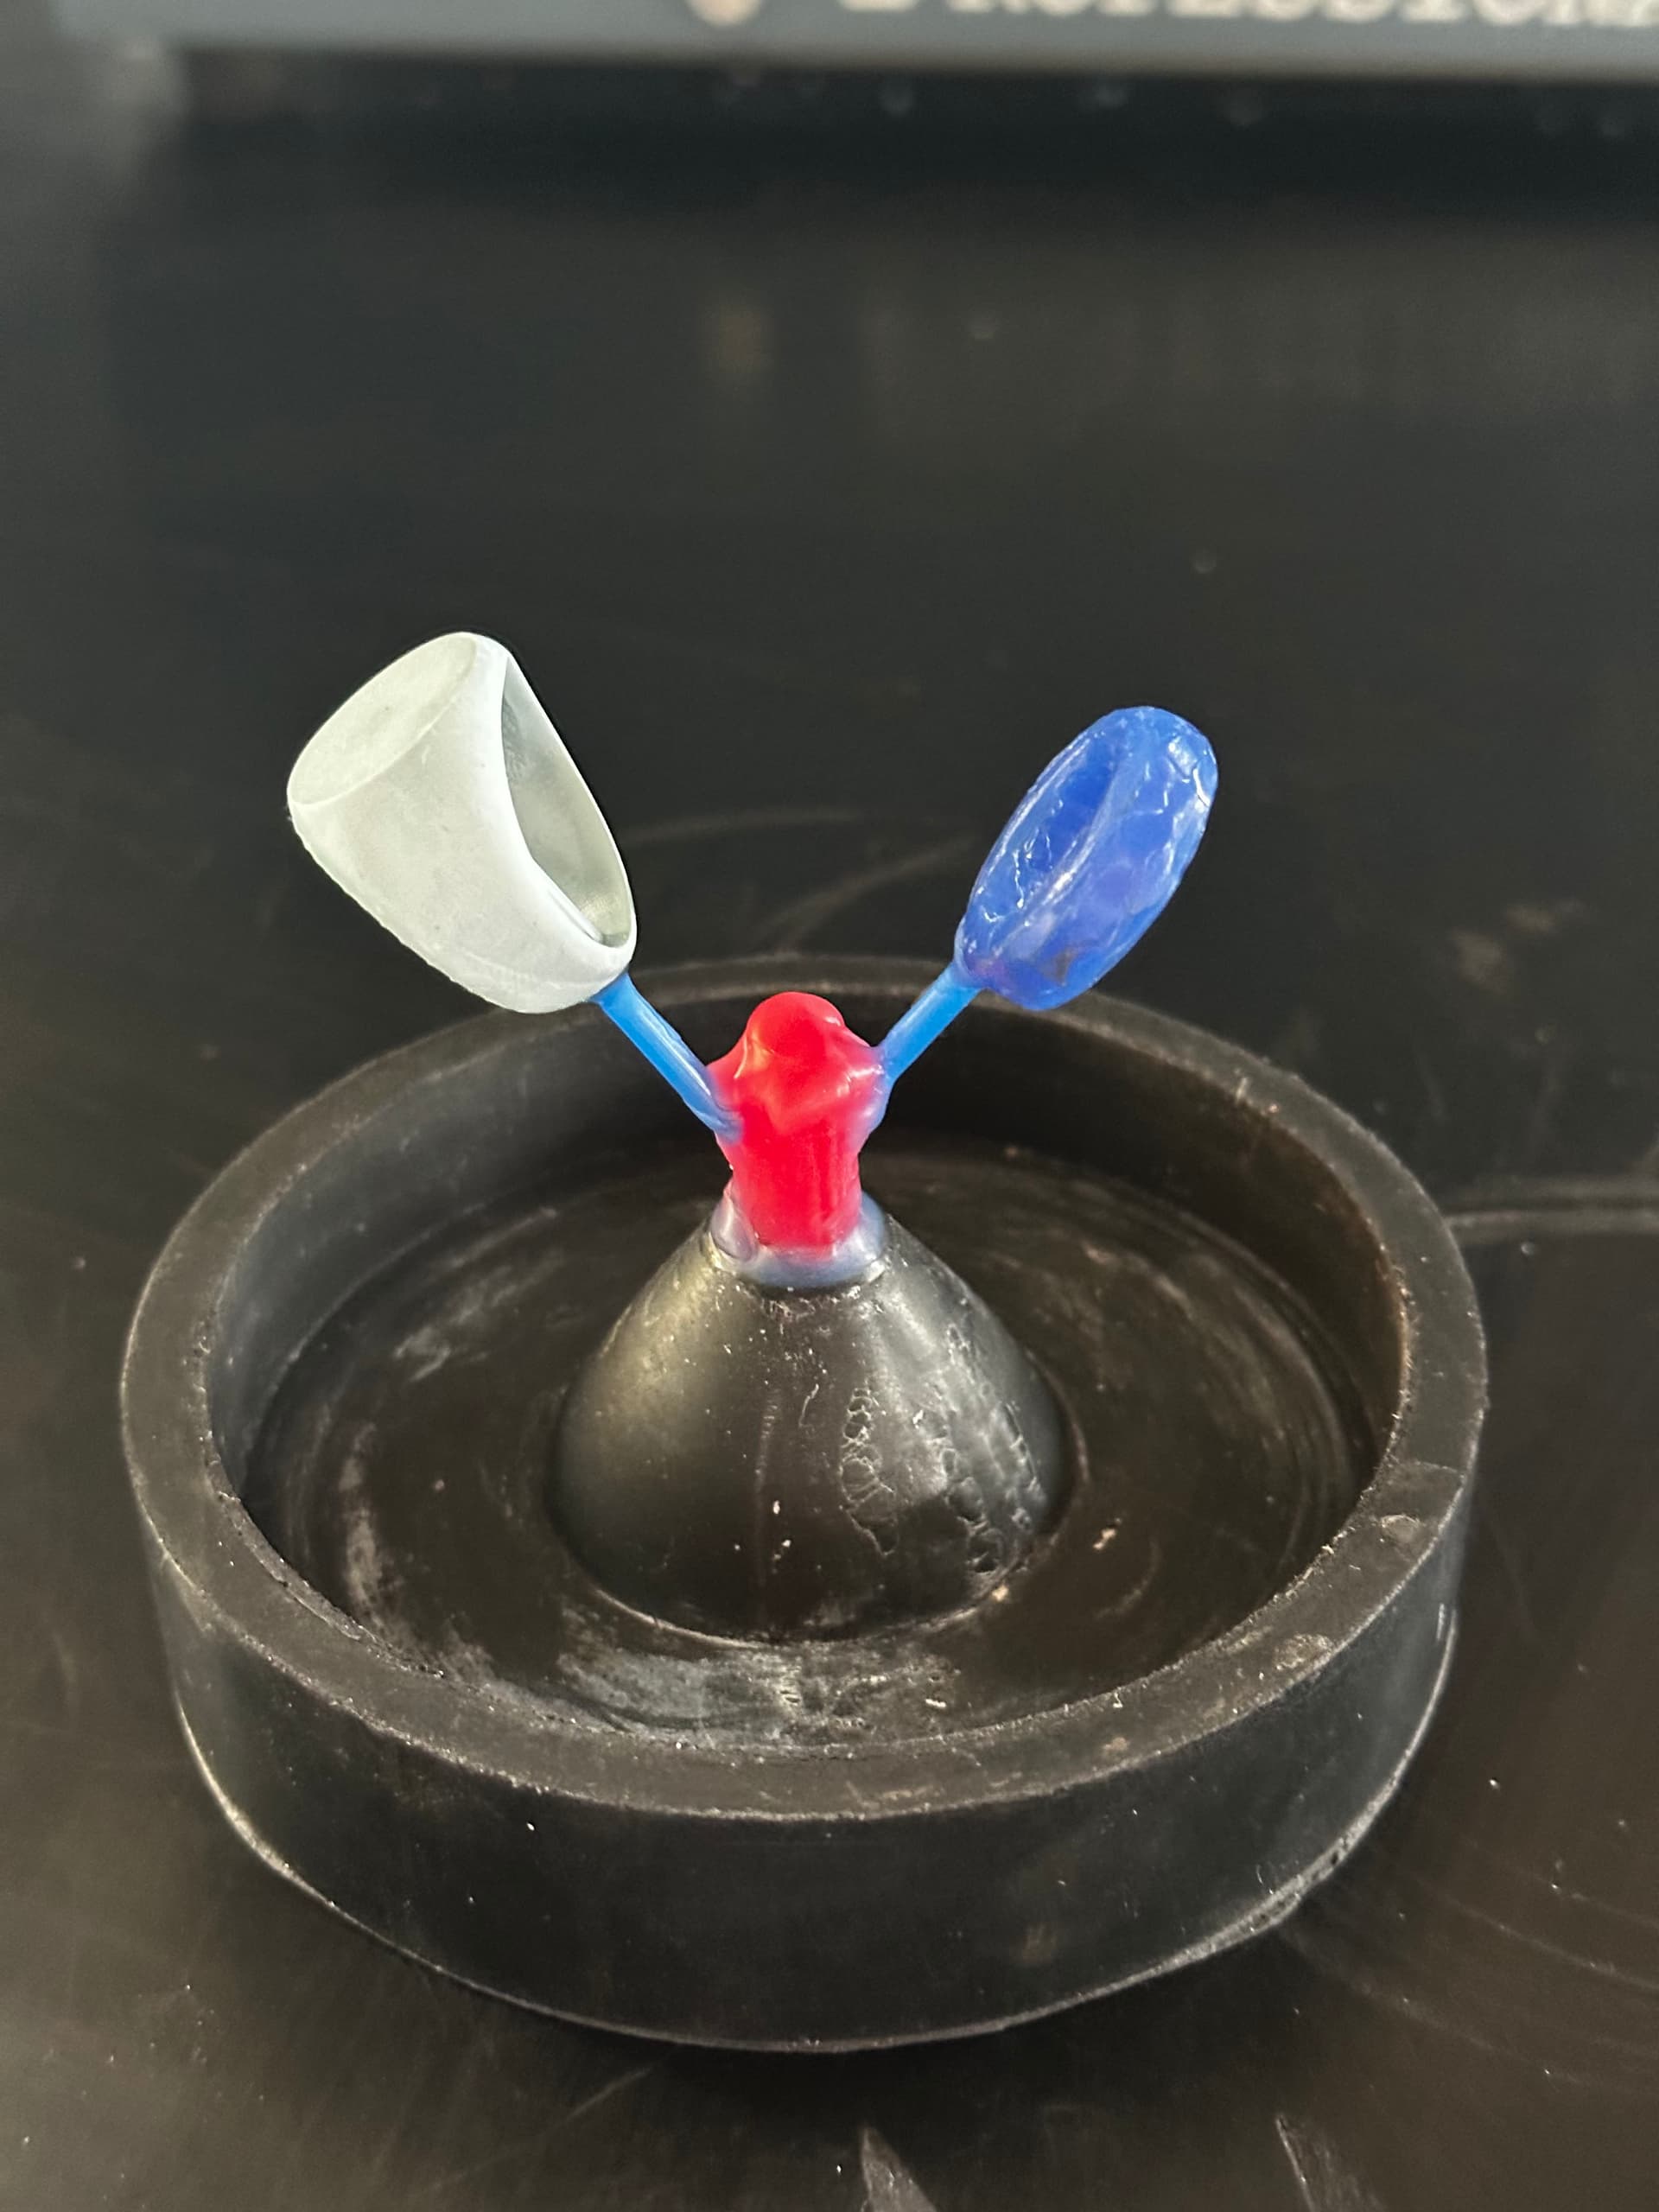
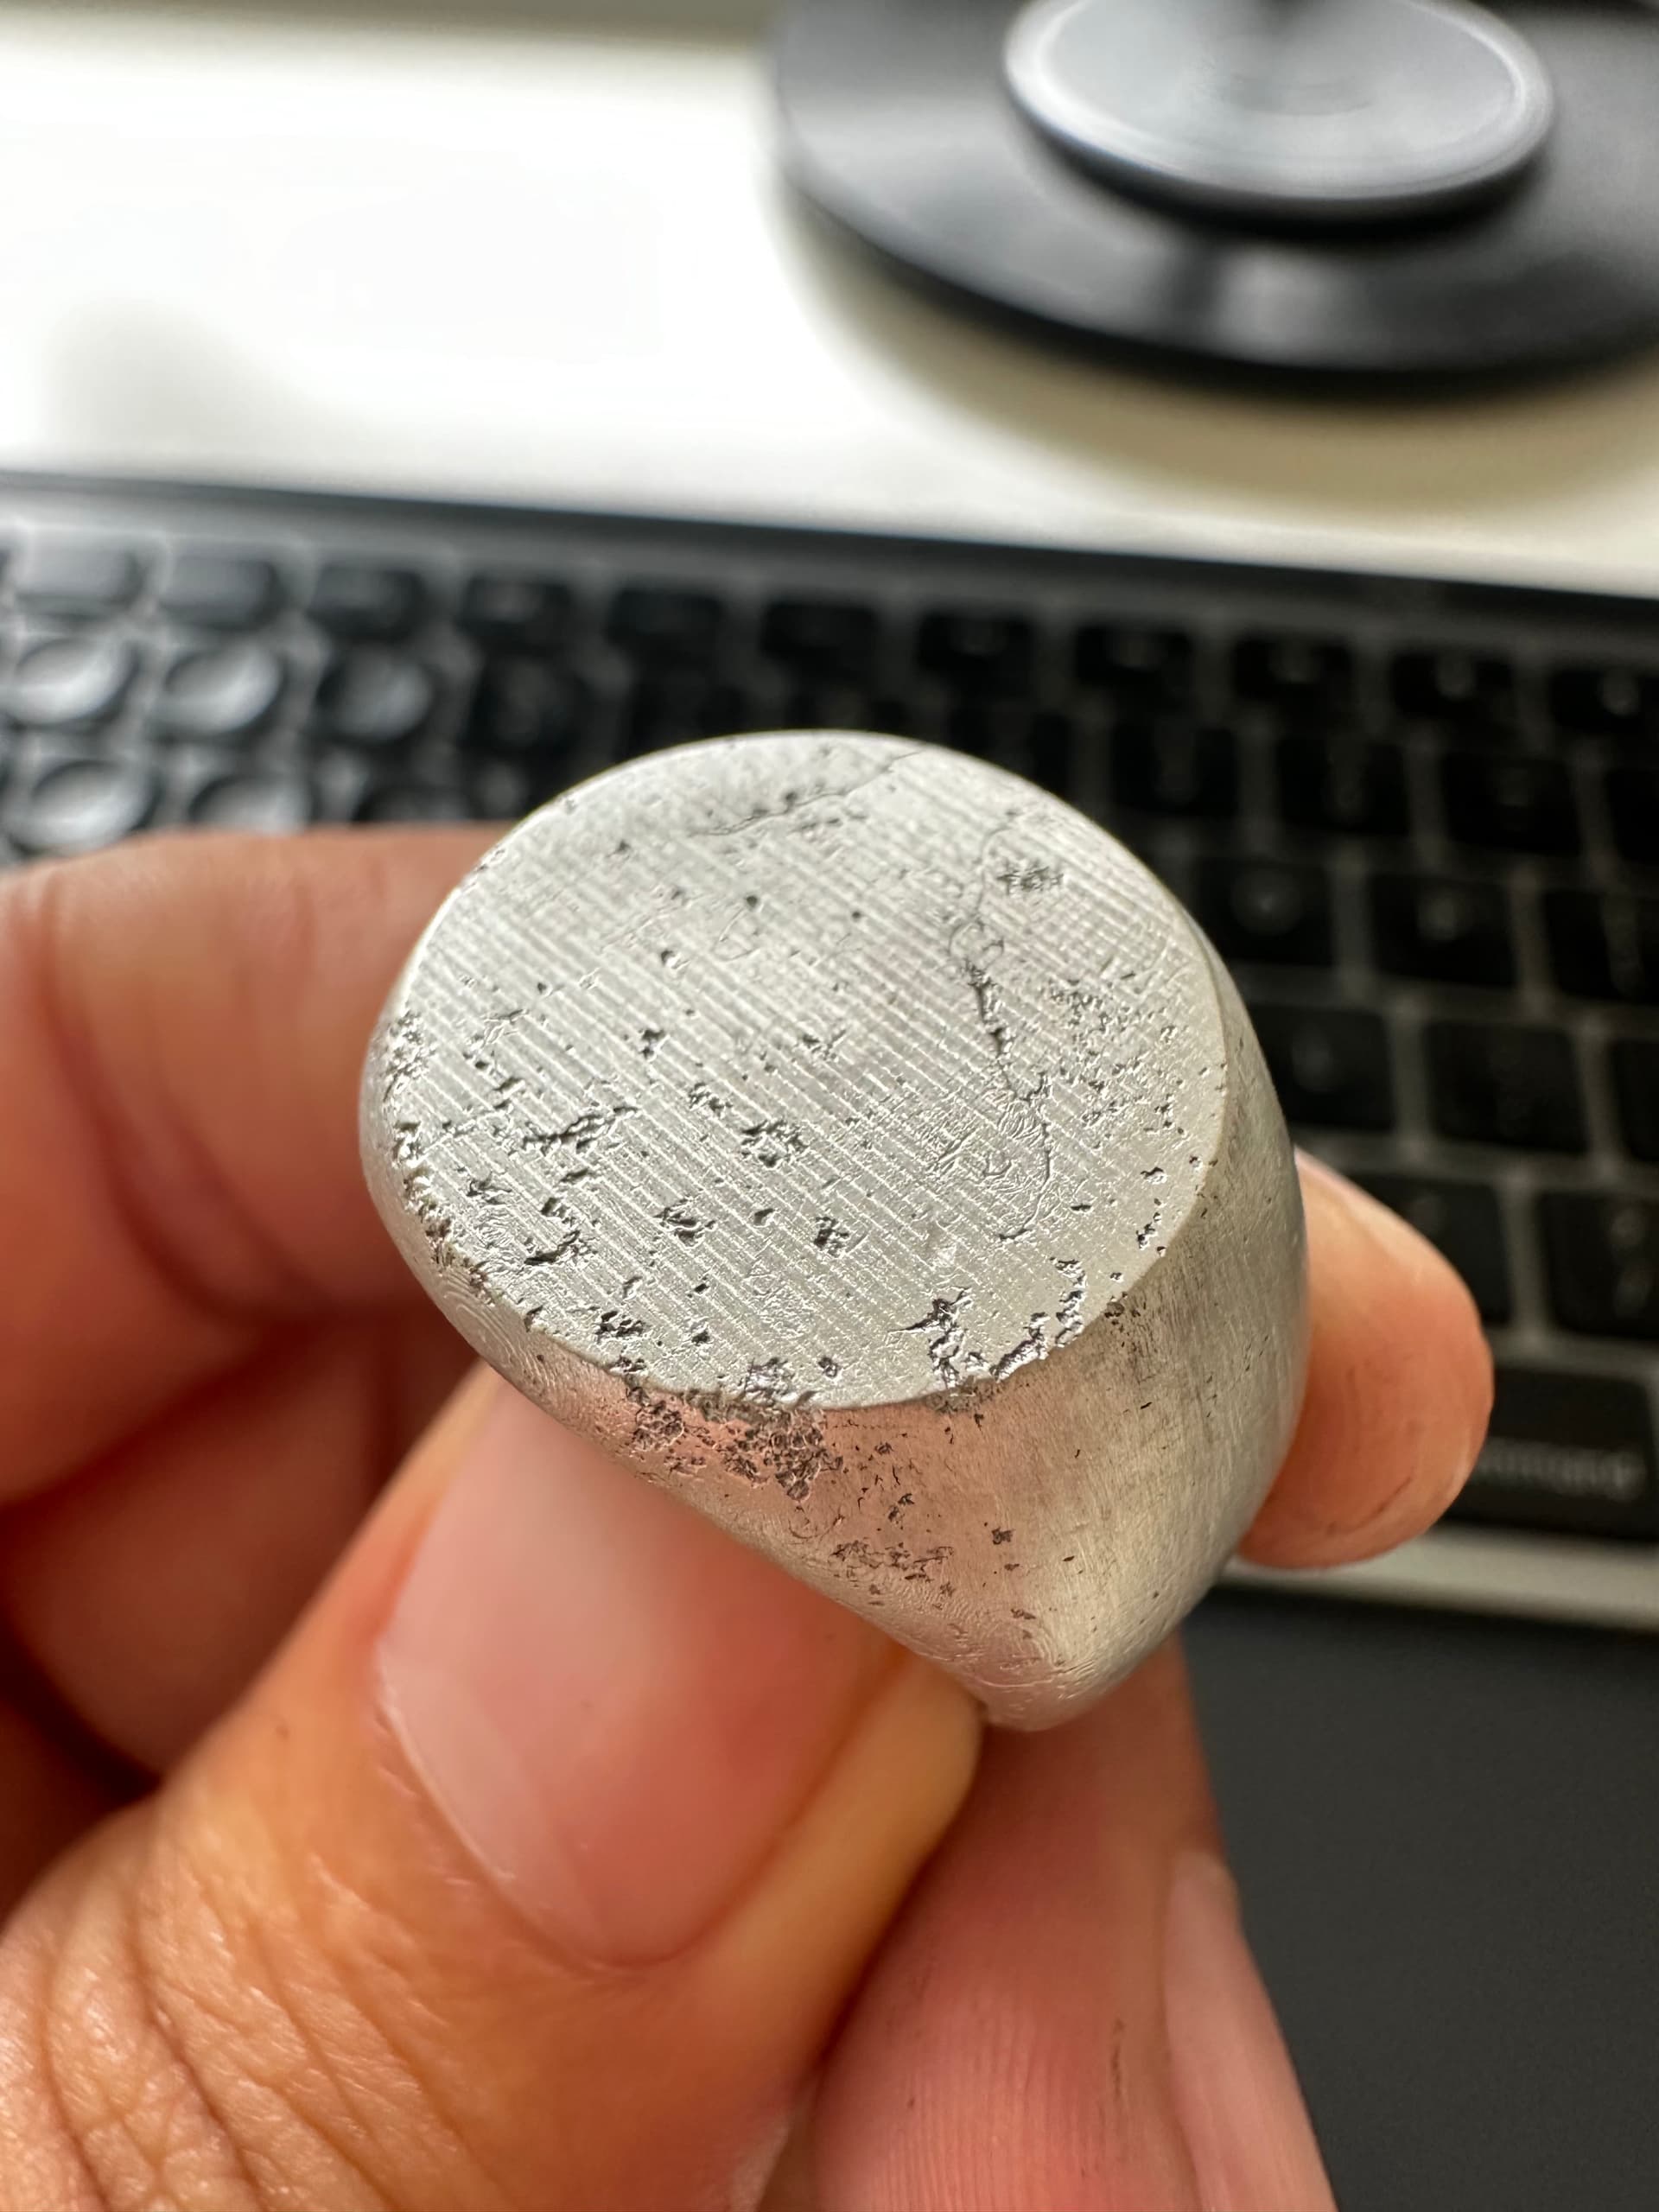
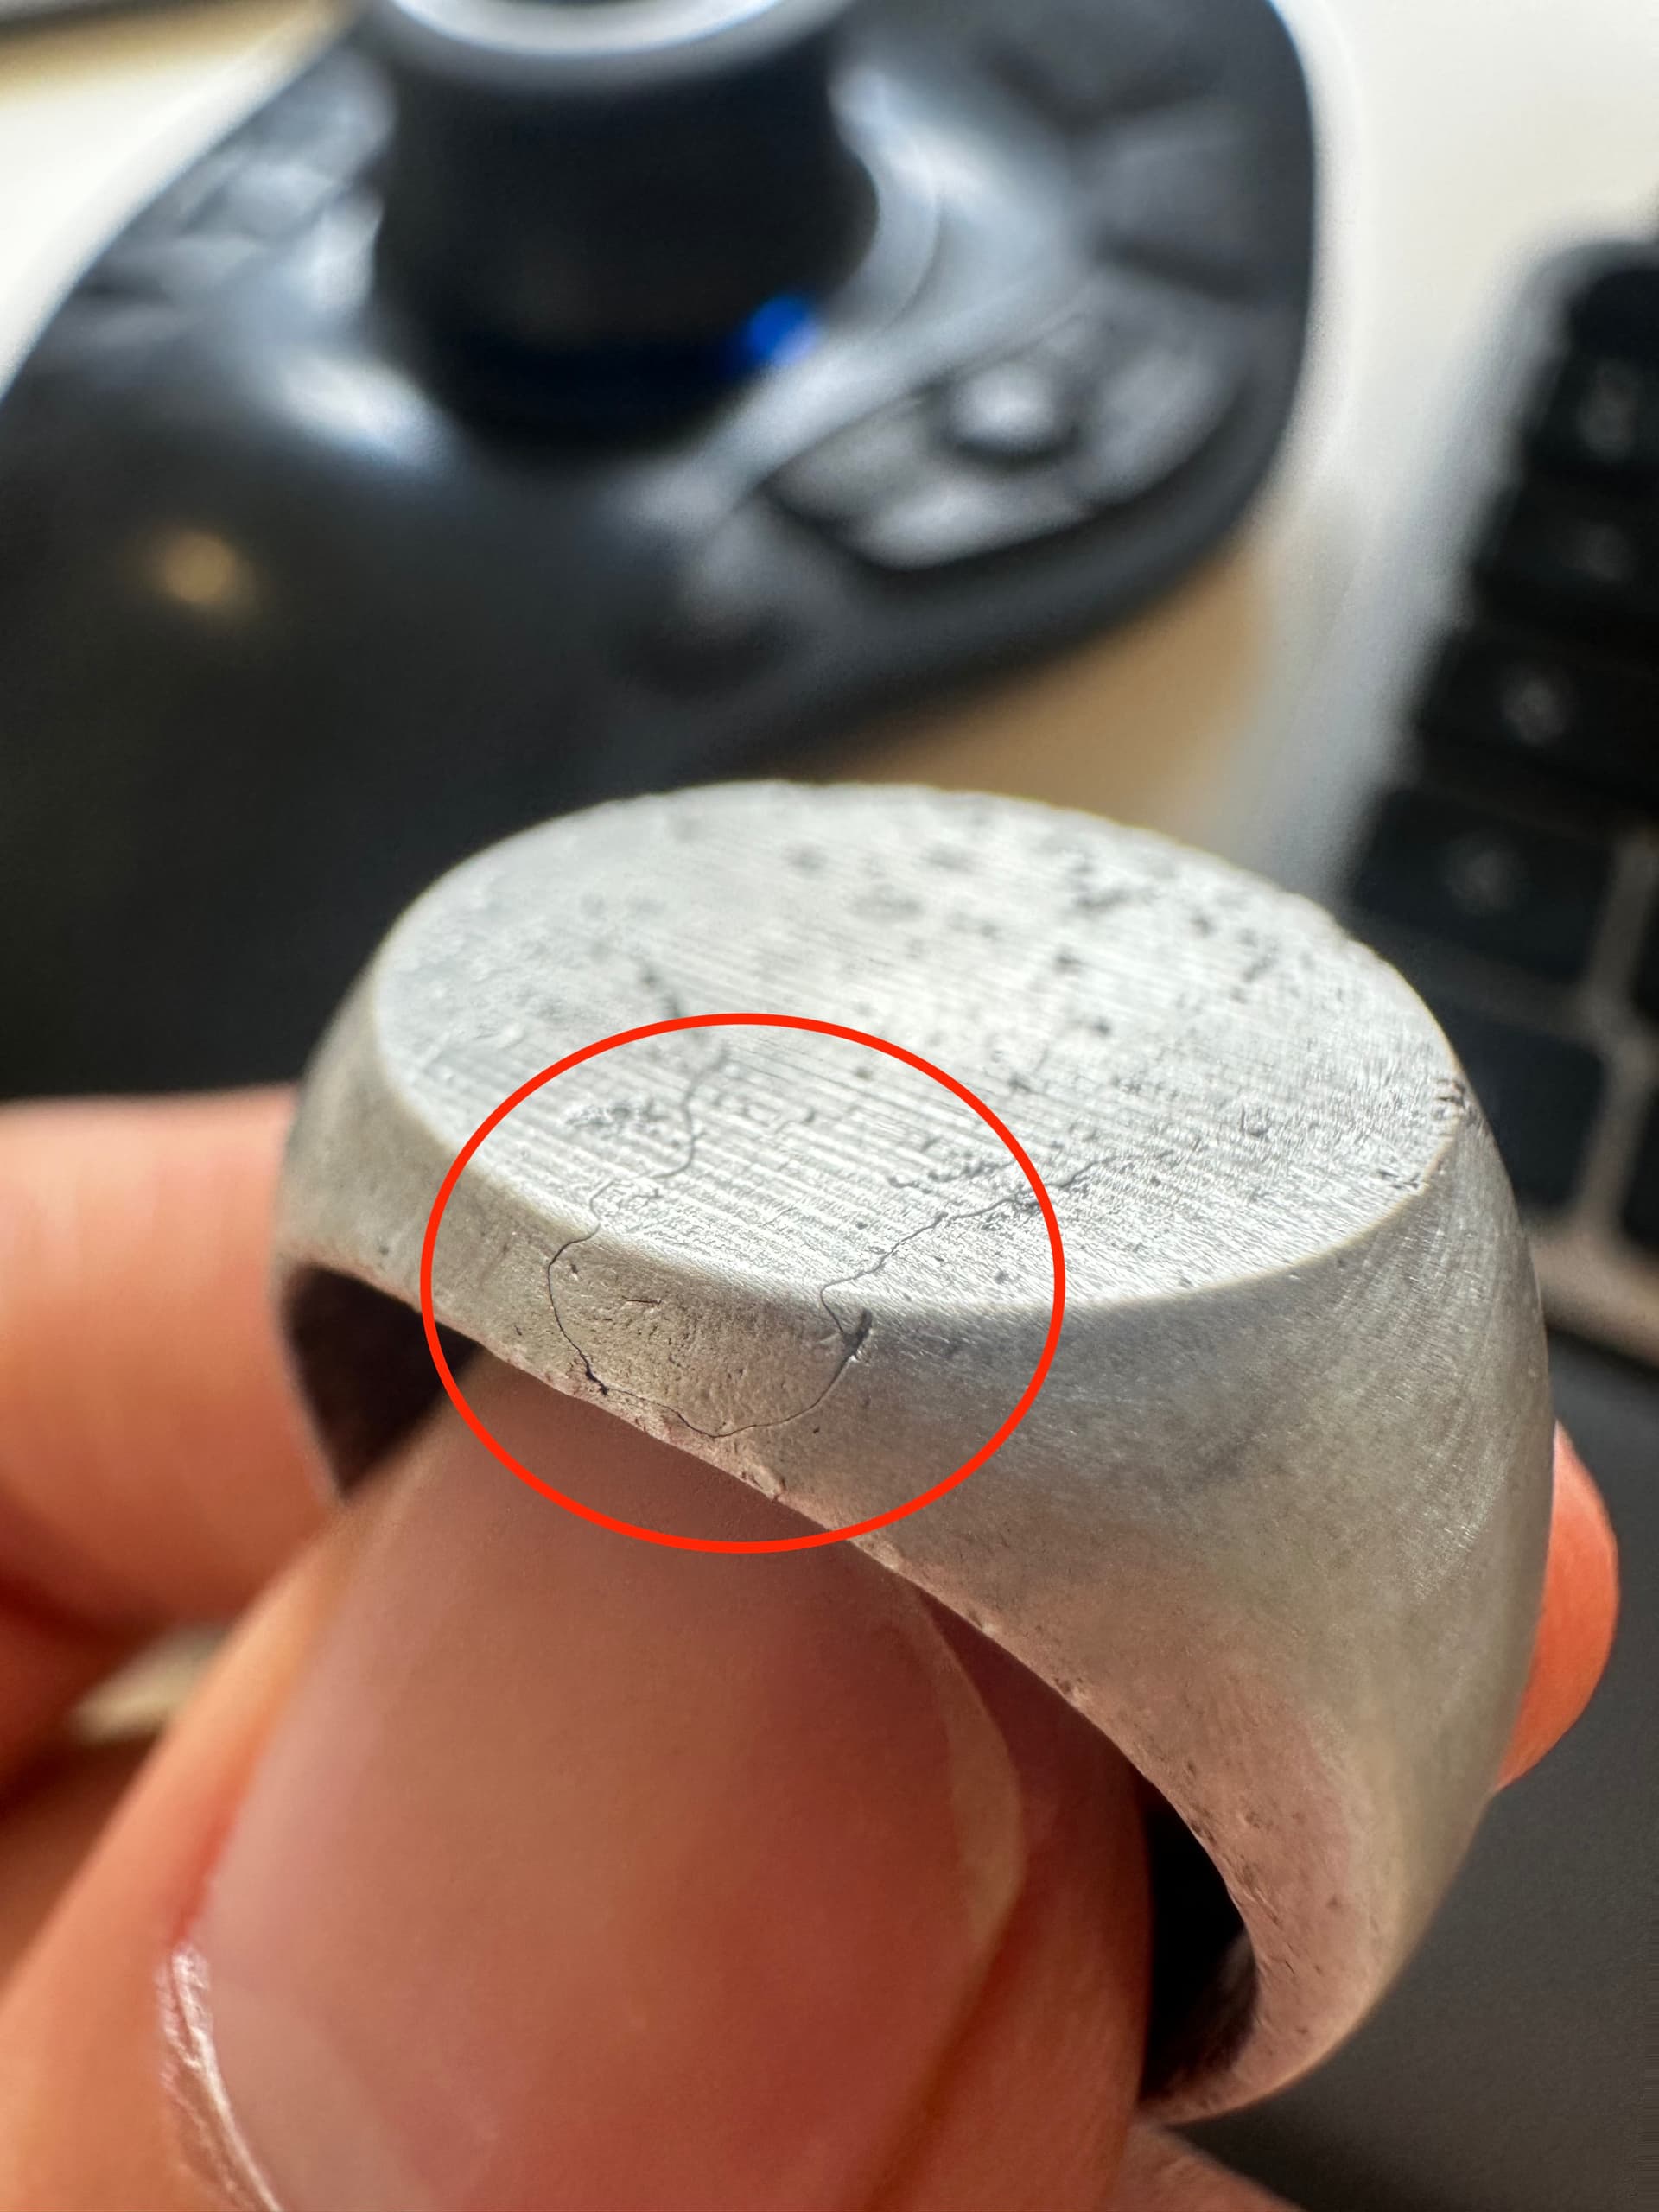
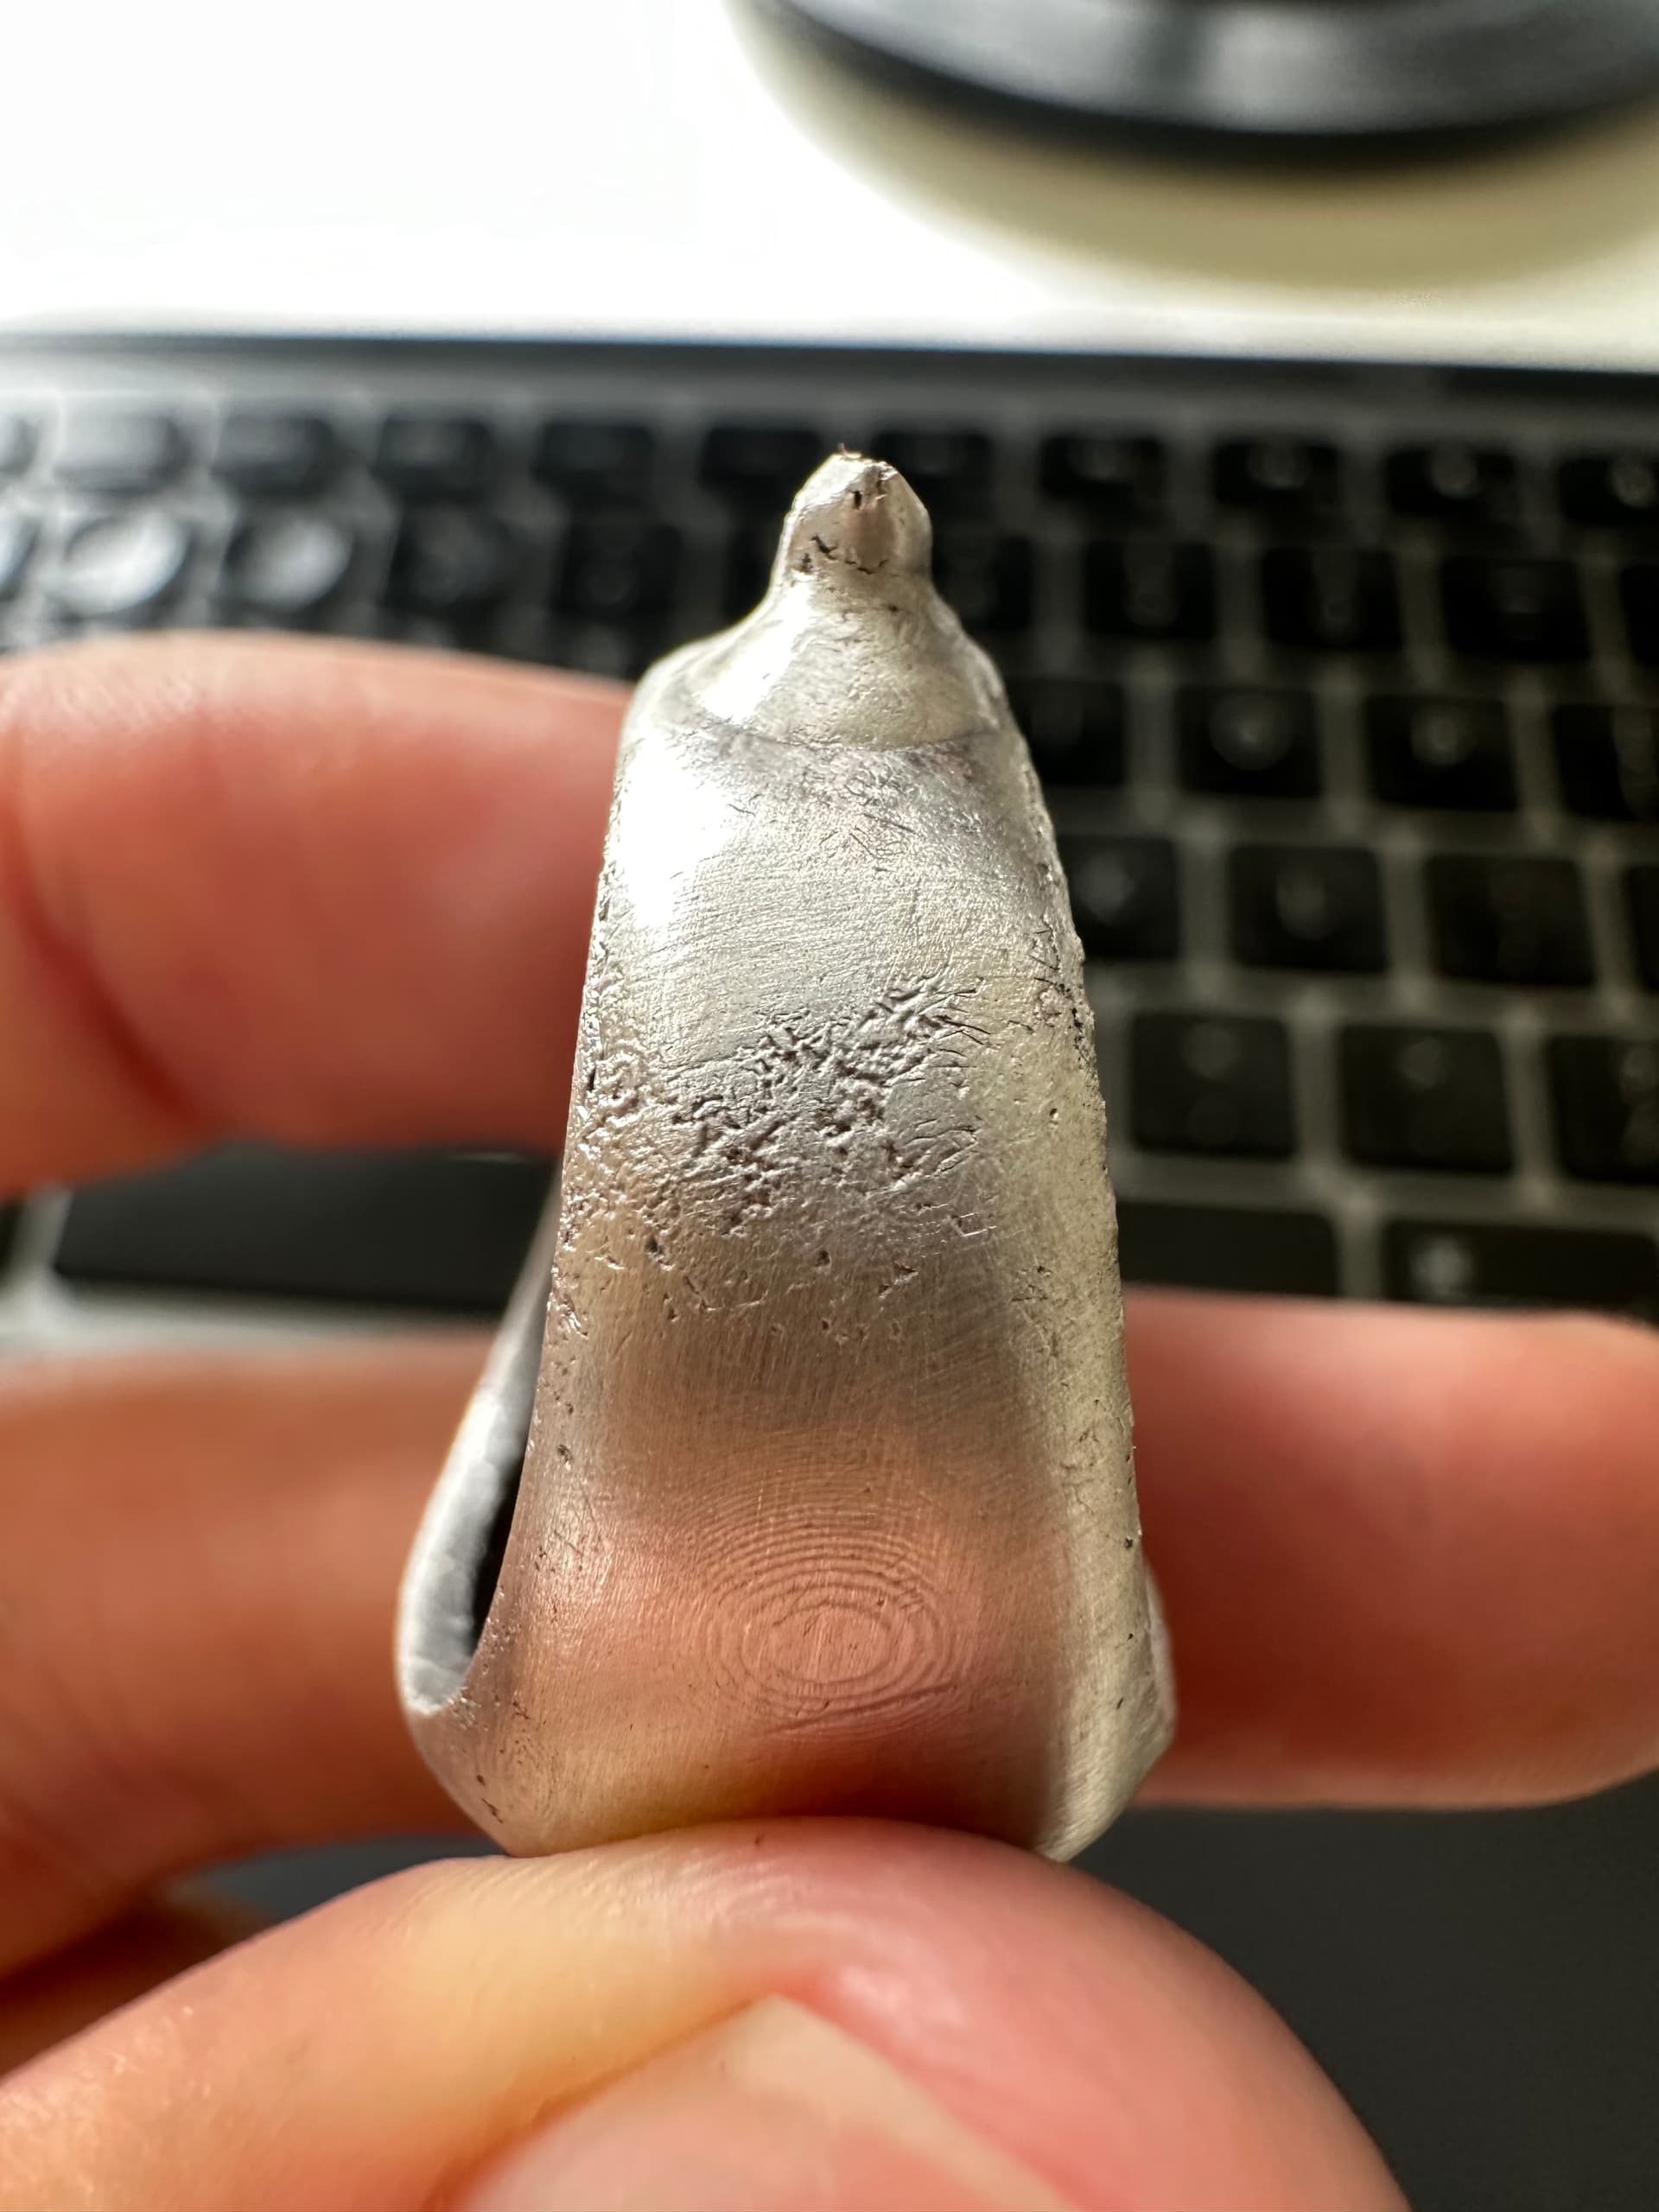
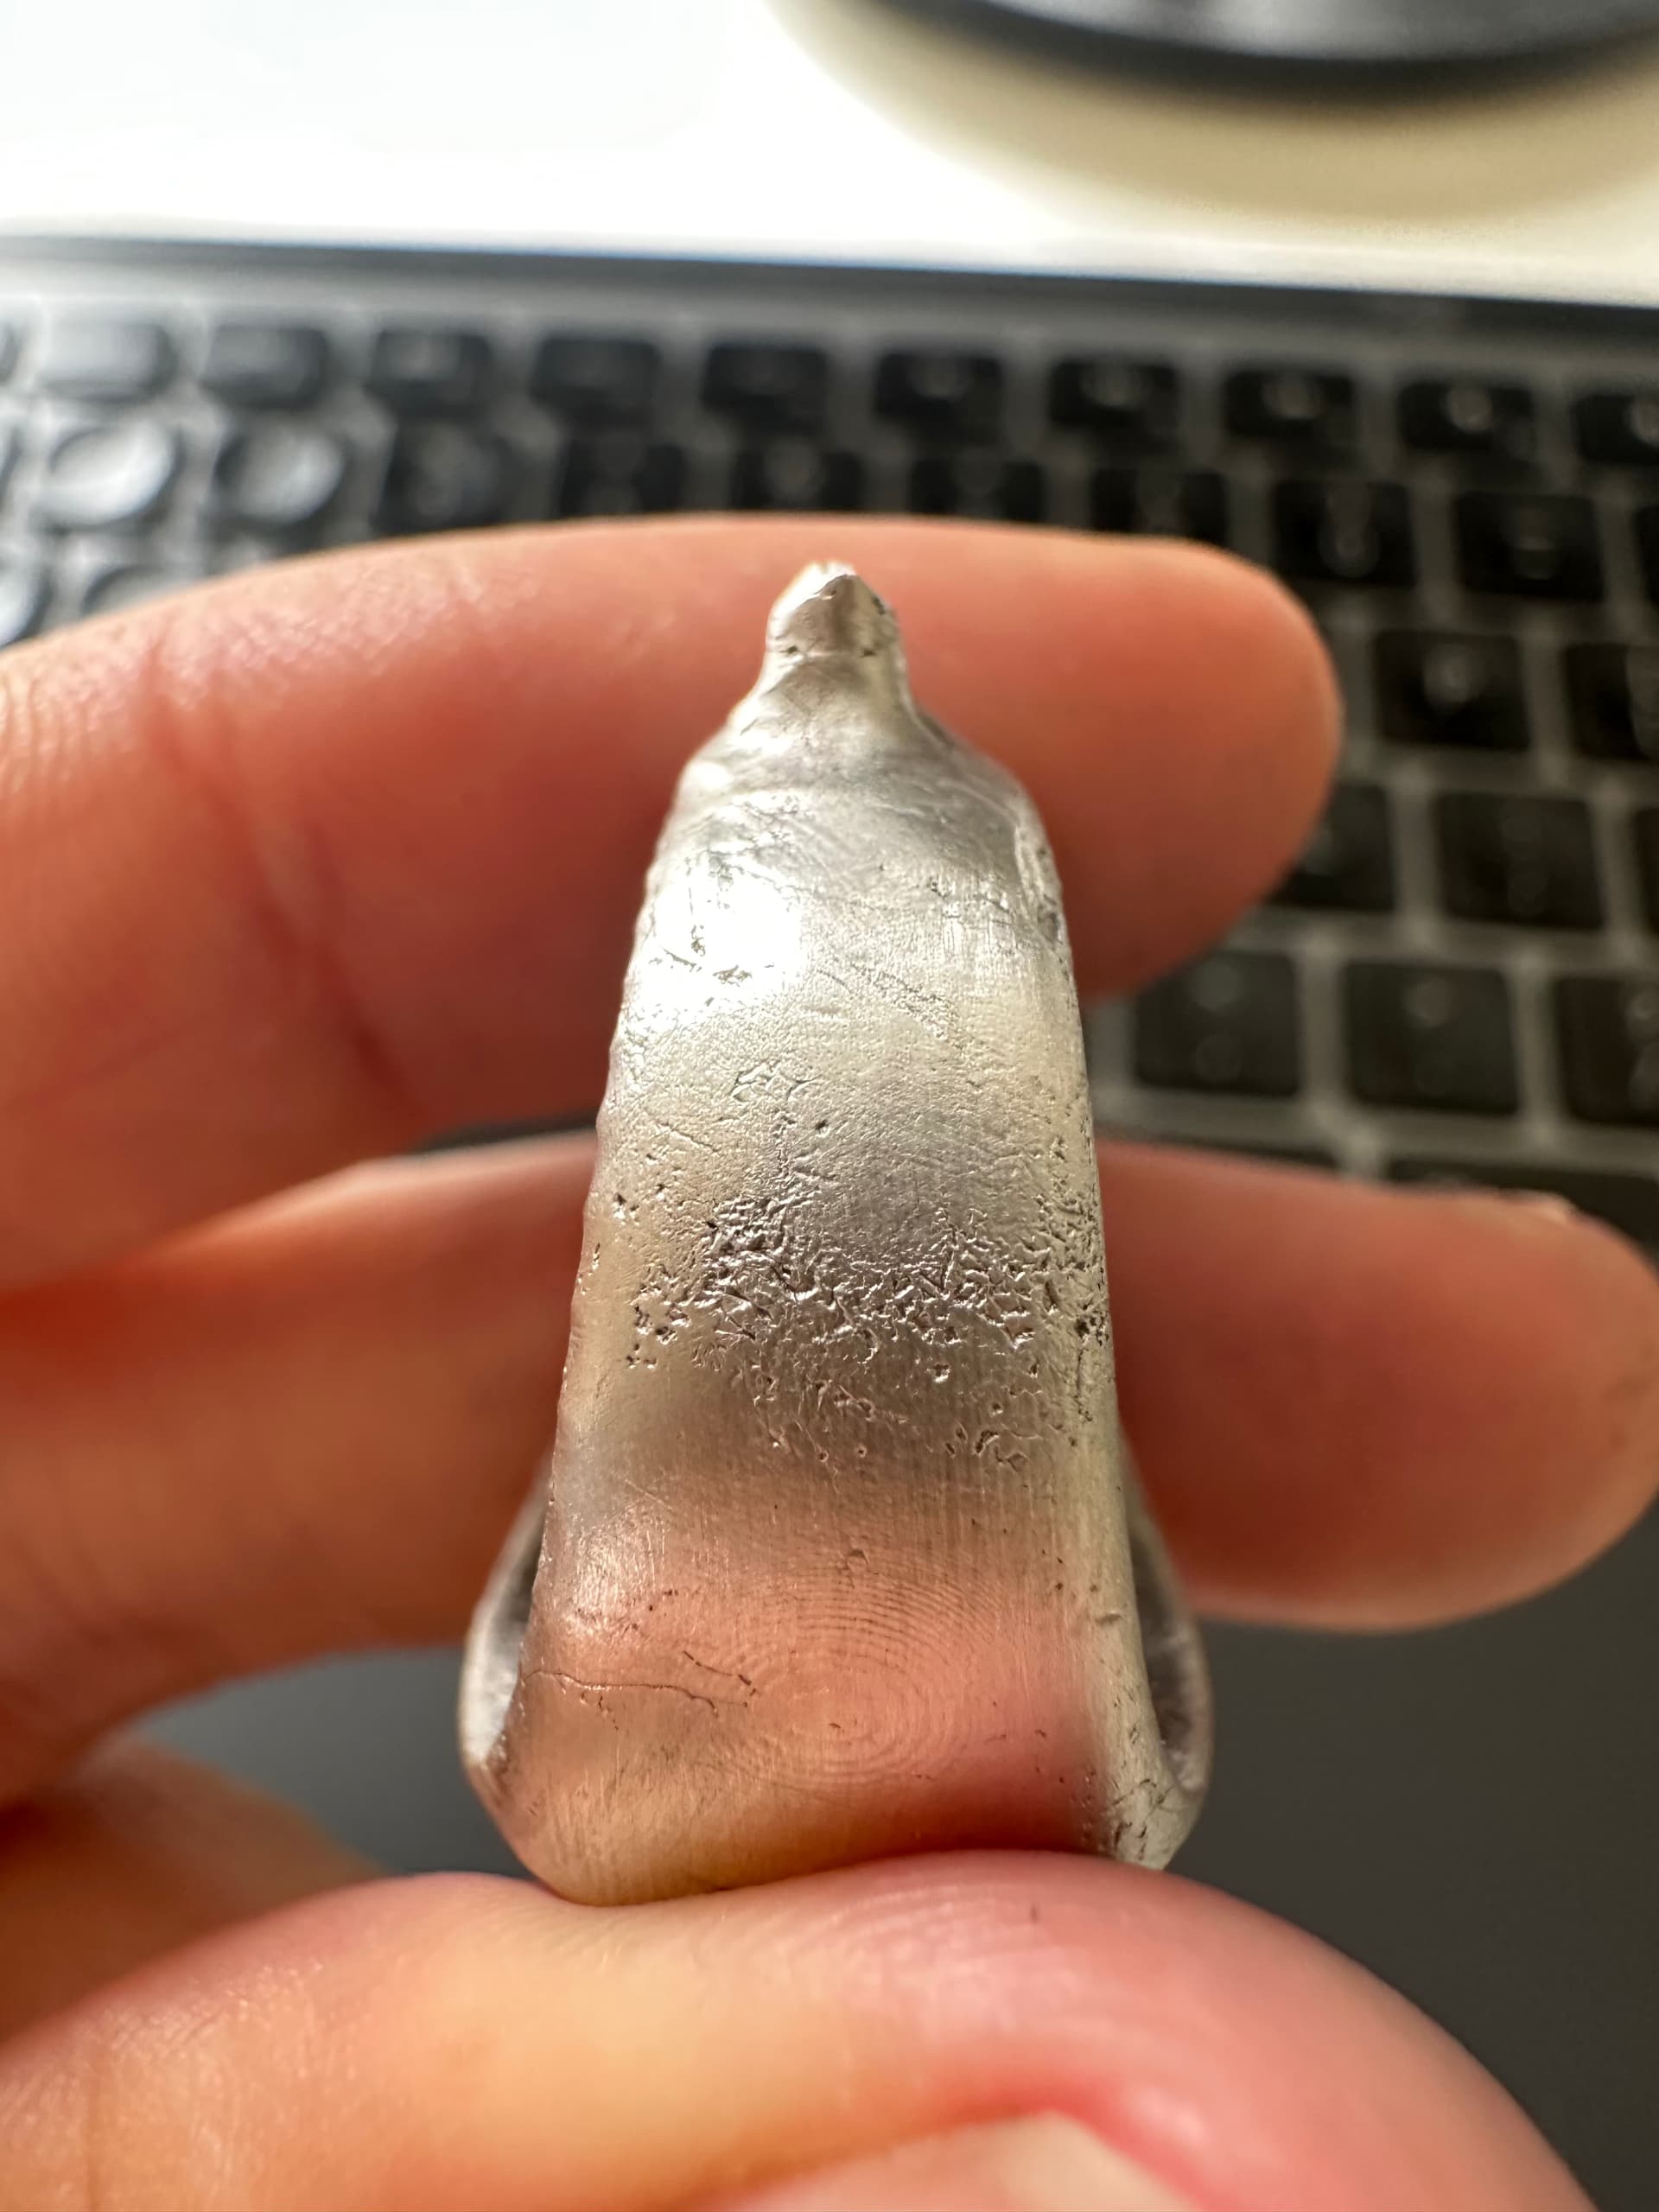
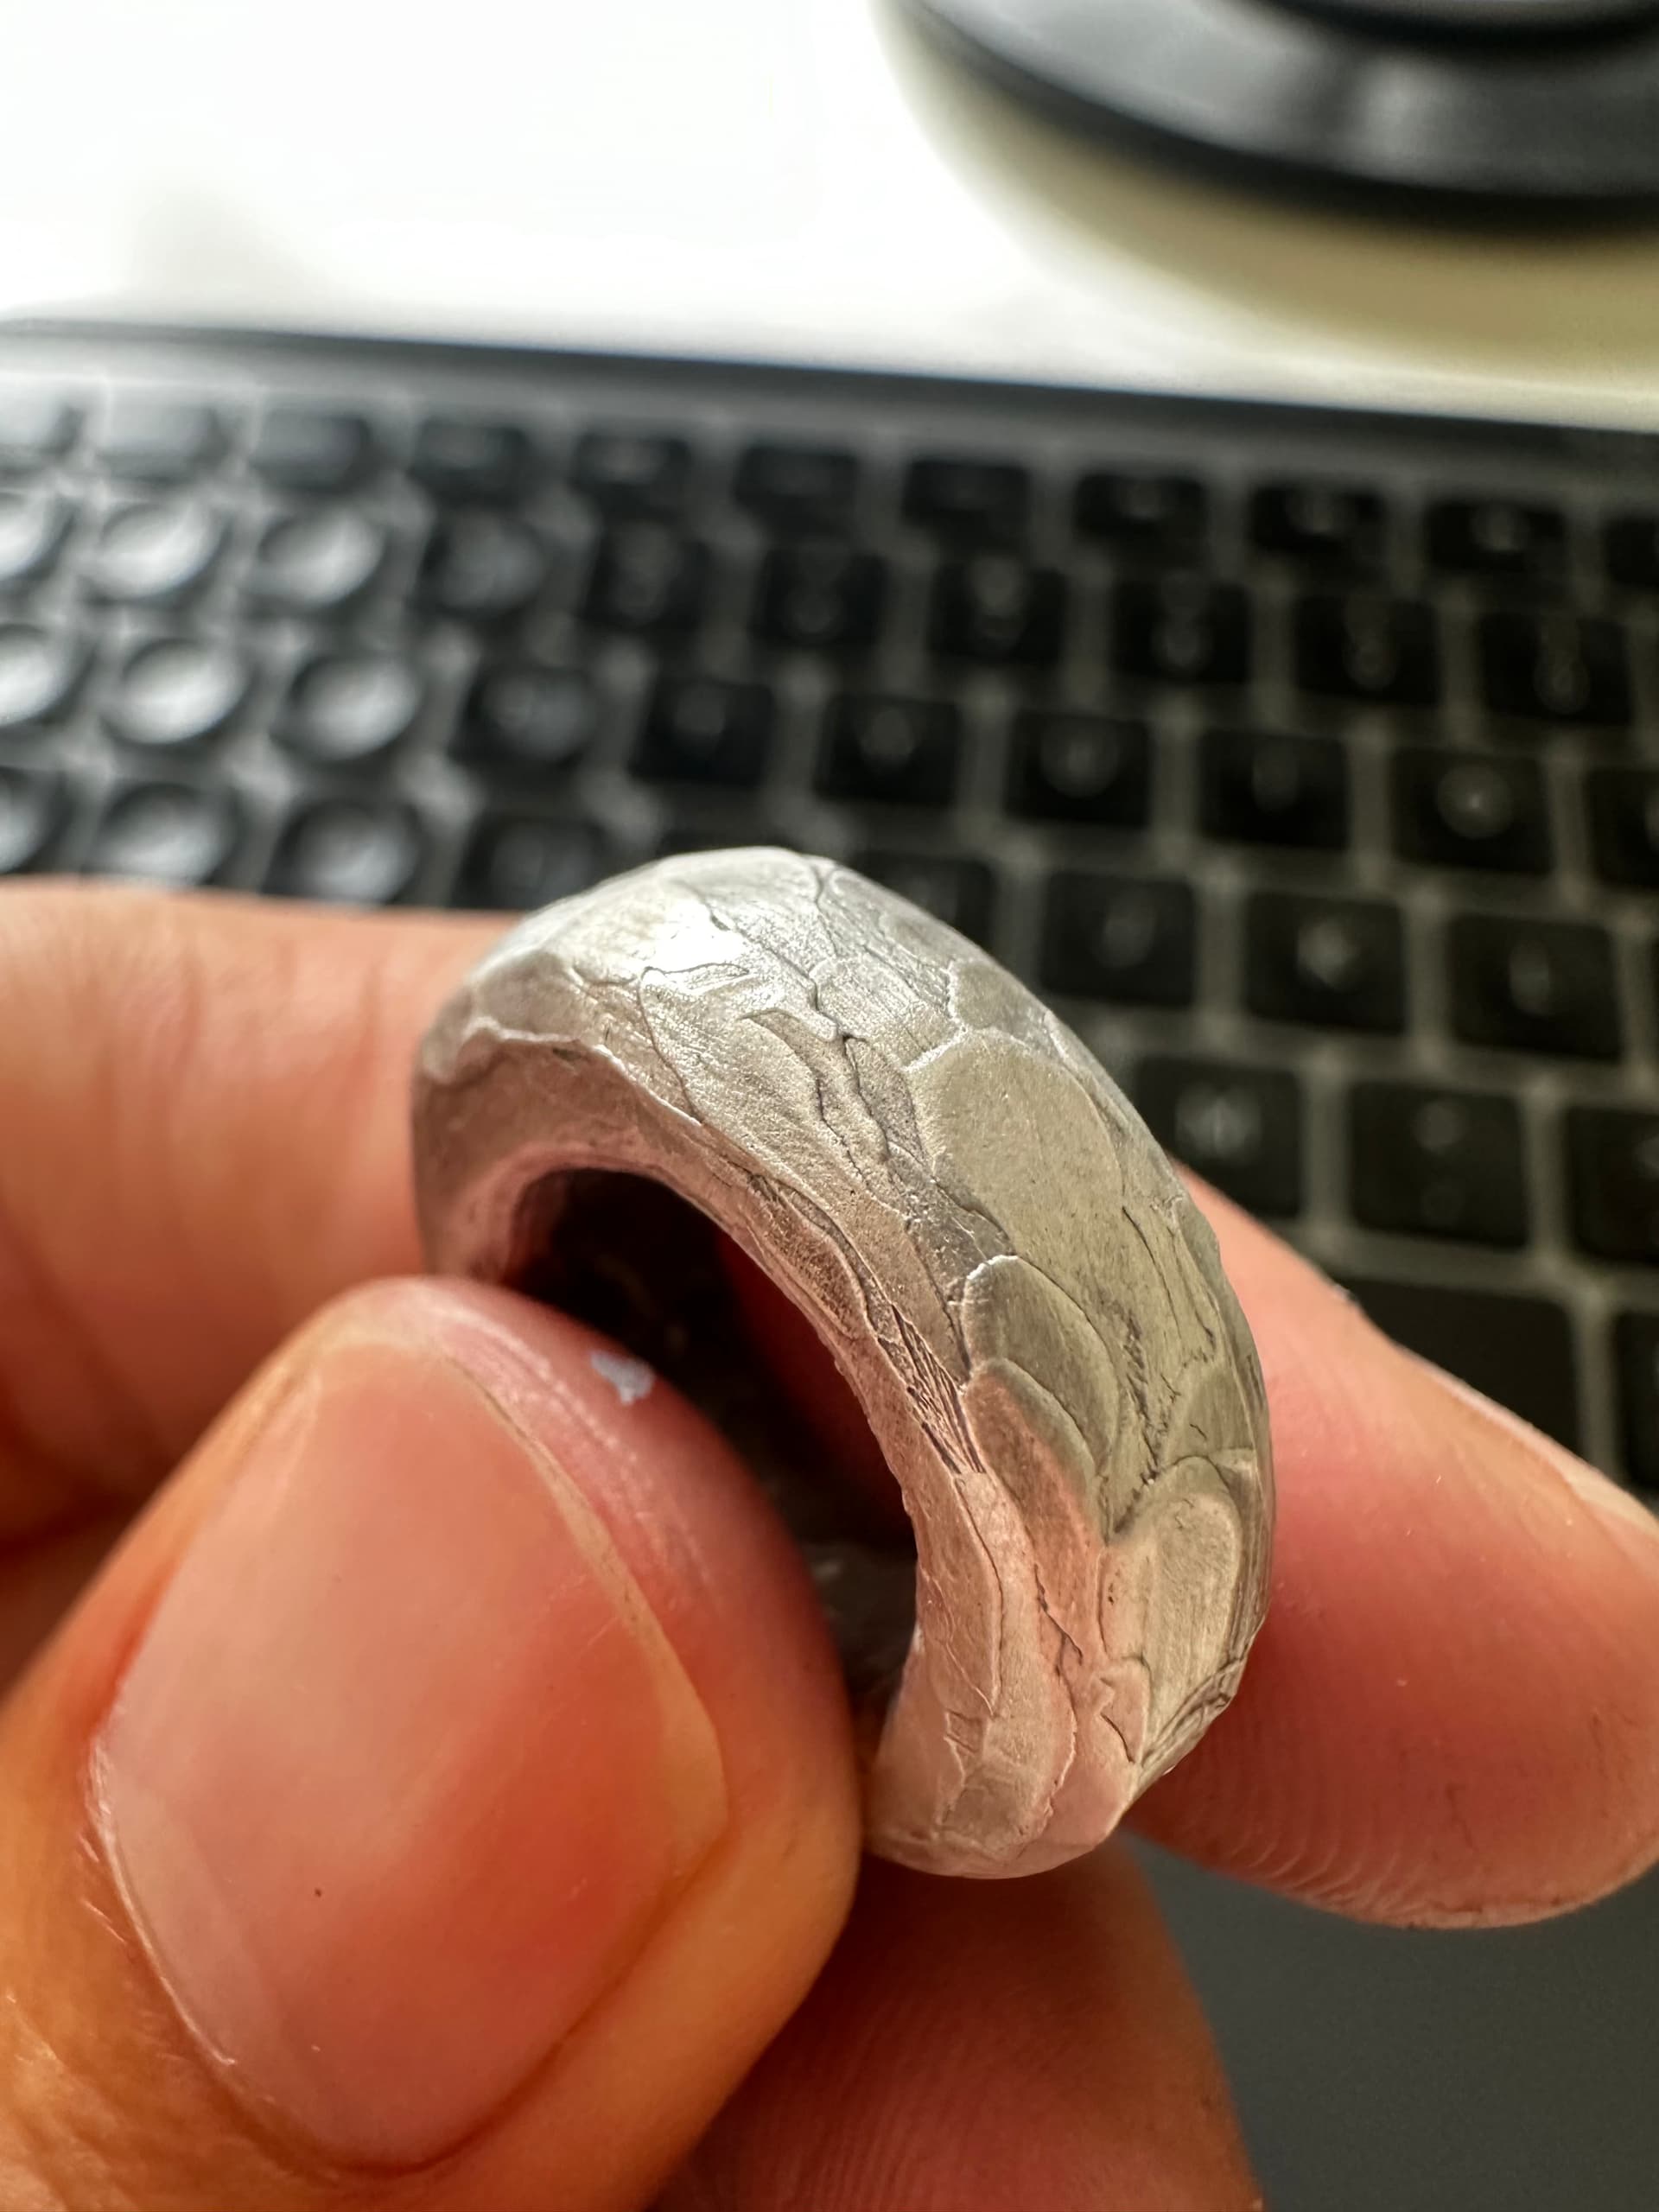
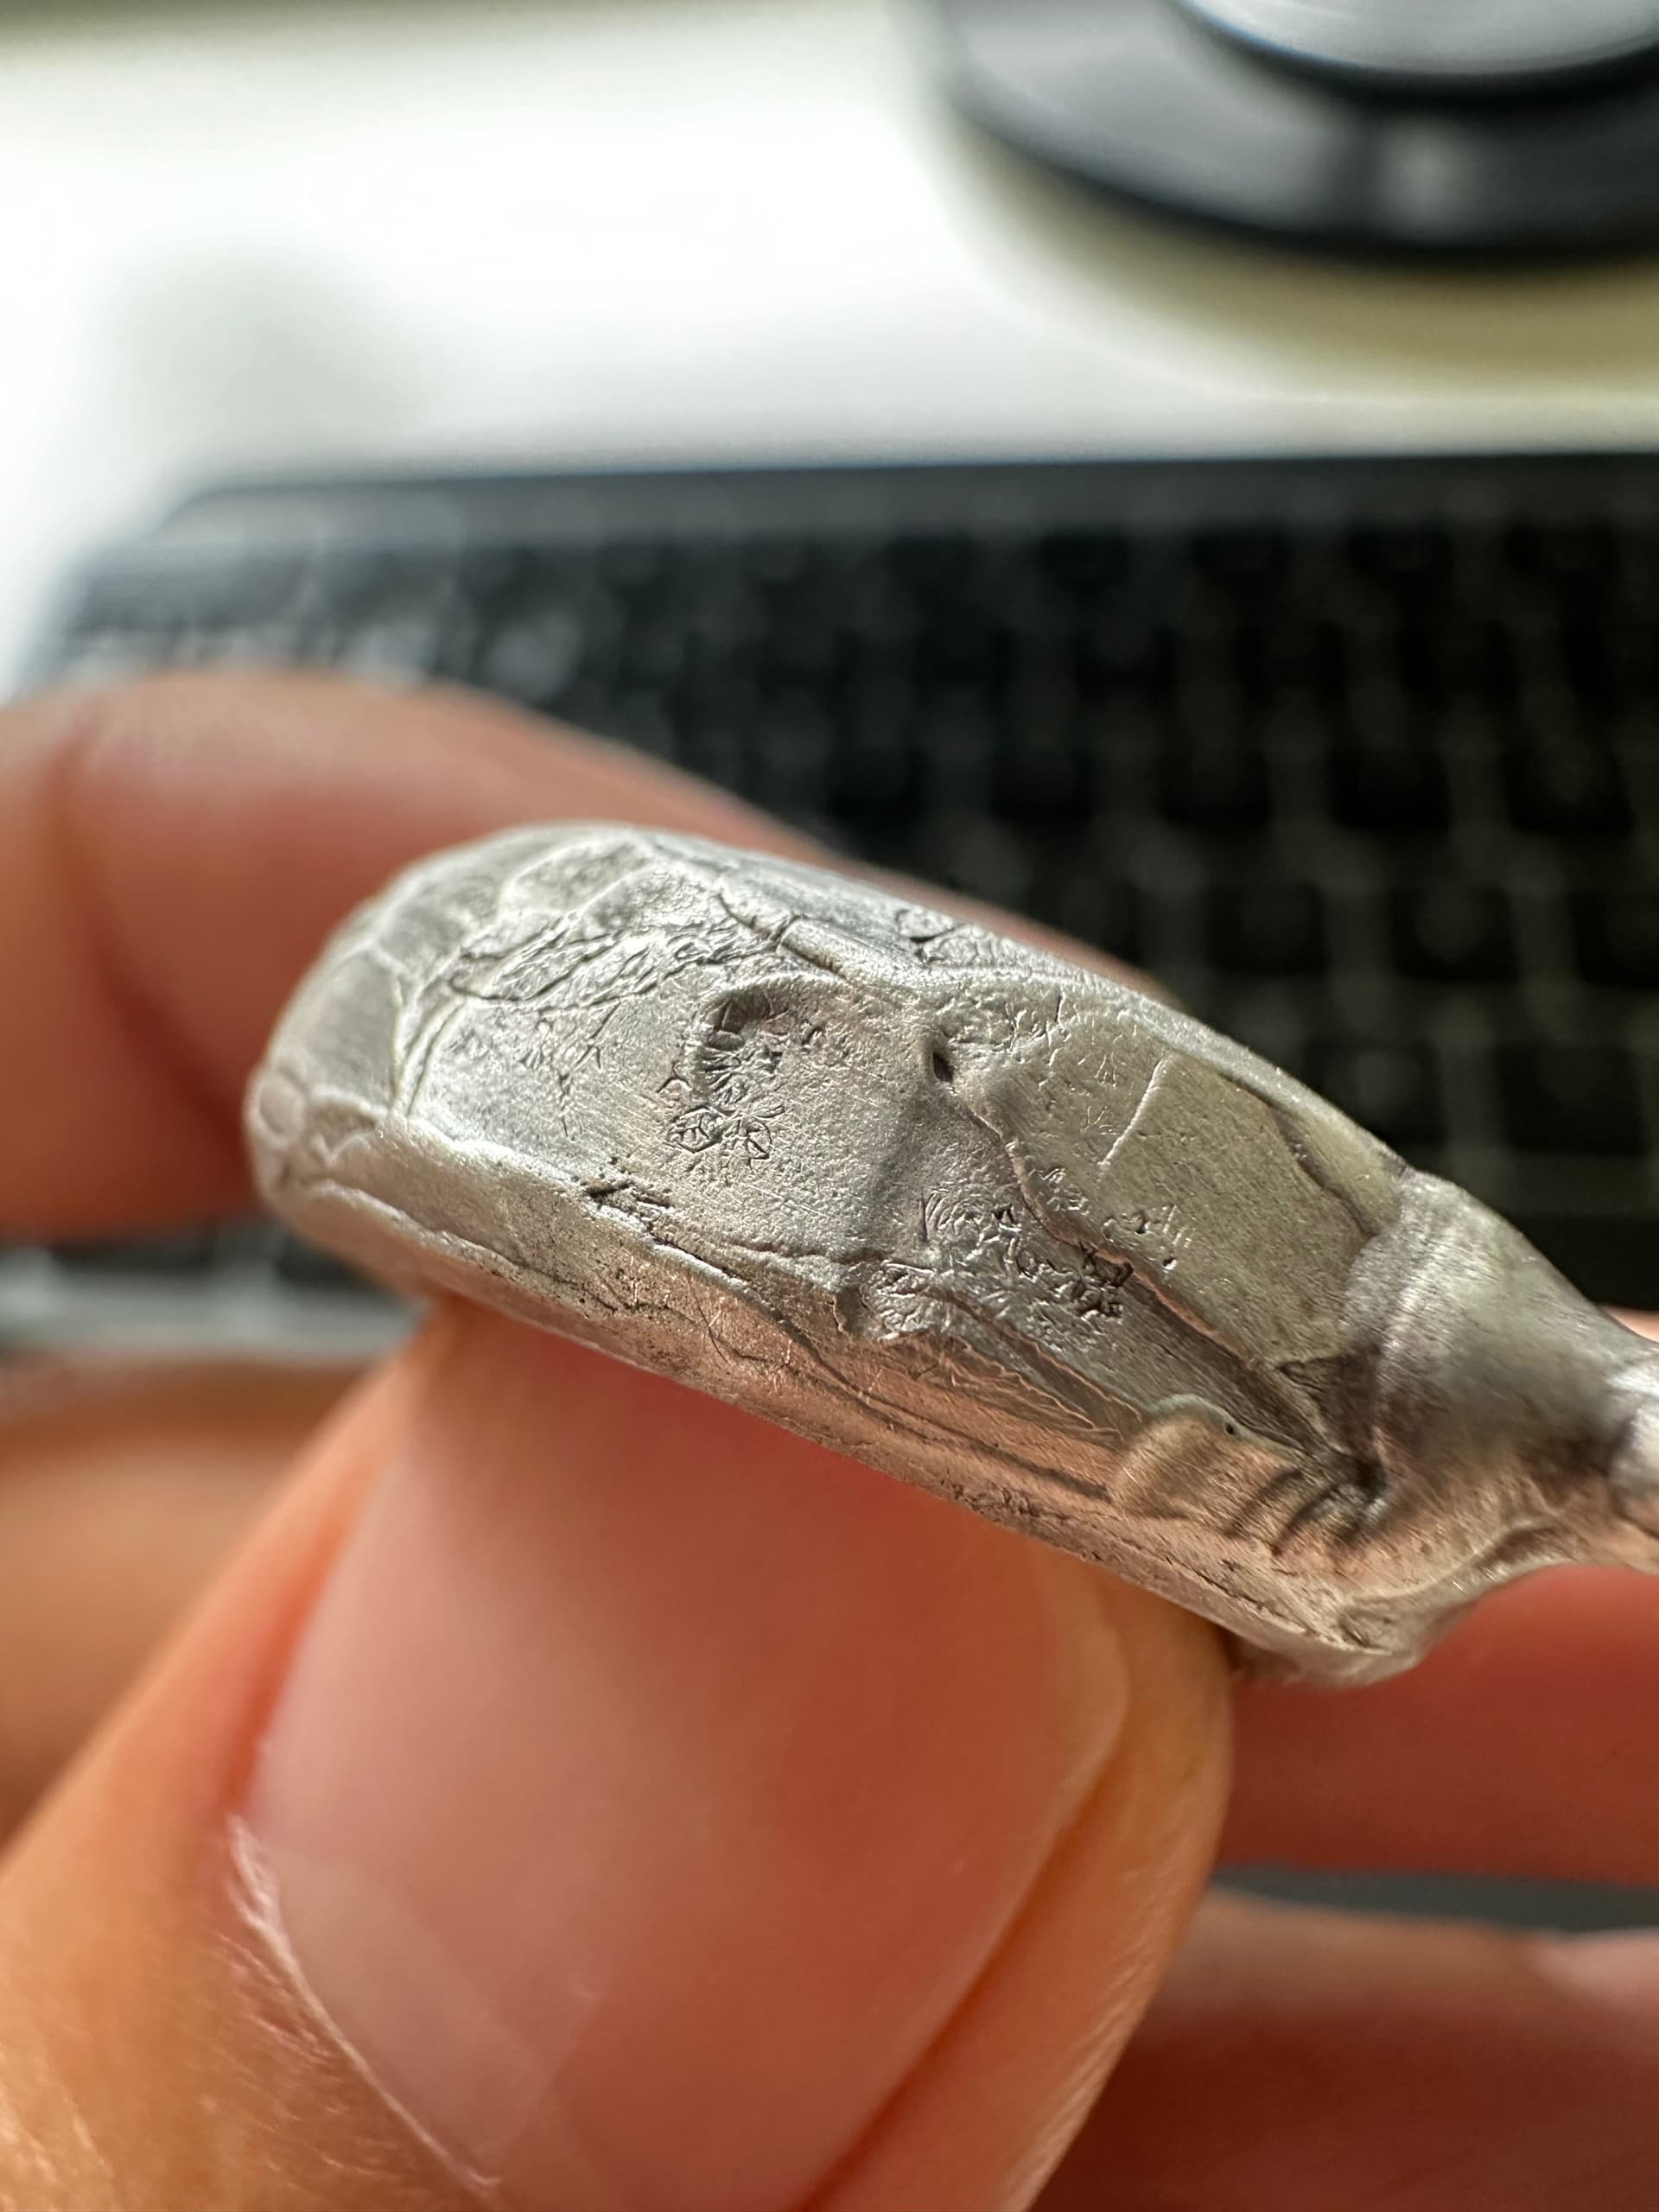
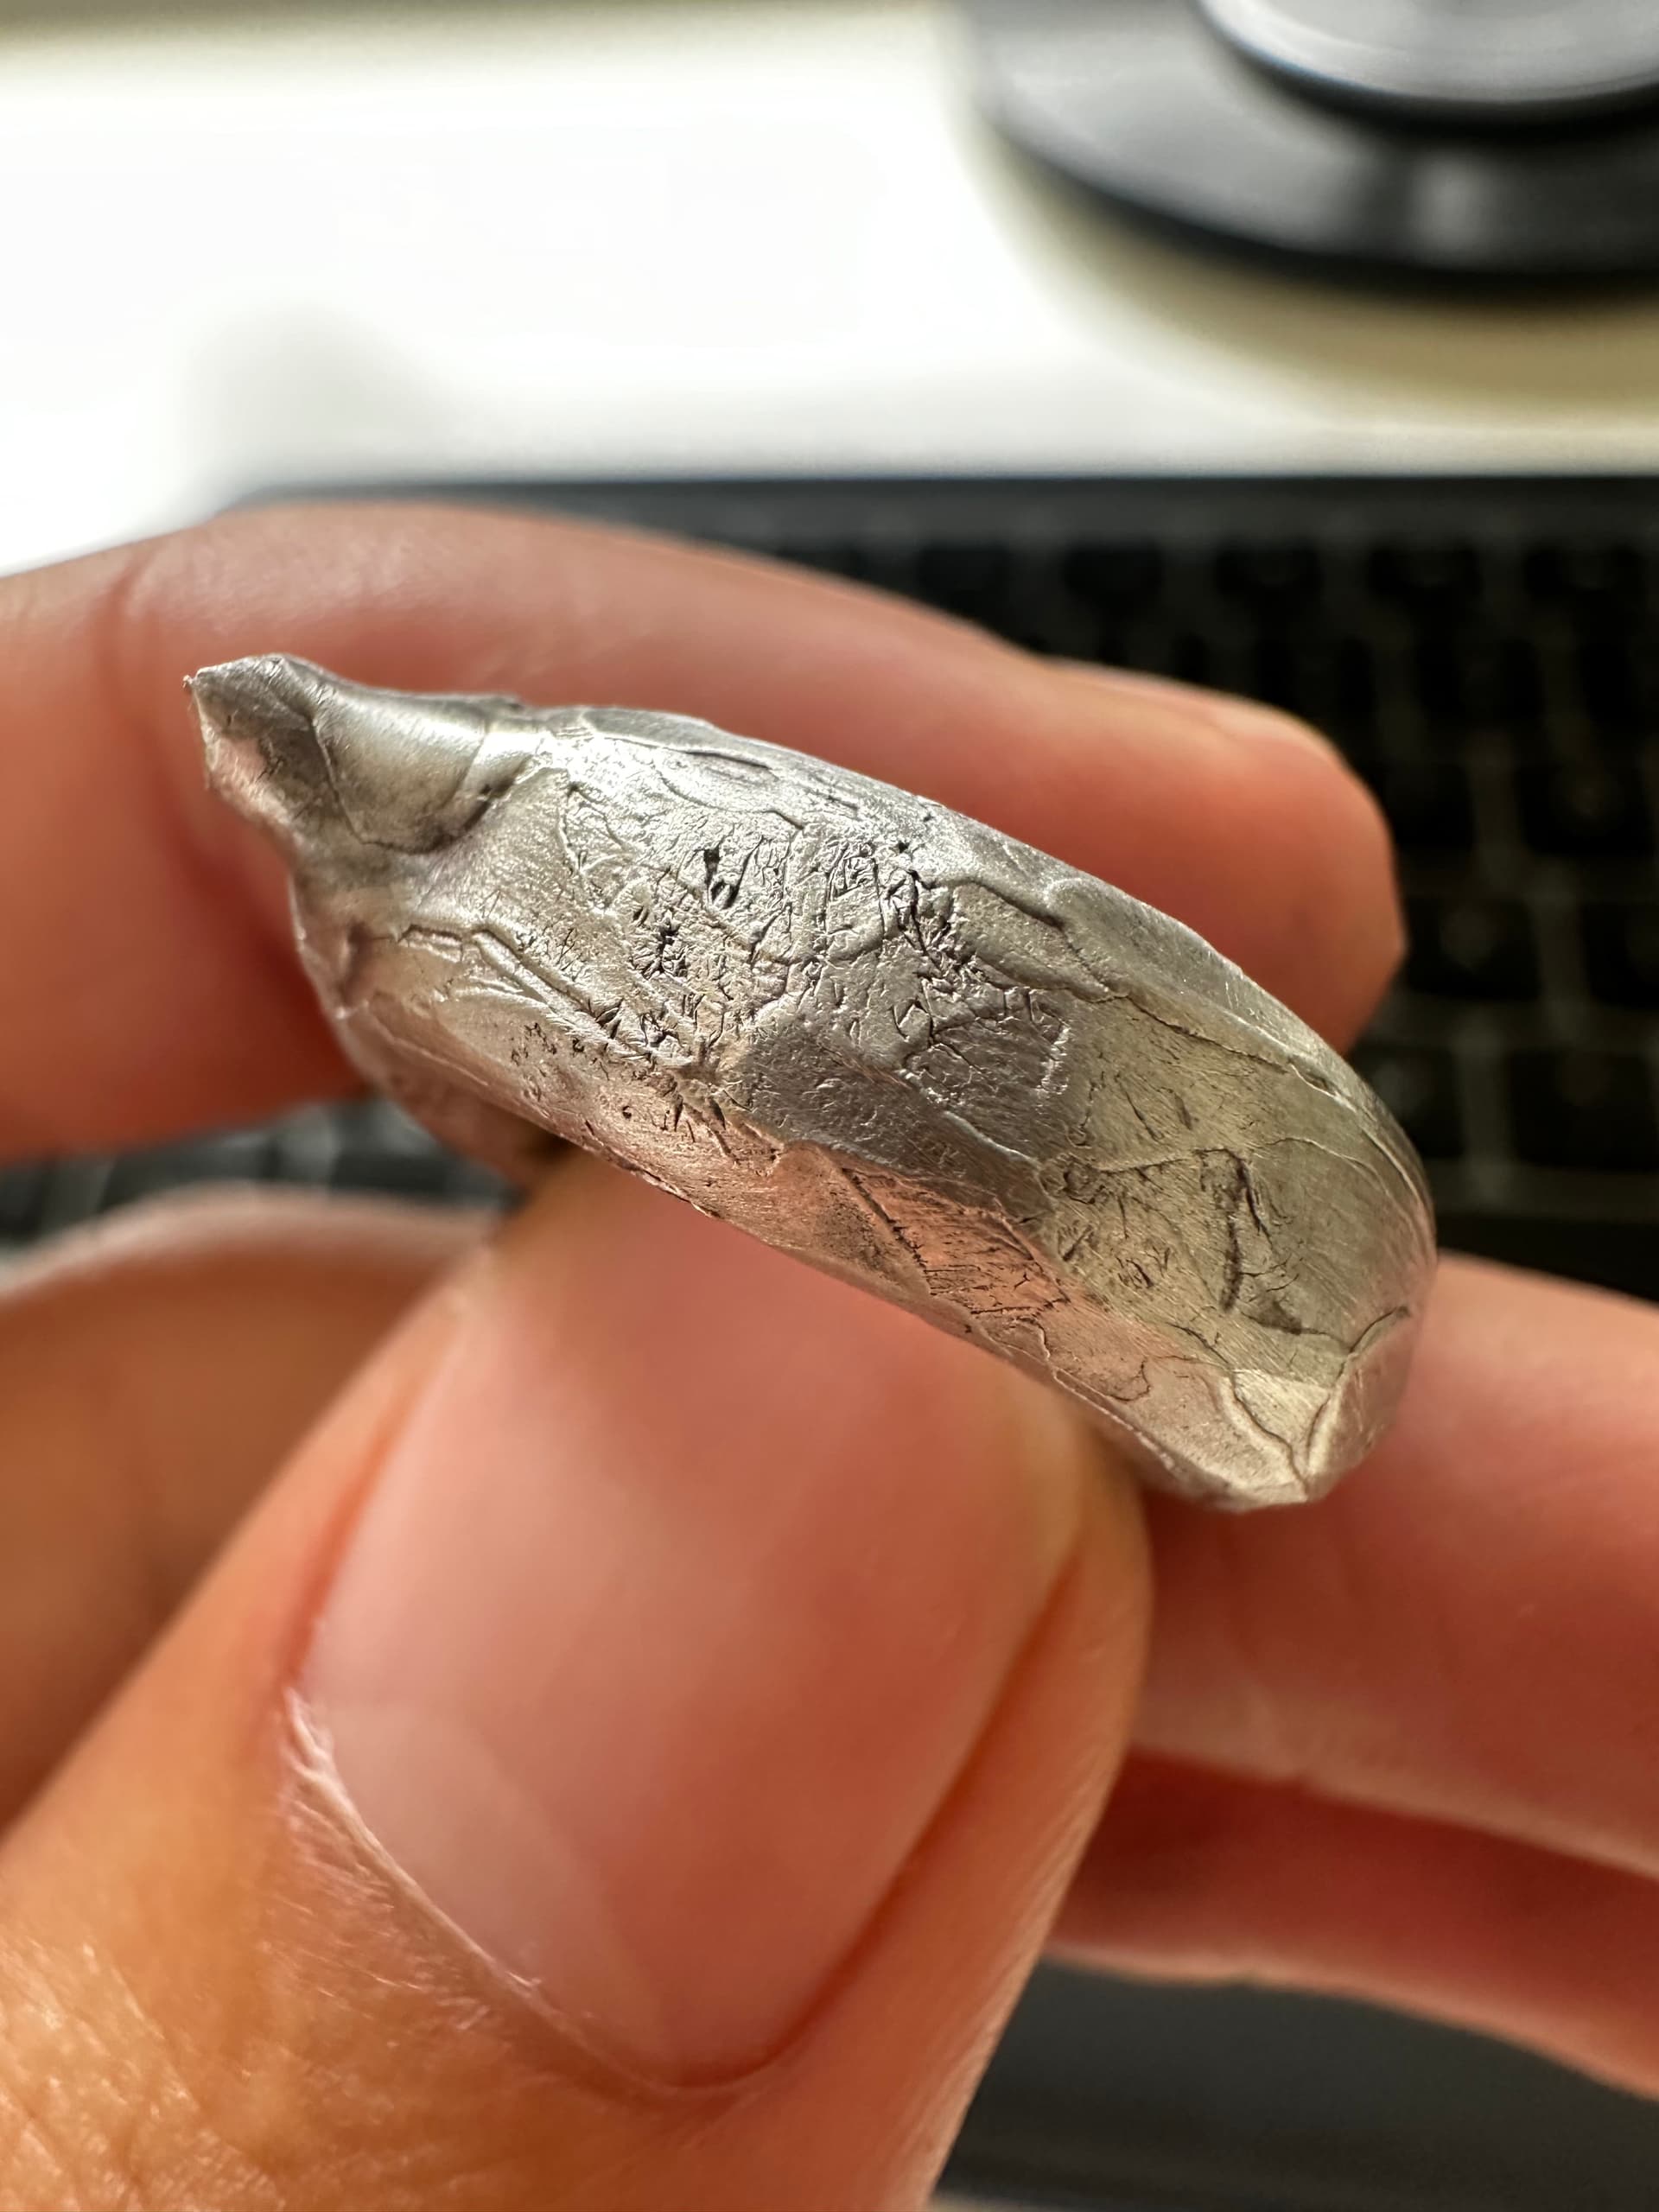
I’m am convinced that your problem isn’t partial burnout or inaccurate kiln temperature. I am positive that your investment is degrading with micro fractures and cracks. After thinking about this for an embarrassingly large amount of time today, I’ve come to the conclusion that it’s your sprues that are the source of your troubles. They are huge and are 3/D printed out of the same material as your model.
Now let me explain what I think the problem is. But before I do, let me say that I have fairly basic knowledge about 3/D printed model casting, but I do know a heck of a lot about traditional lost wax casting. In traditional lost wax jewelry casting, the sprue wax is designed to melt at a low temperature, so it is the first thing that melts out in a burn out. The logic is that because most things expand when they get hot, having the sprue wax melt out first, creates a space for the harder wax model to expand into as it begins to melt. Your problem is similar to what happens if you make a thick sprue and a thick model out of carving wax. You’ll often get similar kinds of imperfections.
I am convinced that because your huge 3/D printed sprues and your 3/D printed model are melting at the same temperature, everything is expanding at the same time with no place to escape to. The sprues are in essence creating a blockage which is causing all of these imperfections.
We know that you’ve switched to a specific 3/D printed model investment, (with extra strength) so that’s probably not the problem.
Here’s what I’d like you to do as an experiment. Take this same ring that you just cast and print another model with the same castable 3/D printed wax, but this time add the sprues manually with regular 8 ga sprue wax. Don’t over sprue. One or two sprues on the bottom edge of the ring (with the ring at a 45 degree angle) are sufficient.
Please use this burnout method.
Follow the manufacturers investment measurements and procedures exactly.
Let the mold sit untouched for a minimum of two hours after the investment sets up.
2 hours at 150C
2 hours at 370C
2 hours at 675 C
2 hours at 450C
(this is a little longer than what I usually do, but in this case it seems appropriate)
Others may disagree with things that I’ve said, but please give this a try. If I’m right, you can have a celebratory beverage in my honor. If I’m wrong, well, I did my best.
Jeff