Julie…I have never made beads like this and rarely stick solder. When I do, I use a very fine medium wire solder that has been rolled thin. I let the flux guide when to touch the solder to the joint. I am a fan of pick soldering as it limits the amount of solder available to move around the joint. I am sure that there are many youtube and similar videos that will help to guide you as well as others replying to your question. Good luck…Rob
Julie, I made a batch of earrings using a similar type of bead. Basically squash blossoms. I made six pair 20 years ago and a few since. For the first bunch I rolled six inches of fine wire solder down very thin. I cut it slightly wider than the domes and laid it across the dome on the bottom. I set the top dome over the bottom, a drop off flux on top and then the heat. Soldered well but messy.
The Last beads I made I used the pick method. Less frustration. Better, easier finish.
For me the challenge has always been keeping heat on the joint, but not on the solder. I use the color of the solder as a guide. When this fails, the solder balls up. The only time I stick solder is when I am soldering a bezel to a top plate. I place pallions all around the inside of the joint. I heat from the outside hoping to pull solder through the joint. As solder will sometimes, it may go in the other direction. I keep a stick ready in case I need a little more solder added to a spot. A lot of youtube videos show people stick soldering adding what for me would be gobs of solder that has to be removed when you finish the piece. This is just one more skill that I have yet to learn…Rob
Stick or wire soldering is my favorite way to solder, especially when I’m in a rush. Personally, I don’t thin the wire out and just use whatever is around. I’ve got both 20 ga and 24 ga wire solder. You do have to have a steady hand to make it work. If needed I’ll rest my hand on a brick or something to steady it.
For the hard, medium or easy solder question, I use the same solder logic as with pallion/chip soldering. In this case easy or medium solder will be best. Like Rob said the flux is your temperature guide. Don’t touch the wire solder to the joint until the flux has gone glassy. That will be about 1000 F.
I would suggest three things to consider that aren’t what you asked exactly.
It’s hard to tell from the picture, but the process will go smoother if you sand or file the two halves to meet perfectly. You may be doing that, but I couldn’t tell from the image.
I’m pretty sure that you said that you have a PUK or an Orion welder. Tack weld them into position first in a 2-3 spots so the two halves are perfectly lined up before you solder.
If you’re making a mess with adding solder from the outside, consider pre-melting solder on the inside of one of the halves. Then put the two halves together and draw the solder out to the seam with your torch. That can be an easy way to solder lentil shaped beads cleanly.
thank you!…yes, I am sanding the edges flat for a good fit
i considered using my welder to tack the domes together…i may try that next…i was hoping to keep the edges intact for a “seamed bead” effect, so i decided not to do that as it might distort the edge…
i see a jeweler named Jen Surine stick soldering on instagram and it looks so “zen” that i decided to try to master it…i must add that she is soldering joints on wire cage-like setting designs…
perhaps joints on wires provide a “self stopping” mechanism to avoid over-application of solder…and less heat due to less metal…versus large metal surfaces where i do not want excess solder to flow all over…
i have never really had a “need” to learn the skill
I guess i should consider the pros and cons of stick soldering and create a few projects to take advantage of them…
ie:
applying solder to many, many joints…and avoiding movement of placed pallions, or solder melting before the piece is up to tempurature…
applying alot of solder to a large joint
perhaps a saucer bead was not the best project to practice stick soldering…where excess solder on the bead surface was not desireable or easy to clean up…
thank you!…i think you bring up a good point about learning to pay closer attention to the flux activity…
because i usually pre-position pallions, i am not used to paying specific attention to the flux…especially while also paying attention to, and coordinating the independant movement of my two hands!!
i will continue to explore this stick soldering skill!!
i fear it may end up being like trying to learn to hand sharper gravers on sharpening stones…skills better left to others, with better hand/ eye coordination, to master…
So…learning to solder well (in a variety of situations) would (ideally) come before this project, but here we are anyway. I’ve seen beads made in a production environment with machine stamped bead halves. That meant that the pieces already had good, flat joints, which is essential here. The hole size and rod size should be very close to the same, so that the bead halves will naturally be centered for good flow and complete joints. The people used long straight rods and suspended them vertically and there was a a slowly rotating base that kept the whole string turning around. It was easy to buzz up the string and solder the whole thing very quickly. I never did that myself but it was used for millions of beads.
I have had successes with stick soldering and horrible failures with solder all over the piece. I have yet to figure why what works, works. I have also never made beads, but have soldered a lot of tops to bottoms in other forms such as solid pendants and earrings. As Dar suggests, make sure the joint is absolutely flat and clean by running a file flush to the entire joint surface on both halves and filling until there is a new filed surface all the way around. This is why I am looking for a 2" wide medium file. Then pre-older one surface, coat both pieces with alcohol and boric acid, solder flux the joint and then support them in whatever way works. Heat up the entire piece and then concentrate on the joint until you see a flash of solder all the way around the joint. I do keep a piece of stick solder handy if it is needed. You burn out the flux fast, so reflux if needed. Good luck…Rob
I saw an interesting video. Once the bead halves are prepared as I describe in my previous post, ball up a piece of solder and place it inside one half. Place the other half on top holding the two halves together with a pair of tweezers with the joint in a vertical orientation. The solder ball will roll to the bottom and be in contact with the joint on the inside. Start heating the entire bead and then go to the solder ball location. Once you see the flash of melted solder, move the torch around to pull it through the entire bead. Of course, make sure to coat with boric acid and alcohol and flux the joint well. You make them one at a time this way, but it looks like it will work…Rob
i ended up abandoning the stick soldering…too much excess solder…bad hand eye coordination!
next i tried tiny pallions, say 12 pieces, pre-placed…4 at a time…kinda like herding kittens…moved off joint…alot of excess solder,…but thin and easy to sand off
next i tried my normal pallion sizes…say 4- 6 pieces, 2-3 at a time…easier to manage…still had excess solder…thicker…used a a 4cut barrette escapement file initial removal…then 400/600 emery paper…
for set up i used a clamp made of Knew Concepts titaniim striis…with very very light tension…that worked well
will continue to practice…
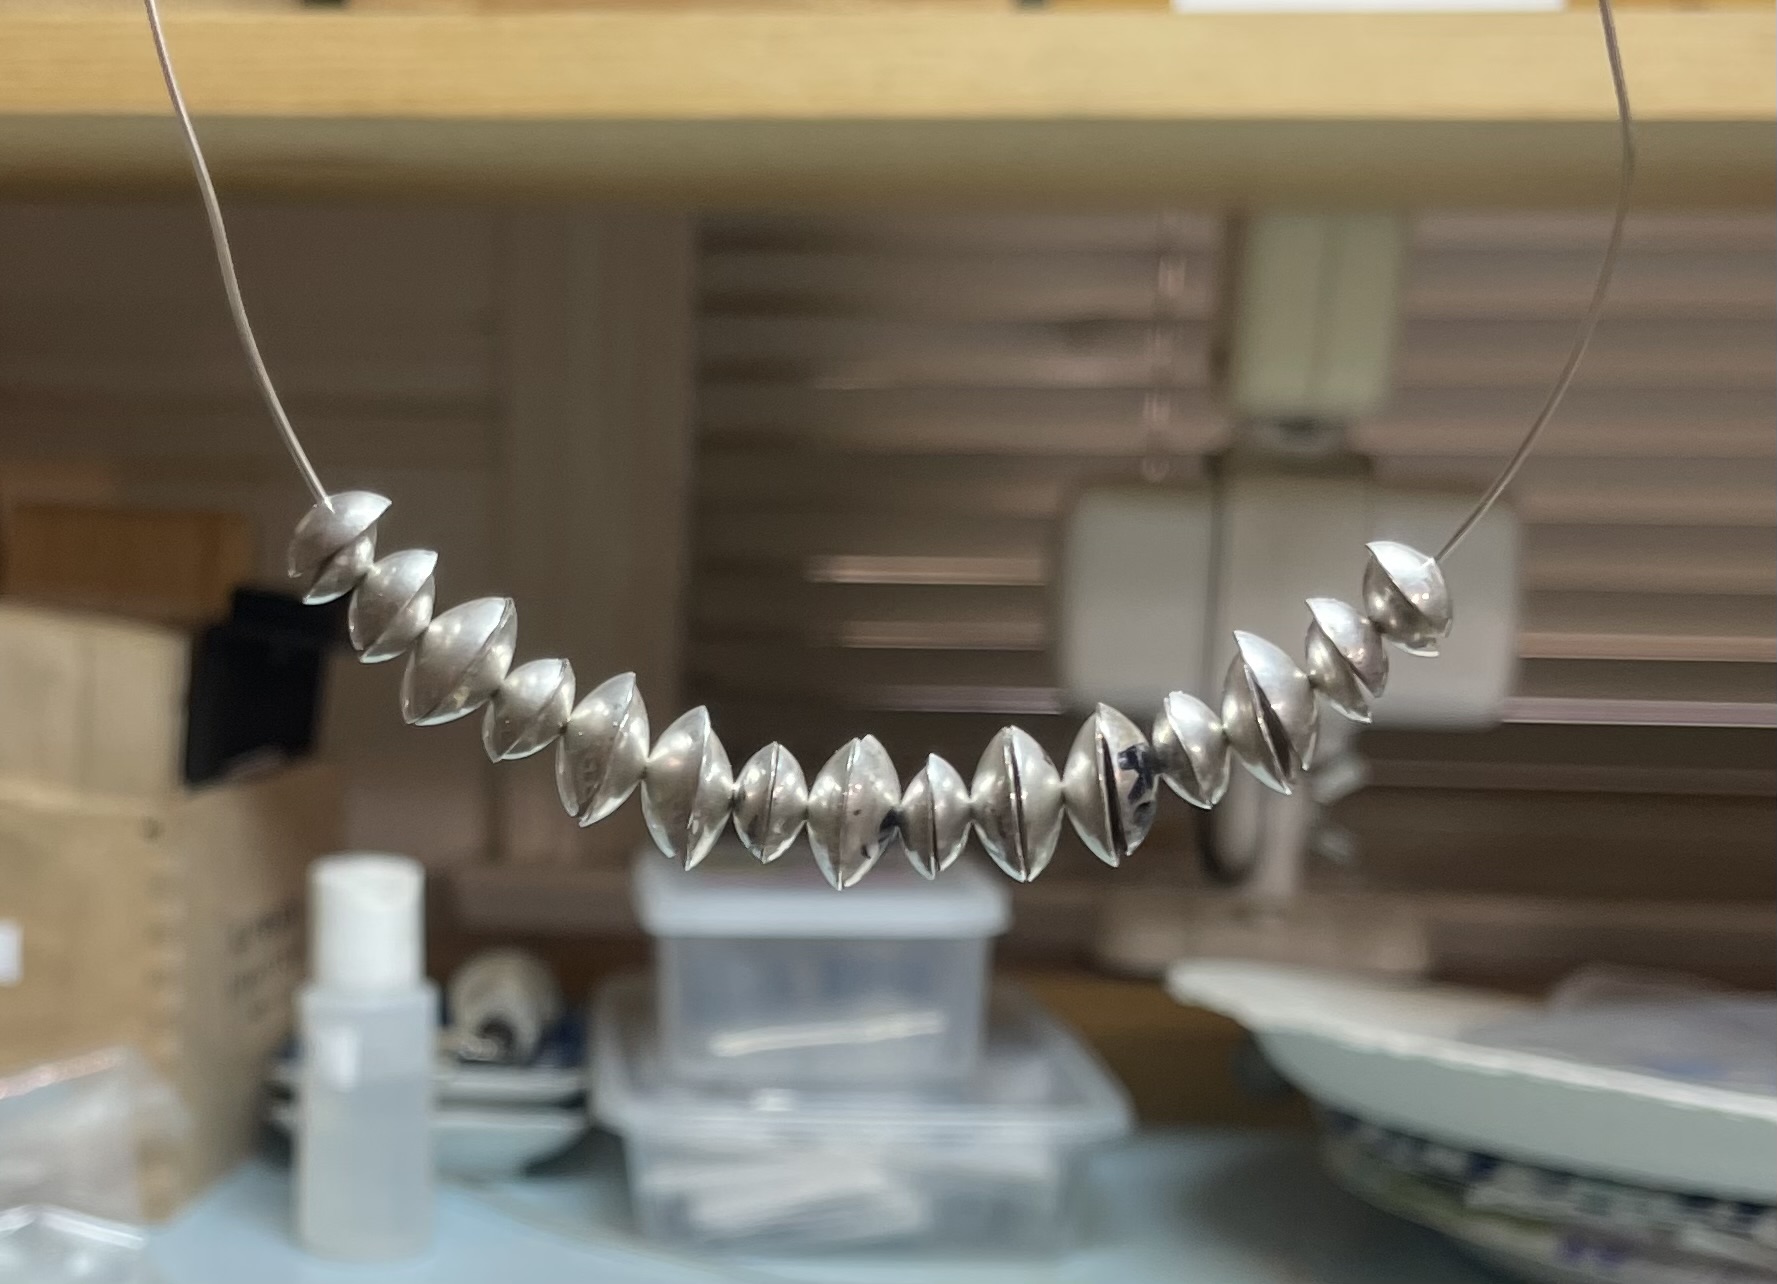
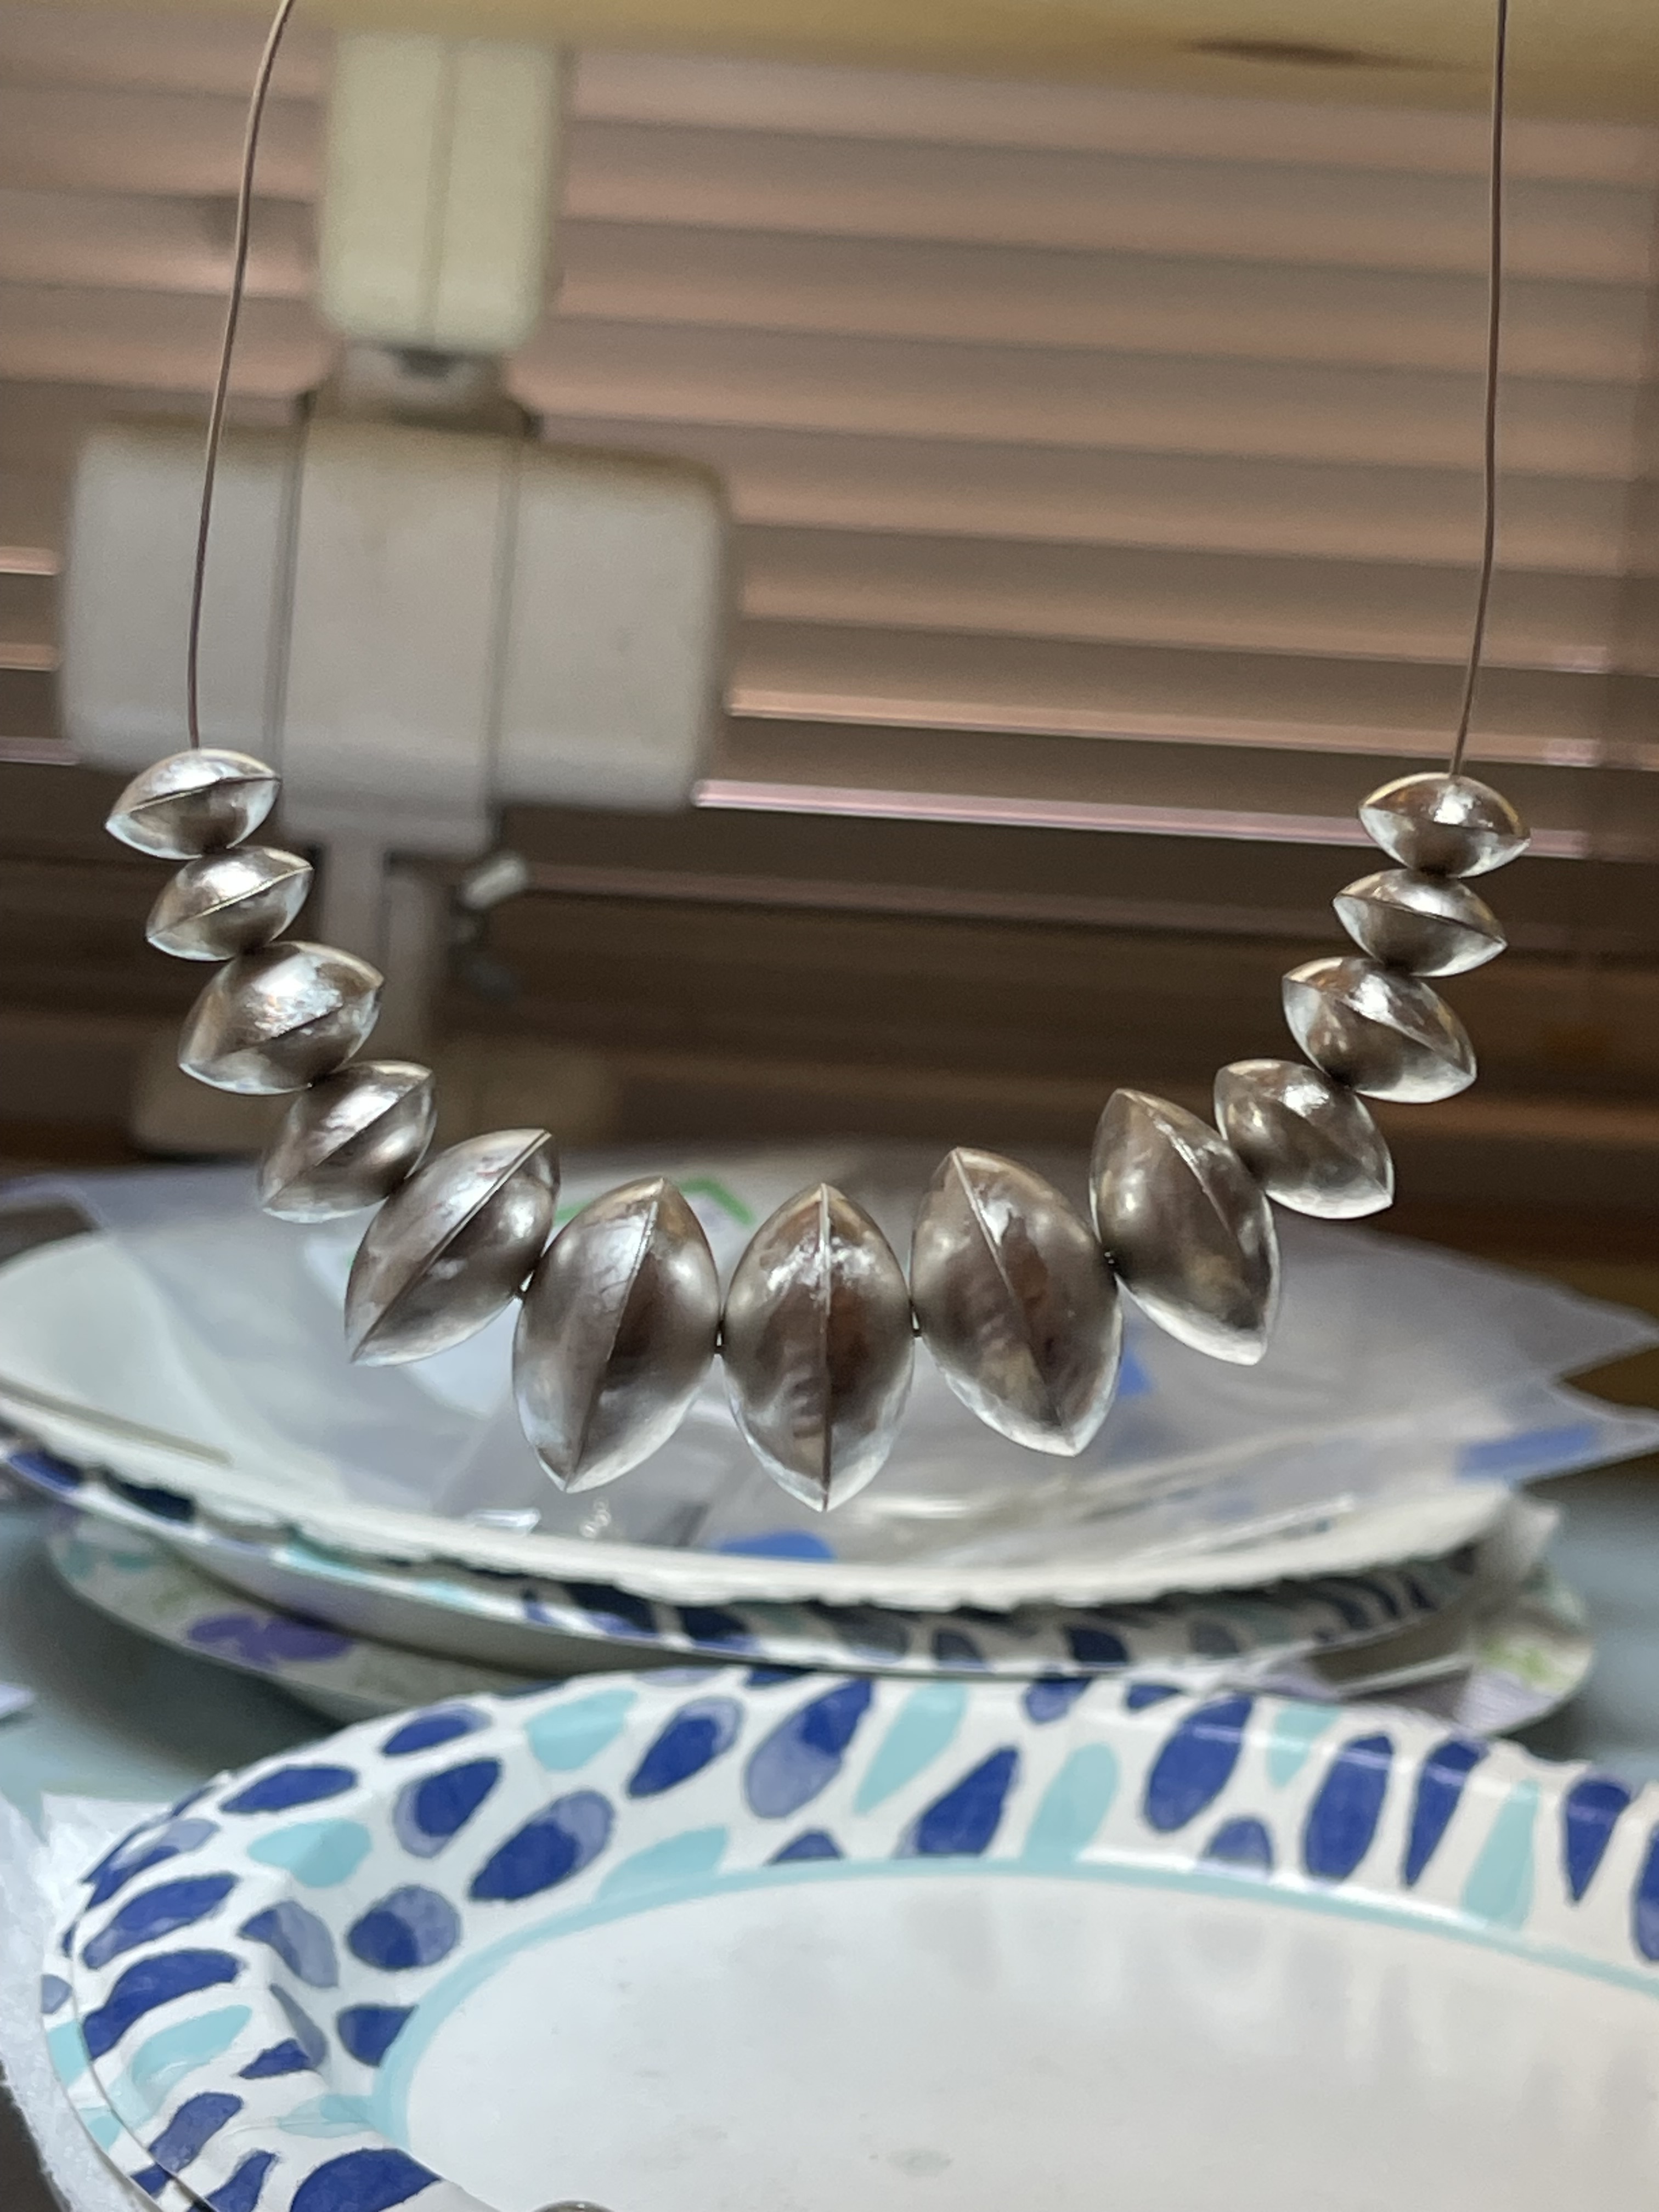
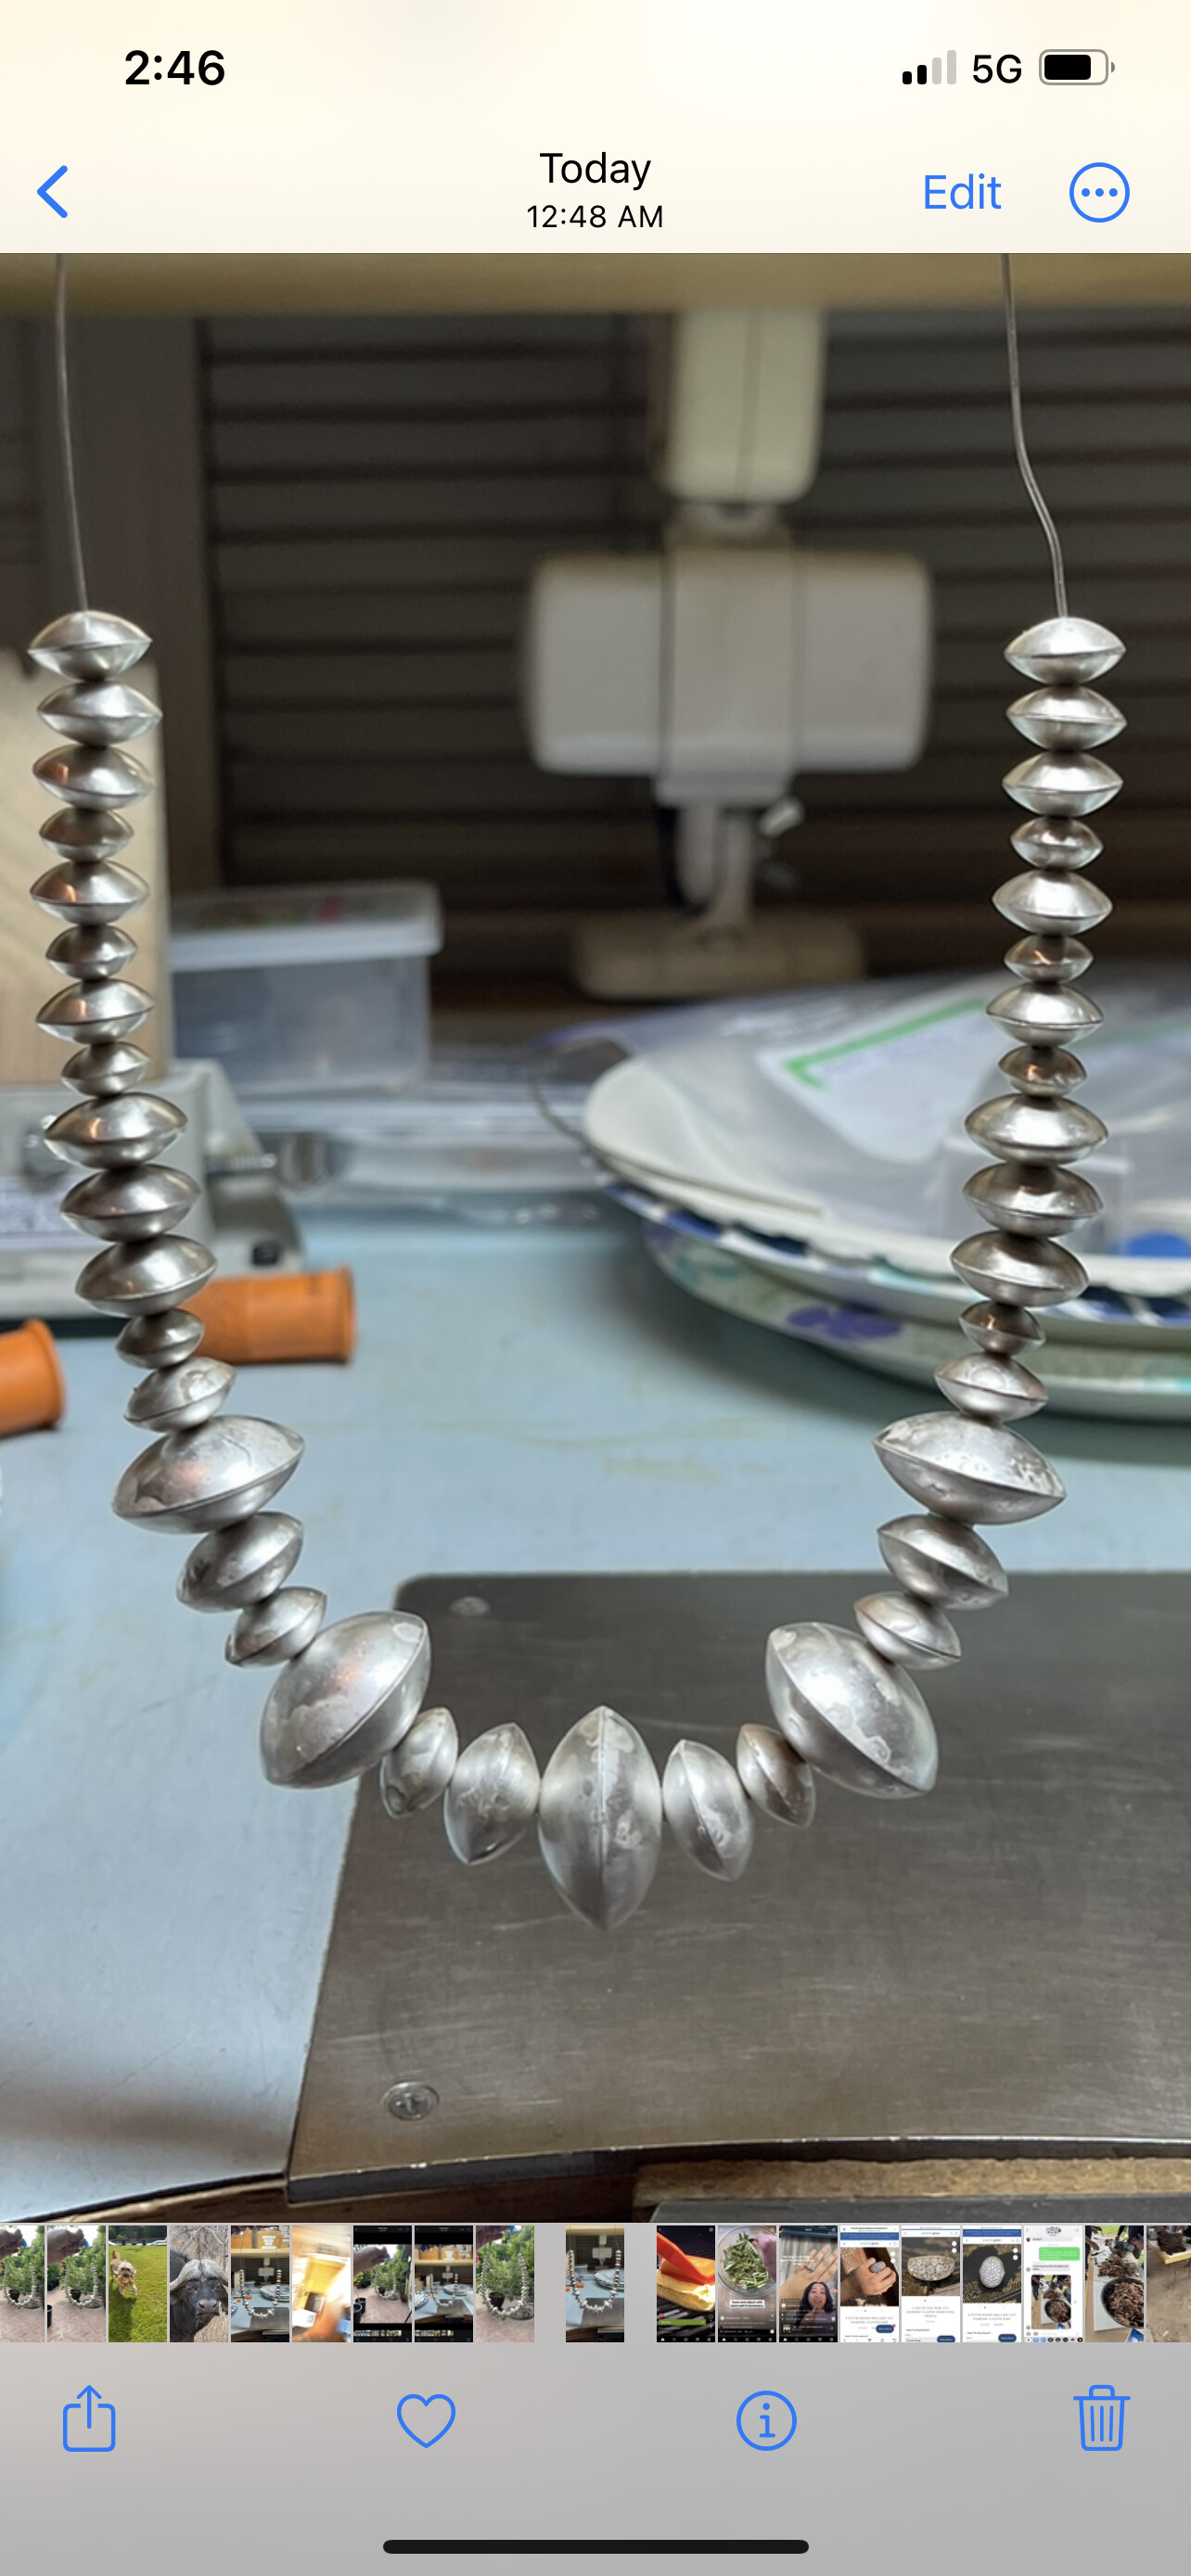
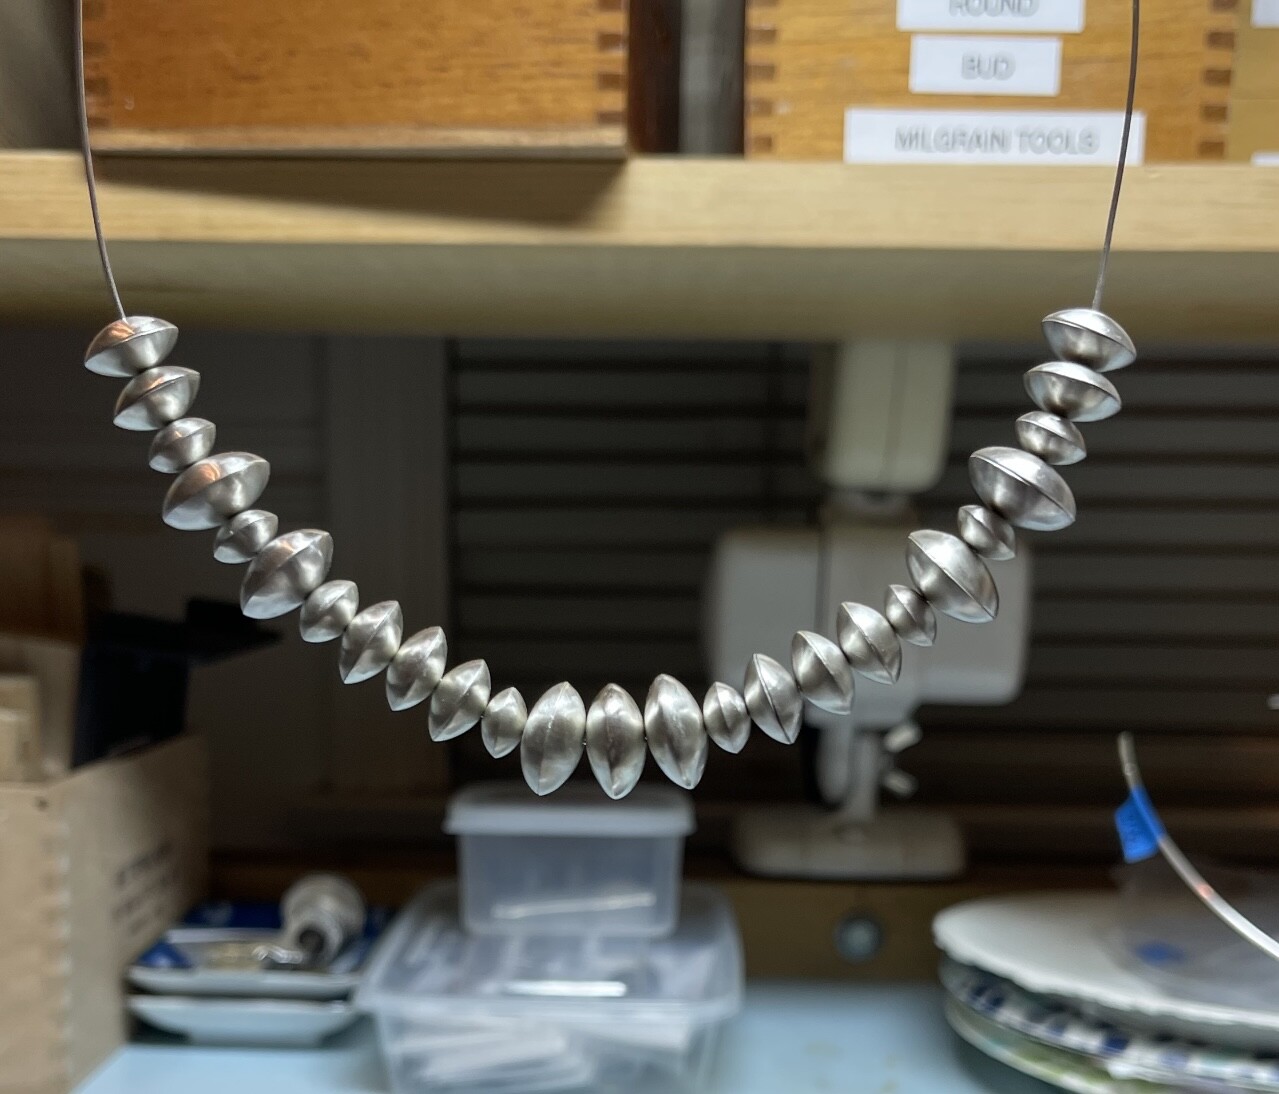
still trying to figure out how i want to order the beads
I still need to make more beads…i just randomly made these sizes…
not done with finishing steps…
still deciding if i want to keep the seam…or sand it smooth…
will probably use a .80mm foxtail bead chain…or maybe bigger …
Good idea, I use it on my filigree and it should work on beads too. It does have a fairly low melting temperature, so if you plan on soldering anything to the bead, that may be a problem…Rob
i dont know how long i want it to be either!..so many decisions…whenever i have been away from my studio for awhile, and just need to get in there and “make something”, i just “start”…with no idea or design sketched out…i just kinda keep moving…
i know i love vintage navajo pearl necklaces…had been seeing them…wanted one…and here i am…in the wind…at least i could bang on some metal…
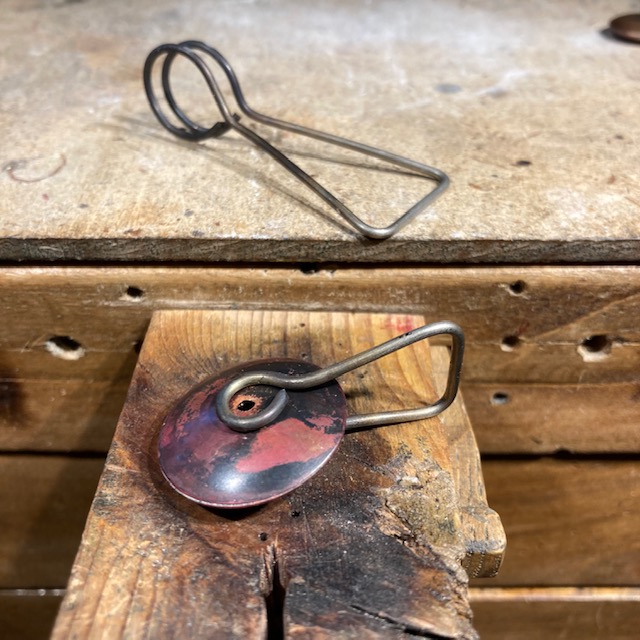
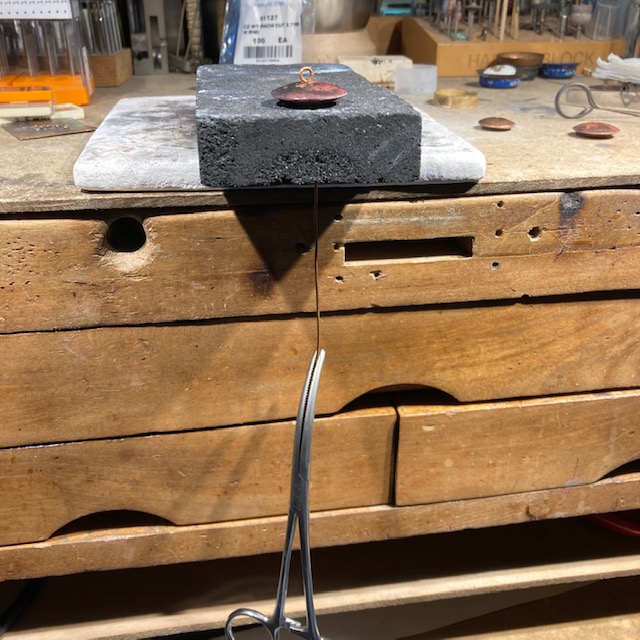
When I make this type of bead I first flatten each half at the rim by rubbing on a diamond ‘stone’ (Eze-Lap credit card fine grit) then I put dabs of (usually medium) paste solder around the inside of the rim on one half. Then place two halves together and either clamping with a simple clamp that is made from 16ga. Monel wire (stainless would work too) or by using a length of ~18ga wire with a loop formed on one end passed through the bead halves and through a hole in my charcoal block and then clamping forceps or a cross-lock tweezer on the bottom for a little weight to keep the bead halves closed snugly. Works a treat!
thank you for the paste solder advice…i am ordering some today!
i love your clamps! and the weighted wire trick is ingenious!!
of course i never thought of that before!!!
another “wire needs tension” “solve the problem”…love it!!!
i tried using T pins, but they were thinner than my hole, and did not provide a secure hold…the round eye at the top of your “pin” looks like it seats into the hole, with 2 tangent points securing the hold!