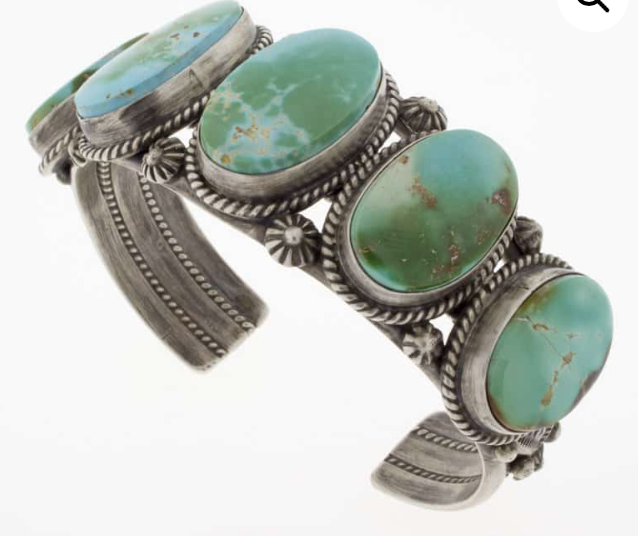
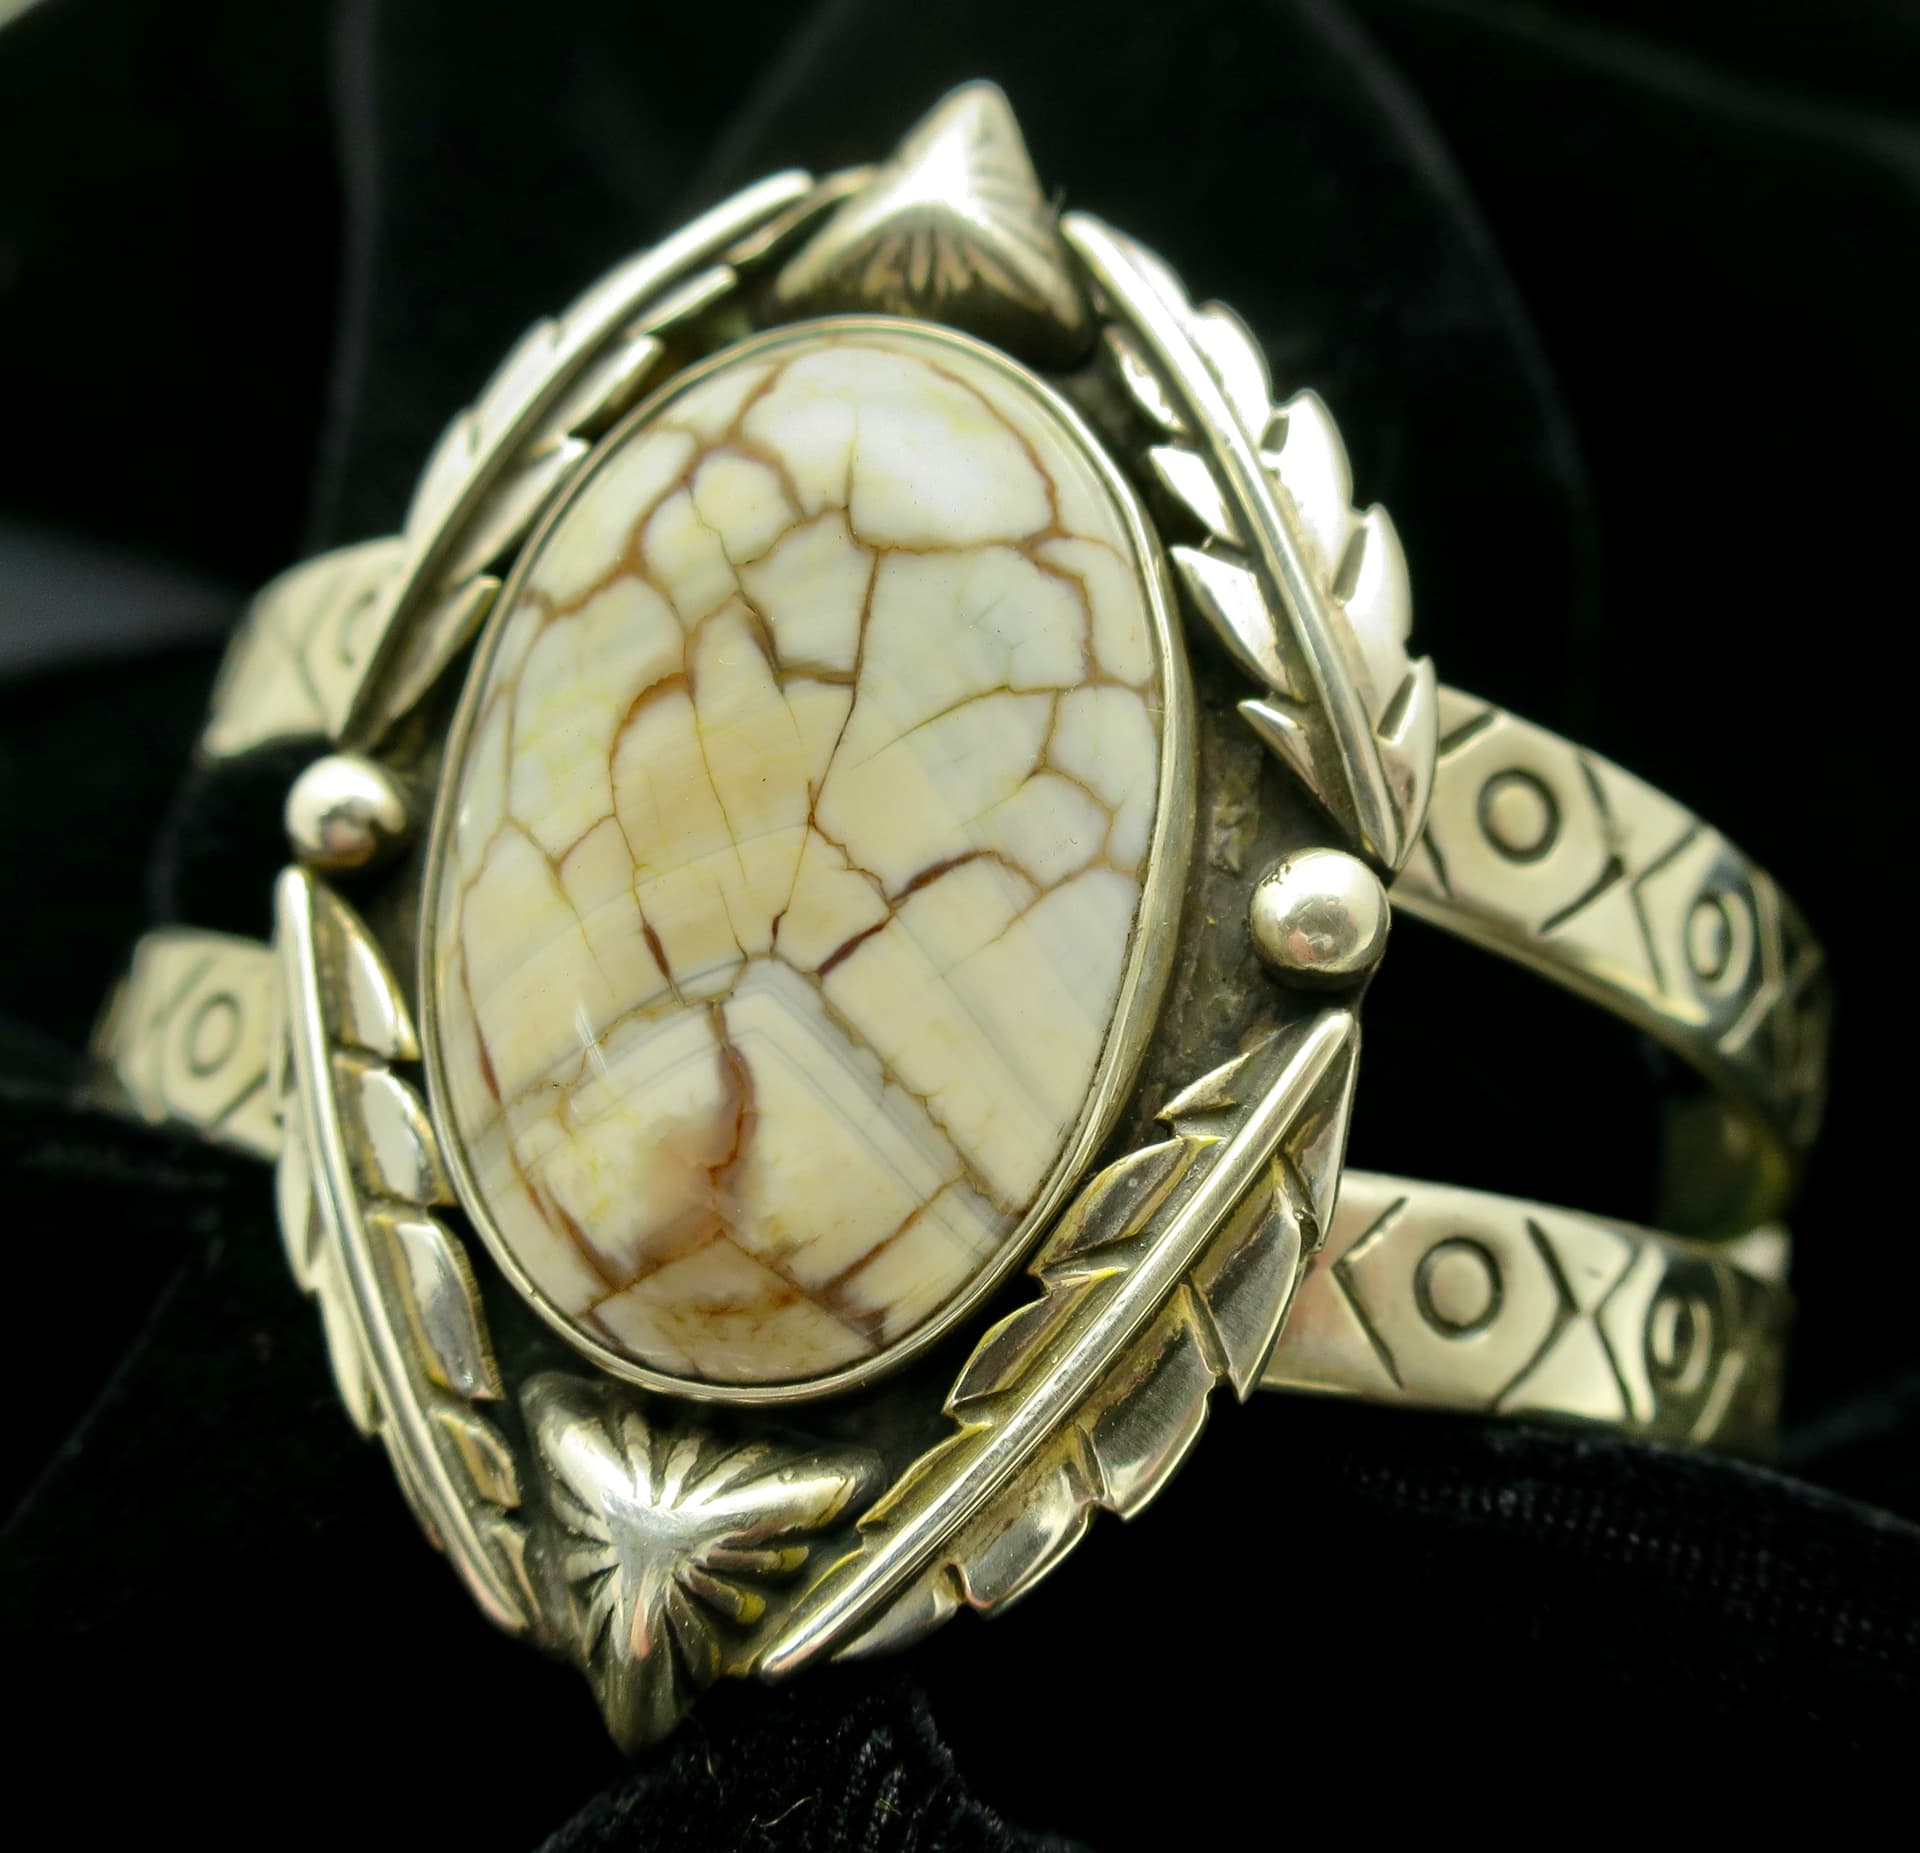
Attached are two pictures, the one with the Jasper is mine and the other is a sample that I’m trying to figure out how to do. How do you go about adding multiple bezels and add-ons all at the same time while keeping them in their respective positions…especially on a curved surface! I figure if I do them individually, then I’ll just be desoldering the one(s) next to the one I’m soldering. In this case it’s the little shot plate stars in addition to the bezels. Anyone out there done this before that can provide a little direction…thanks!
2 Likes
Hi You are not a hack as you claimed! Nice job.
It has been 35 years since I made any Jewelry.
I think that they are all soldered to the main band while he bracelet is flat and shaped into a bracelet afterwards
I am also interested in what more experienced people have to say here.
2 Likes
Thanks Jeff! Well, with a bench like the one you just made, it looks like you’re gonna be back in the jewelry making business!
That’s what I also think. Not 100% sure. I don’t think I’d set the stone until I formed the piece. Looking to see what the others say as well.
1 Like
I don’t like the look of a bracelet having been bent to shape after the bezels are soldered to it flat. You get a bump, for lack of a better term, at each bezel location after bending. I have also never done five bezels. I think that the most is three. You have to plan what melting point solders you will use as you assemble the piece and use hard solder first, possibly in the assembly of each bezel. Then use medium to attach the bezels to the shaped cuff. Finally use easy to attach the shot plate pieces. Remember that if you remelt solder, it melts at a higher melting point because of the lost zinc. Final suggestion, you should prepolish all the pieces separately before you assemble them. Clean them well first and use Boric acid and alcohol. I have read that early native american smiths would presolder all the pieces and then assemble them holding them together in whatever way they could, probably with binding wire, and then heat the entire piece making the solder flow as each junction came up to temperature. I have also read about putting the assembled piece in a controlled charcoal fire. That sounds scary to me. Our father learned to work silver while he was working at the Chilocco Indian School in Oklahoma and talked of the native smiths using gasoline blowtorches as this is all that they had for a torch. I watched a youtube video yesterday of a very complicated piece being assembled on a mound of clay to get all the pieces positioned. Then wet casting investment was flowed over the entire piece. Once the investment hardened, th clay was removed and all the pieces were soldered. Then the investment removed in water while it was hot. I have heard of this technique, but never tried it because I don’t cast and can only find investment in large quantities. I look forward to hearing how others might make these pieces because there are a lot of them around. Thanks…Rob
4 Likes
Thanks Rob, interesting read on the obscure methods. I did try flat once and trashed it because of all the flat spots once bent. I know it’ll be a challenge because you also have to compensate for the stone raising a little higher out of the bezel due to the mounting on the curve so the bezel should be made a tad higher than usual. Also getting the bottom of the bezel to be dead flat on the curve for a complete solder joint…whew! I do a lot of step soldering; all bezels are hard solder, next the bezel and all design features are soldered with medium in a single heat to the back plate. And finally, easy to attach the backplate to the cuff. I’m thinking similar as you and kind of what I already do but with the aid of binding wire. Never used it before but I know others do. The other thing is keeping all those dang little solder chips in place on a curved piece! I may try solder paste rather than try to control the heat and stick solder them all, and a 100 little hopping solder chips? No thanks! lol
1 Like
Rob you are correct. I’ve seen a similar bracelet made by a Native American who had a place at the East entrance to Zion National Park. I was working at the park that summer way back when. We’d go up to the restaurant next door for dinner then go to his shop and watch him. It’s amazing to me now how fast he was. He could do a bracelet like the one pictured in less than 2 hours from start to finish with very basic tools. He bent the bracelet portion first before soldering the bezels on. The one thing he did do was at each spot where a bezel was soldered on, he would take his flat file and file the half round wires down so it was flat. He knew where to file since he used of all things a bic pen to mark the outline of the bezel. the area where he would be doing the soldering didn’t have a lot of bend to it. If you look at the picture each bezel doesn’t have to be filed much to have that area. He soldered one bezel at a time. Leaving the bracelet dirty not pickled. The area he wanted to solder the next bezel too, he would carefully clean it with a small rag he dipped in a solution he had on his bench. I never asked him what it was. Now I figure it was pickle. Leaving the rest of the bracelet dirty acted like yellow ochre would. I ended up spending most my paychecks buying bracelets and rings he made for me.
4 Likes
Hi Aggie,
So, do you think that the bezel "unit"s were soldered together first? (backplate/ bezel wire, rope wire) and then the completed units were soldered onto the 2 half round cuff wires…?
Julie
2 Likes
Wow Aggie, what a privilege to watch such a skilled artisan at work. I would have paid to watch and bend his ear all day long!
1 Like
Hi Julie, I would assume so, but I’d also assume that each one, bezel and rope (twisted wire) would be soldered onto a backplate and then soldered onto the flats of the half round wire. This is how I currently do it myself only I cheat a bit and use my 9” disc grinder to make the flats rather than use a file. It’s just the multiplicity that stumps me. Bezels onto a wide band though presents some unique obstacles as compared the wire mount. Come to think of it, doing it that way overcomes a lot of the problems I described in an earlier post  I’ve got a couple of pieces I made a few months ago that I’ll take pictures of and post later that show the difference and the similarities of both.
1 Like
I have not made anything like his, but when I have a funky shape with lots of close joins (usually a ring) I have been having good success with wolf clay, or for even more precise molds, you can try soldering clay. You can usually get a bunch of joins done in a single go. (This is probably what Rob saw on the You Tube video he mentioned.)
3 Likes
Thanks for the tip! I’ve heard of it but never seen or understand exactly how it’s used. Time to go you tube surfing!
Aggie…Thanks for mentioning filing the flats. I forgot to…Rob
1 Like
Here’s three different bracelets, two I would call cuffs and the other 3-wire. The cuffs I cast, finished and stamped; then assembled the stone mounts…backplate, wire and bezel as a unit w/ med solder. On the wire bracelet I ground flats and on the cuffs I did not. In all three cases there’s a backplate. I assume that it’s not necessary where the cuff is larger/wider than the bezel, it just seems that it would be easier? Pardon the poor pictures, I’m just getting started trying to figure out the photography thing 


2 Likes
Can you post a picture or two of the rings you assembled with lots of close joins and used the clay? I’d be really interested in seeing how you might have used it by looking at the finished piece.
Make your individual bezels with hard solder if possible. Make the bracelet and curve it. Then take a fire brick or preferably a softish charcoal block and carve into it a concave curve that matches or is a little bigger than the outer curve of the bracelet. Place the bezel settings face down and gently push them into the charcoal in the curve, solder them together where they touch from behind with hard or medium solder. Pickle and clean them after soldering. Mark on the bangle where each bezel back rests. Melt medium or easy solder to those points.
Then replace the bezels in the block face down. Then after applying paste flux lay the bangle on top and solder away.
Have fun and remember if it doesn’t work the beauty of silver is that if we mess up we can always have it refined and try again.
Jo
5 Likes
Here are some photos of a jade and pearl bracelet that was a family heirloom that I had to copy. I used the technique I just posted to solder and shape the curved top part.


7 Likes
It fascinates me that in the years I have been building jewelry I just this past month made my first bracelet with a set cab in a freehand bezel. Any cabs before were in bezel cups( maybe 3). I can now count on one hand the amount of scratch built bezel sets I have done on a bracelet. They have been pretty successful and I am pleased with the work so far. Improvements to come. Much yet to be learned.
I have learned to work from below when adding the bezel to the back and I use as hard a bit of solder as I can get to work to solder the bezel in place. I build the bracelet separate from everything else and curve the bracelet before the setting s installed. I also did a lot of pickling and pre-polish wok before I set the cab.
I made my son a Kachina Doll bolo slide using the old native method of assembly and solder in a single step. I used a rosebud and blew the heat on all at once. Moderate success, glad I did it, never again.
Don Meixner
2 Likes
Jo, first of all, amazing art! I read your bio and all I can say is that I’m thankful I joined Ganoksin. There is such a wealth of collective knowledge here that I’m sure to grow as an artisan and hopefully have and will have things to contribute as well. I’ve had a couple of conversations with Gerry Lewy and I’m realizing that there are decades of learning here to draw from, and from people who are generous in sharing it.
Question, when you say, “the bezel settings face down” do you mean for instance the bezel, backplate, twisted wire, etc. all pre-assembled? In the case of my example in the first picture in this thread, that would mean that the soldering points would be where the rope designs touch…correct?
And I will add…Thank you! I would have never thought about doing what you described and have never heard it discussed before.
1 Like
No Don! Don’t say never again! You’re always encouraging others on here so let me encourage you. Keep going! Admittedly, I’m a glutton for punishment…addicts usually are  While my scrap pile was replenished often in the beginning, it is much less so these days. And the benefit of the scrap pile was the need to learn how to melt and reuse the silver, so of course I needed a rolling mill and a draw plate or two, and, and. Oh yeah, I’m also a tool addict, could you tell, lol. I’ve been at this a little more than two years now, still working full time with plenty of honey-do’s but I’m driven to learn at 66 years young. I think you are too, that’s why you’re here. Keep forging ahead and build that scrap pile!