Hi there,
I have been metalsmithing for a few years now, but I’m still trying to find the right process for obtaining a mirror finish without any seen scratches on larger pieces. I work mostly with sterling silver. With pieces that have a flat surface area about 1 square inch and bigger i.e. a pendant, I cannot seem to get all the scratches out, and I’m not sure what I am doing wrong. I of course do not see the scratches until the very end when I apply the red rouge.
These are my normal steps to finishing
I use the radial colored sunburst sanding discs on my flex shaft
I start with 80 grit, 120, 220, 400 and then 6 micron
from here I use Tripoli- with my flex shaft I apply it using a stoddard soft bristle brush
I then clean the piece in my ultrasonic and then finish with rouge
if I’m not using my flex shaft, I do have a durabull polishing cabinet that I use for the last two steps, but I still cannot get out the scratches, and when I keep going back, the problem just seems to get worse
am I missing a step? and I not not sanding enough or too much? any advice would be so helpful. thank you!
-Mallory
Polishing is basically putting finer and finer scratches on a piece of metal. When I need a mirror polish on a flat surface I will emery first in one direction. Then I will rotate the piece 90 degrees and then emery in that direction. When I am satisfied that I have removed the file marks with my first go round I then duck down to the next finer grit. Again I sand in one direction til all of the previous grit marks are gone and then again turn the piece and sand in a perpendicular direction to make sure all those previous marks are gone. I clean off the piece between grits to avoid contamination. I repeat this process till I reach 600 grit. I sometimes go to even a finer grit with polishing papers. I then use a Muslin cloth wheel with bobbing compoud or white diamond compound. Then Tripoli. Then I use Picasso blue for silver on a soft white flannel buff. I change out buffs and clean the piece between compounds and I also use a light touch as over polishing can drag out solder seams, casting pits, and often on silver an orange peel finish. Polishing is an art form unto itself. I have worked in trade shops where the polisher was part d as much as 5he best gem setter. Also keeping your buffs well raid and clean is important. I use just the edge of a flat piece of brass to clean mine. I use a lighter to singe offf any fibers that are sticking out after the raking. Also after finishing do NOT rub the pieces with your bare fingers or a paper towel. Even Kleenex willscratch it. Use only clean soft fine woven cotton. Preferably flannel to dry the piece off.
Jo is a source of knowledge and answers about many of the questions that we collectively might ask. Reading her reply, I want to emphasize that you probably need a larger piece of polishing equipment than a flexshaft, if not now, soon. Think about a polishing motor that will allow you to run a 6" buff. You will learn to use both the flex shaft and polishing motor together to finish your work. I polish a lot of sterling silver and much of the success of polishing comes long before you start polishing. You need to do what you can to keep fire stain and scale to a minimum. Learn to use alcohol and boric acid or a similar commercial product prior to soldering. Use enough, but just enough, solder that is as hard as you can work to avoid pitting. Pre-polish pieces like bezels before you assemble the final piece. As Jo suggests, try different polishing compounds. It is very difficult to keep sterling silver free of scratches. When you are polishing one side of a piece, the other side gets scratches just resting it on whatever you rest it on to support it. In the end, that mirror finish will soon disappear. I always tell my customers who watch me polish that the shine is just temporary and they should learn to appreciate the patina that comes from long use. They can always come back and have me repolish a piece, but they should learn to love the scars that come from living…Rob
It is very difficult to keep sterling silver free of scratches. When you are polishing one side of a piece, the other side gets scratches just resting it on whatever you rest it on to support it. In the end, that mirror finish will soon disappear.
echoes the more humorously phrased quotation from former Orchid member Jeff Demand that I keep on my computer desktop:
Sterling scratches if you look at it cross eyed. Since forever I have high polished then hand brass brushed with soapy water. It is going to scratch anyways, might as well start the process. To my eye it looks better than the chrome bumper finish which has a half life of minutes.
Jo is great and generous with her knowledge. I echo her comments and add a different sort of method but still the same. Go to a good hardware store and get some wet/dry sand paper. Since your surface is flat this method will work well. Carefully tape the paper to a completely flat surface. I have a marble slab that’s 30 inches by 30 inches that I use. It can be a sheet of plastic. Just try and make the flat surface the same size as the sandpaper. Go way beyond the 600 grit. I’ve gone as far as 15,000 yes that is fifteen thousand grit. Work your way in increments say from 600 to 800 to 1200 to 1500 to 2000 to 2400 to 3000 and so on. I doubt you’ll need to go past 6000. I’m anal so I go further. You can do the final polishing with rough on your durable thingy ( thingy a technical term when you have senior moments)
Regarding Neil a3’s quote from Jeff Demand. Regardless of what my final finish is, I always start with a properly high polished surface. Otherwise, whatever imperfections were on the surface before I apply my final finish will likely show through the final finish. This is just my opinion. There is a lot of “organic” jewelry made that is very popular, but if they scrimped on the finish, they may have skimped elsewhere too…Rob
I’m lead bench jeweler at a small company where our main operation is polishing silver and gold pieces. Picasso blue is the ticket. Whether you’re sanding through grits, tumbling or just starting raw, you can get a mirror finish on a 1” x 1” piece in less than 2 minutes. That’s on a Baldor lathe on high using a 6” 6x60 muslin stitched buff untreated. One trick is finger protection. I wear cotton finger cots covered with nitrile super grip gloves and then another set of finger cots and sometimes alligator tape on top of that. Some people wear leather finger or thumb guards, others more layers of gloves and finger cots. Your fingers can get hot and you go through lots of finger cots and tape, but the pieces look great fast. We produce several hundred pieces a day this way. Keep your fingers from getting hot and you can apply a lot of pressure to those pieces and polish them up very quickly. Unstitched balloon cloth buffs work great and so do hard felt buffs. I absolutely love Picasso blue. It is worth every penny and I will, never go back to multiple compounds and changing wheels, cleaning pieces, etc. with the old school Tripoli/rouge method or the newer compounds.
Ruthanne Robertson
Bench Jeweler Team Lead Legacy Touch, Inc.
Lee’s Summit MO
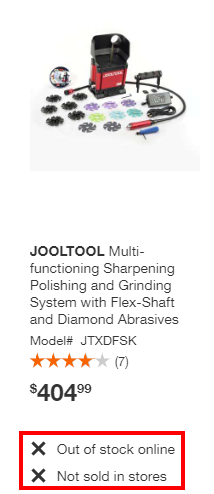
Mallory polishing is a very underrated jewellery skill. For decades getting a mirror finish ‘quickly’ on flat backed raw castings was taking us far too long. We just got tired of all the hand grinding, filing and sanding on the flat backs so we decided to try a Jooltool which is basically a small lapping machine. We manufacture a lot of flat backed jewellery and this machine has allowed us to ‘significantly’ reduce our finishing time. It is relatively easy for a novice employee to operate and take a flat backed raw casting to a mirror finish in a fraction of the time it was taking us previously. It is a permanent tool in our toolbox now. PM me if you need a more detailed break down. (No affiliation to the manufacturer…just worked well for us)
Cheers,
Greg in Vancouver
Ruthanne: Not having heard of Picasso Blue I looked it up on the internet. It seems to be a rouge, and people who leave comments say they use it for a final polish. Are you saying you also use it instead of tripoli? Also, folks seem to use it for white metals. Do you use it on yellow gold as well?
I forgot to mention in my previous post that when I am looking for a mirror finish, like on the back of a large bezel, I use my lapidary lathe with progressively finer resin wheels. I then finish with a light rouge polish. This may not be the best use of my resin wheels, but they work great…Rob