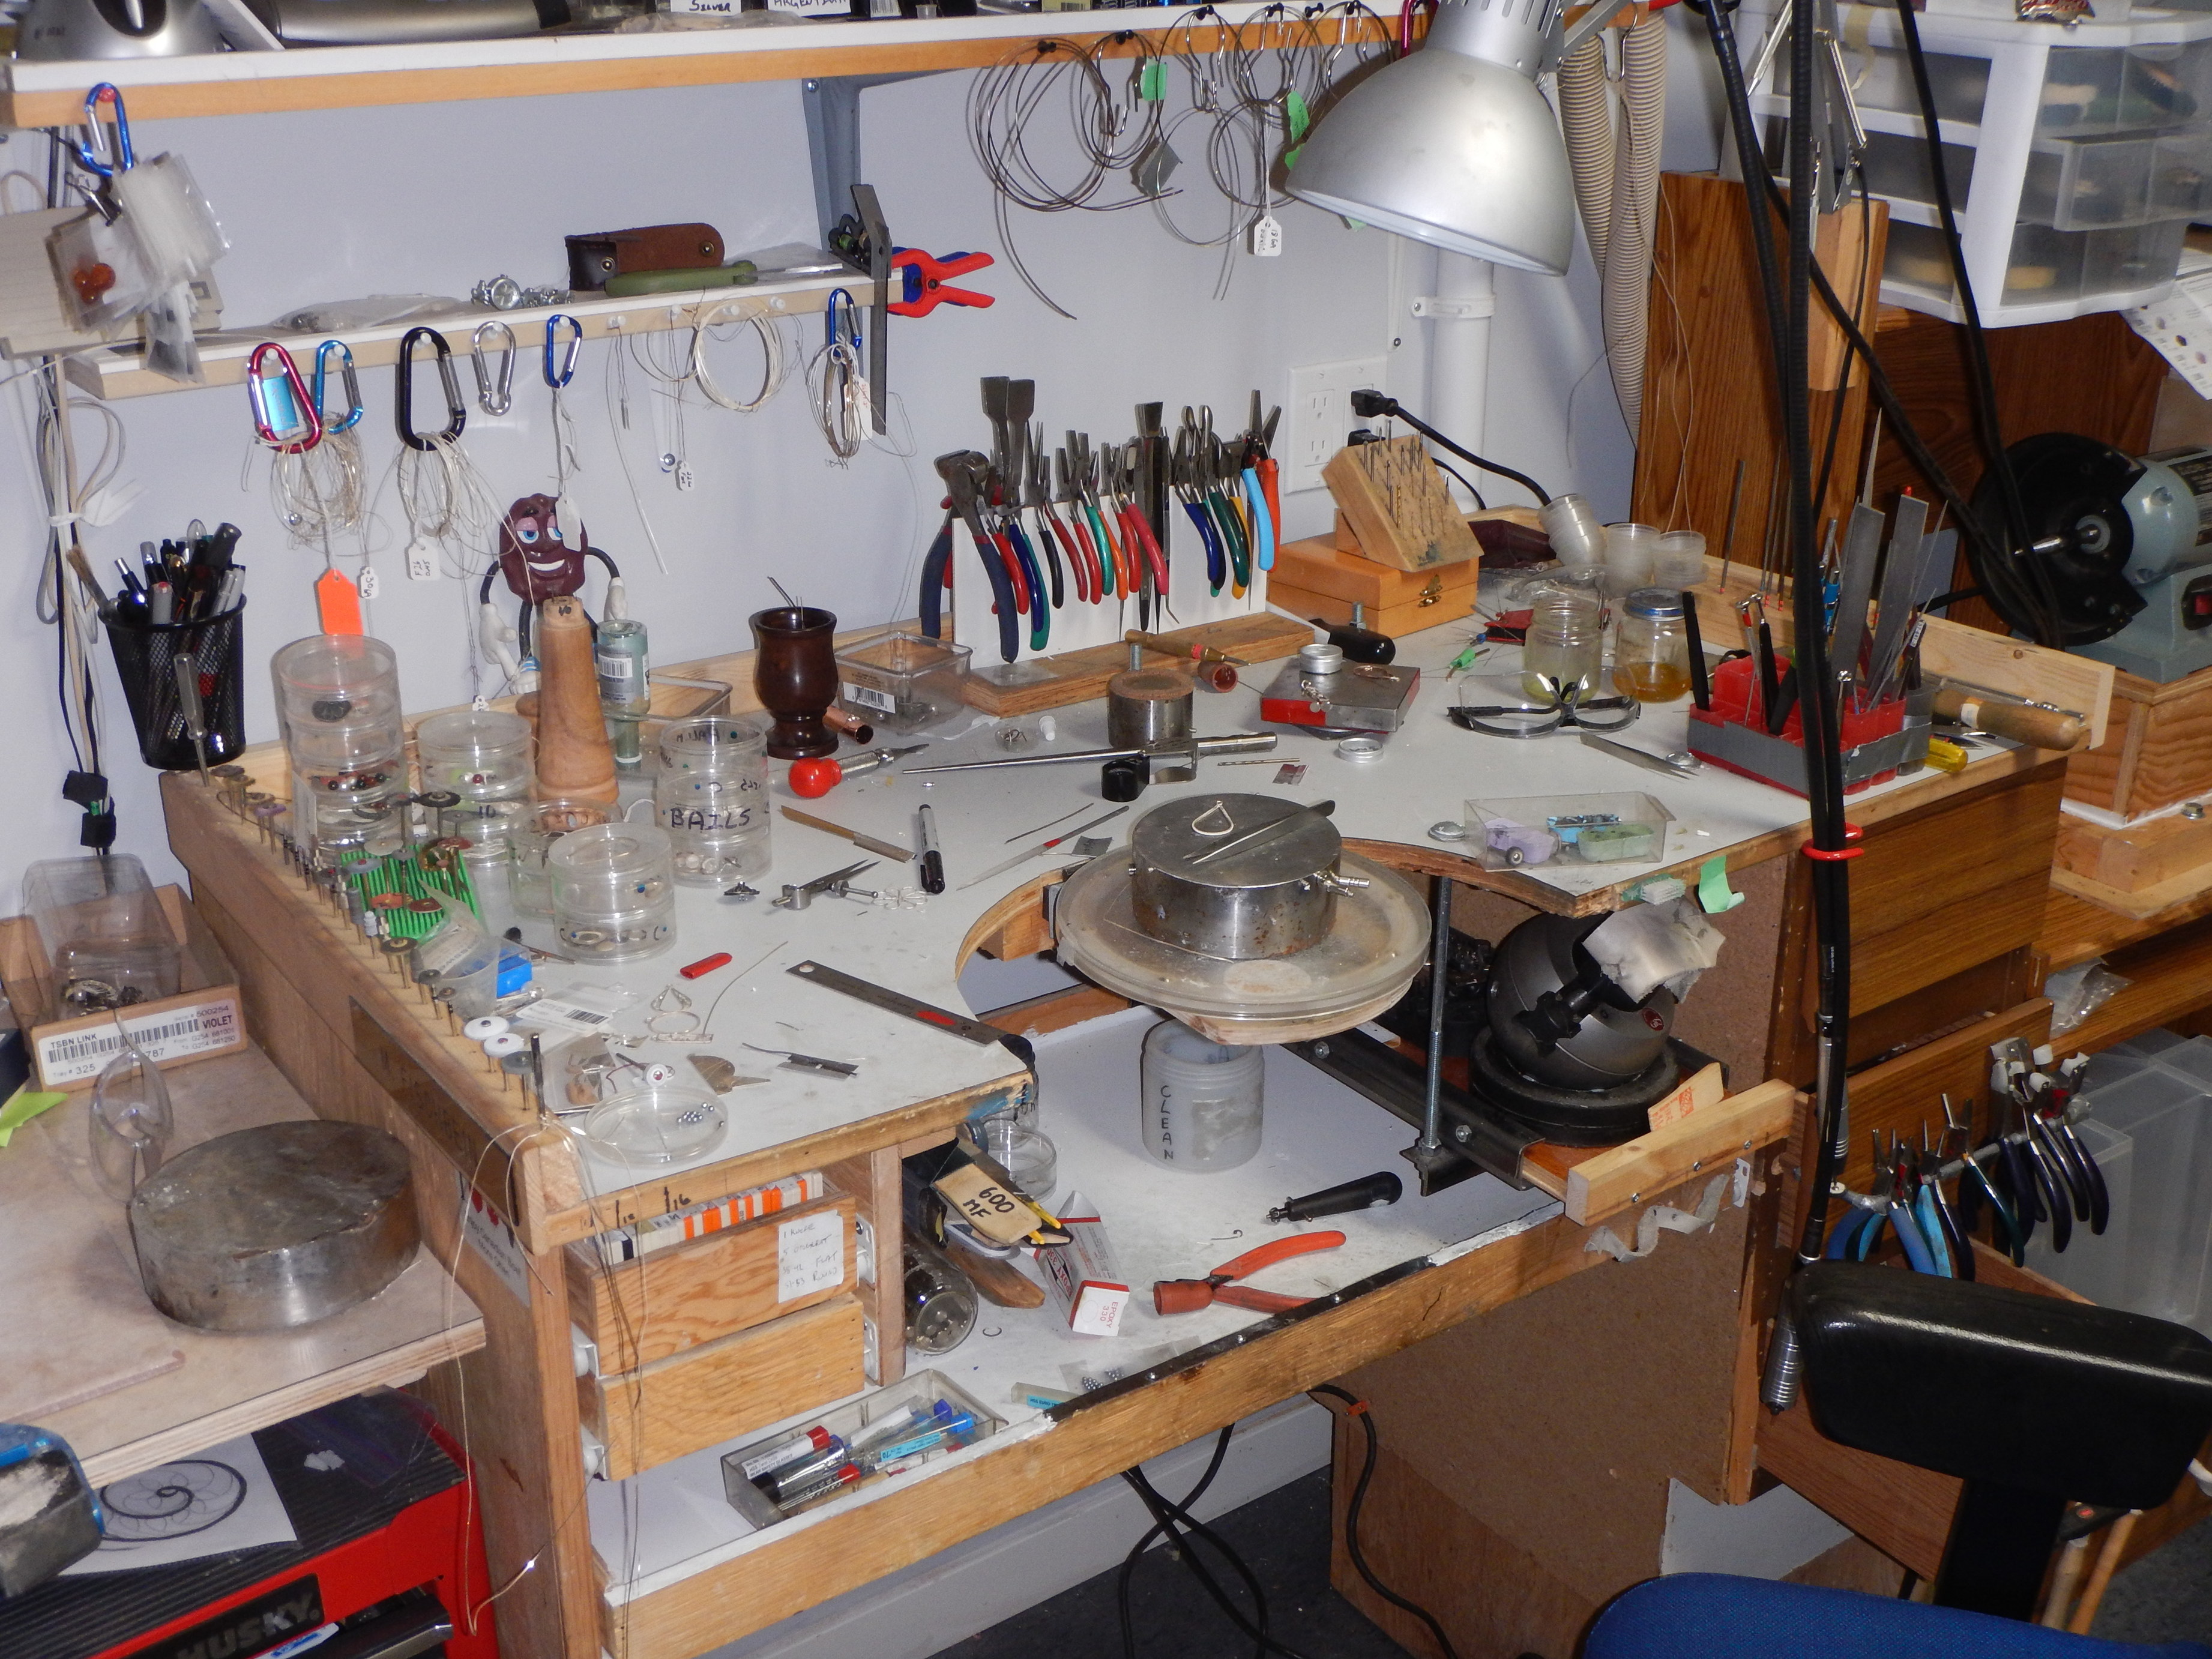
I have 3 primary work areas in my studio. My main bench where I do all of my fabrication, my soldering area and a forming /hammering station. My setup is only about six months old as I recently moved my 20 yr old studio to a new location. I used most of what I had in my original studio, but configured it carefully so that it now matches my work flow better than my old studio.
My studio practice is currently predominantly filigree, hence most of the tools you see on my bench are geared to fine filigree work.
My main bench is custom built. I started with an old bathroom vanity and topped it off with 3/4" plywood and built some additional storage drawers and a sweep drawer. My main bench pin is made of plywood and supports a rather large and heavy piece of 5" diameter steel bar stock that I picked up in a scrap yard. The bar stock sits on a turn table which then sits on the custom bench pin. This creates a very stable surface for me to assemble my filigree pieces. I can rotate my work without disturbing my filigree pieces.
One of my most important tools is a variety of tweezers. I have been using Blue Heron tweezers from Rio Grande as they are excellent quality for a reasonable price
Traveling along the wall behind all of my work areas is a dust collection system which is made out of spare tubing from a built in vacuum system. The network of dust collection tubing attaches to a shop vac.
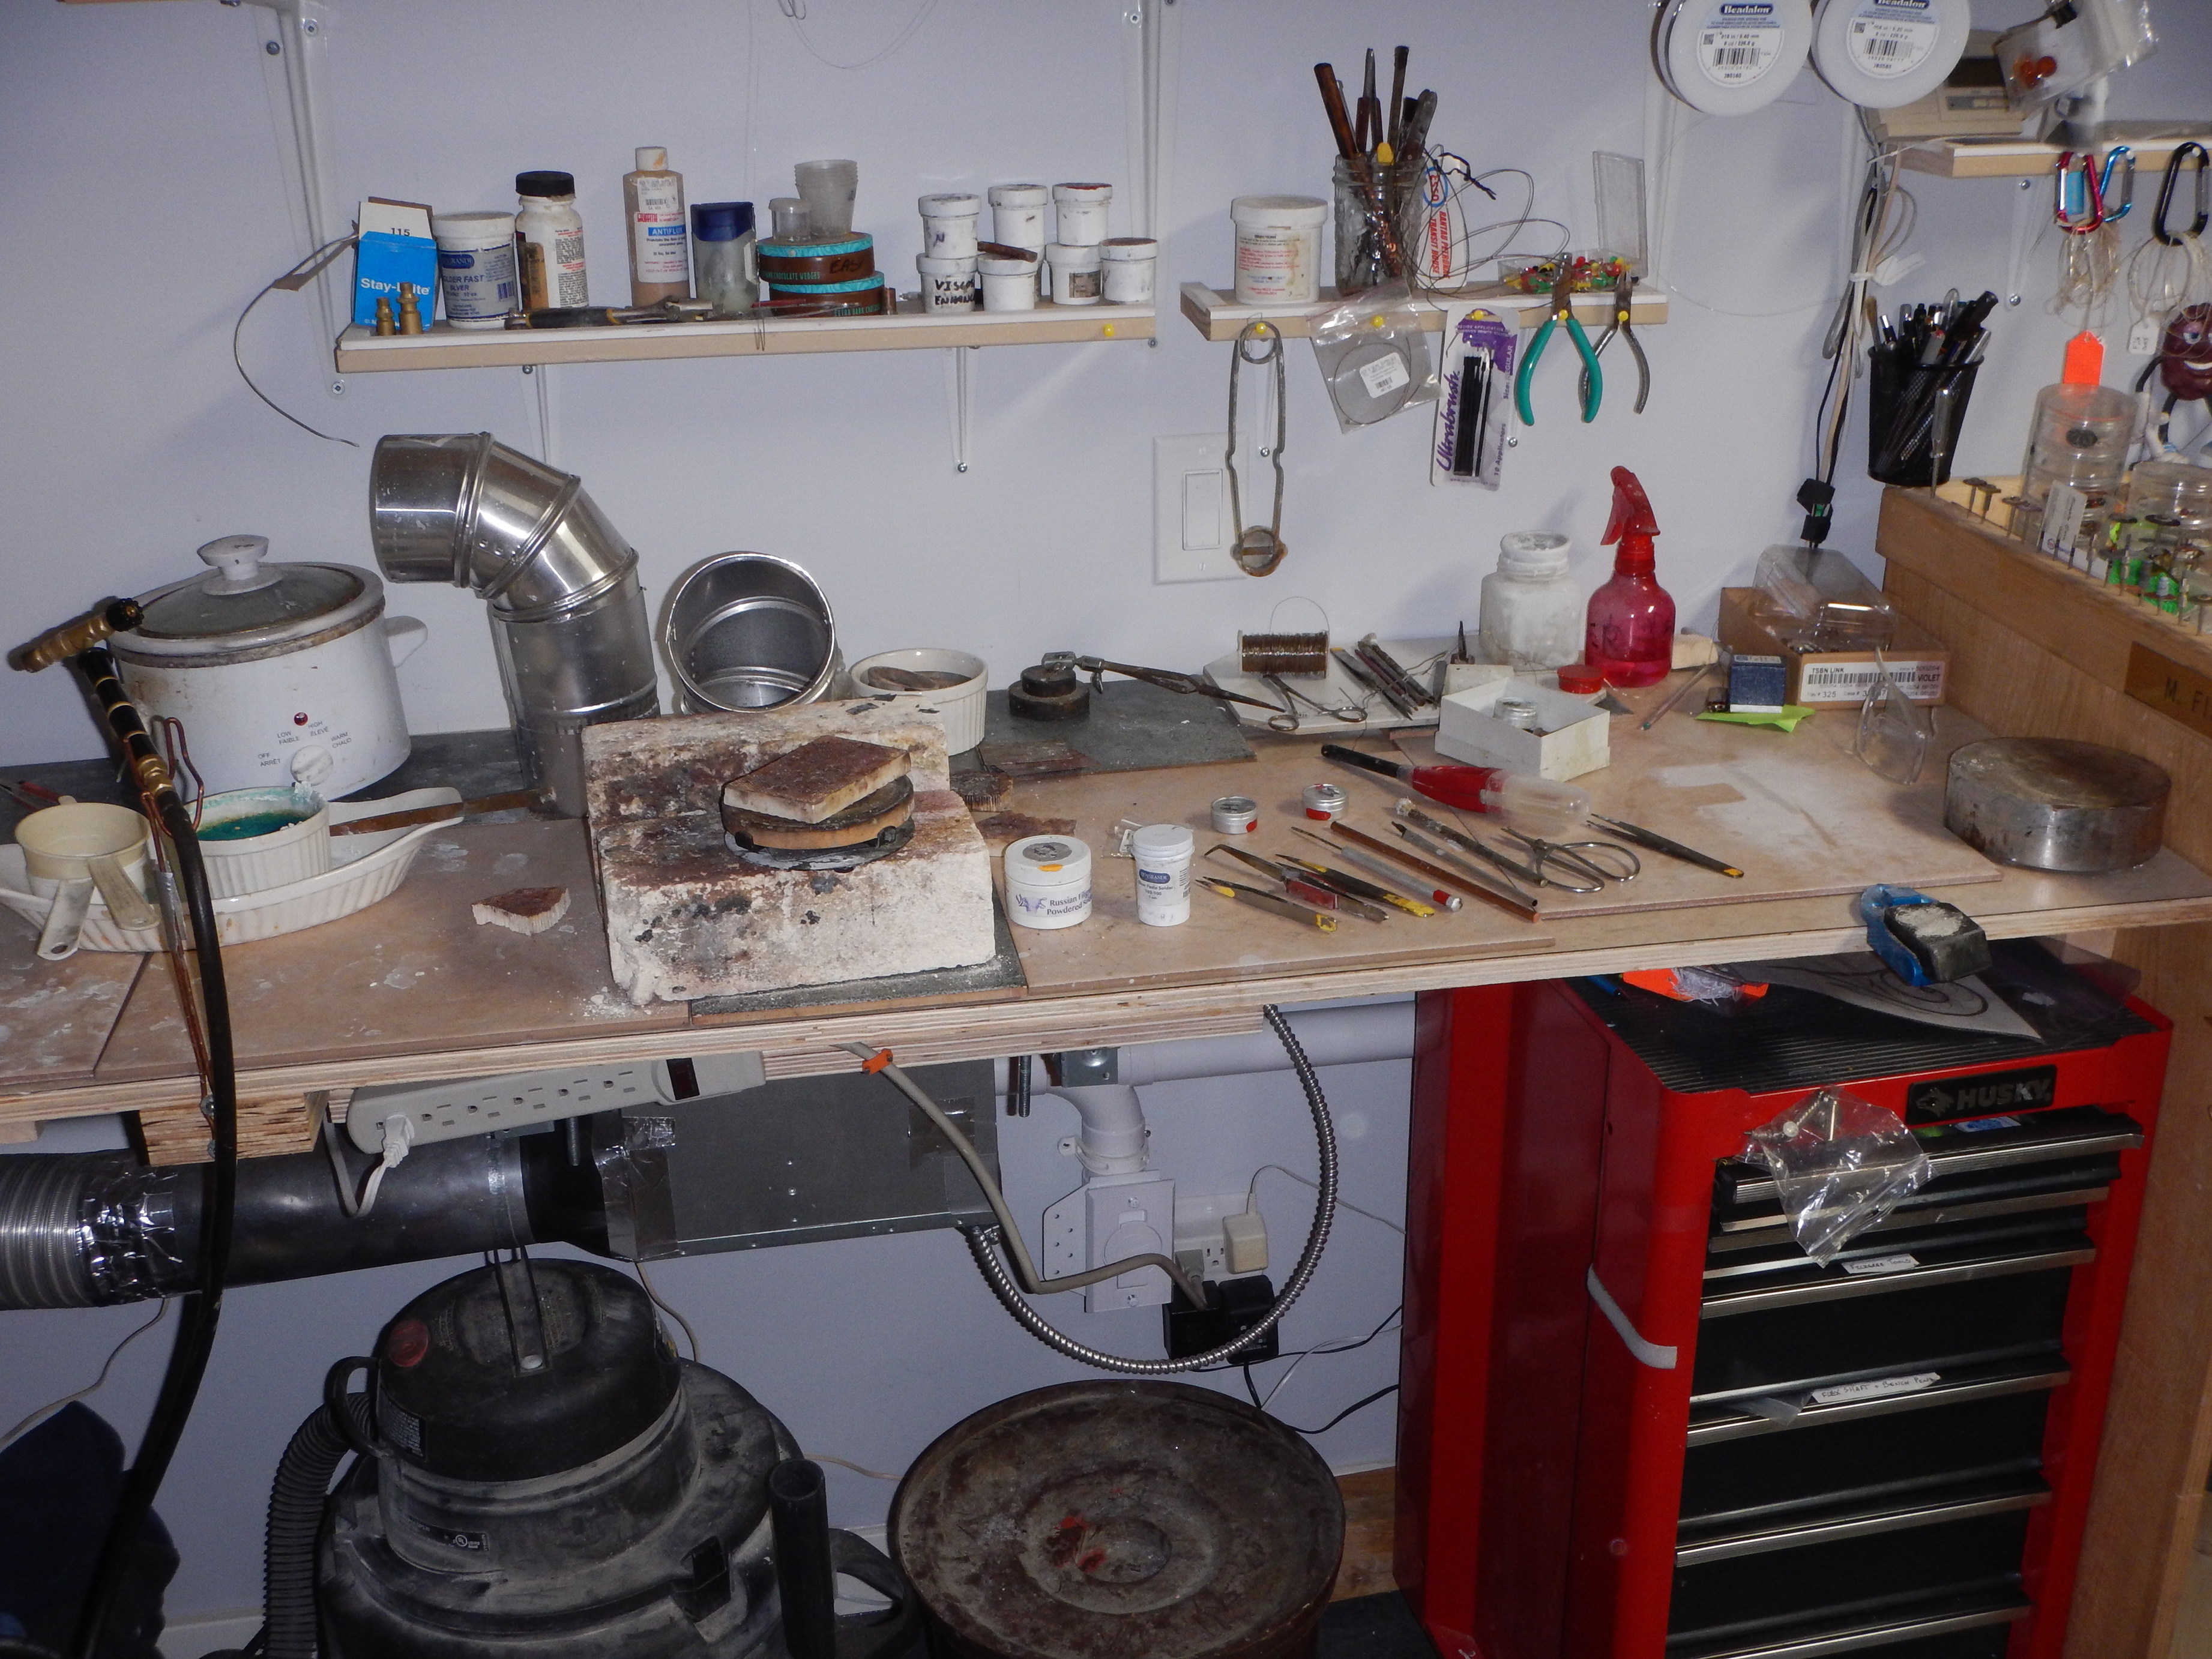
My soldering station has its own ventilation system which is made using a standard bathroom fan. I used a very quiet high capacity fan. The fan is mounted in a box which is attached below the soldering station. I cut two 4" holes in the table and inserted 4" ductwork which is directed to my pickle pot and my soldering blocks. Works really well.
I use both paste solder and powder solder on my filigree, both come from @RioGrande .
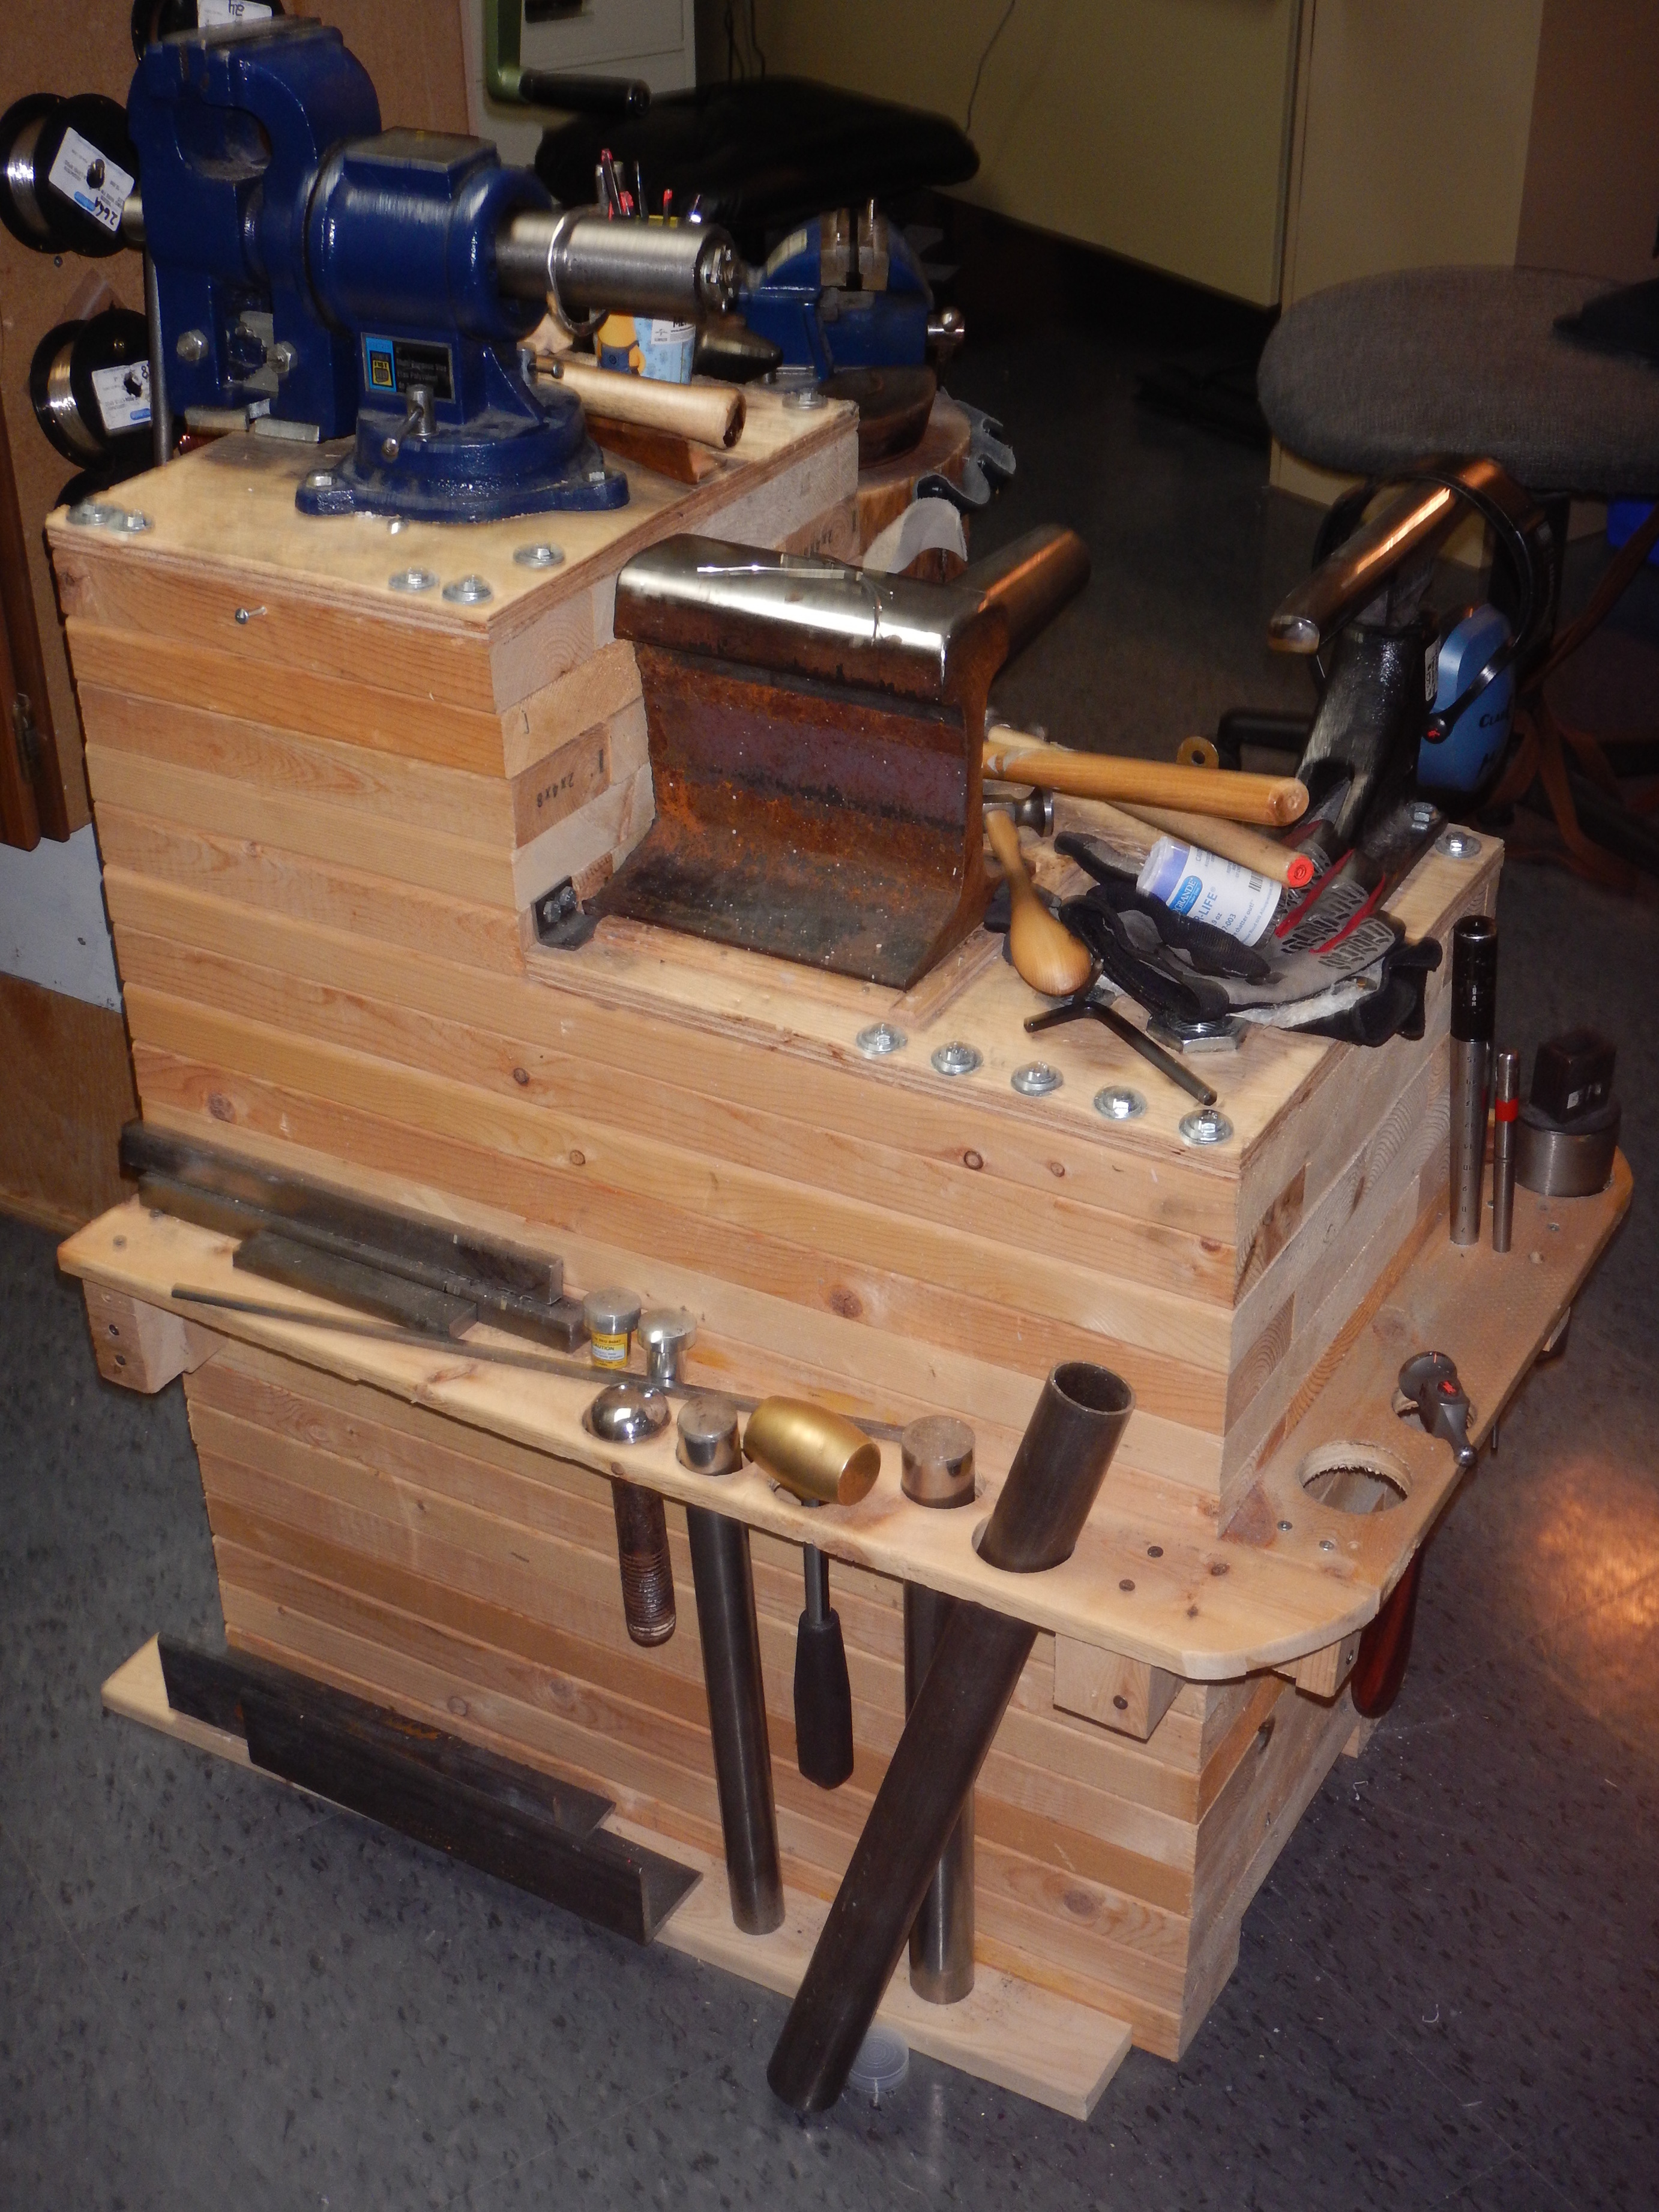
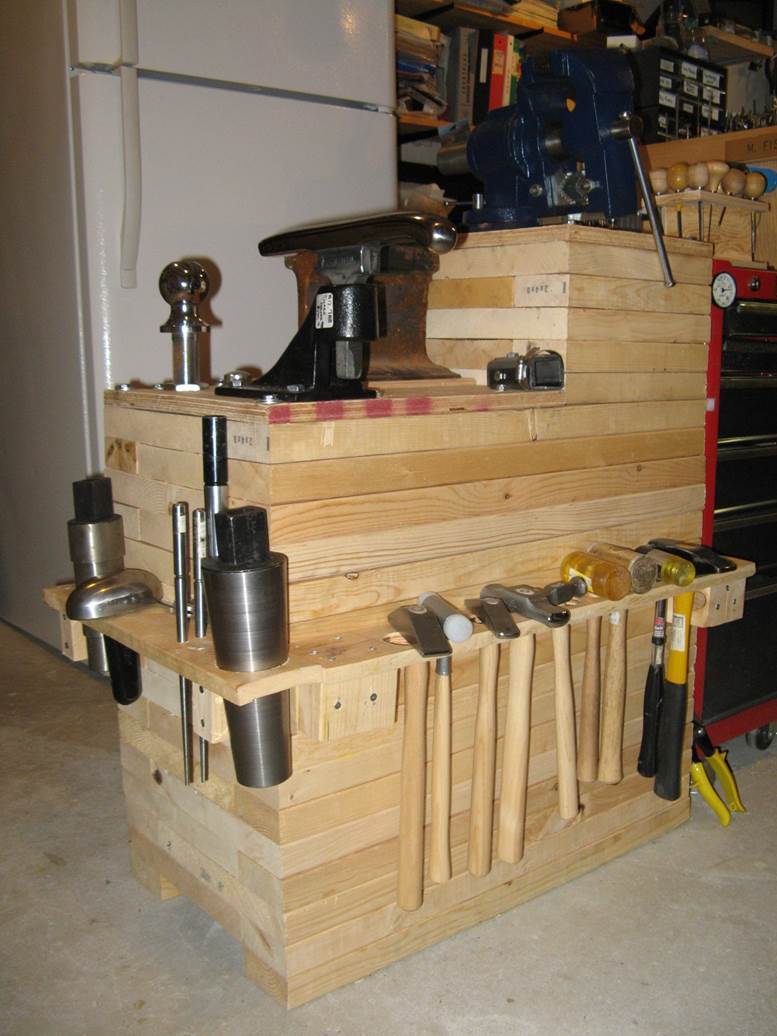
My Forming Station is made of 2" x 12" and 2" x 4" pieces, stacked and glued together. My main anvil is a piece of old railway track that has been cleaned and polished.
Hi Janet
I do have an interchangeable bench pin which uses the GRS mounting plate and GRS Bench Mate as the basis
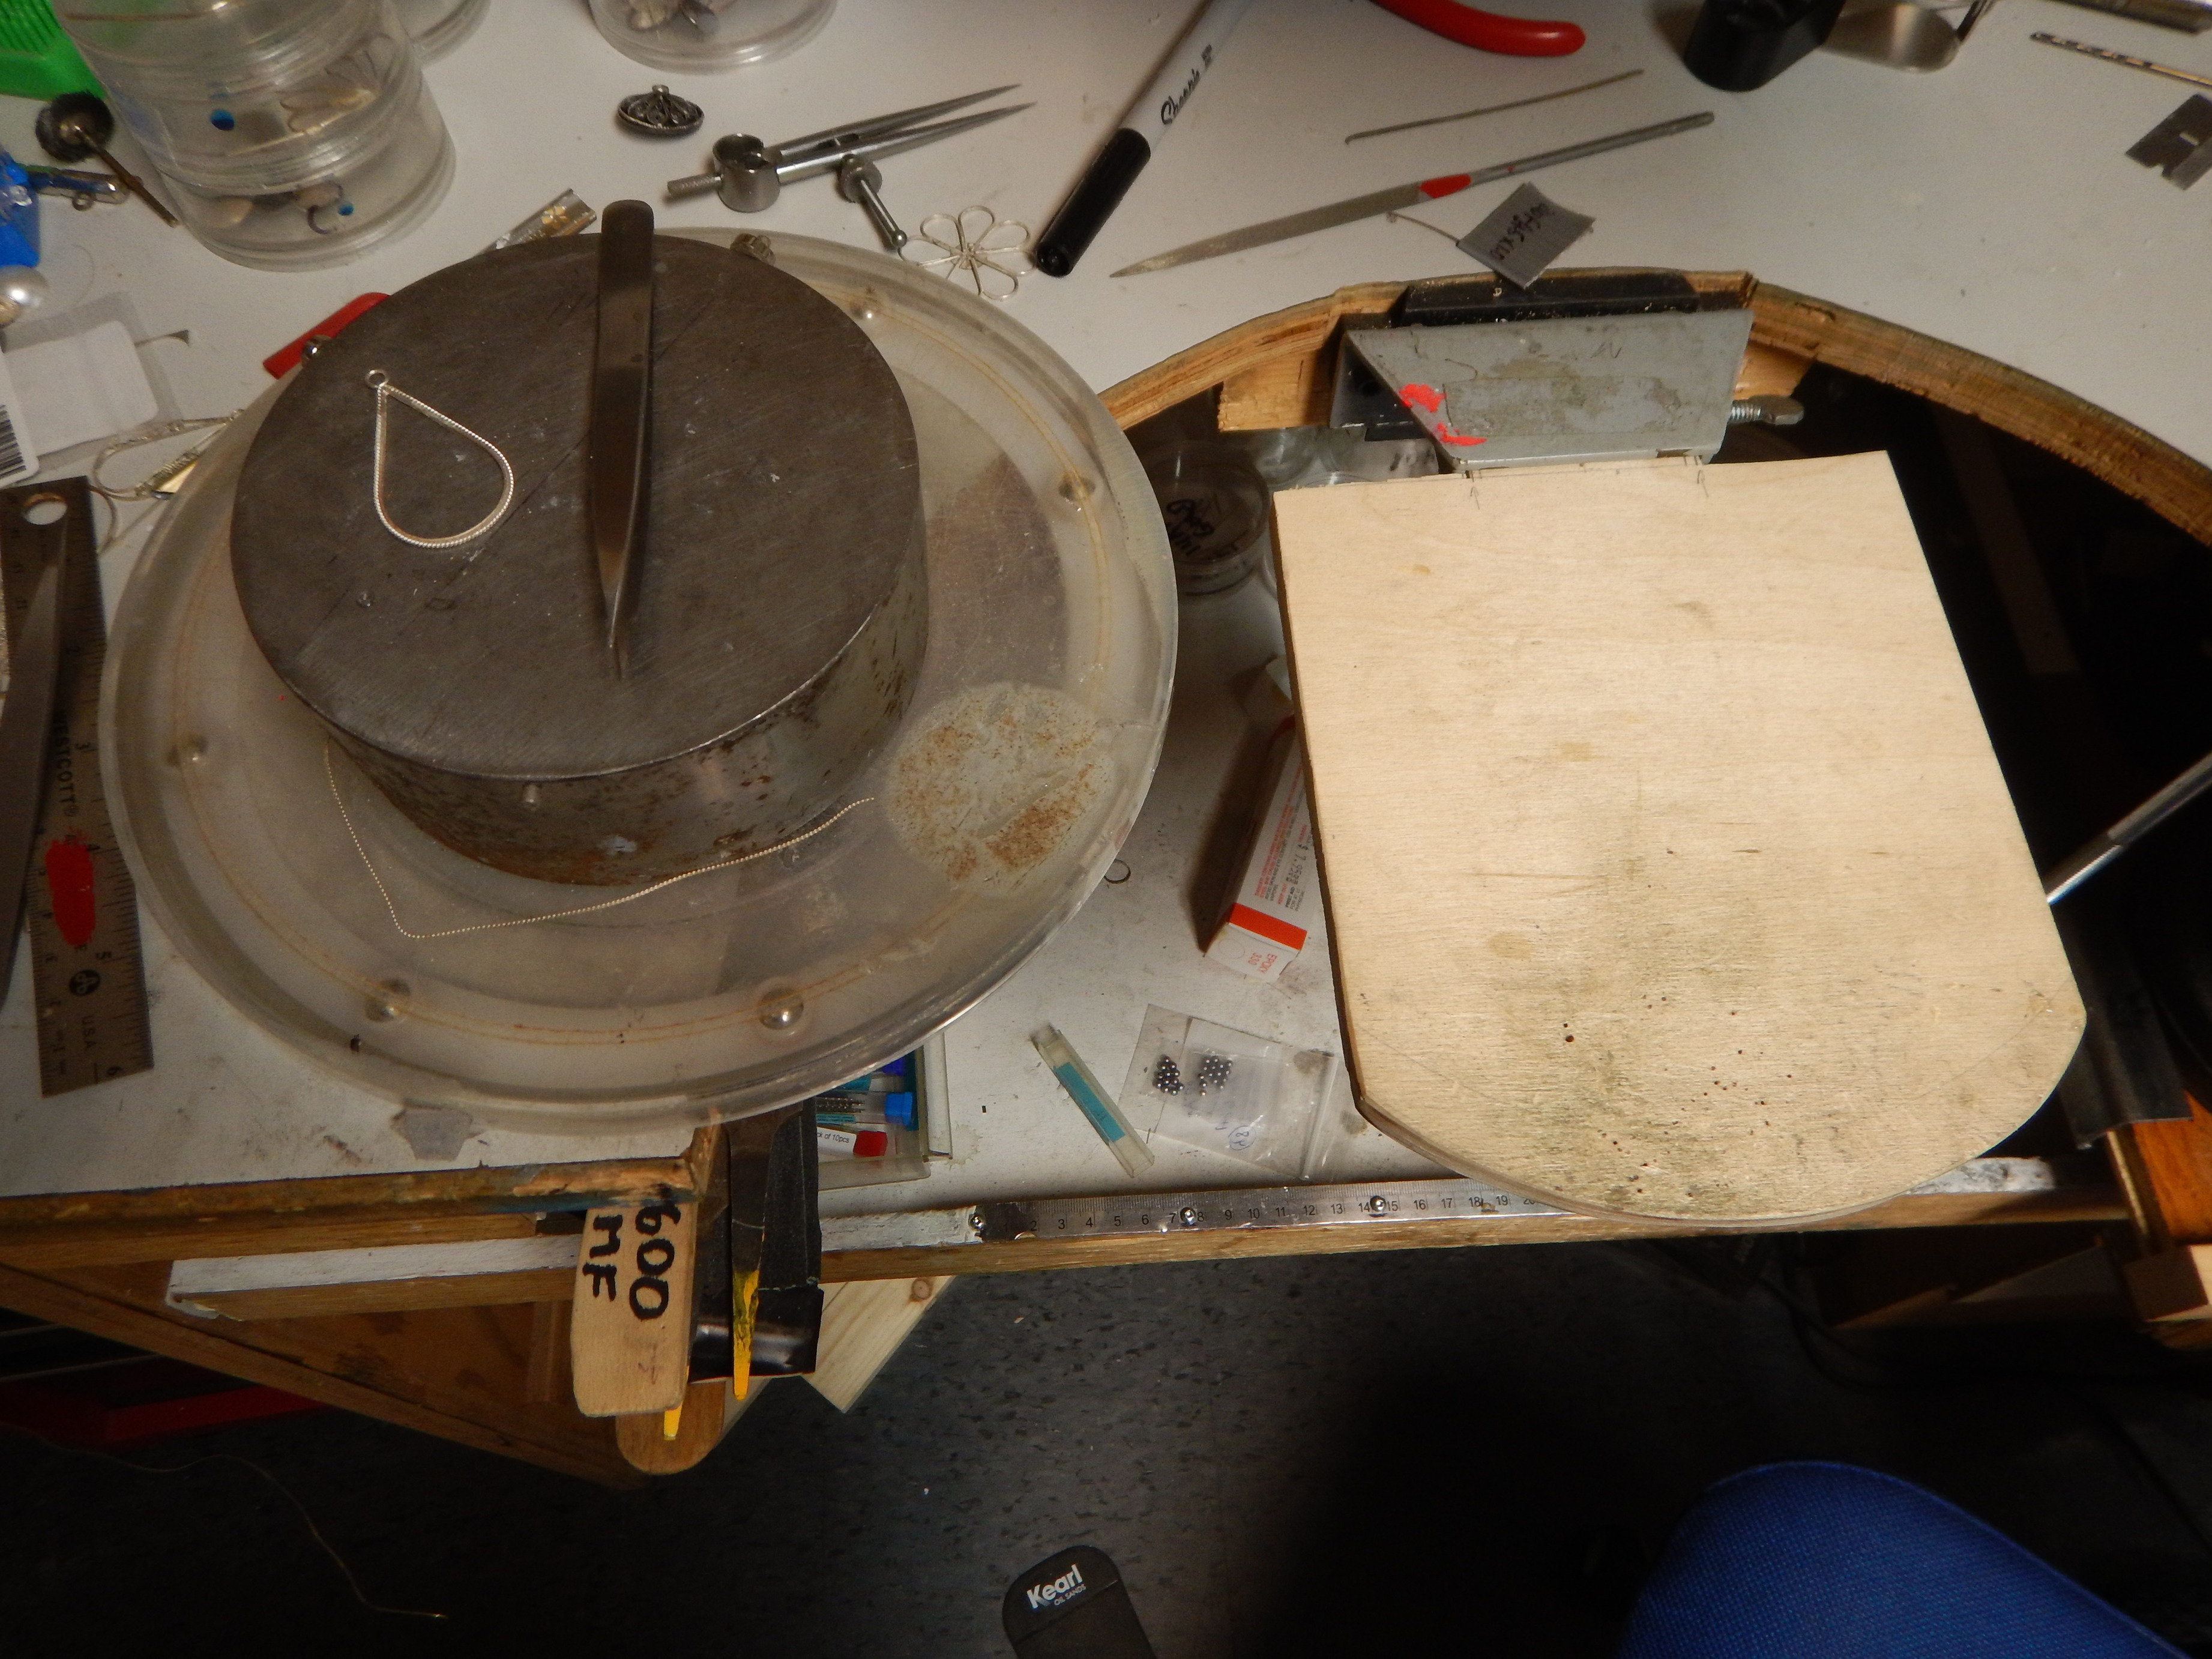
When I am doing filigree I use a large plywood bench bench pin about 6" x 7" x 3/8" thick. This supports my turntable and the 5" diameter piece of bar stock that I do my filigree work on.
When I am doing more traditional work ie sawing, I install a more traditional bench pin in that location.
I have included a photo of my “filigree” bench pin, with the turntable and barstock moved to the side so that you can see the bench pin more clearly.
I also have a second bench pin mounted on my rolling mill work table. I use that bench pin occasionally, if i need to so some filing or sawing while I am working on filigree.
It is located behind my main bench, so I only have to swing my chair around to access it.
I like the shelf around this forming station. I am trying to come up for a base for my small anvil. I have some left over lumber from a deck and cut offs from fencing posts that I could utilize. Thanks for the great idea.
Hi Joanne
The shelf is a really handy way for me to hold my hammers. Most of them are on the other side of the forming station, so you cannot see them. Only downside is that sometimes when I am working in close, and sitting on a stool, I can end up banging my leg into the shelf, but, generally I am back far enough that this does not happen.
Also, if you are building from scrap wood, make sure that you make it large enough that it has a lot of mass and does not move around. Mine is very heavy, probably about 200# without anything on it. Dimensions are 15" X 28" X 25" high and the little tower that has the vise on it is 15 x 11.5 x 7" high. So the tower working surface is about 32 inches off the ground. I picked the two working heights based on what is comfortable for me to work at.
I have attached a showing the other side of it, taken about 5 years ago when the forming station was brand new and when my studio was in a different and much smaller location
Base for small anvil: I use a hydraulic lift (similar to a motorcycle hoist but smaller) for my rolling mill. I got the idea from someone here on Orchid. It’s the most stable such model I could find for obvious reasons. It’s strapped on, and sits under the bench out of the way (next to the beverage cooler where our baby turtles are brumating til spring) until I need it. Then I roll it out and hand-crank it up to my working level. Likewise my very old secondhand faceting machine, now used only to grind flat backs on cabs etc., sits on a Harbor Freight mover’s dolly ($9.99) under the soldering station until I need it.
Thanks for the extra picture Milt. Great storage for hammers and mandrels to boot. Looks like you made a graver stand too. I have mine in a small storage container but would like to keep them at hand in a orderly manner. I built a wooden file stand and it looks like all I would need to do is hang a narrow board off the side and drill some holes to hold them. Wish I would have thought of that when I made it this summer. I really like this bench exchange.
Milt
I love the forming station
thats hurricane proof I’m sure
I will be copying that one for sure thank you
its like building a tee stump out of 2by’s
Anthony
I love the studio, but especially the forming station. That’s awesome! I live in the desert so heavy tree stumps are actually hard to come by. I’m super glad I saw this post, it would be perfect for my home studio.
Hi Milt. I hope you’re doing well. I don’t know how I missed these messages. I would love to read the .pdf! Please email it to me at erica@halsteadbead.com. Thanks!
Hi Linda
My bench is surfaced with arborite laminate. It is the same stuff used on kitchen counters.Although it may look white in the photos, it is actually a light grey. The colour works well for finding misplaced bits and pieces. It is easy to clean and the surface has stood up very well to daily use for about 15 yrs so far…