HI
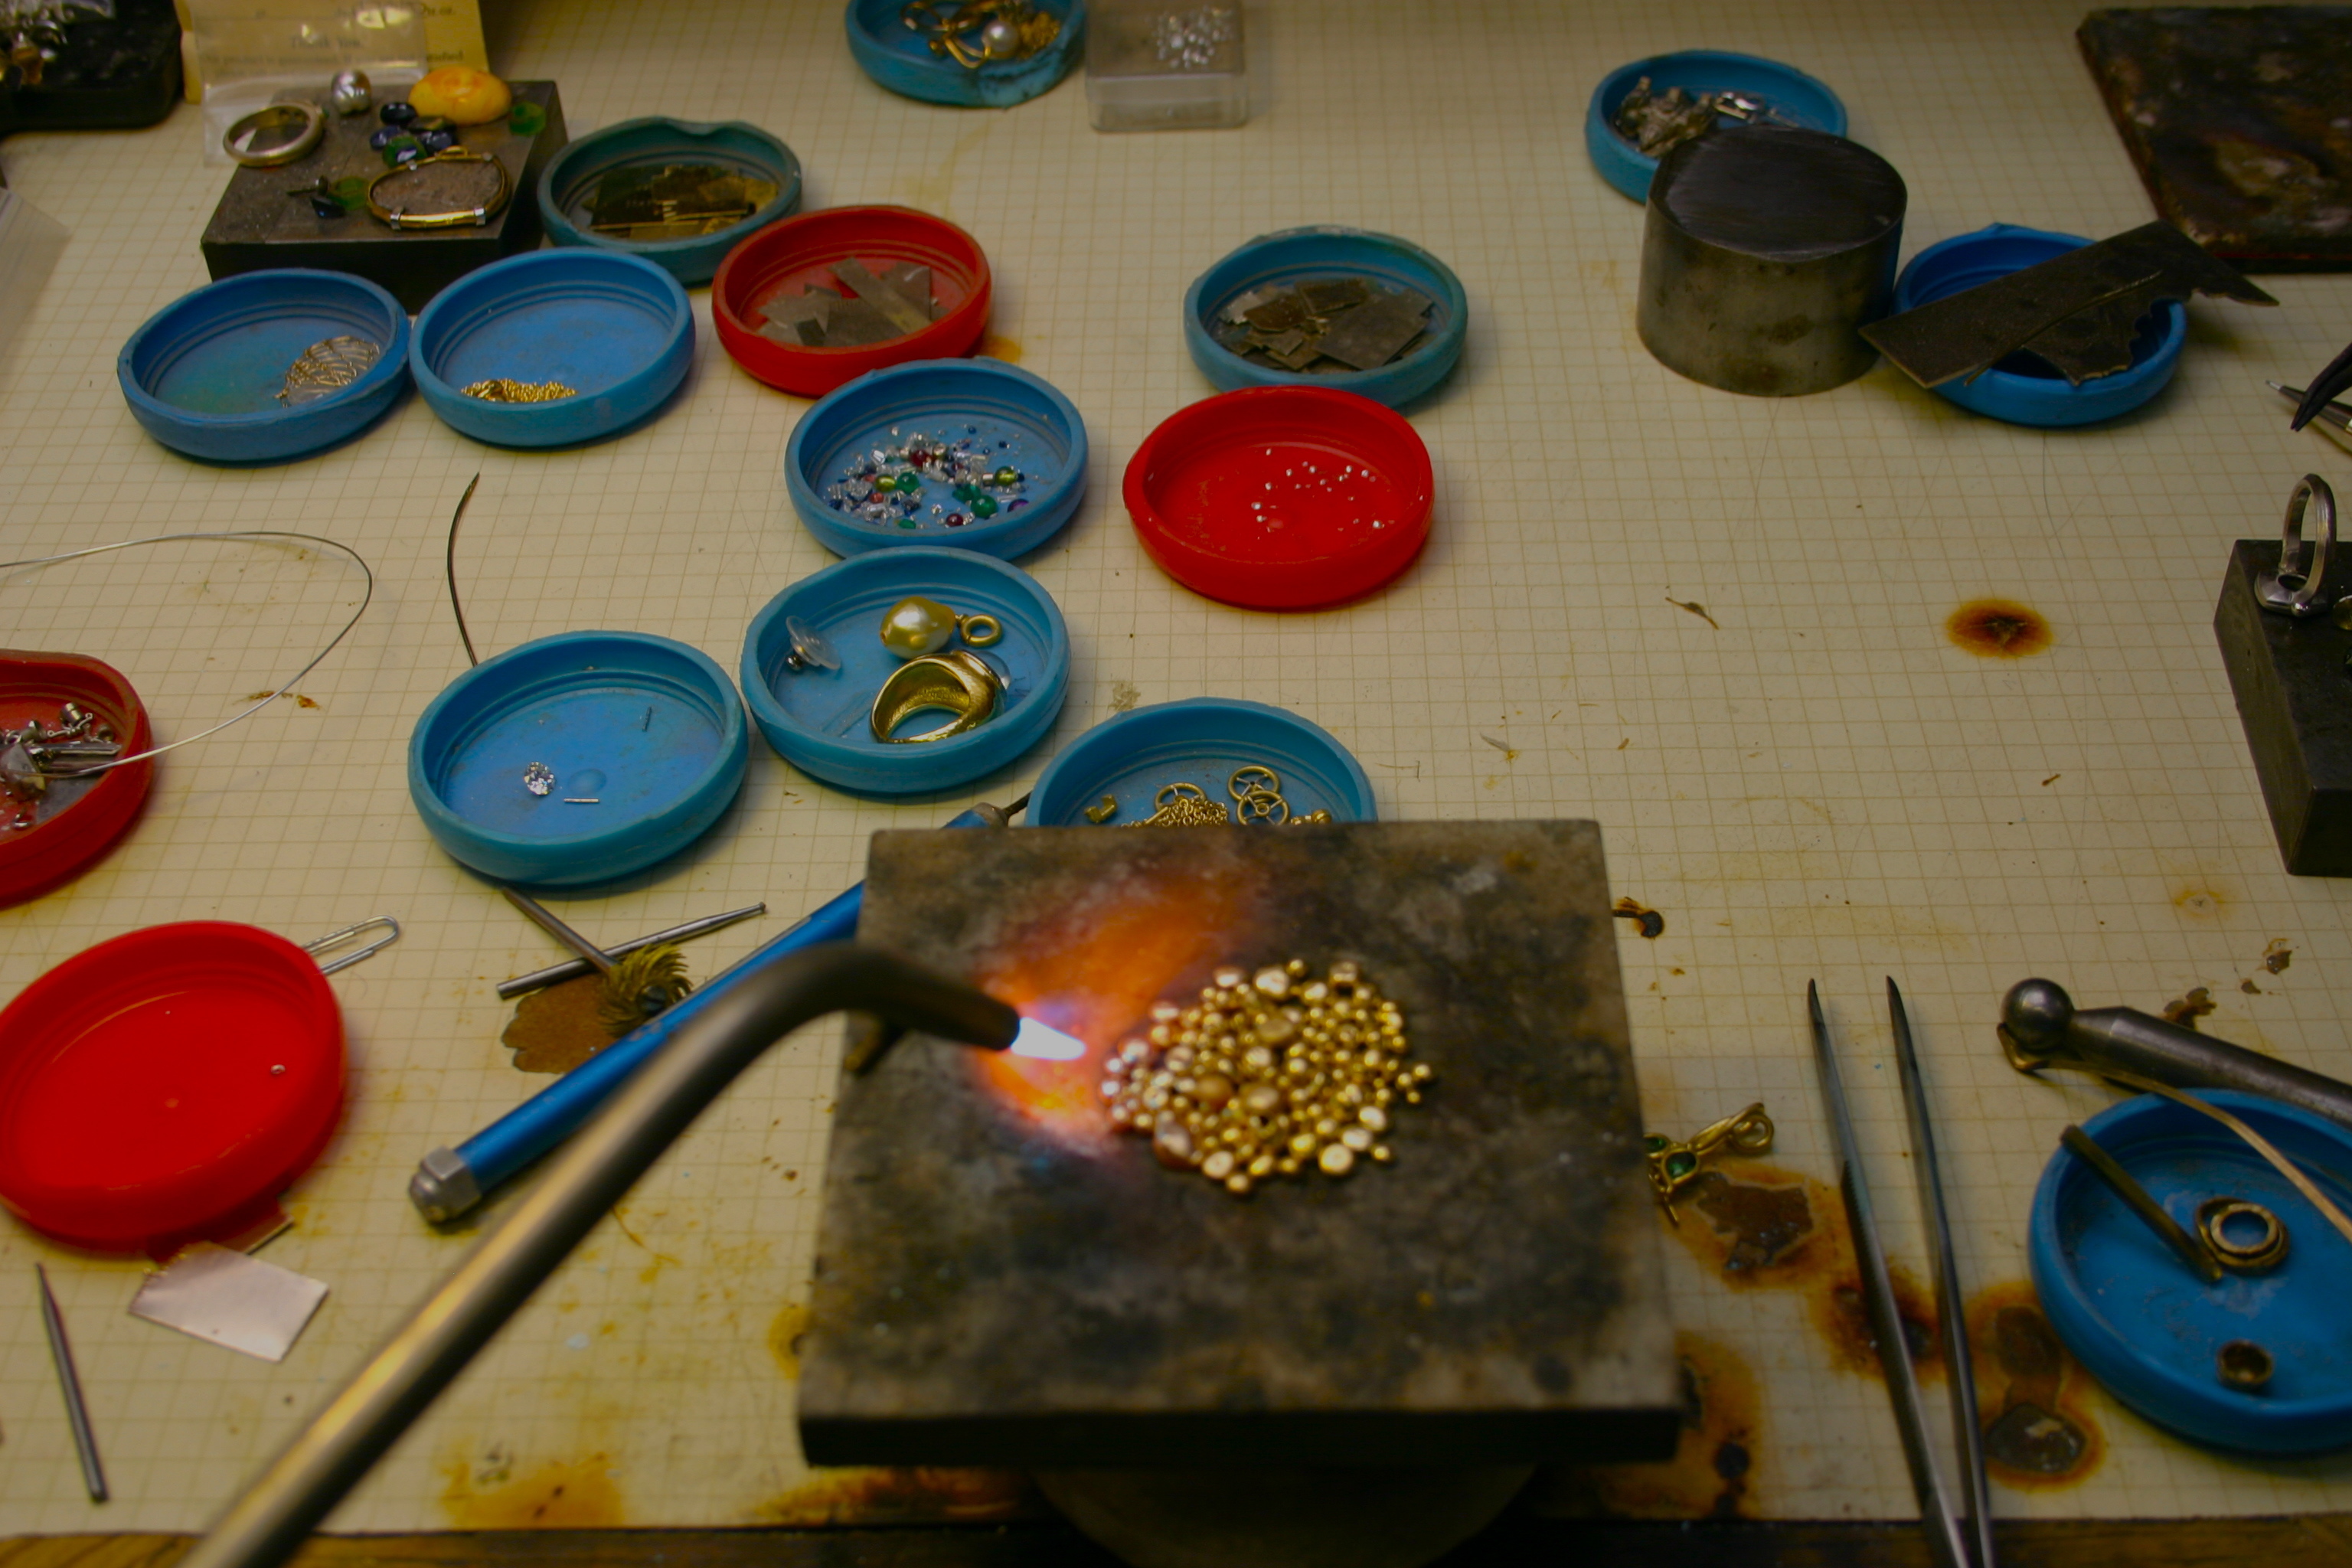
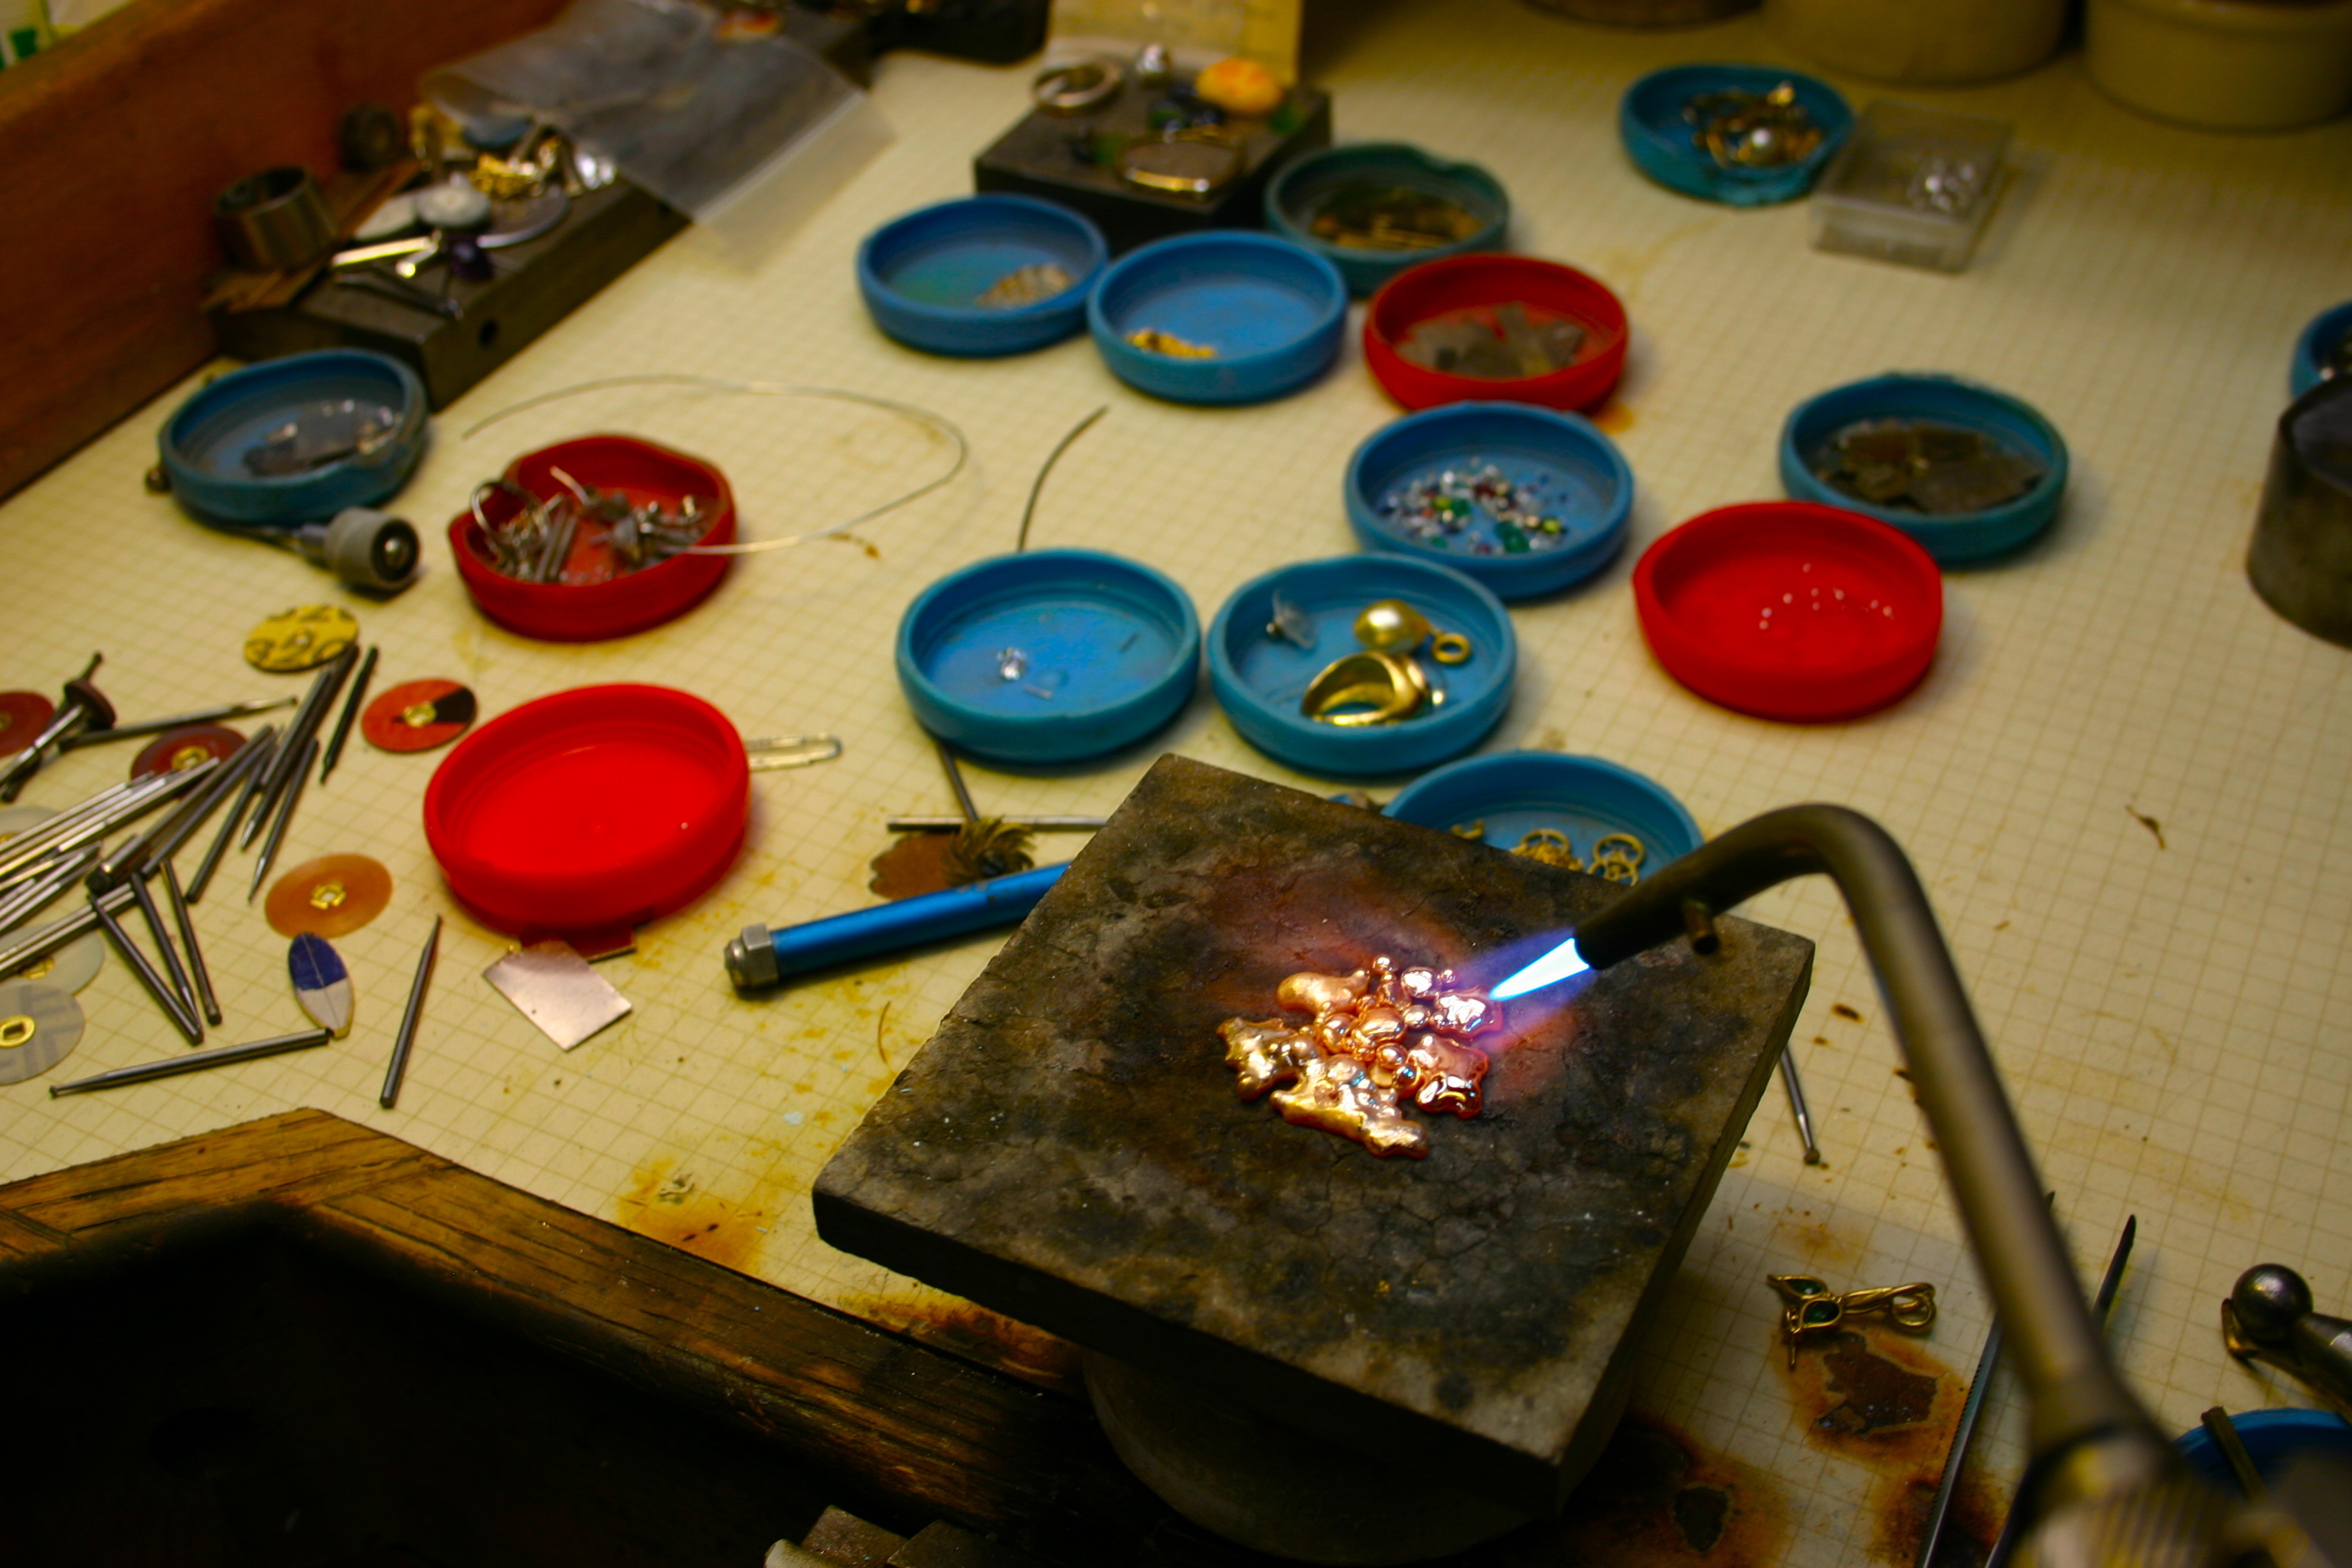
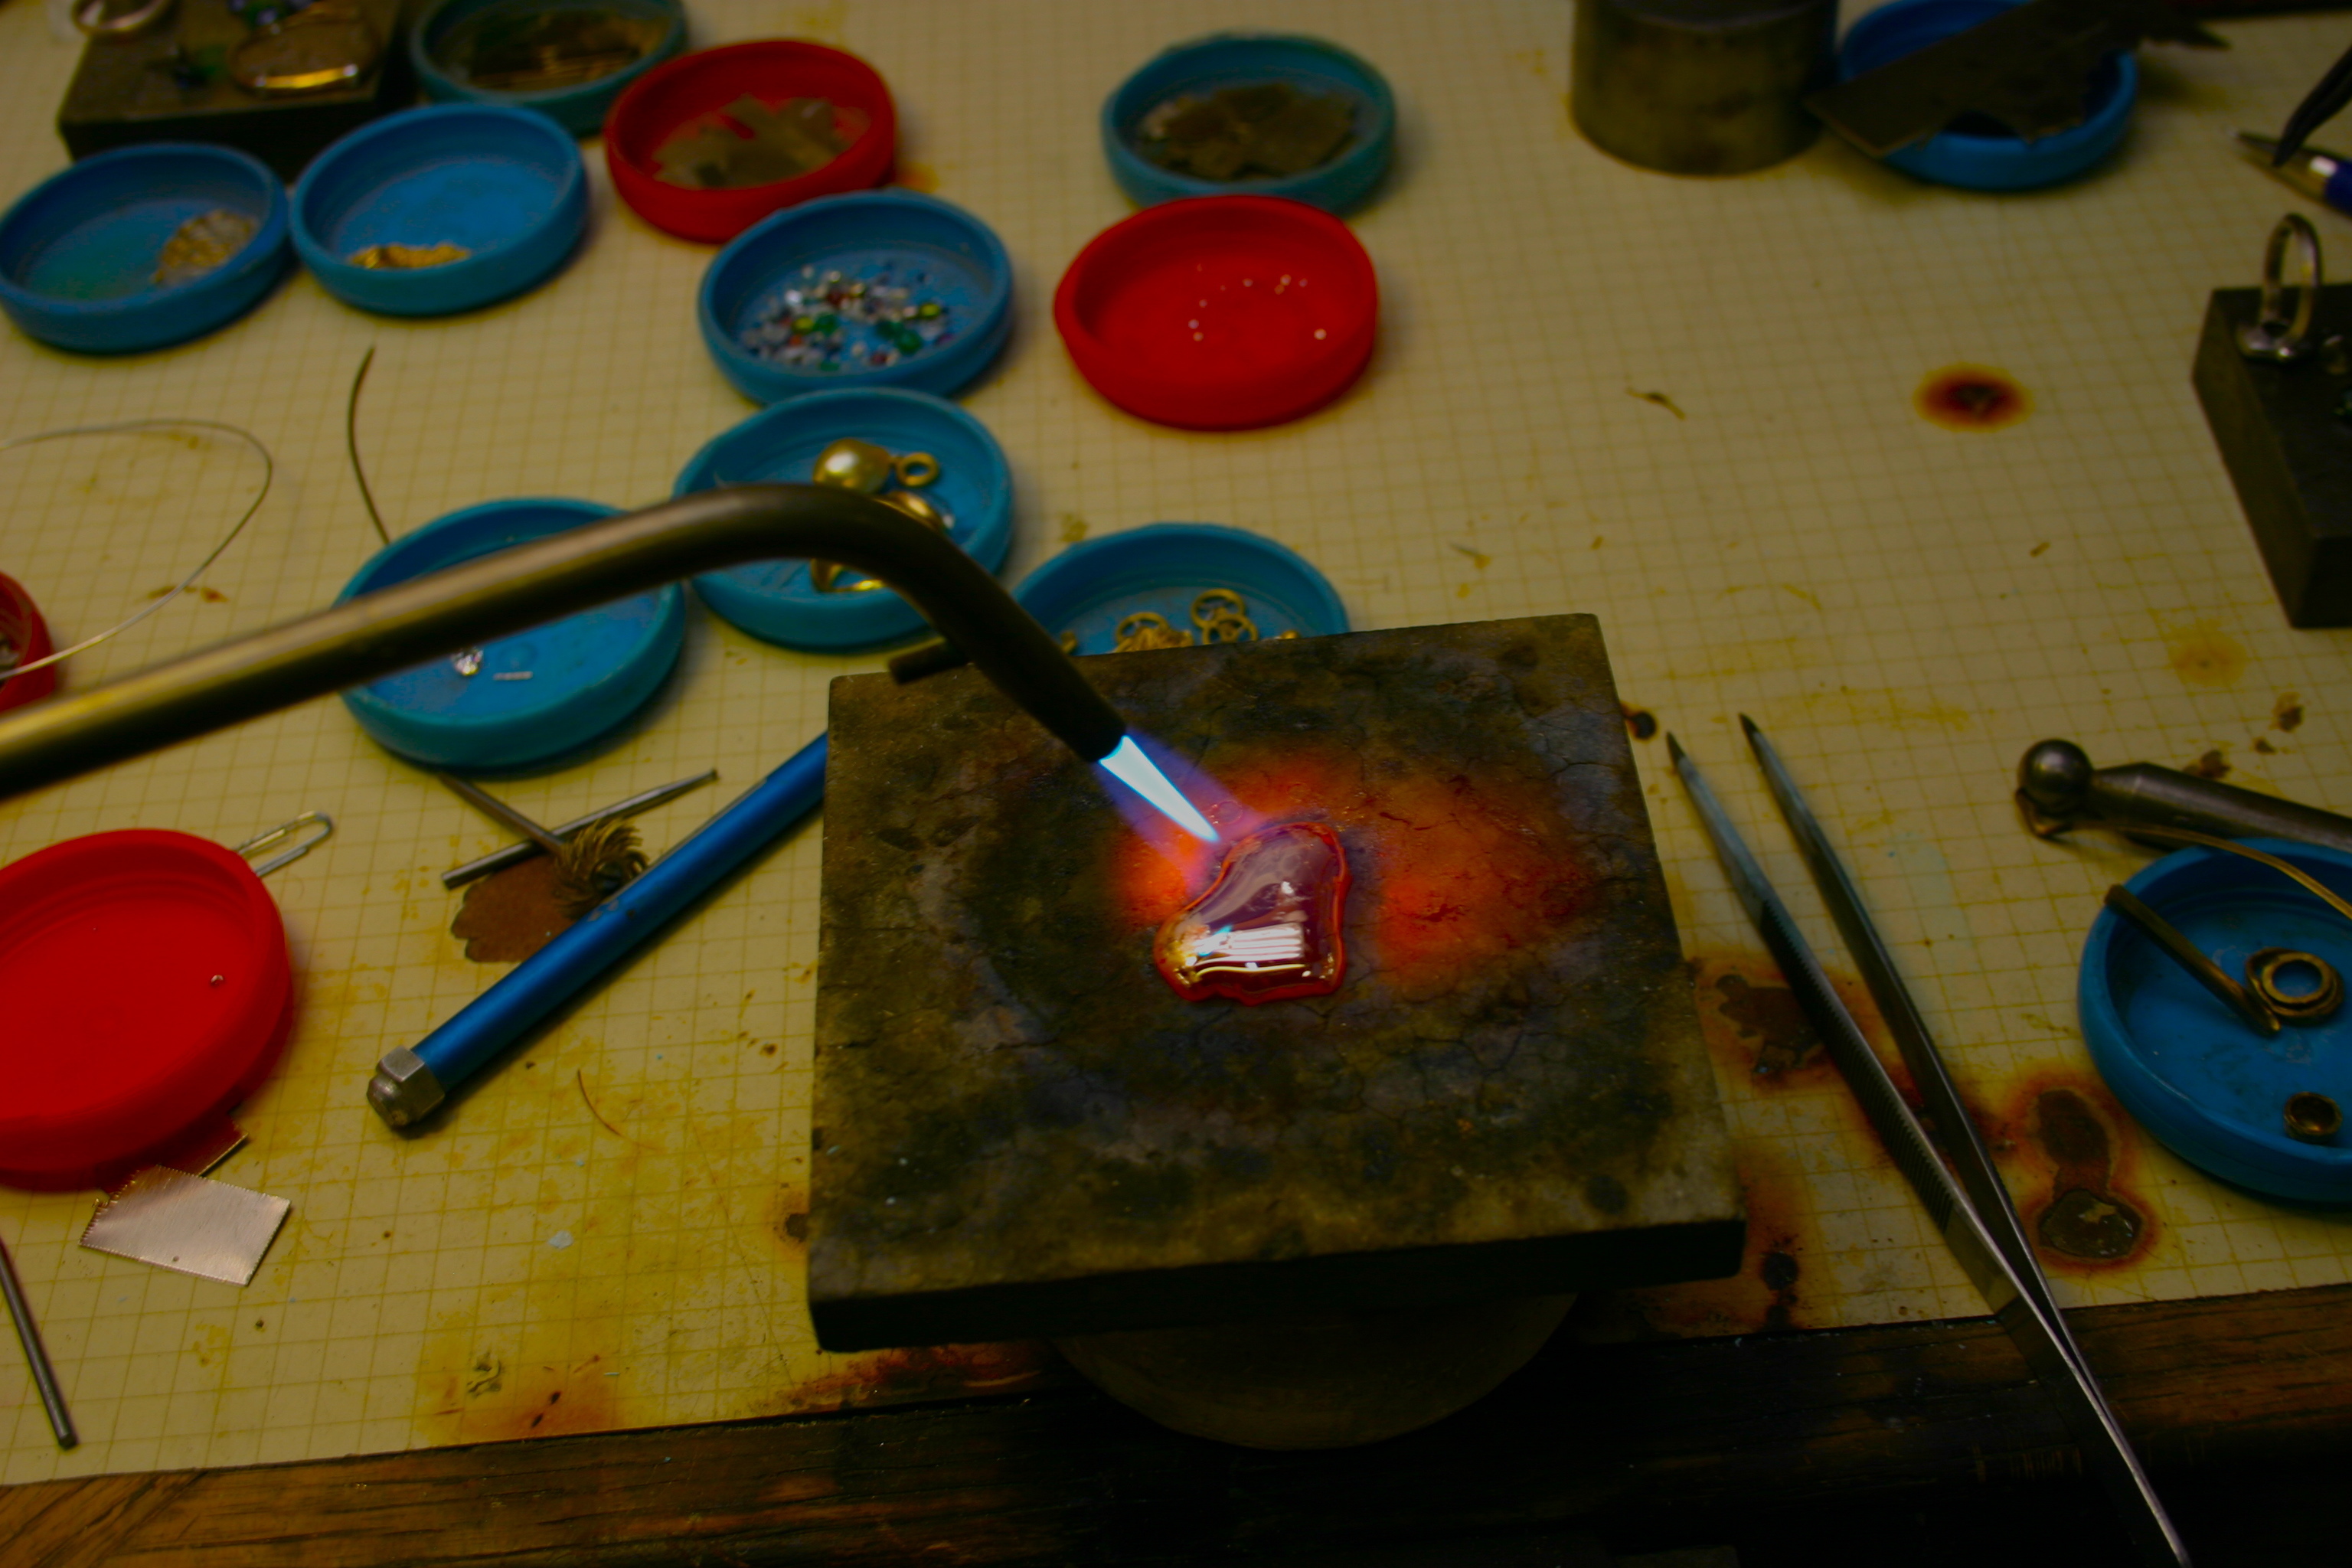
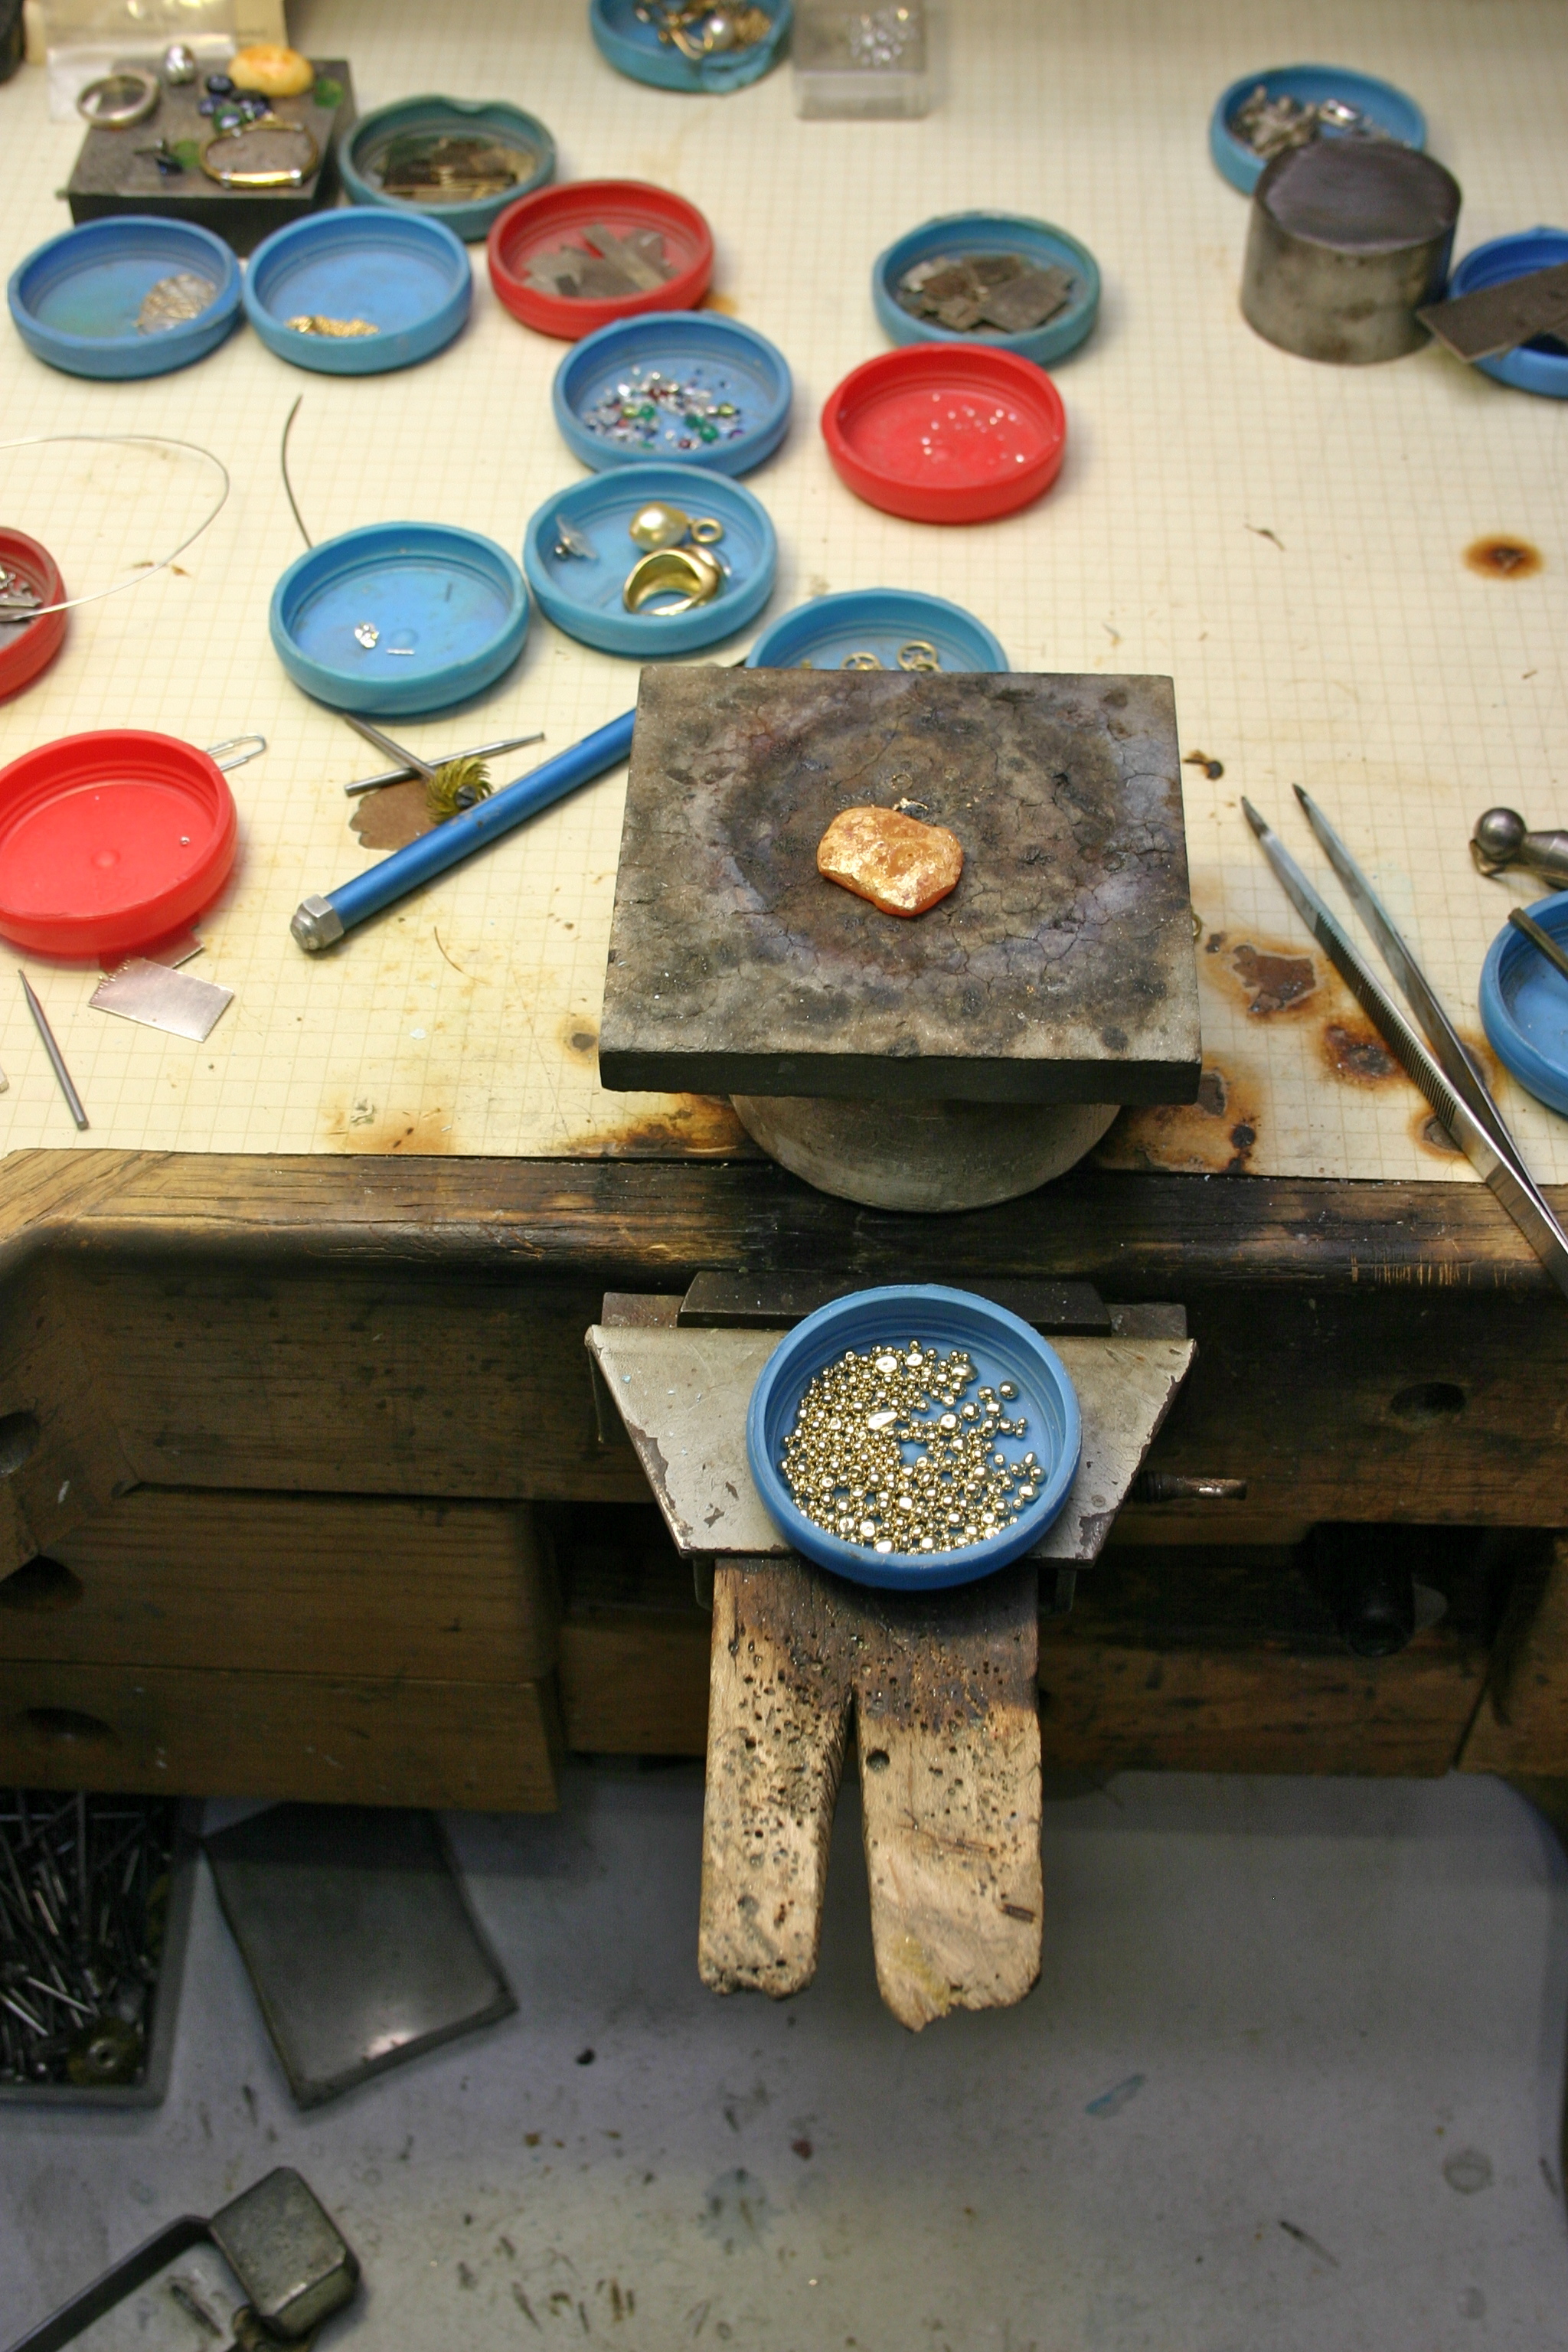
These are decomposed slide shows, shown frame by frame. They are done for private clients documenting their pieces in process.
I know as makers we expect data, however in this case please view through the eyes of the recipient.
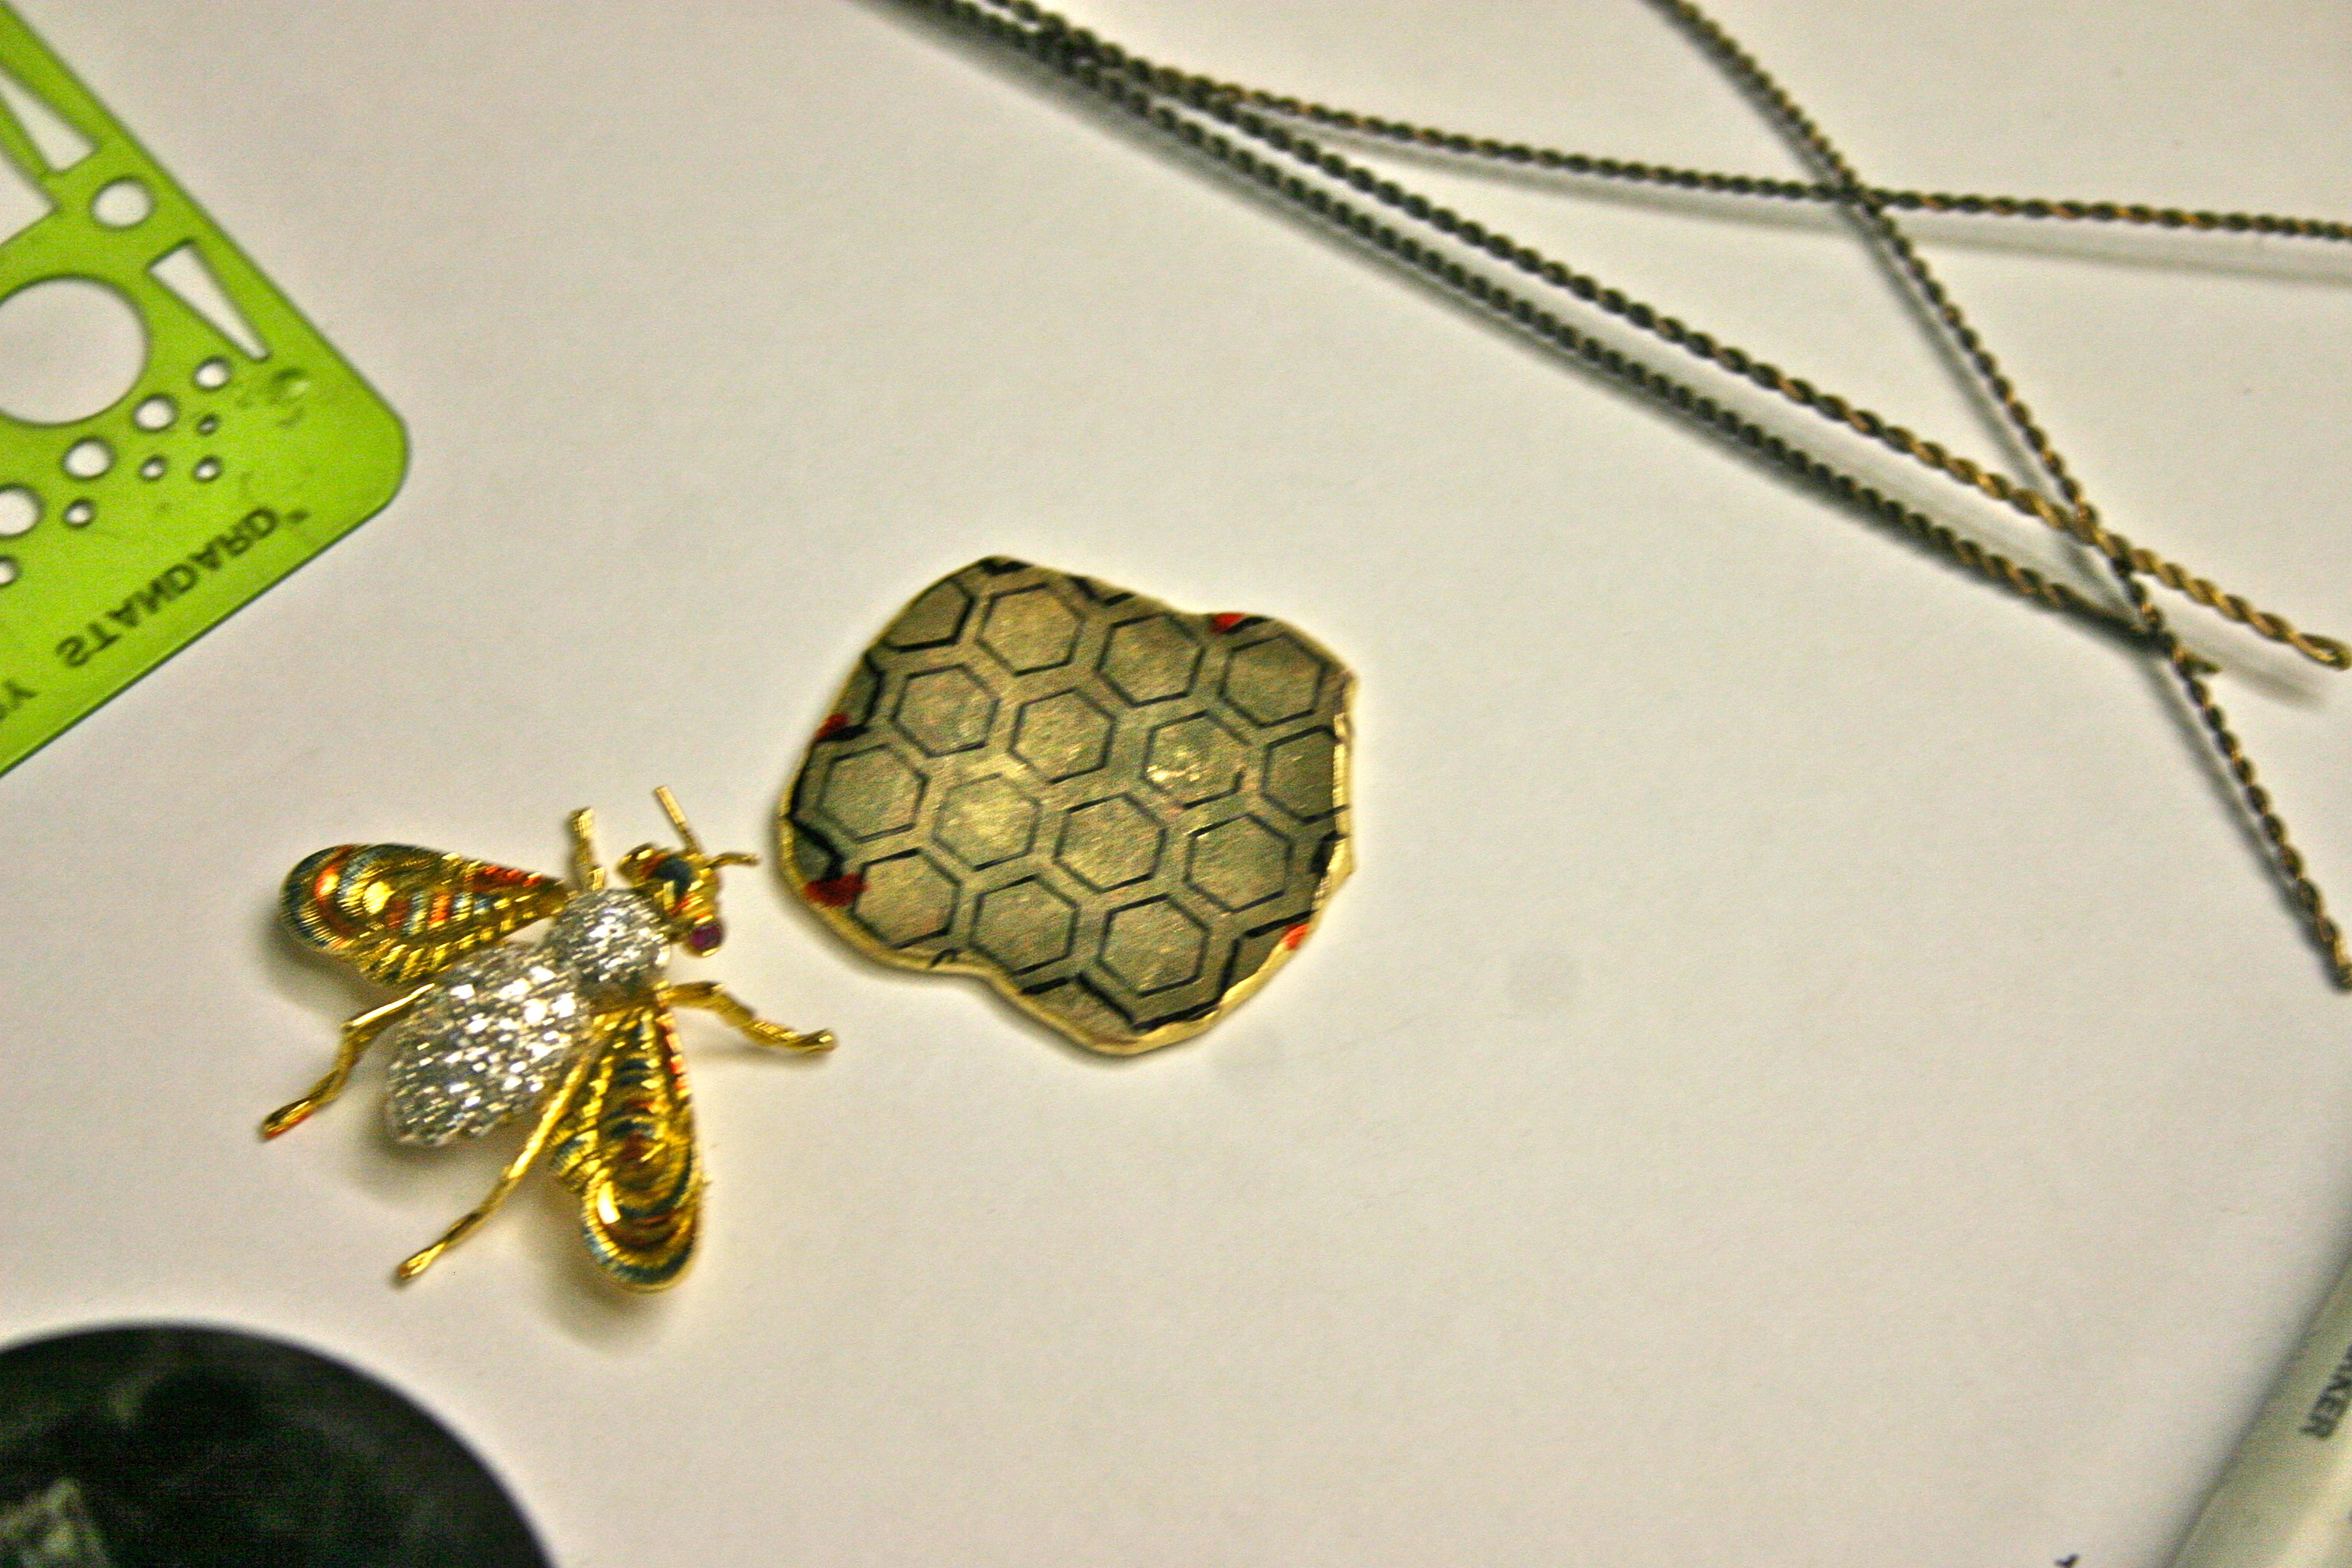
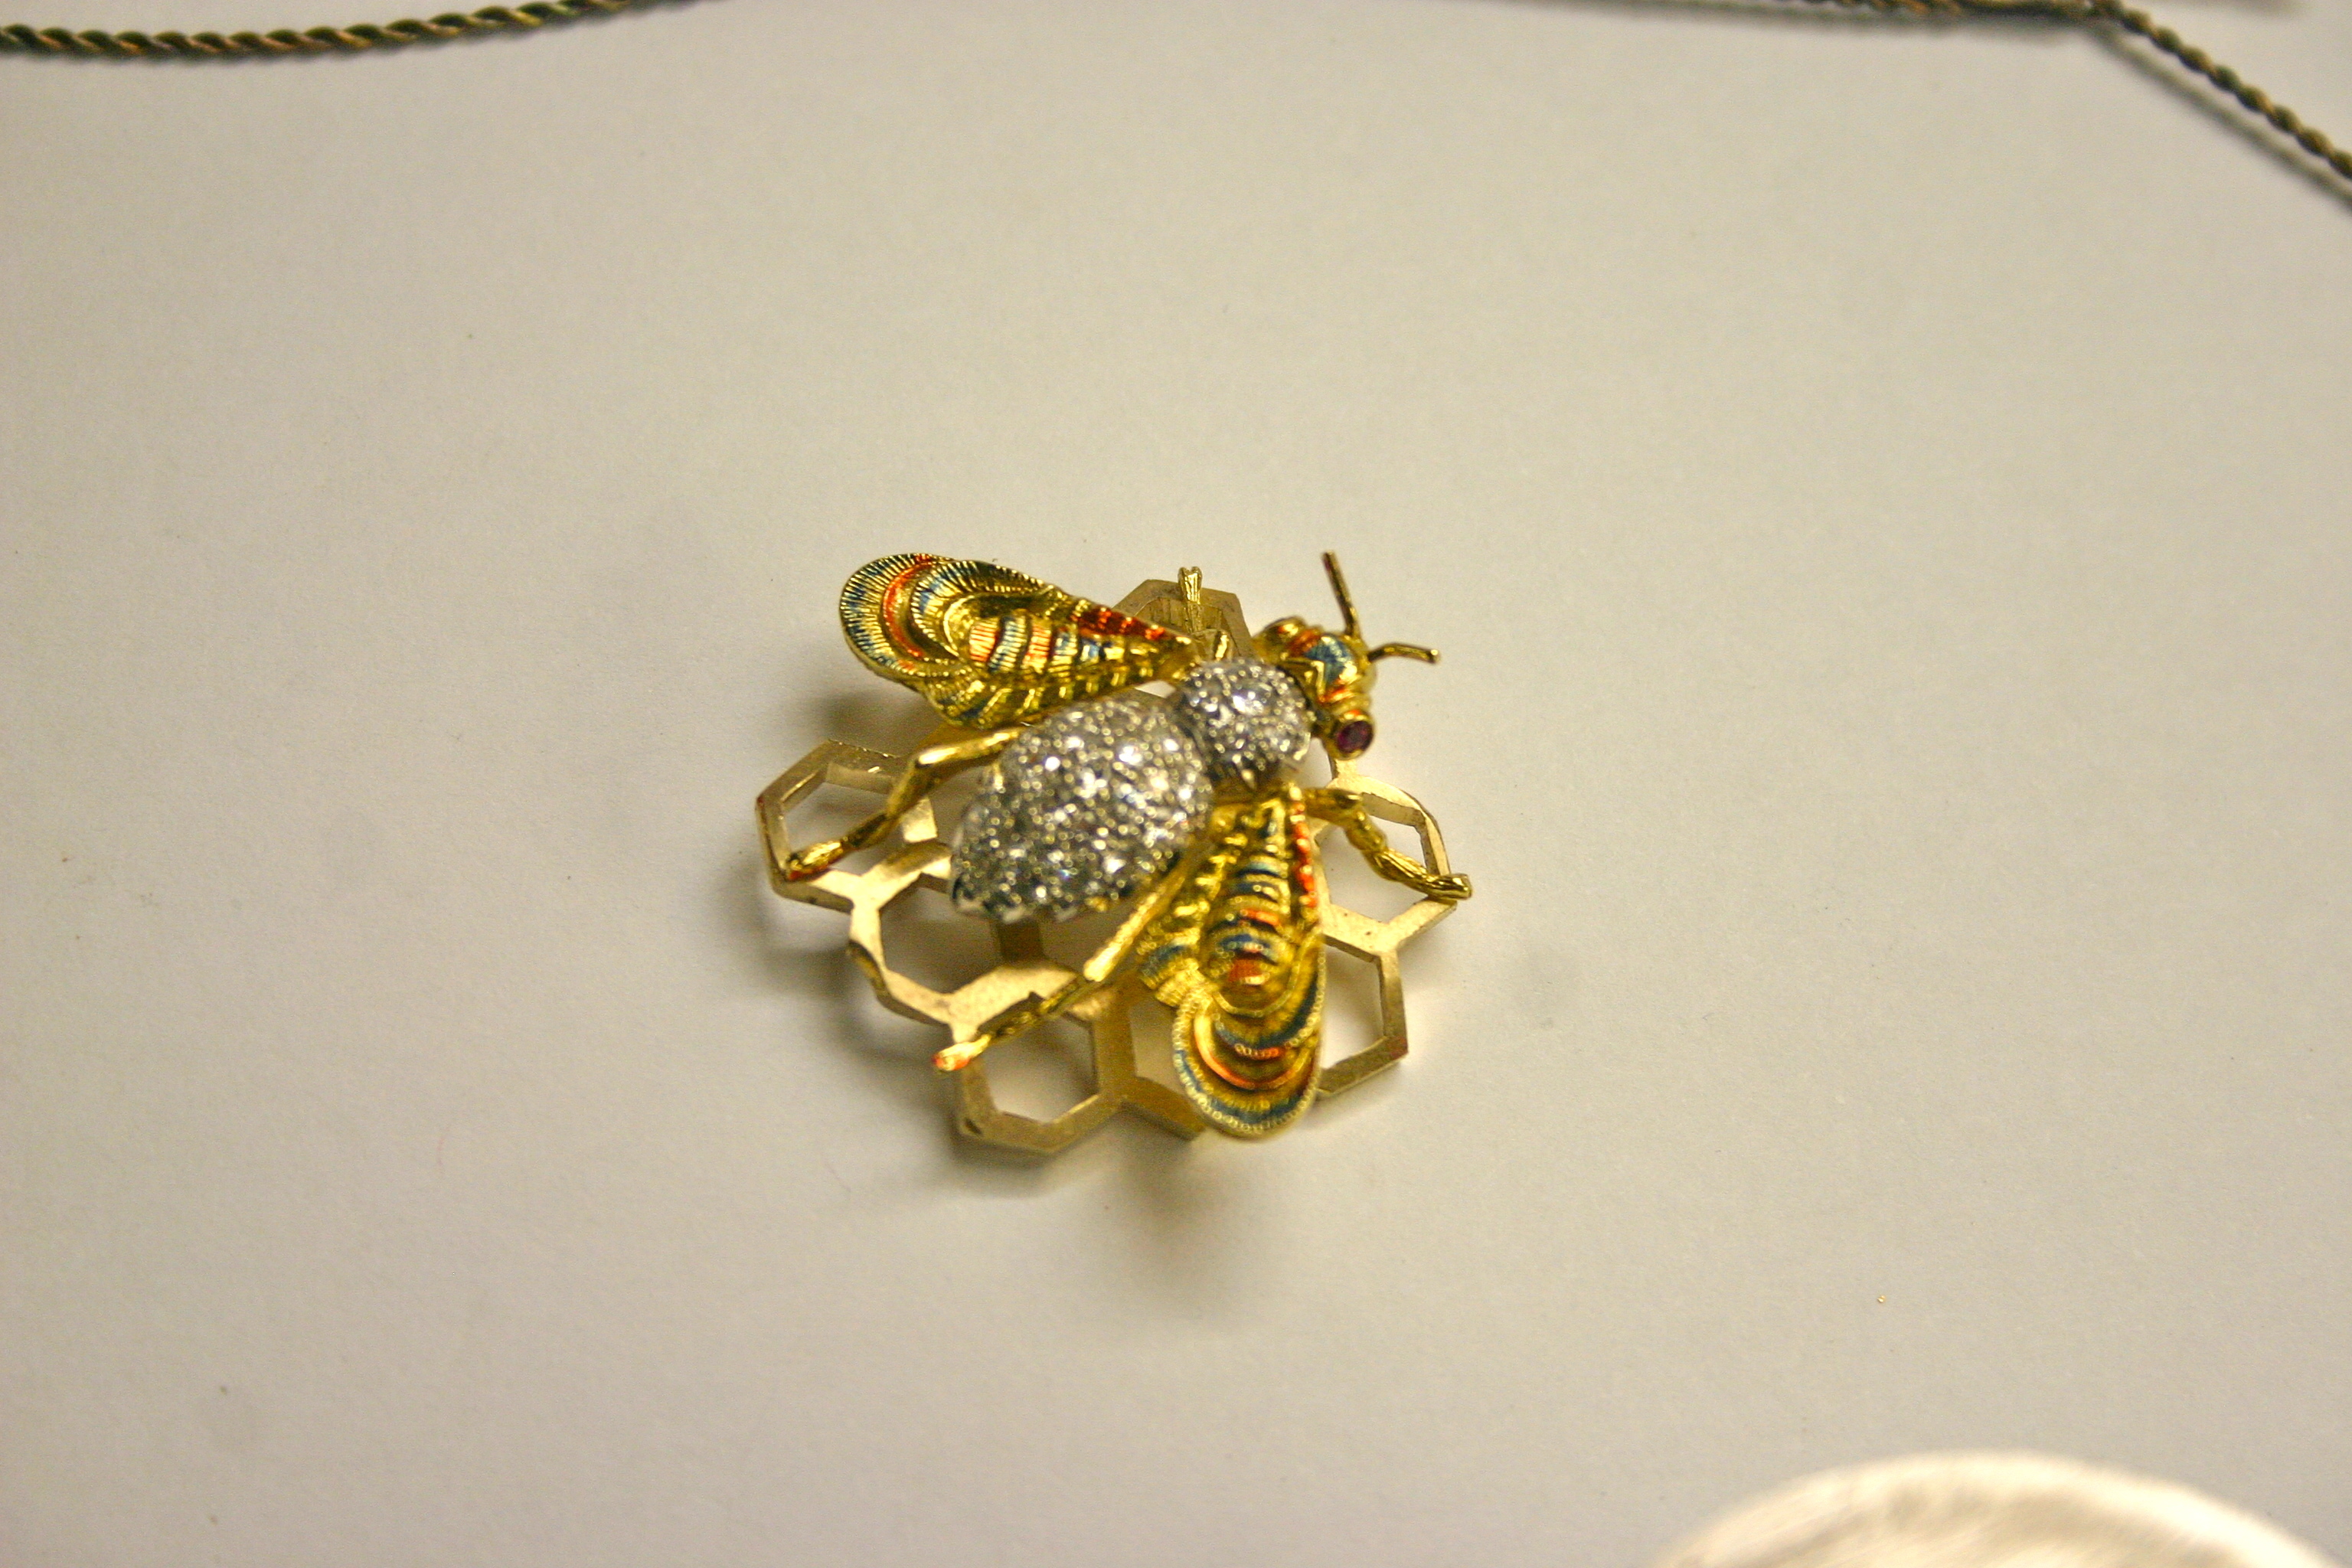
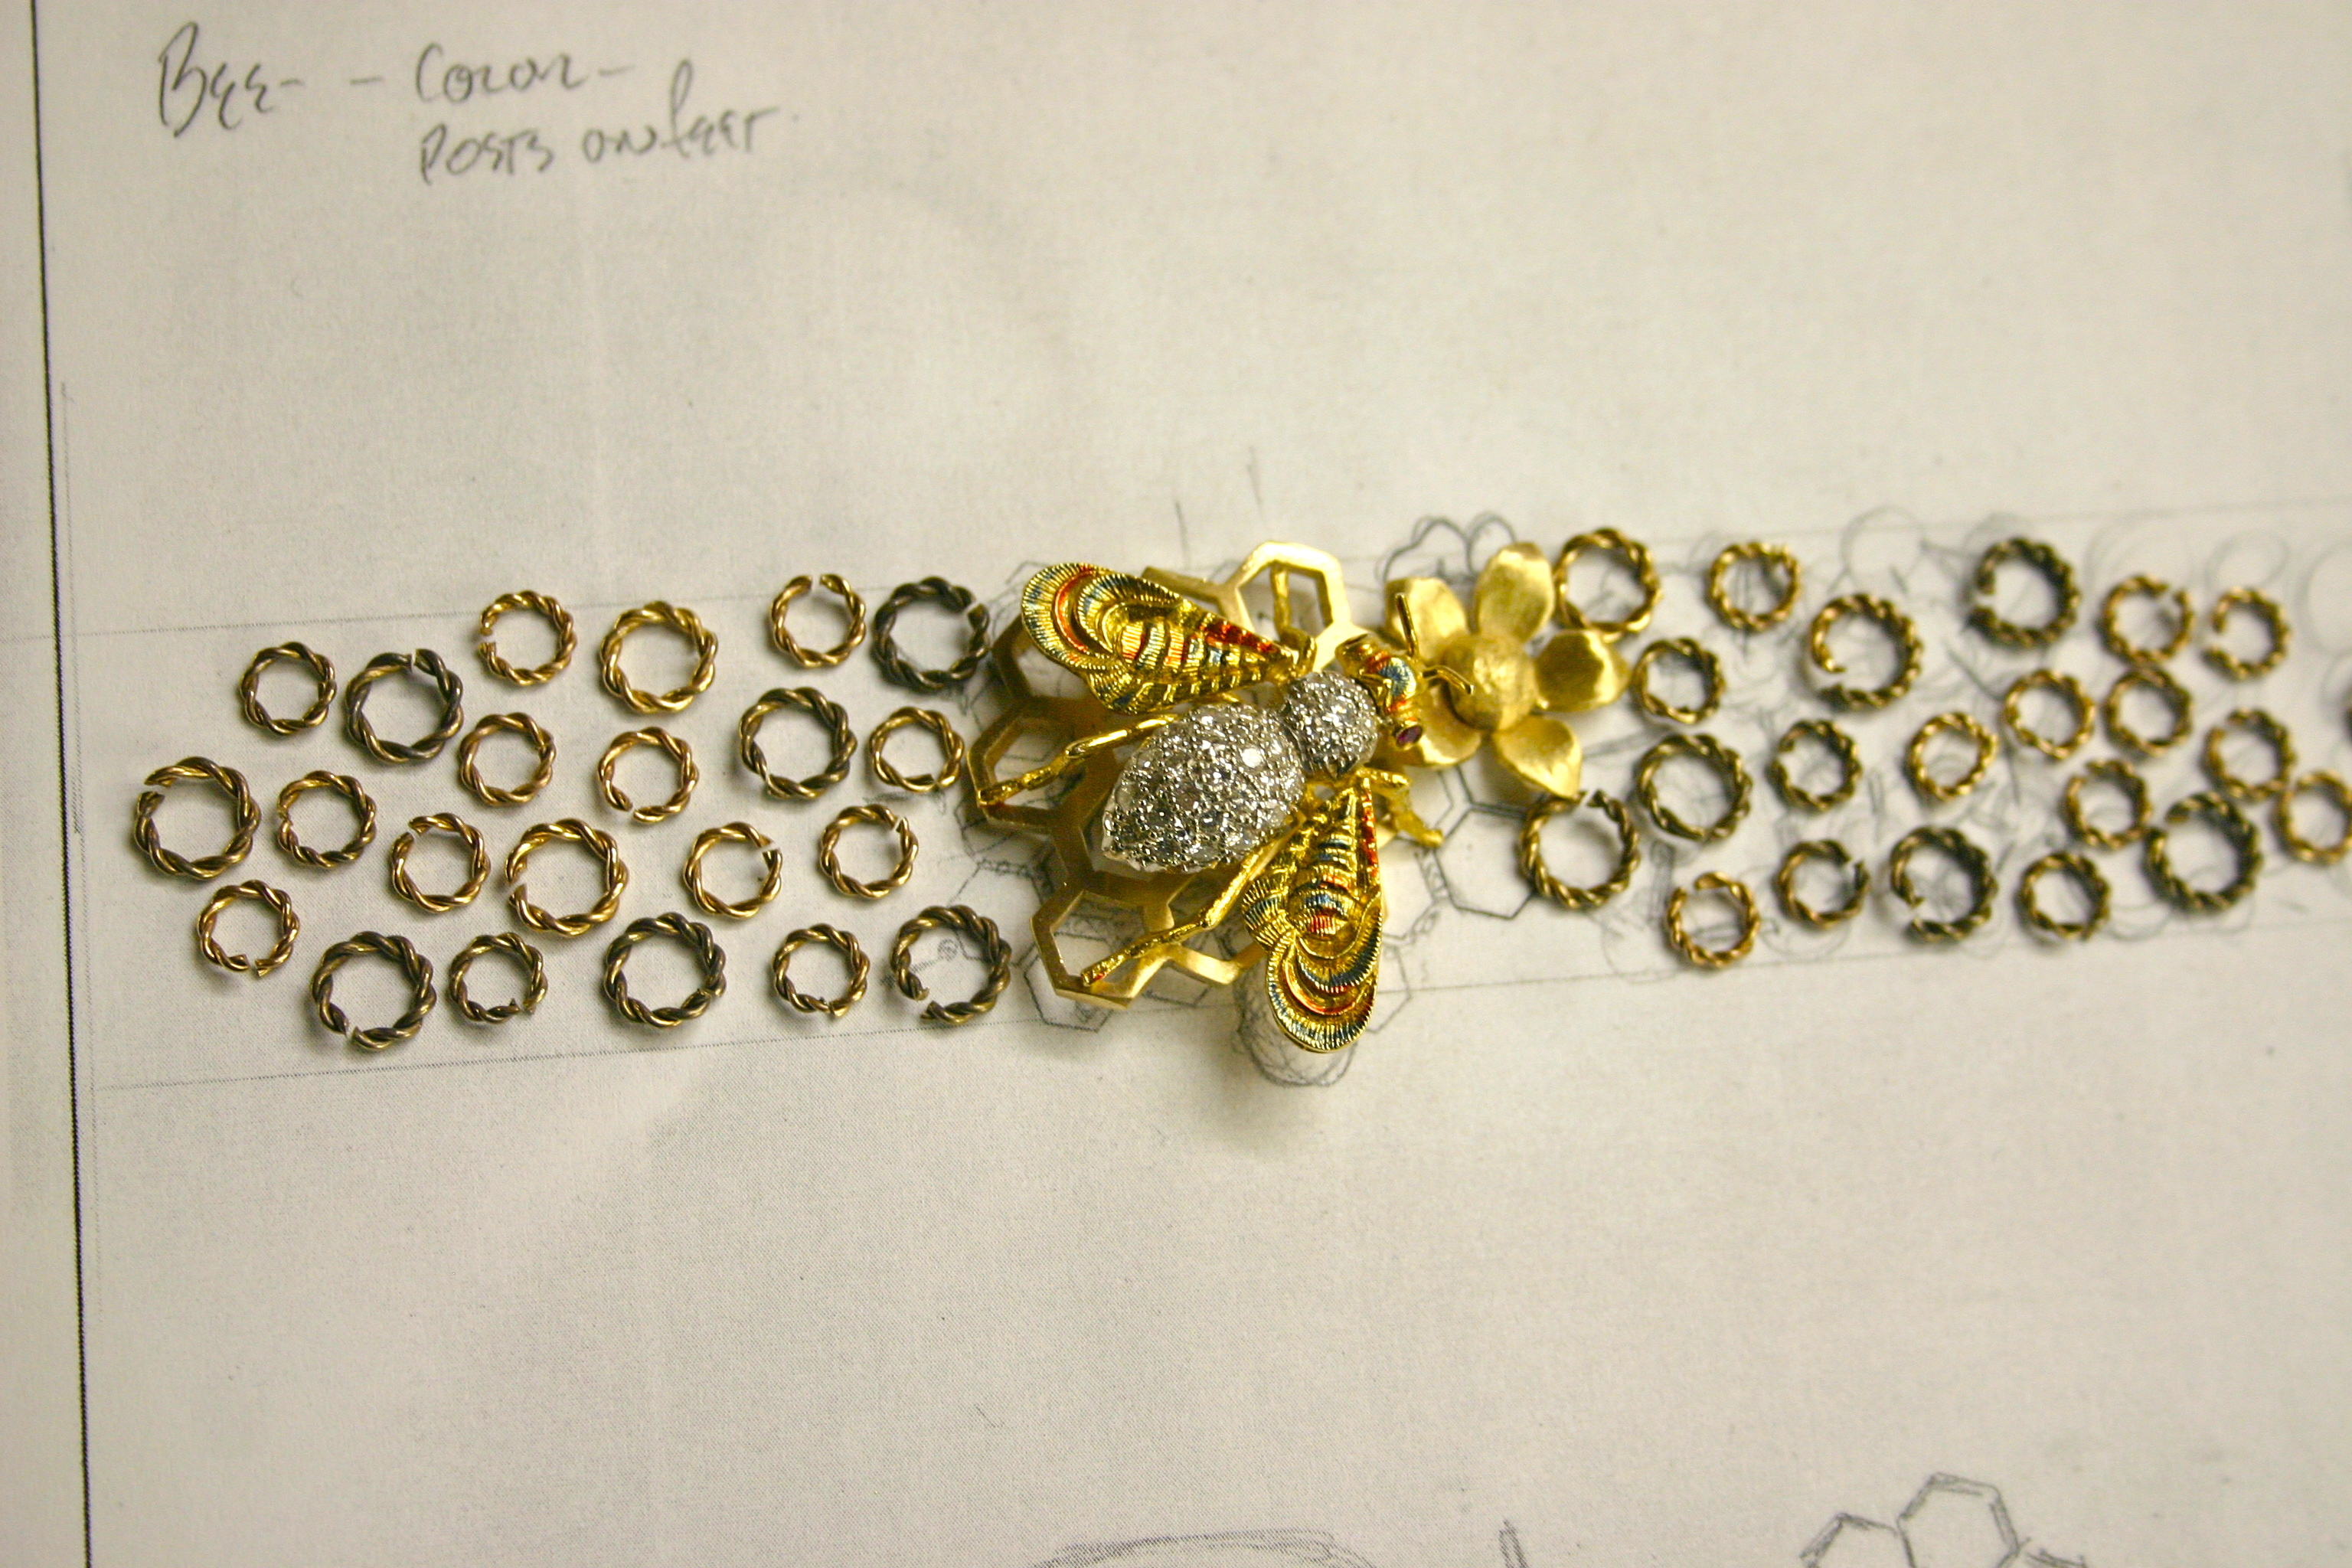
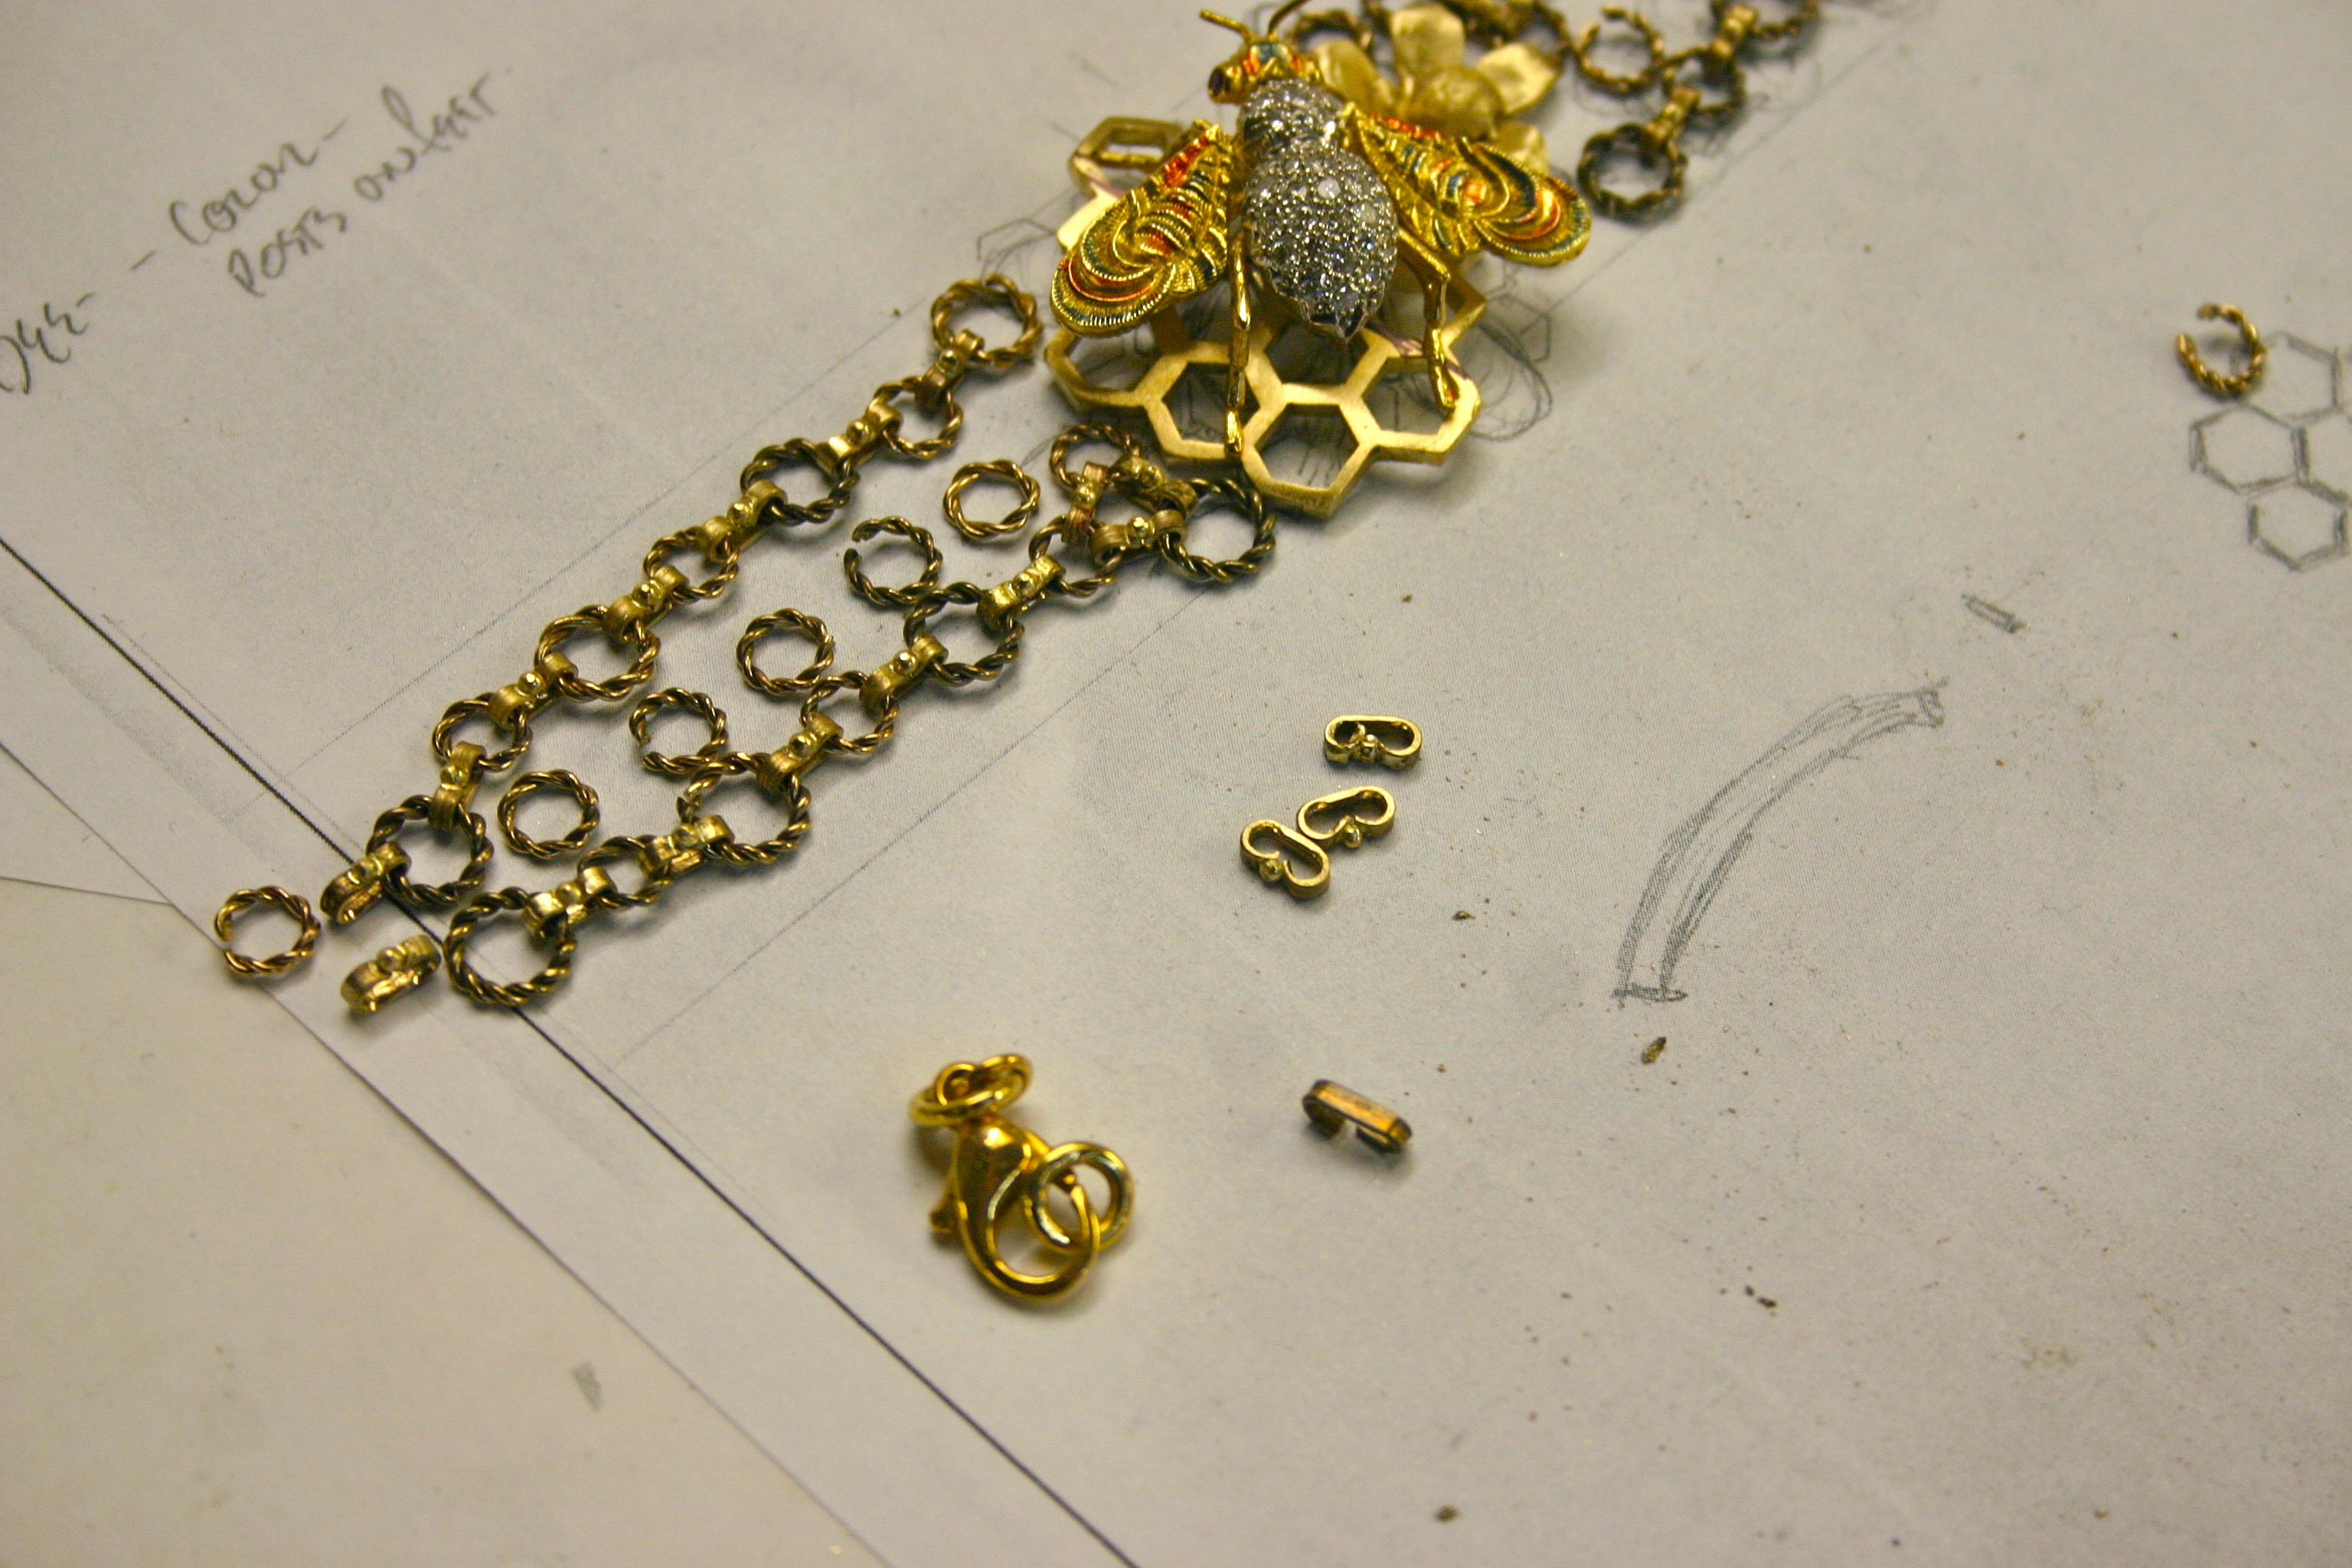
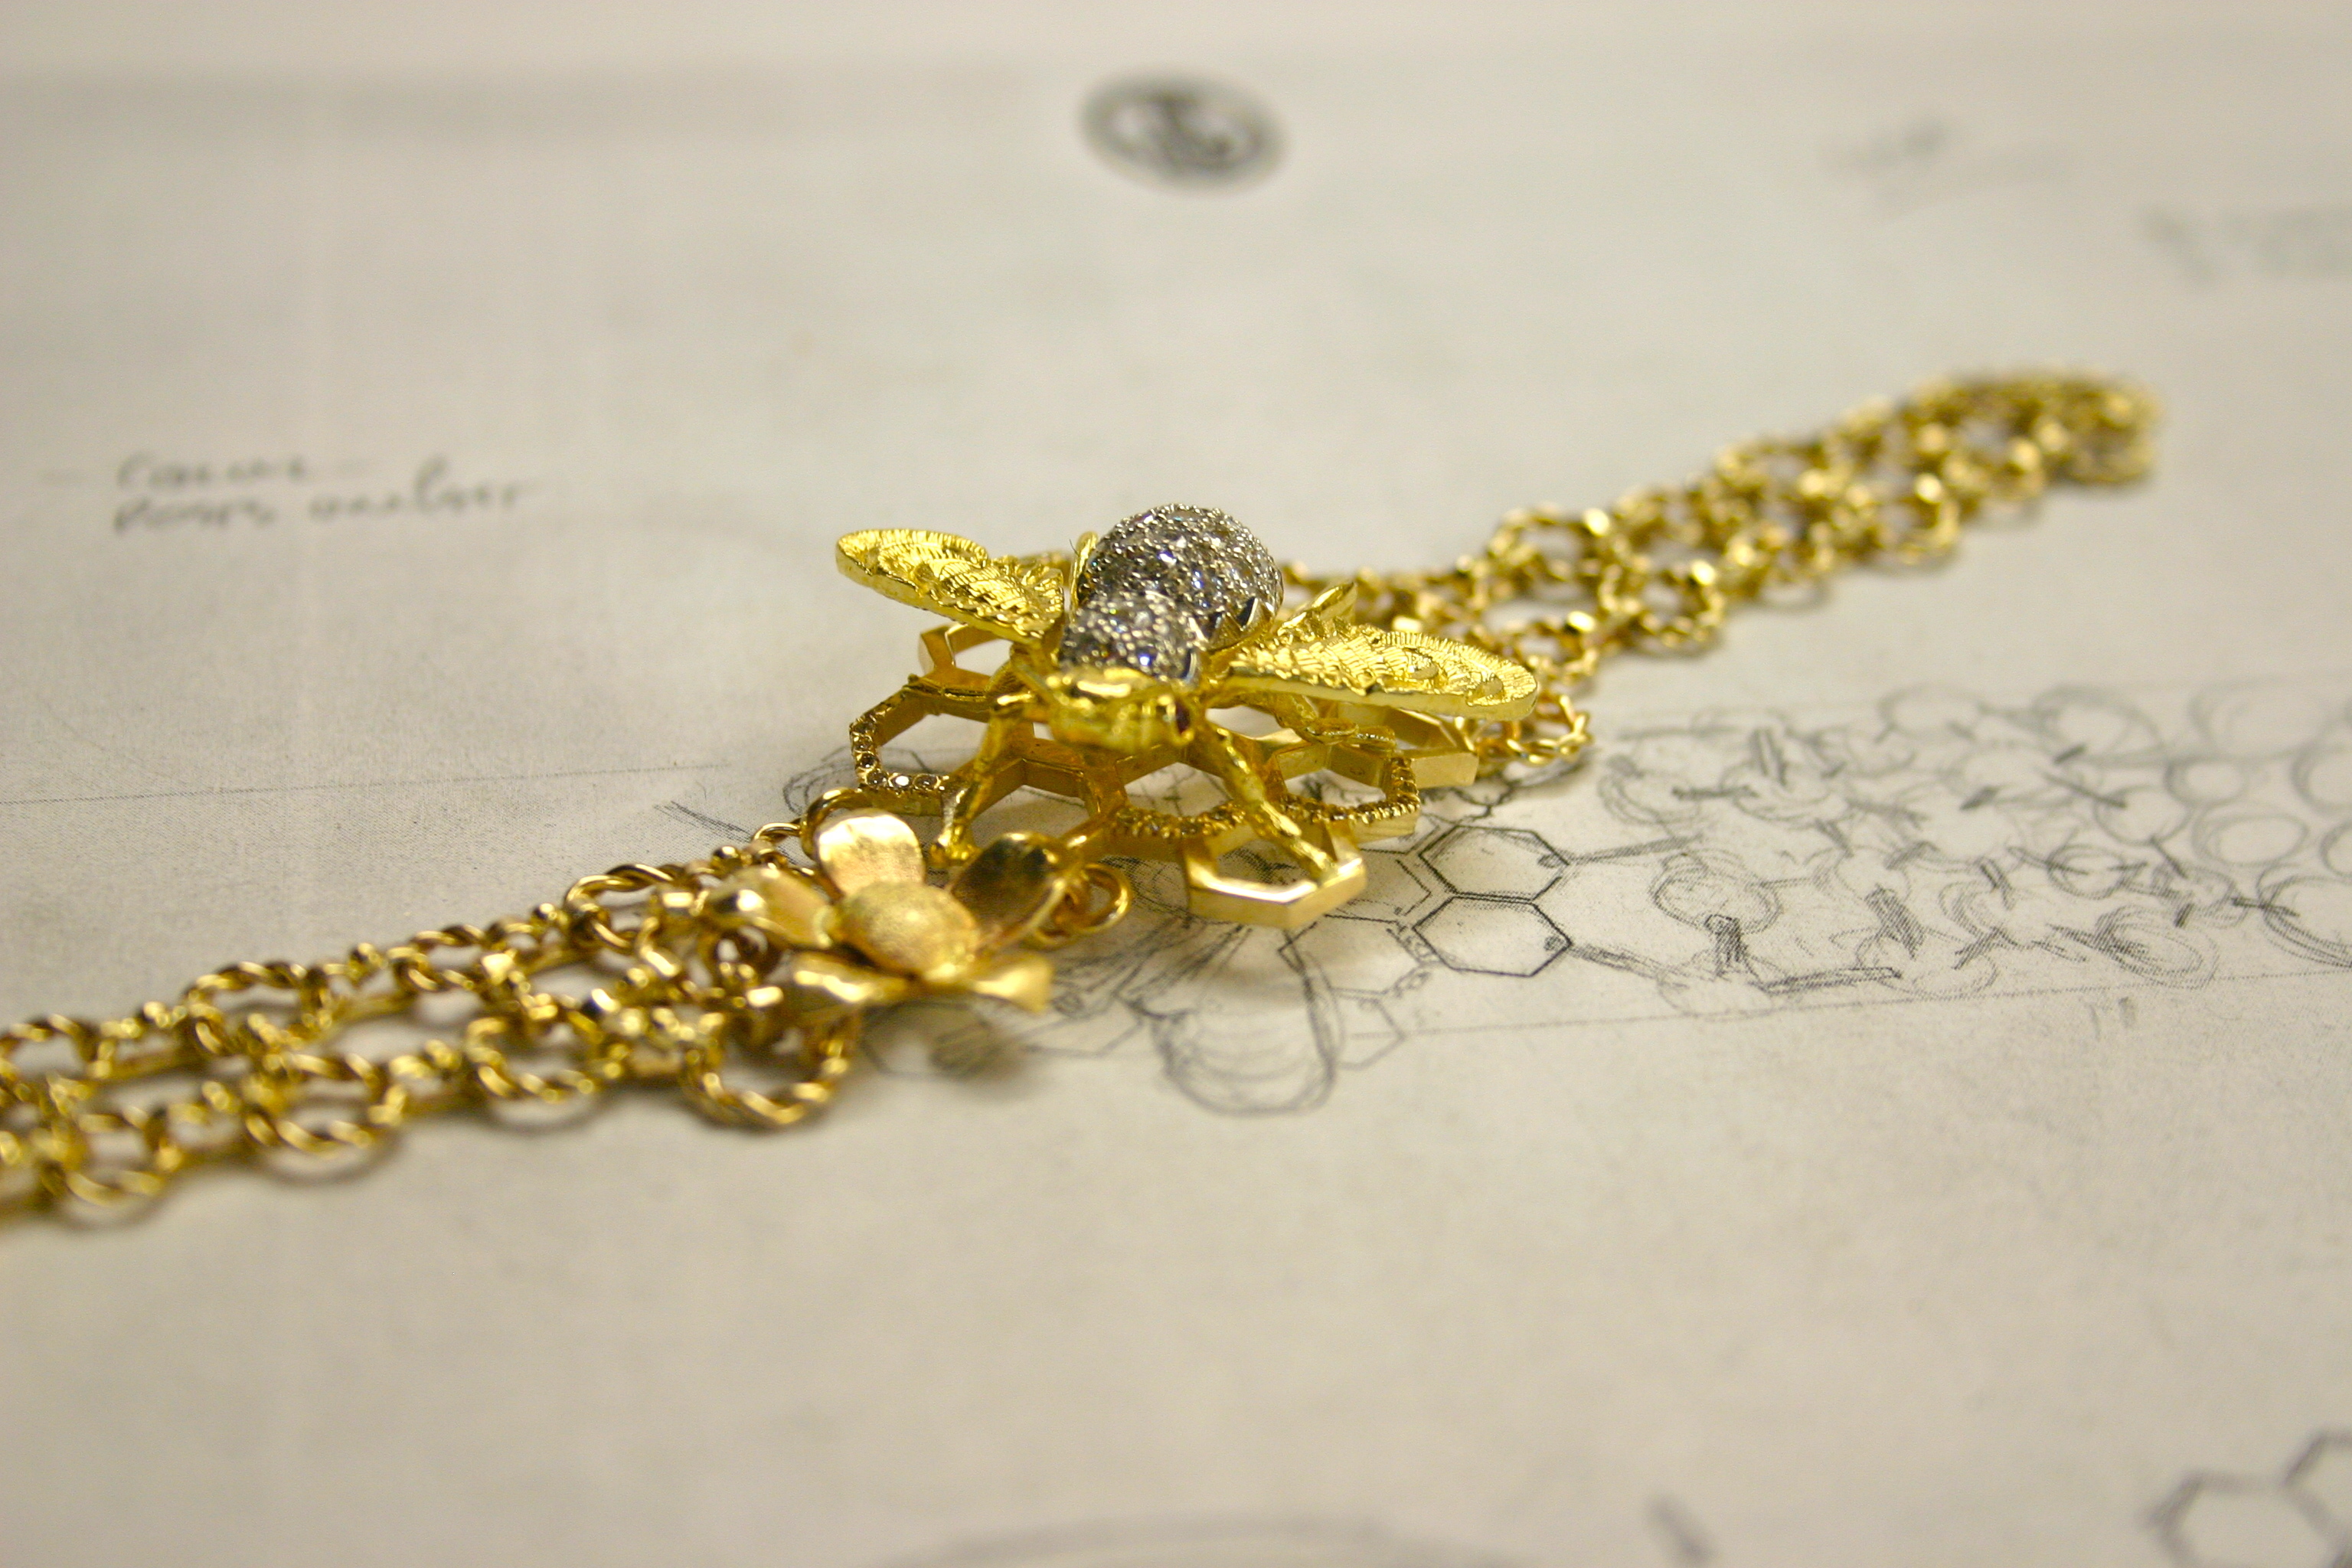
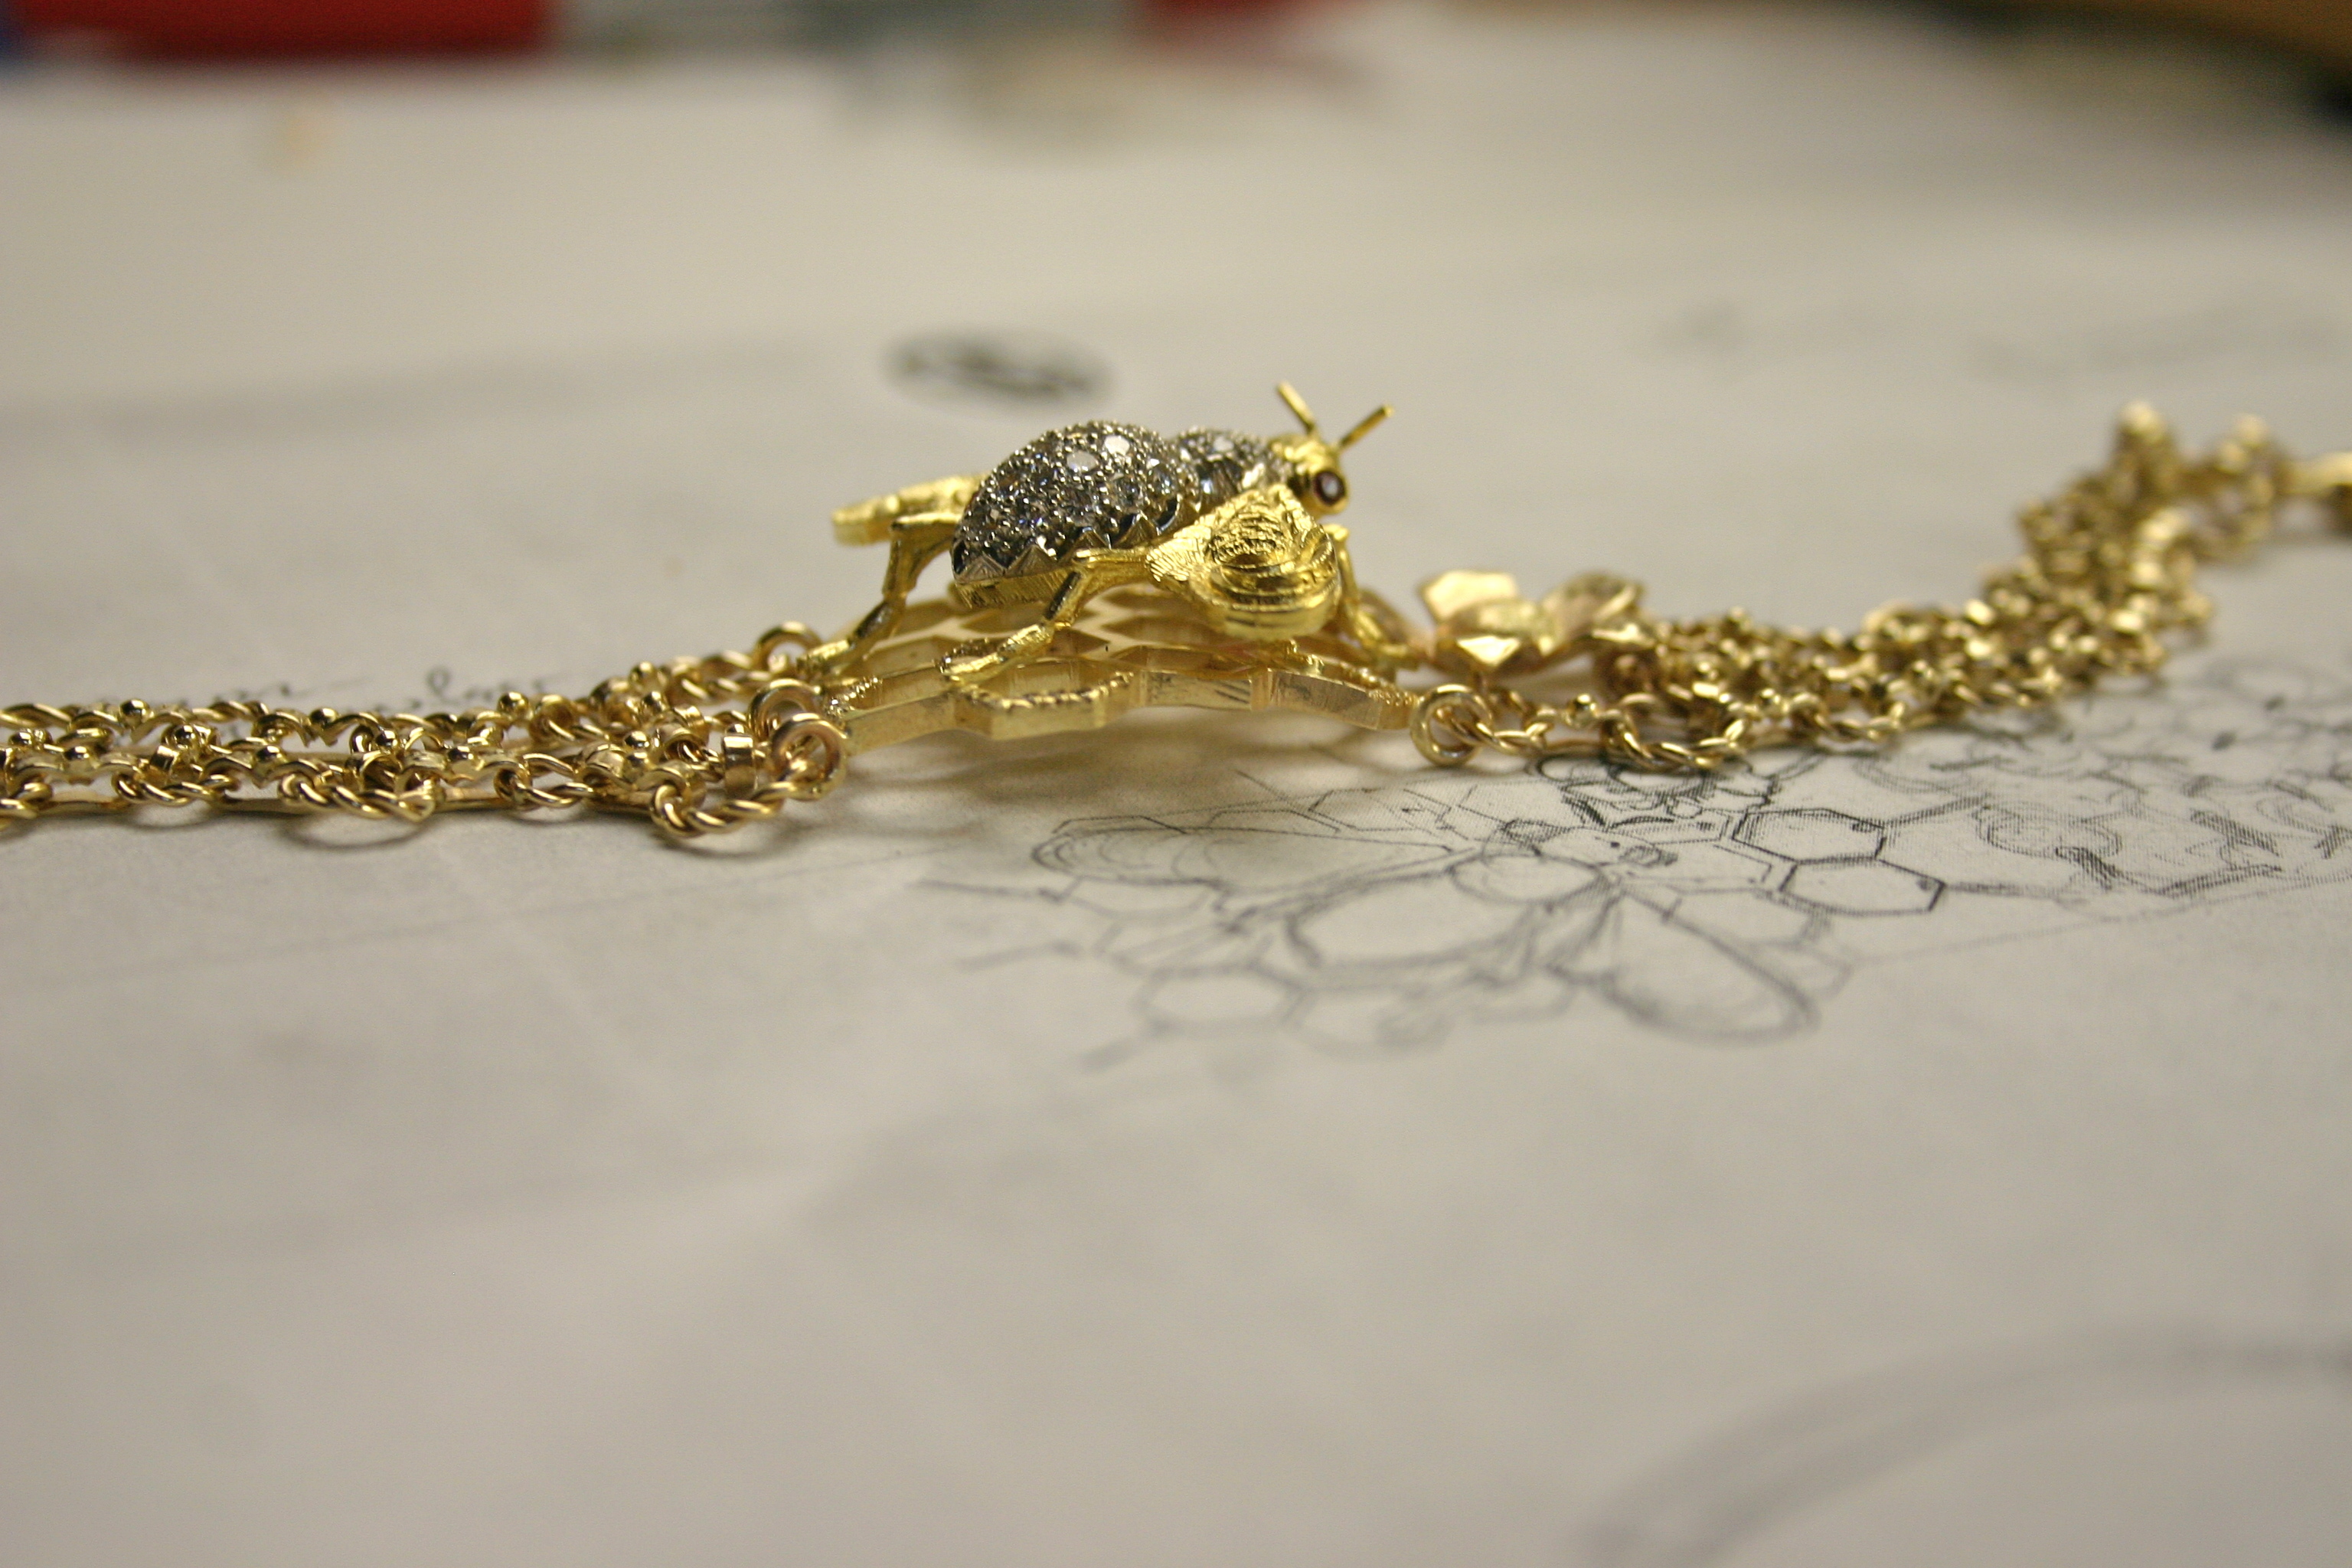
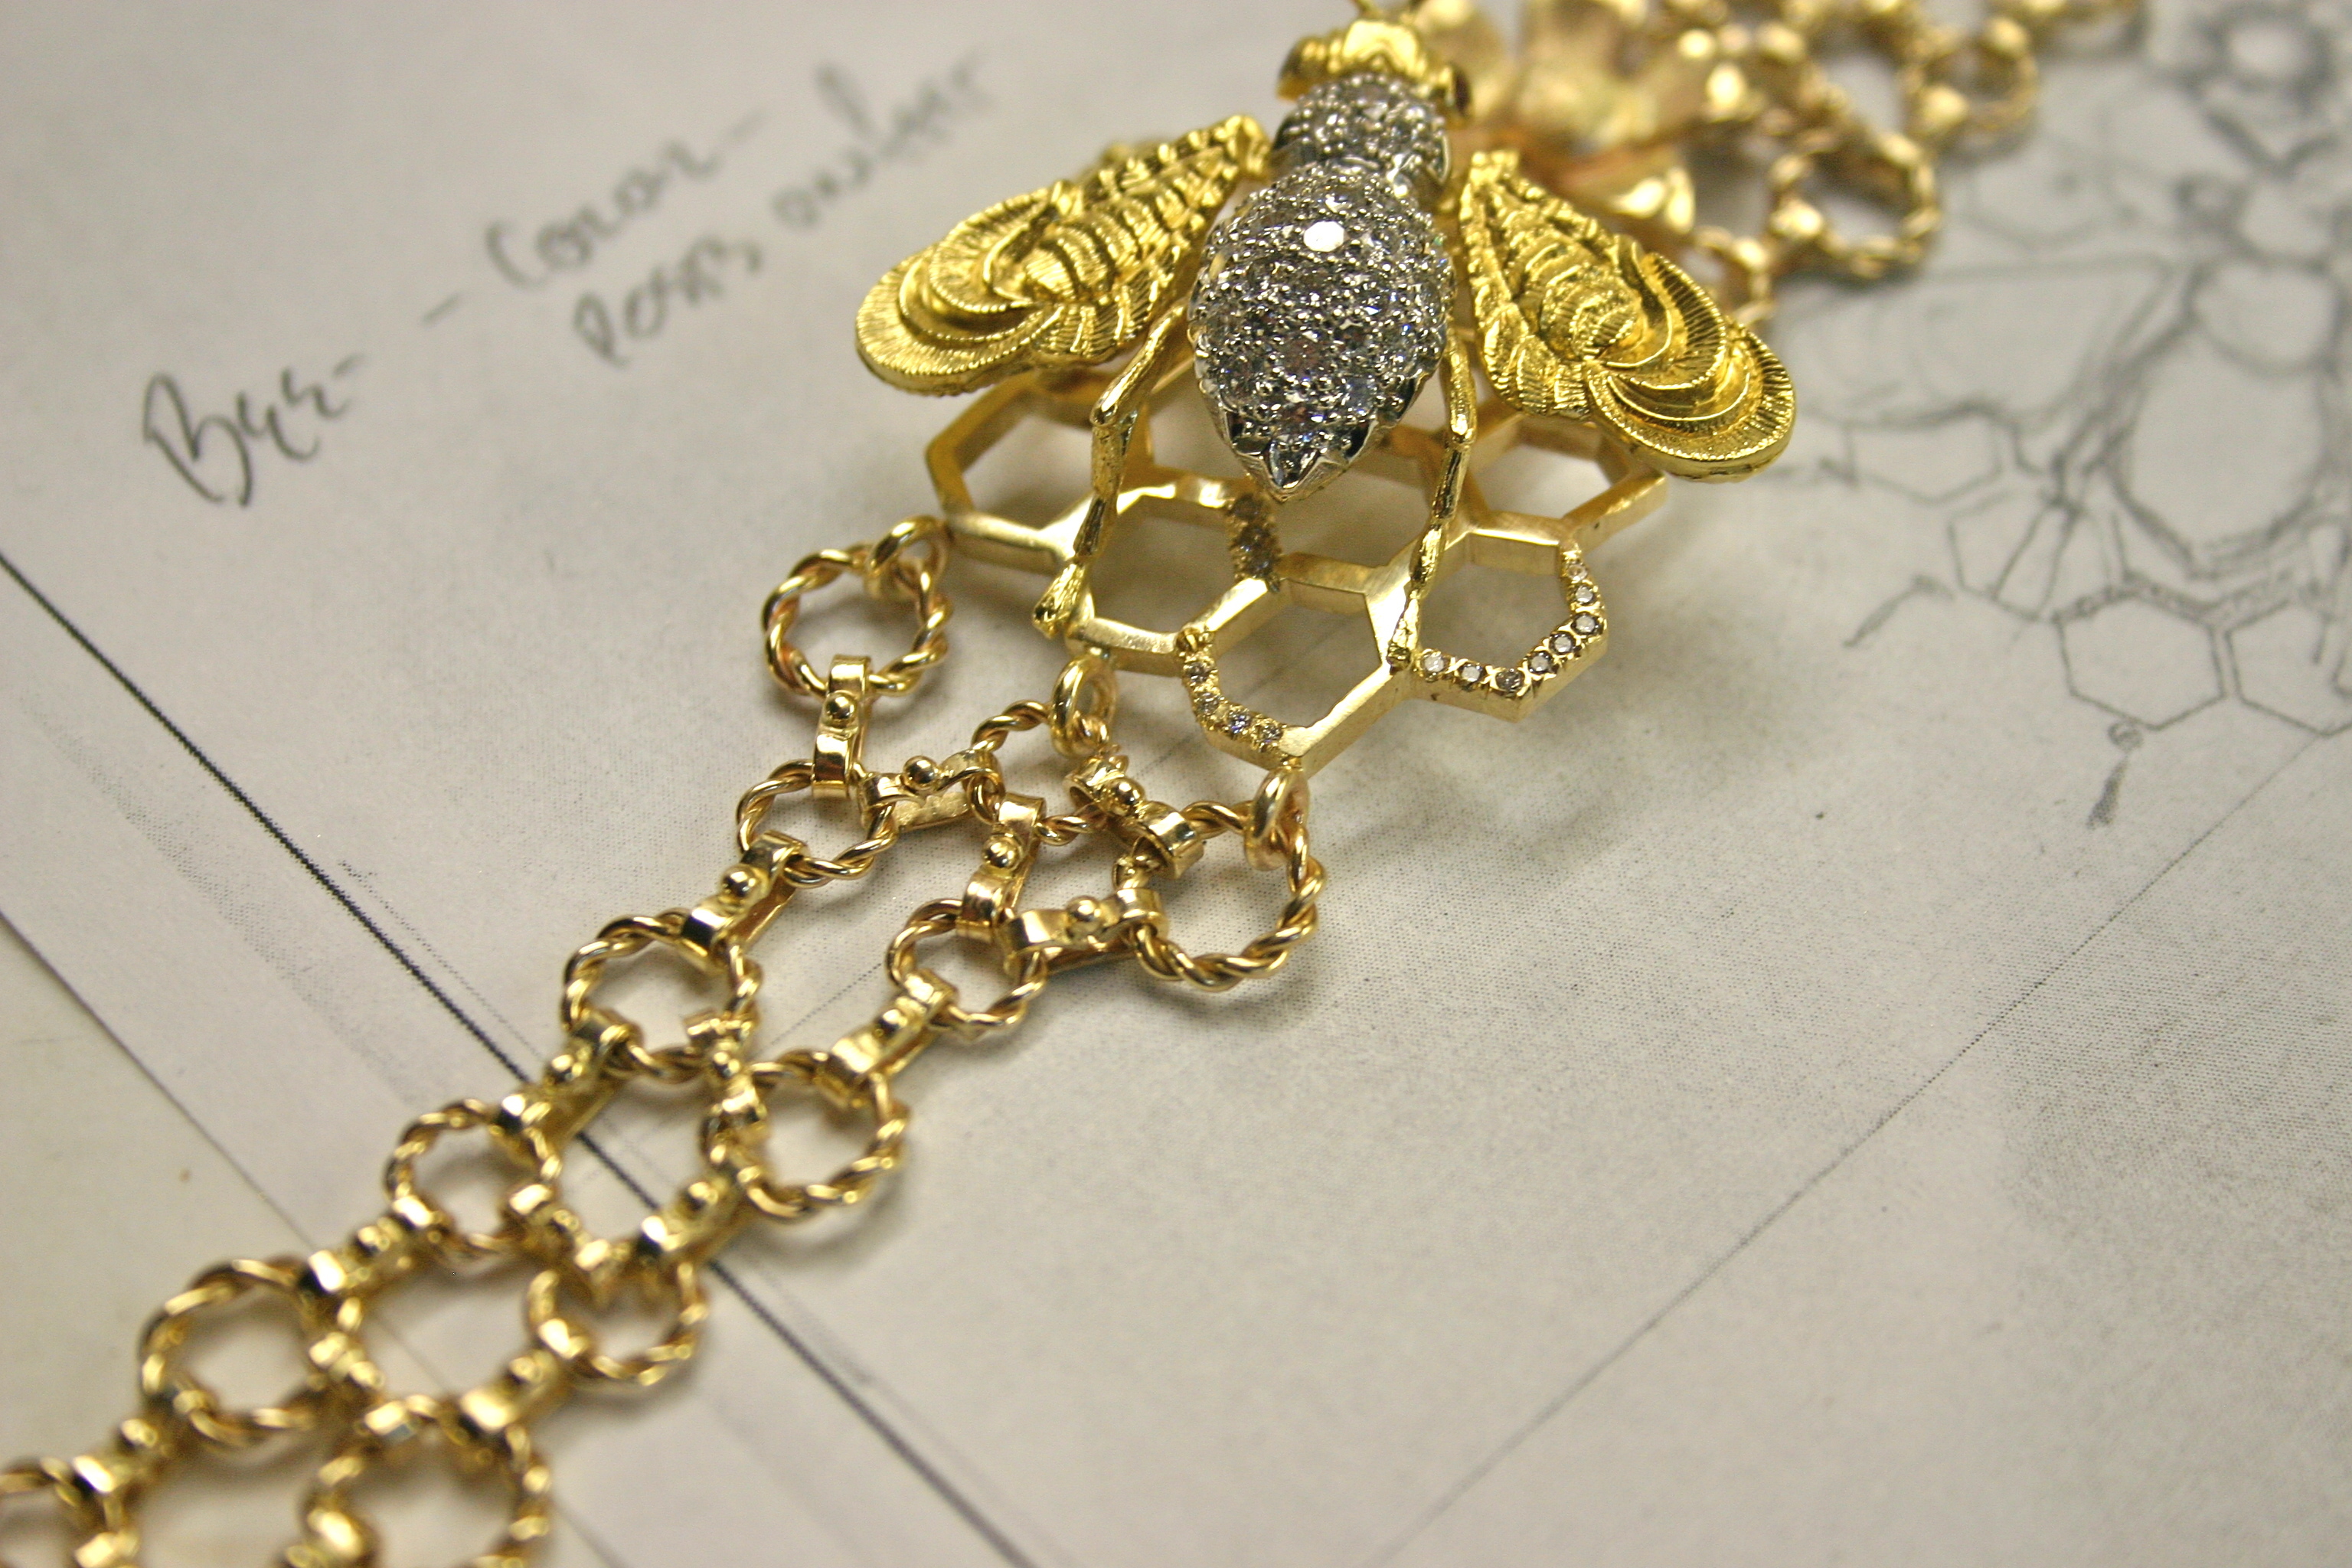
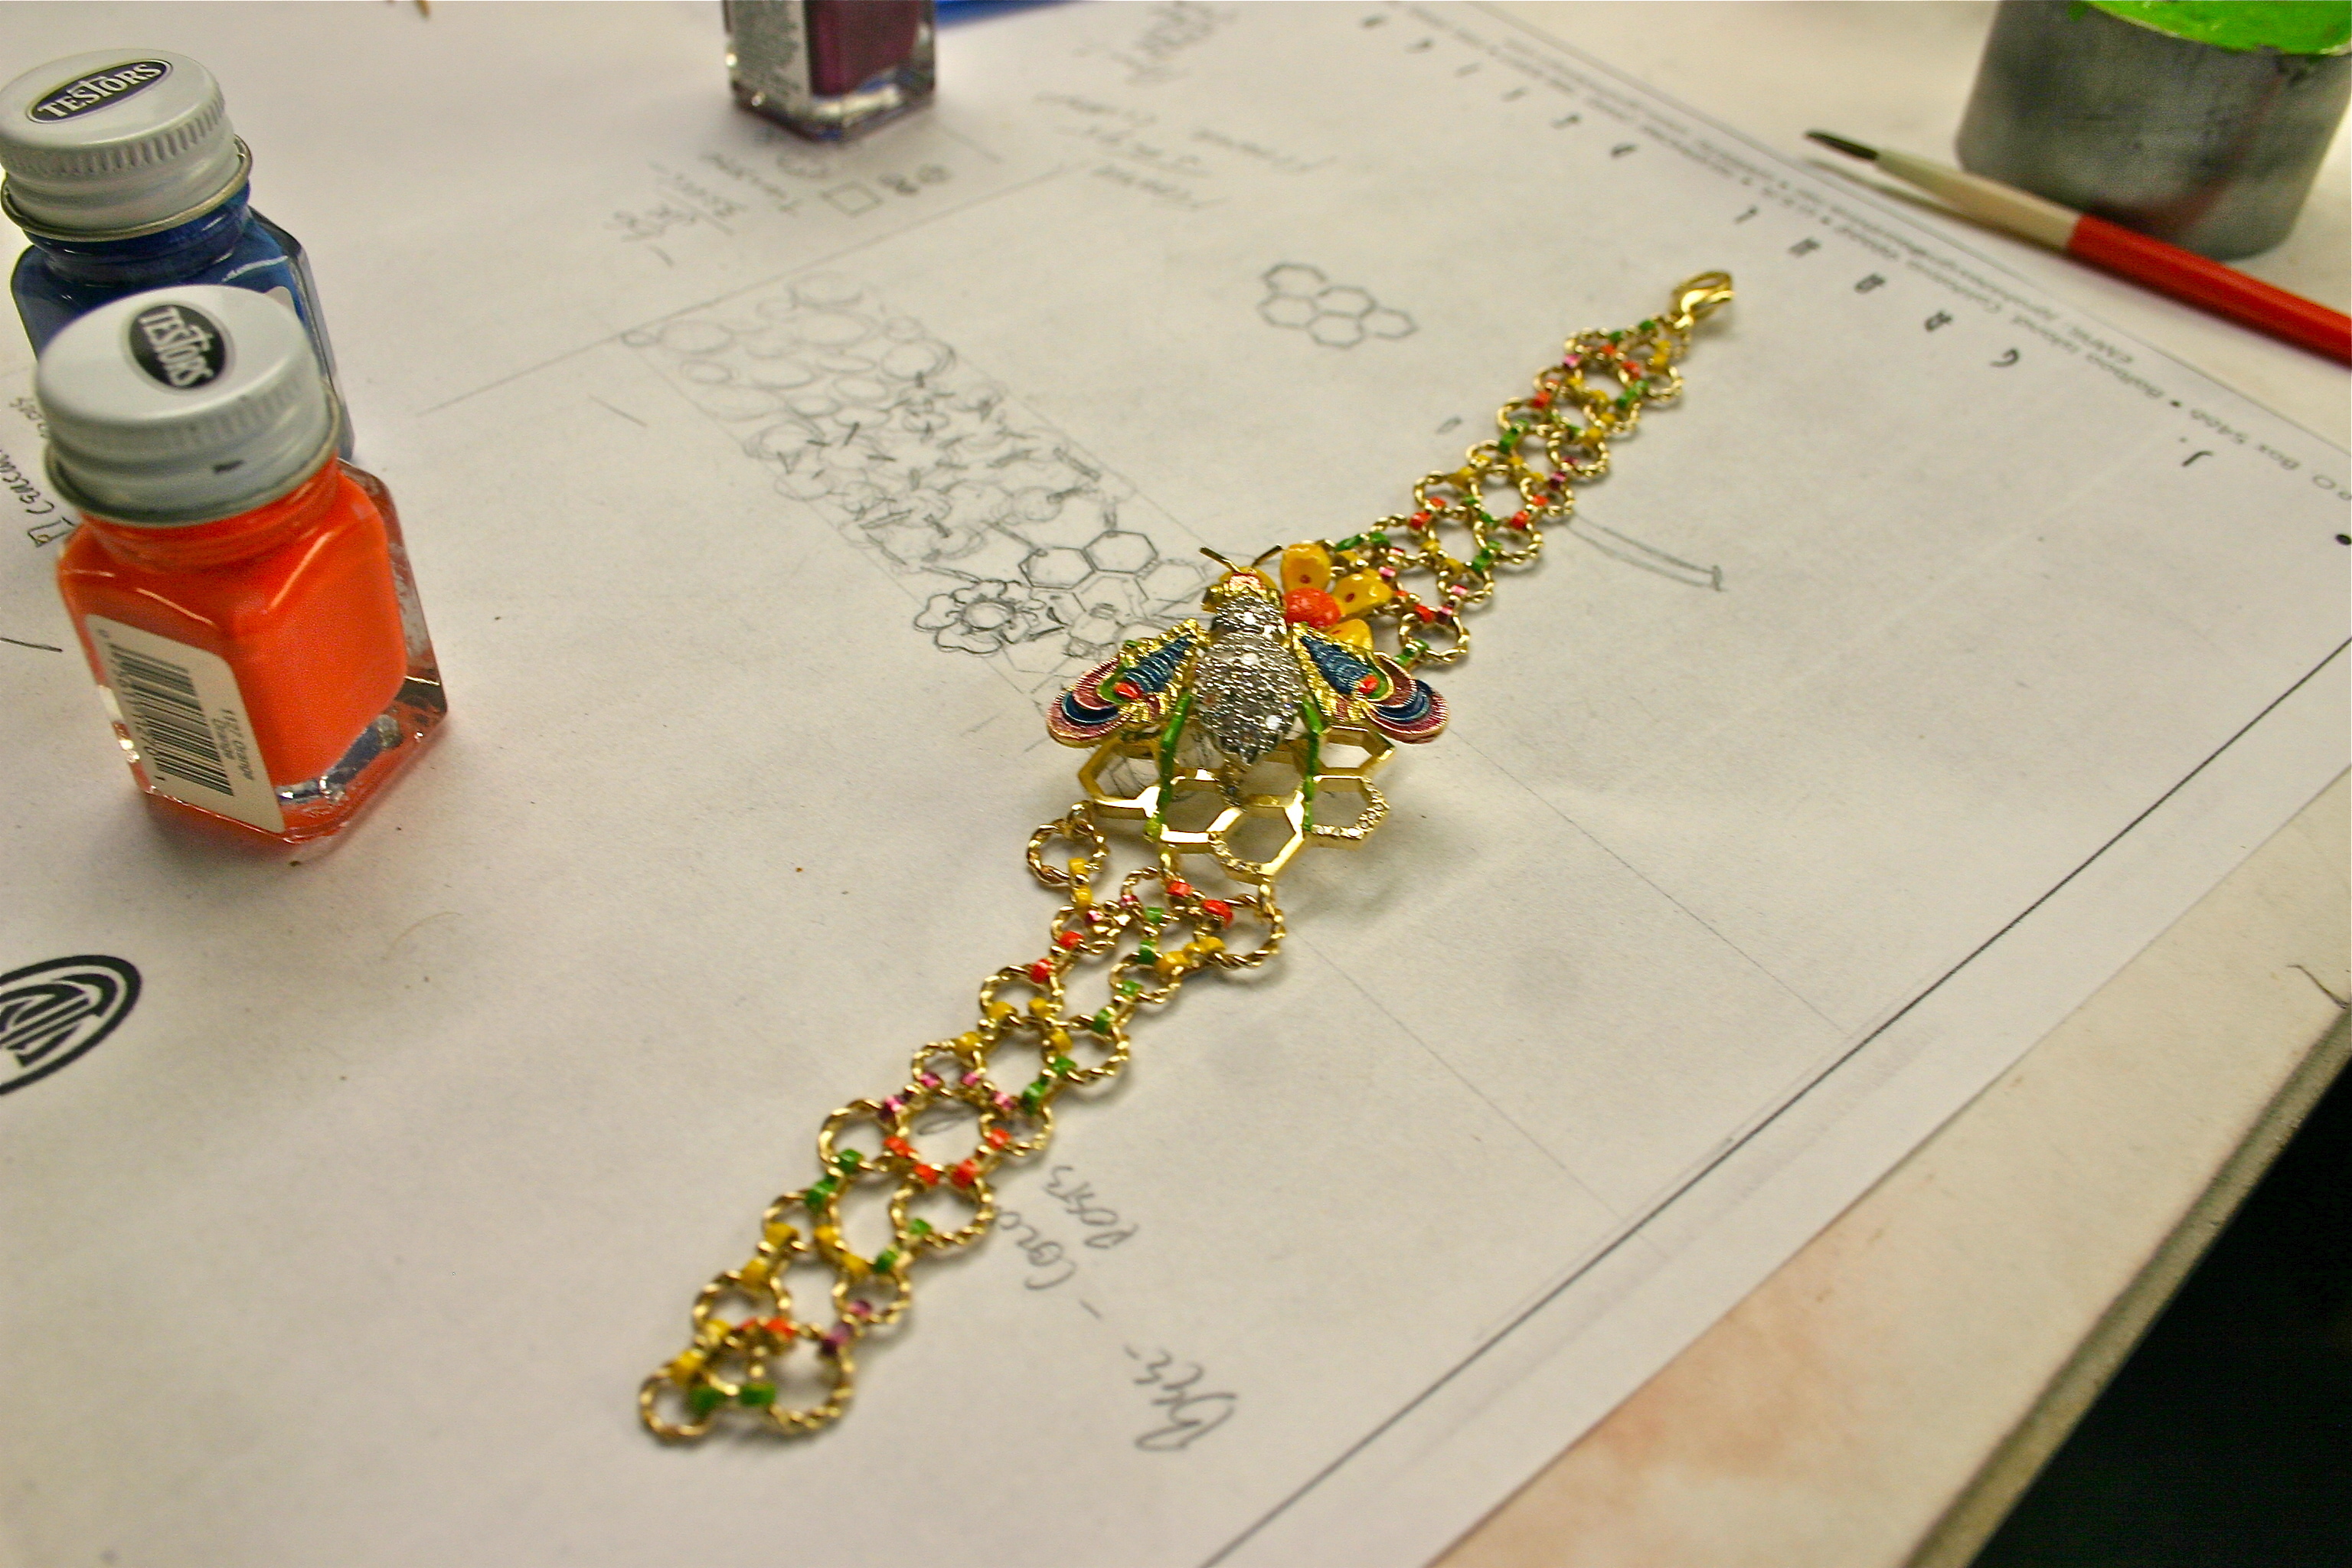
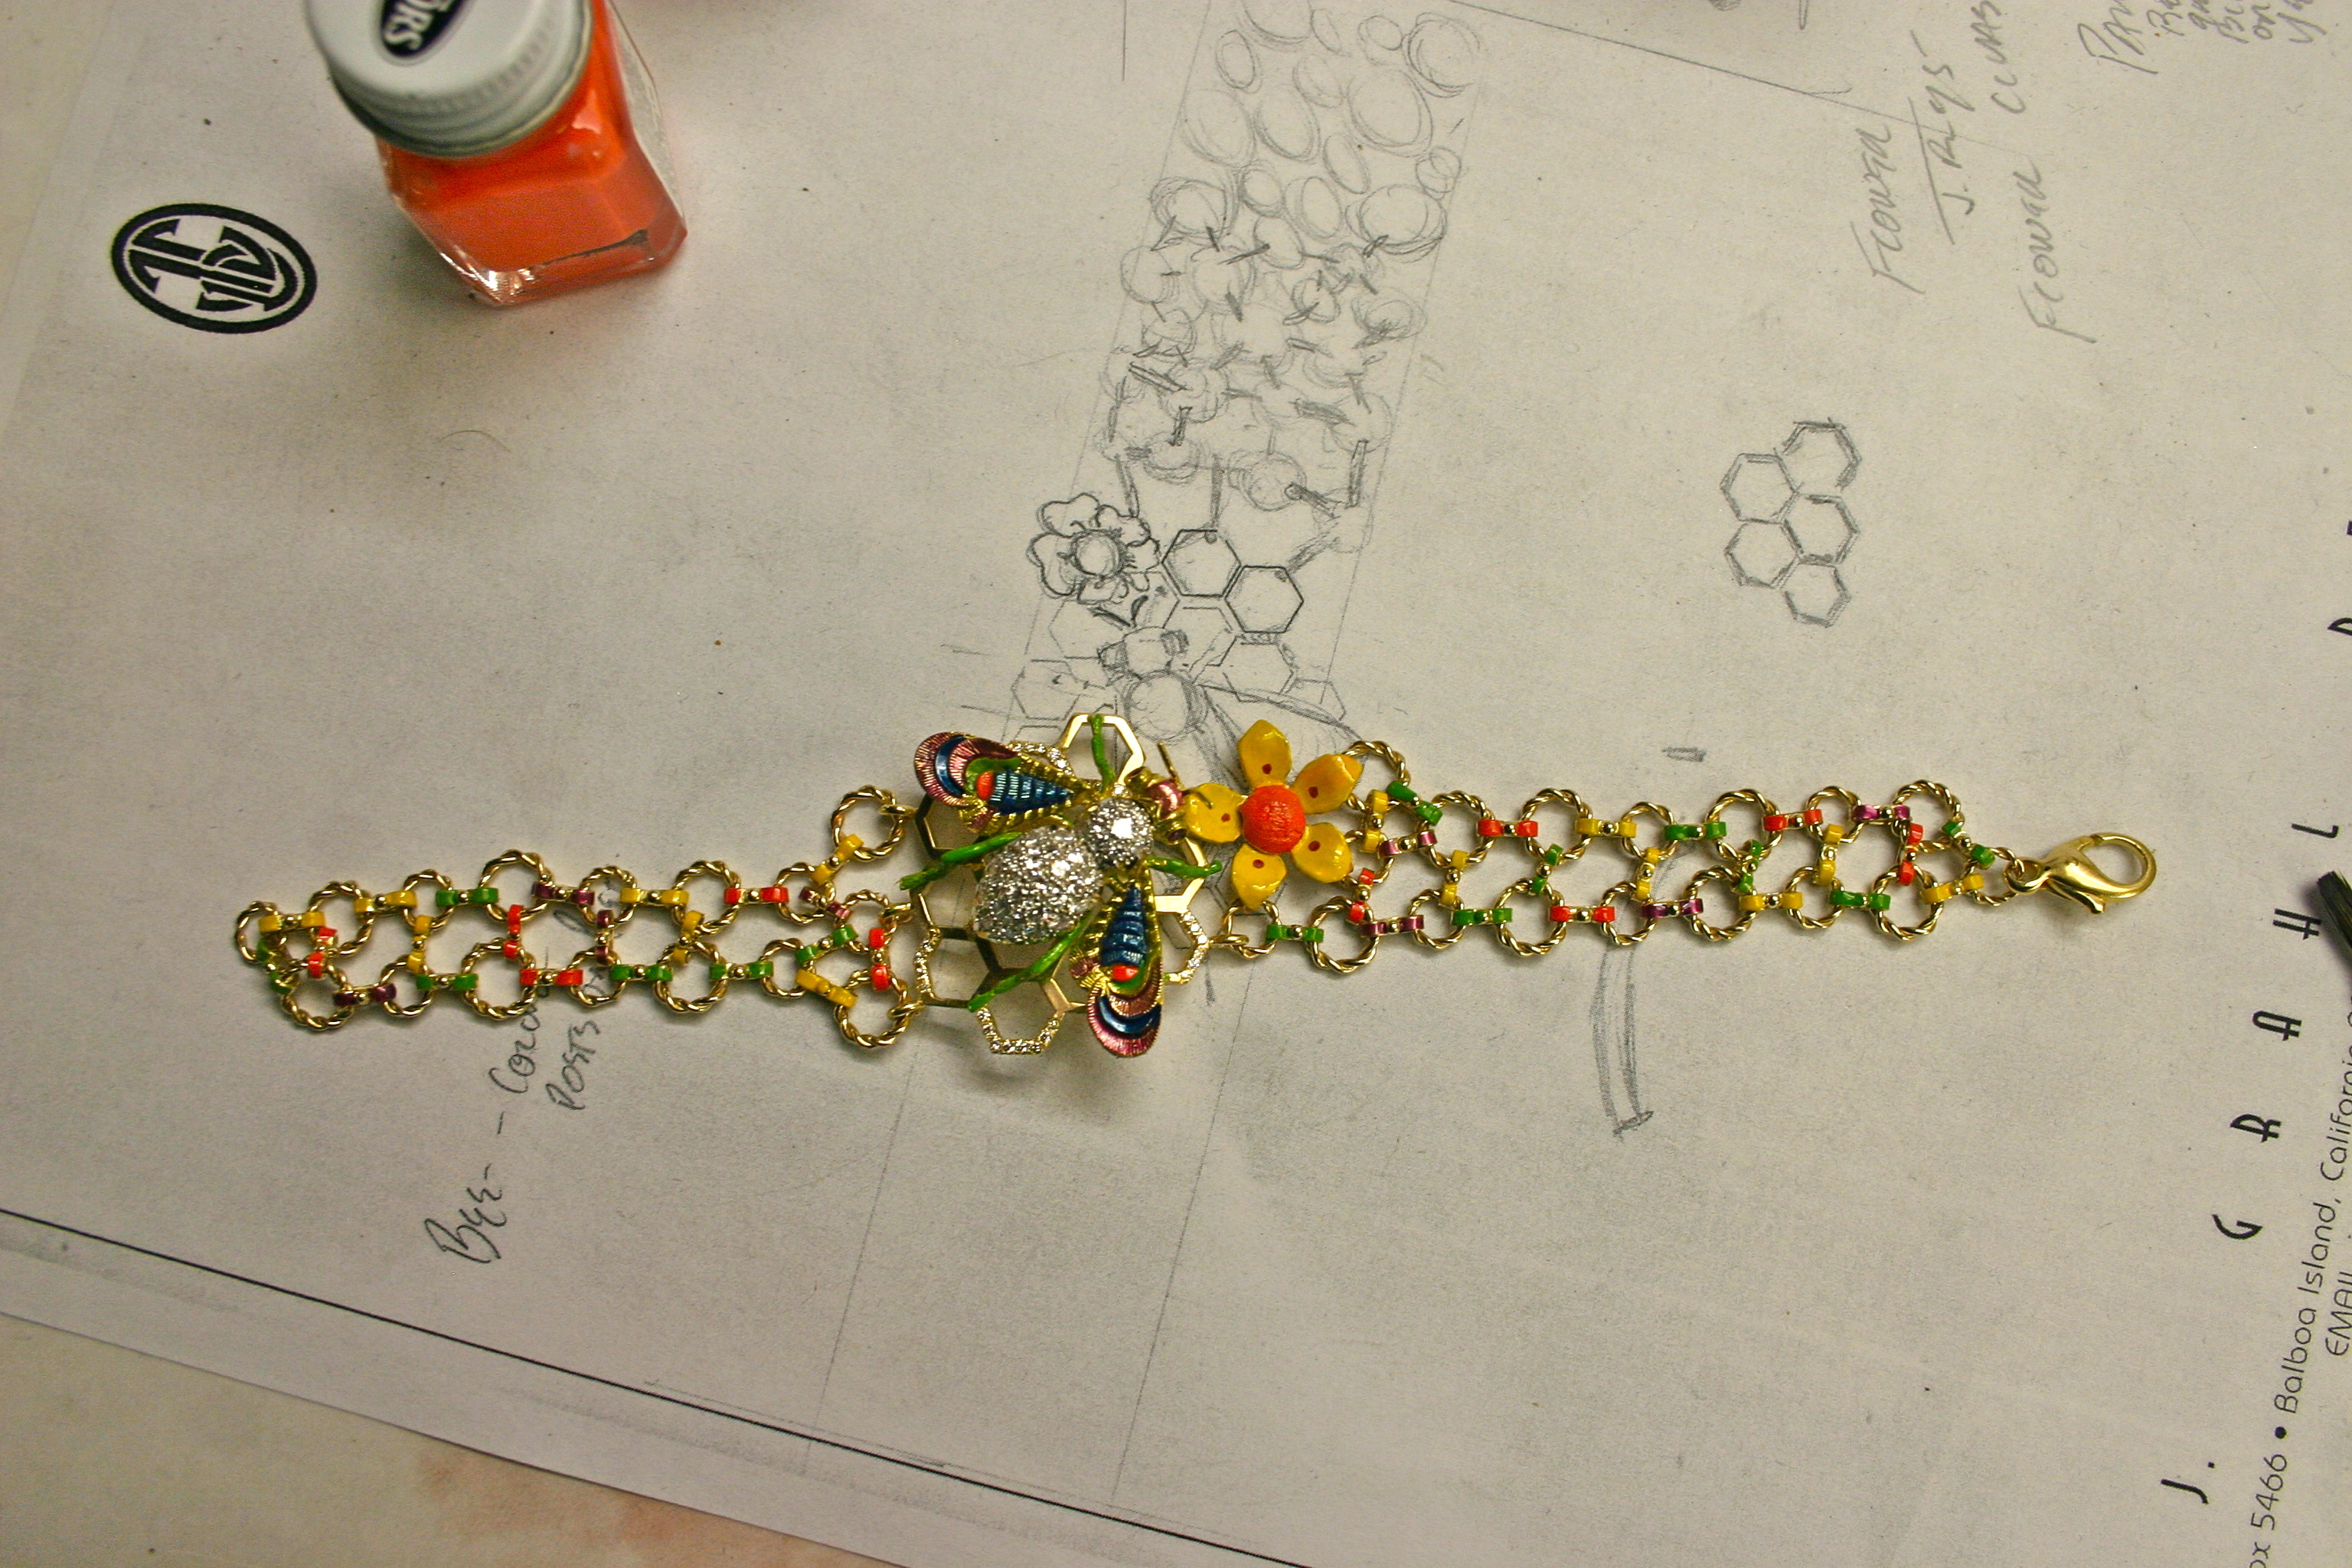
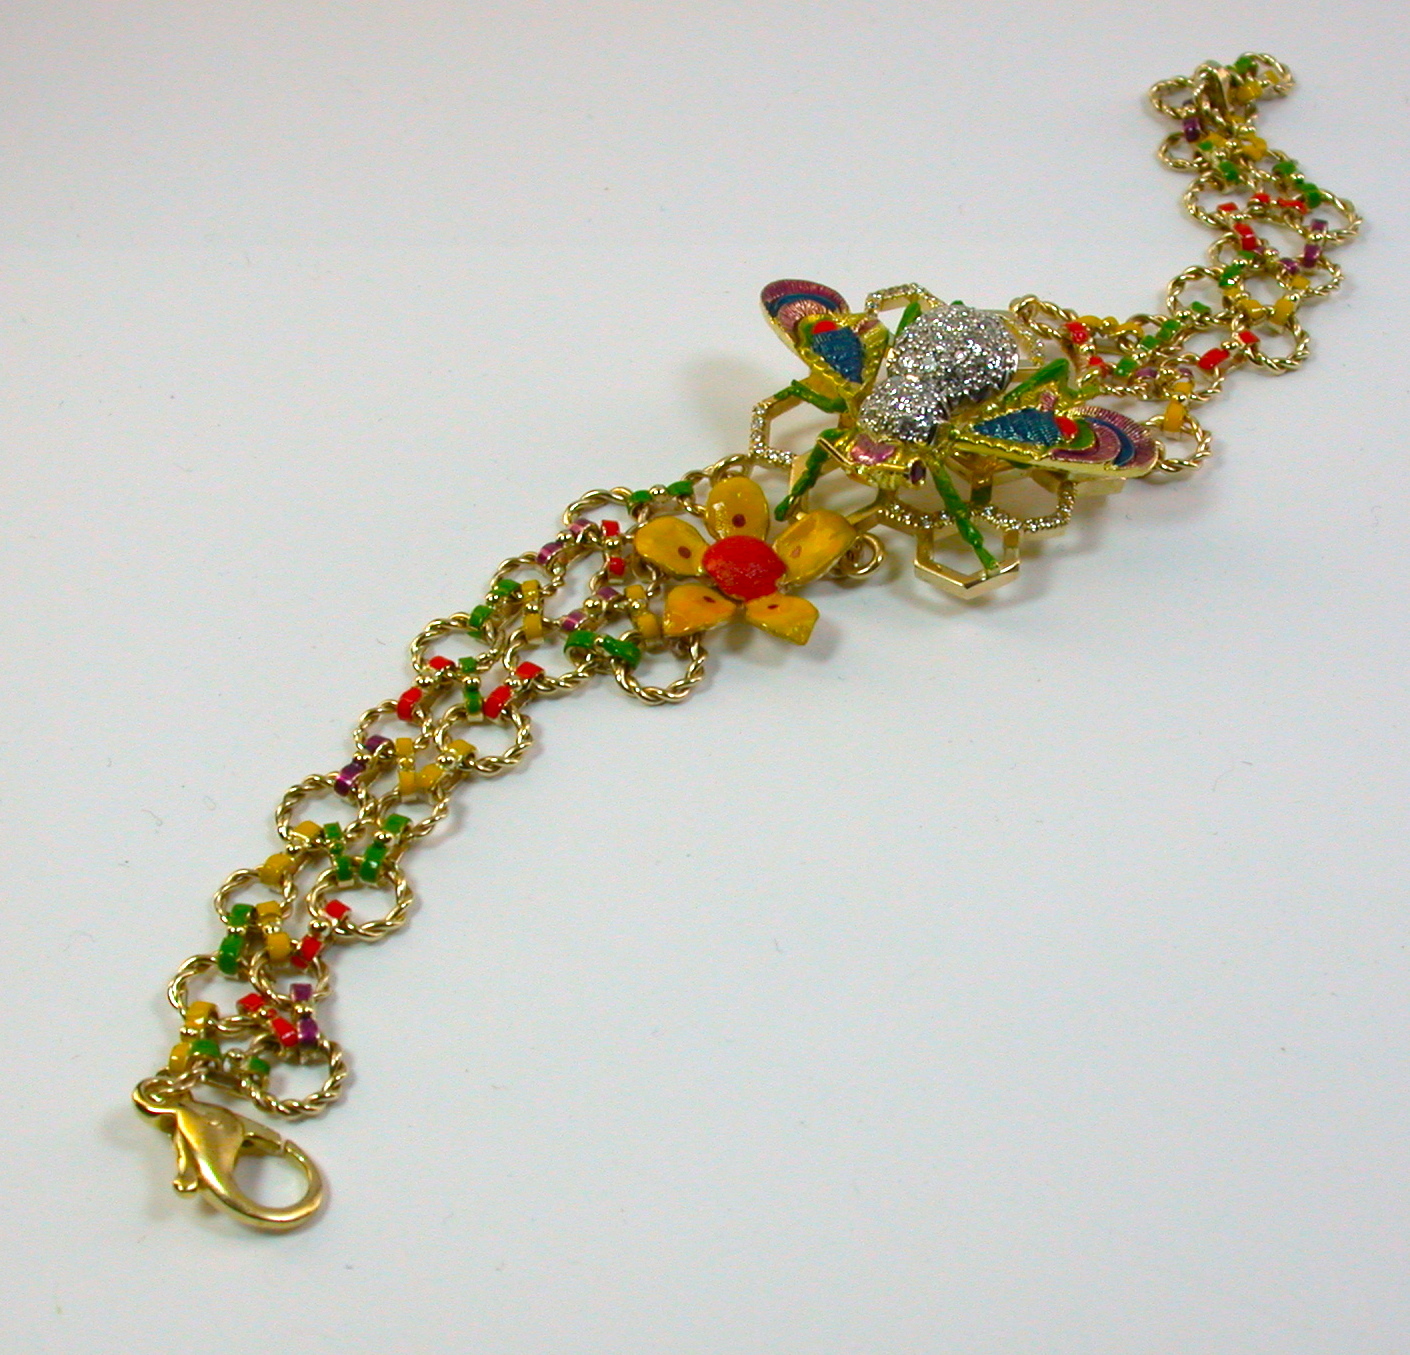
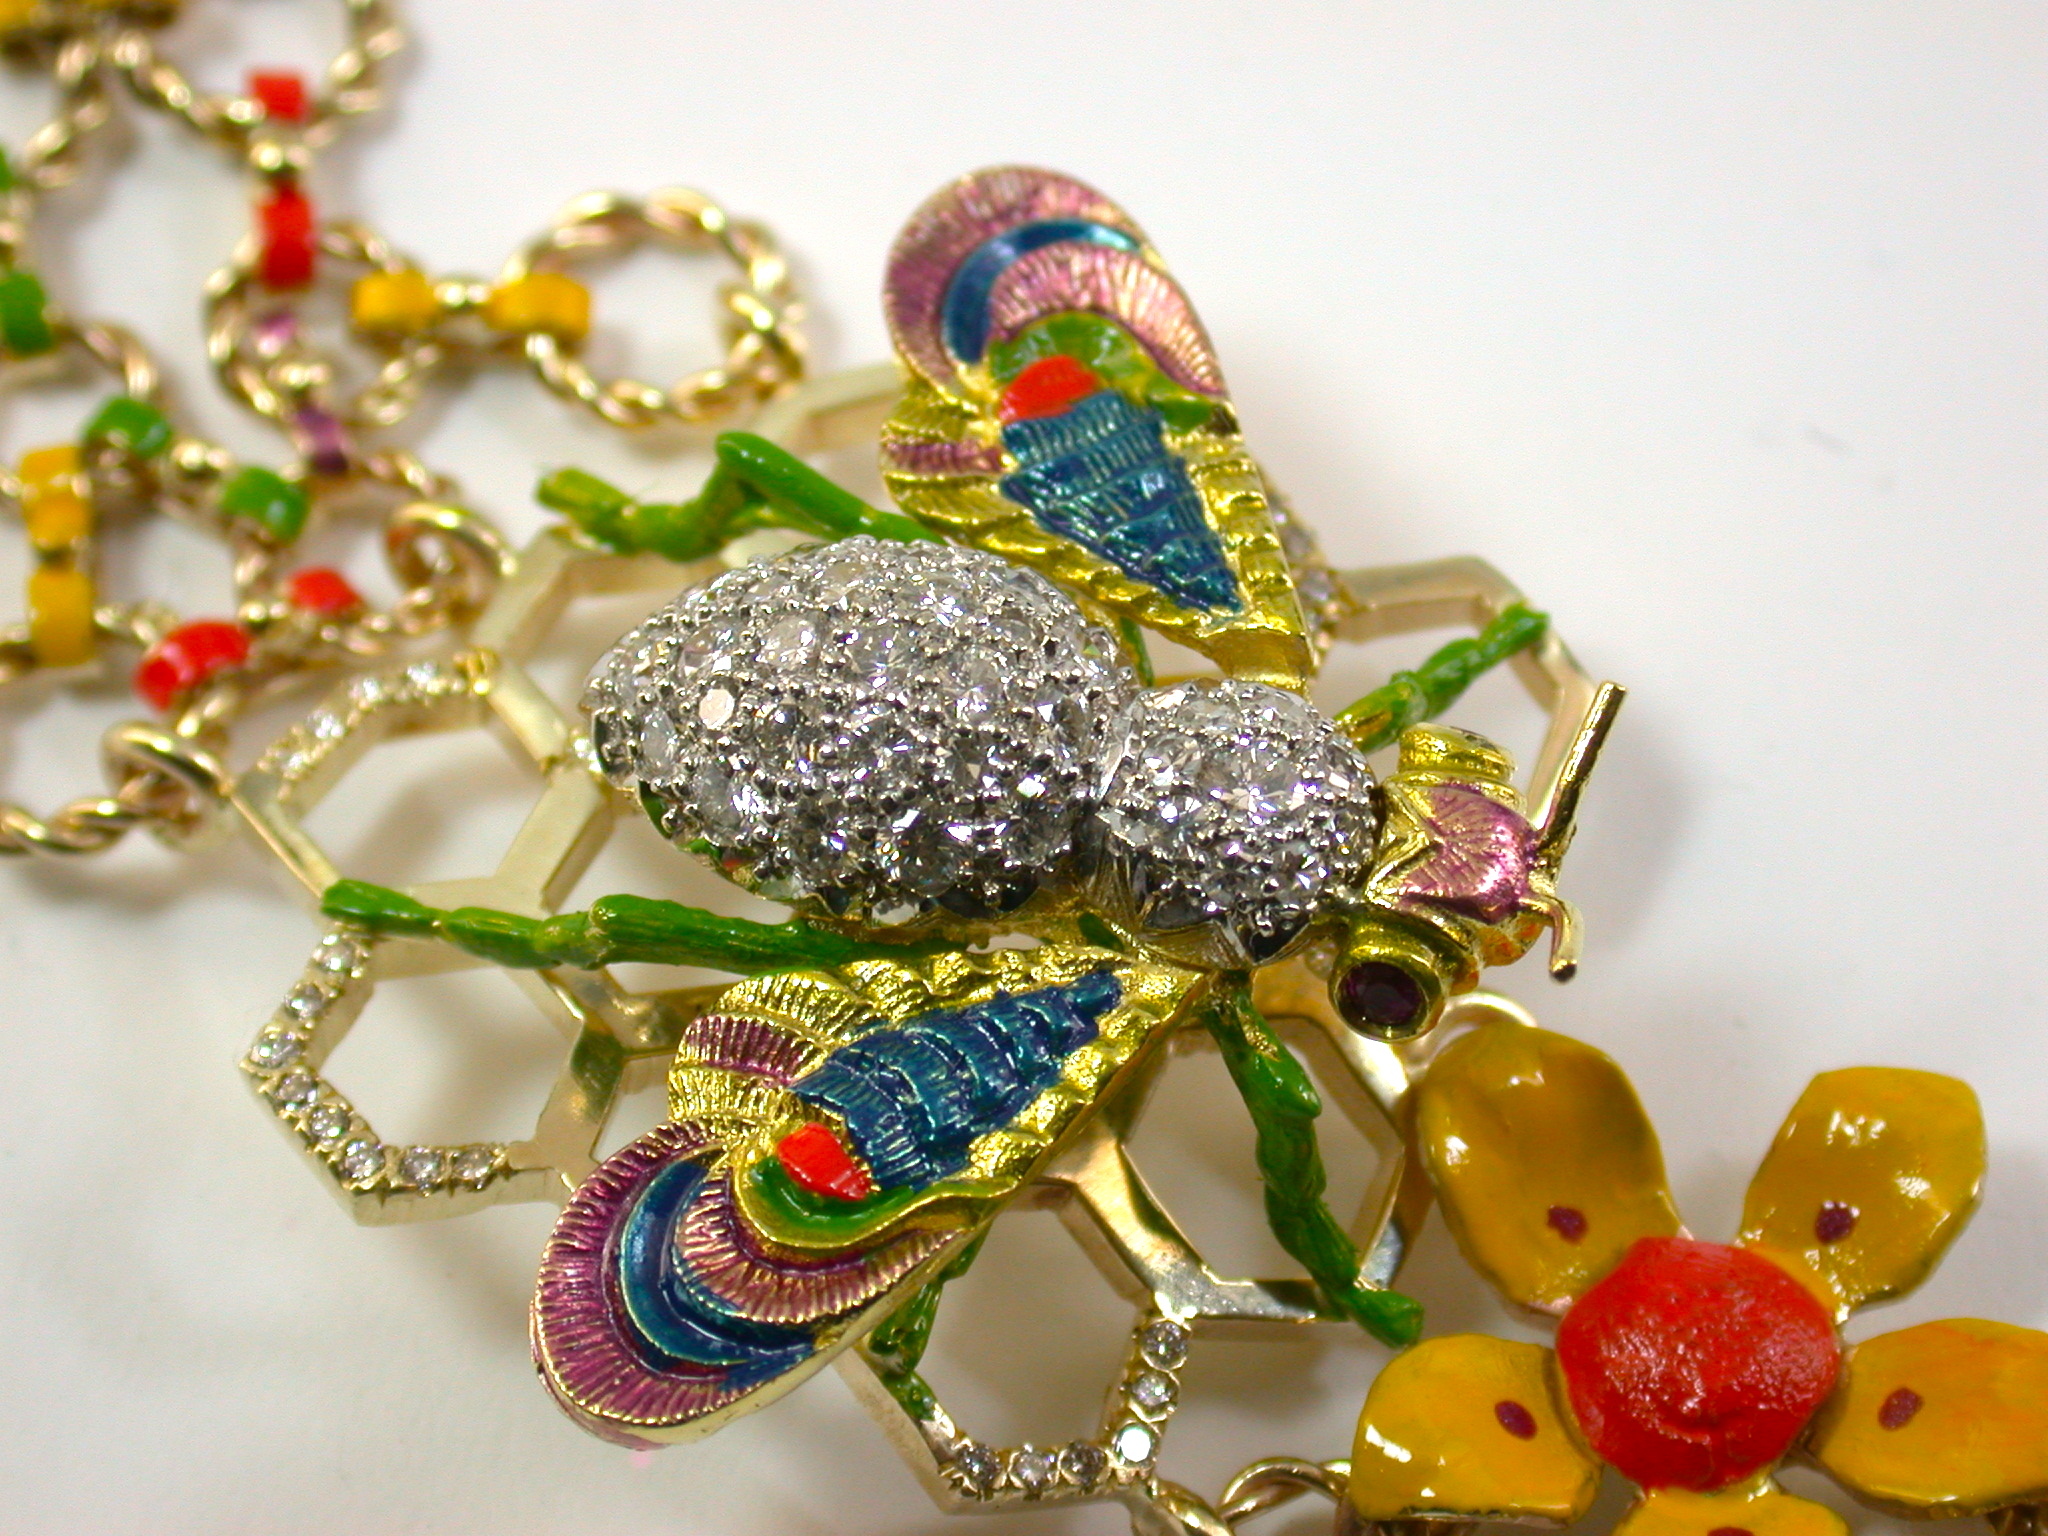
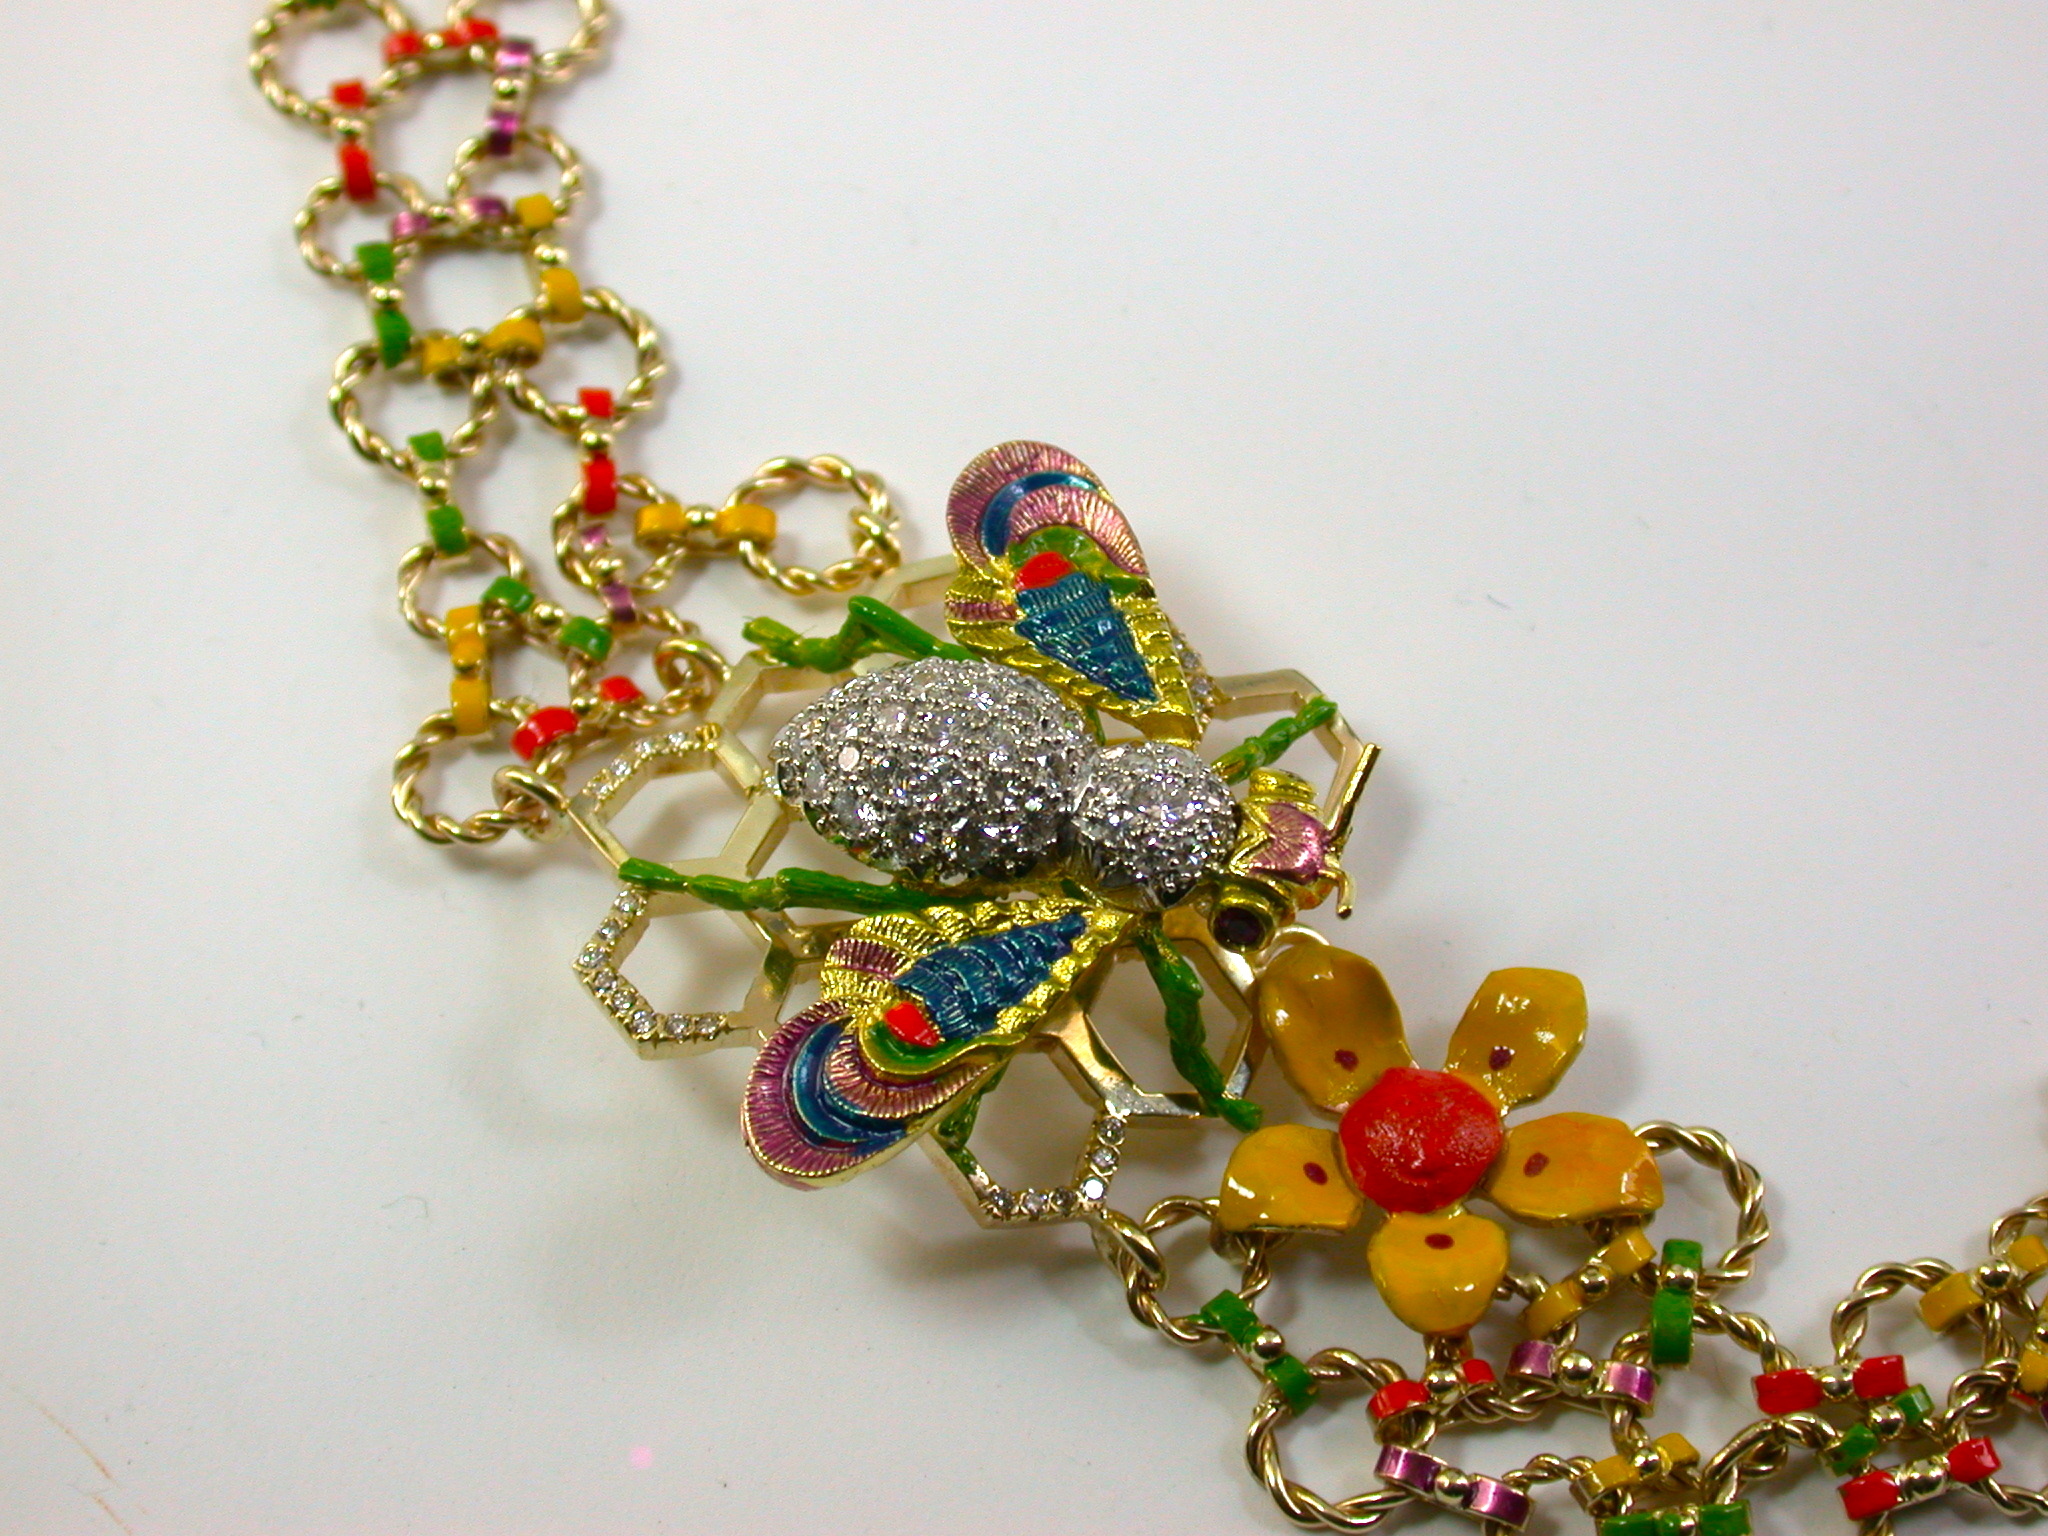
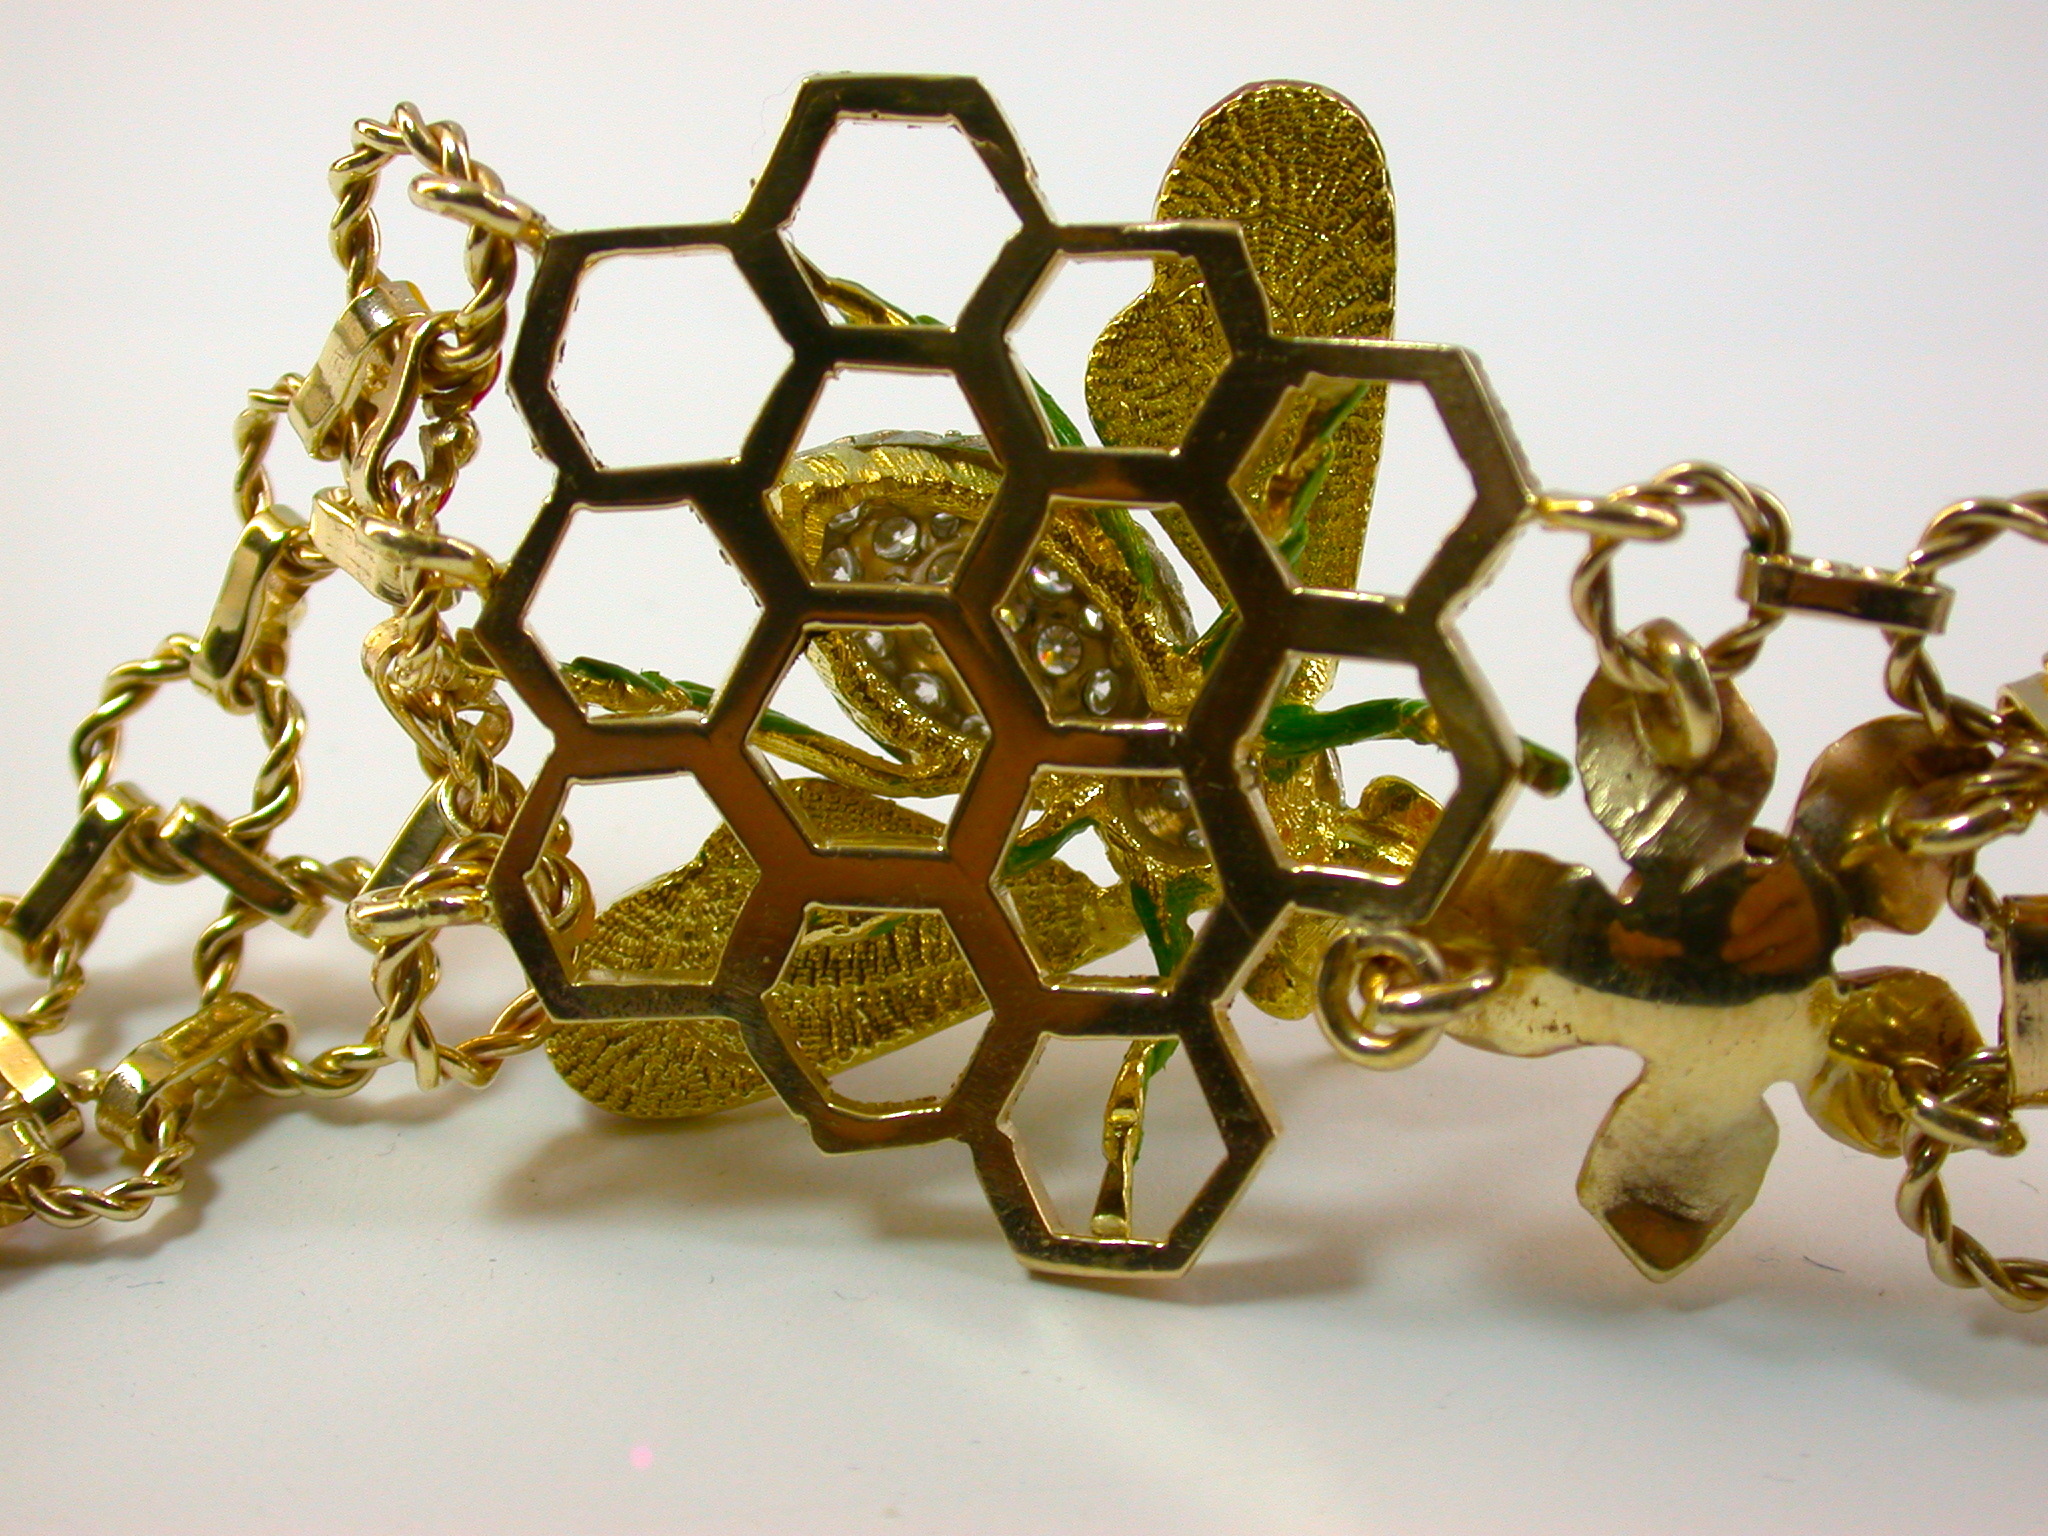
The enamel (sic) process provided by Testors… The concept was really 50’s kitsch, on 18K yellow gold…
There are a lot of pictures here, hoping not to overwhelm.
Thanks
Enjoy,
Jim


5 Likes
Hello Jim,
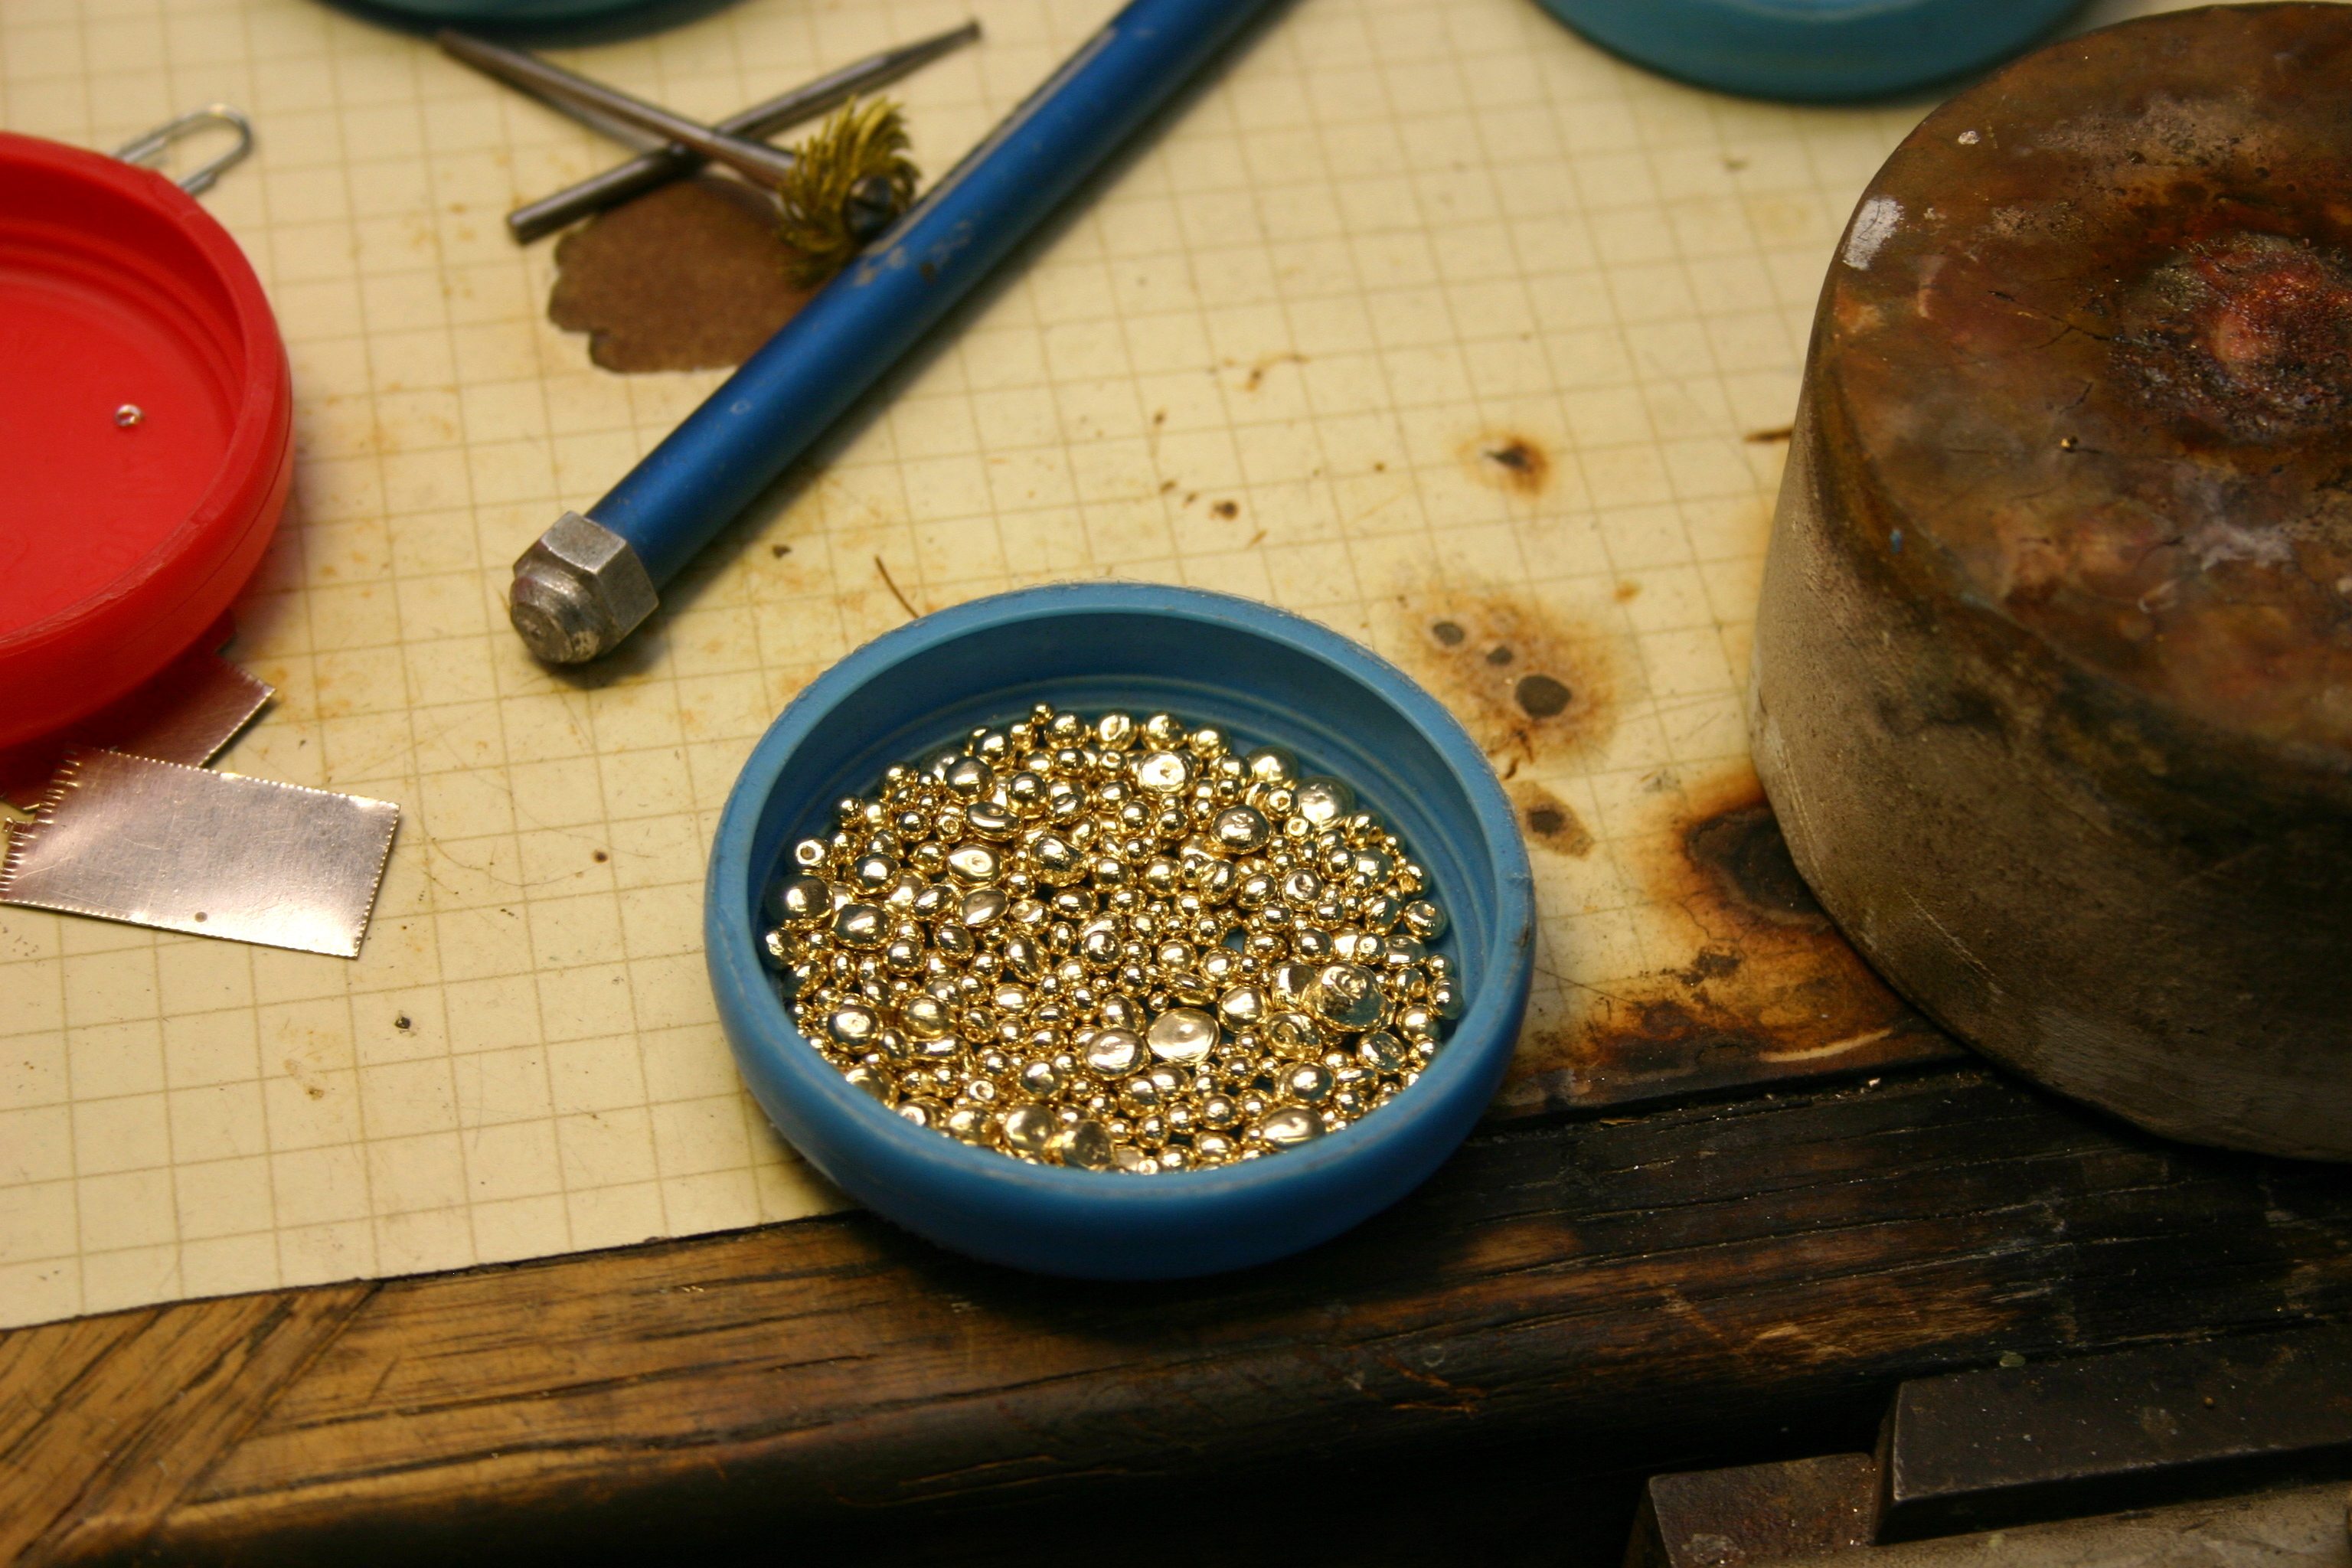
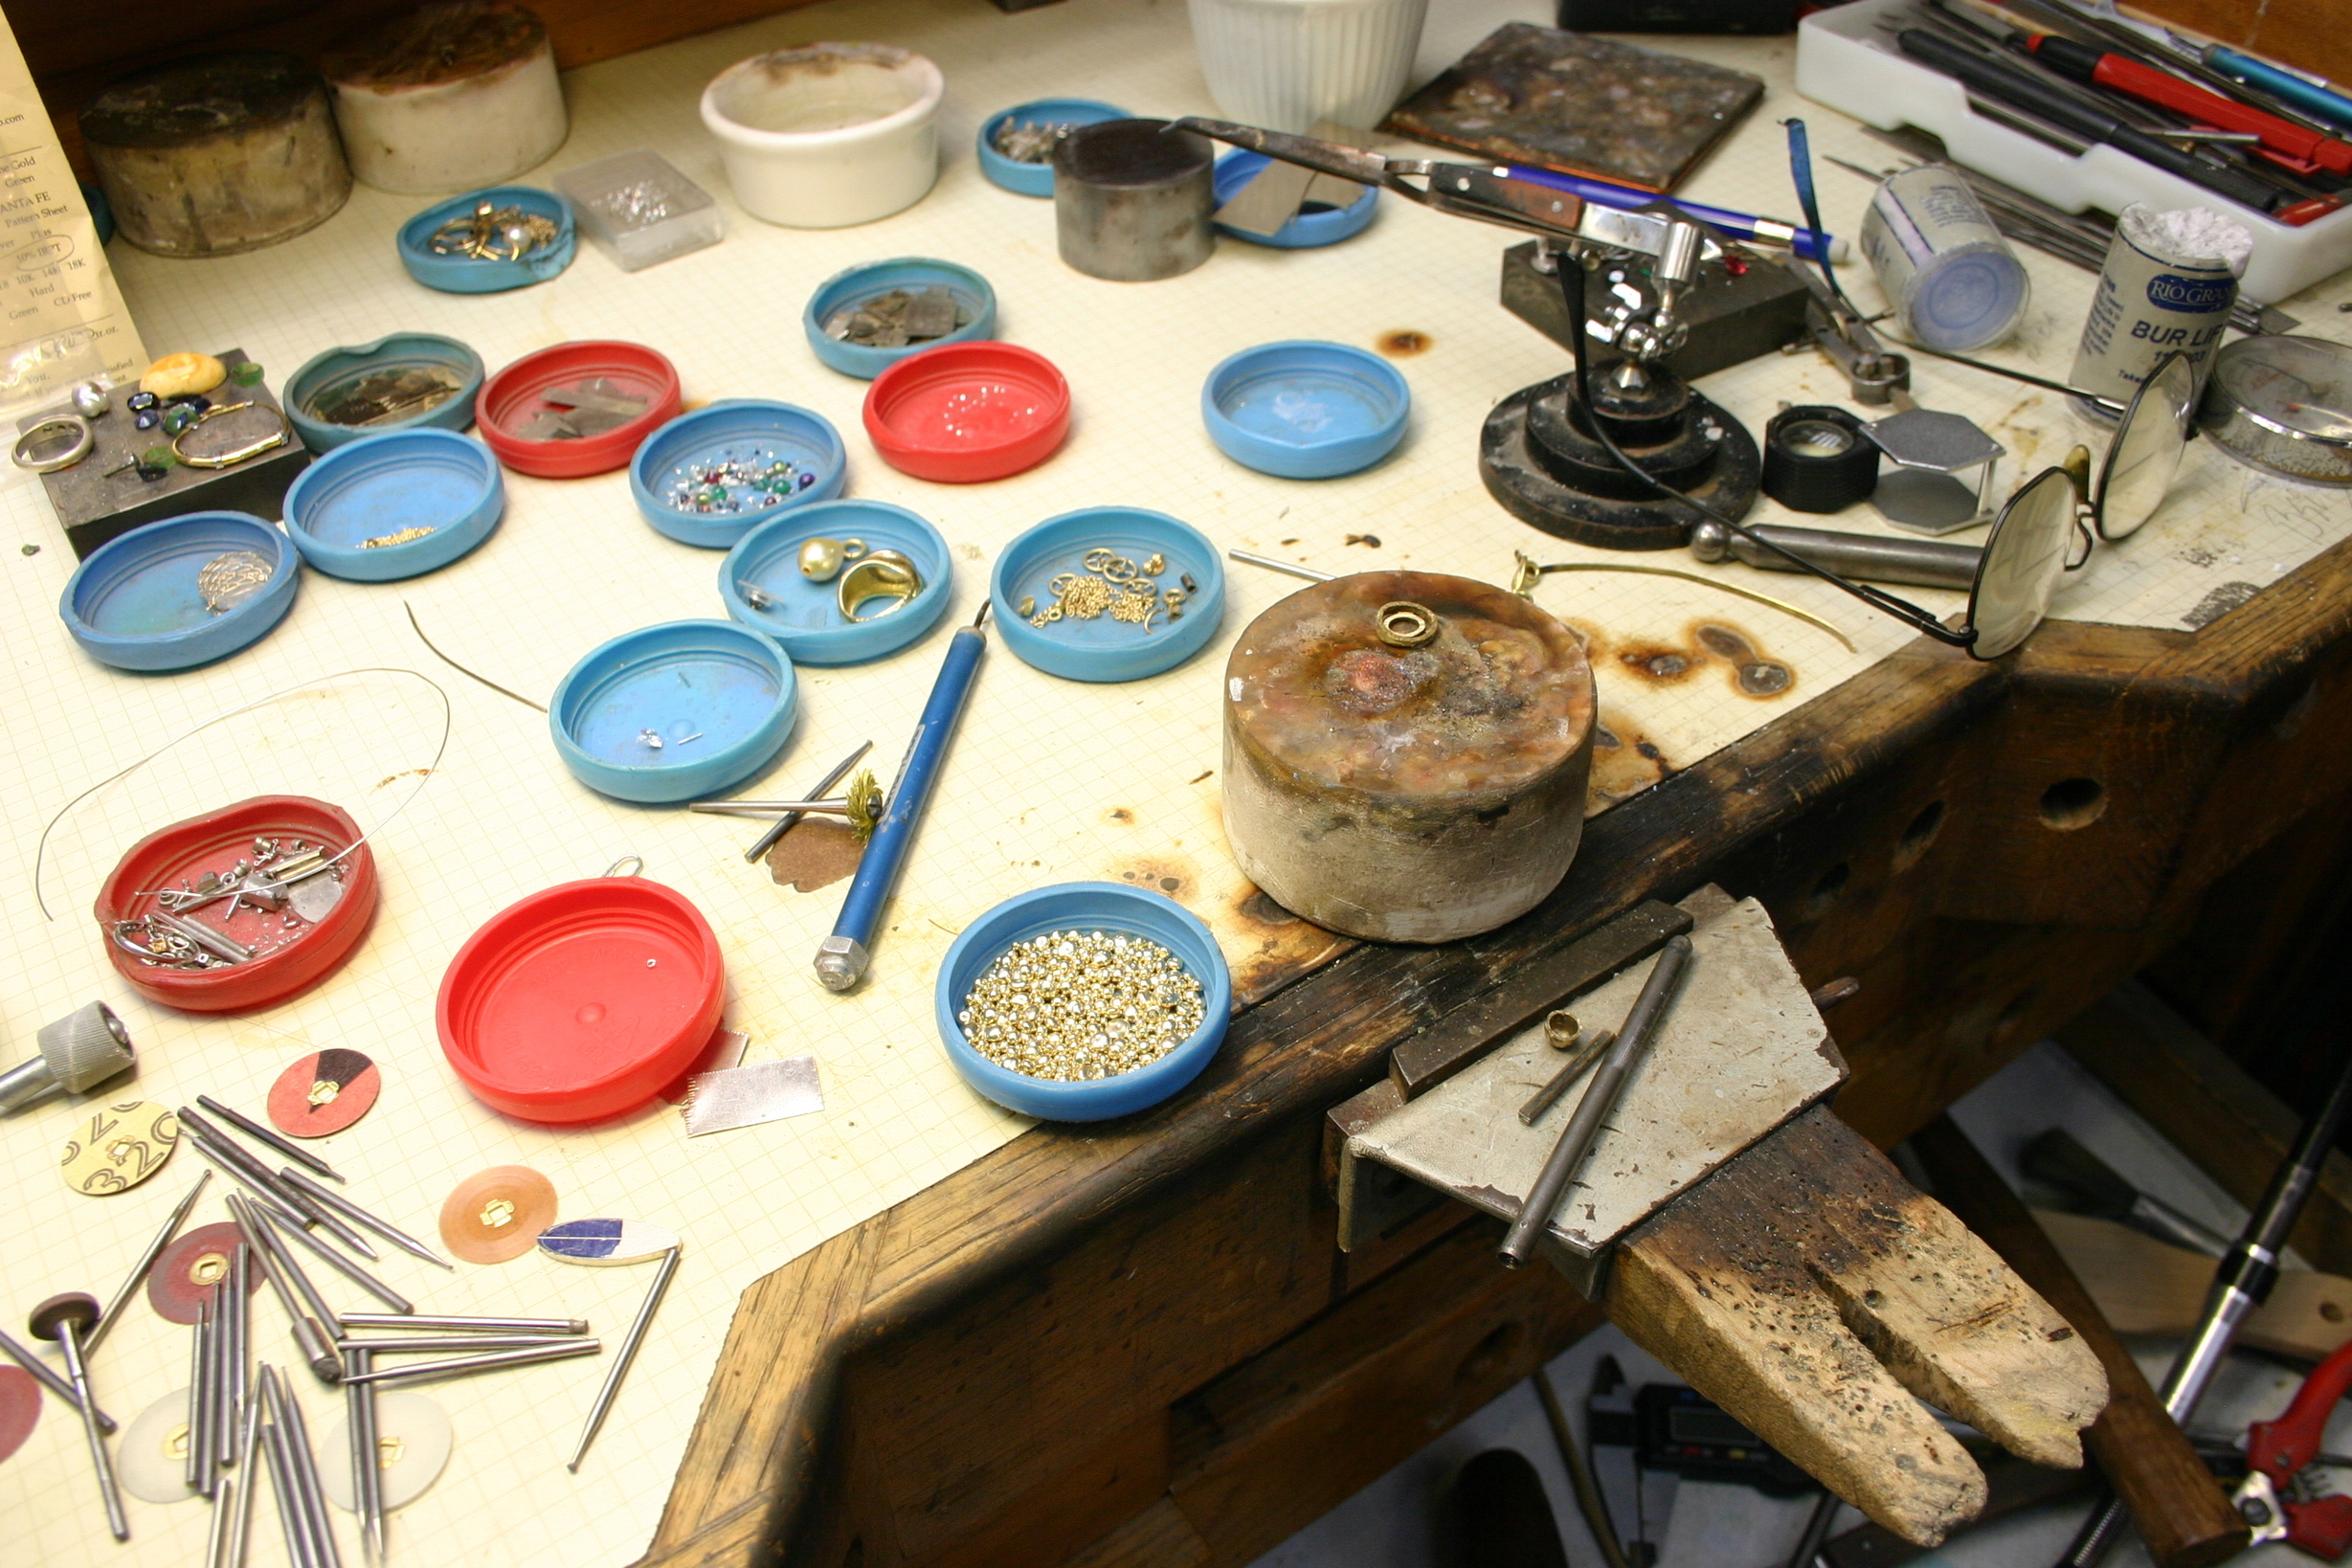
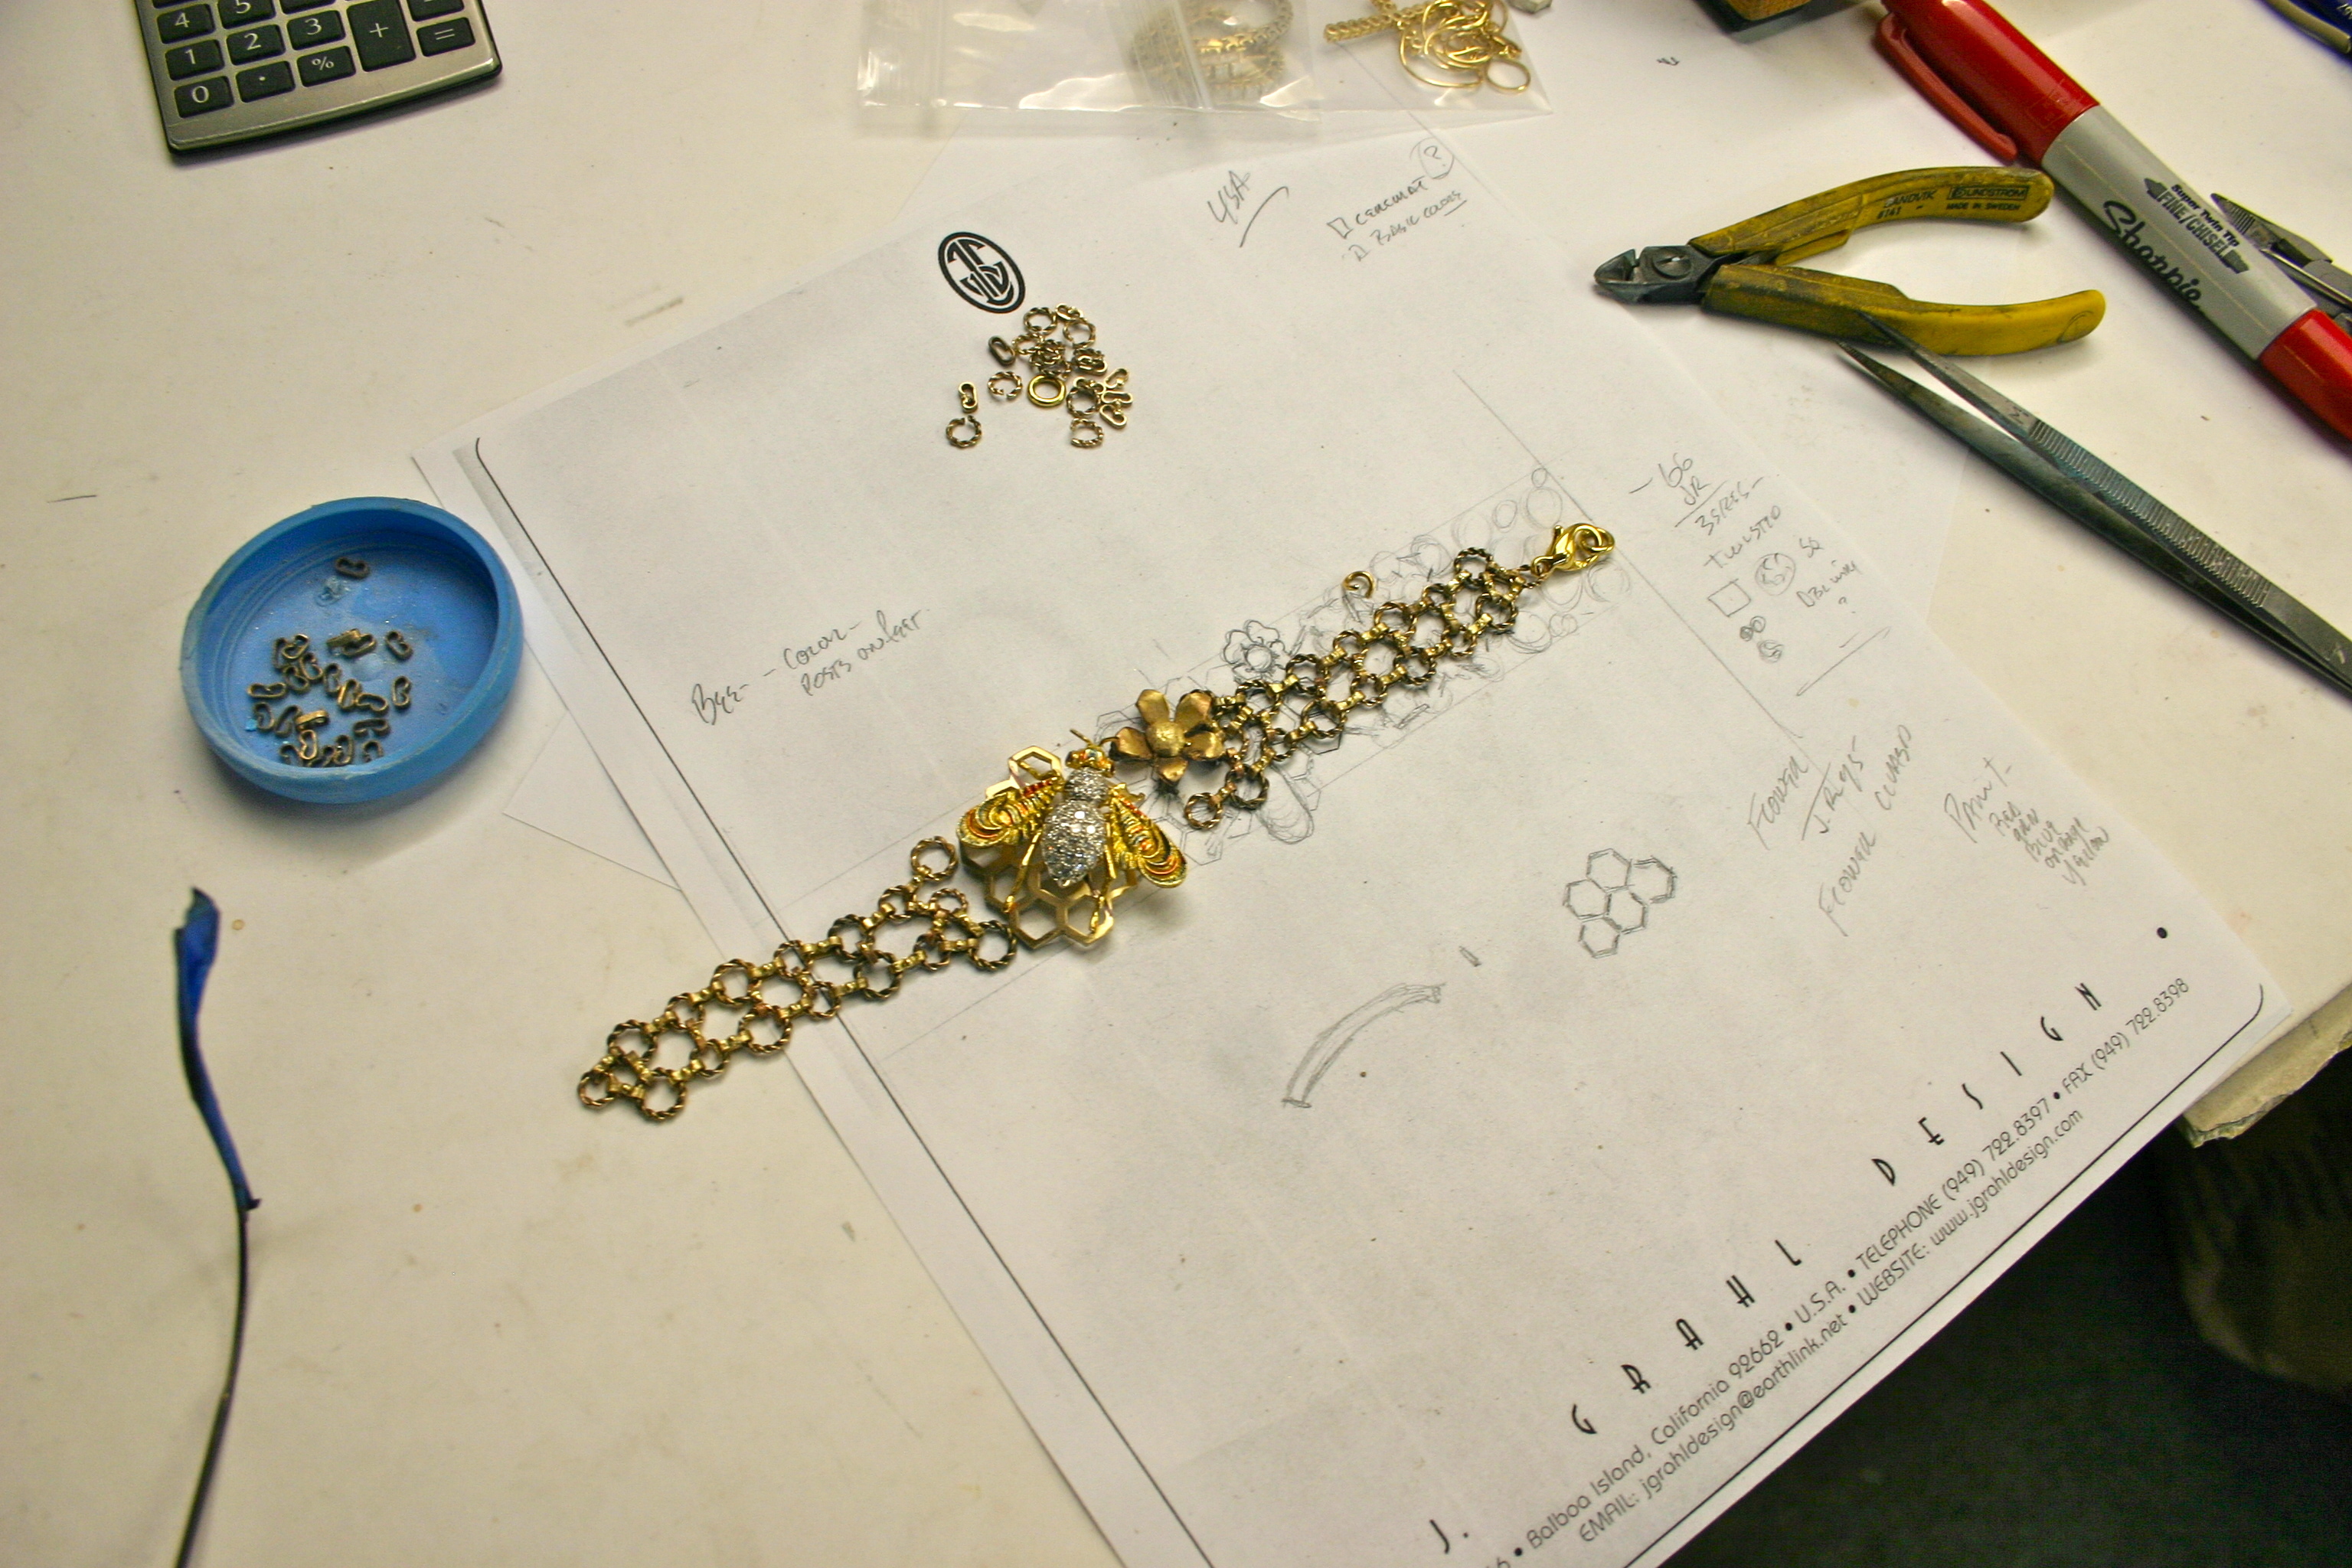
I see you make use of plastic jar lids to hold bits of the work in progress. Good on you! BTW, I have found that there are some lids that will actually screw together to form a secure container. Colorful, cheap, and a great example of re-purposing.
Judy in Kansas, who harvested all the tomatoes and peppers yesterday when temps were in the 70s…today temps are in the 40s and falling. Freeze tonight!
Hi Judy, Burrr… still warm & sunny here.
Those lids are from Sparlkets water bottles… ancient now.
Sure handy though.
Have a great day… do something tasty with those tomatoes and peppers…
Thanks, Jim
Beautiful piece! Loved the process and love the idea of those lids! I am so bummed about all of them that I thrown out over the years!  Thanks for sharing.
Hi,
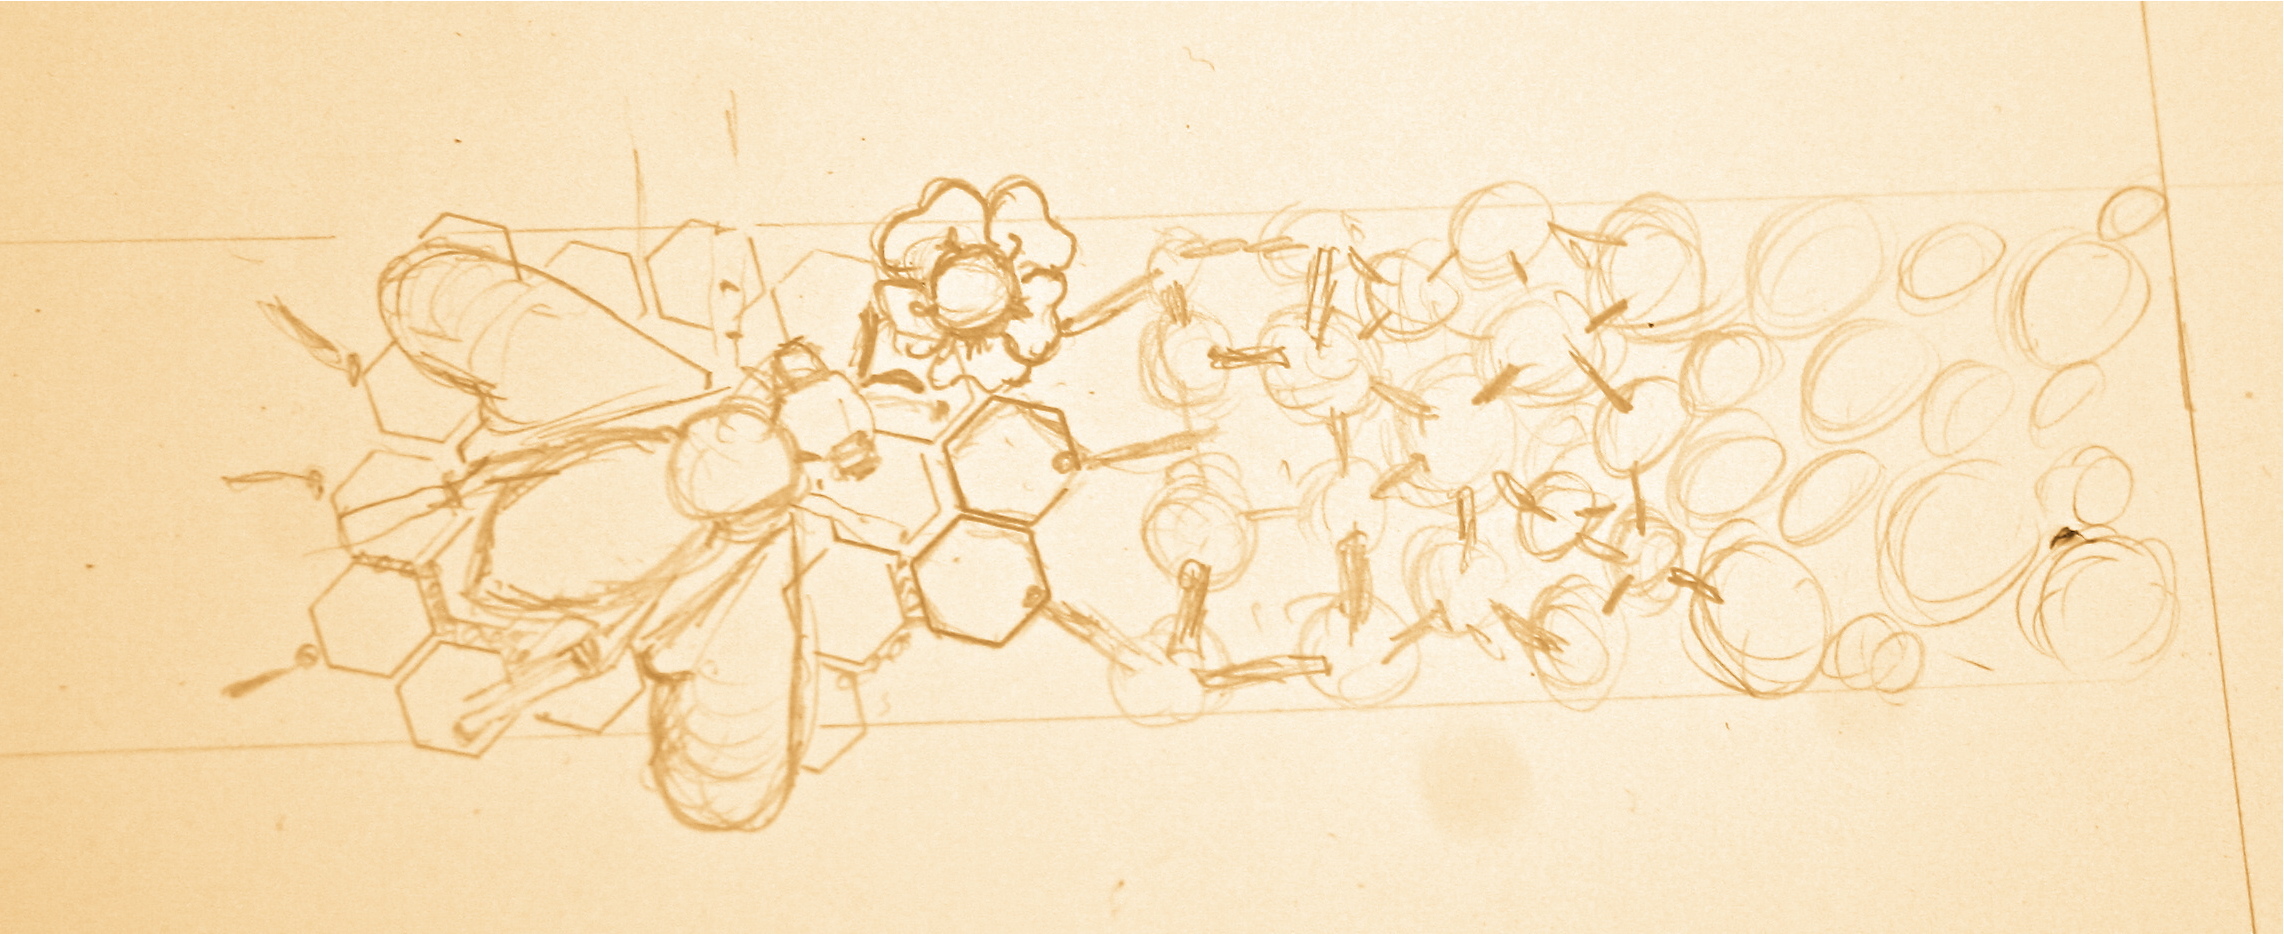
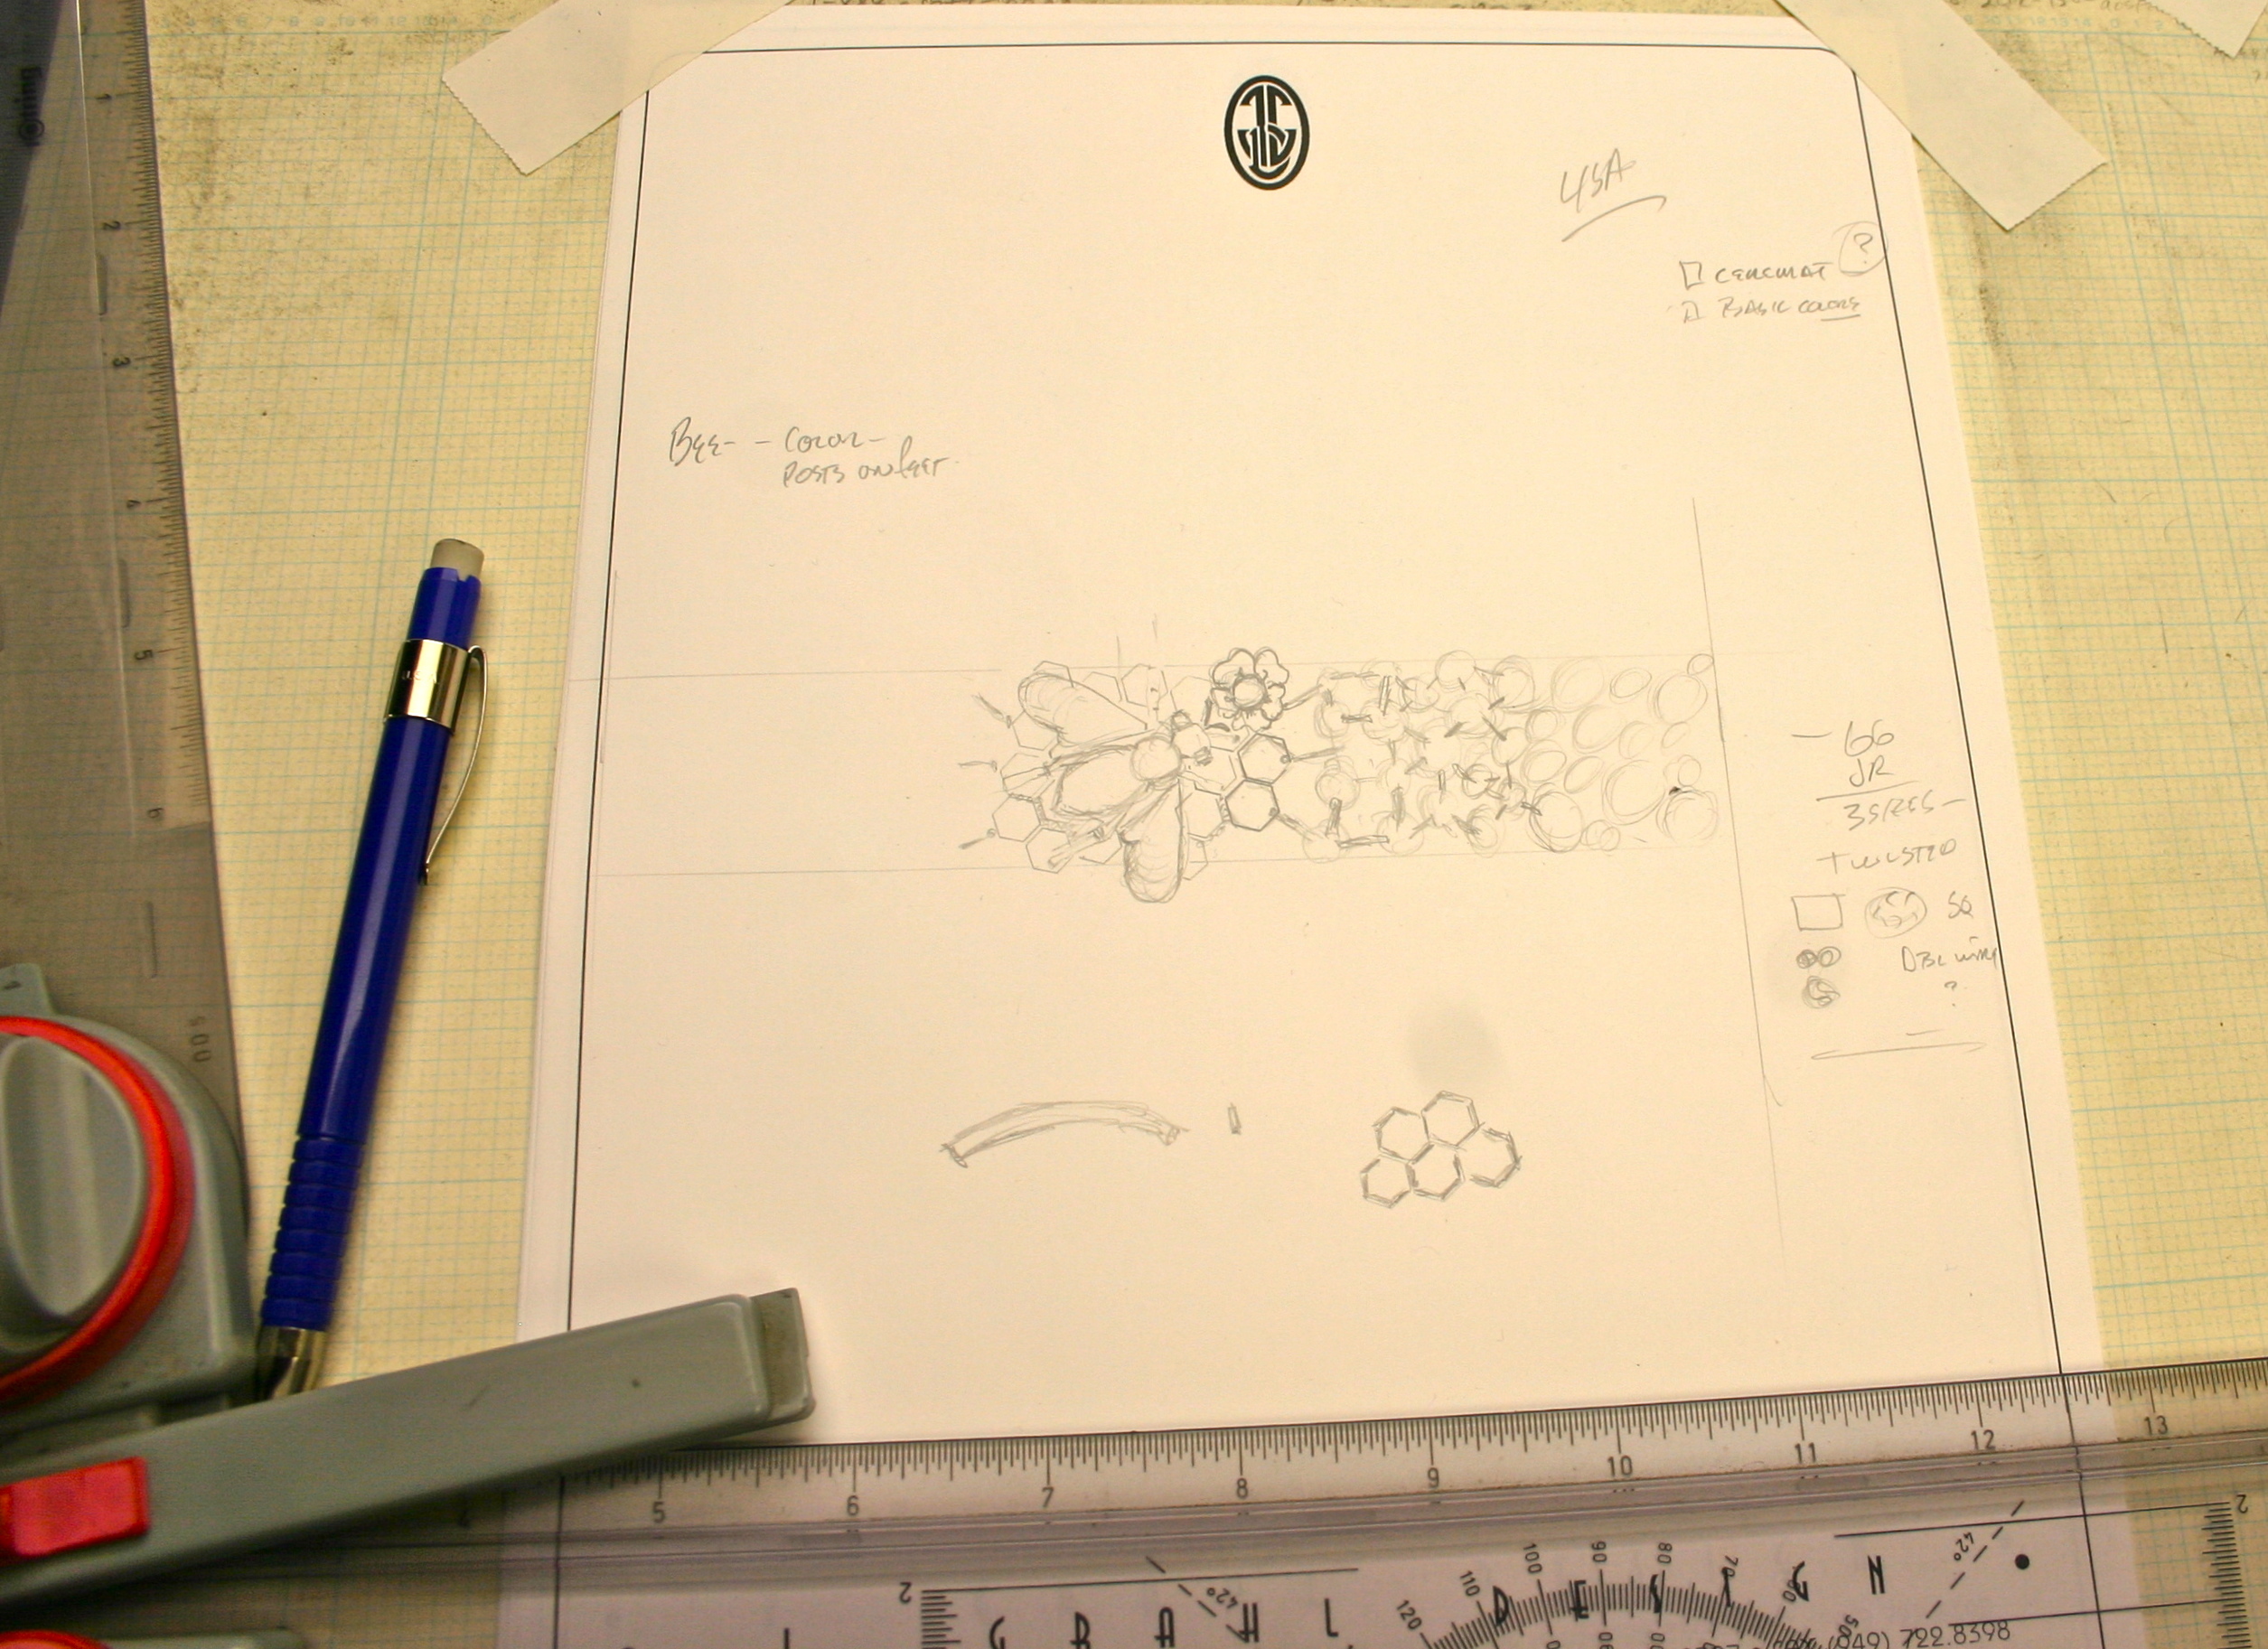
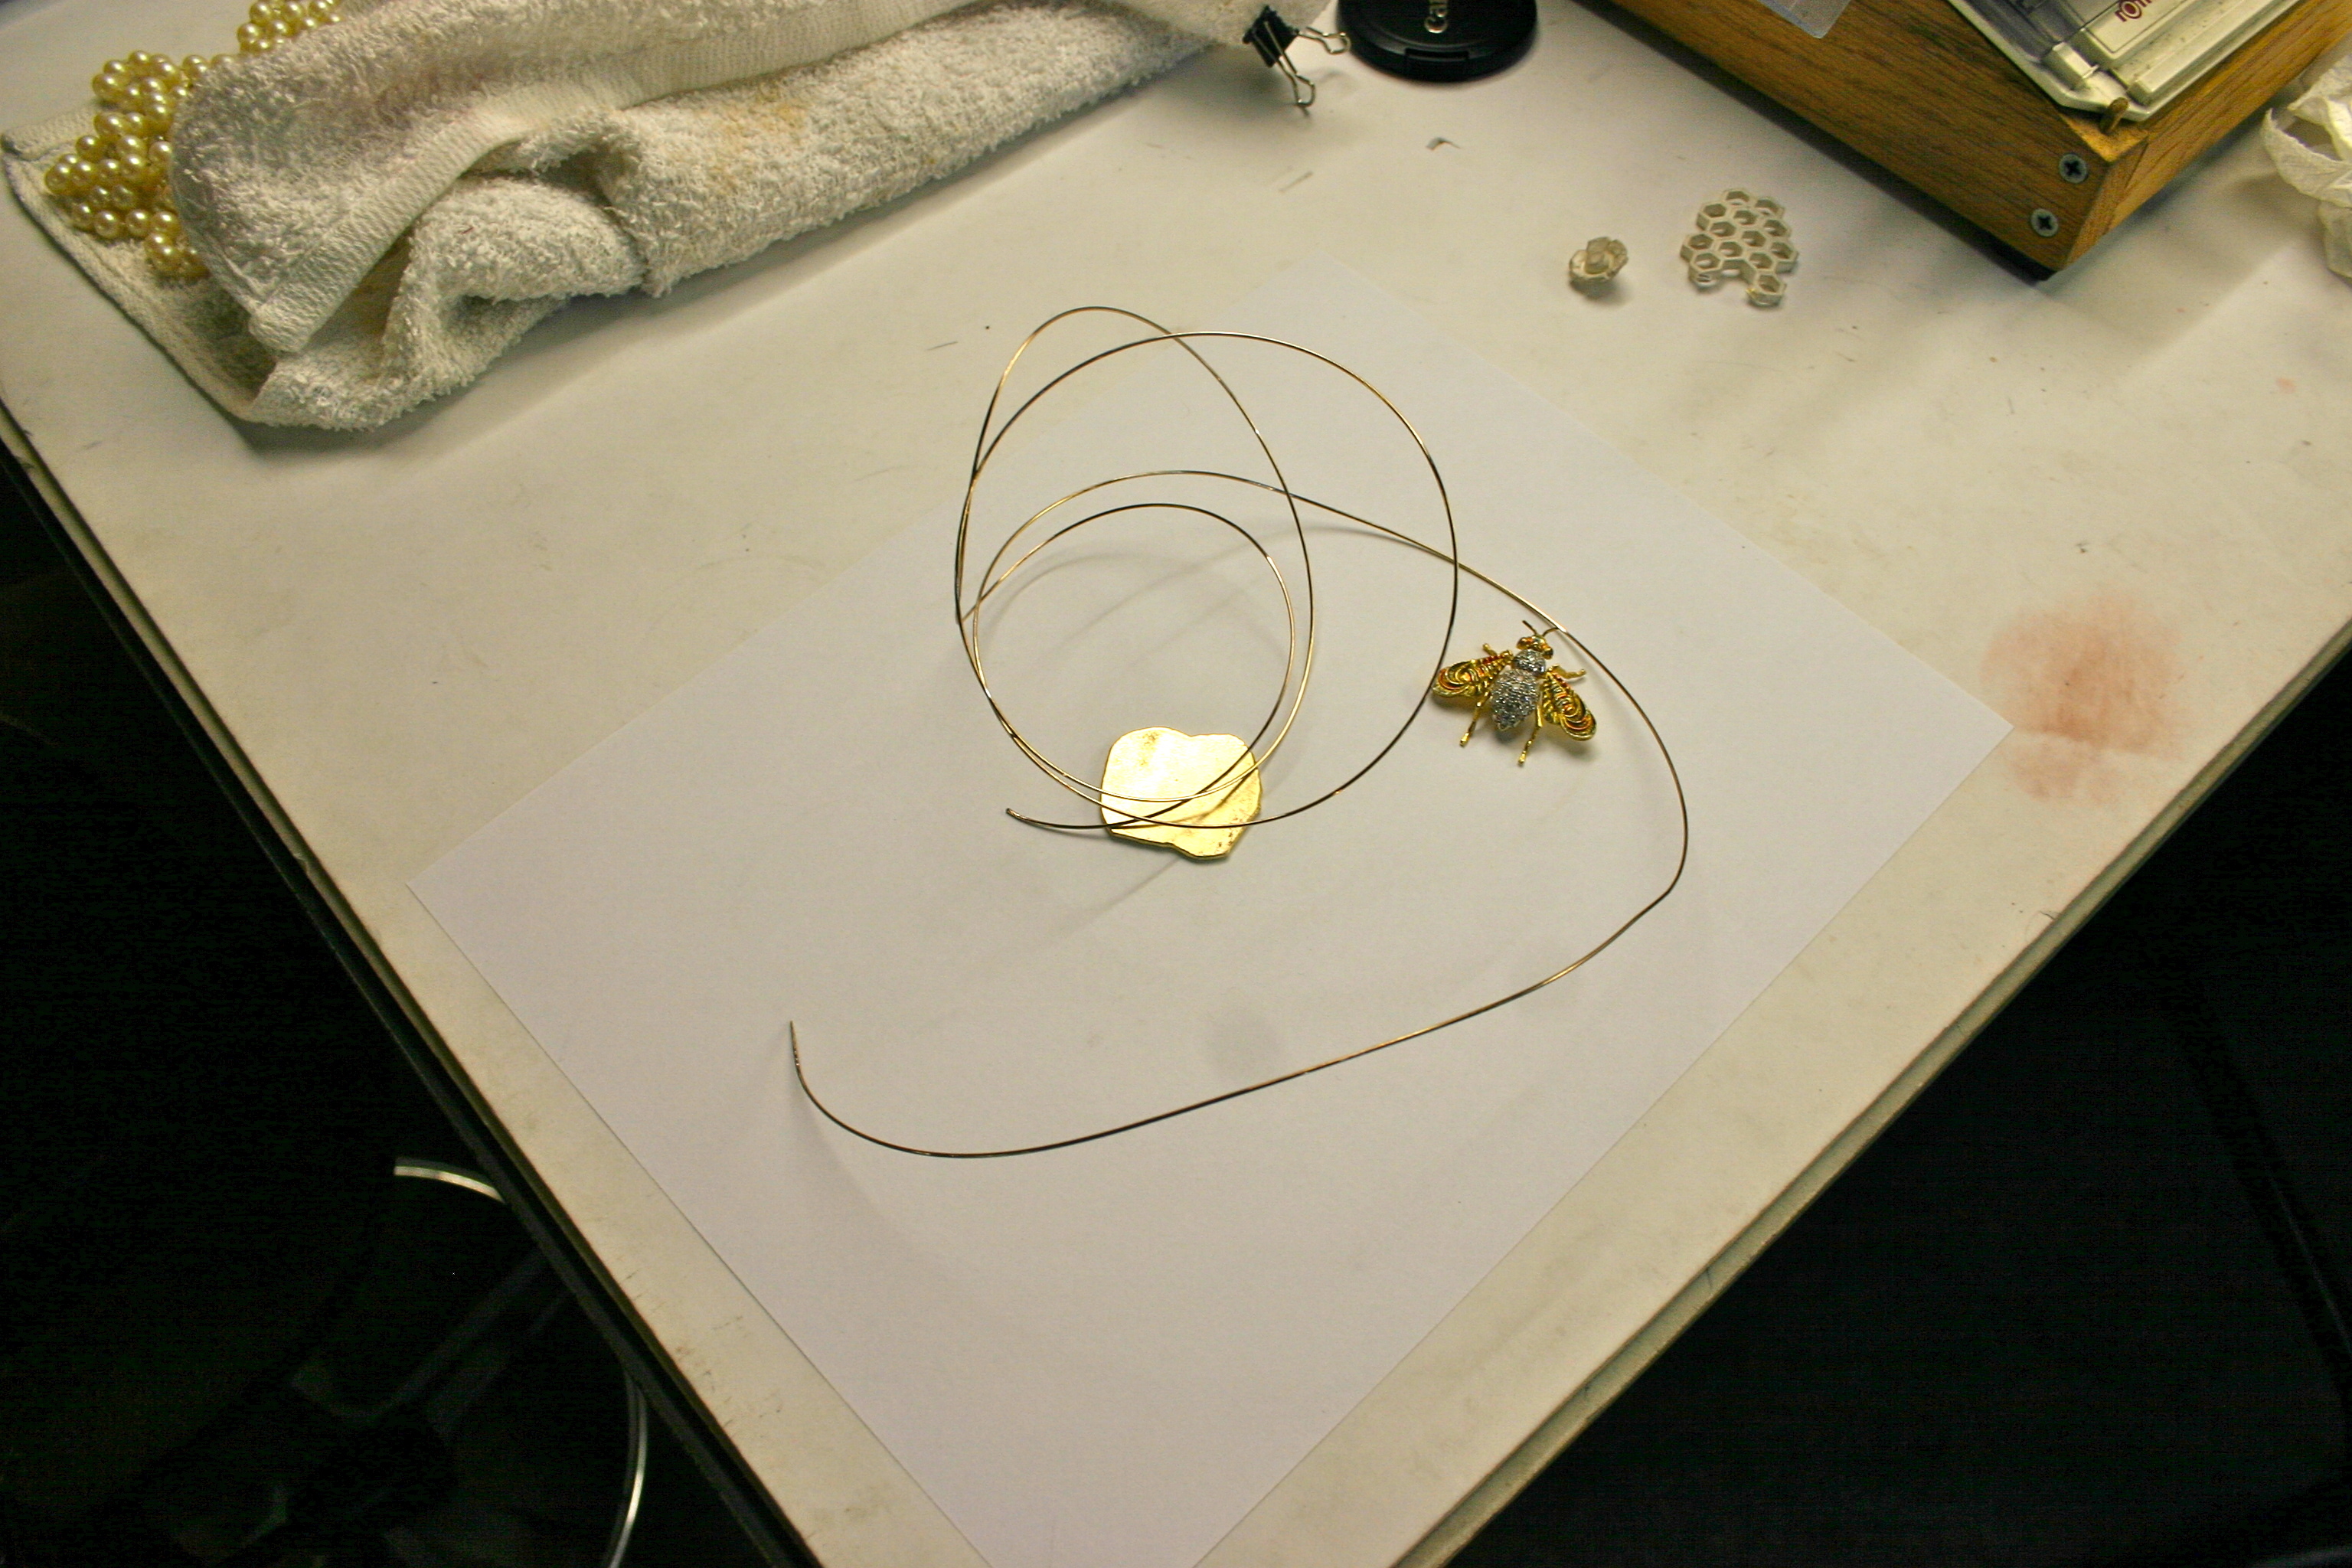
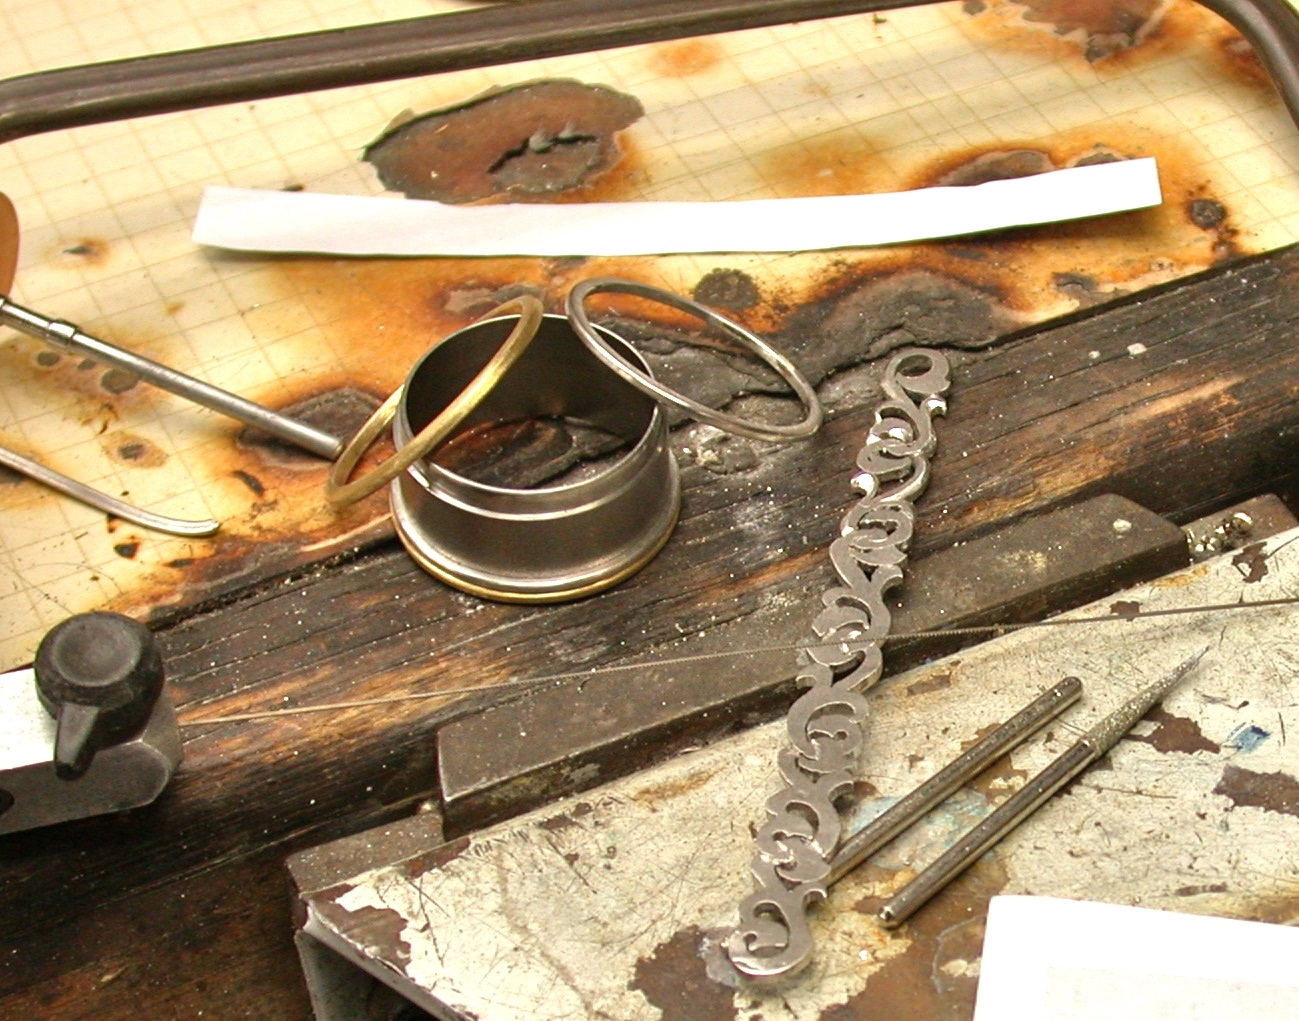
Hope this isn’t overkill, I posted the drawings in the illustration folder earlier and then remembered i had a few in process shots.
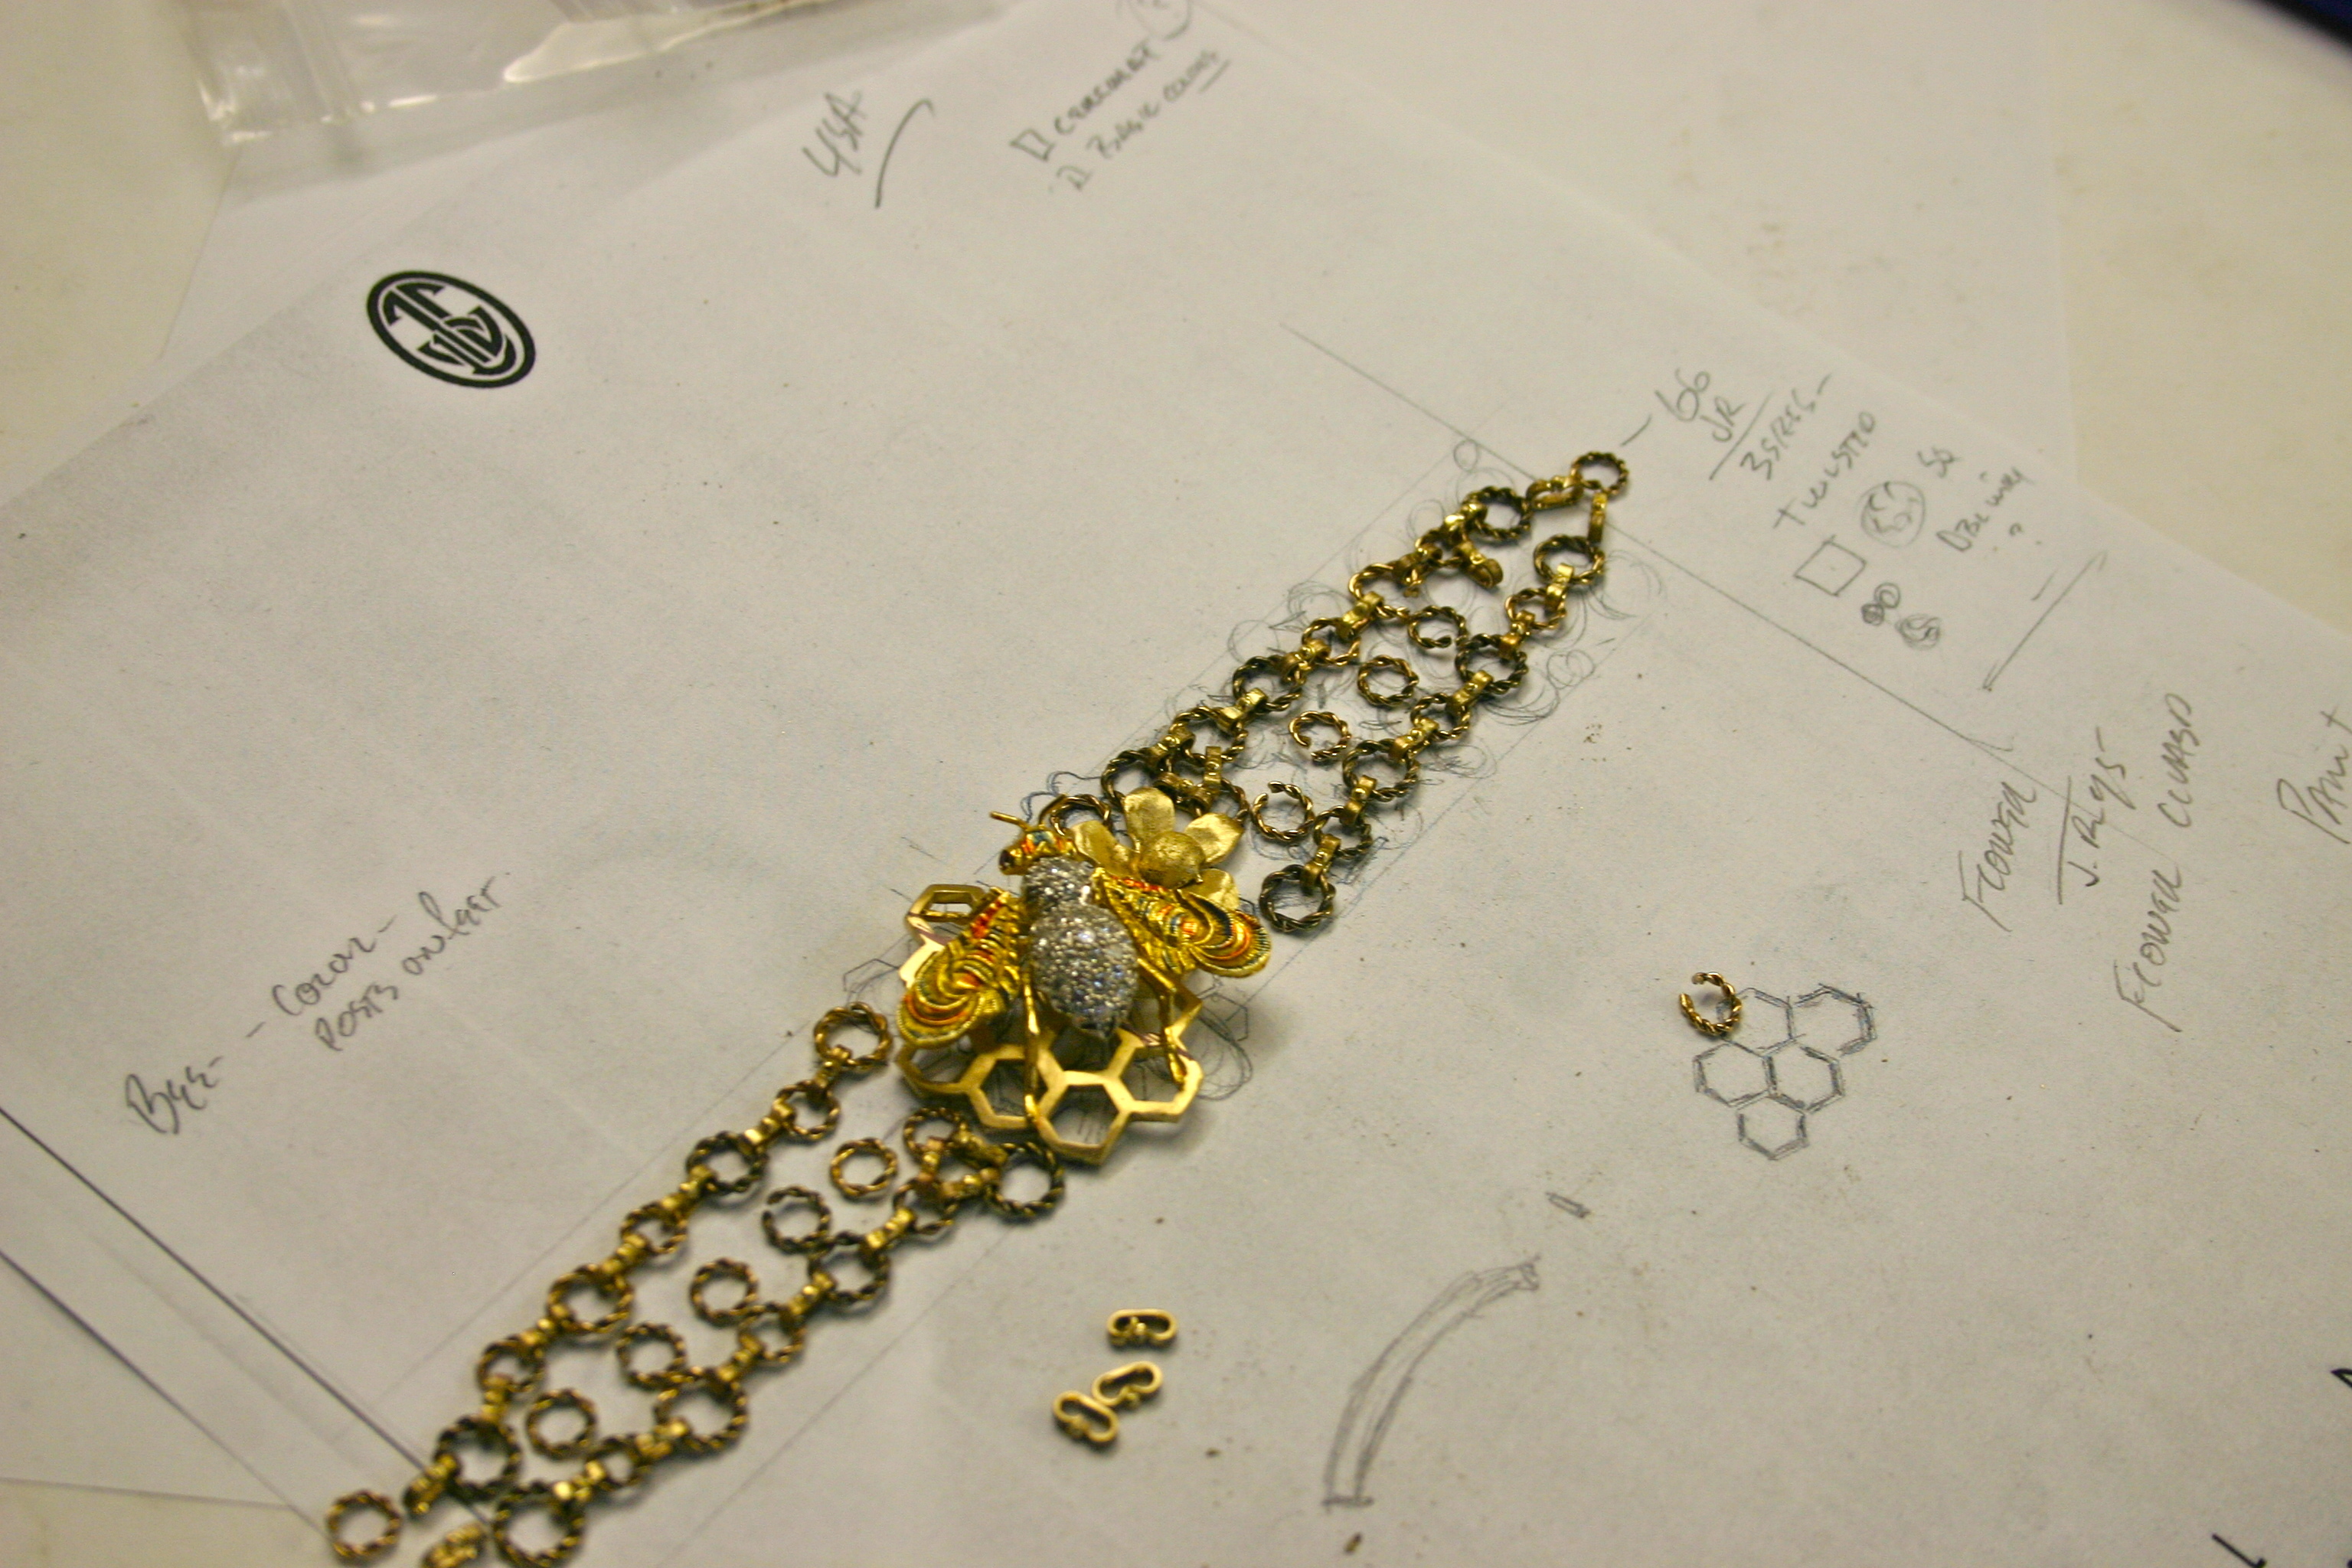
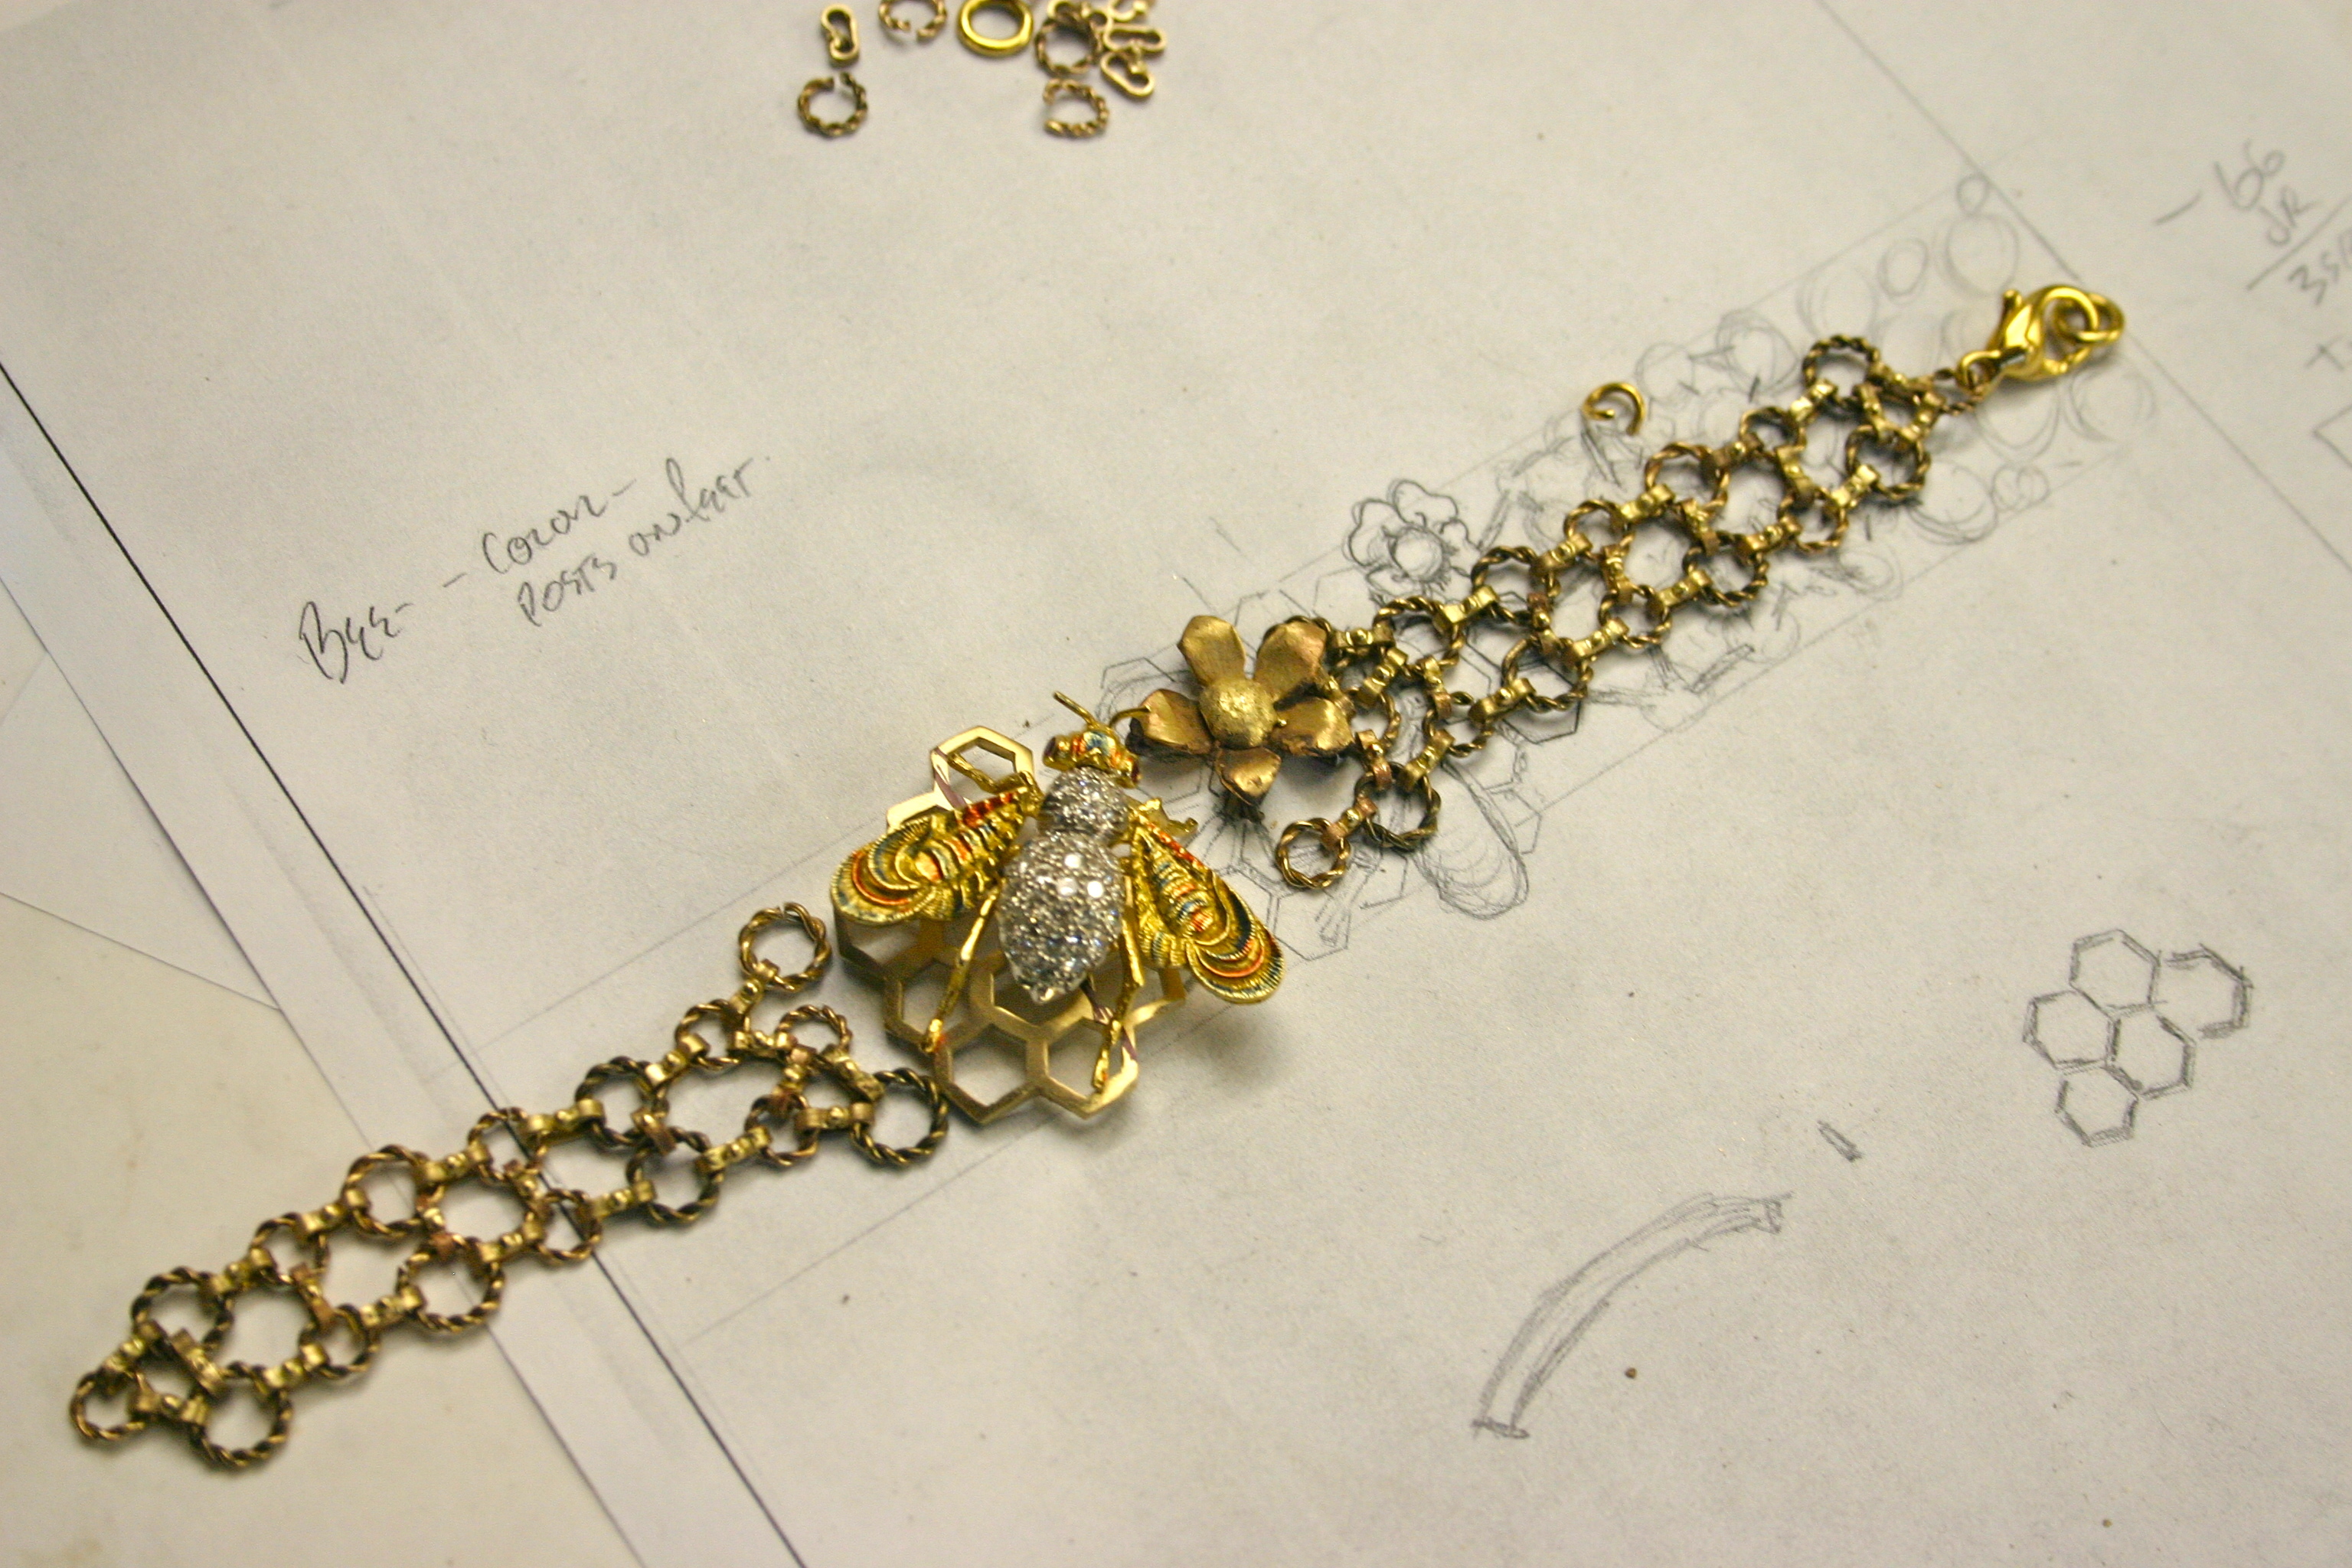
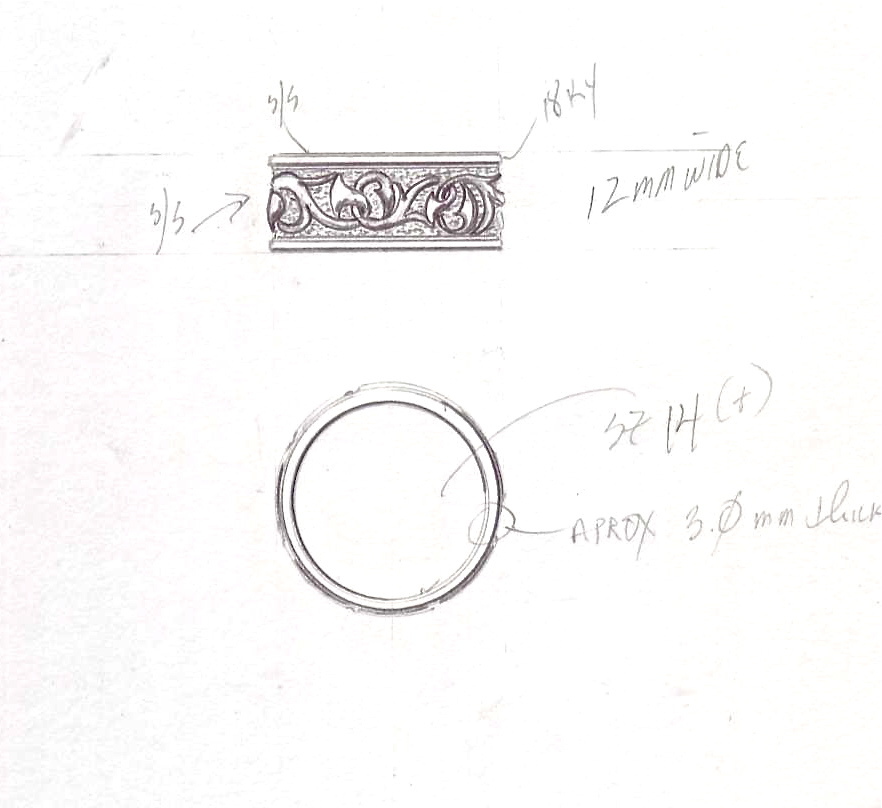
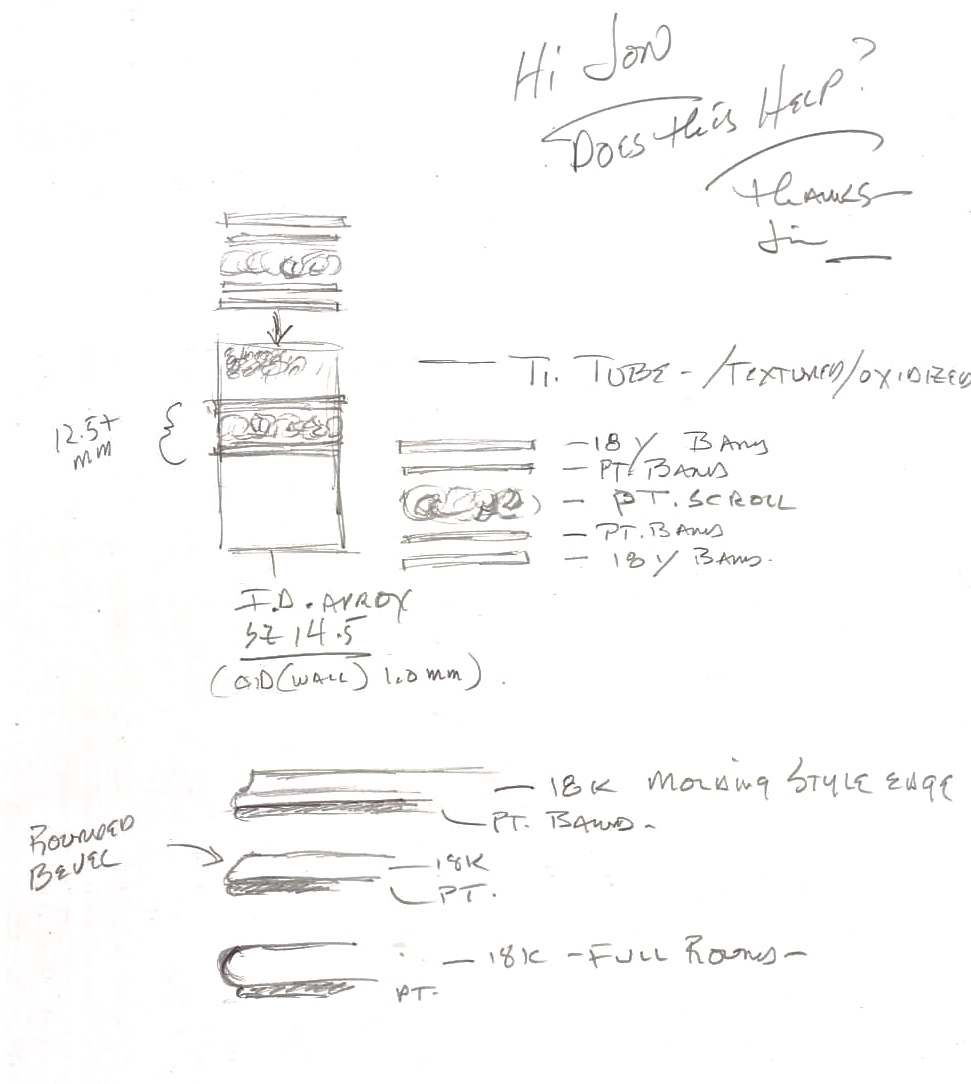
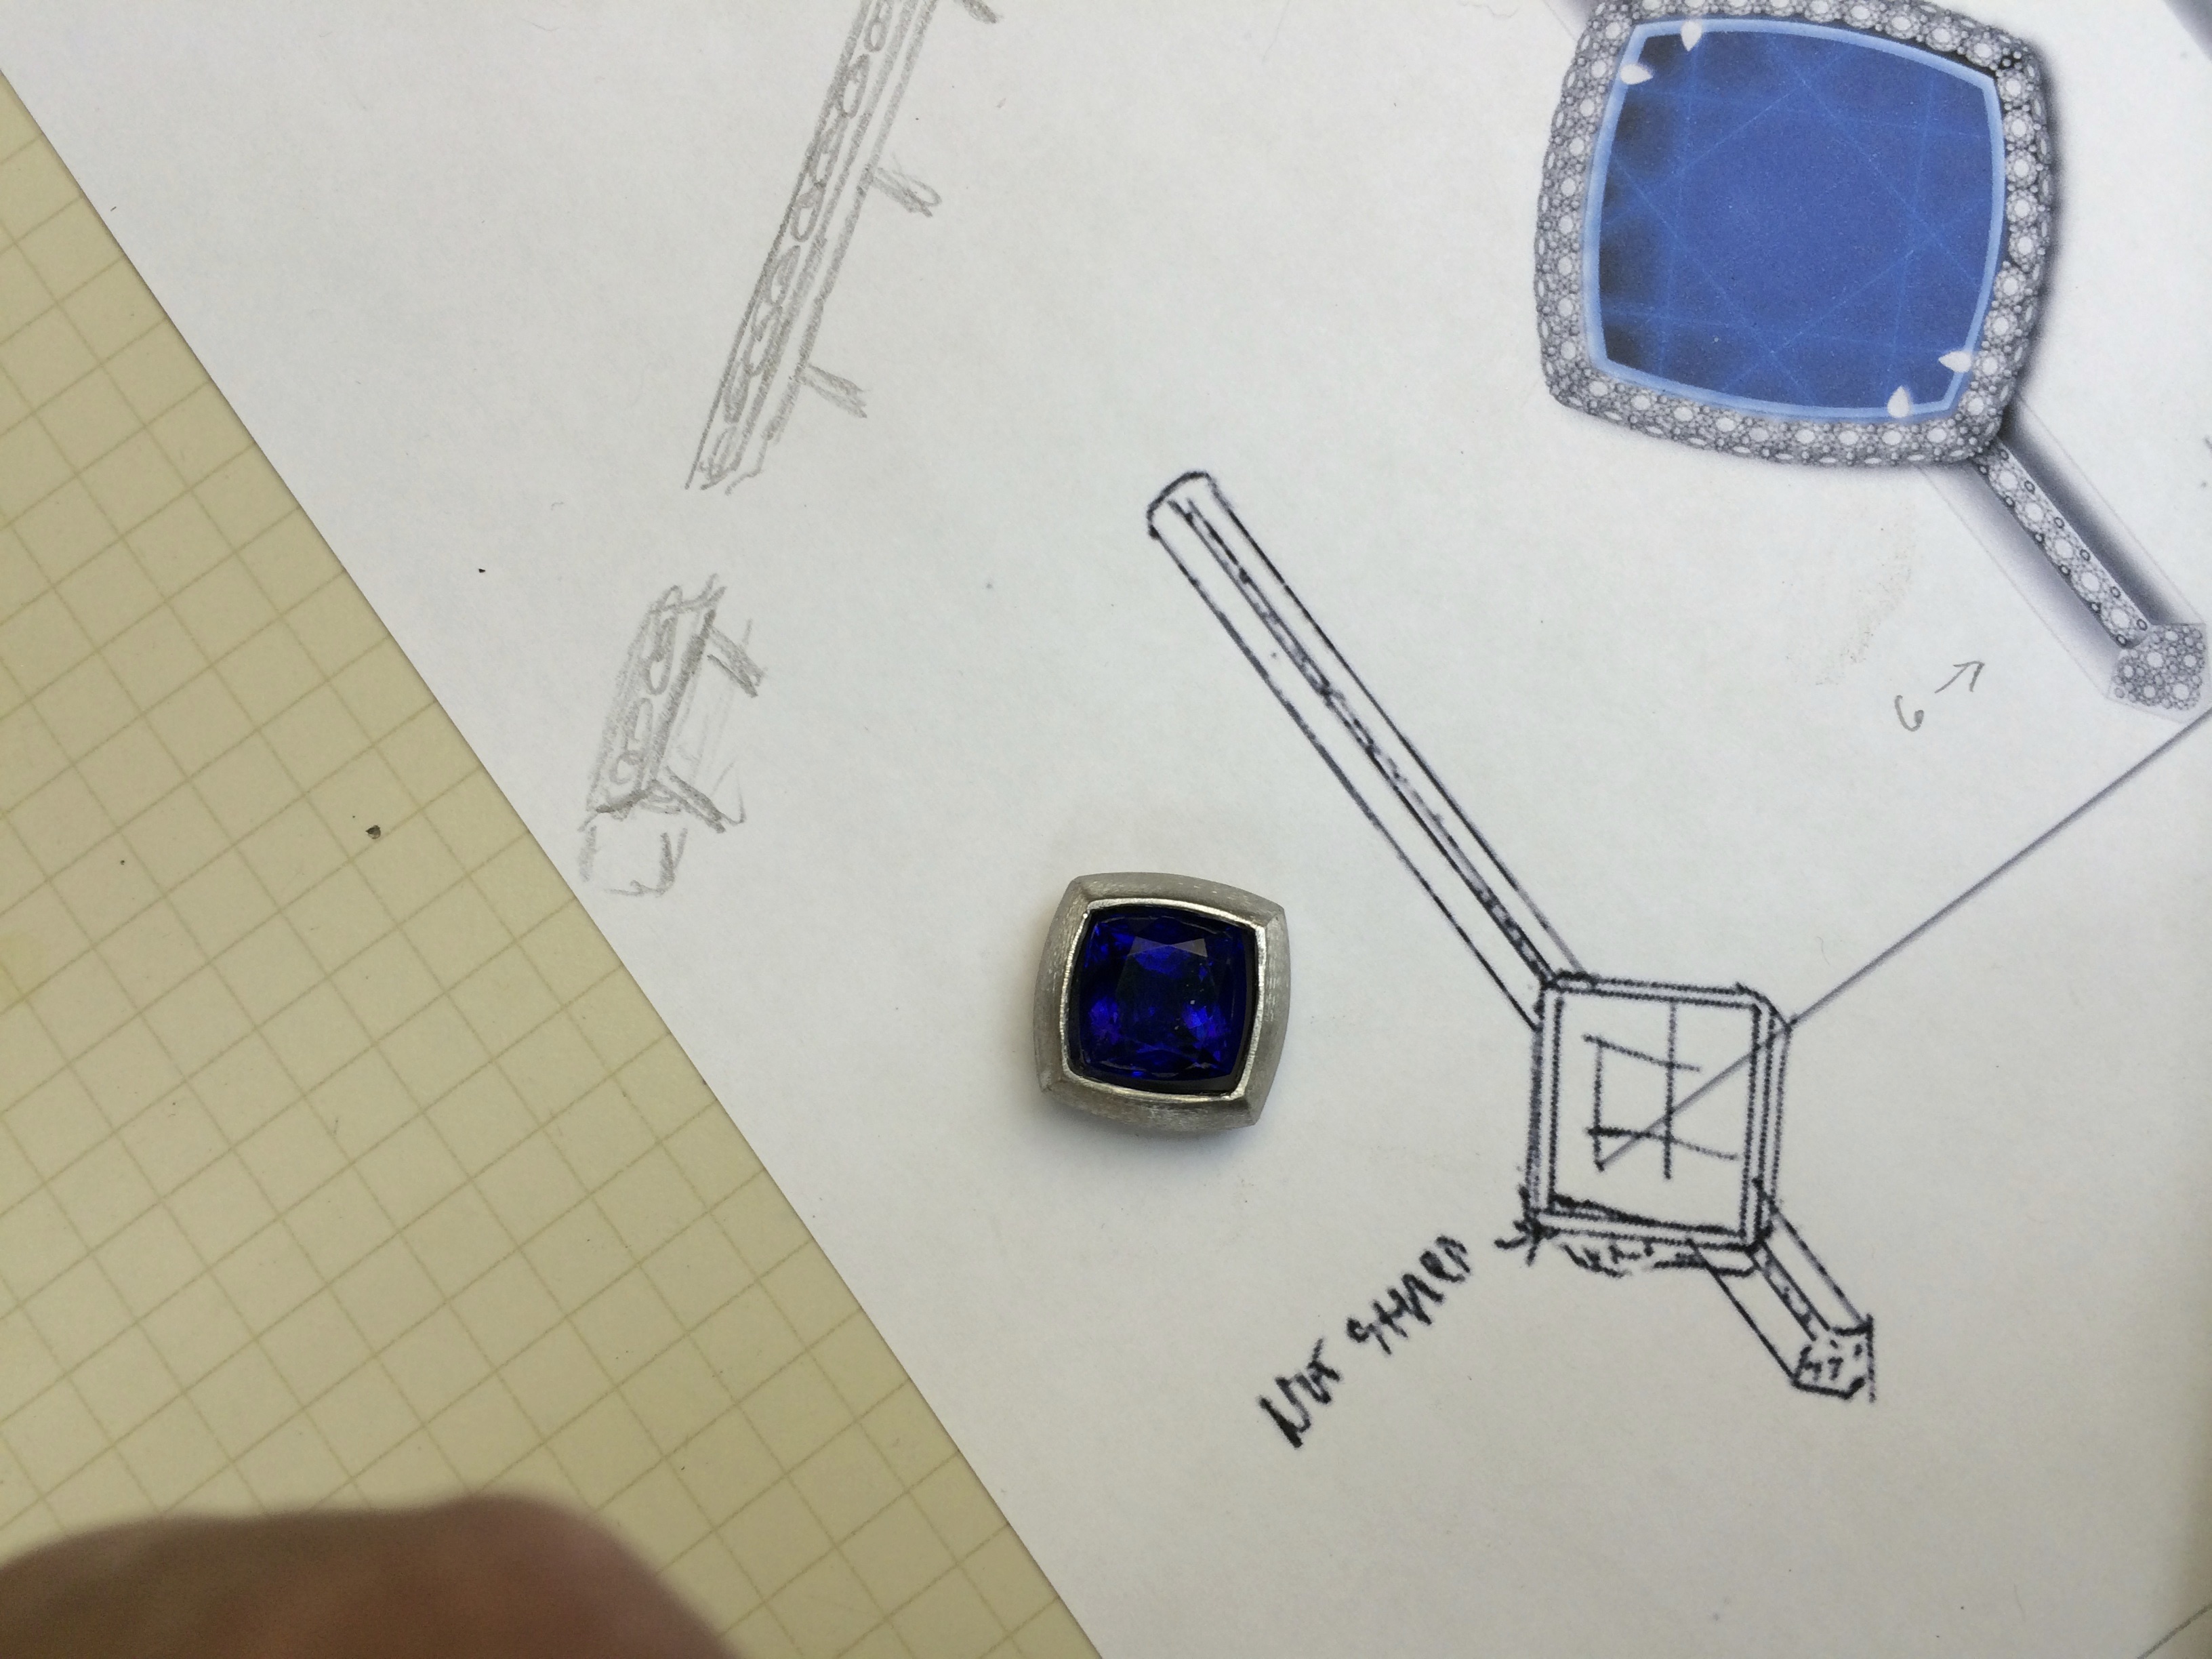
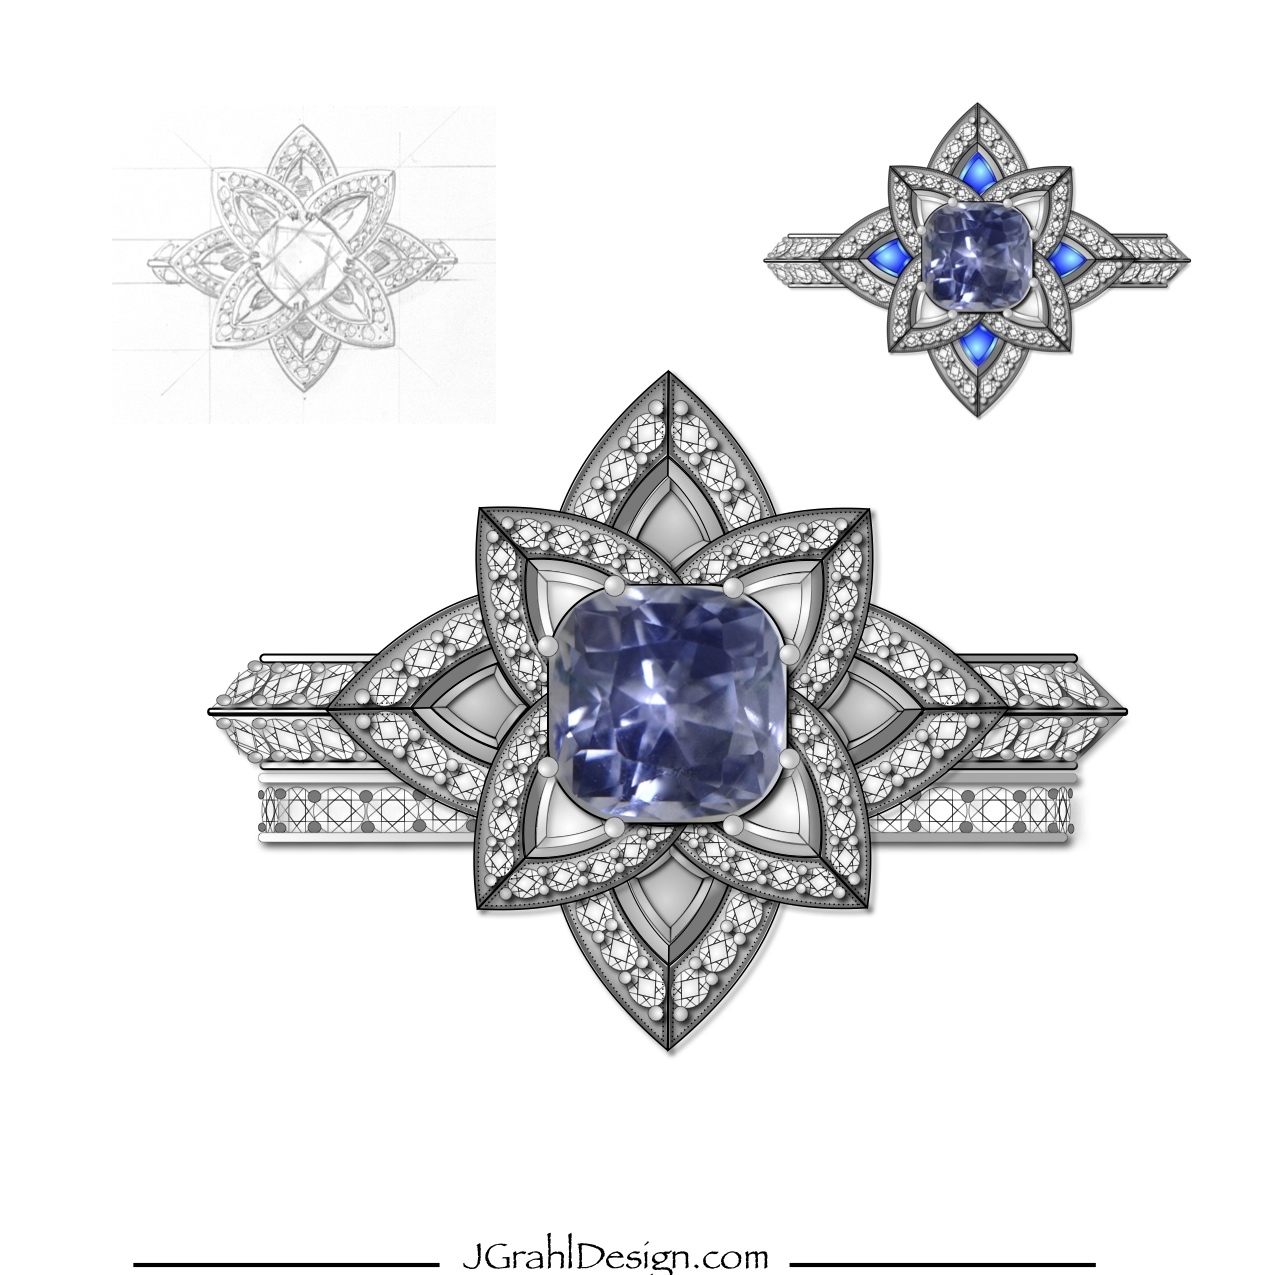
These sketches are really the norm for communication in my shop.
a basic drawing, a breakdown of parts and notes pertinent to the piece, and the final piece shot this time.
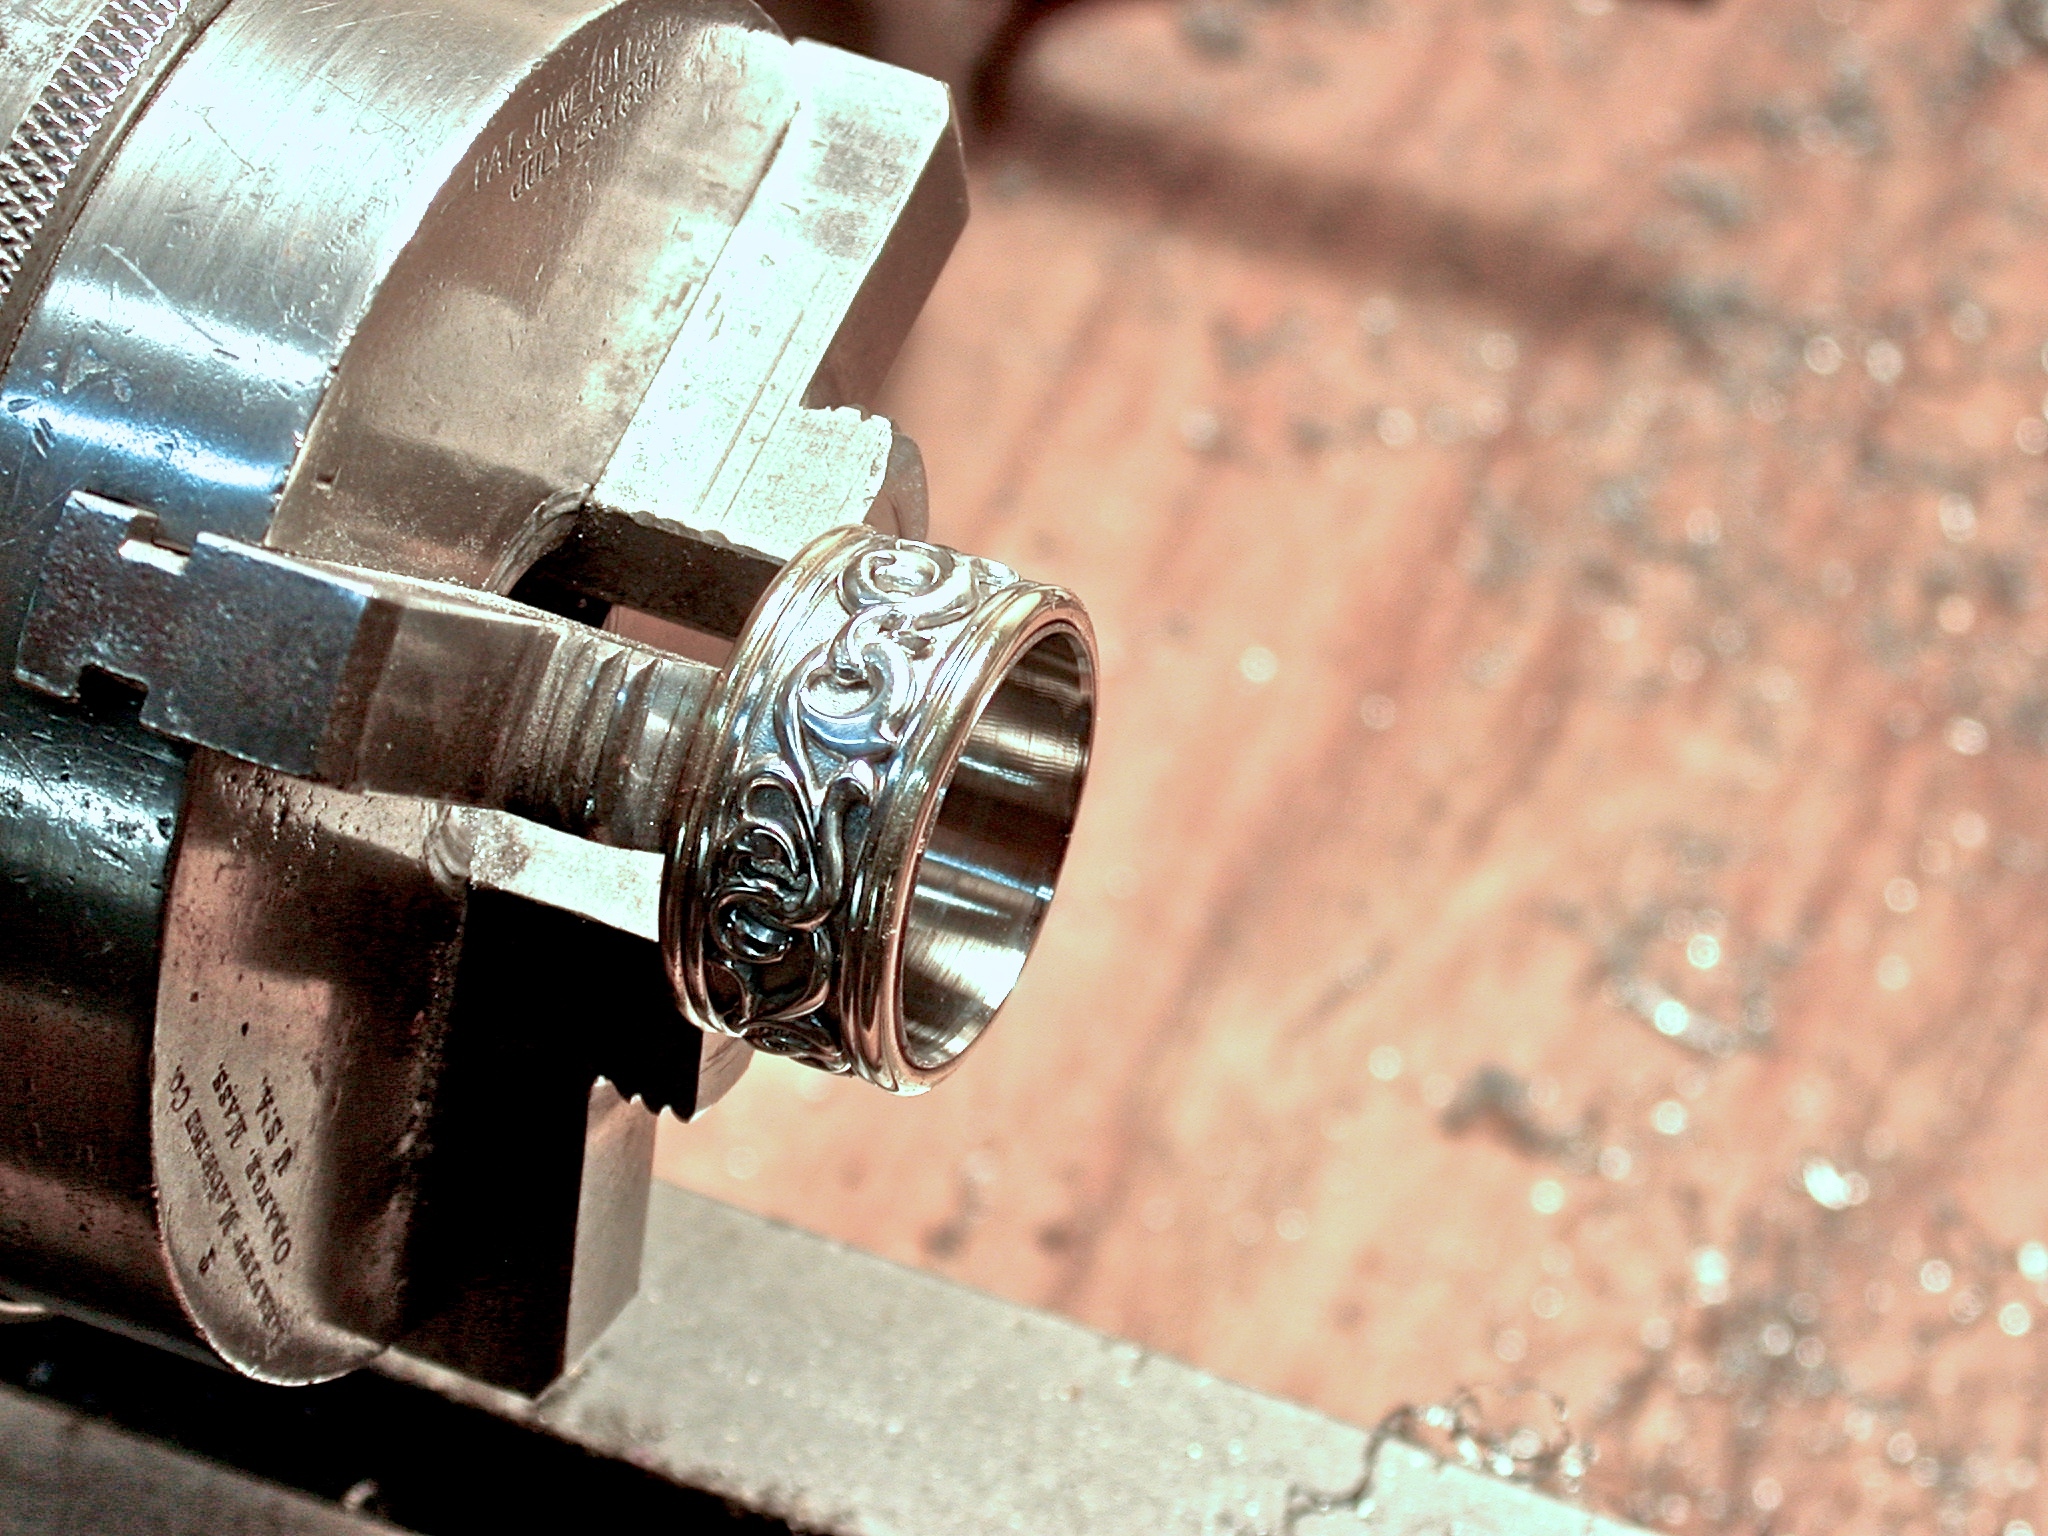
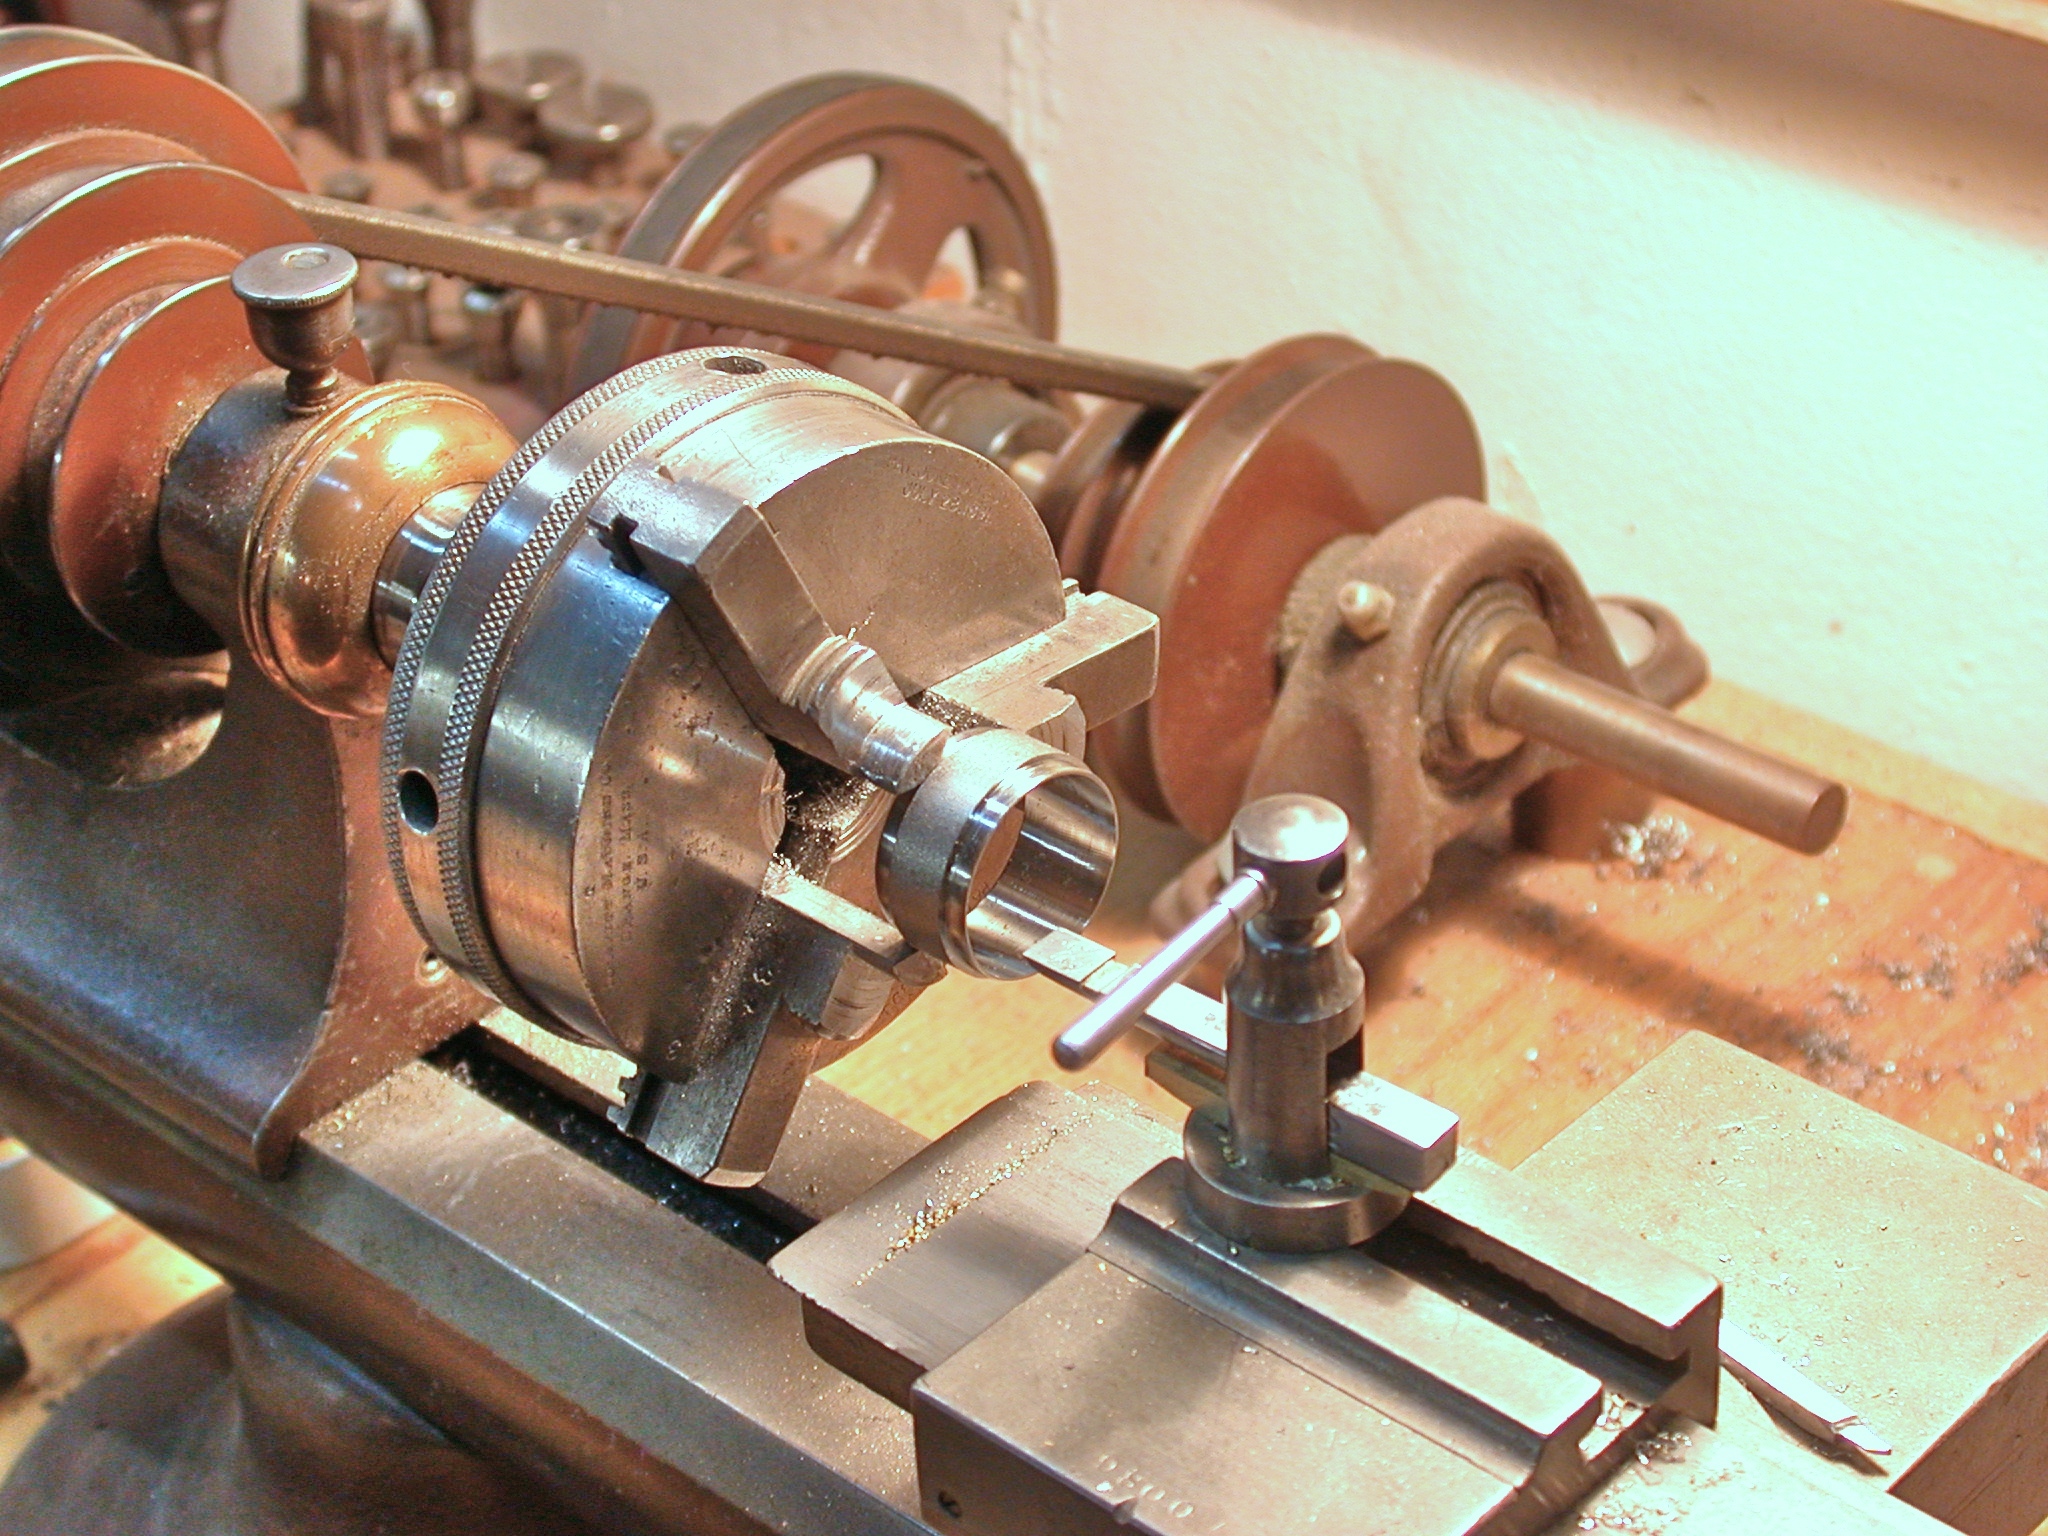
This one is platinum, 18K yellow gold, titanium. The platinum scrollish /tatooish…(?) band is hand pierced and engraved / carved to the pattern. the titanium is turned on the lathe (love working with Ti, Have a TIG welder now… even more fun) It all stacks together and the titanium core is flared over the outer bands to hold it all together.
Enjoy,
Jim

2 Likes
Hi,
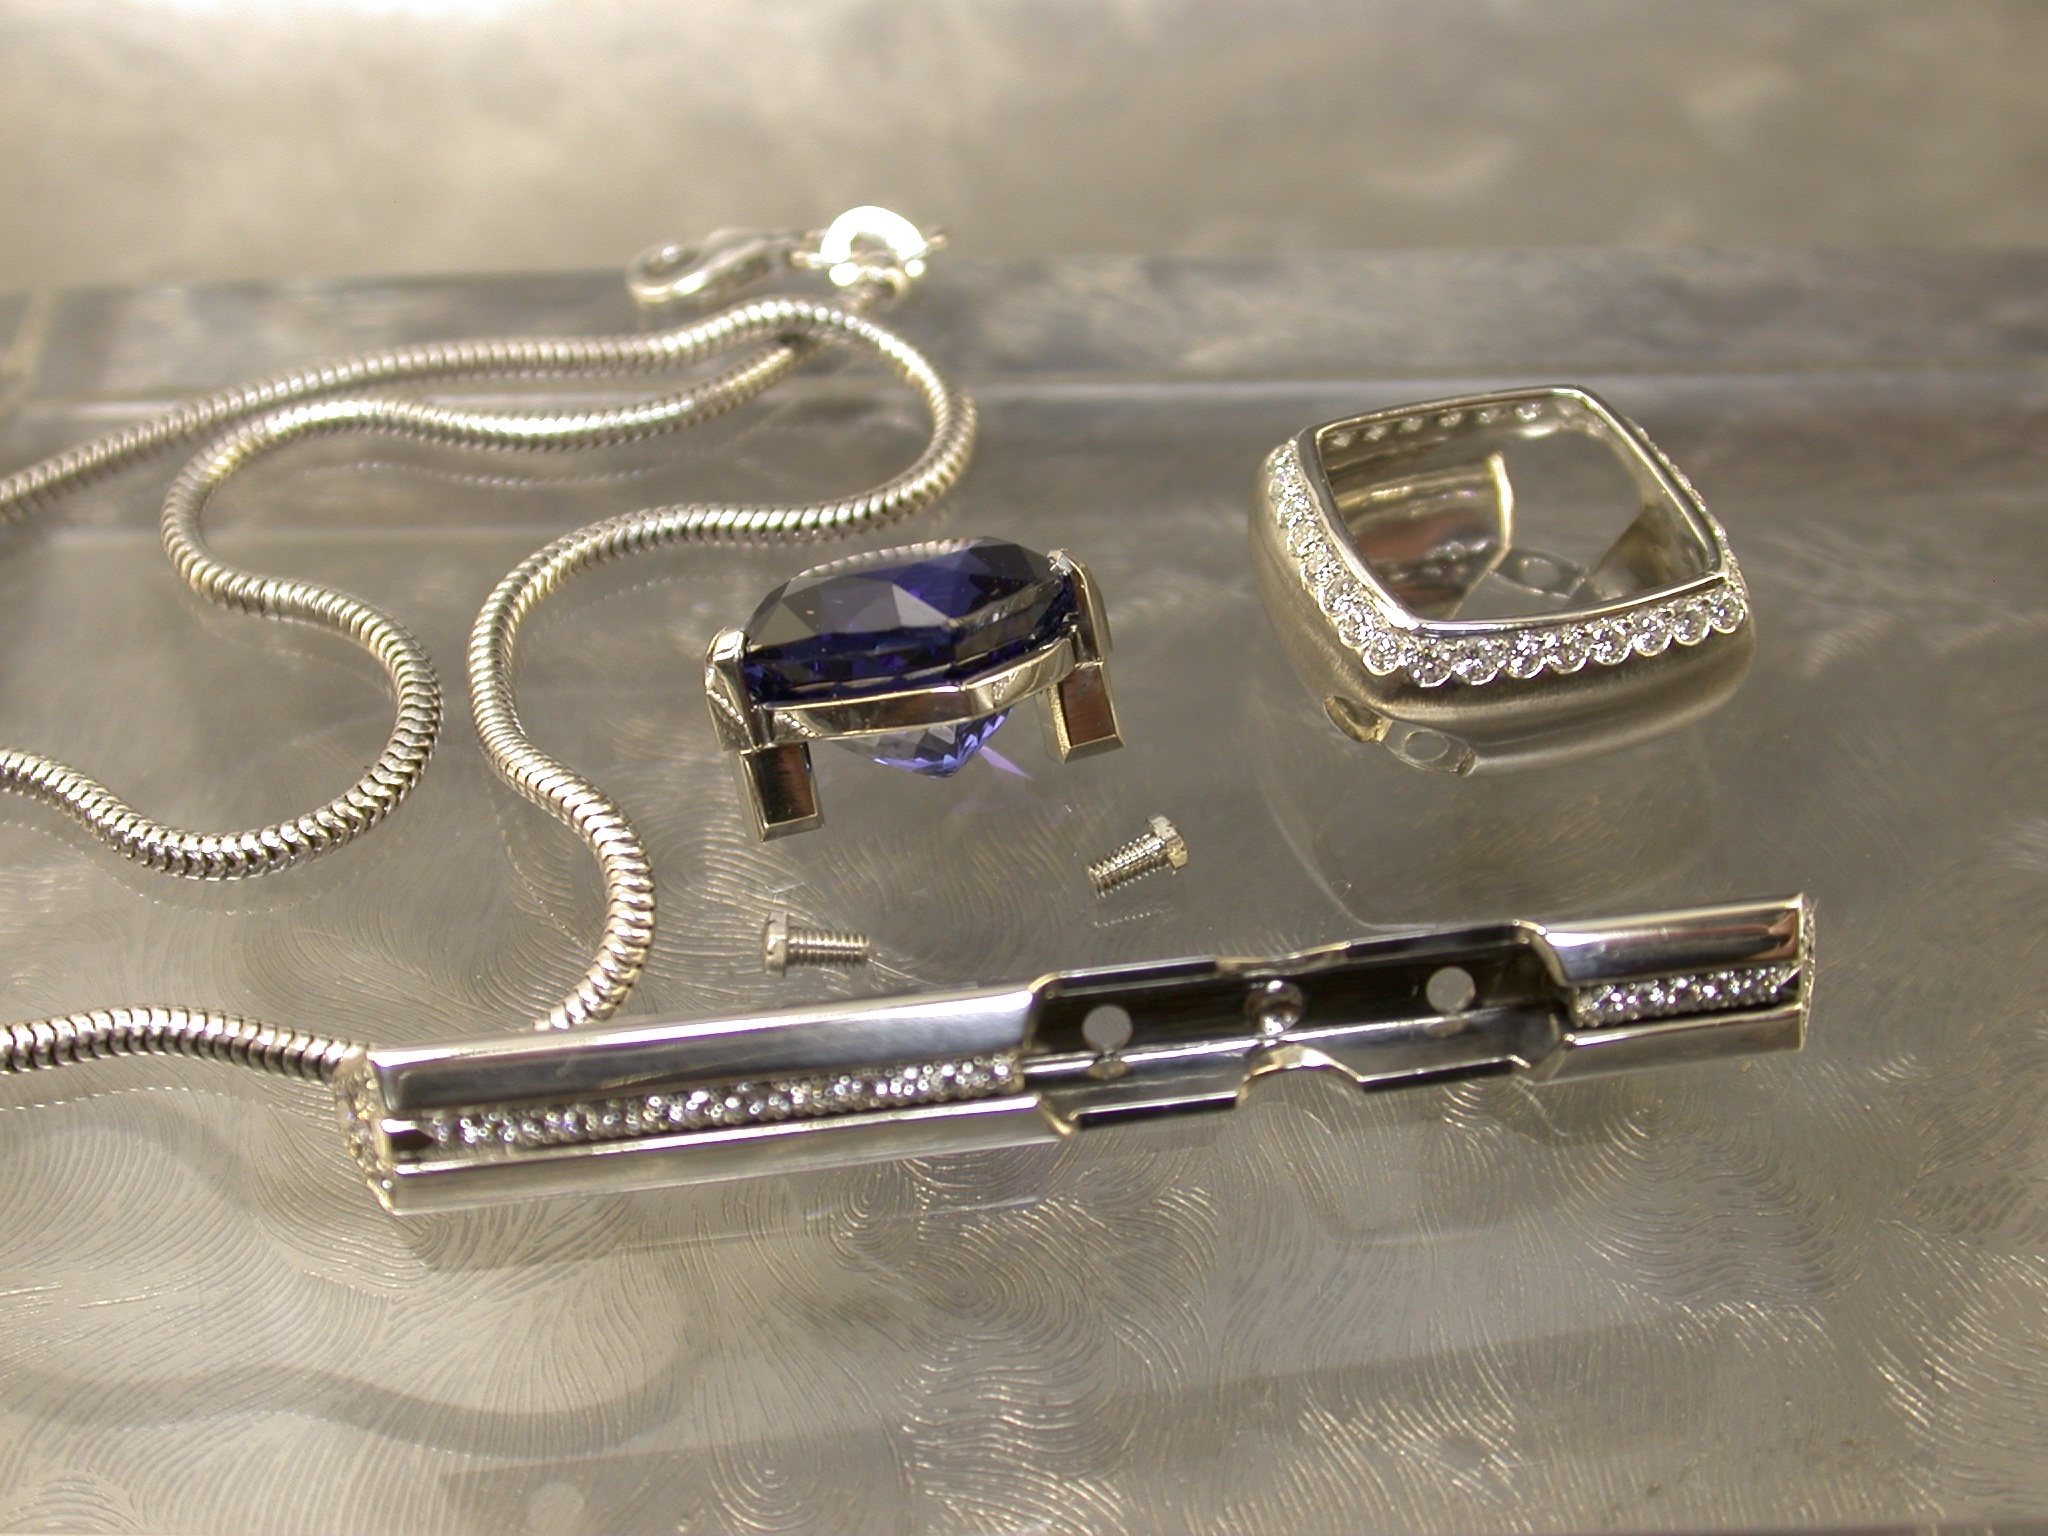
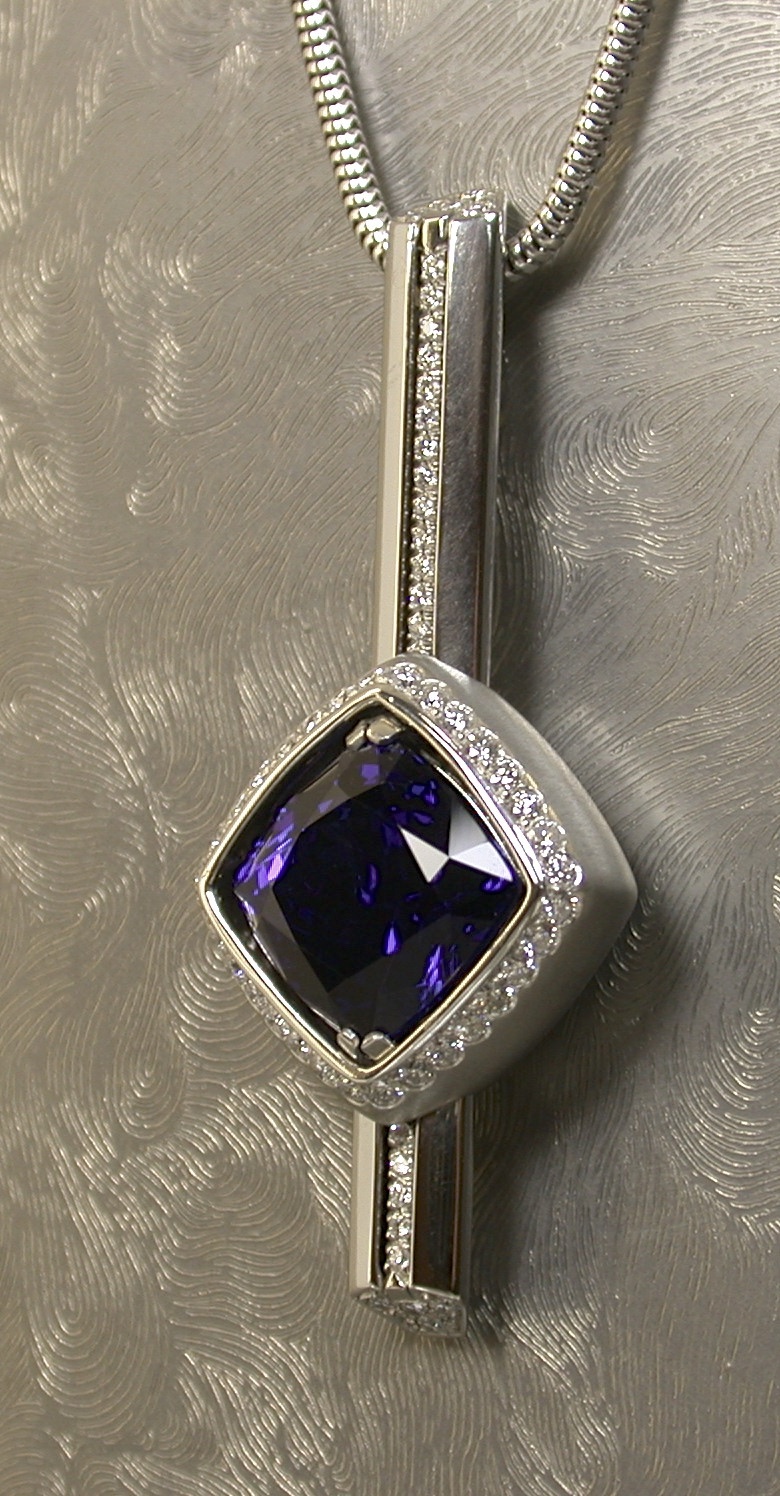
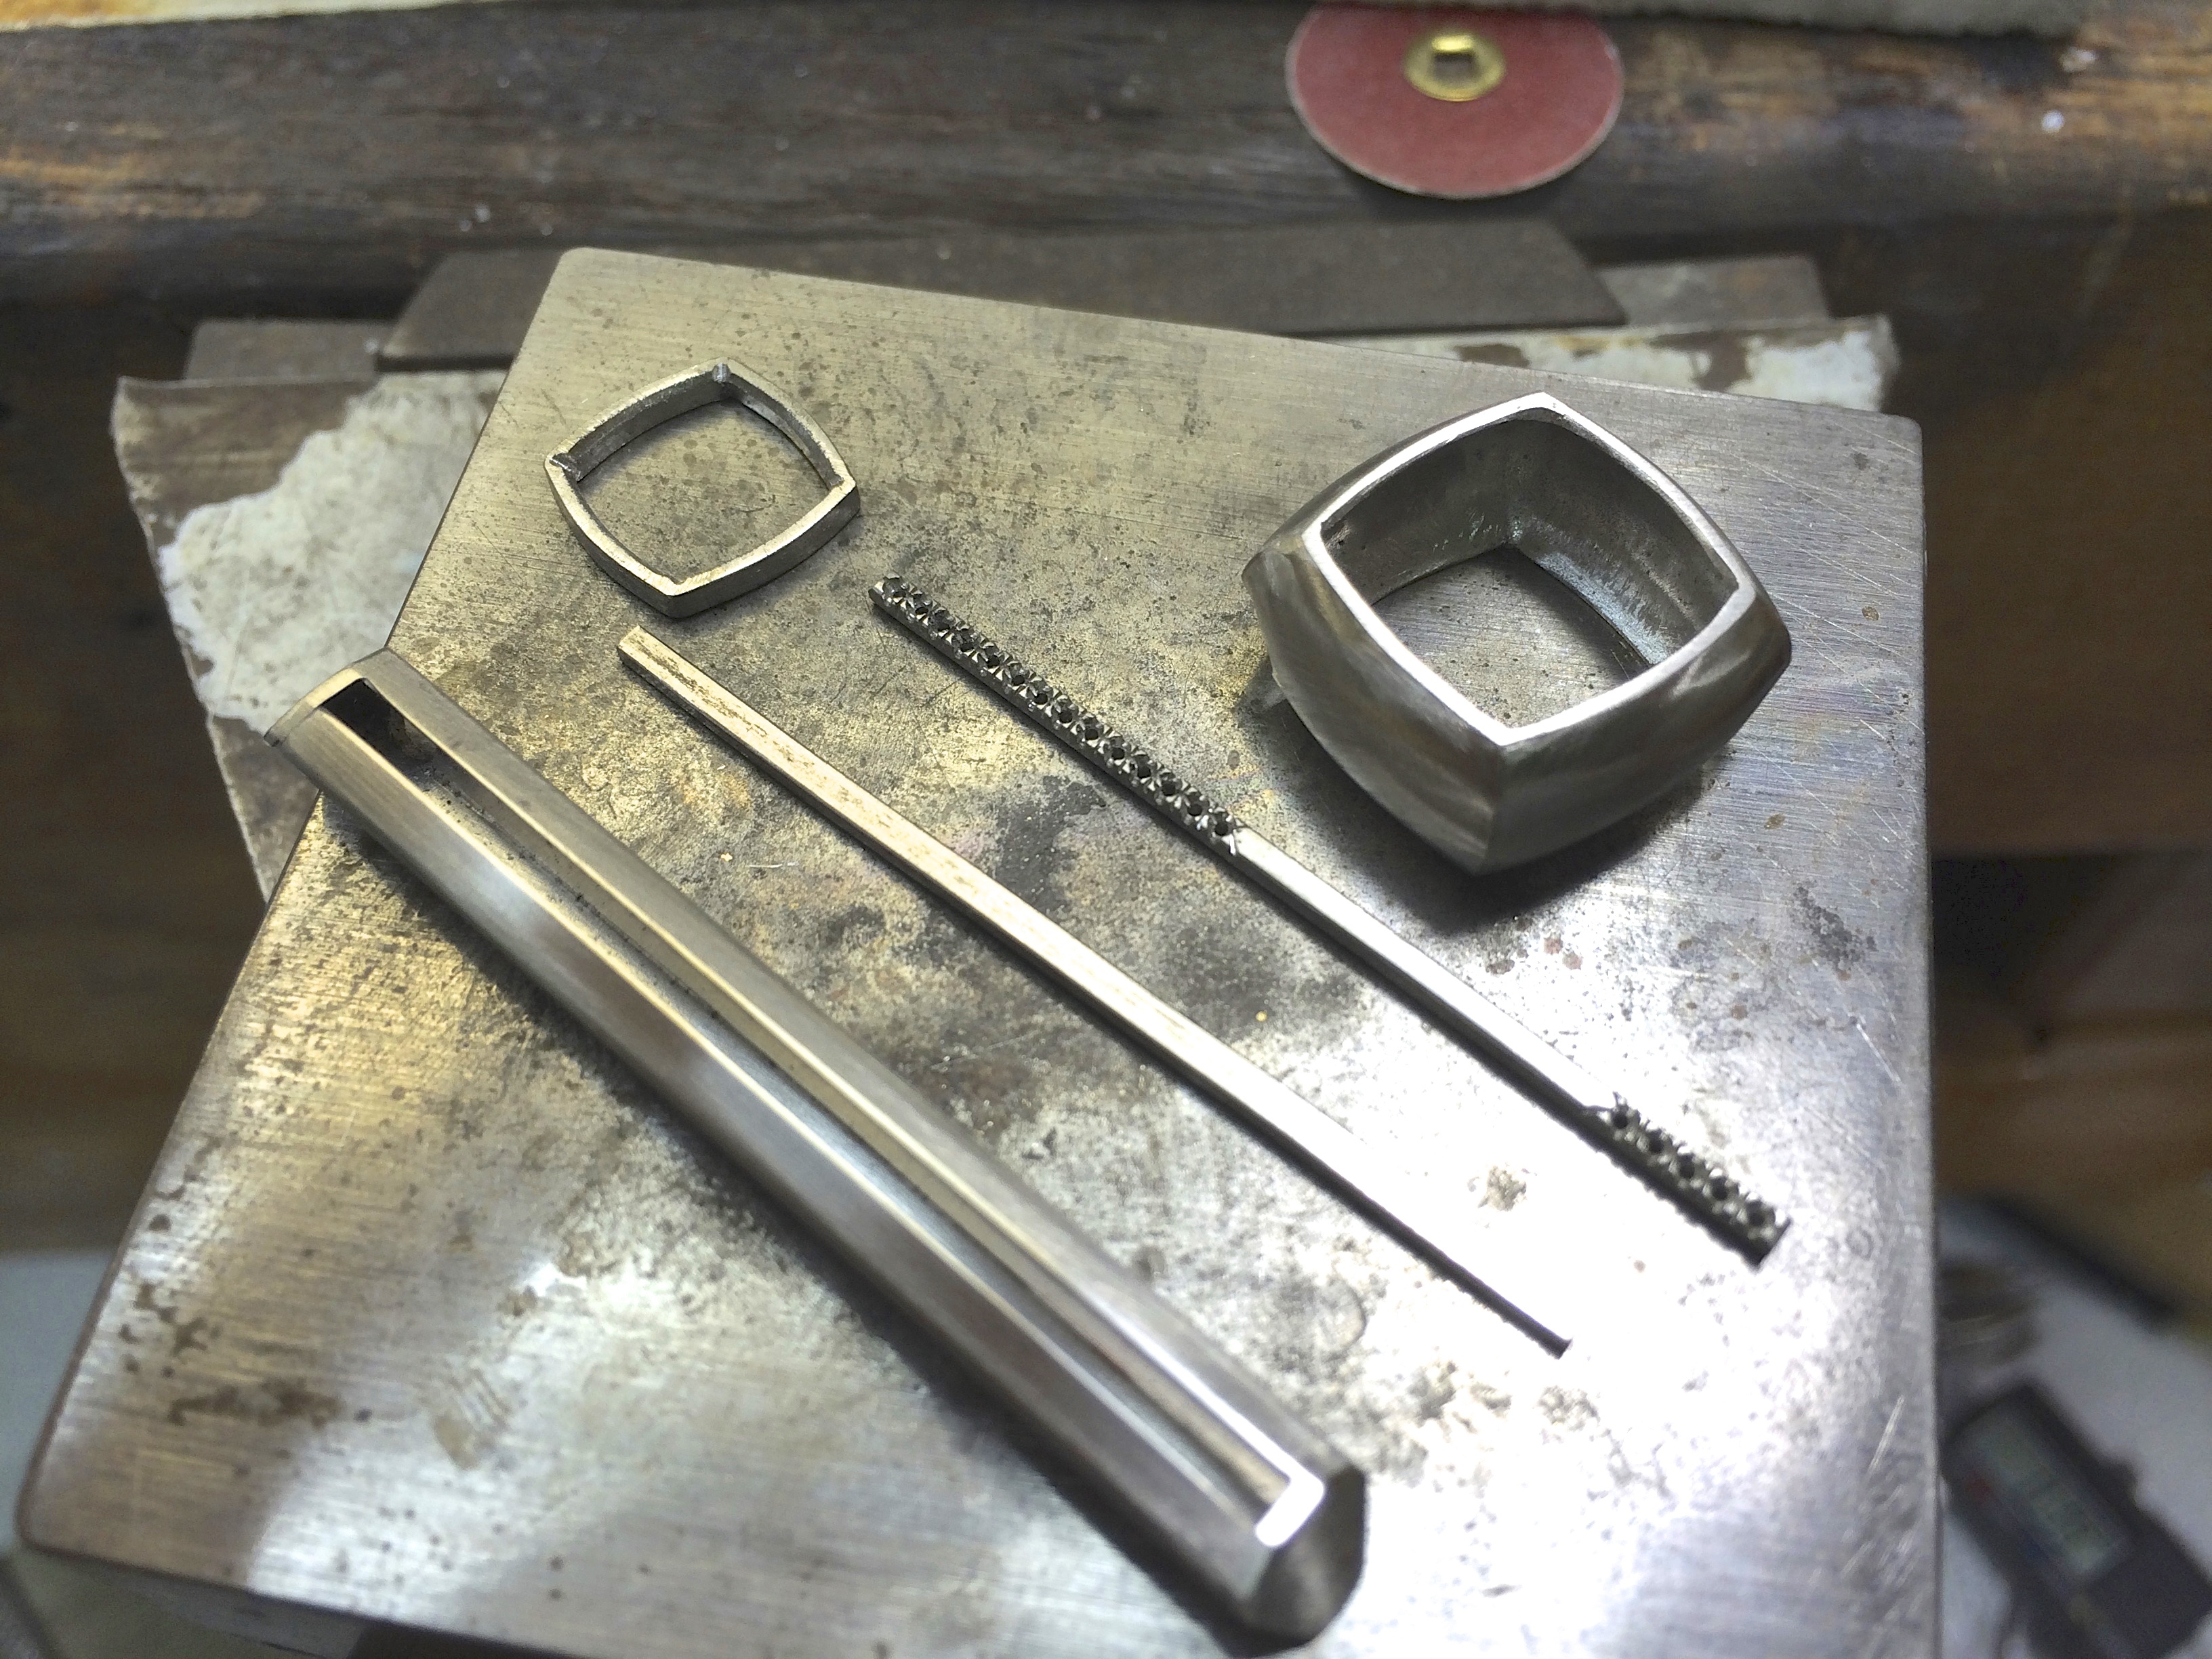
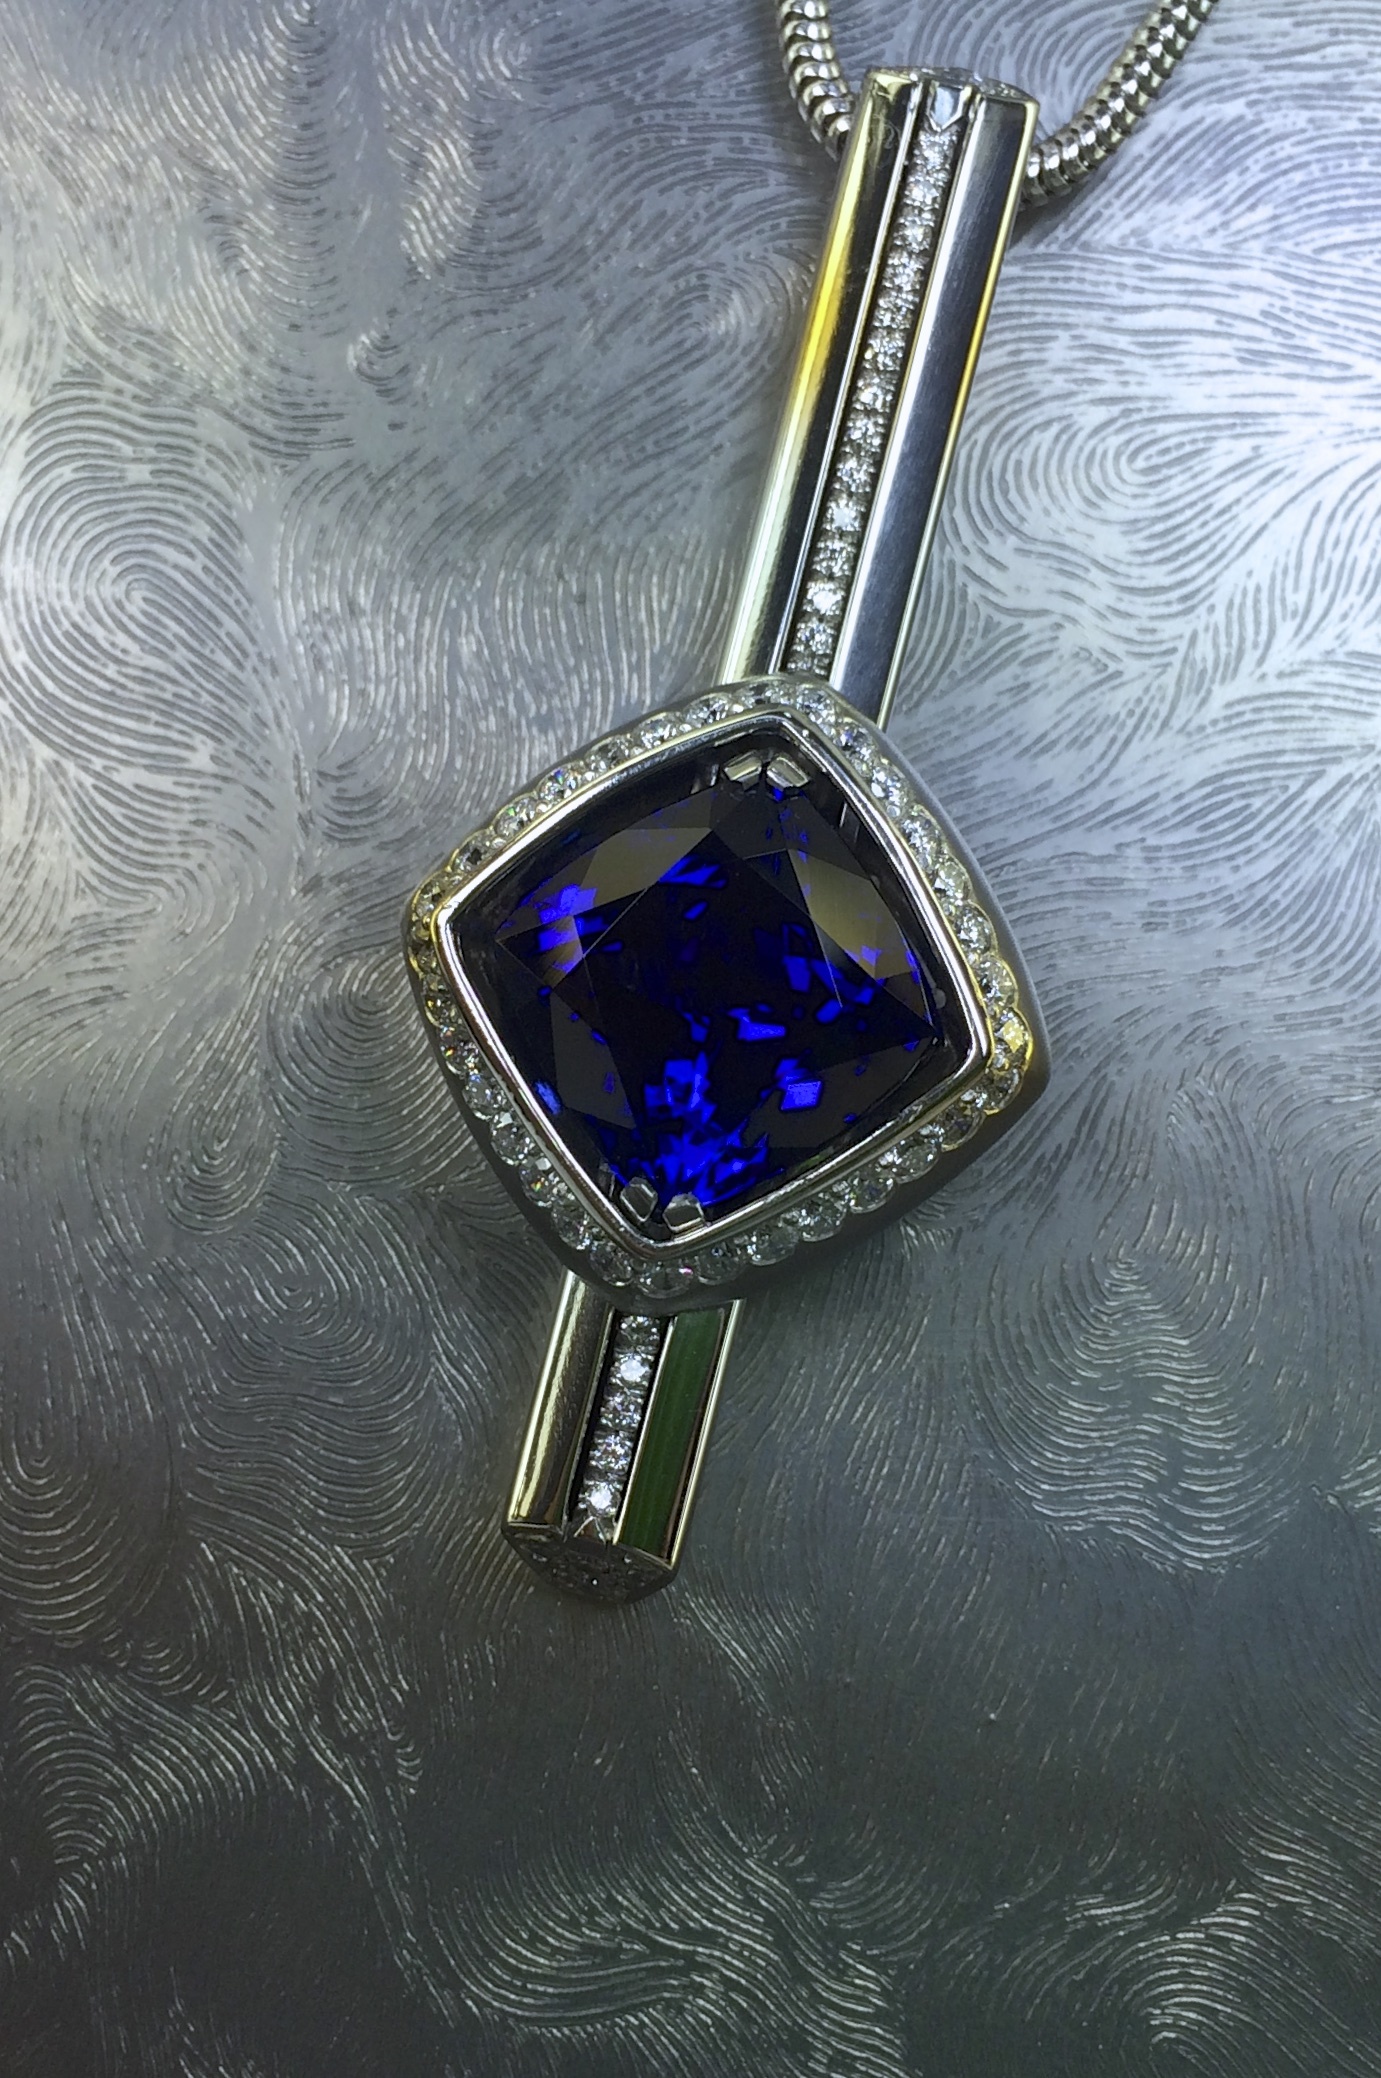
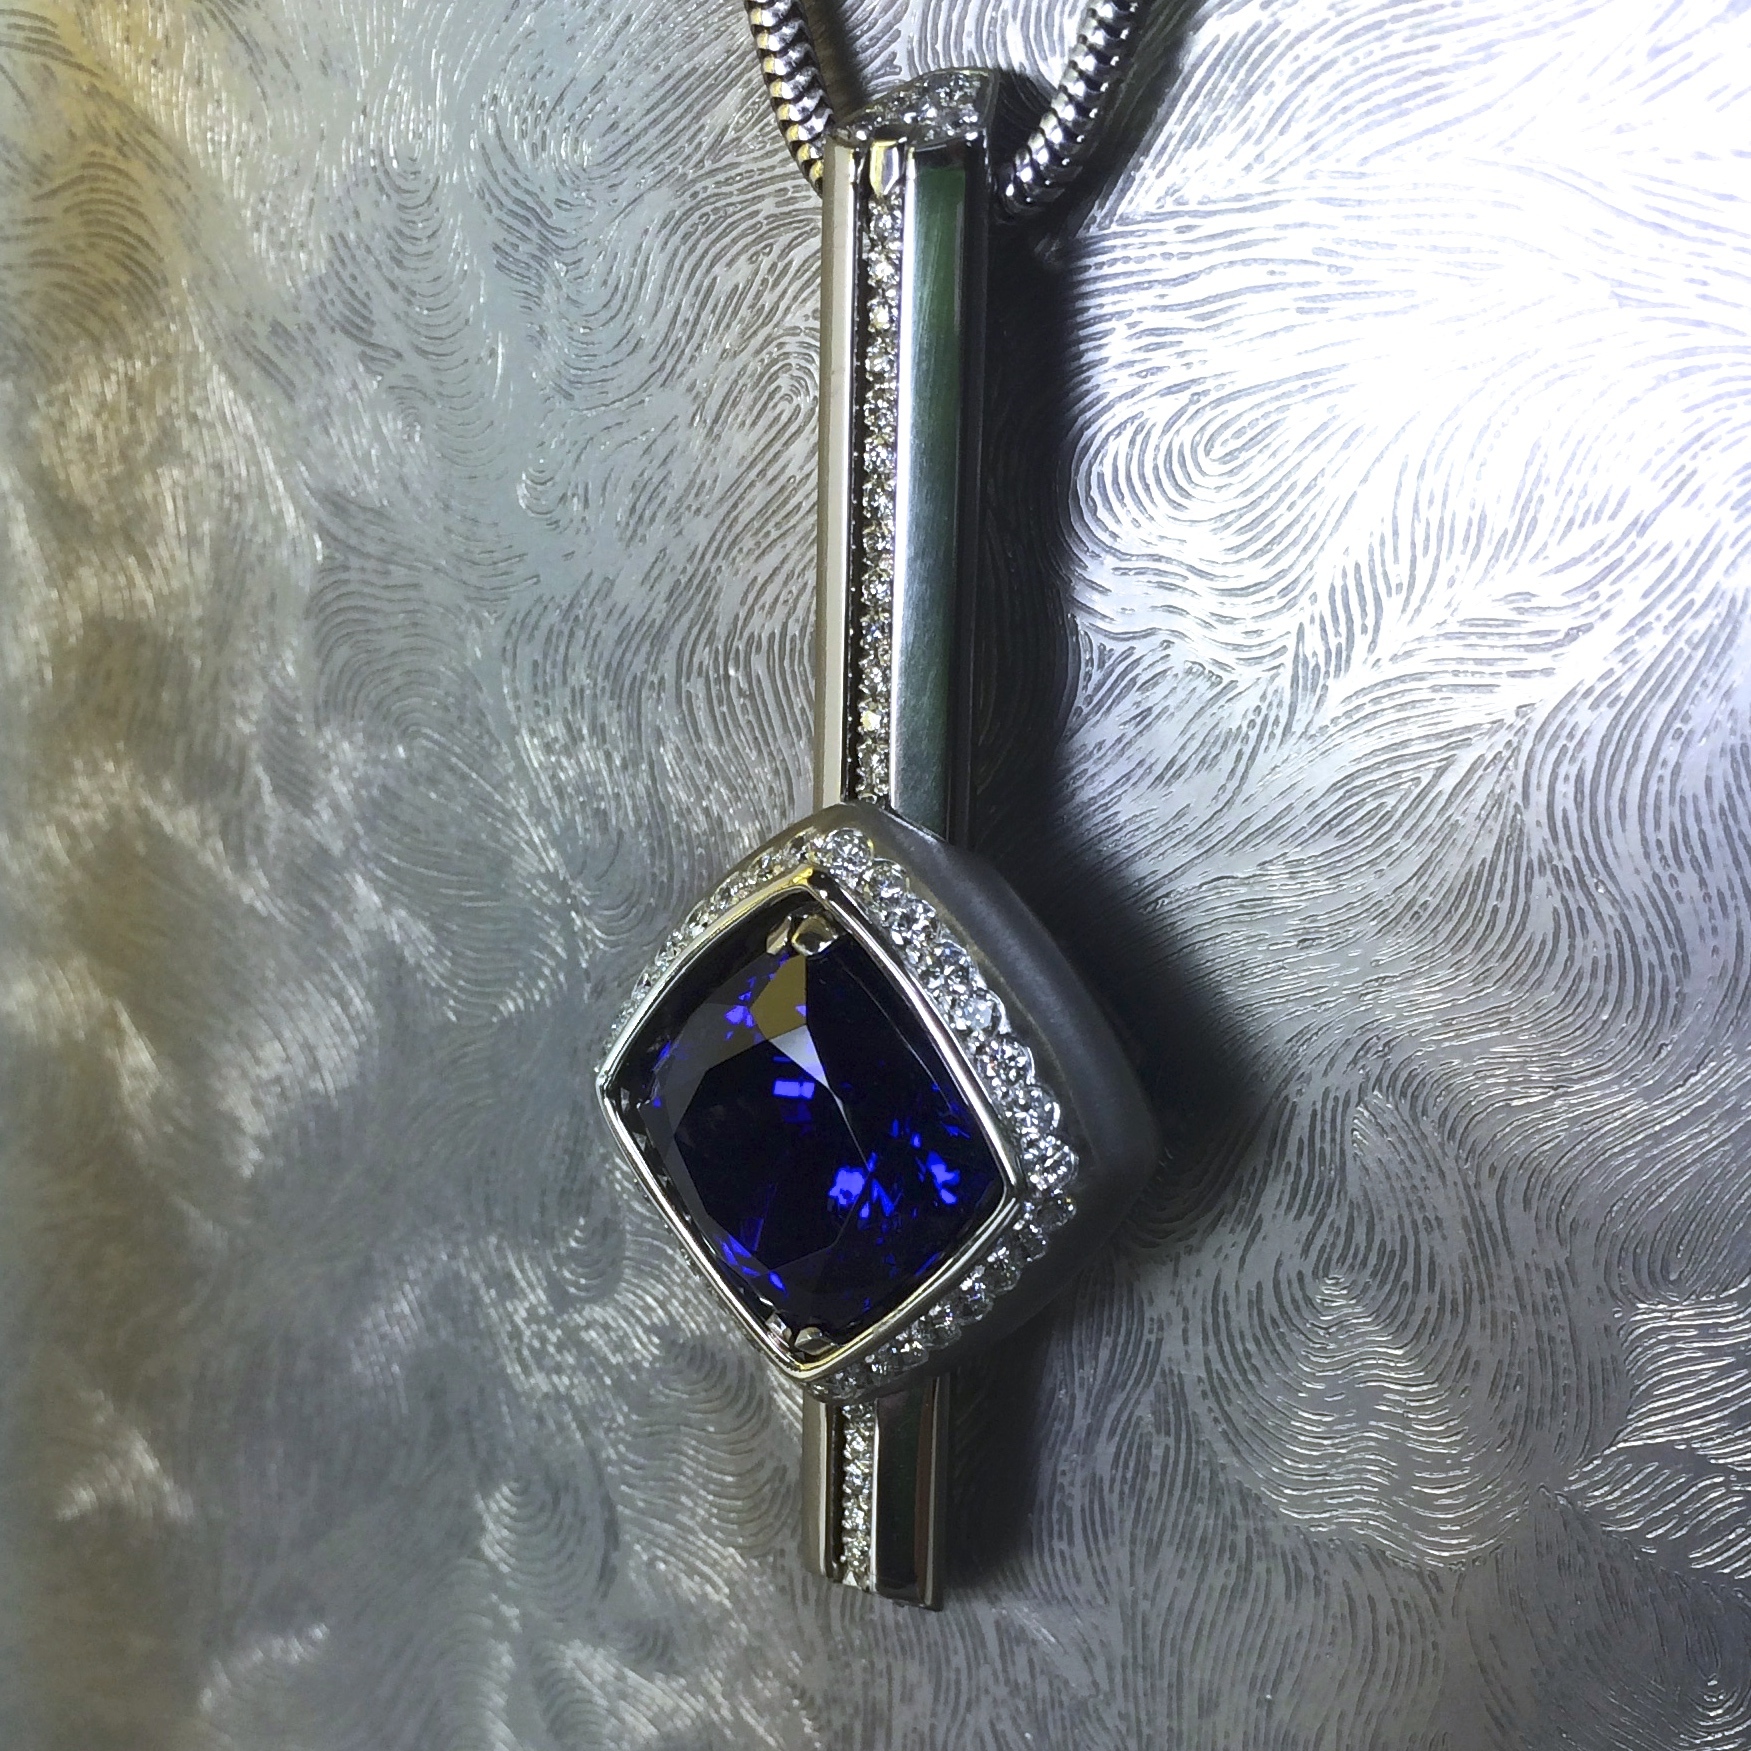
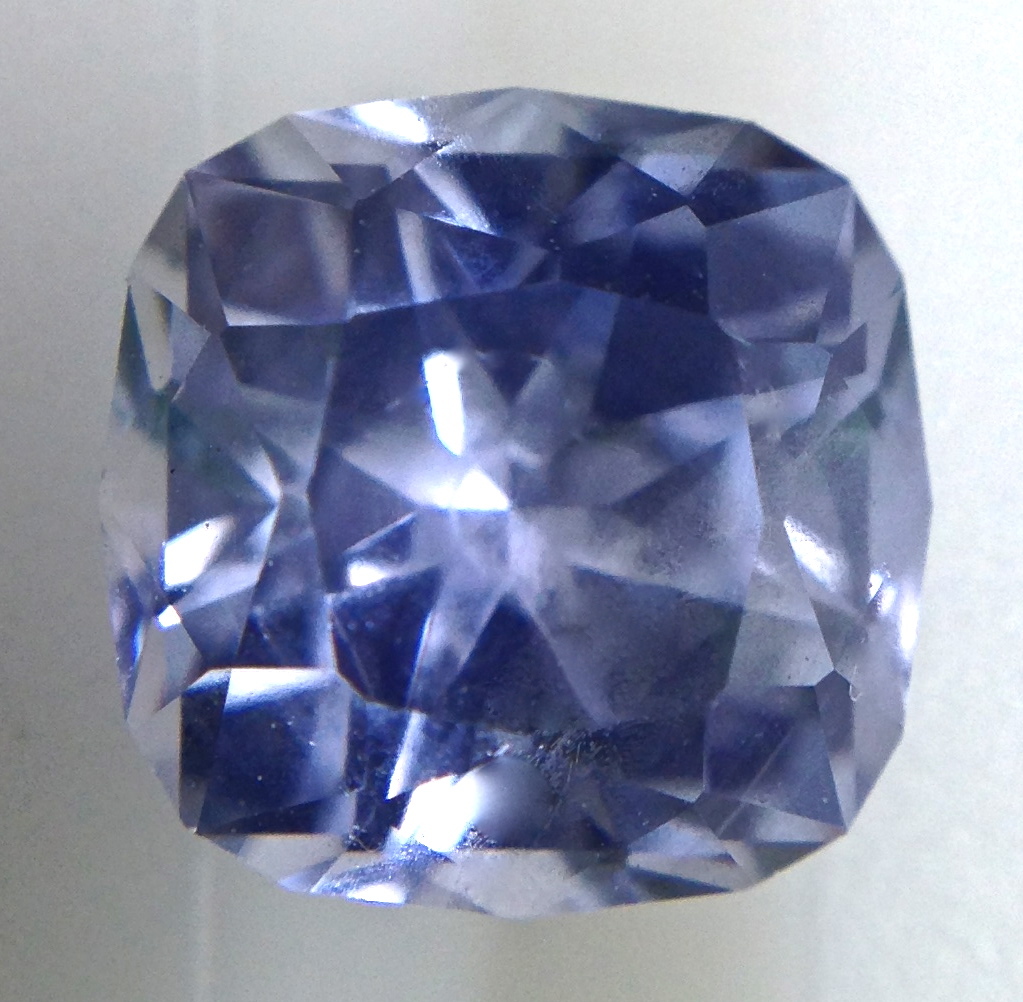
This will post here and in Color, but the build is interesting.
I’m sorry for tha lack of verbiage on these, the intent is to see how I approached this project, and then have you think about how you might do it.
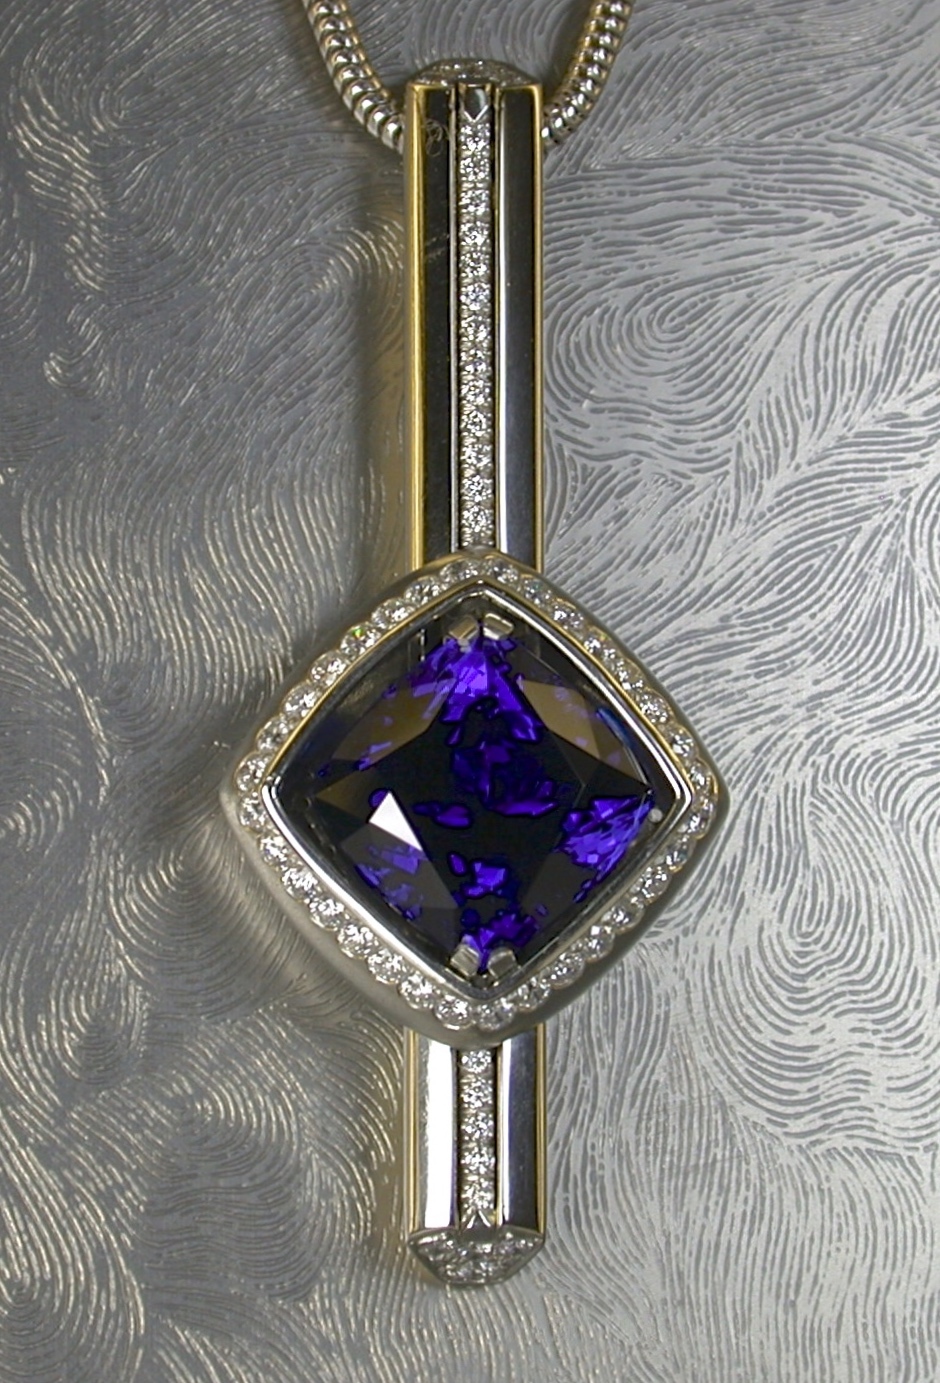
Please note the color change in the Tanzanite.
This is old mine stock from Andrew sarosi’s collection.
This stone was probably mined around 1962 ish. It shows the true dichroism thad had these stones become so desirable, It also shows how far down the scale we’ve come when it comes to new mine finds.
I have several of these stones from Andrew.
Not for sale…
Enjoy,
Jim


Uploading…]()


2 Likes
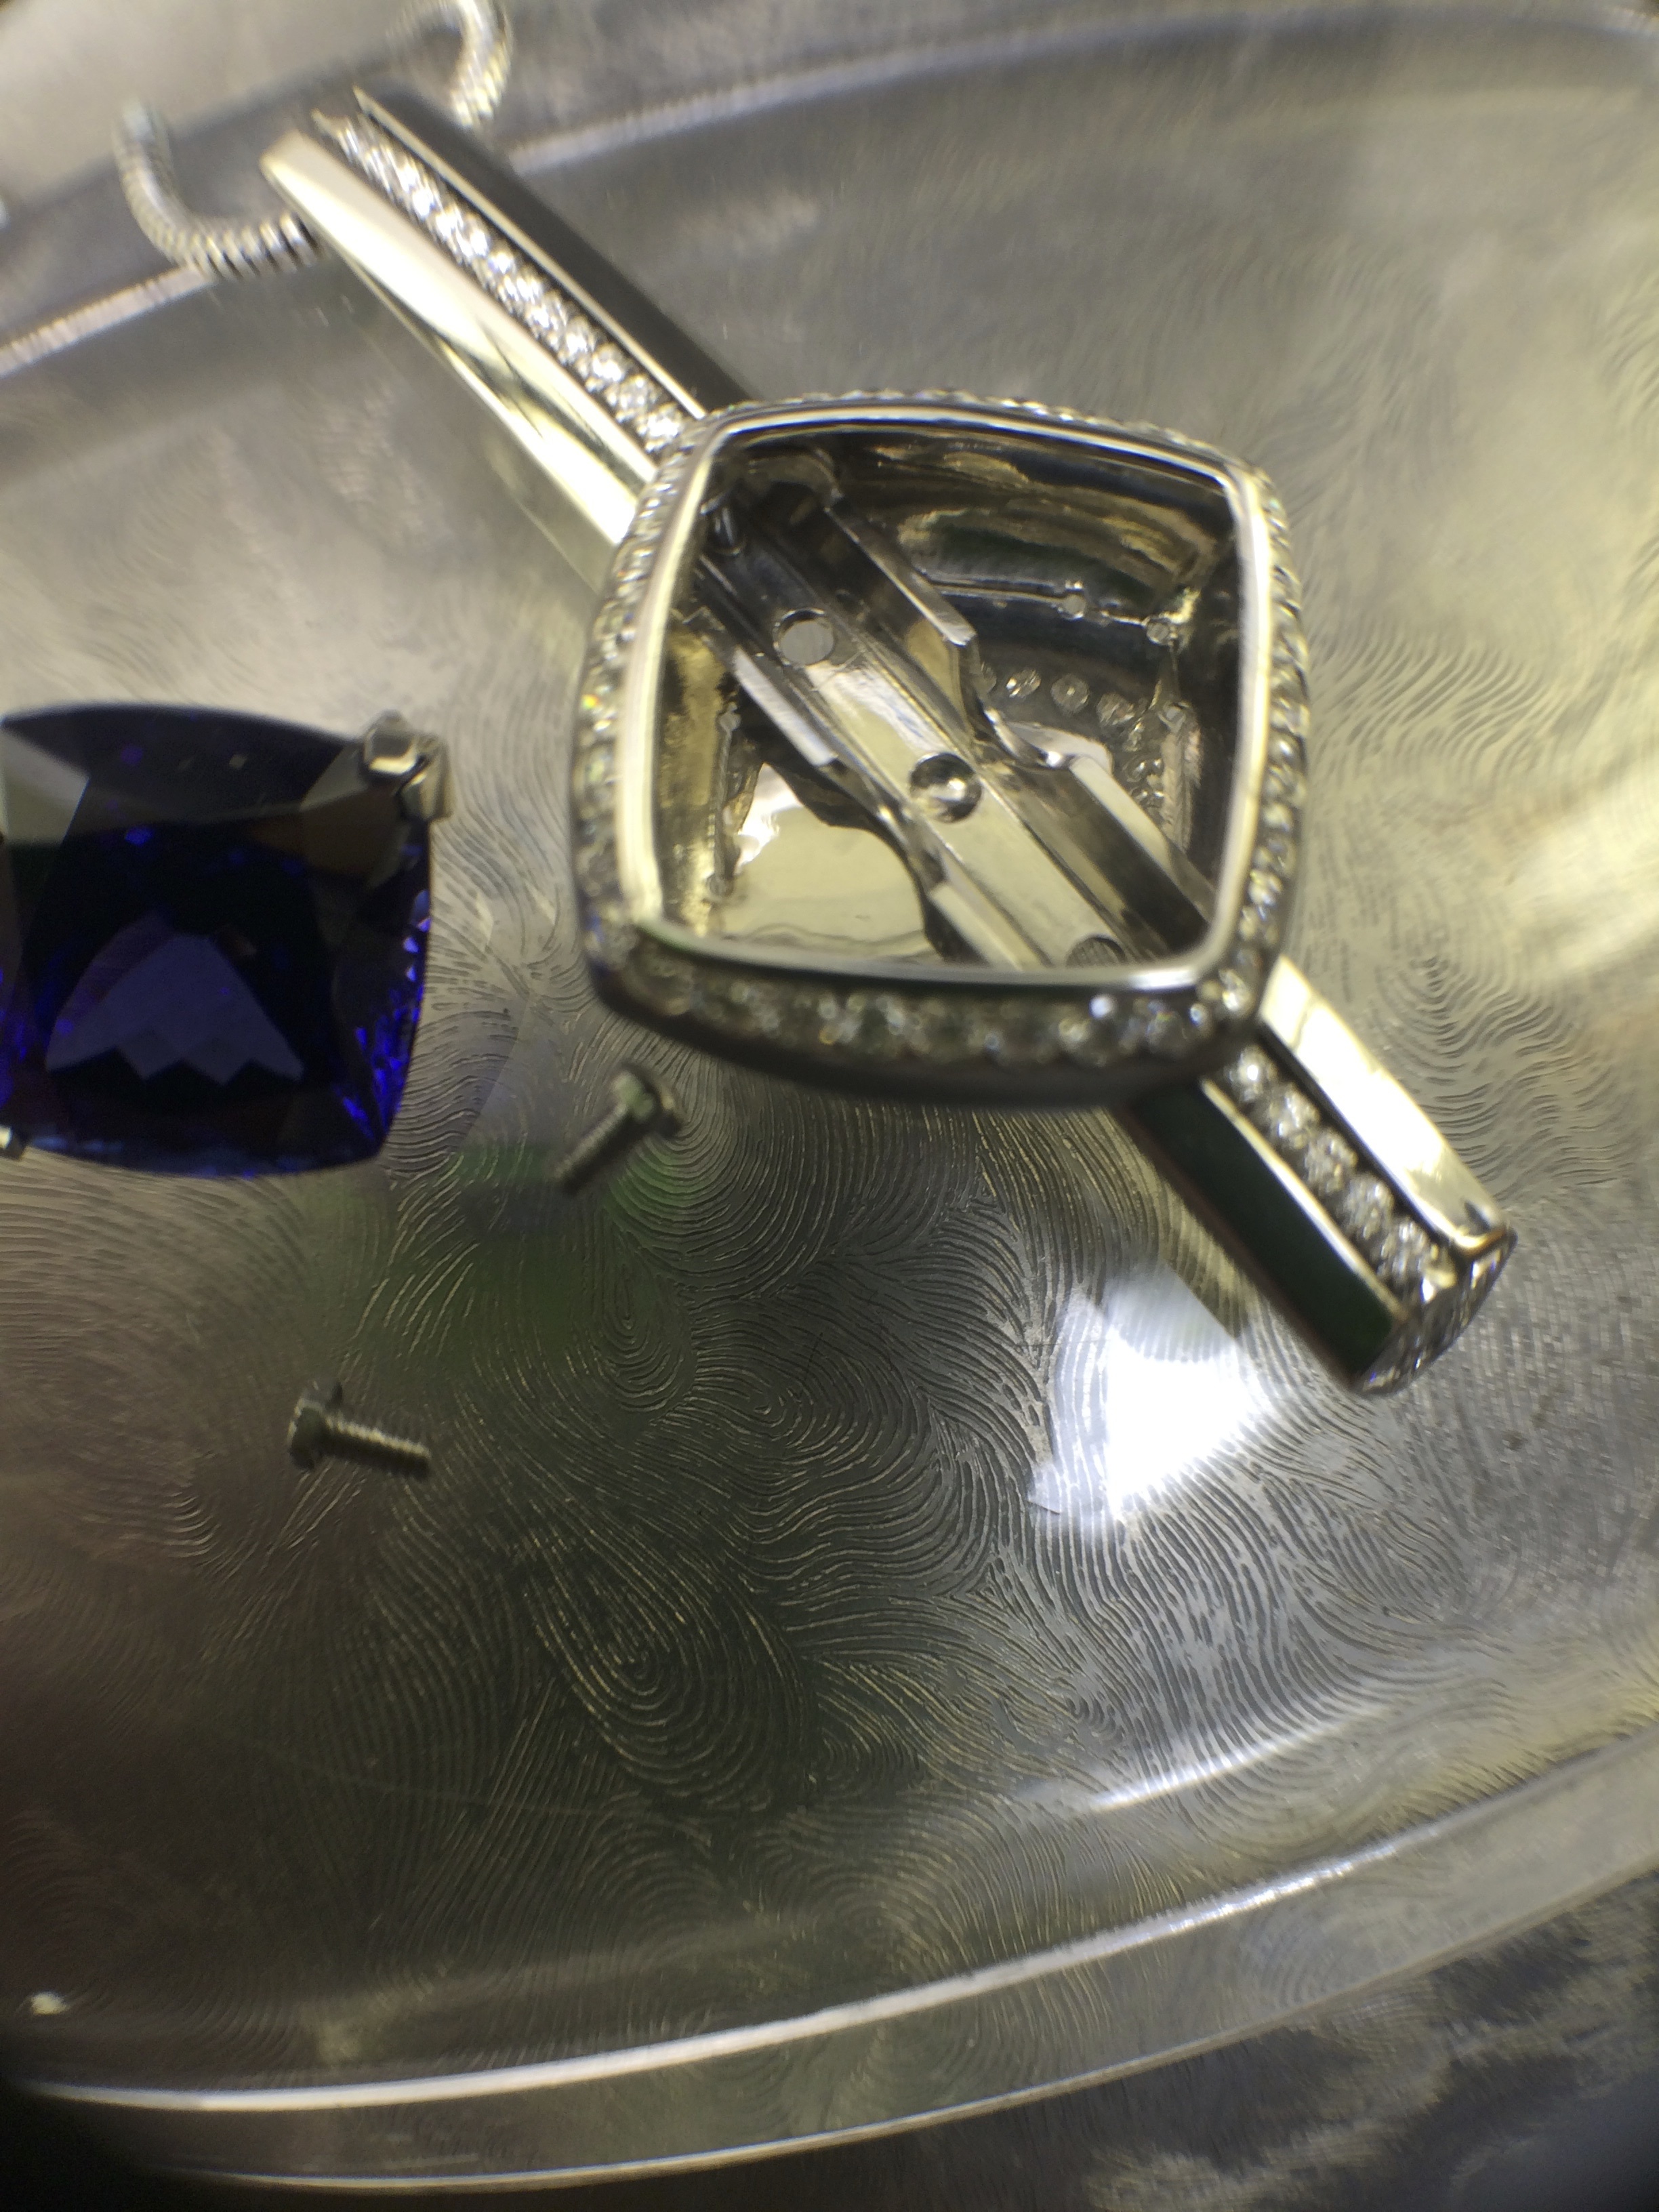
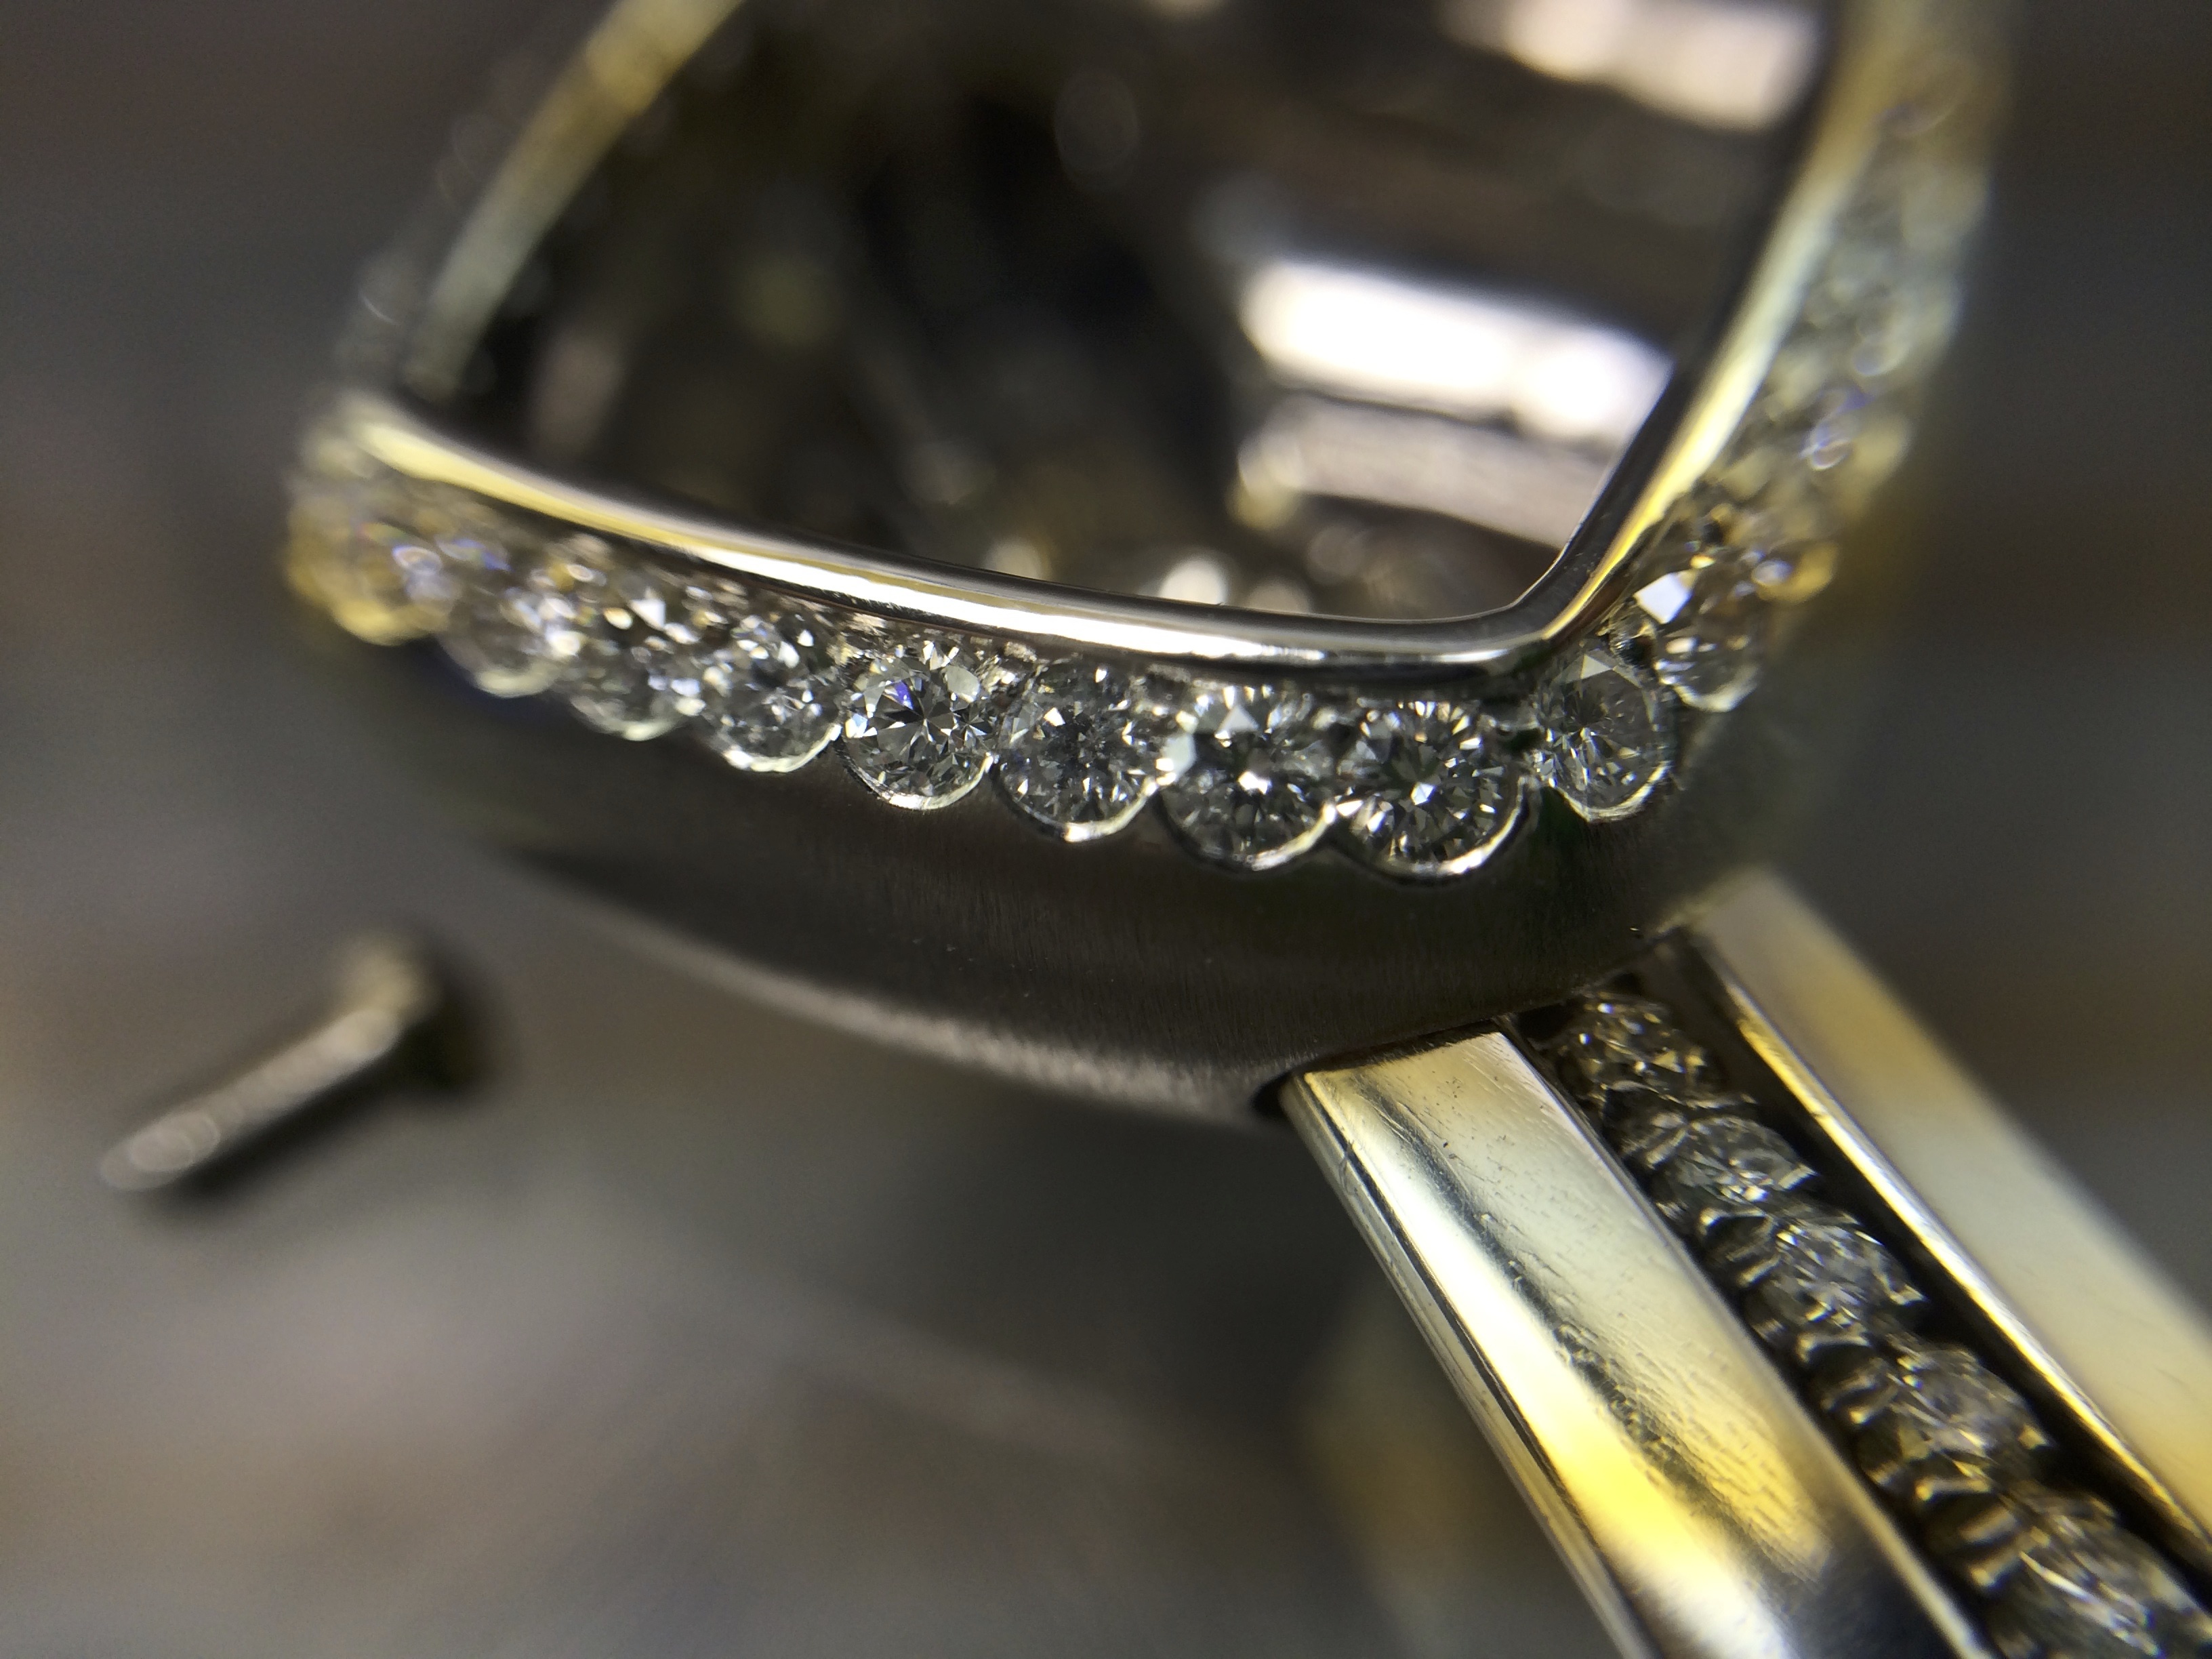
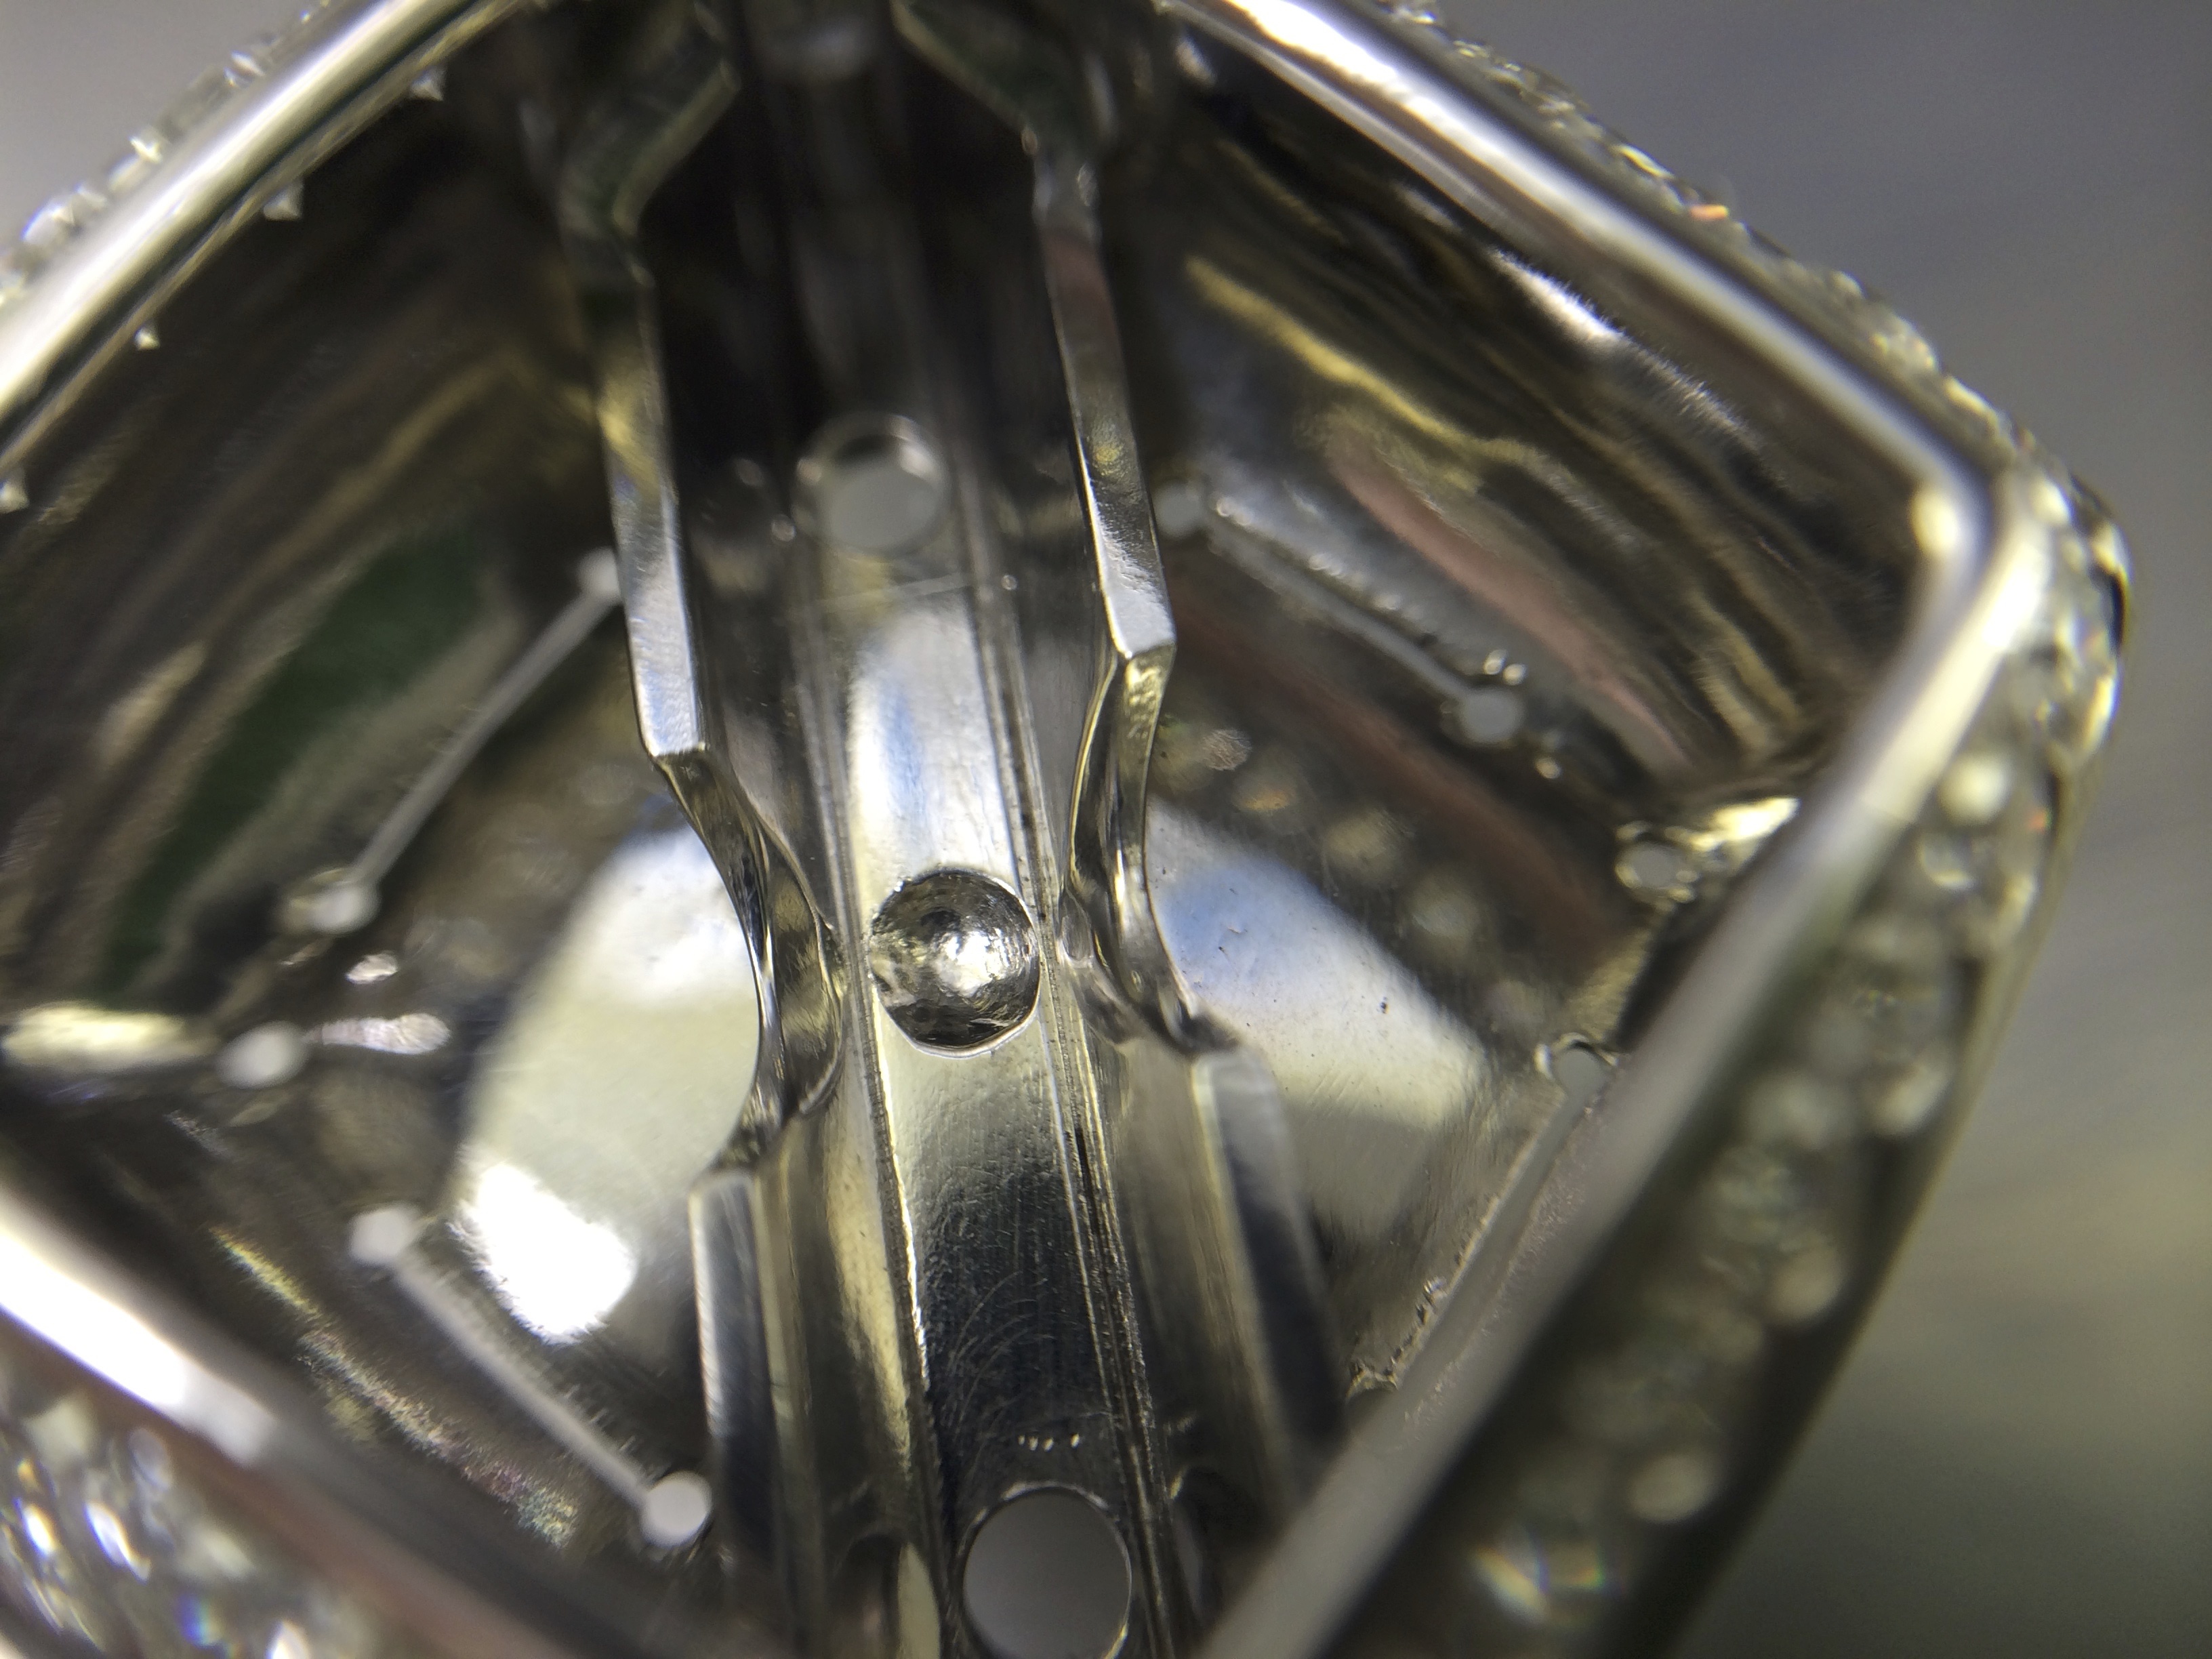
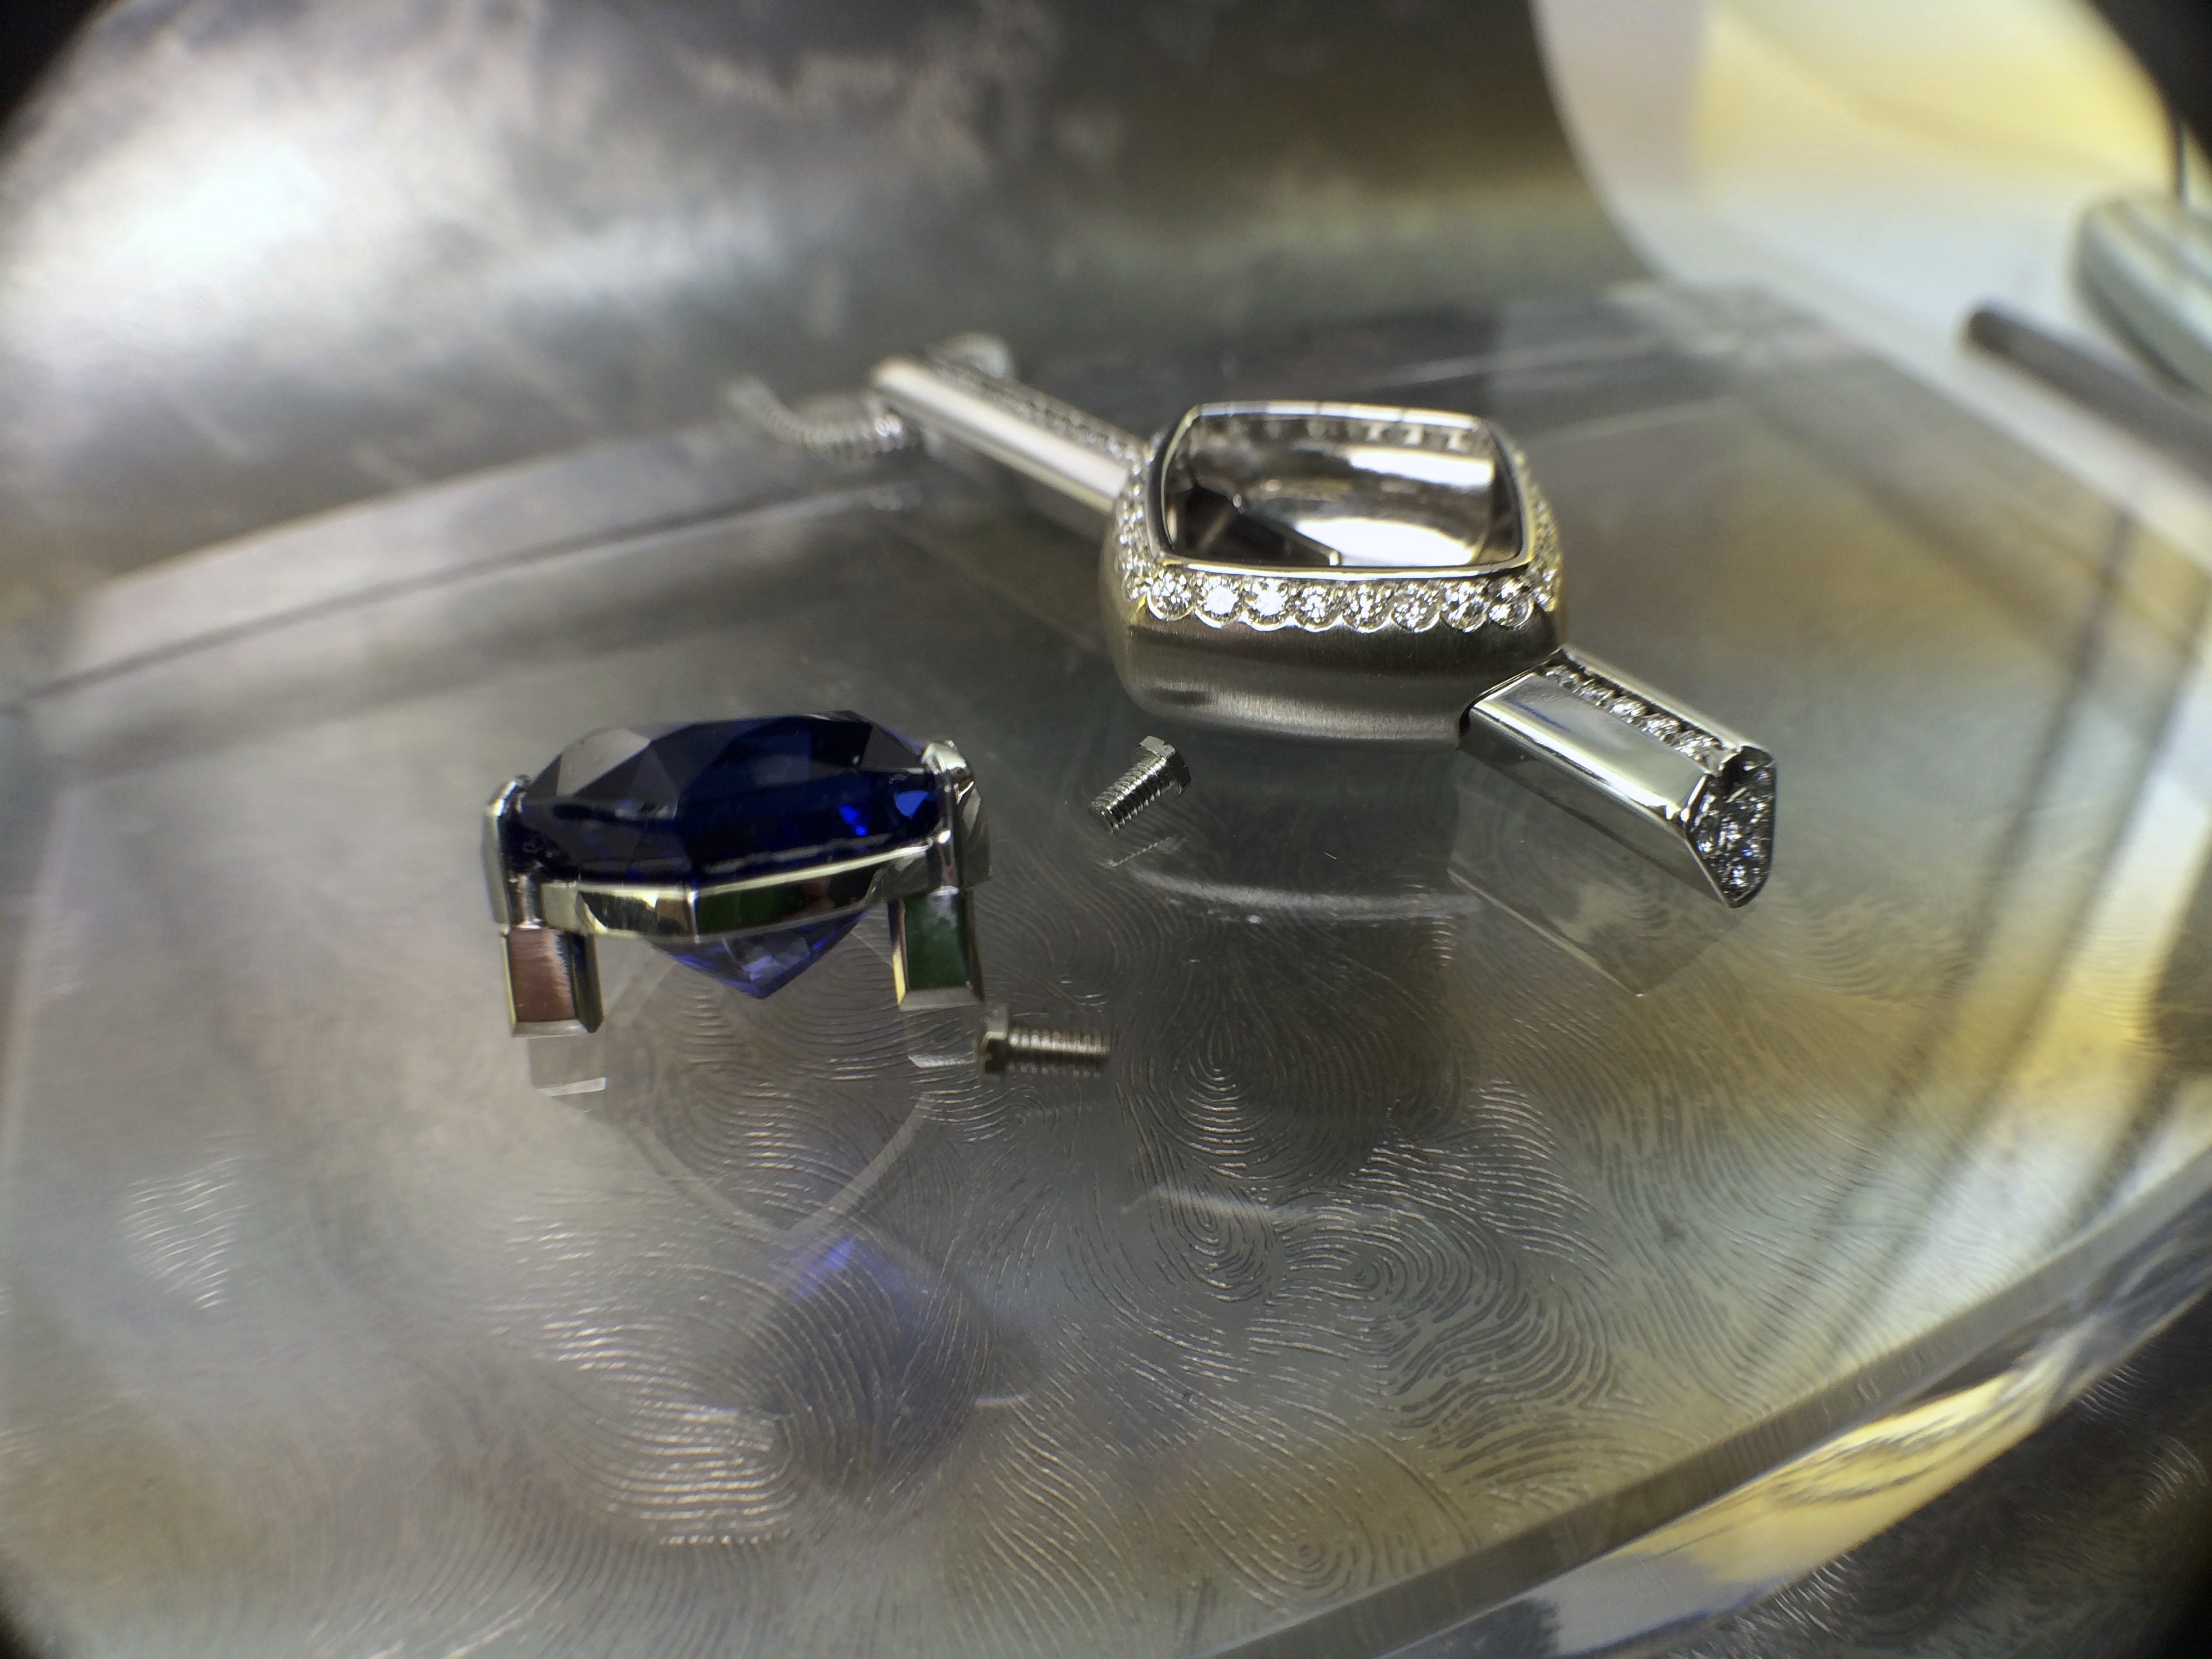
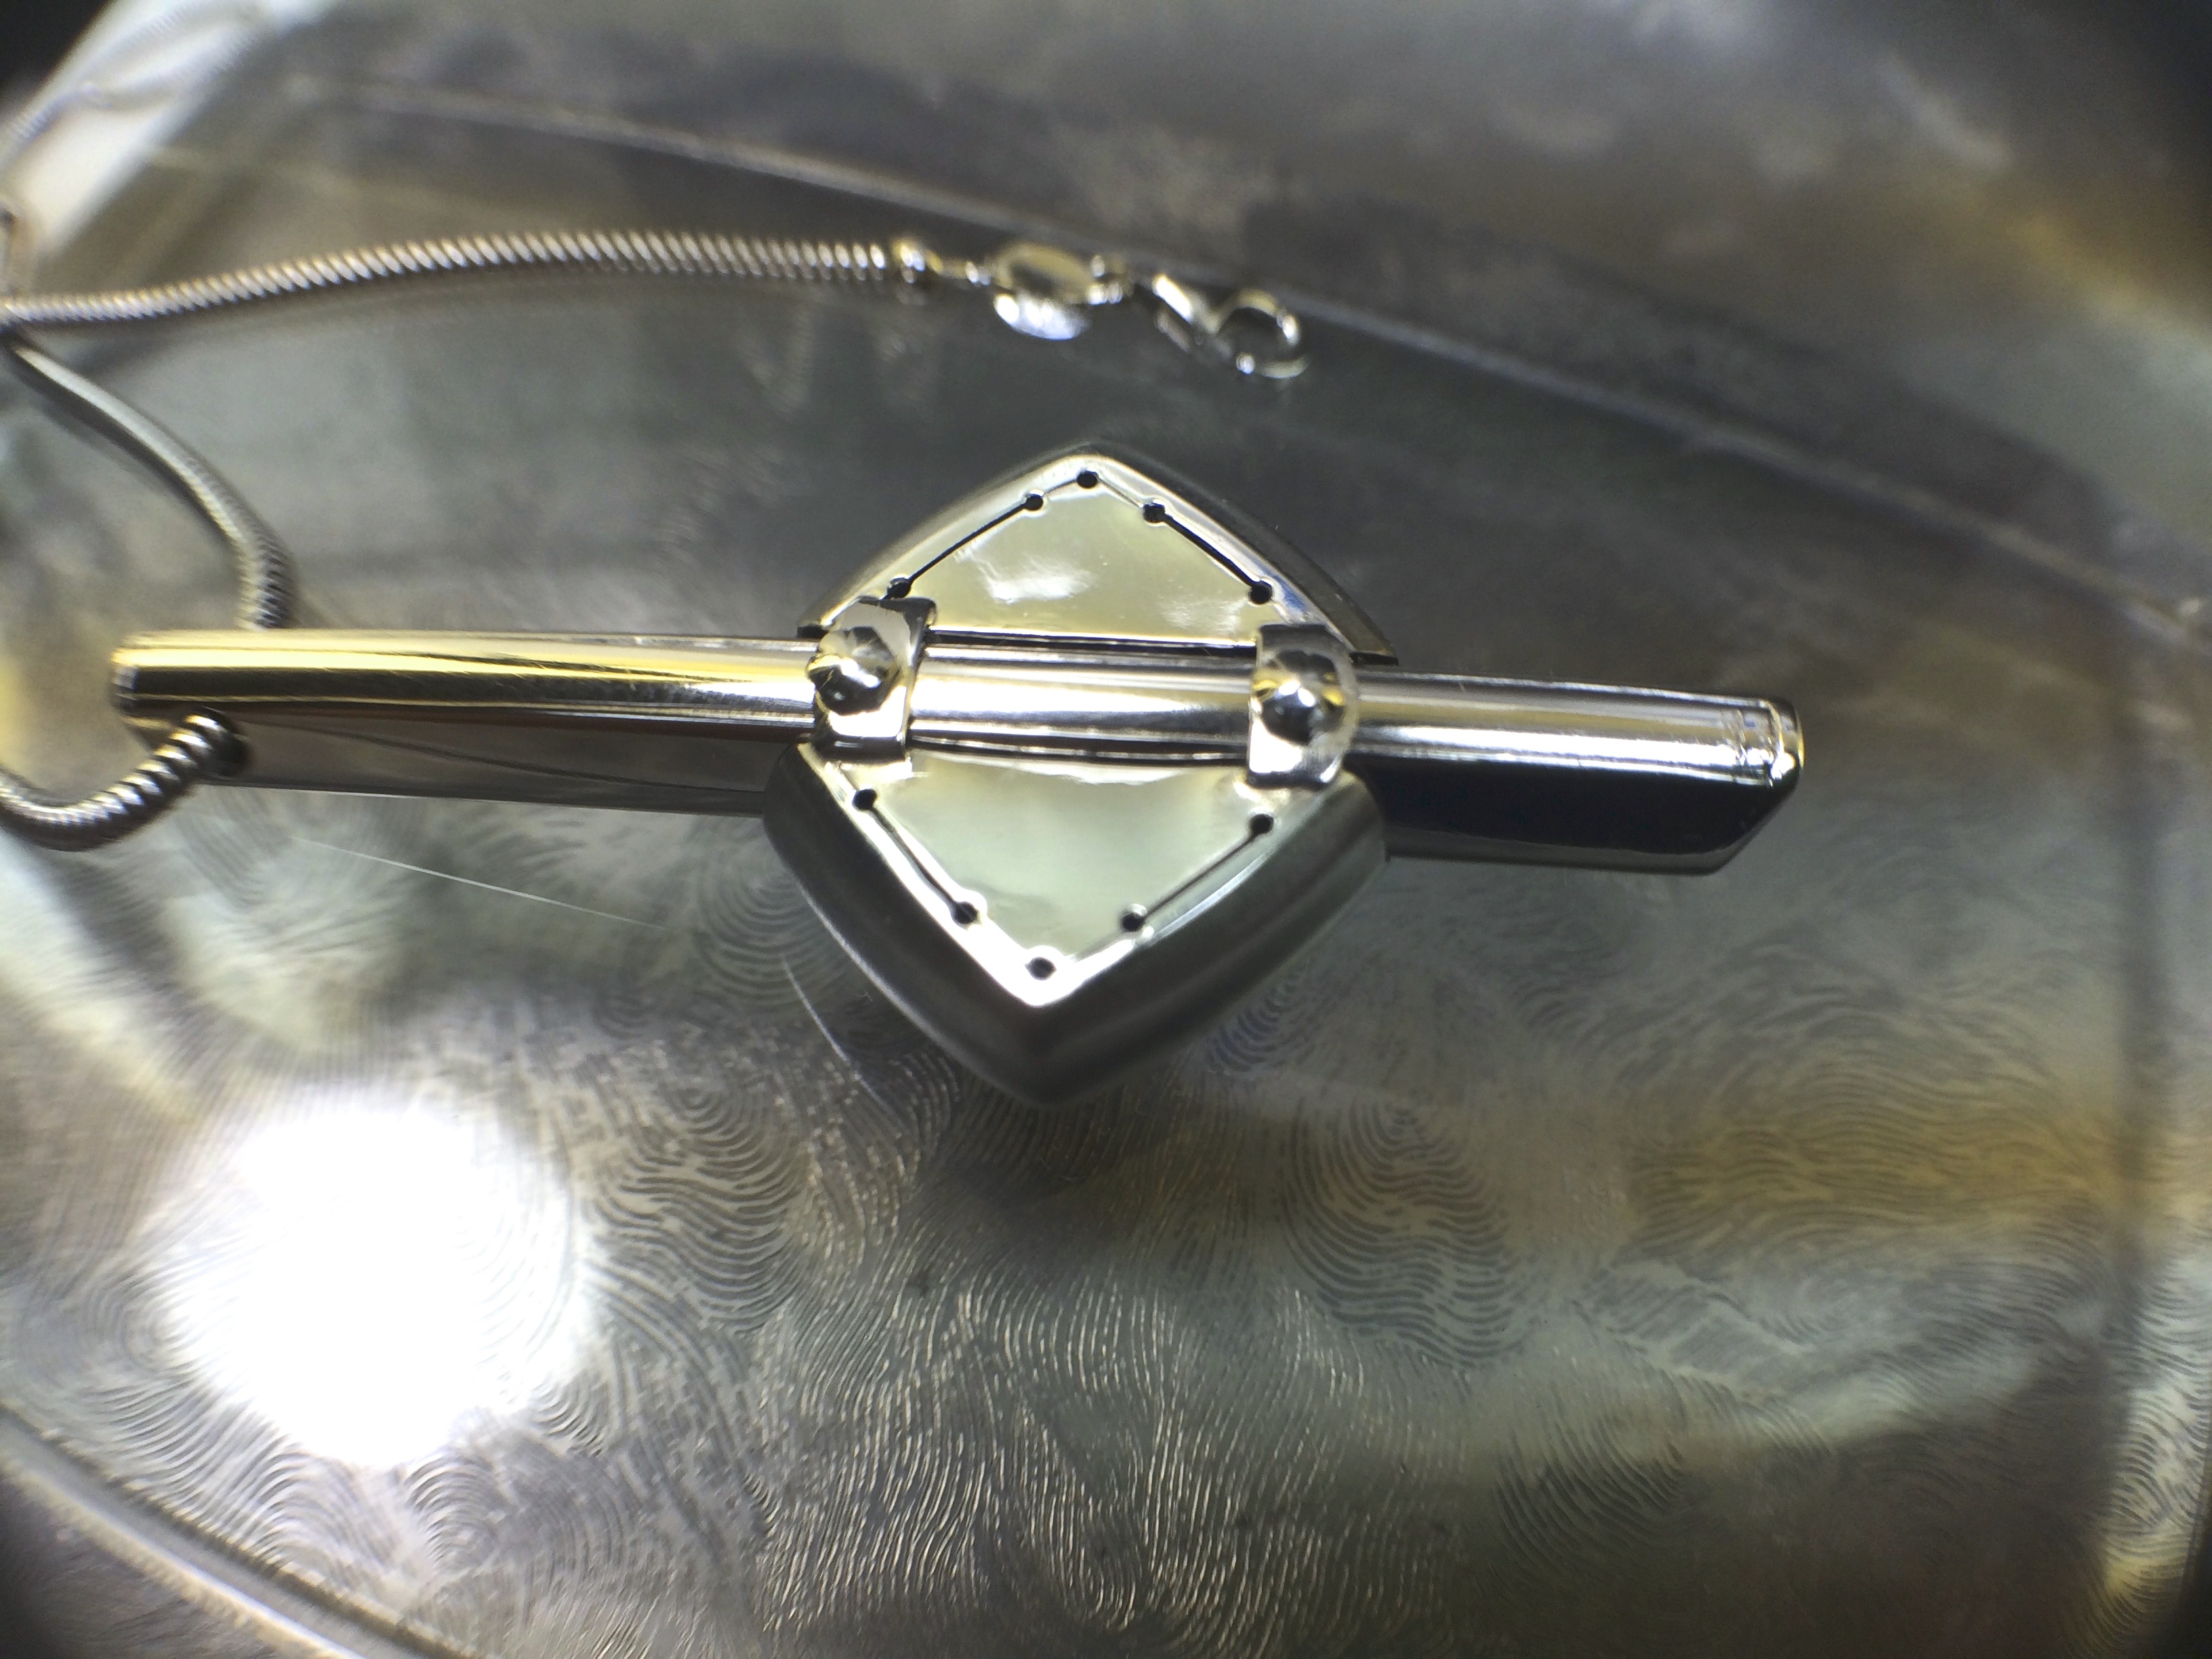
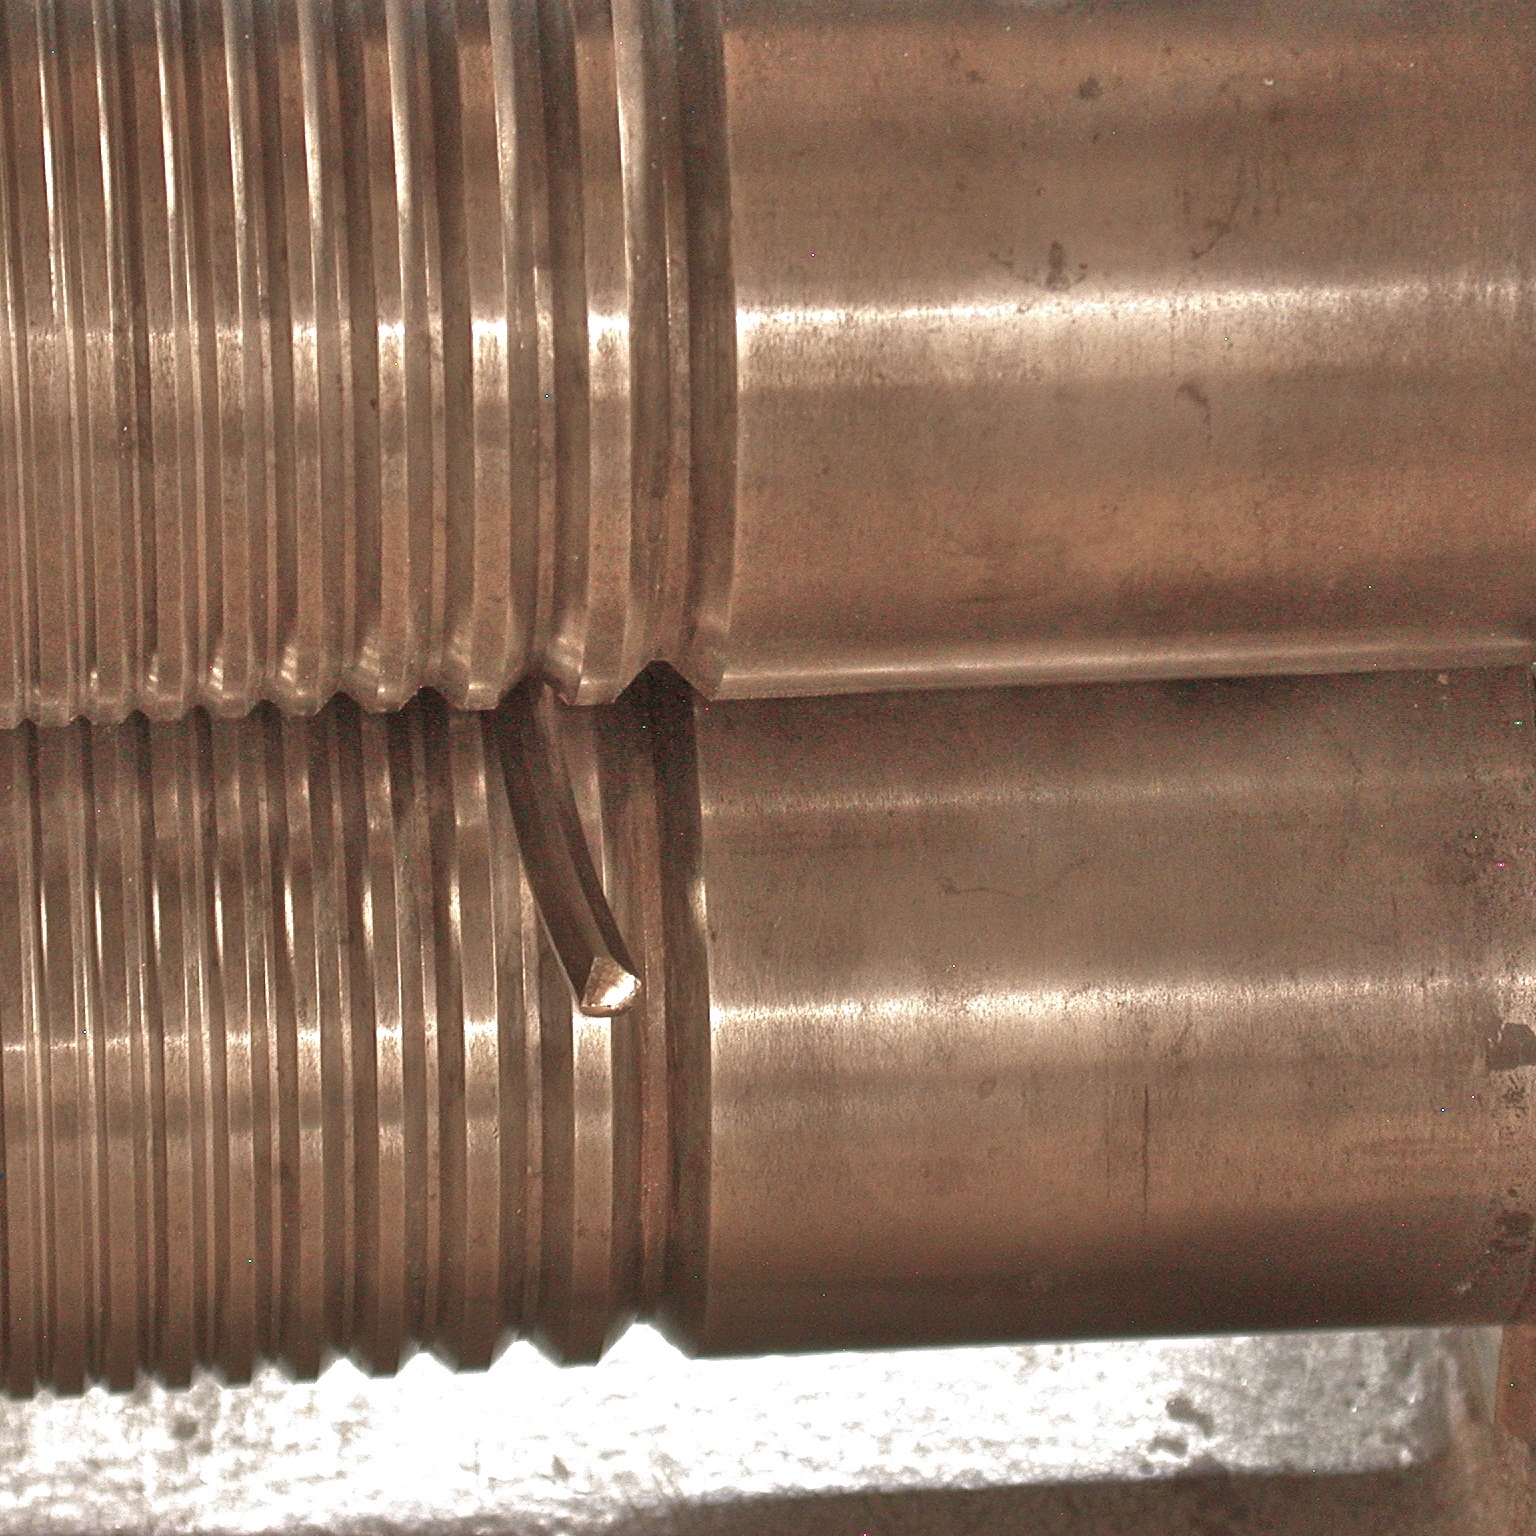
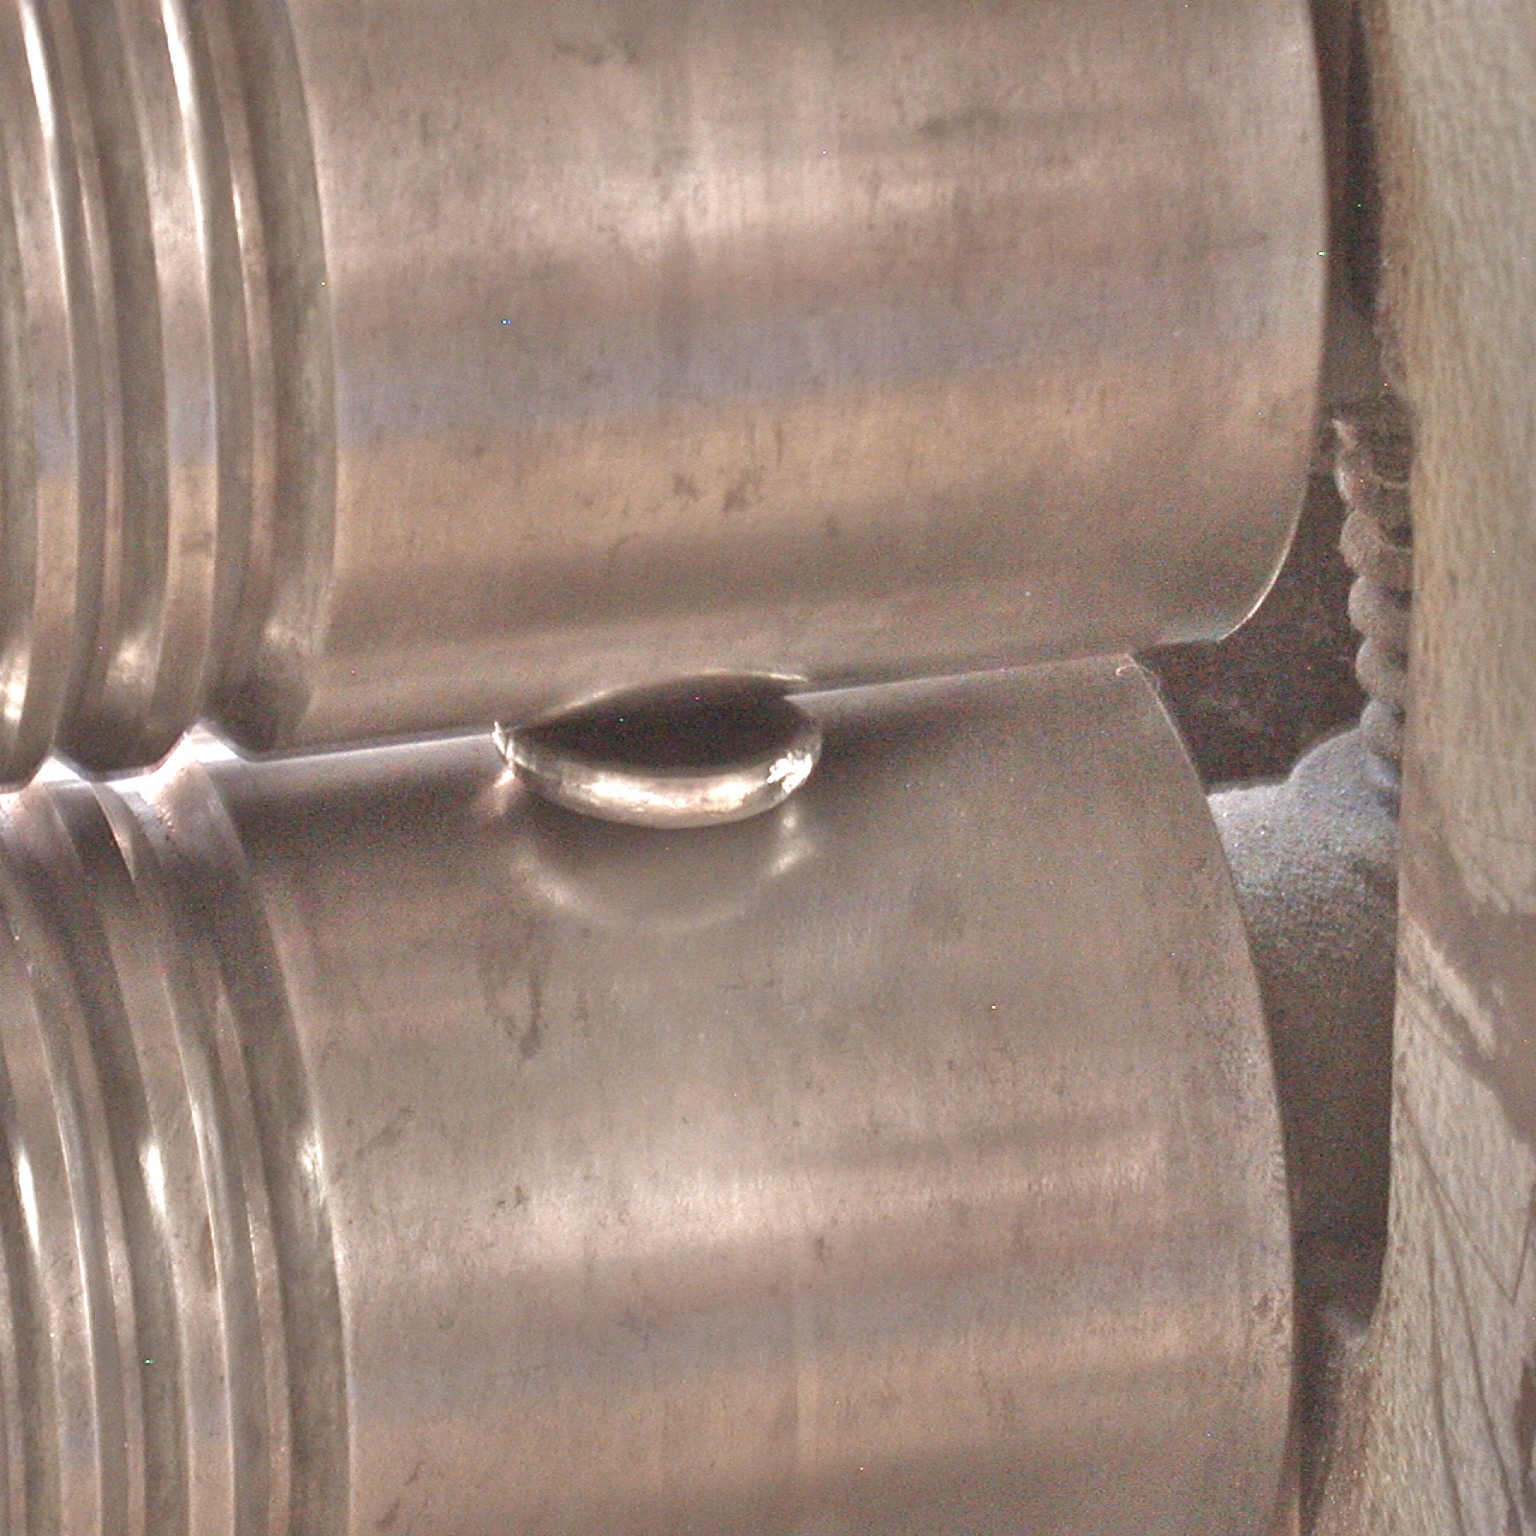
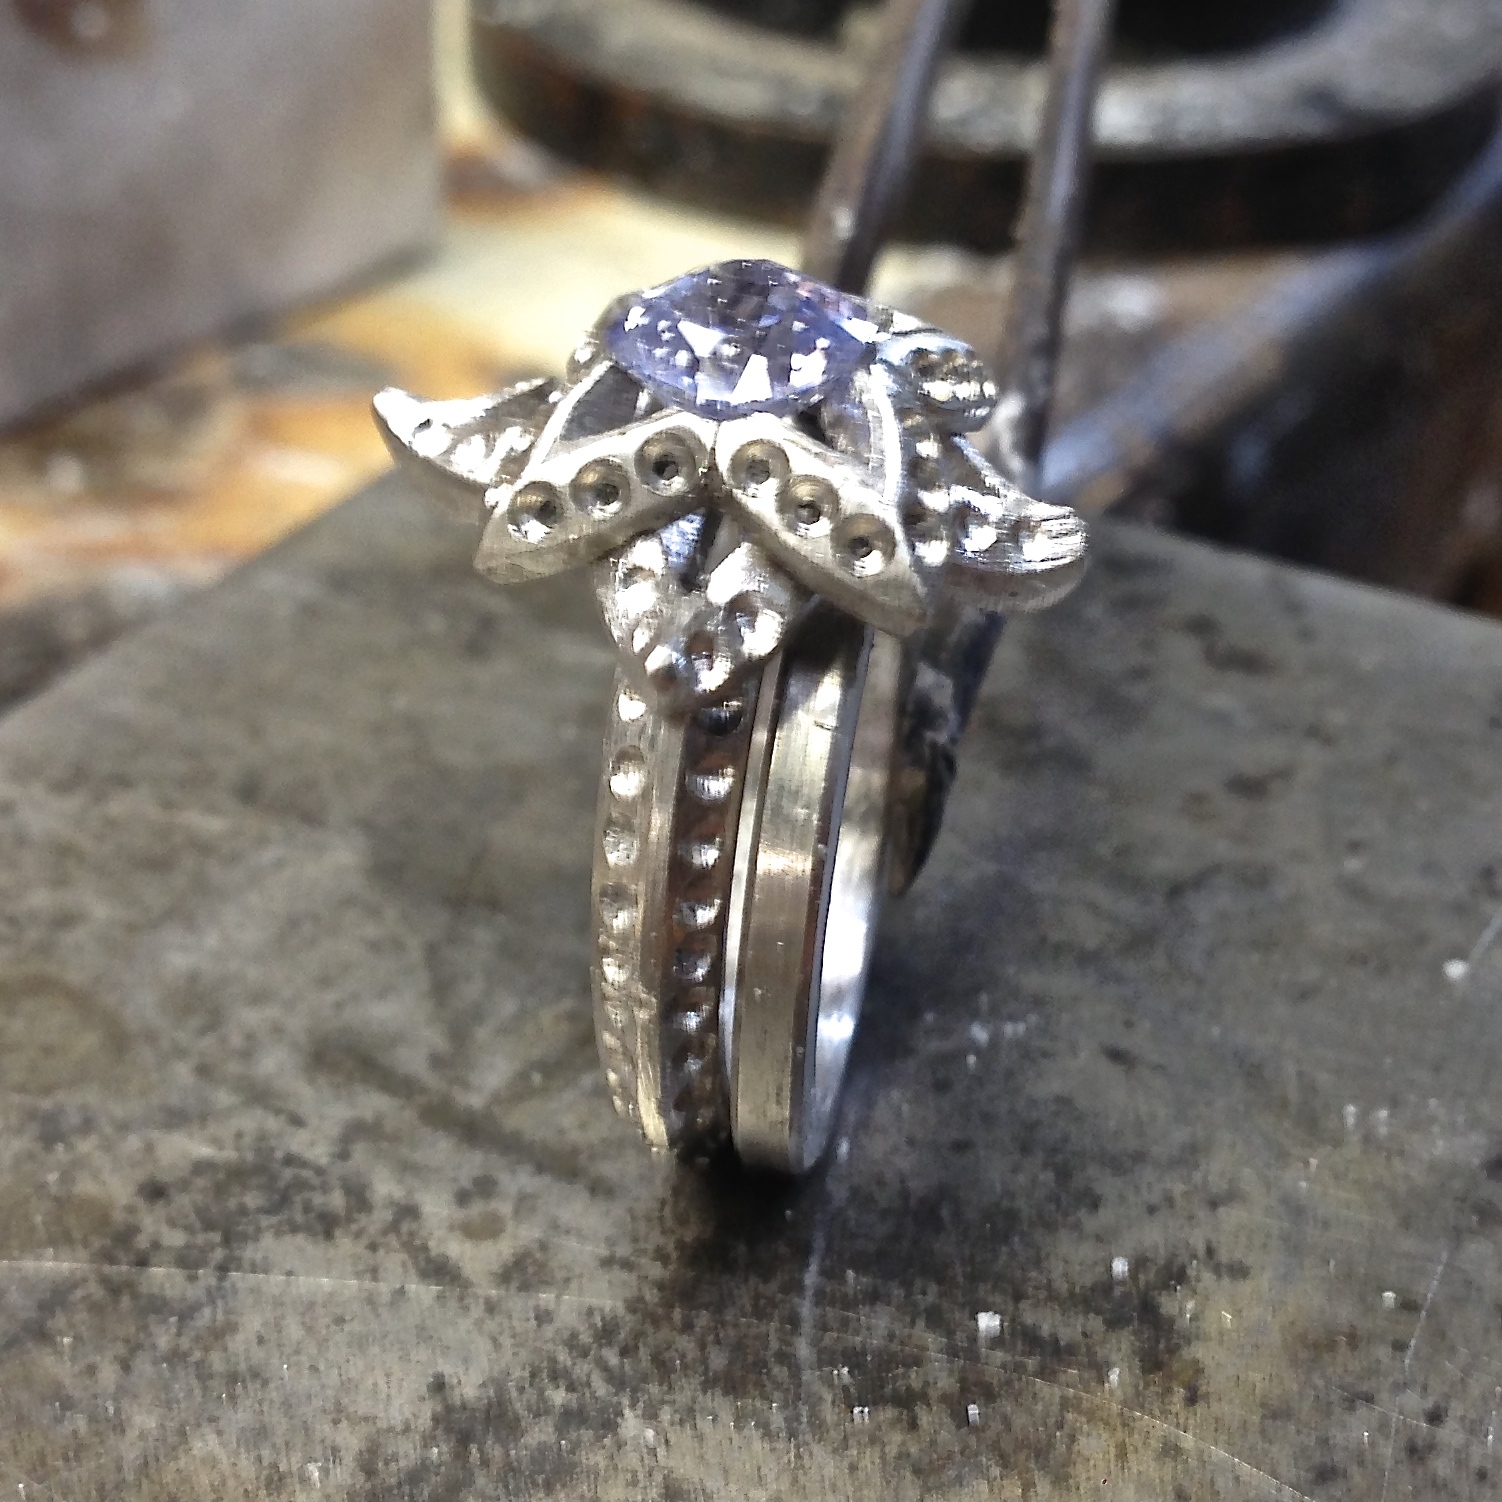
The purpose of this design is to protect the stone from the hazards of setting, wearing and repair.
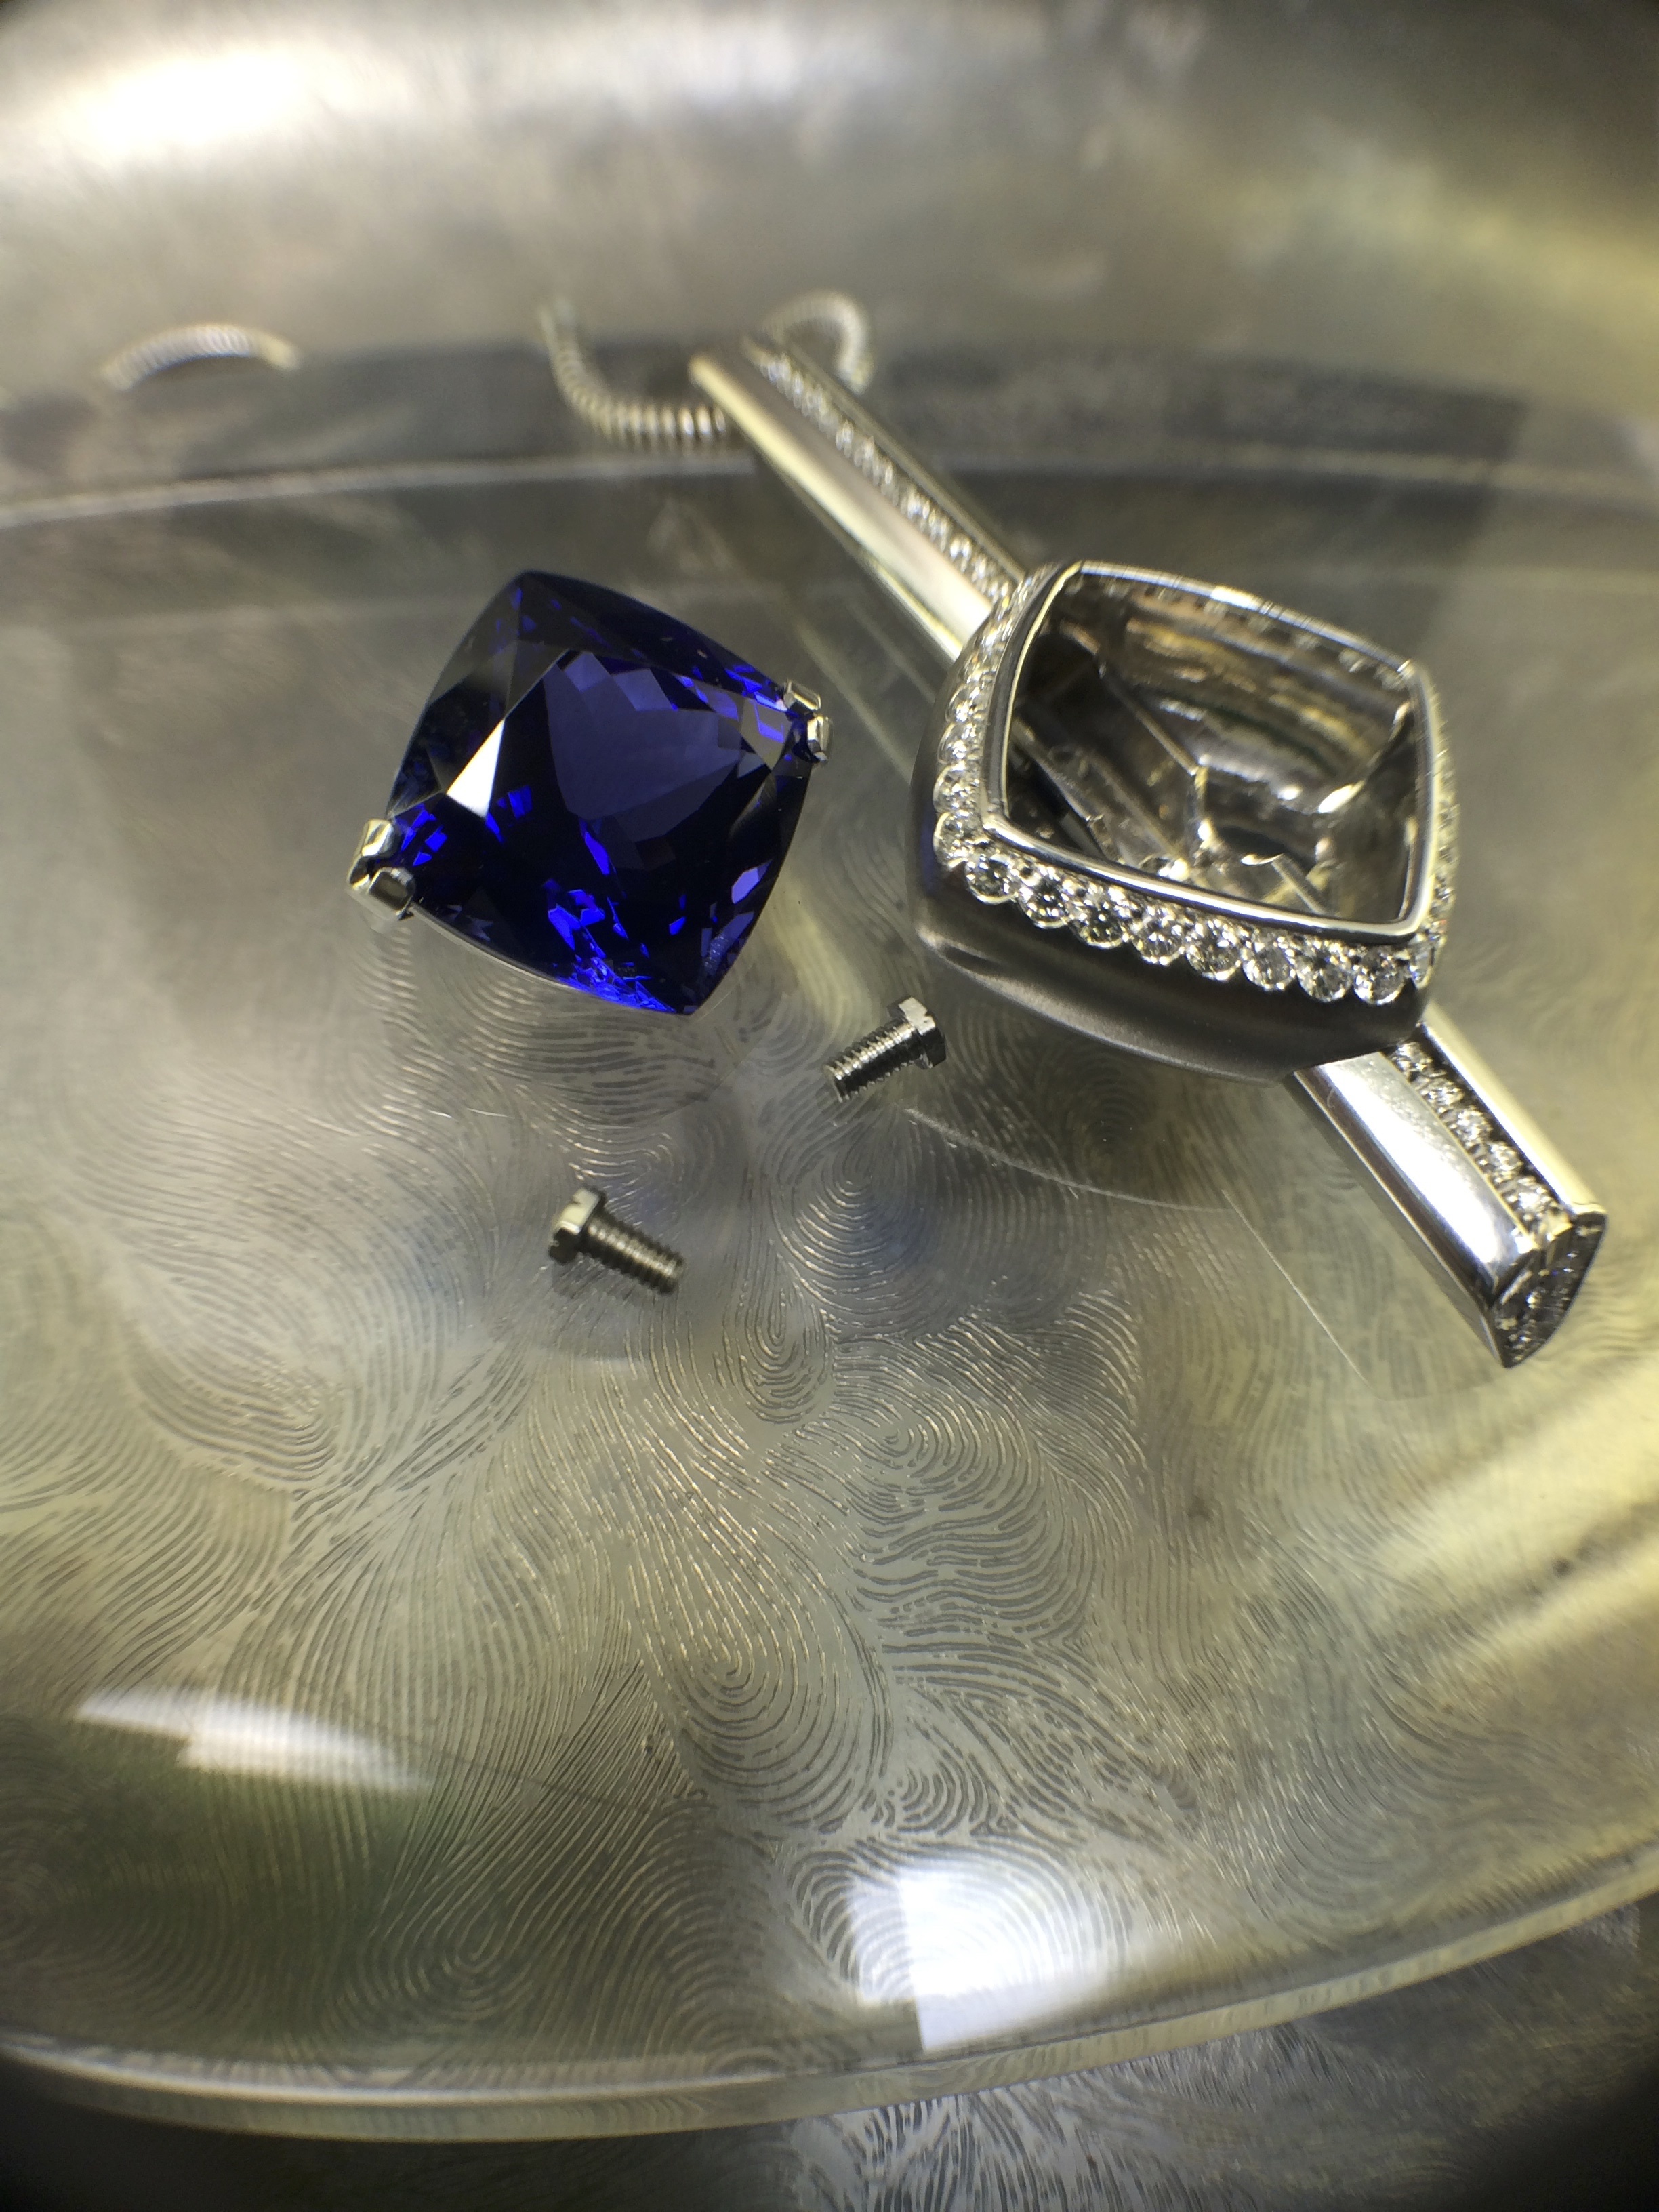
How do you keep the screws from accidental movement?
Is there a security mechanism to keep the pedant parts attached if the screws start backing out?
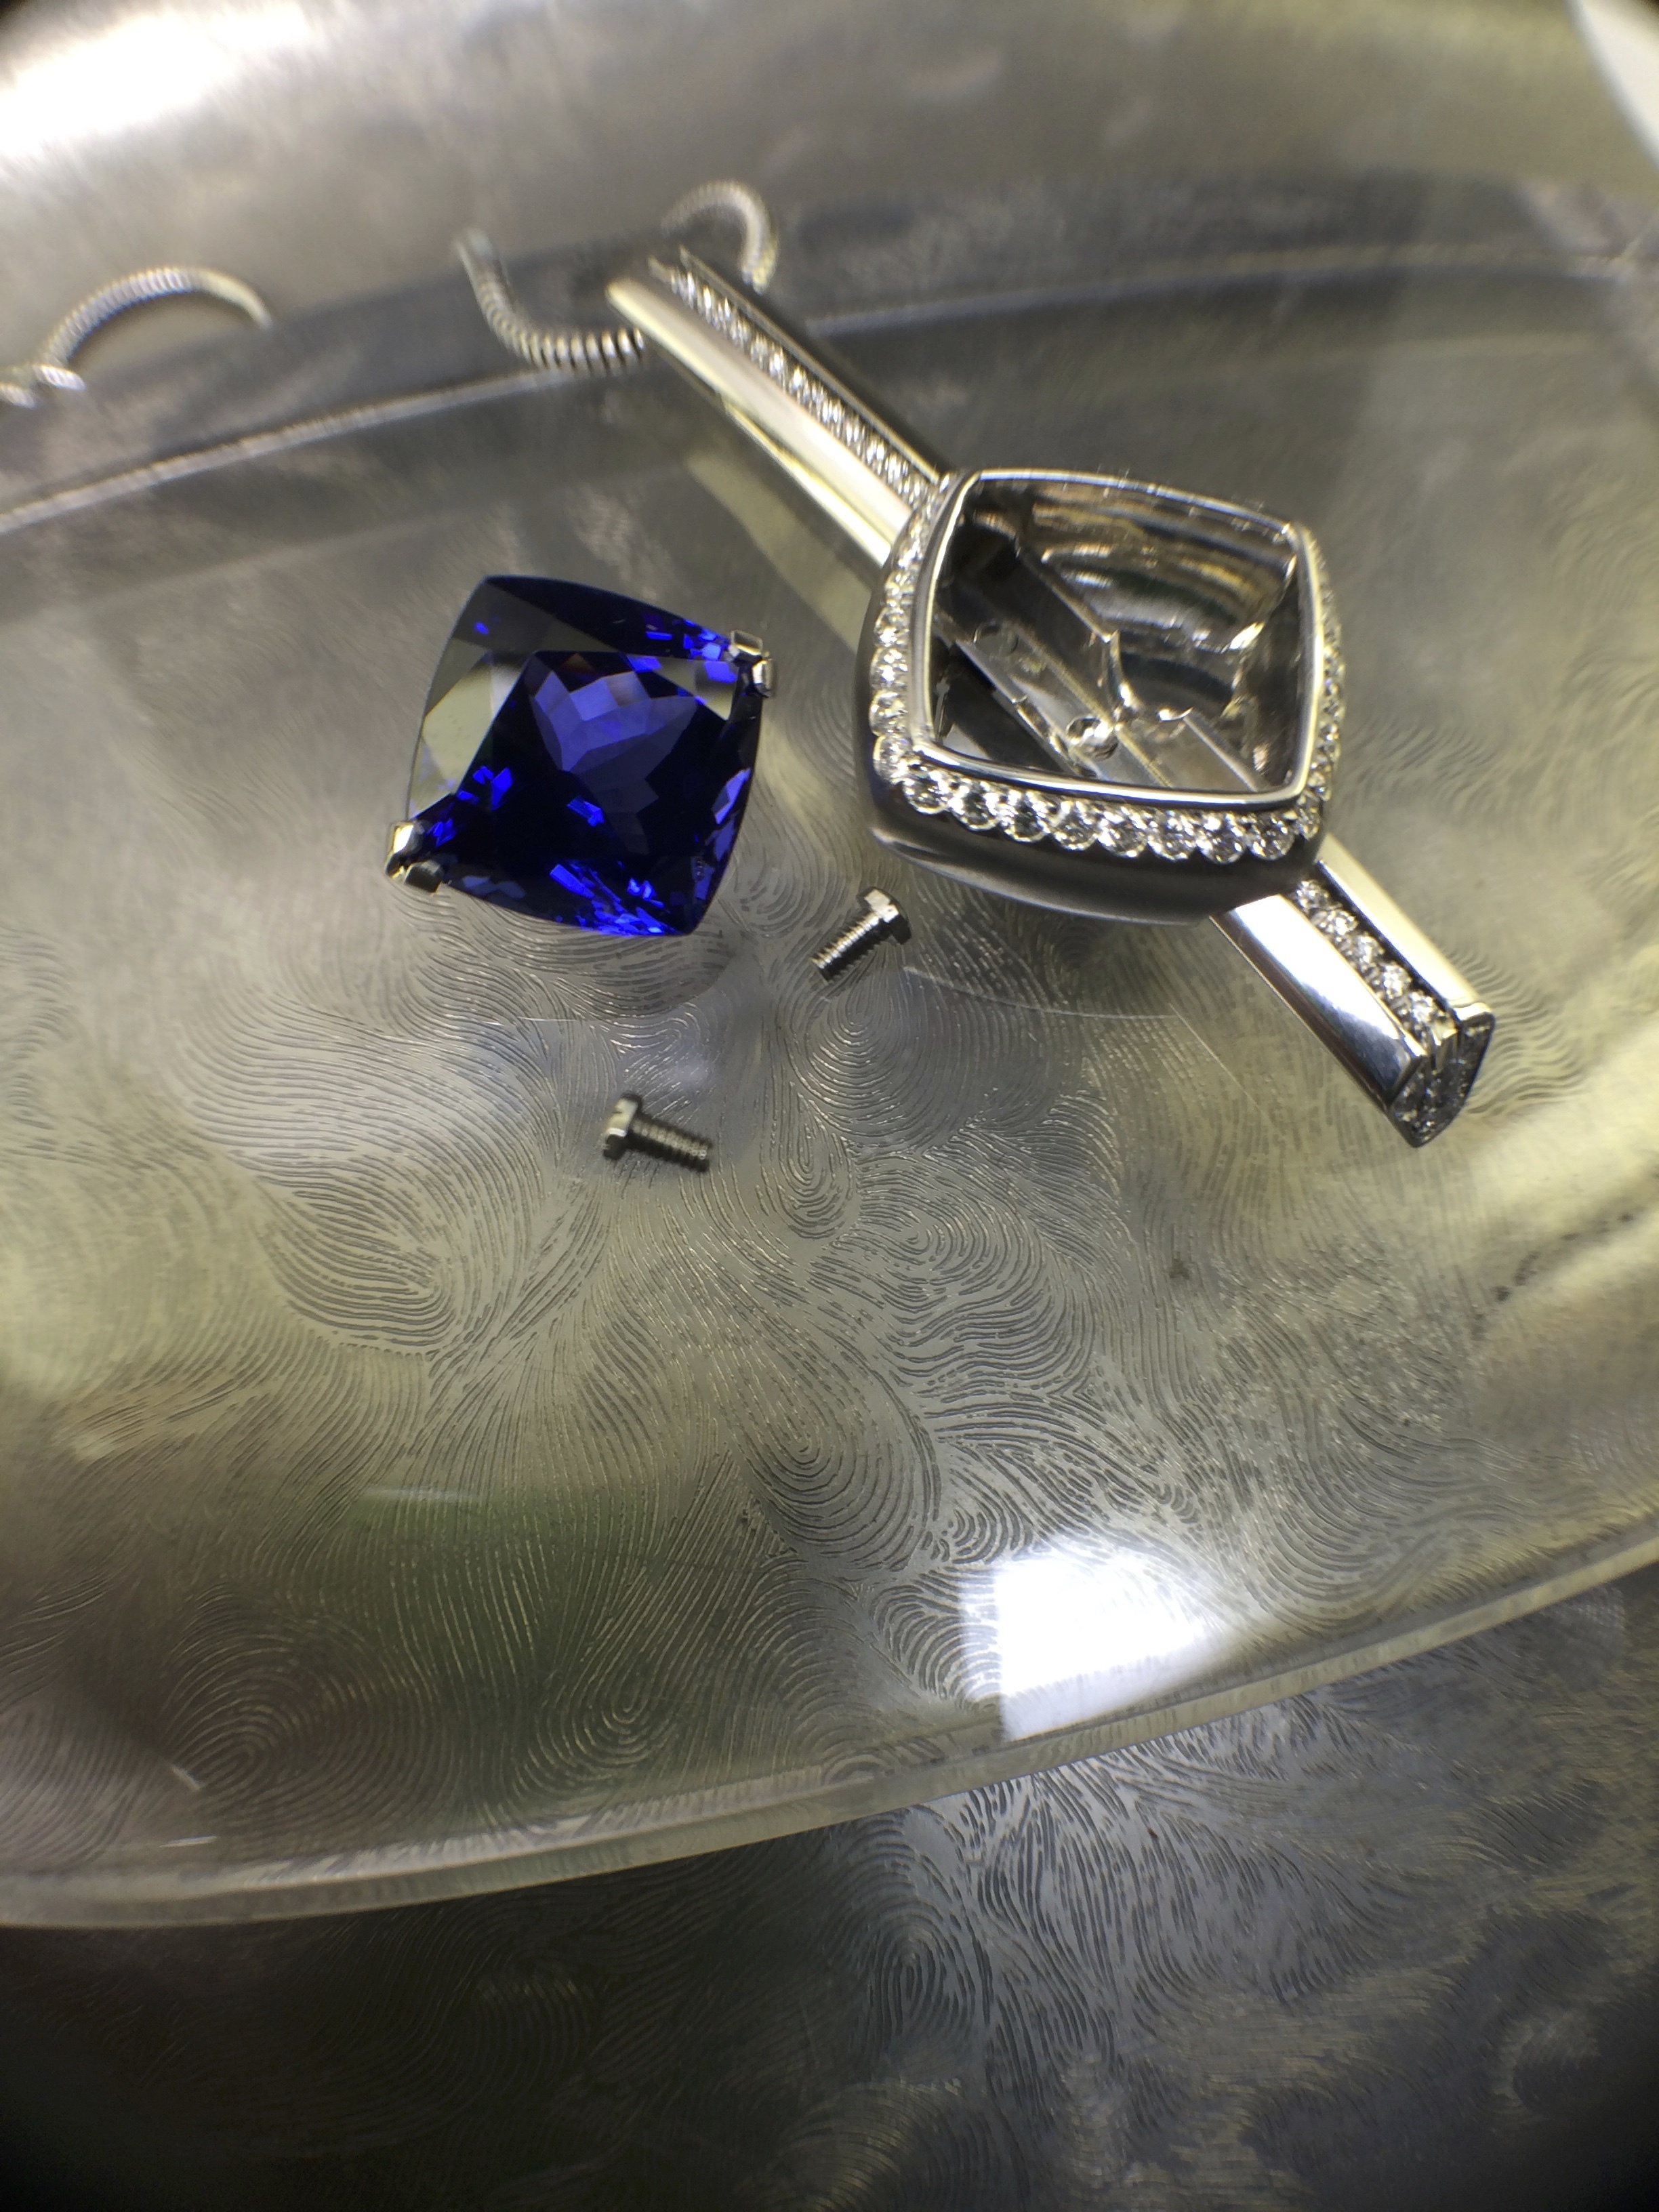
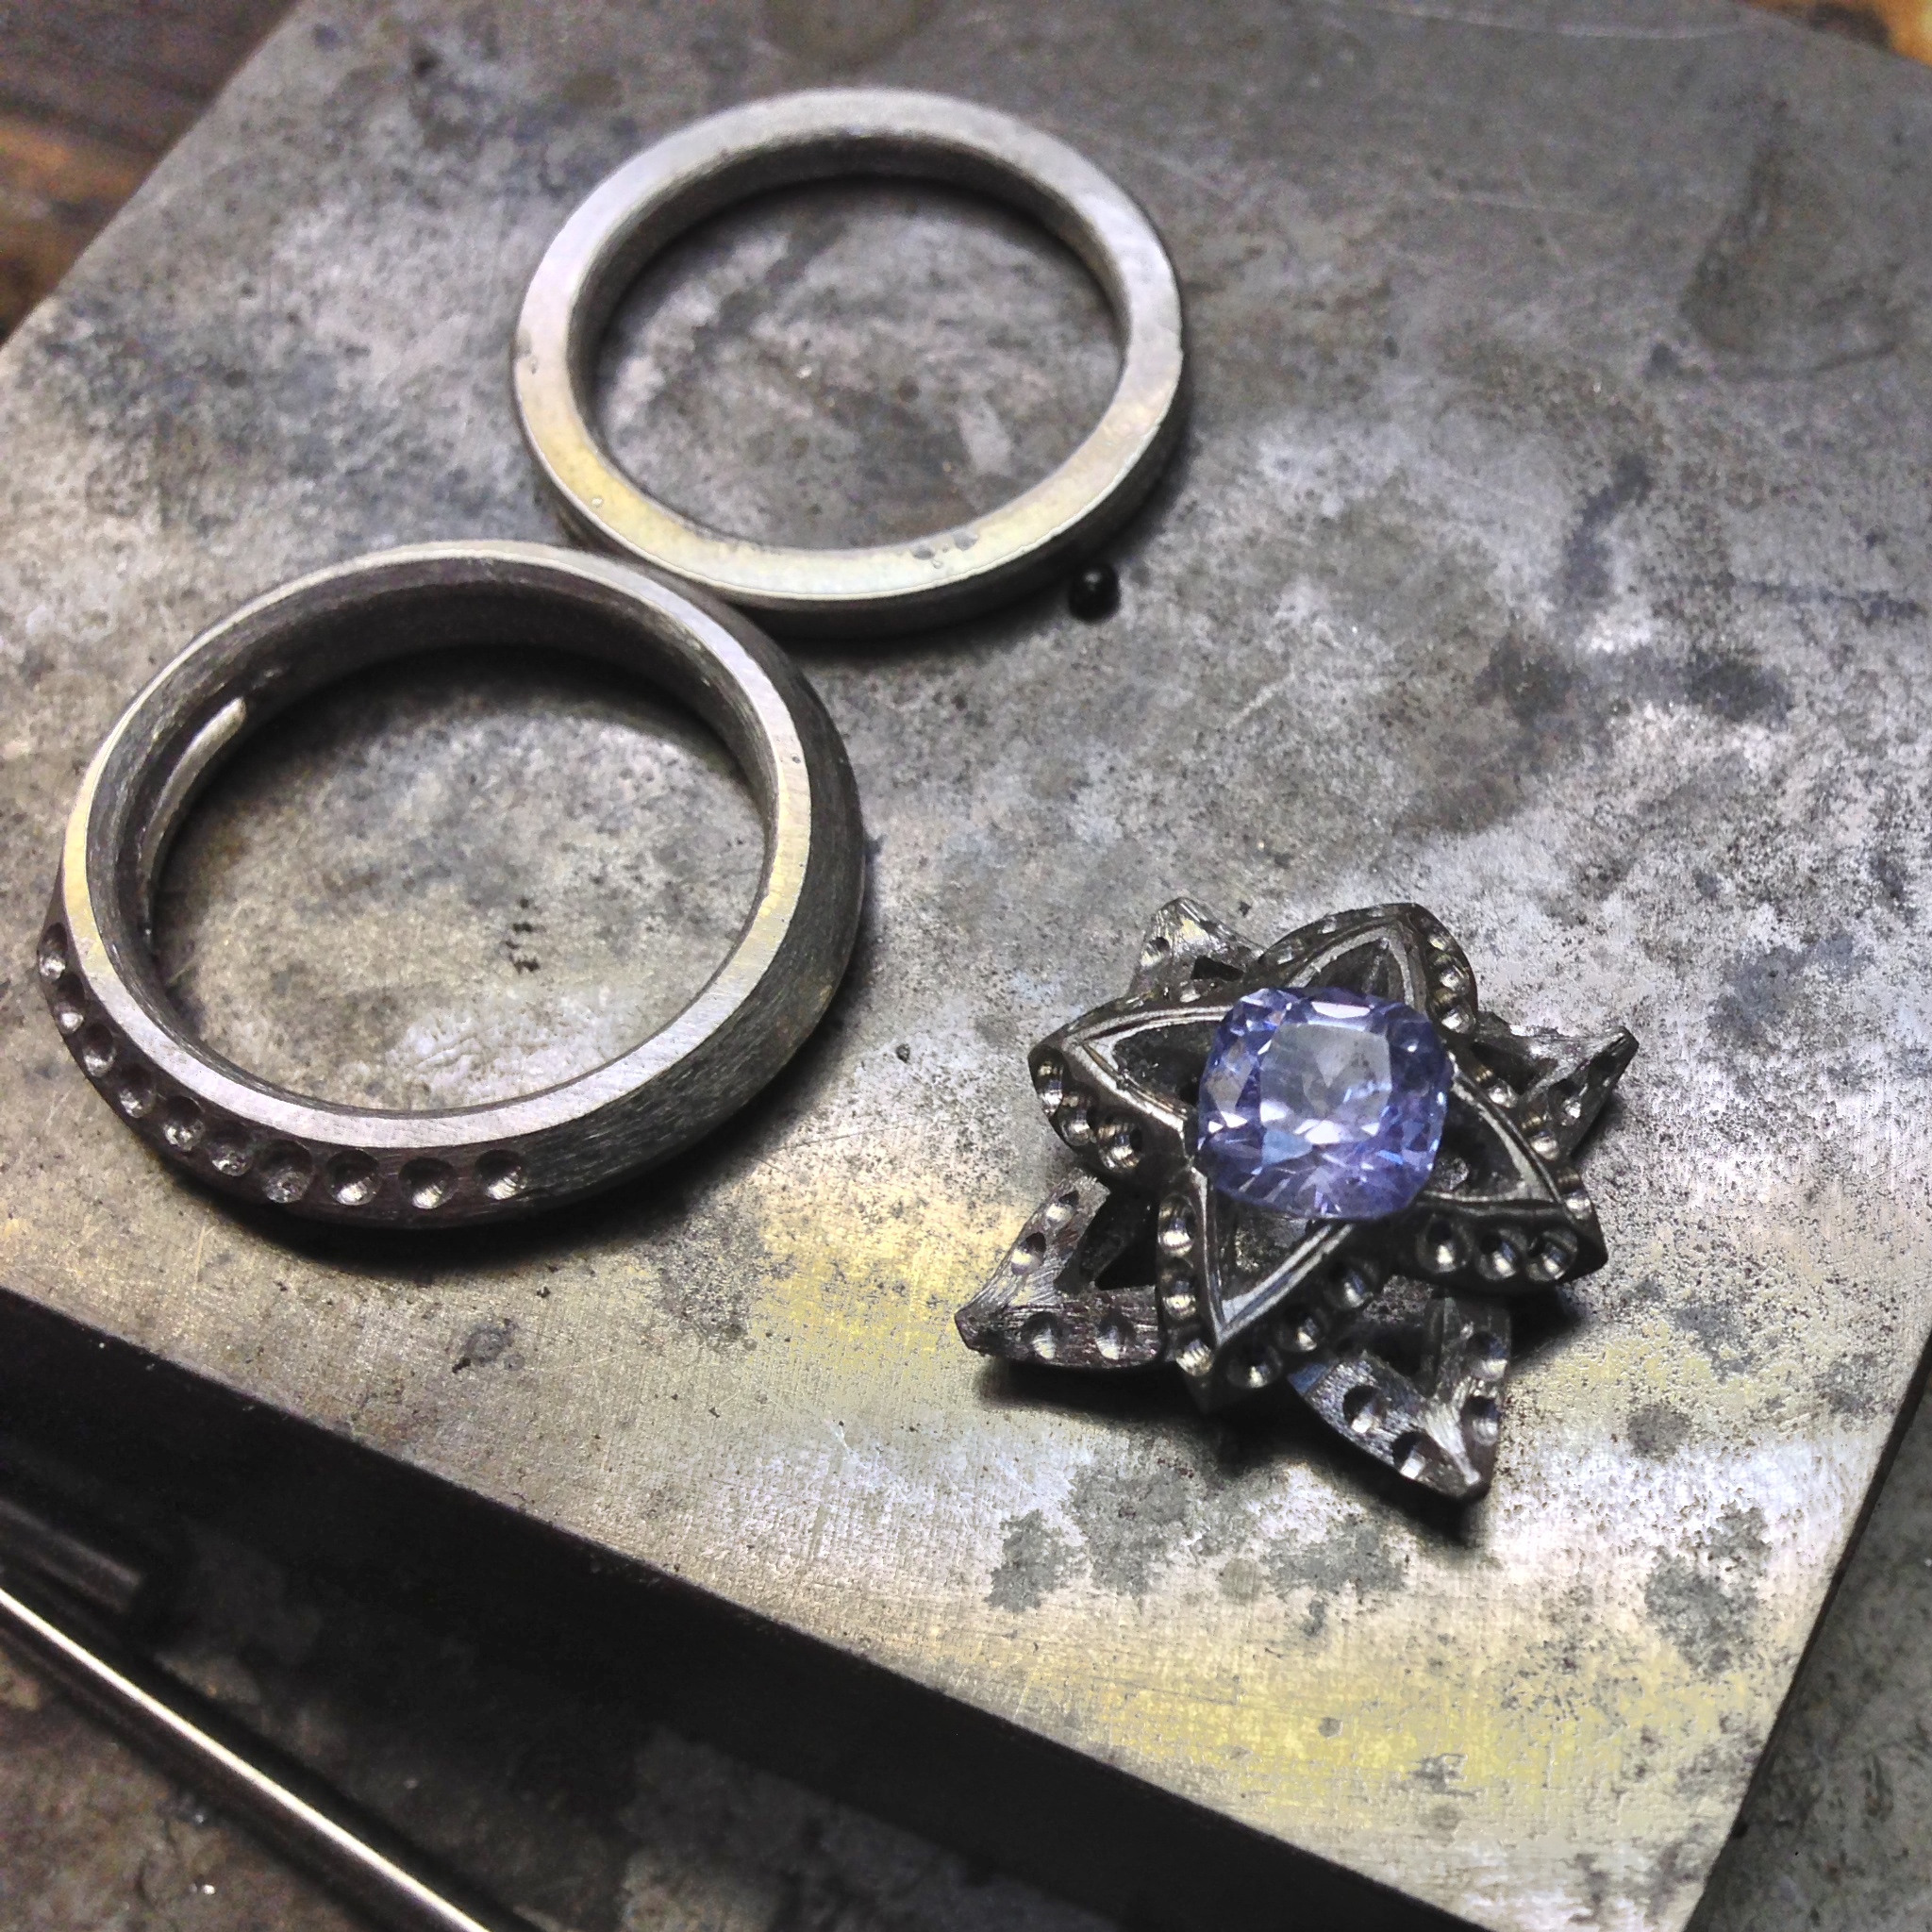
Edited: ok, I understand. The outside of the setting slips over the top end of the long stem, and the bottom end of the stem is made wider so that the setting will not slide completely off of the stem.
And the divot and cutouts on the side of the channel are there to prevent breaking the culet during hazardous movement.
Hi Betty…
Yup…
Also,
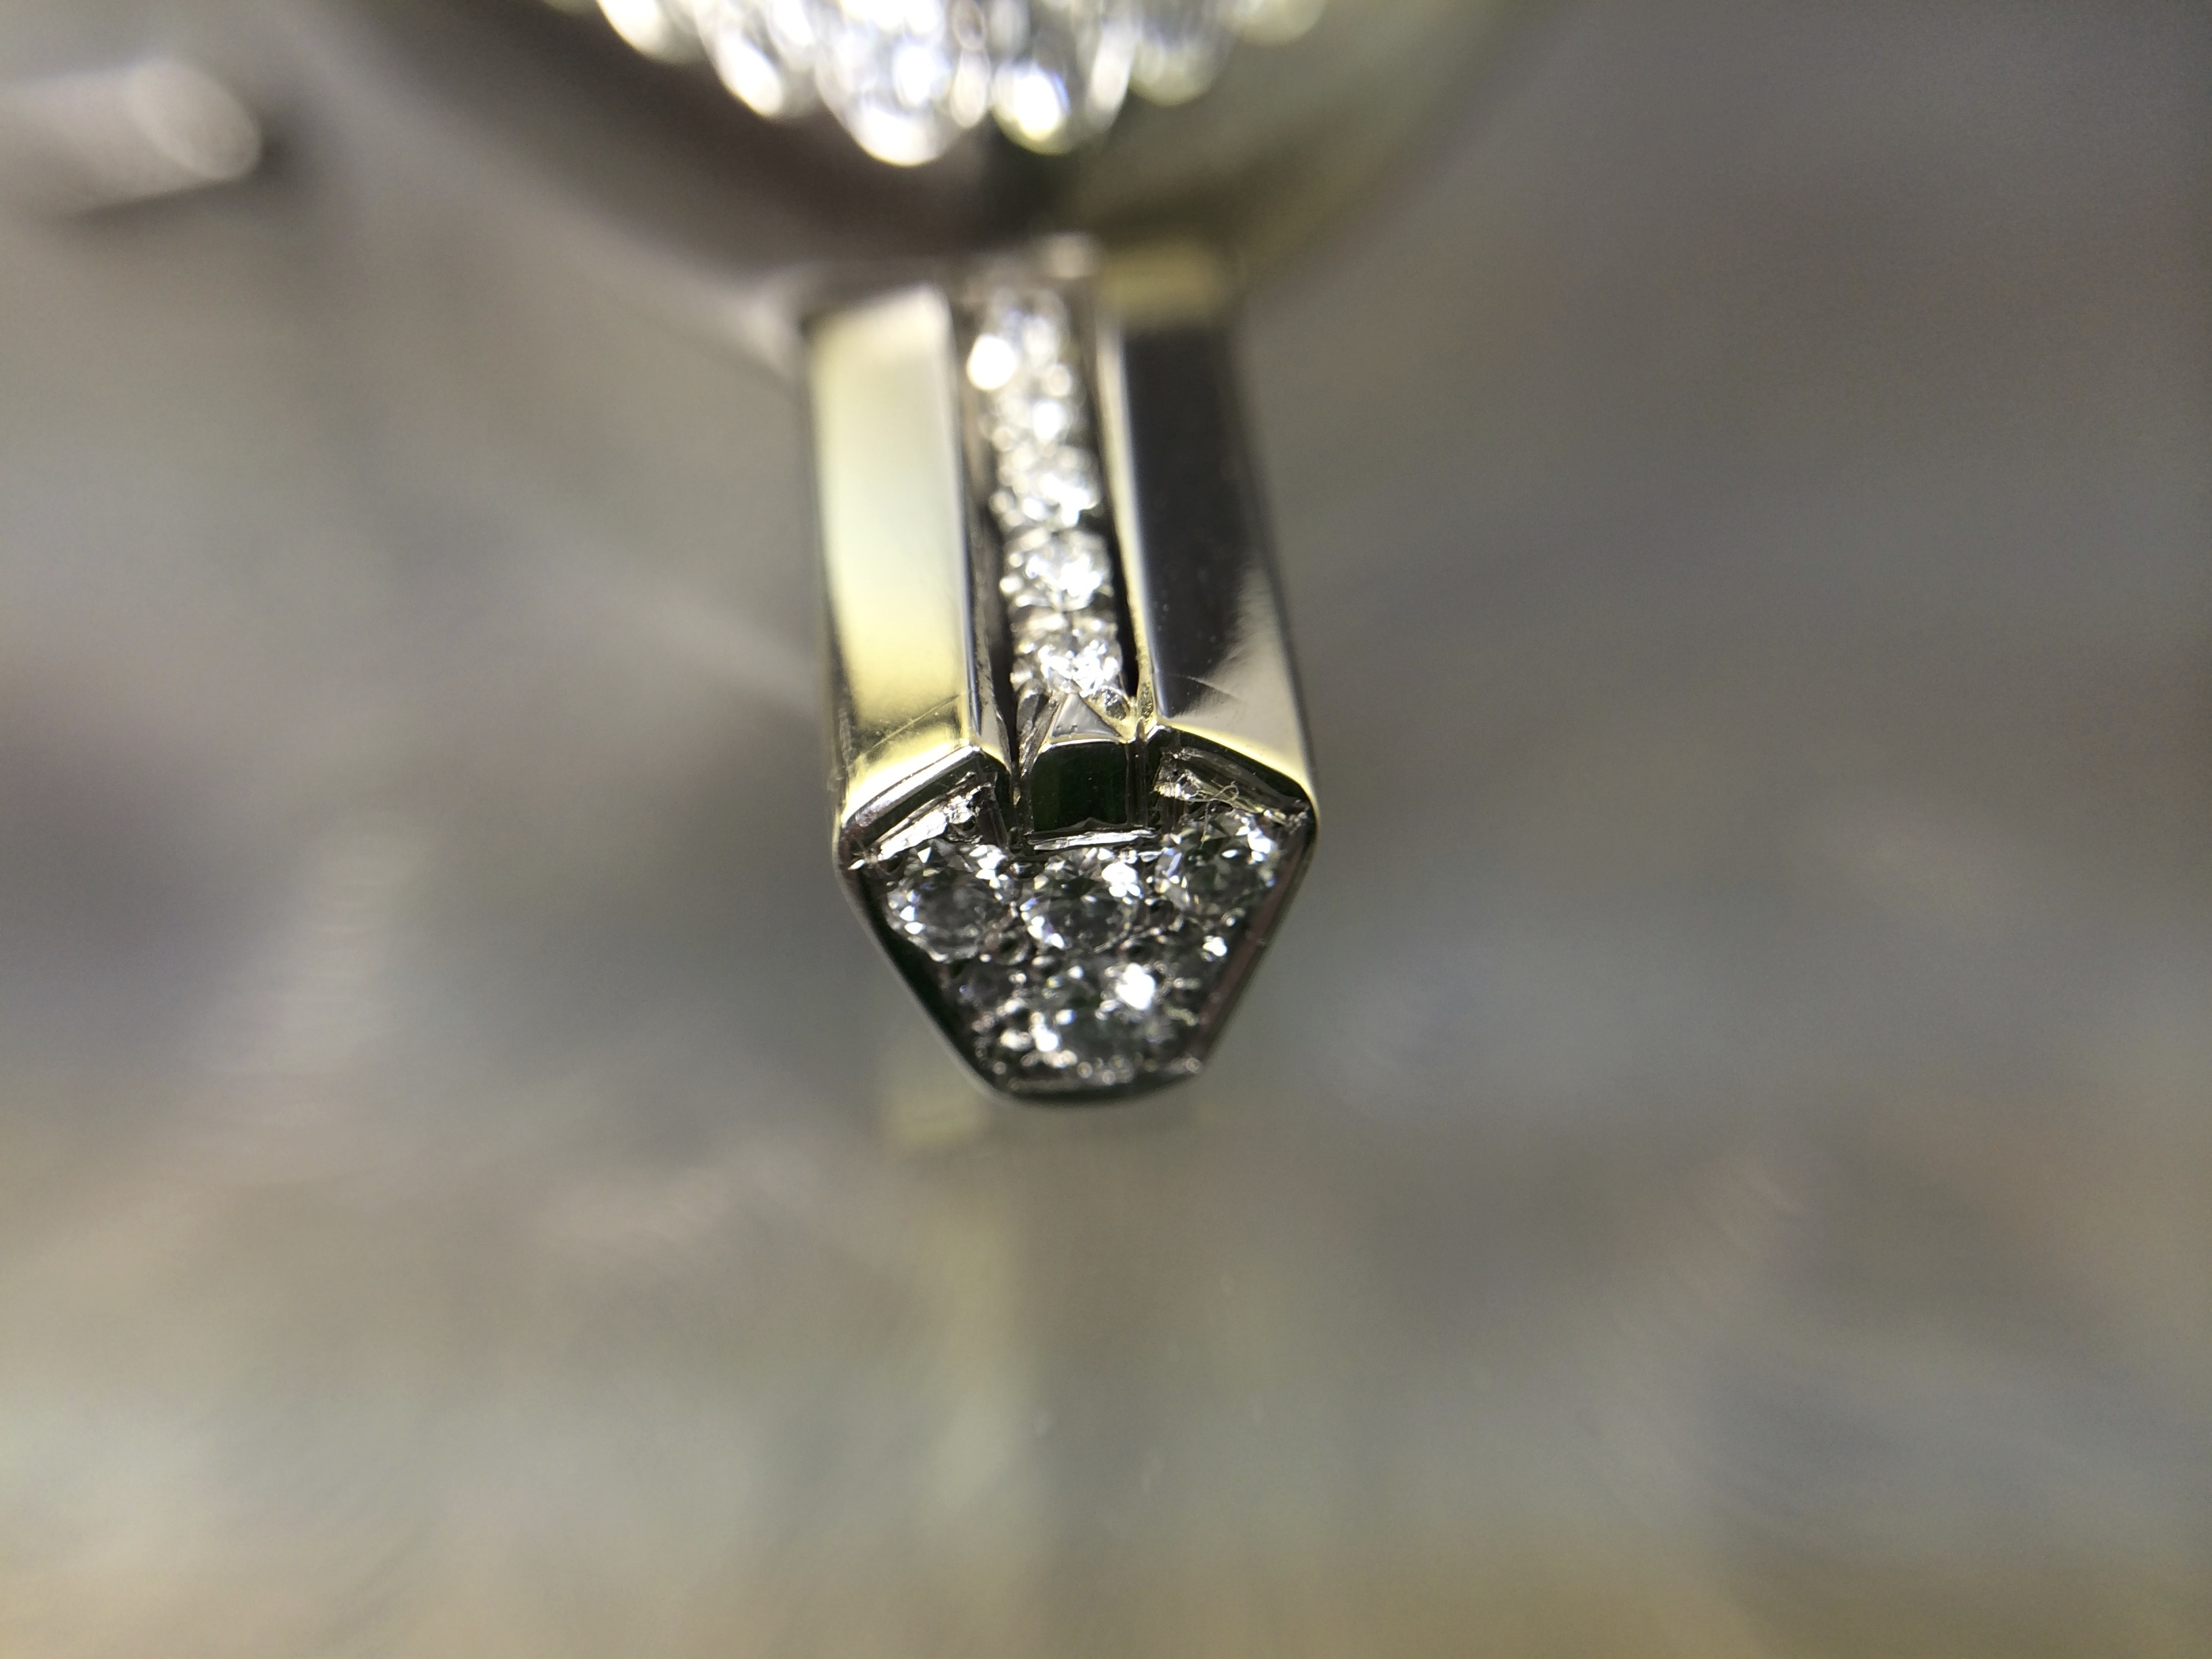
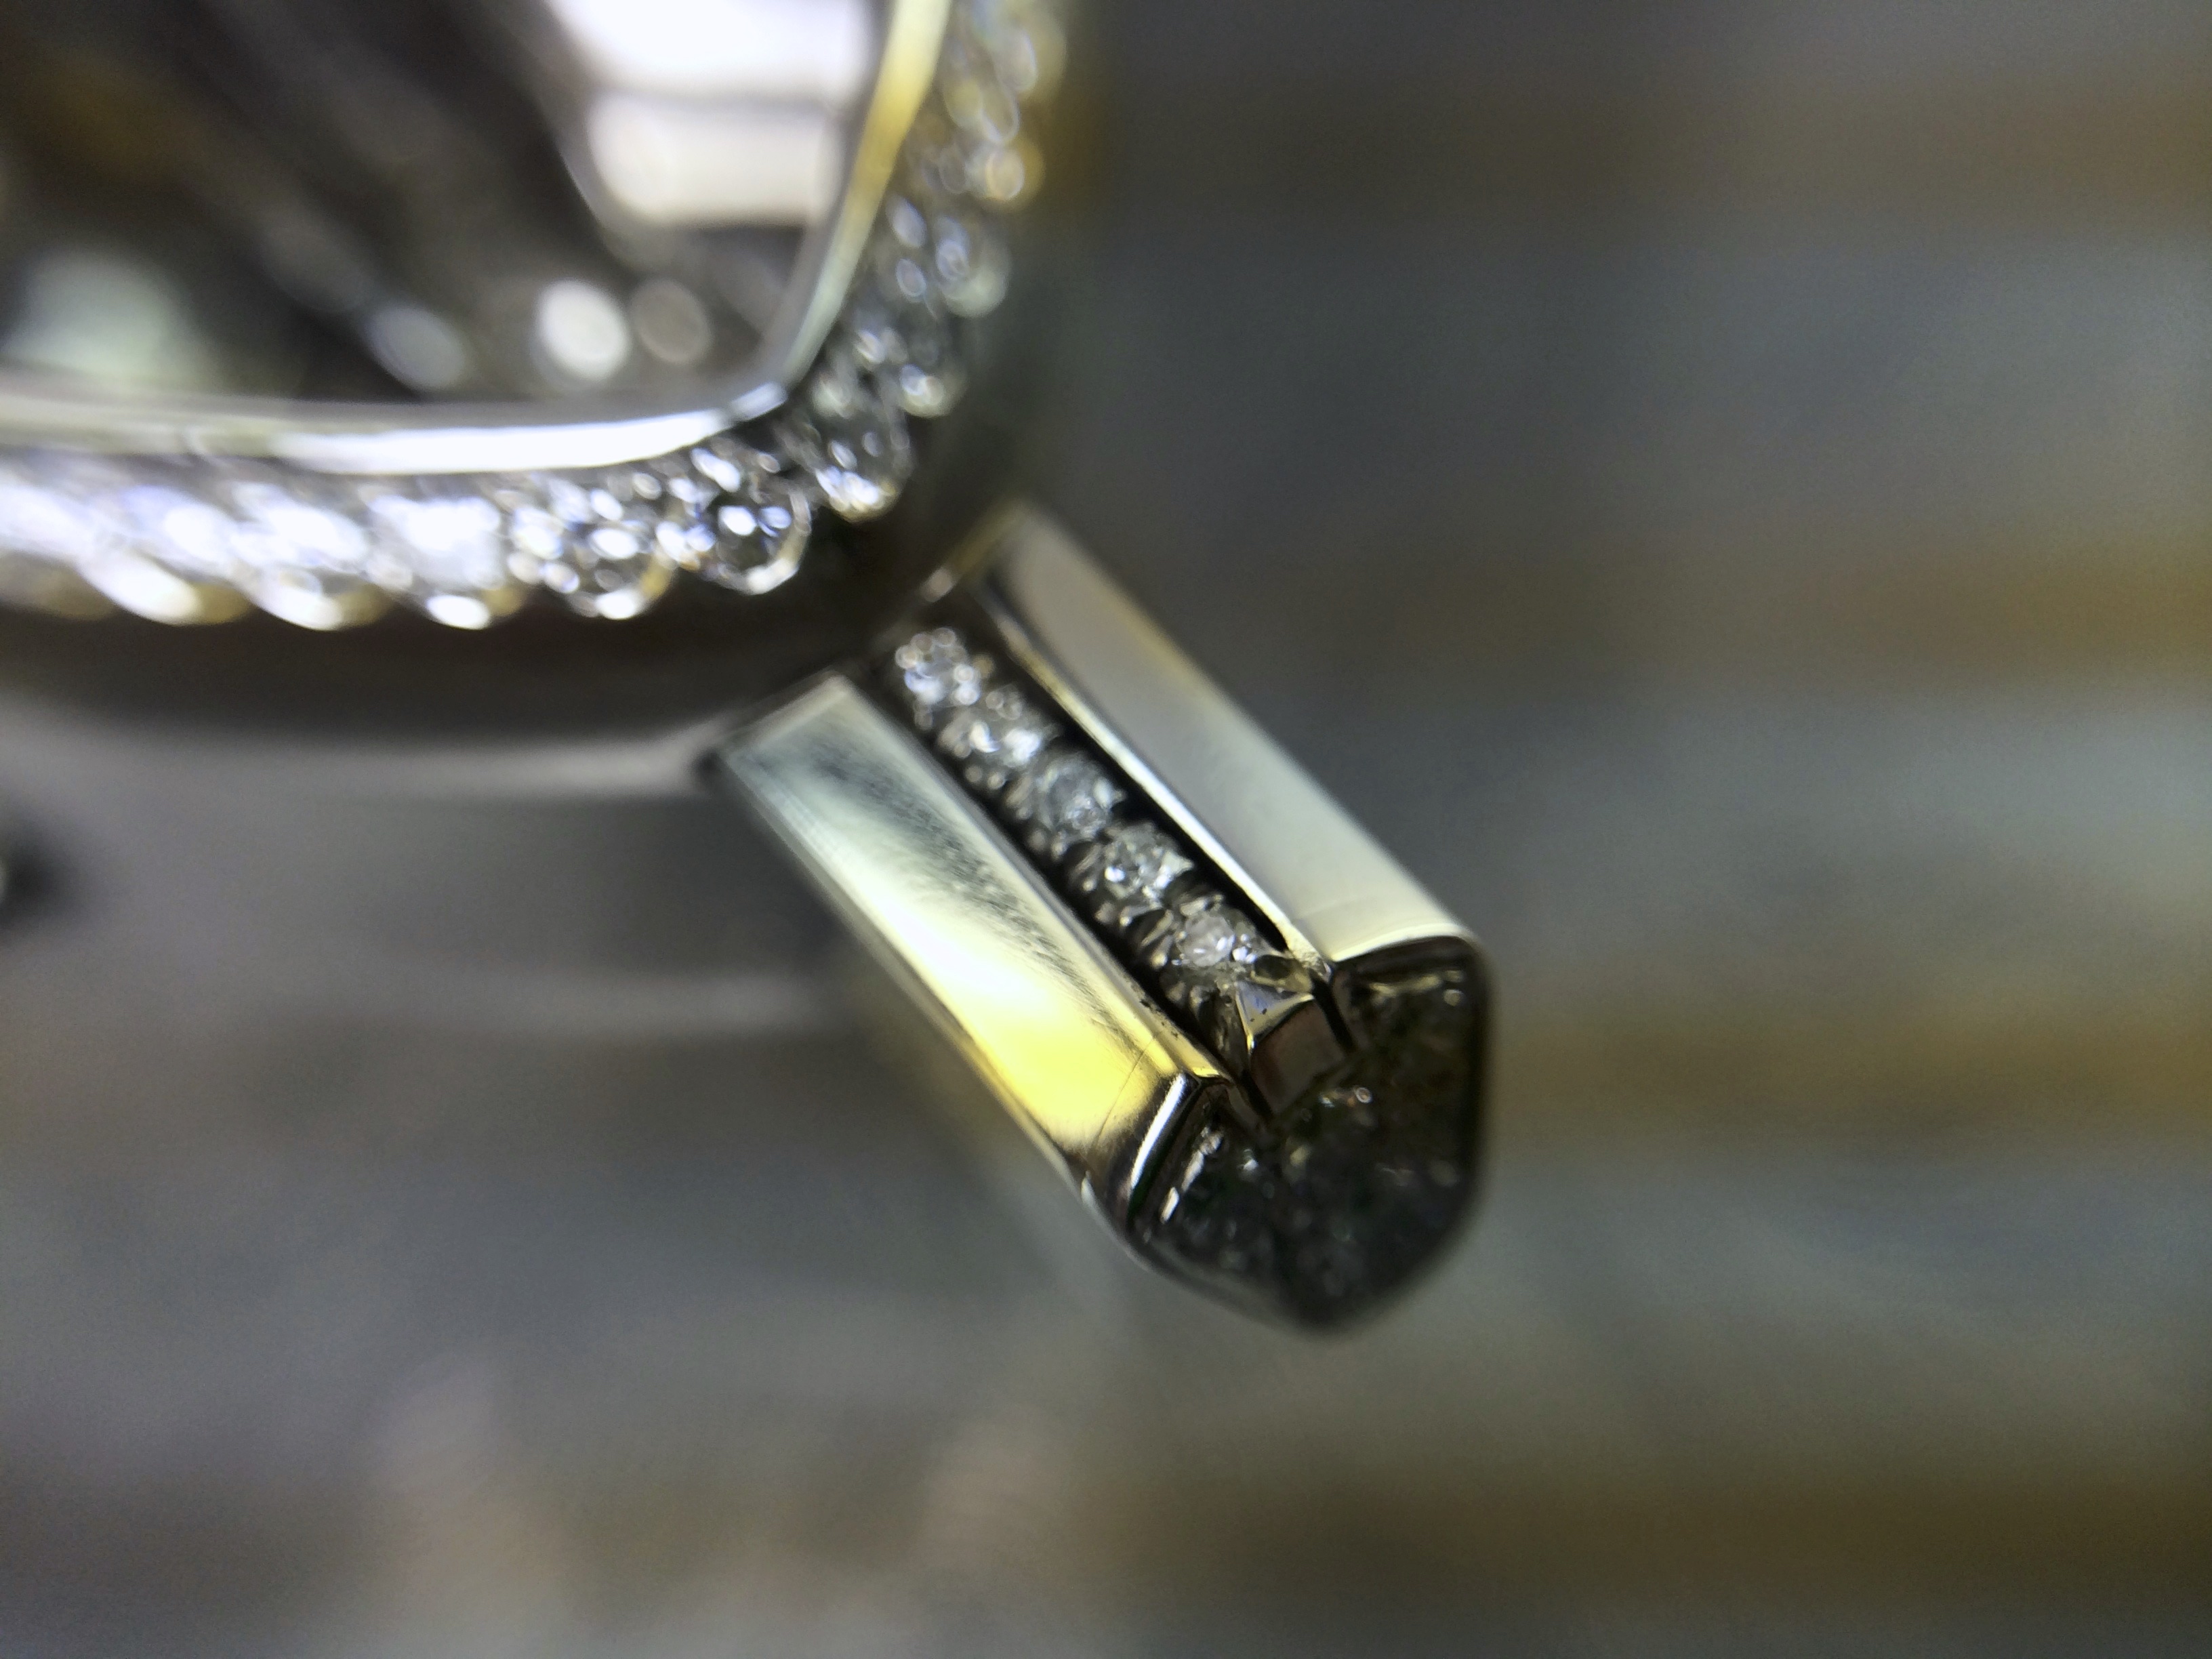
The casing around the stones, as well the channel the diamonds float in, are reflectors.
All are very highly polished, while the photography can’t capture it, the piece glows from the inside too.
I coat all the screwes with loctite so they can’t vibrate out.
Your observations are all very accurate, there are relief cuts so the cutlet, and the pavilion facets don’t get dinged.
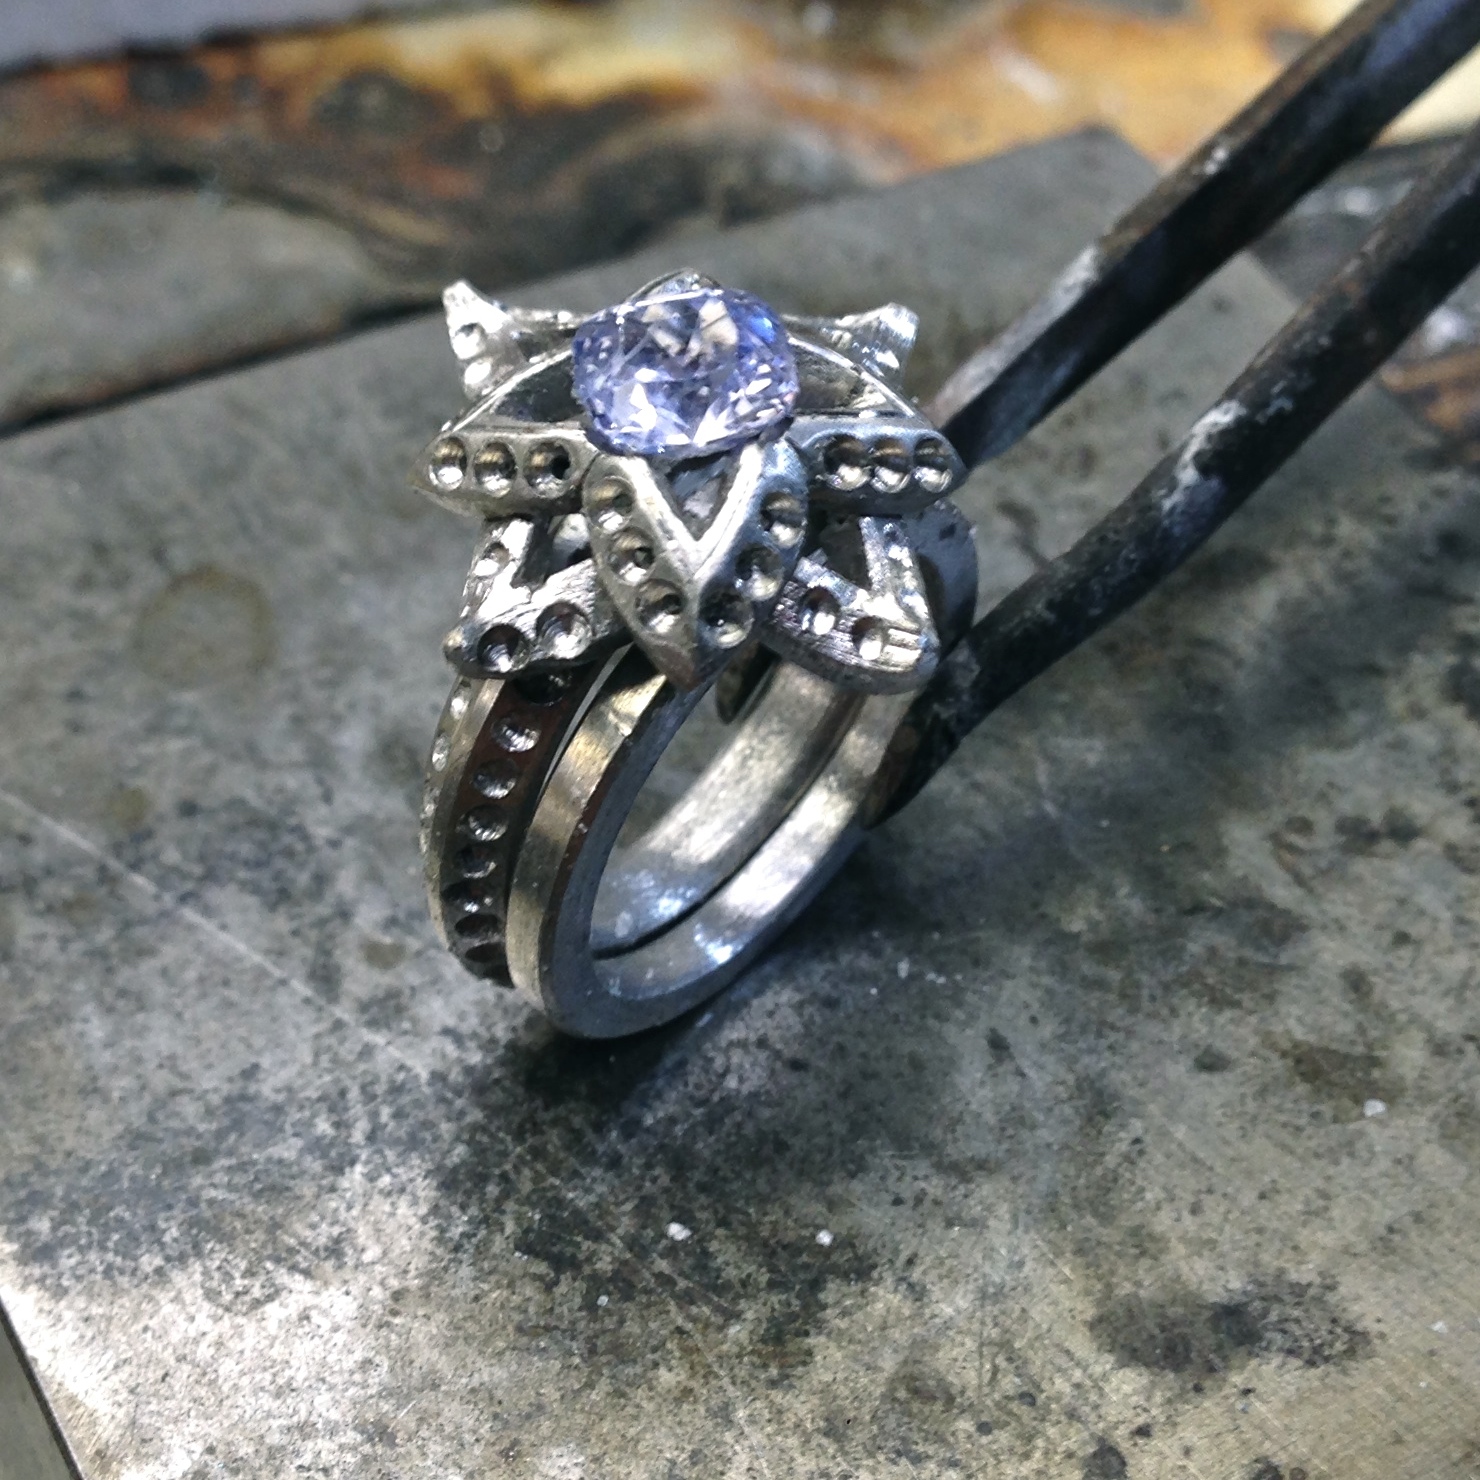
It’s assembled this way so I can go back and forth with fitting, it’s critical all gaps are even and , even though the stone is beautifully cut. It’s not square, only off by a few thousandths , but it’s important that that aspect disseapears…
Thanks,
Jim
1 Like
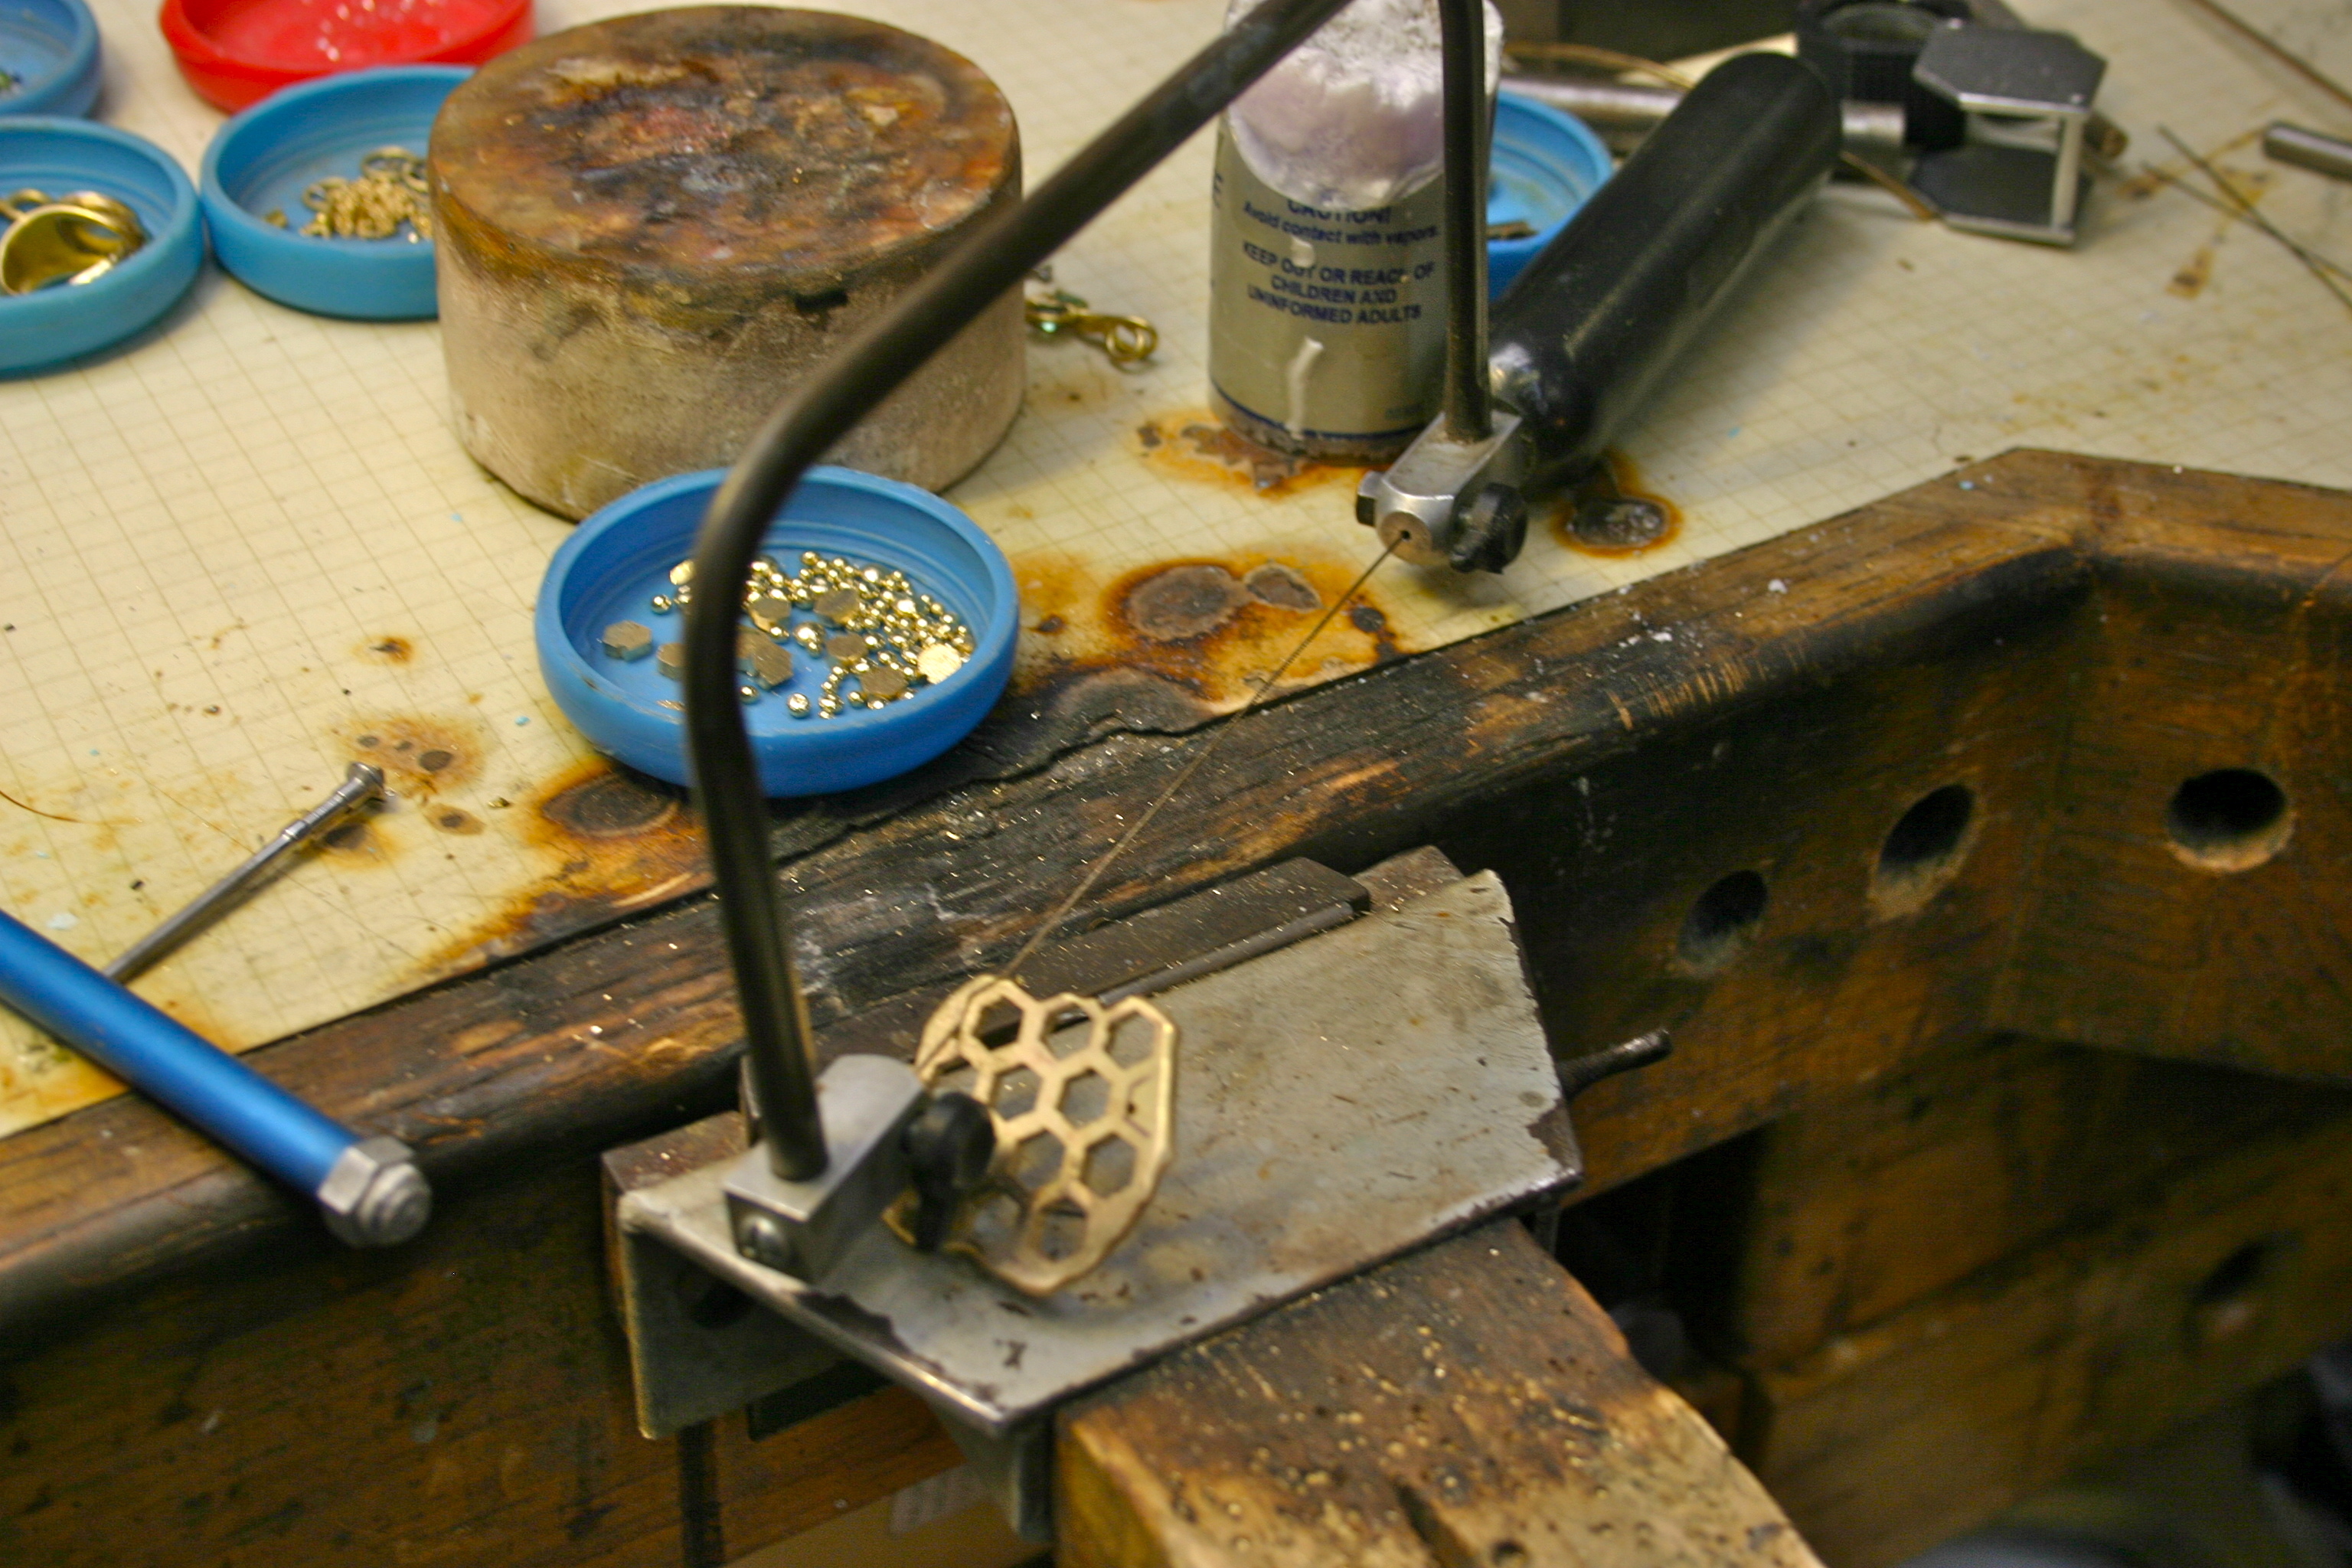
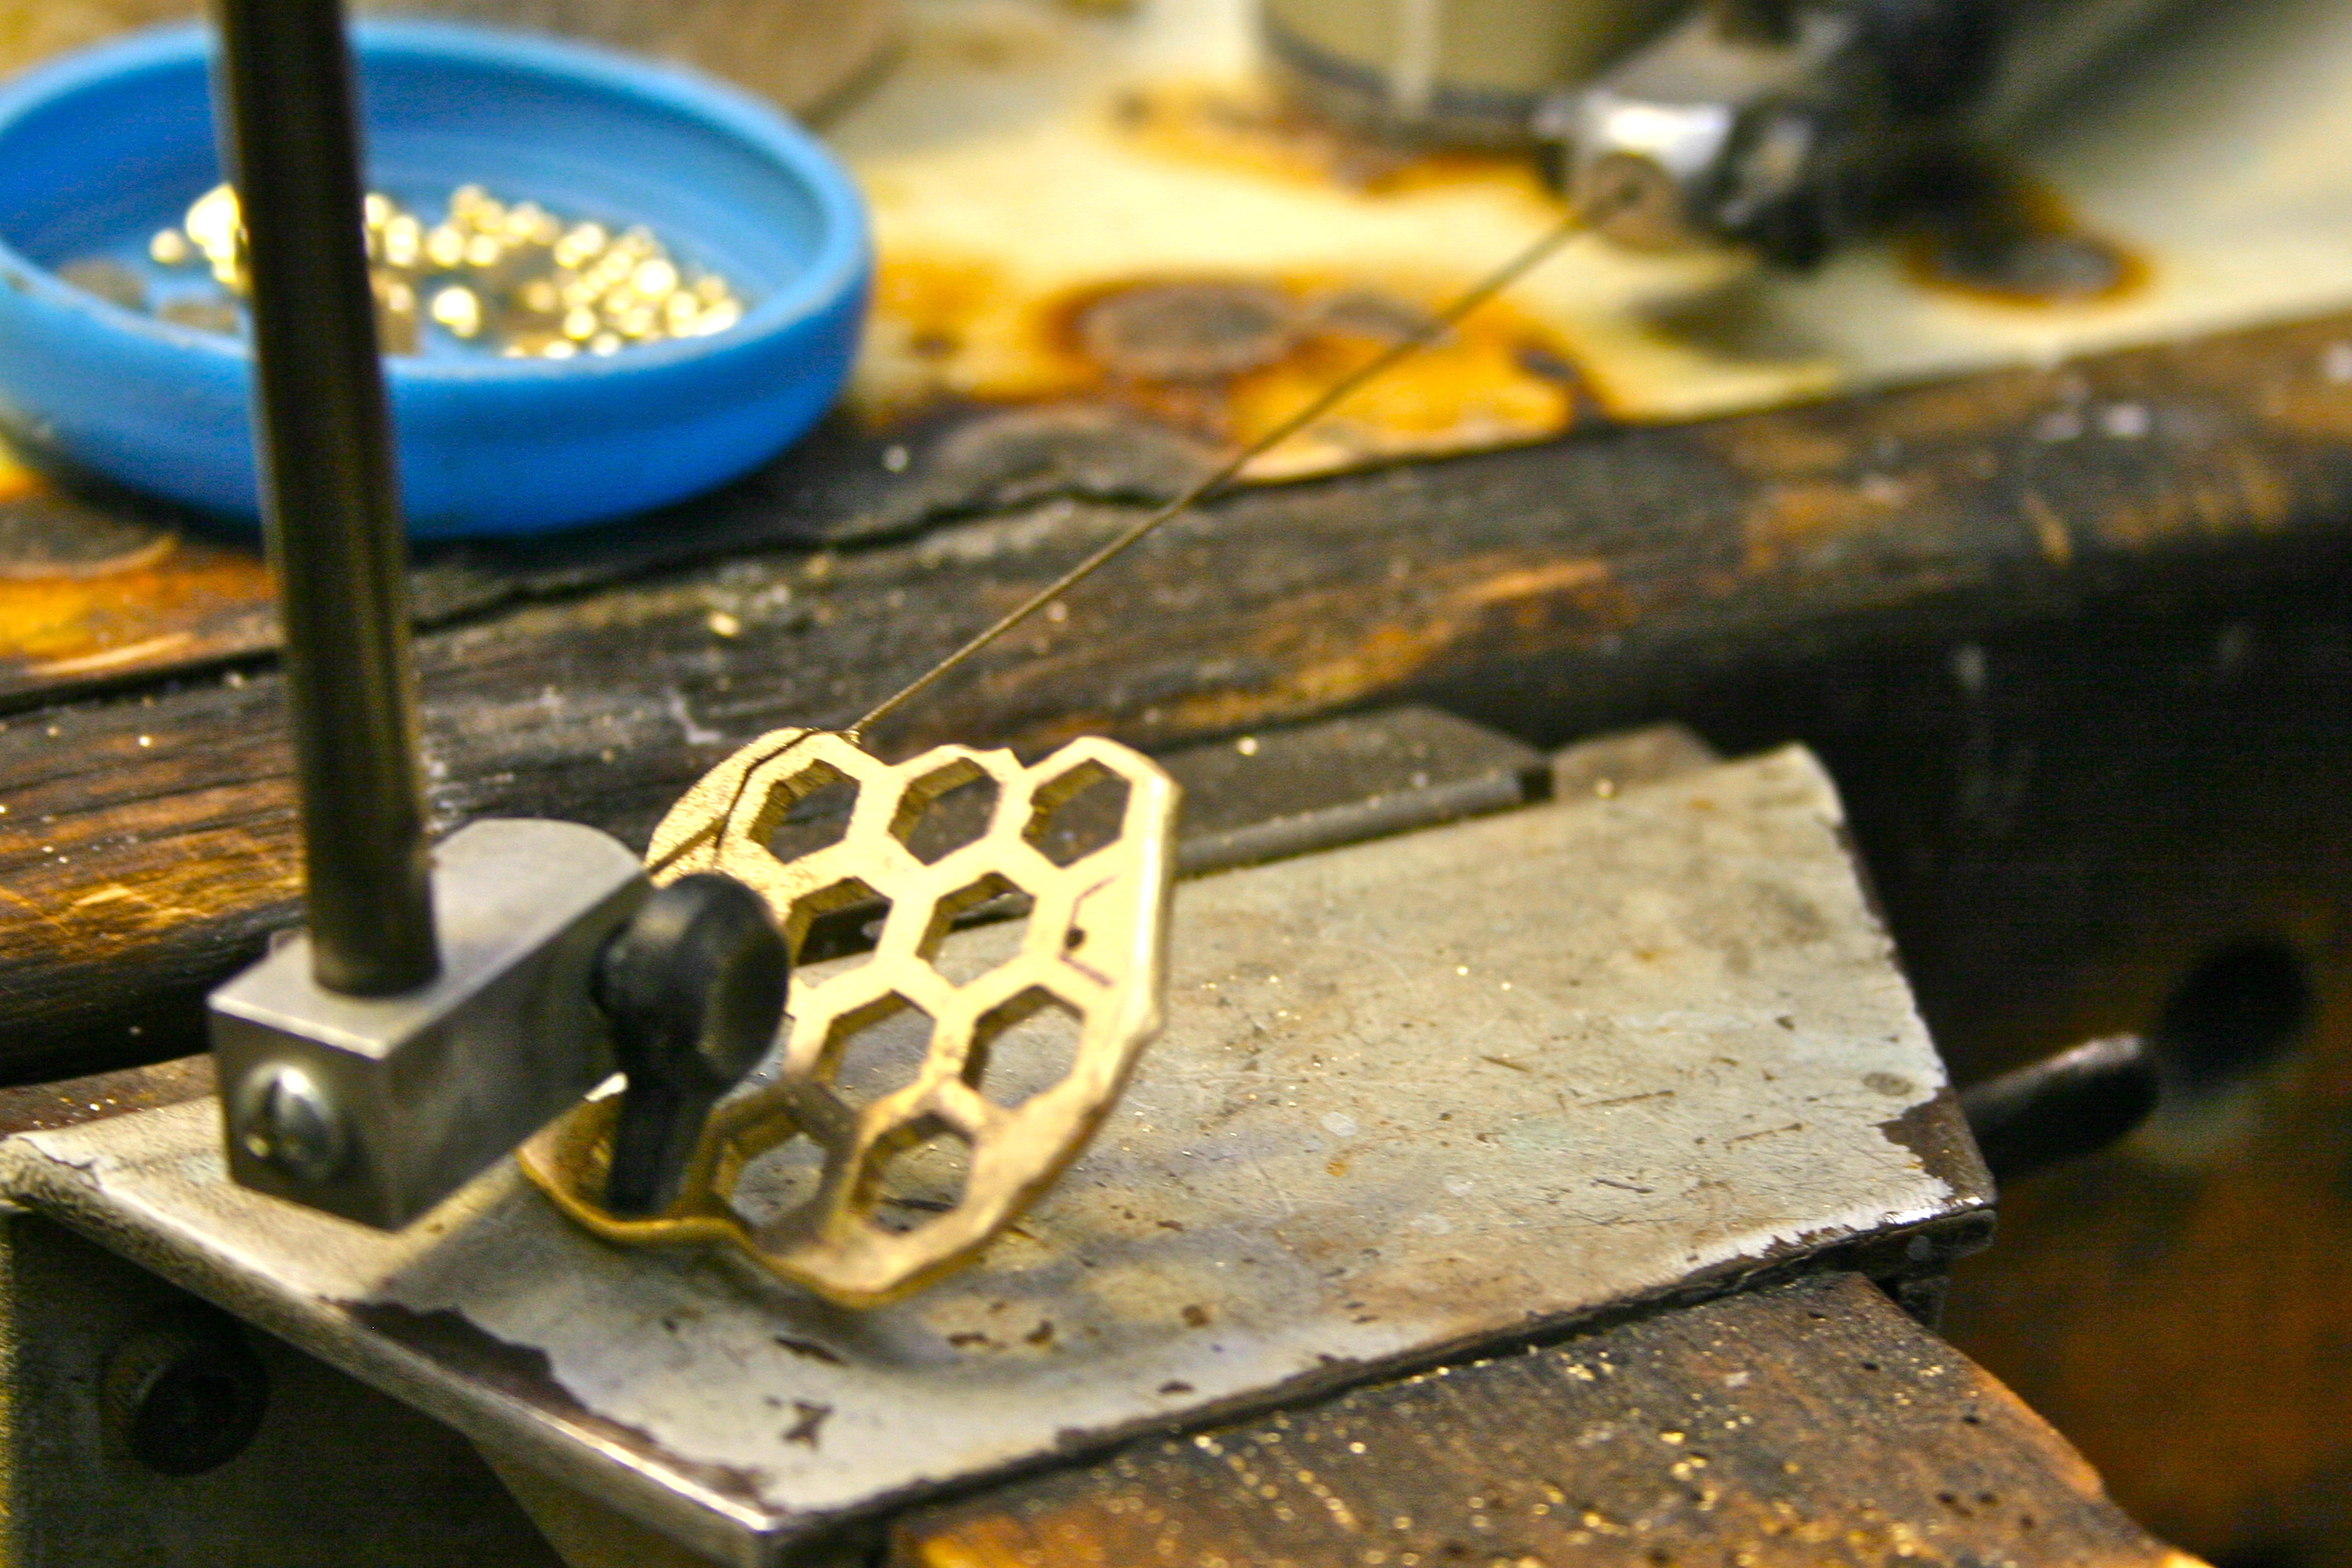
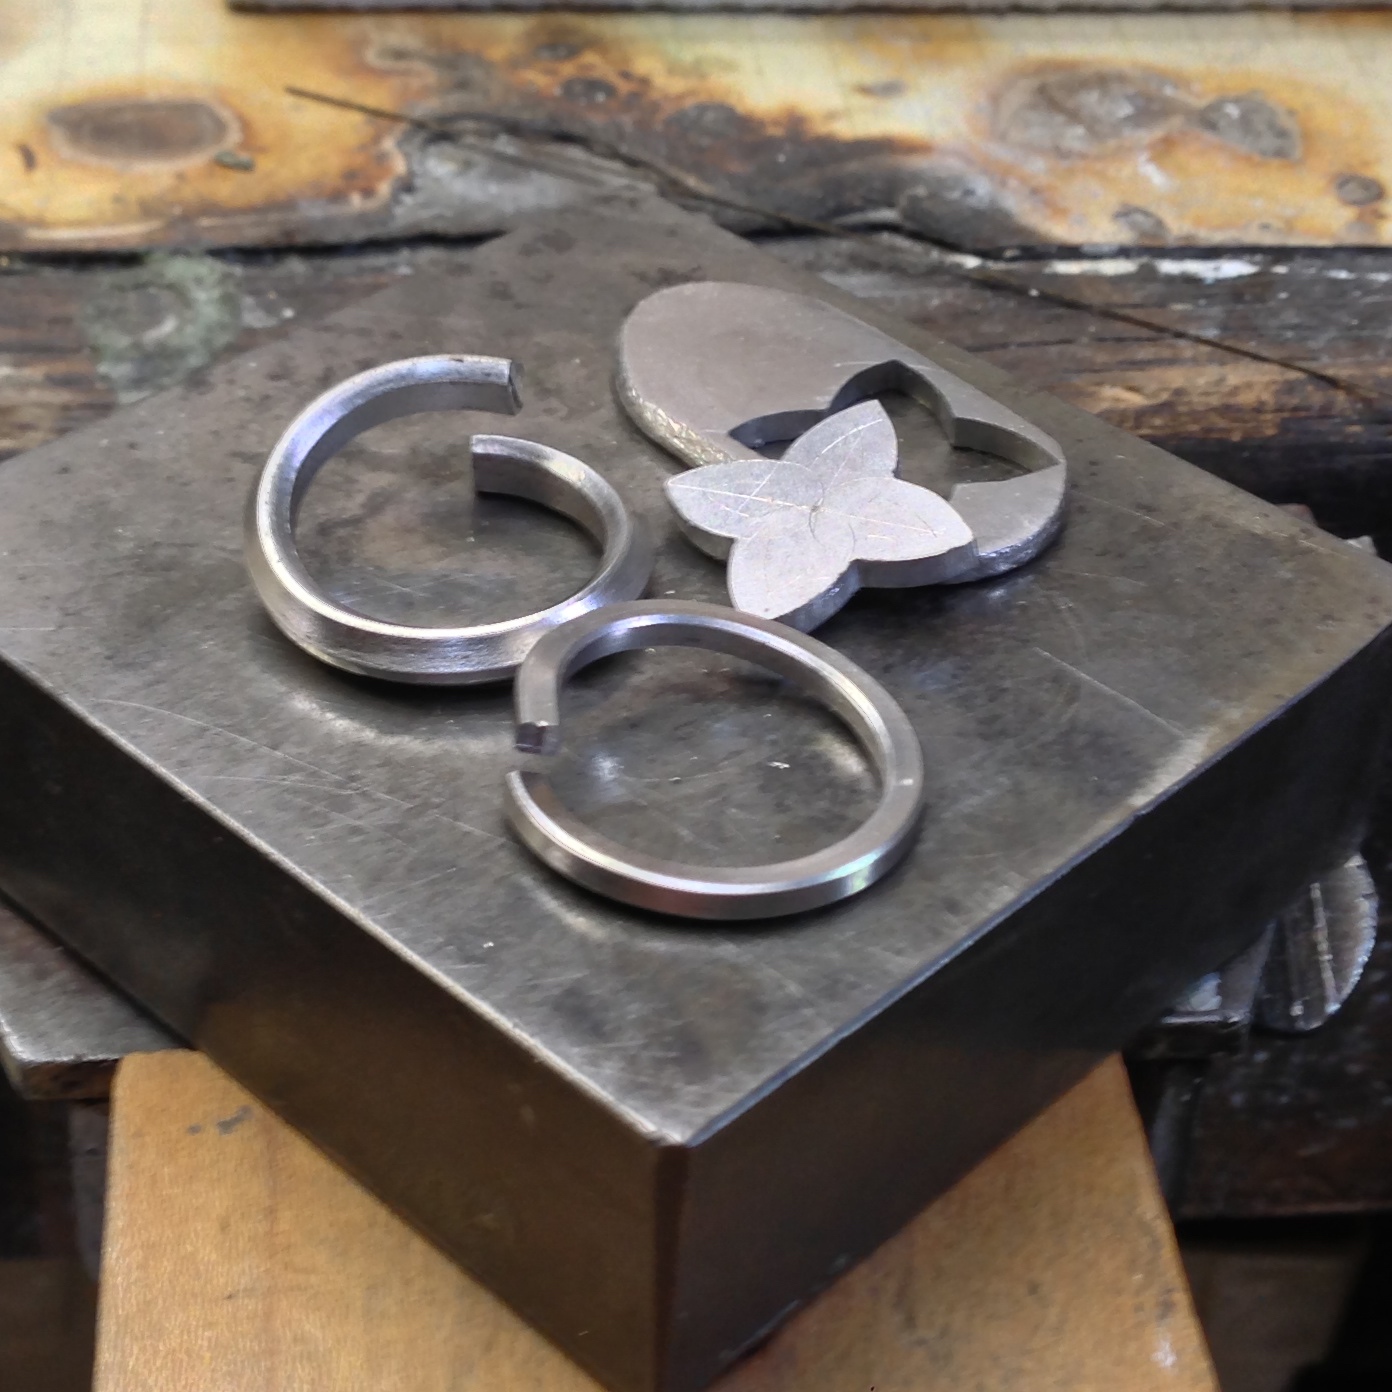
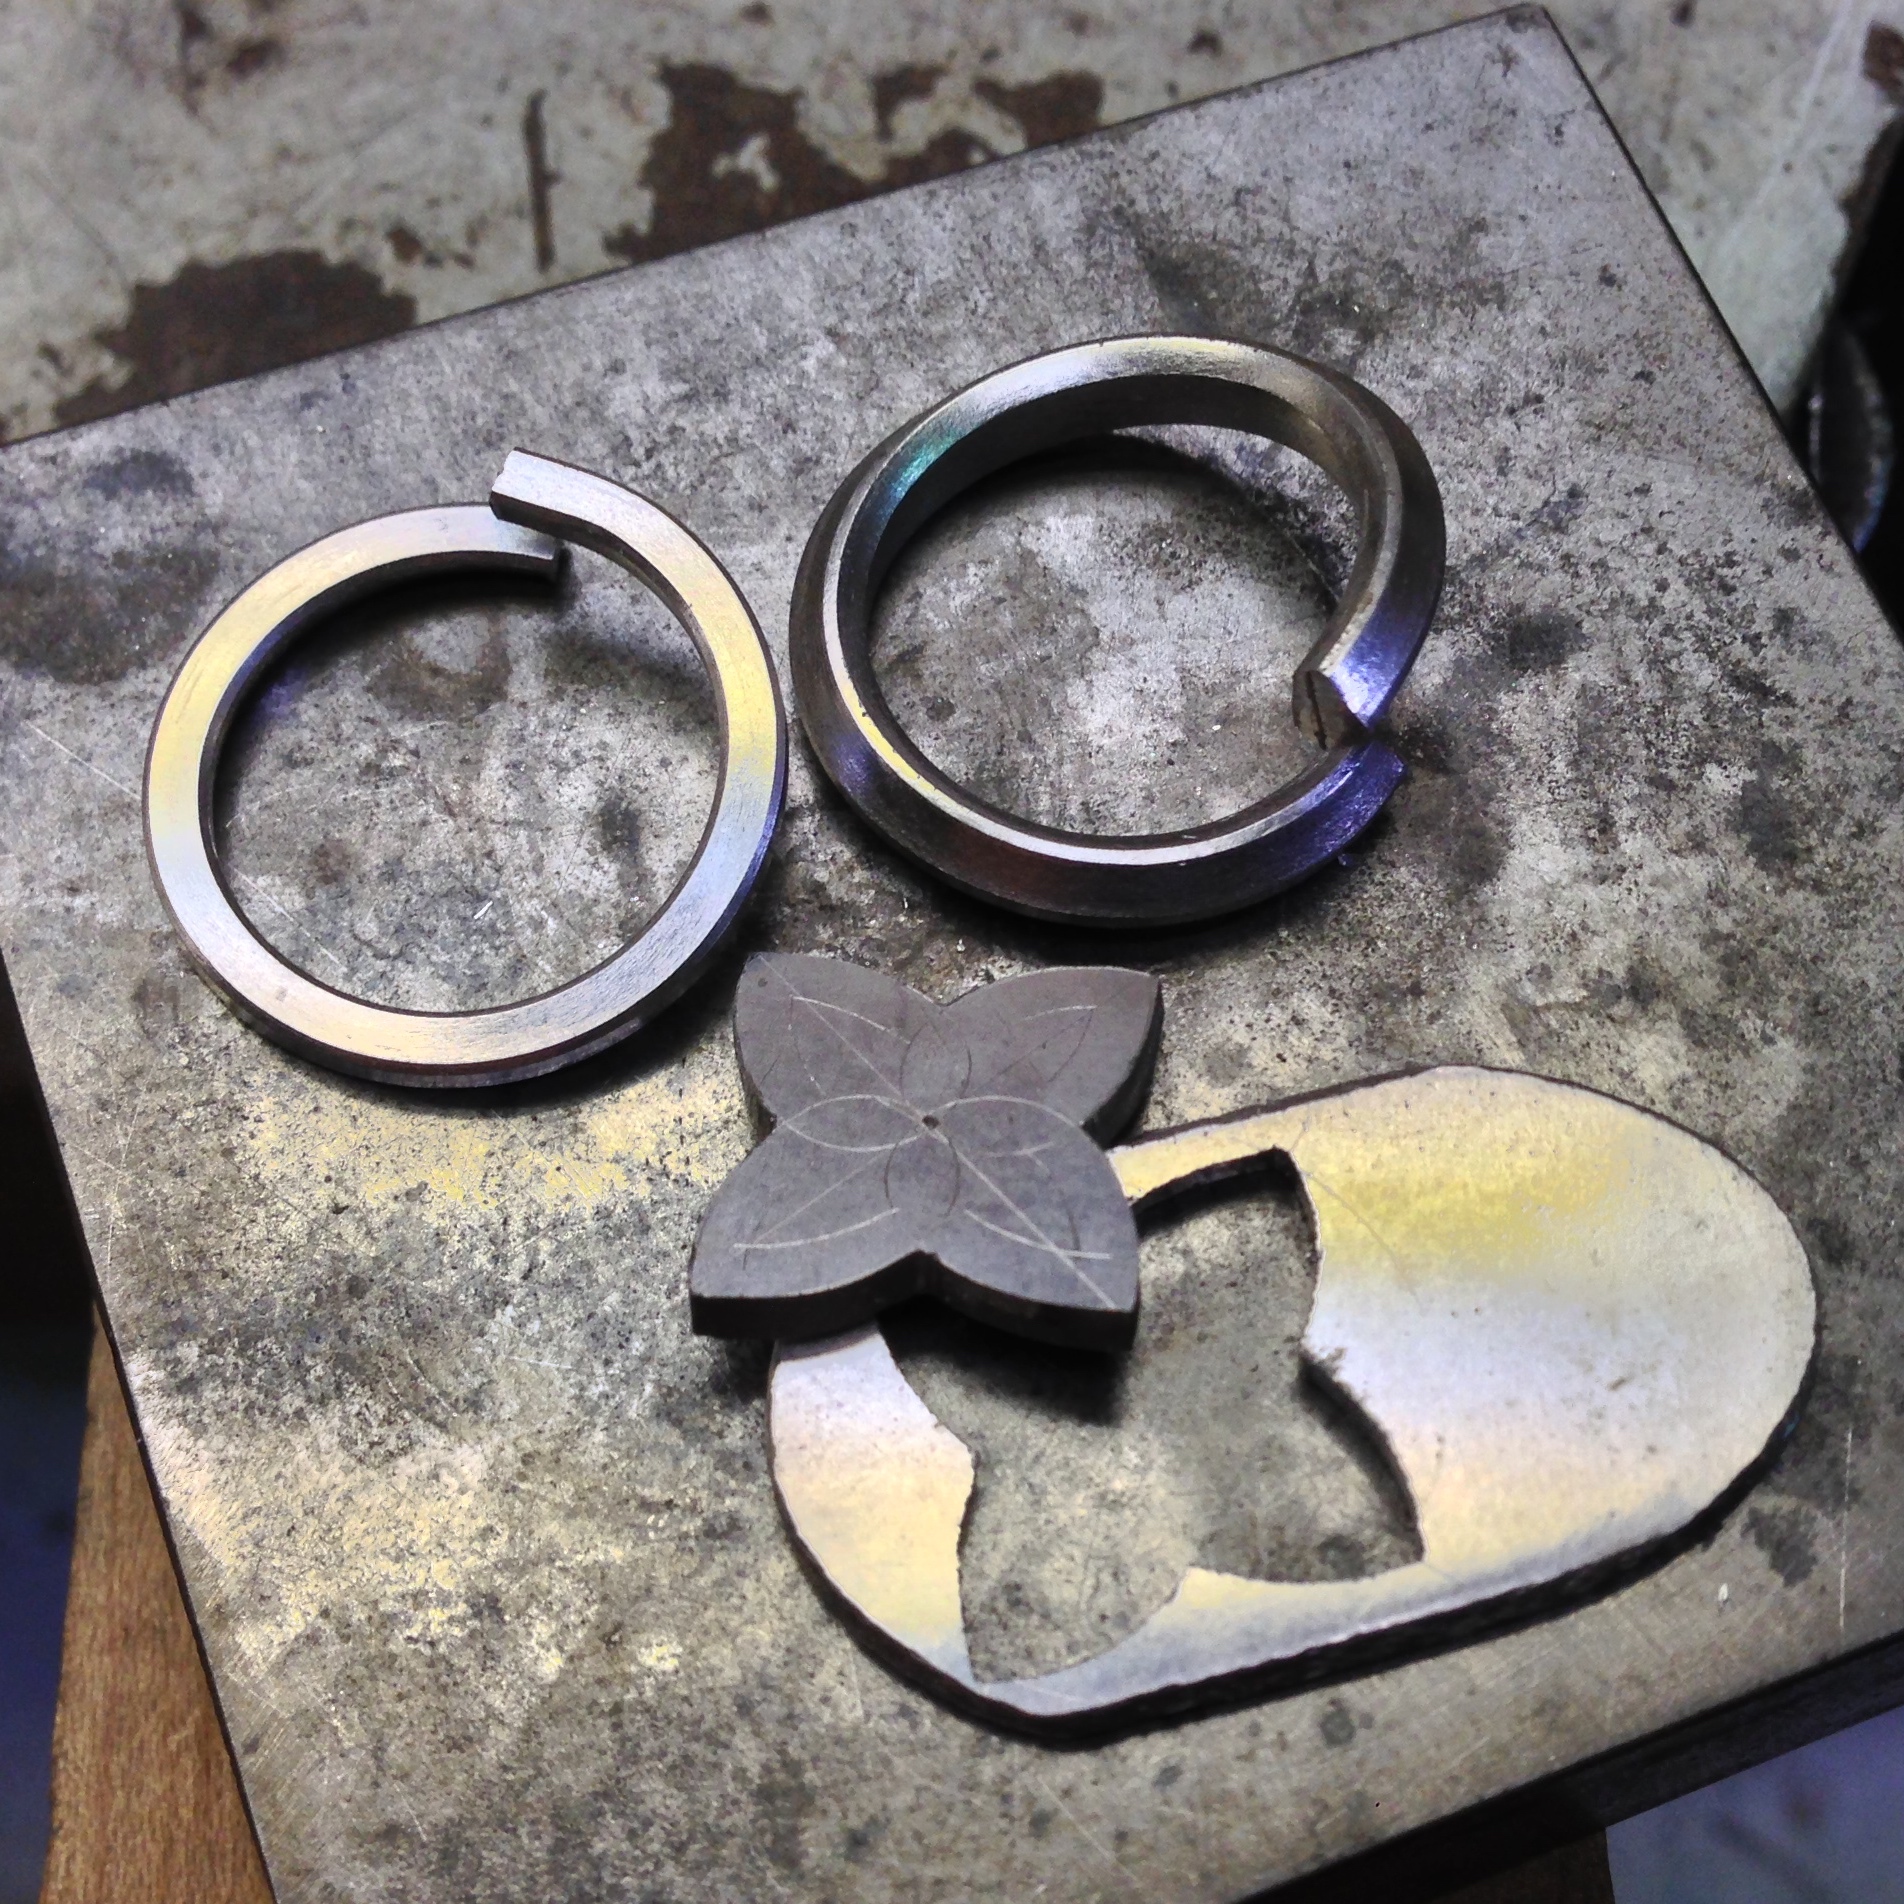
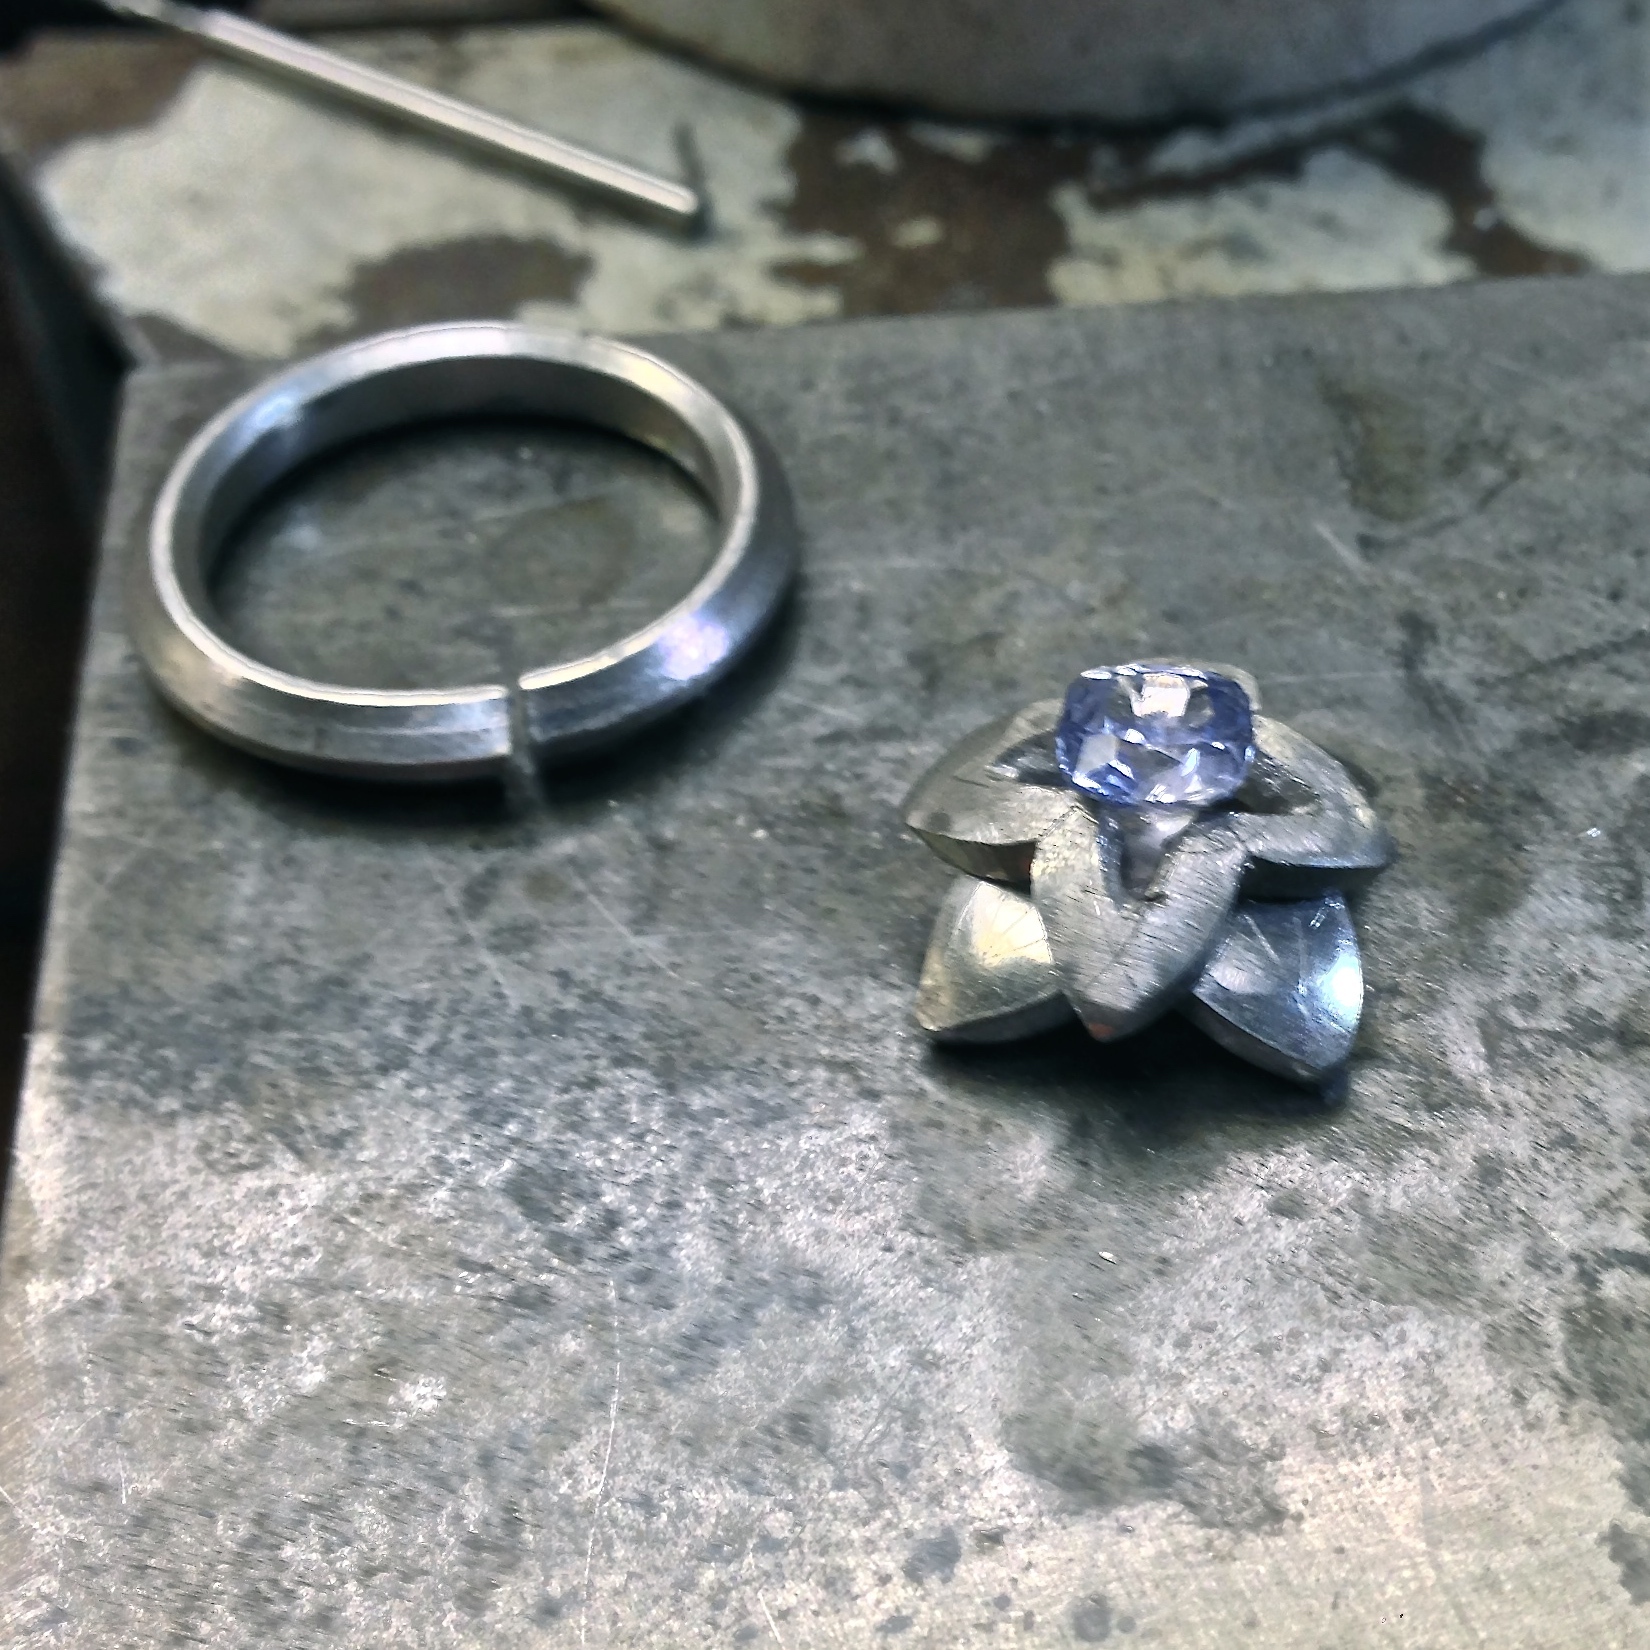
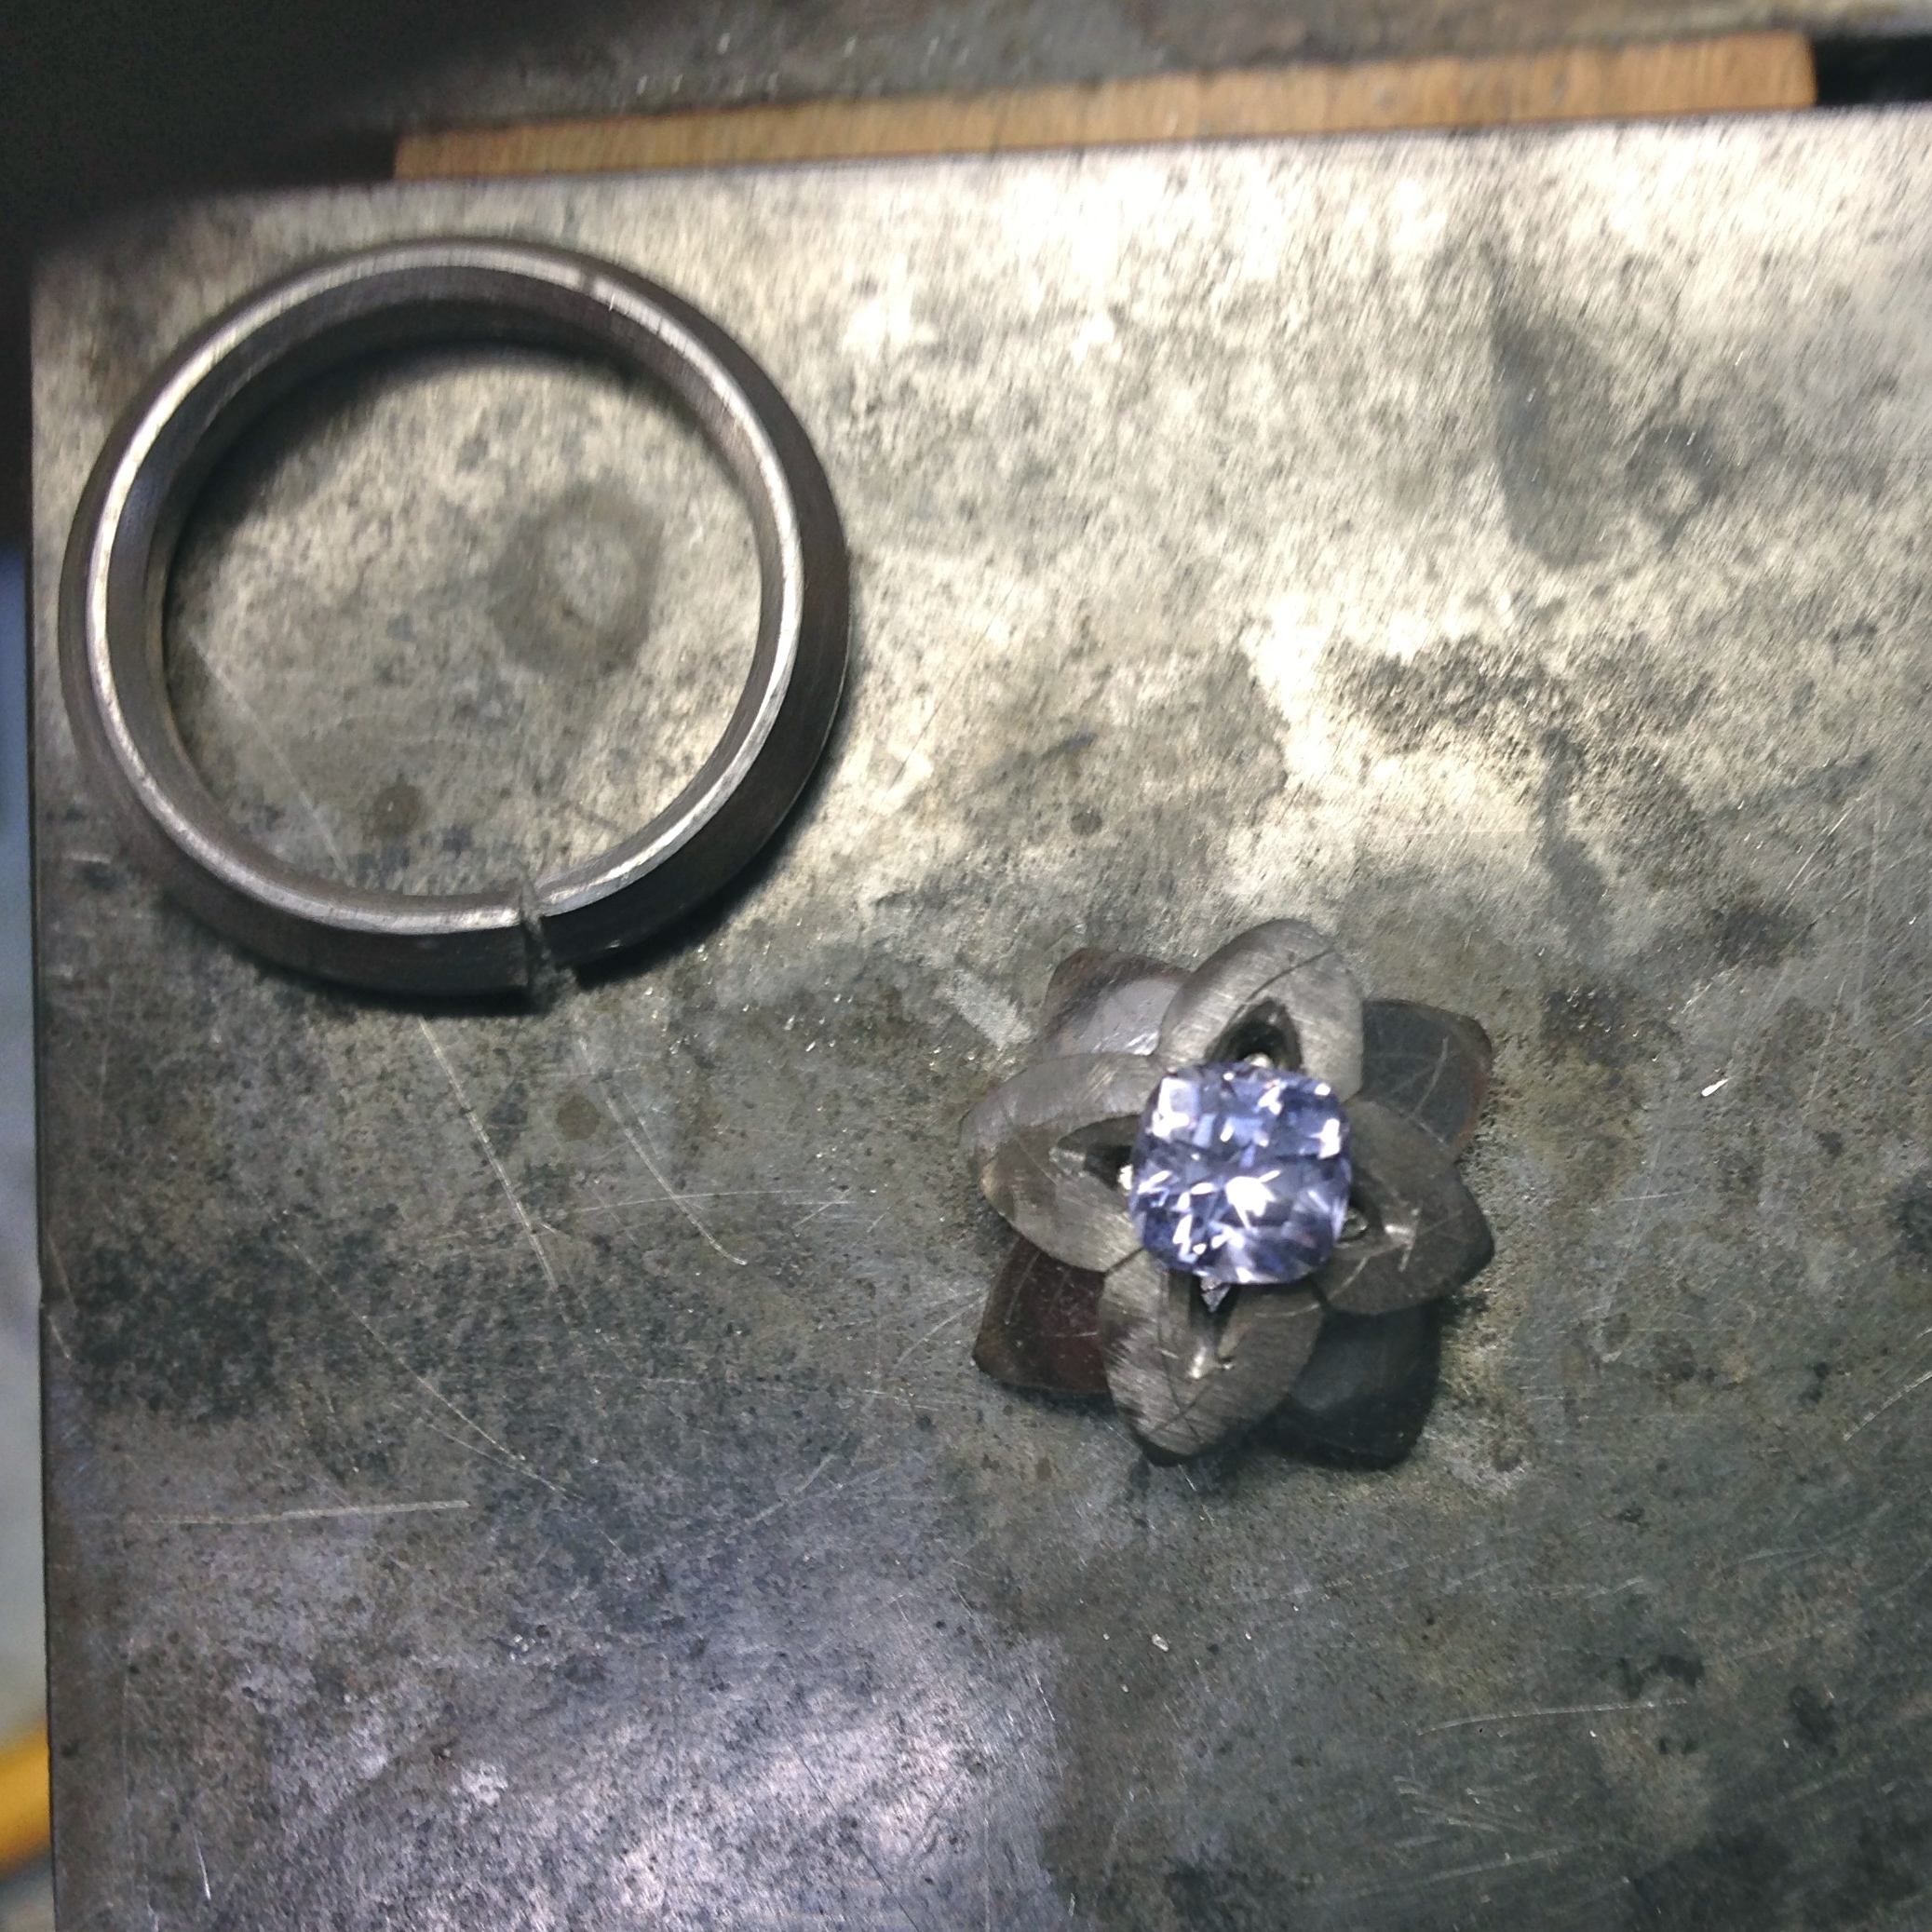
Hi
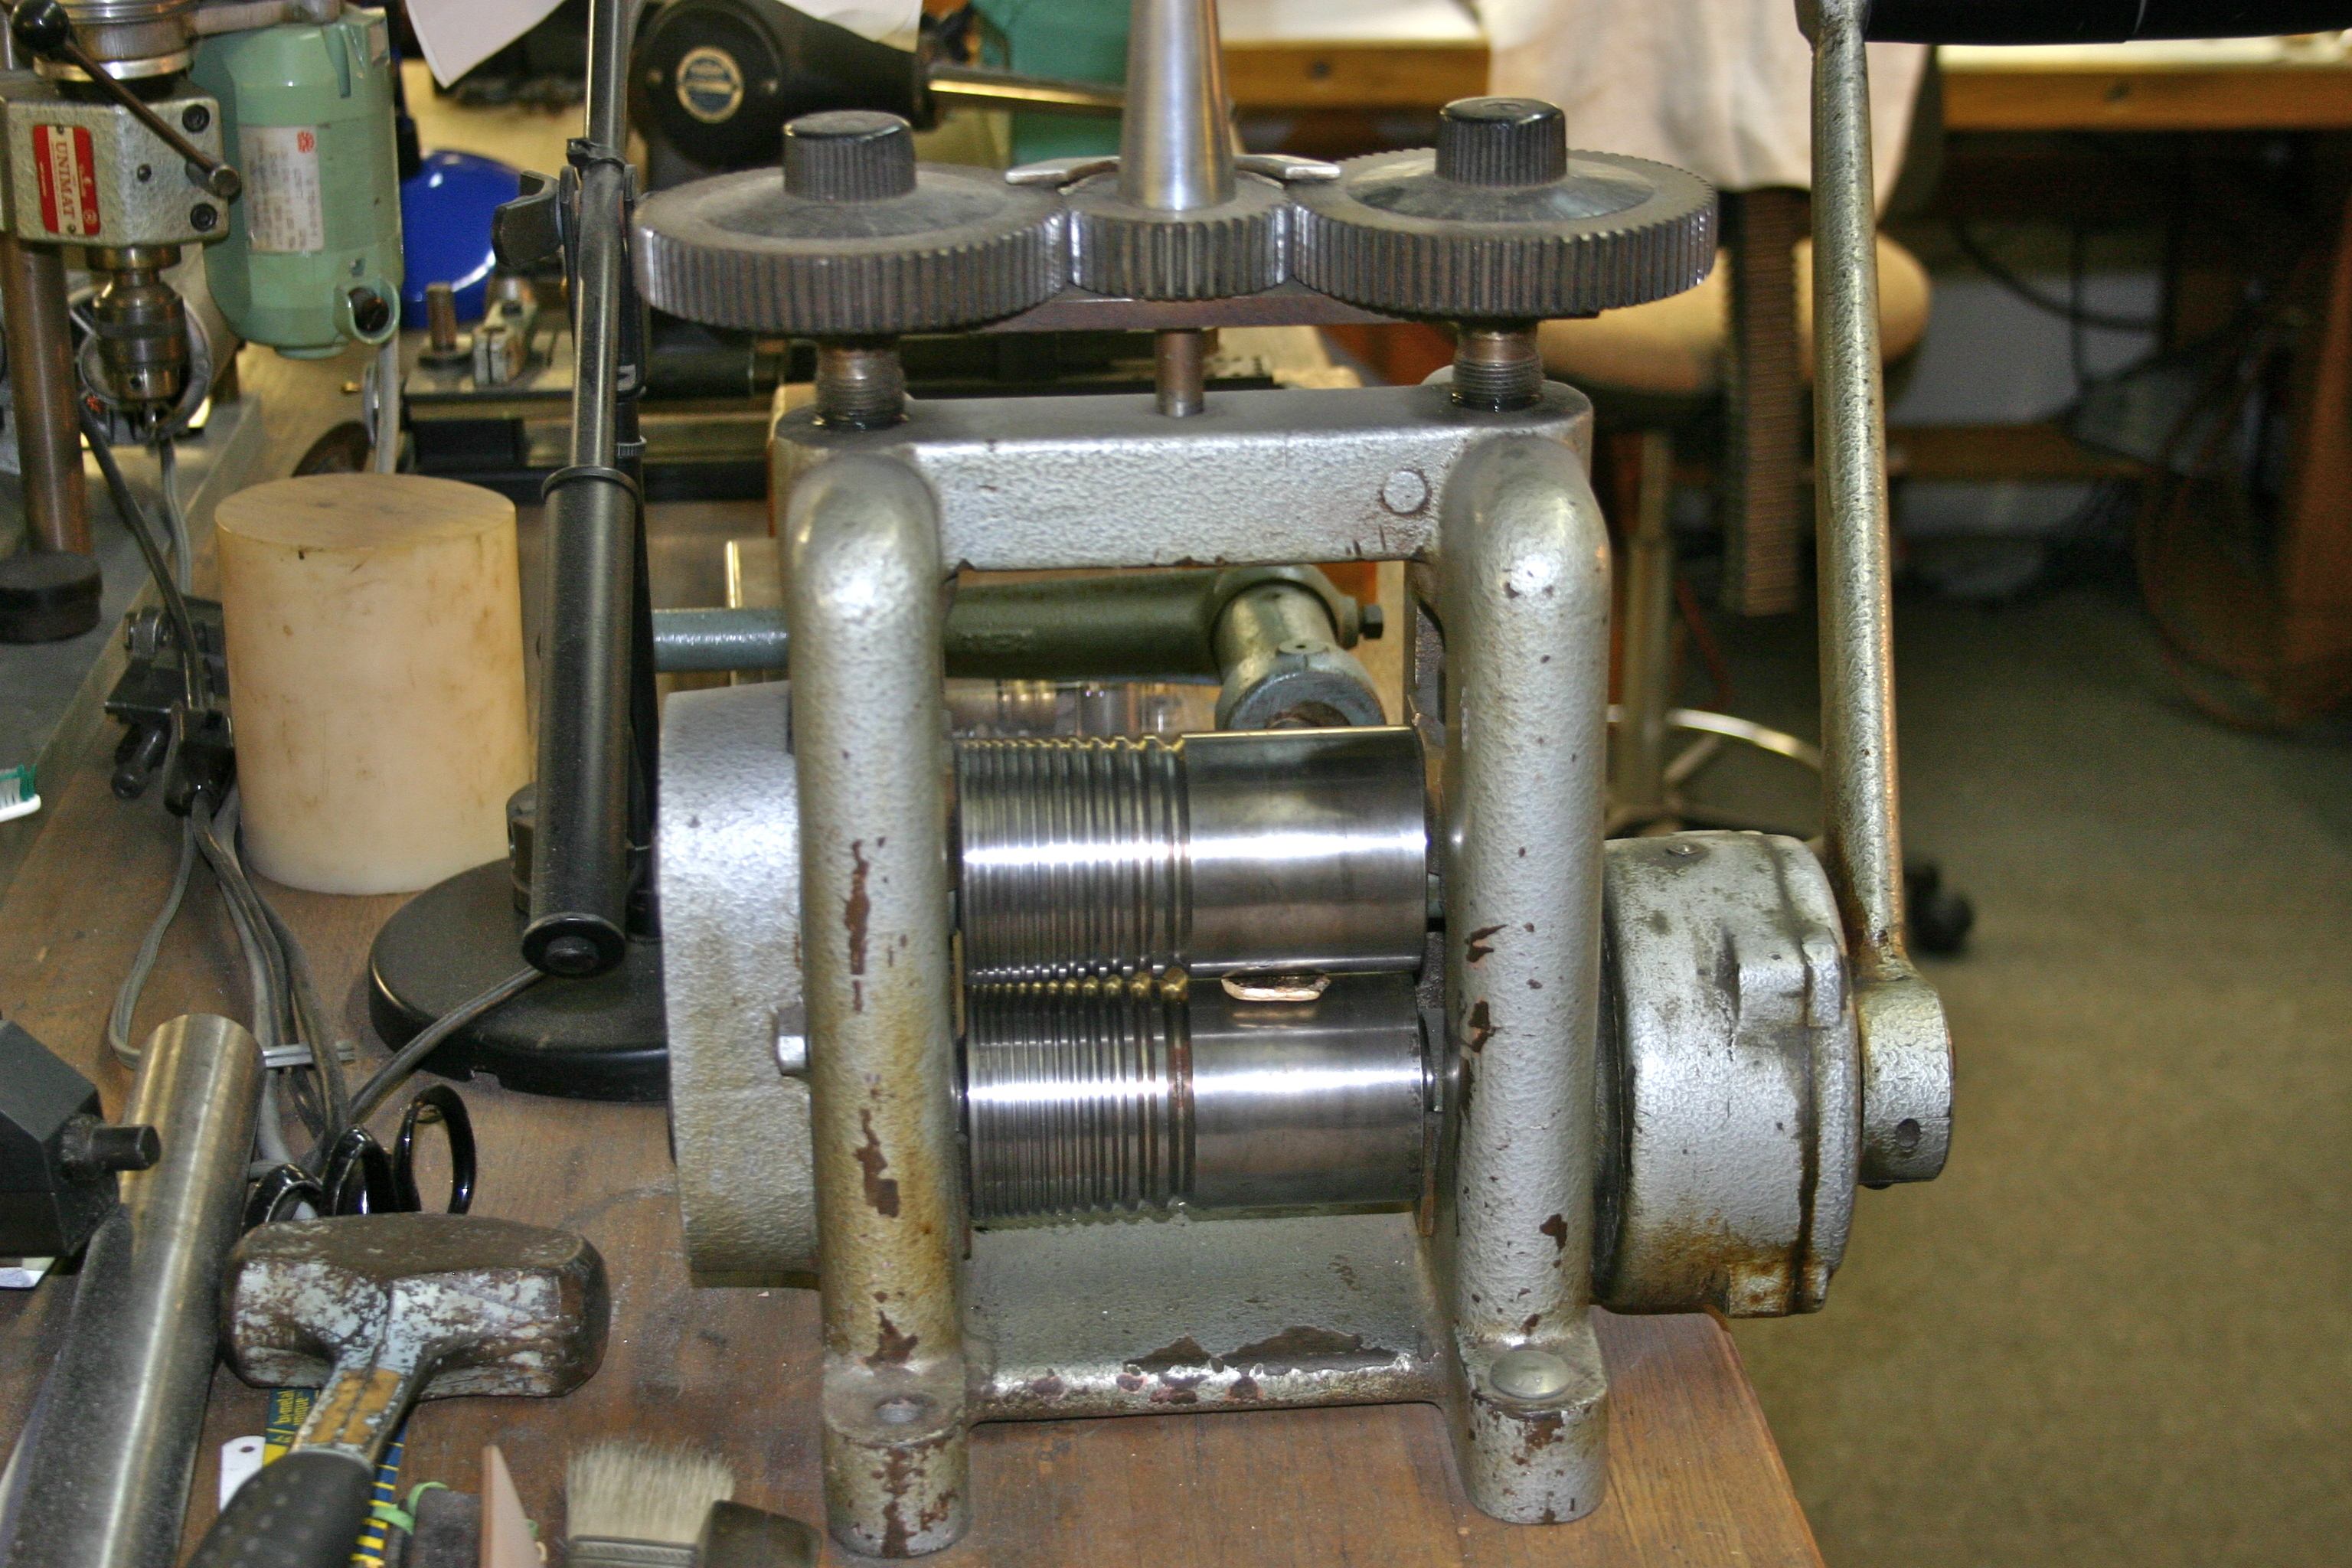
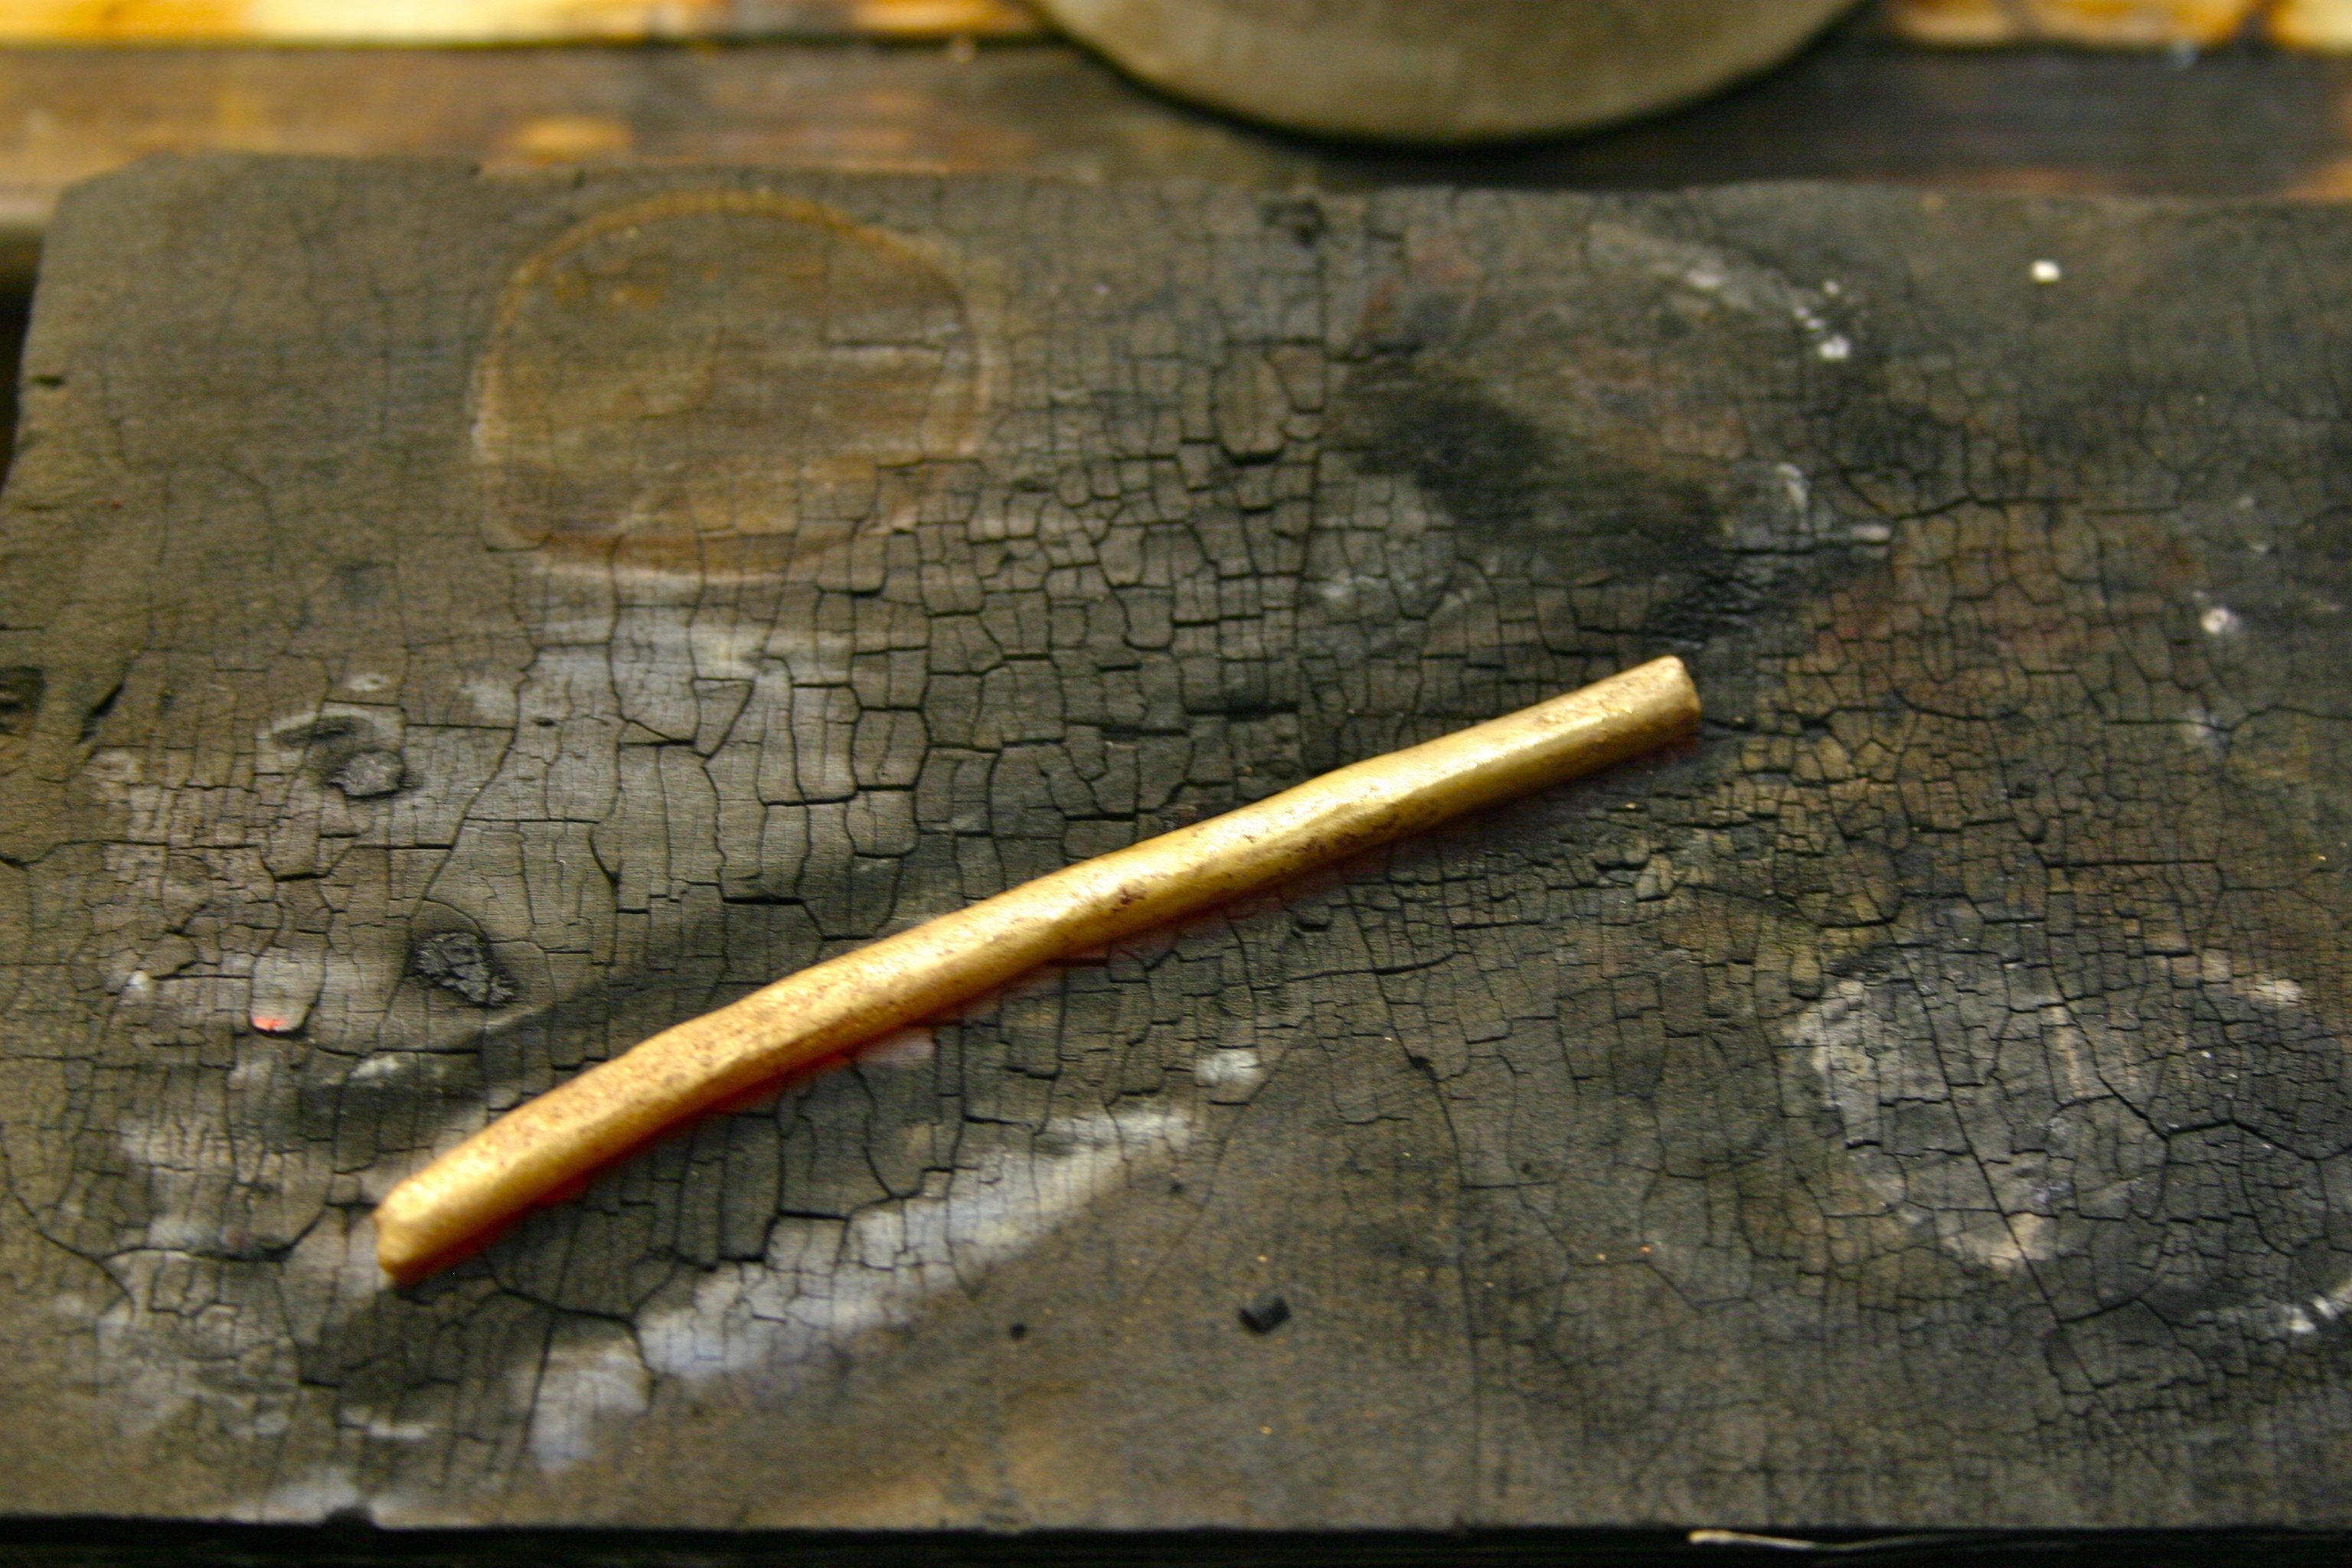
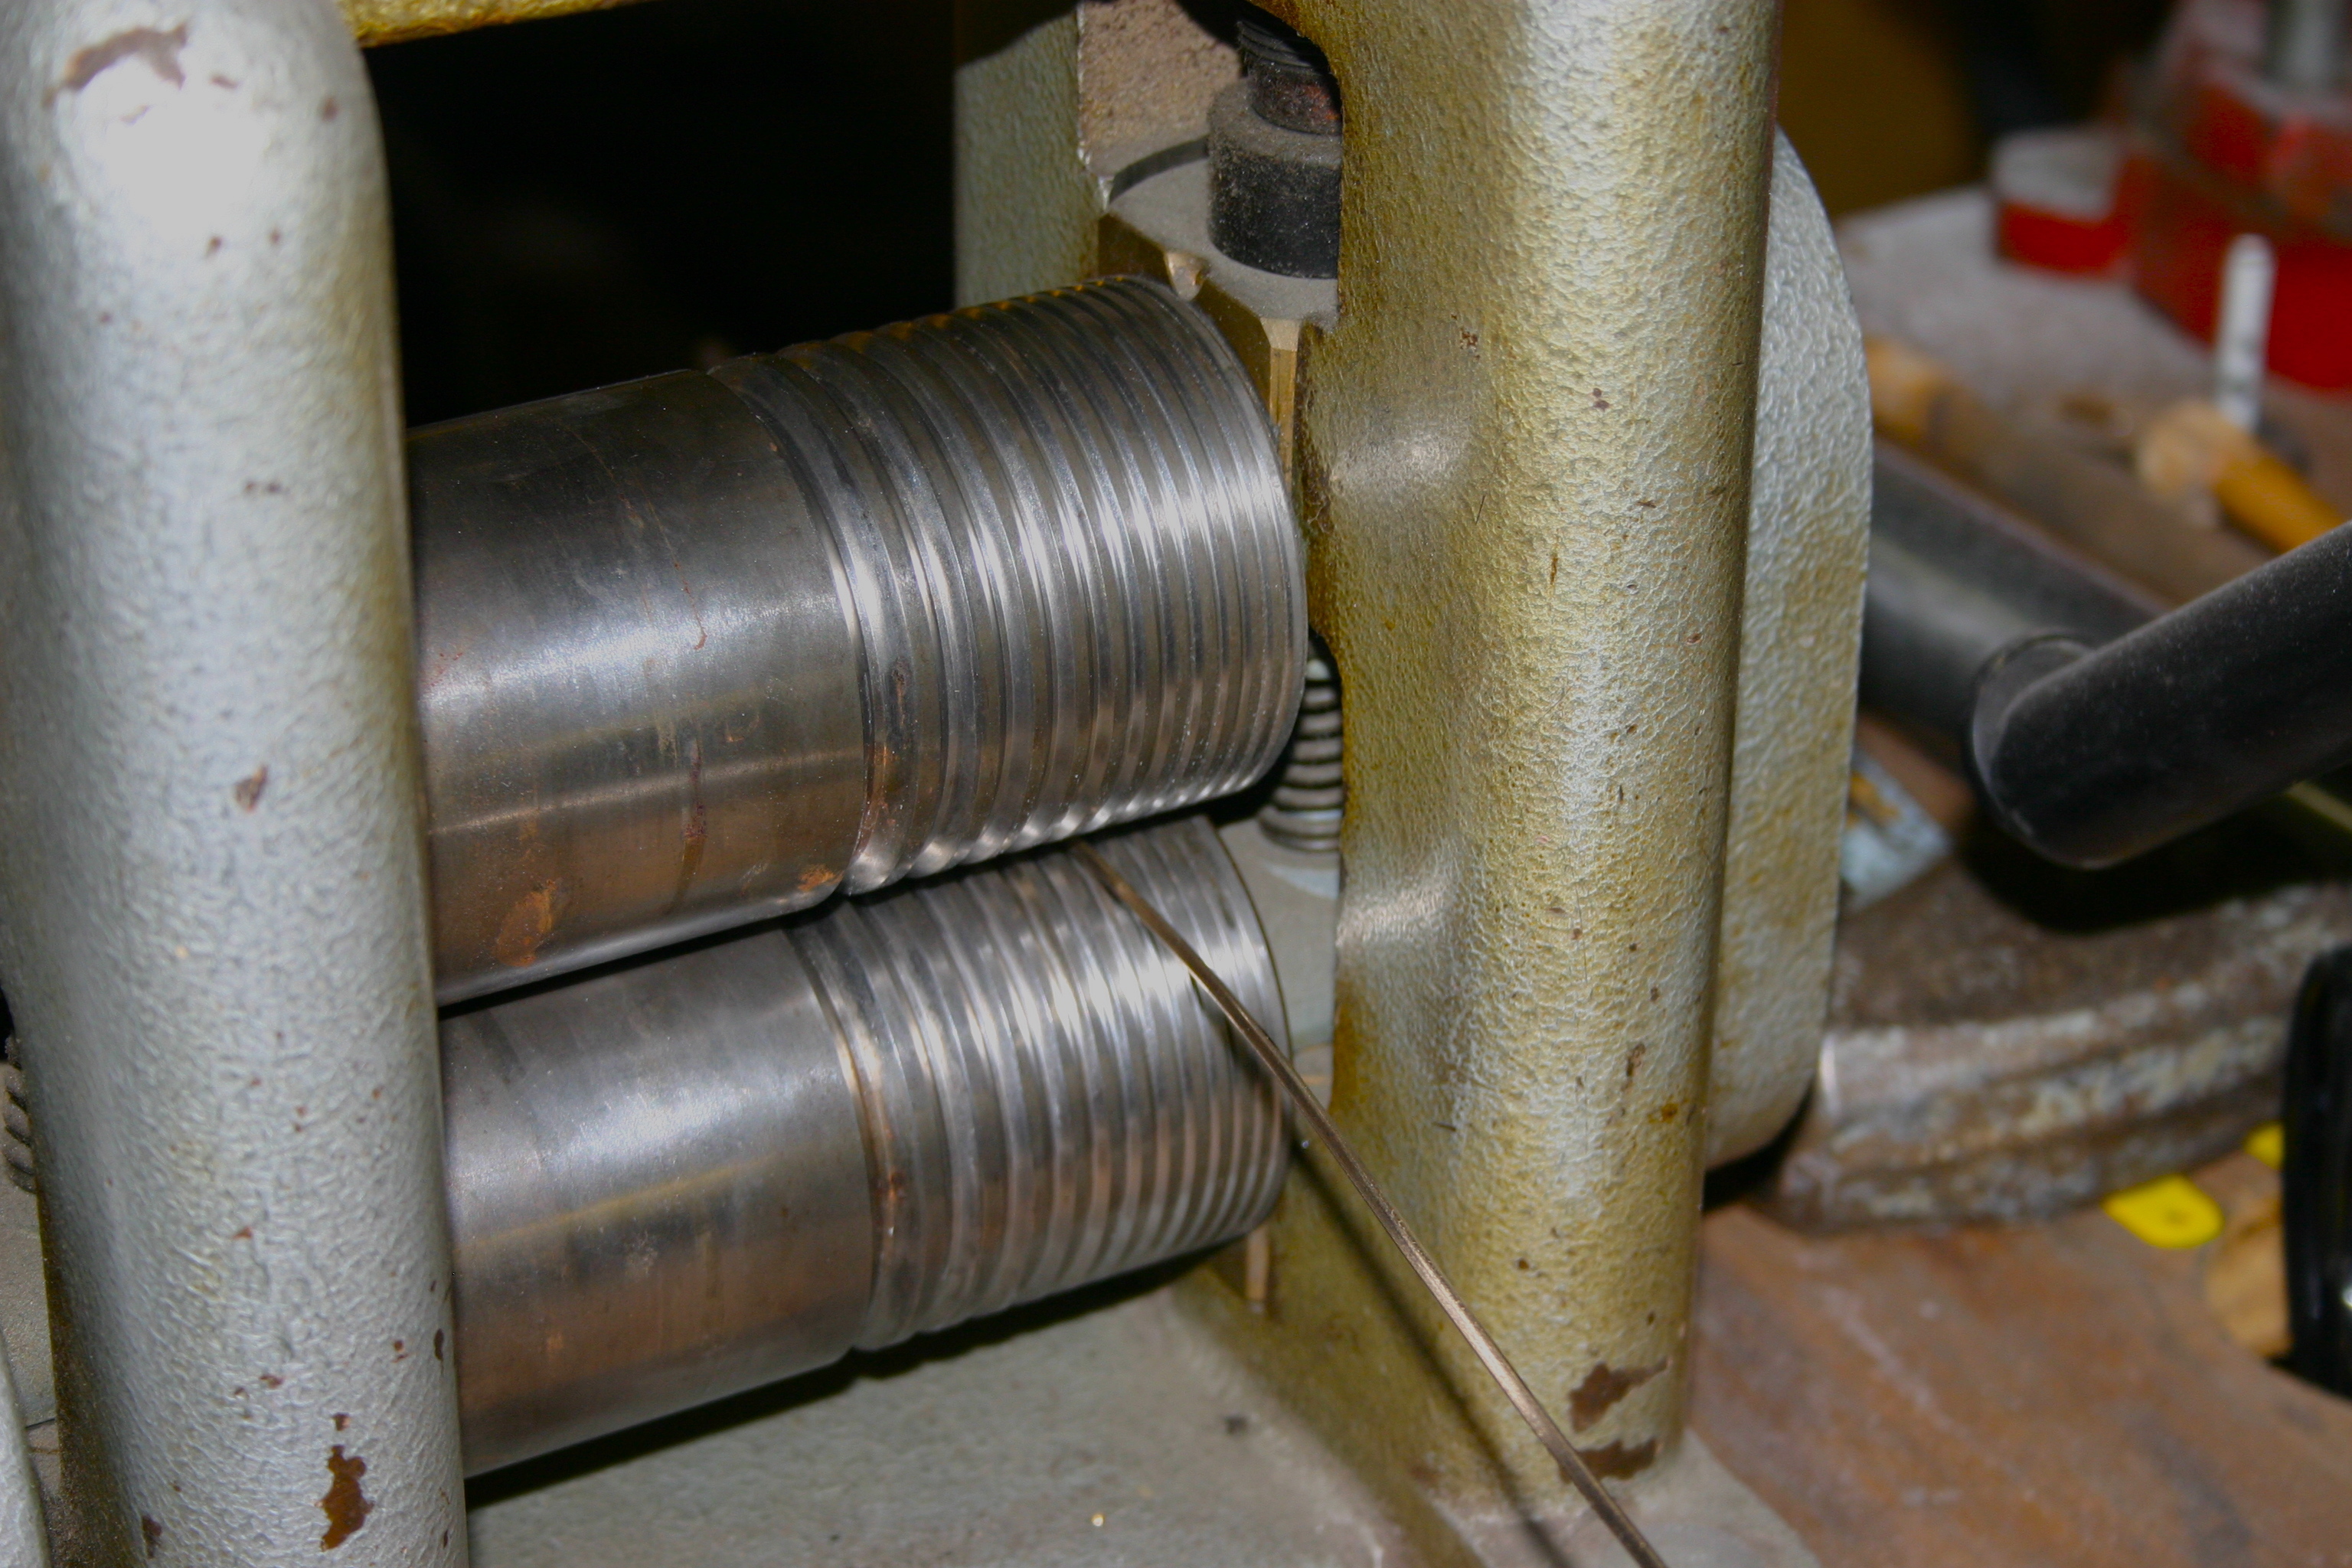
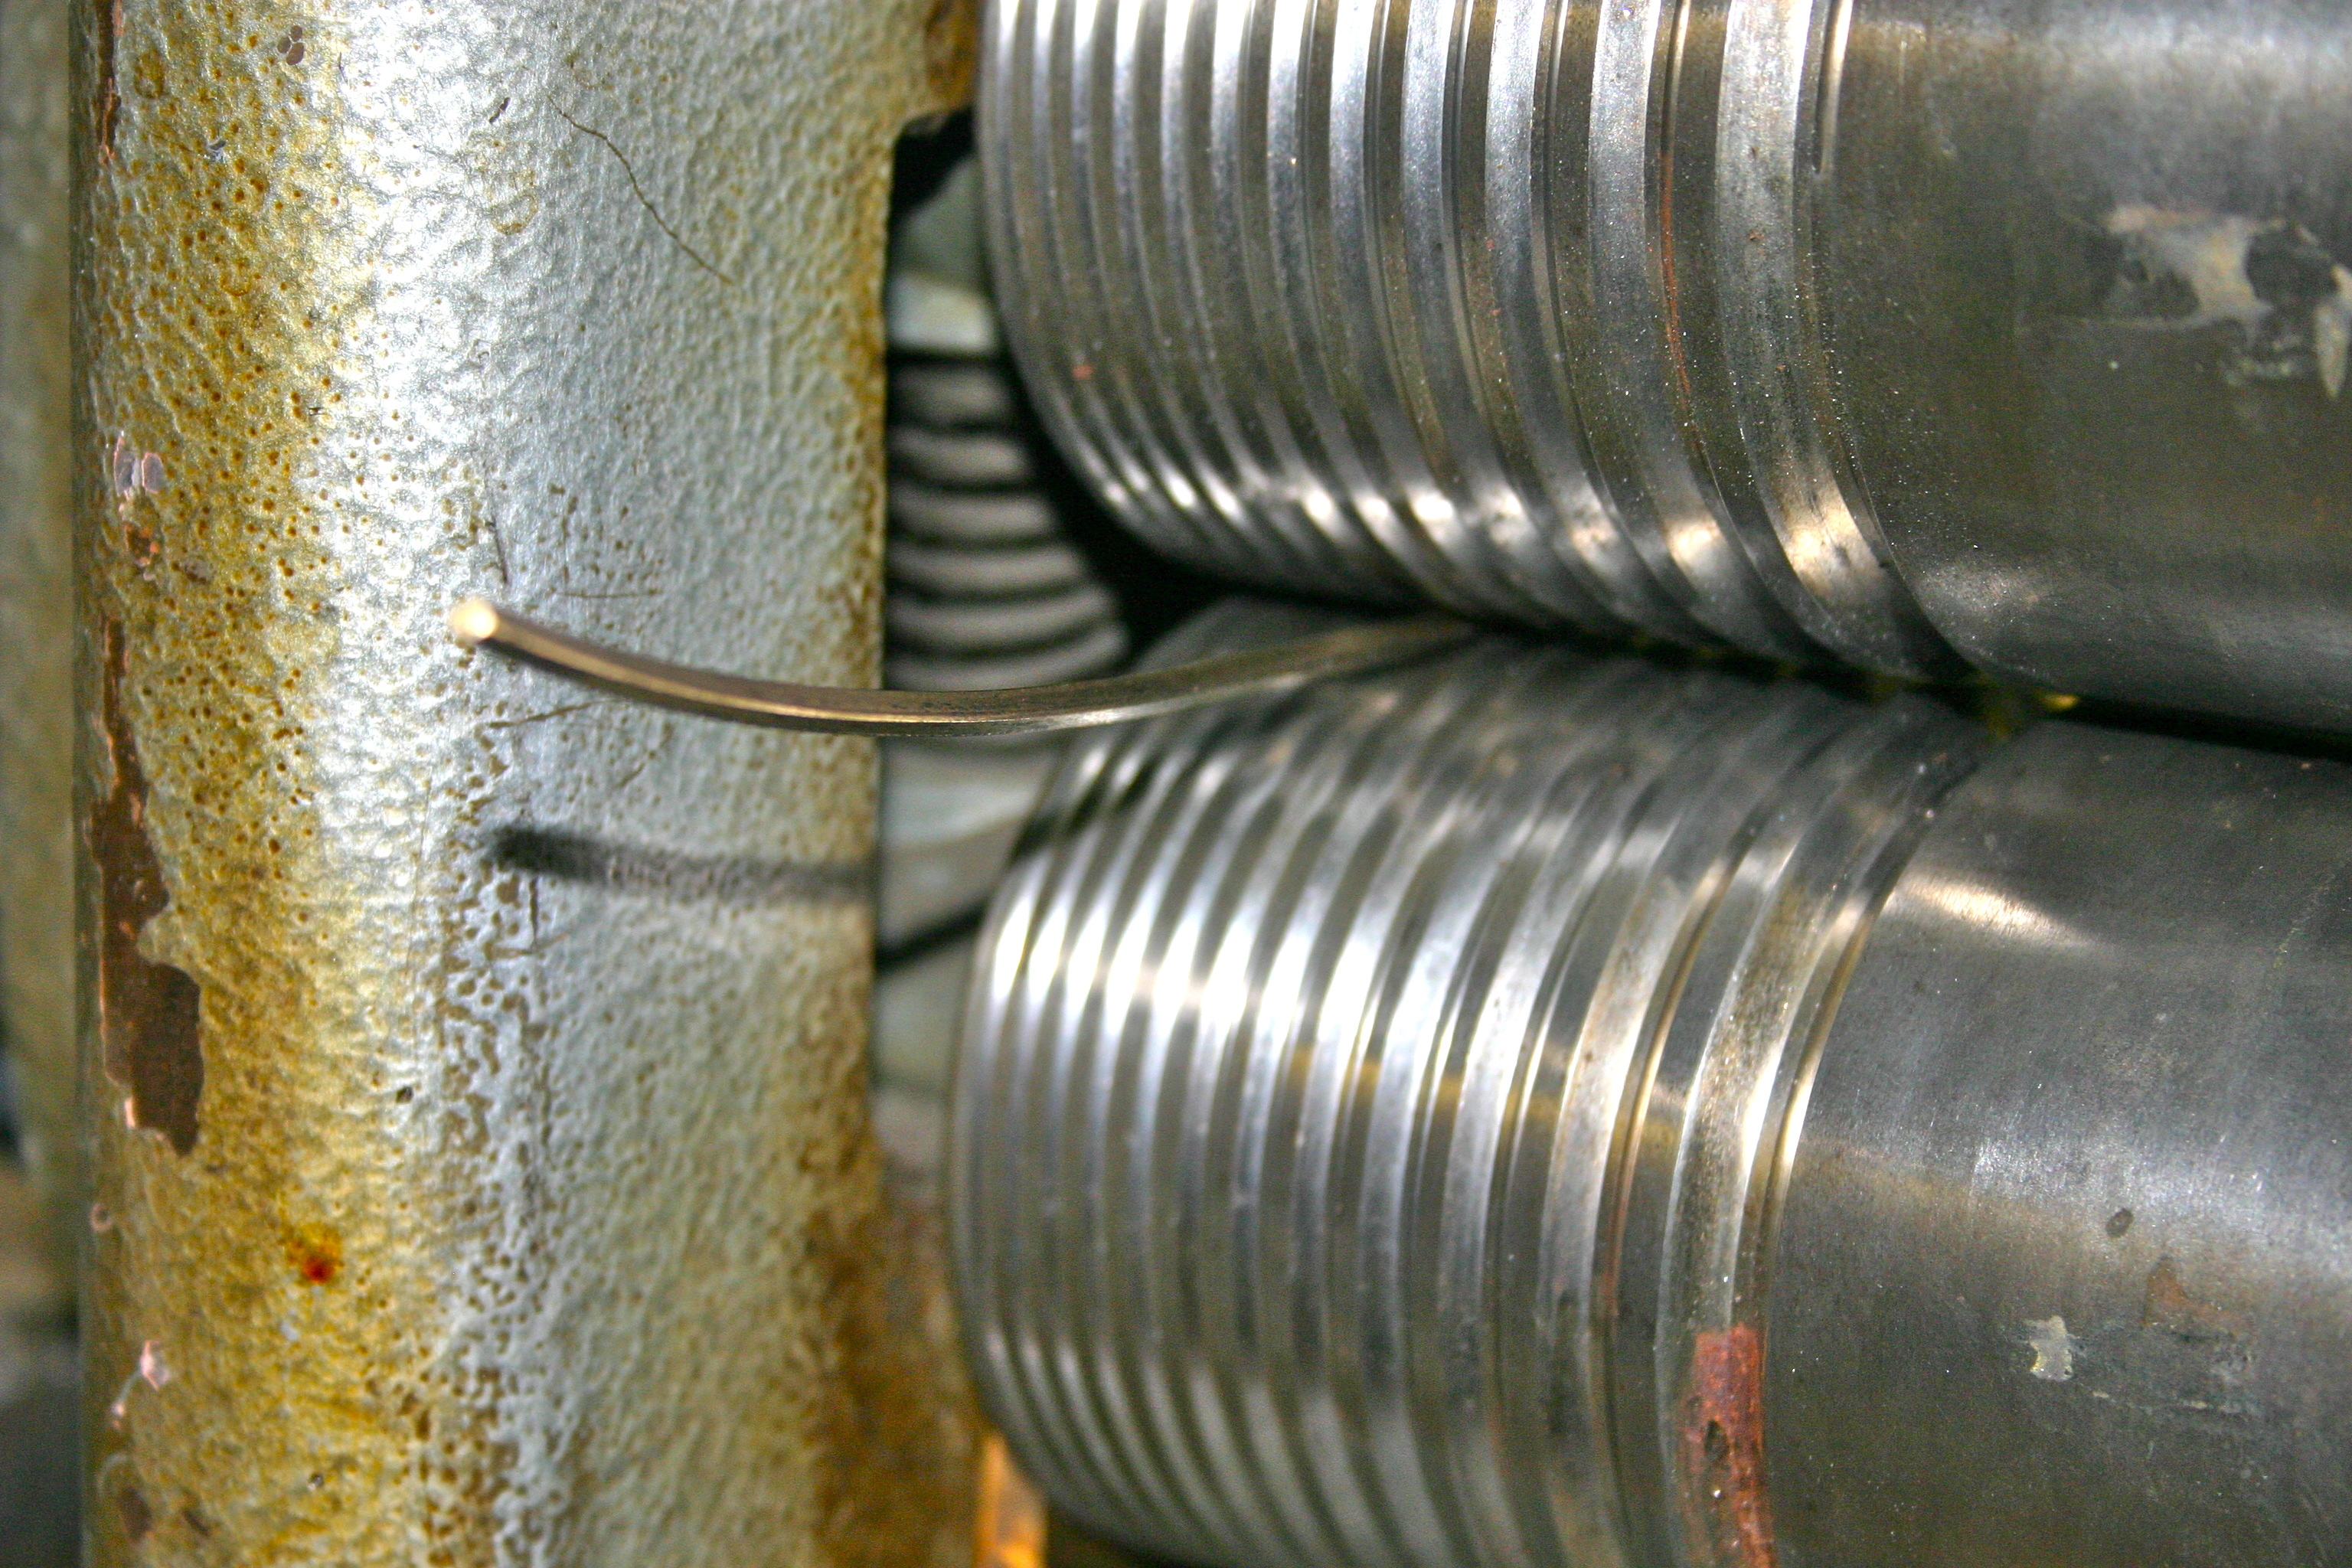
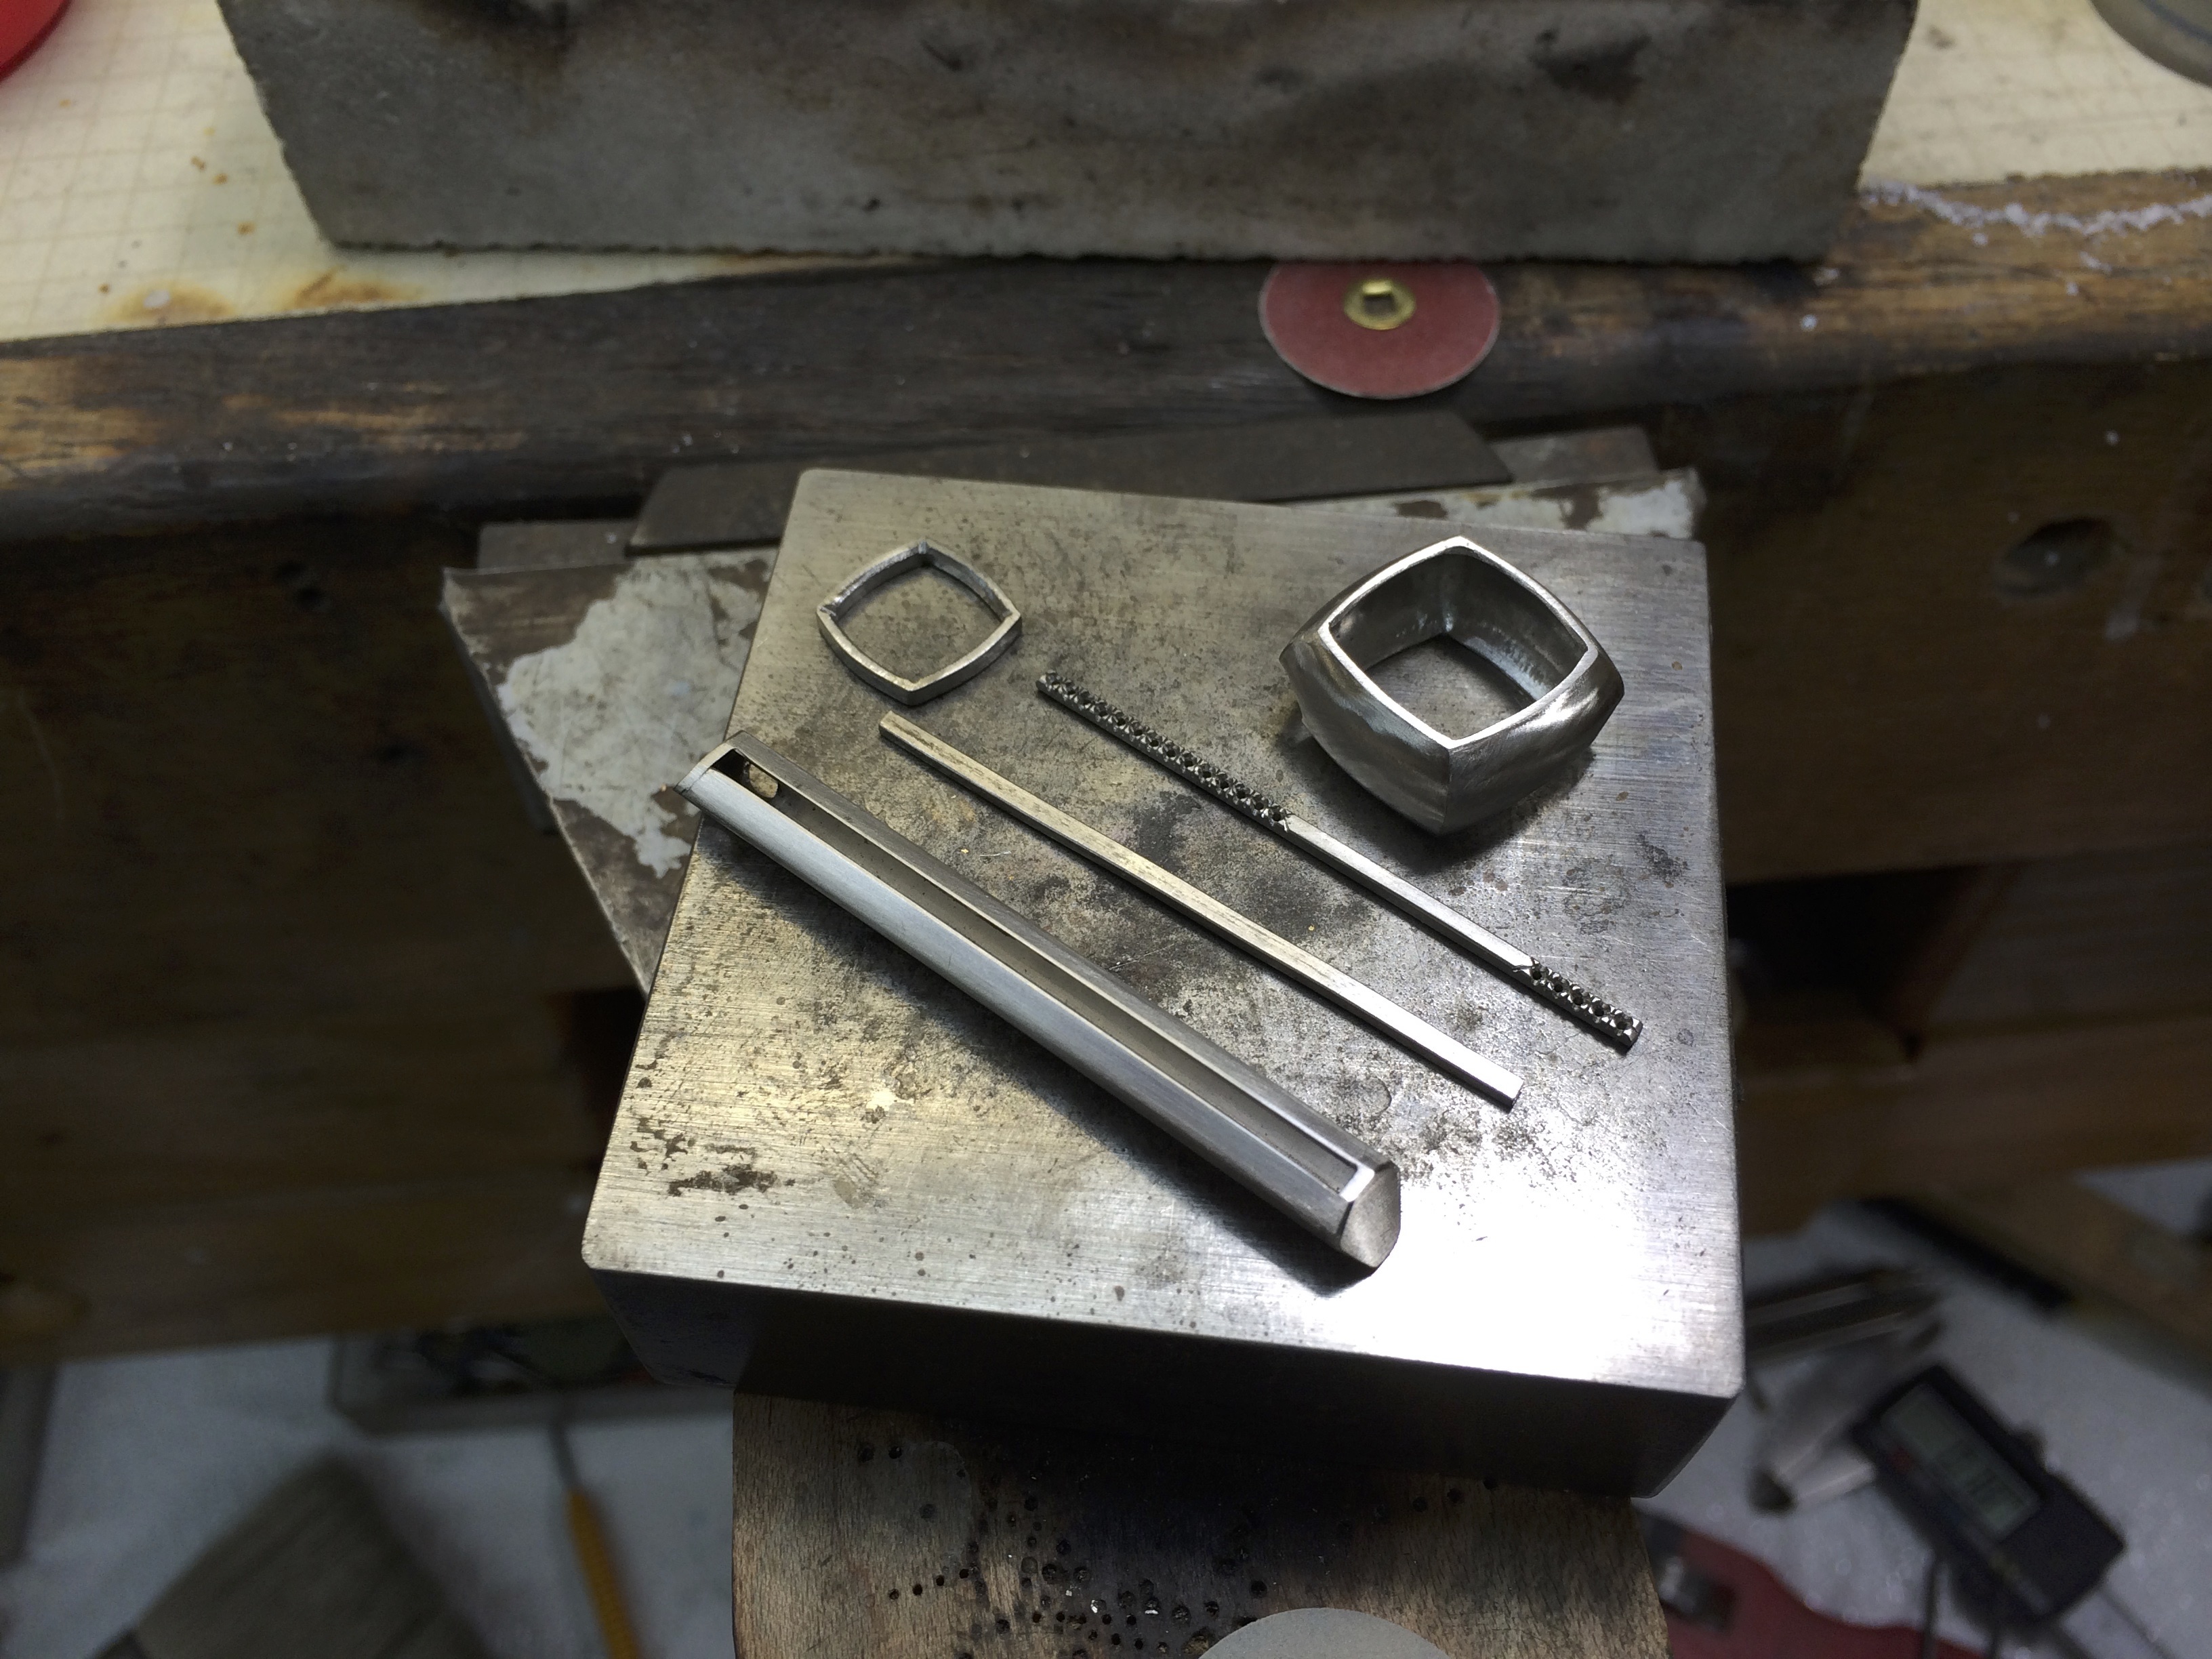
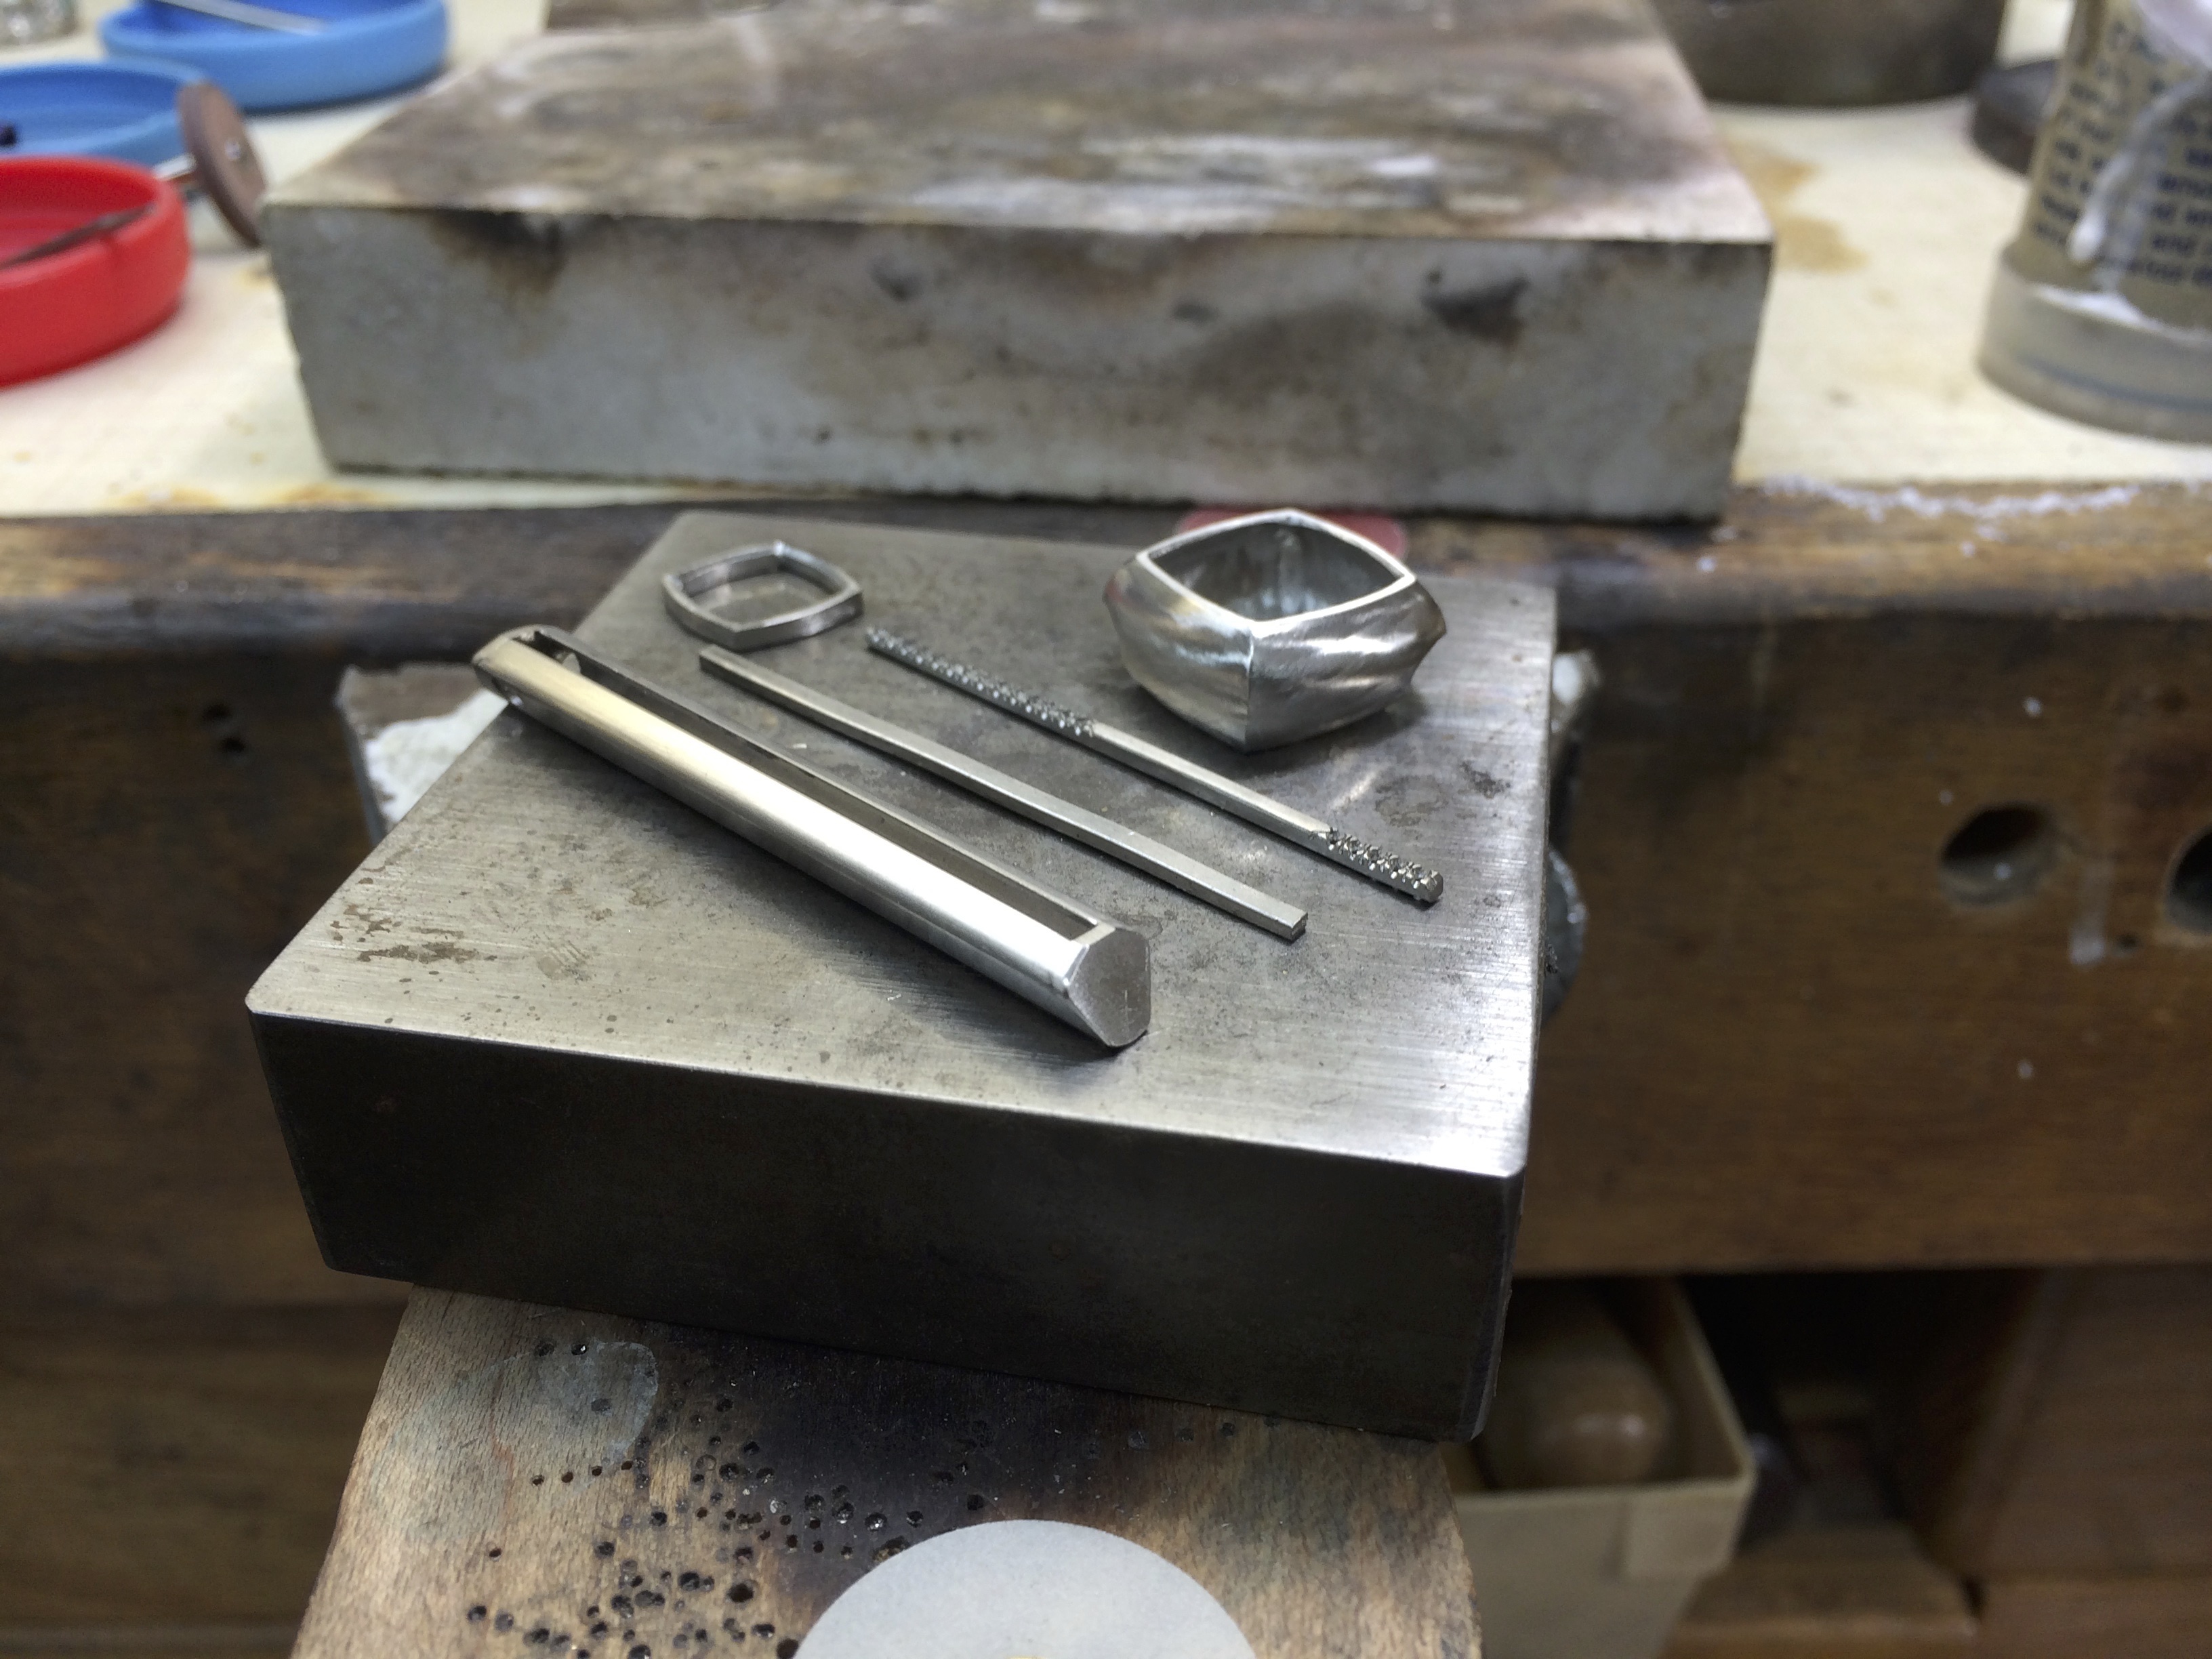
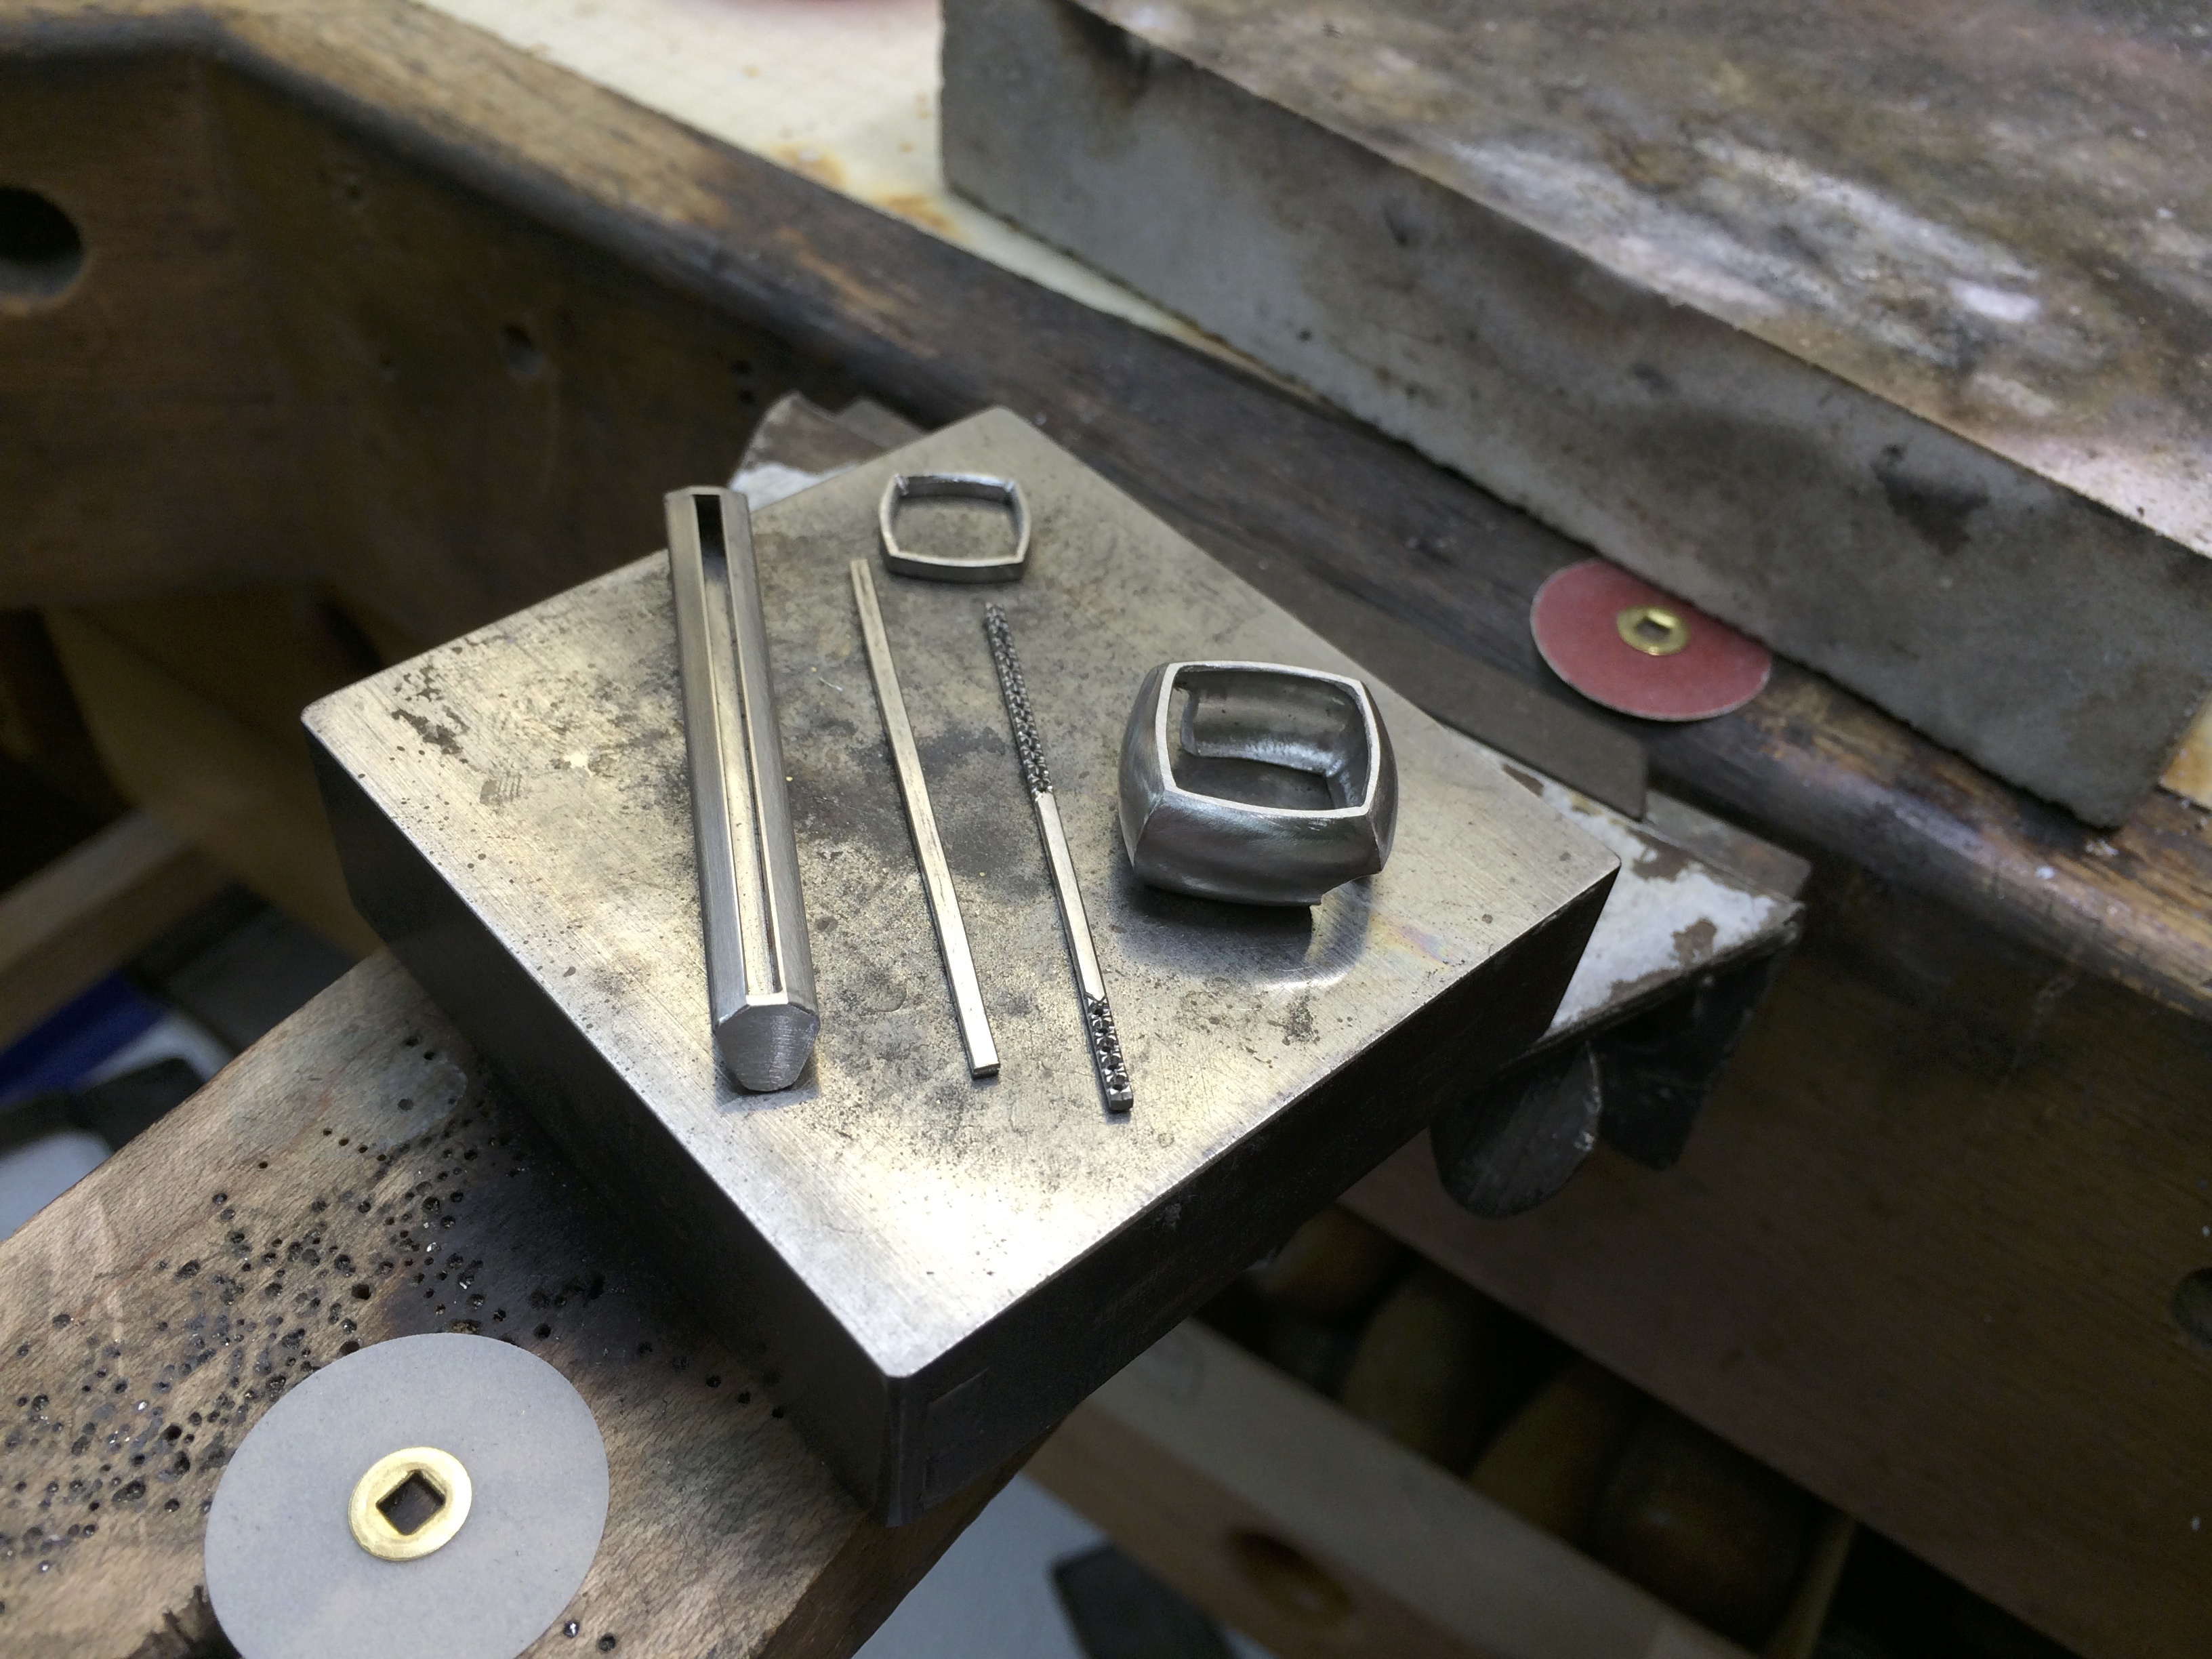
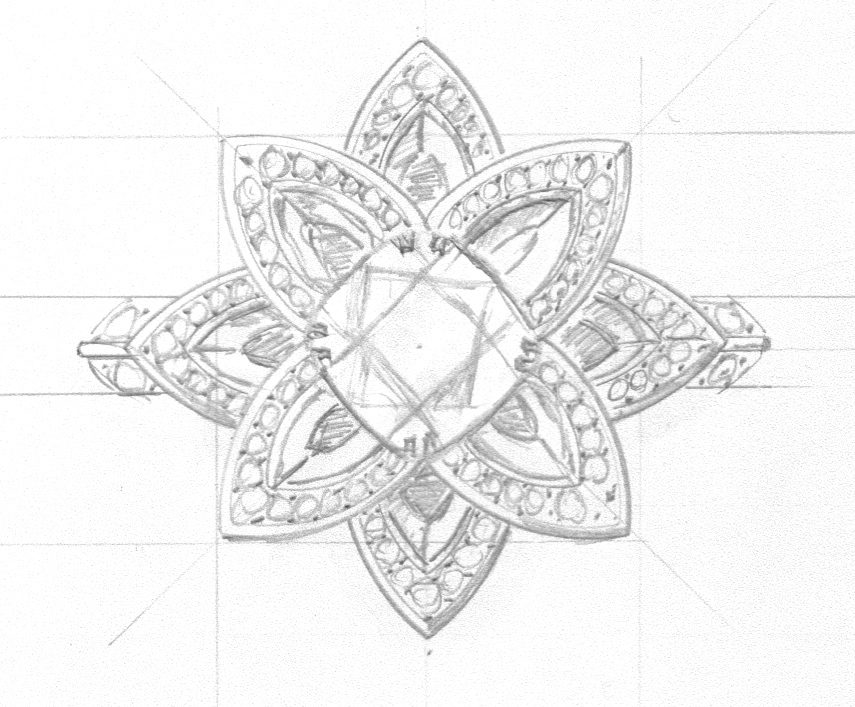
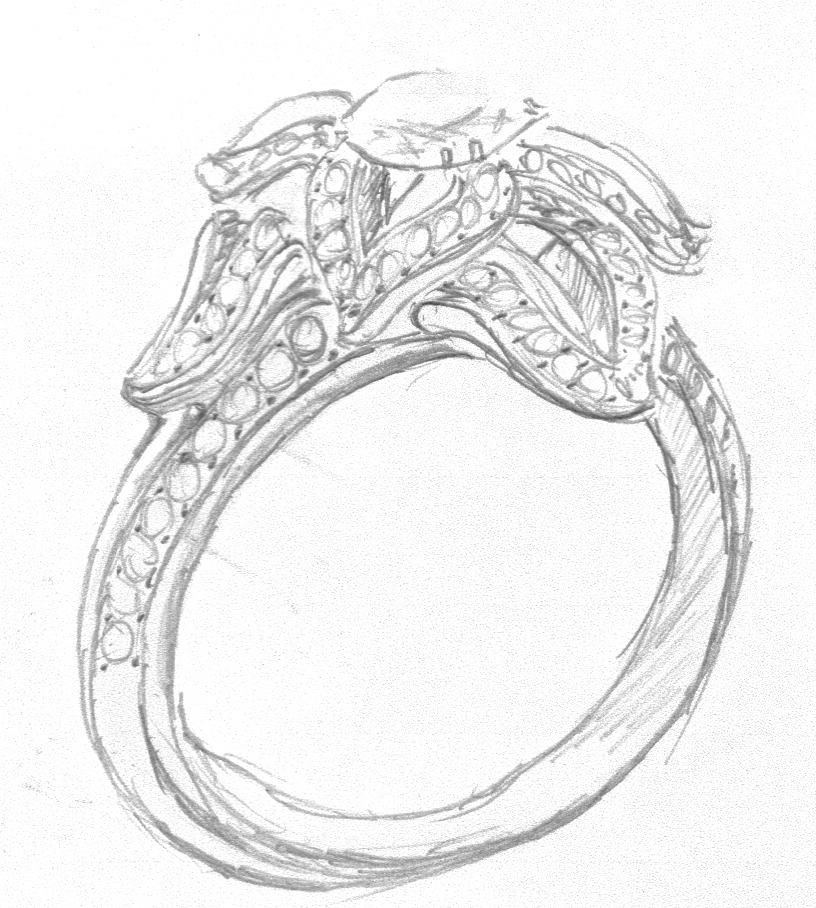
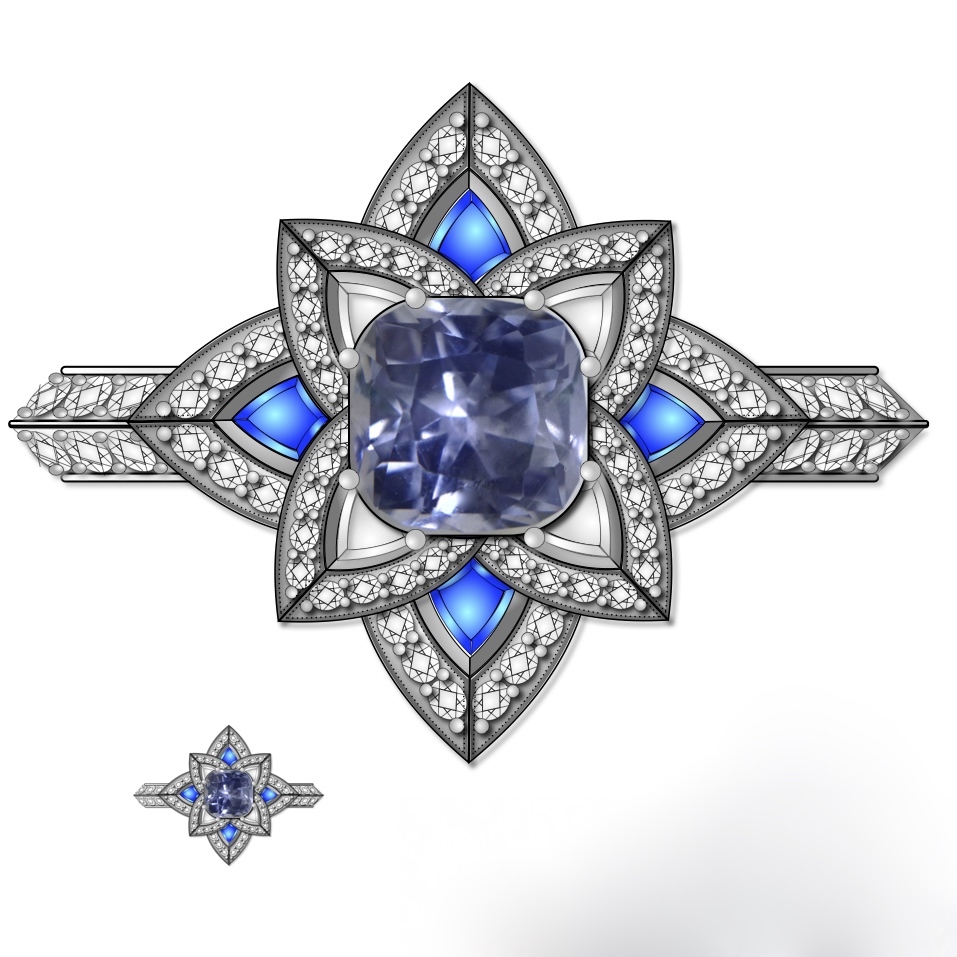
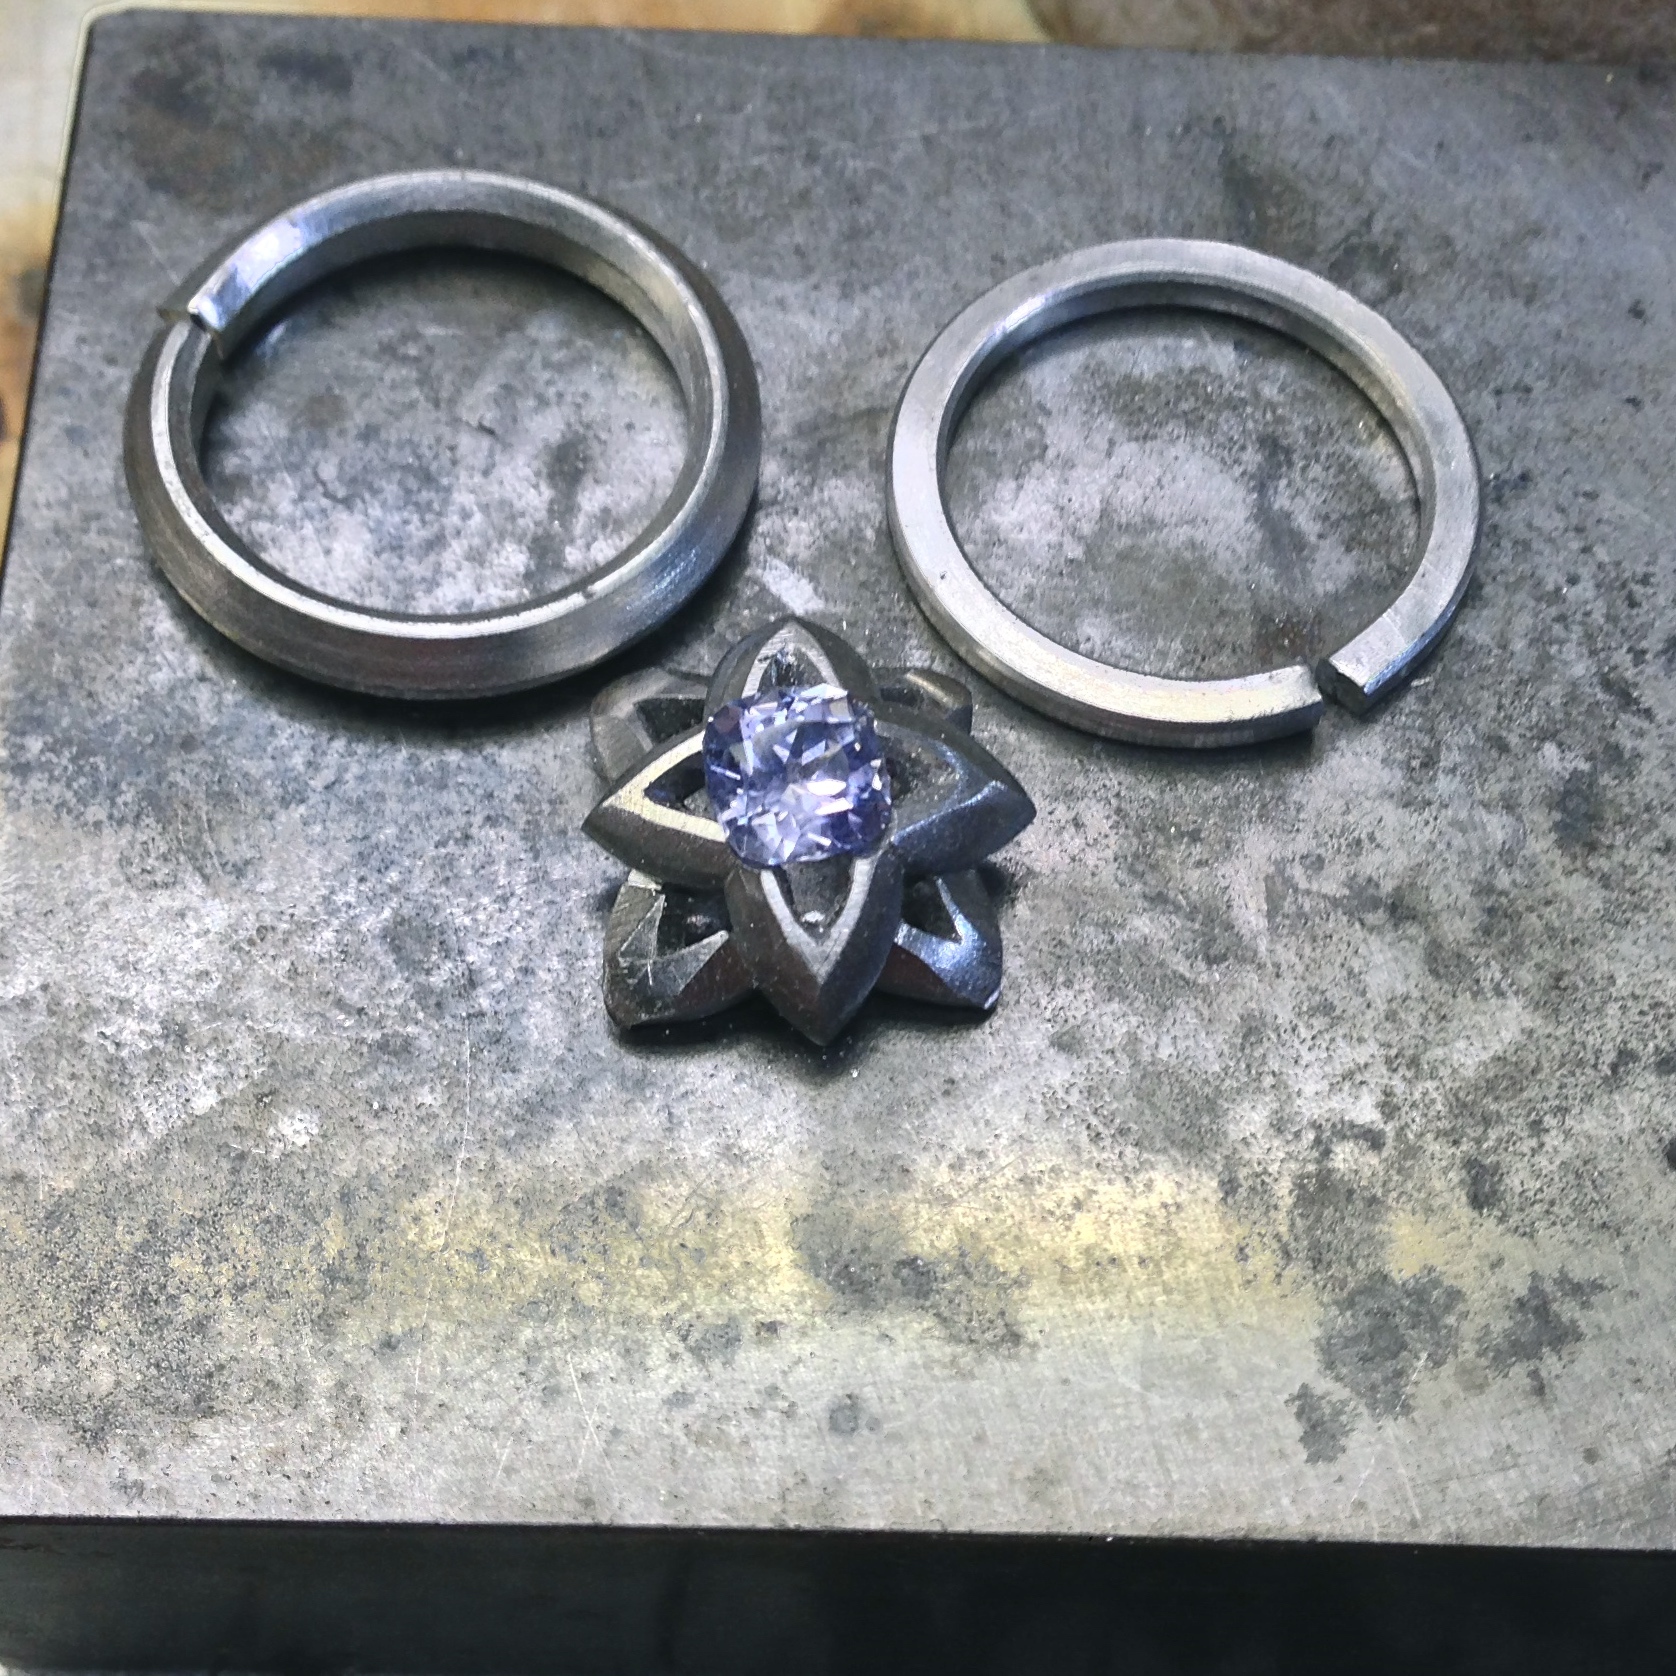
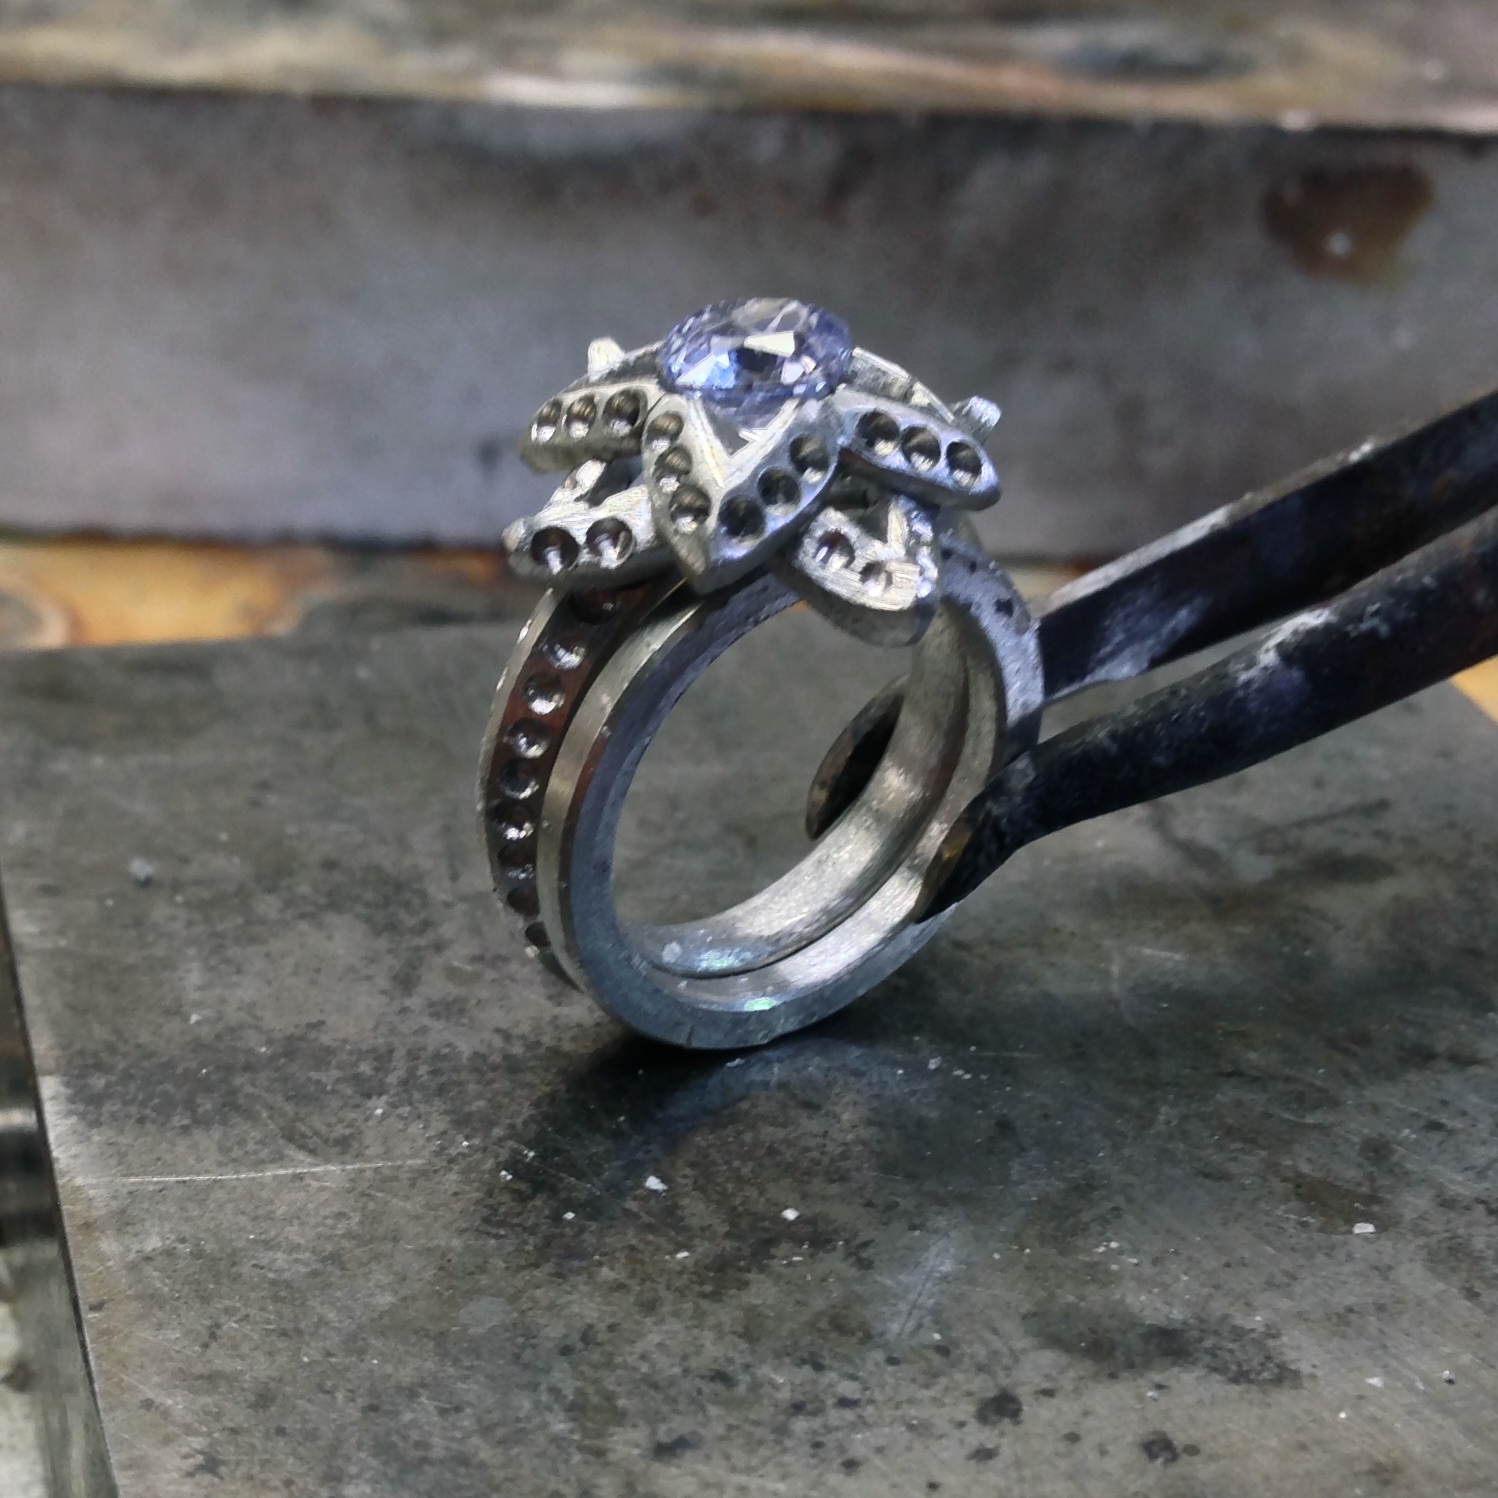
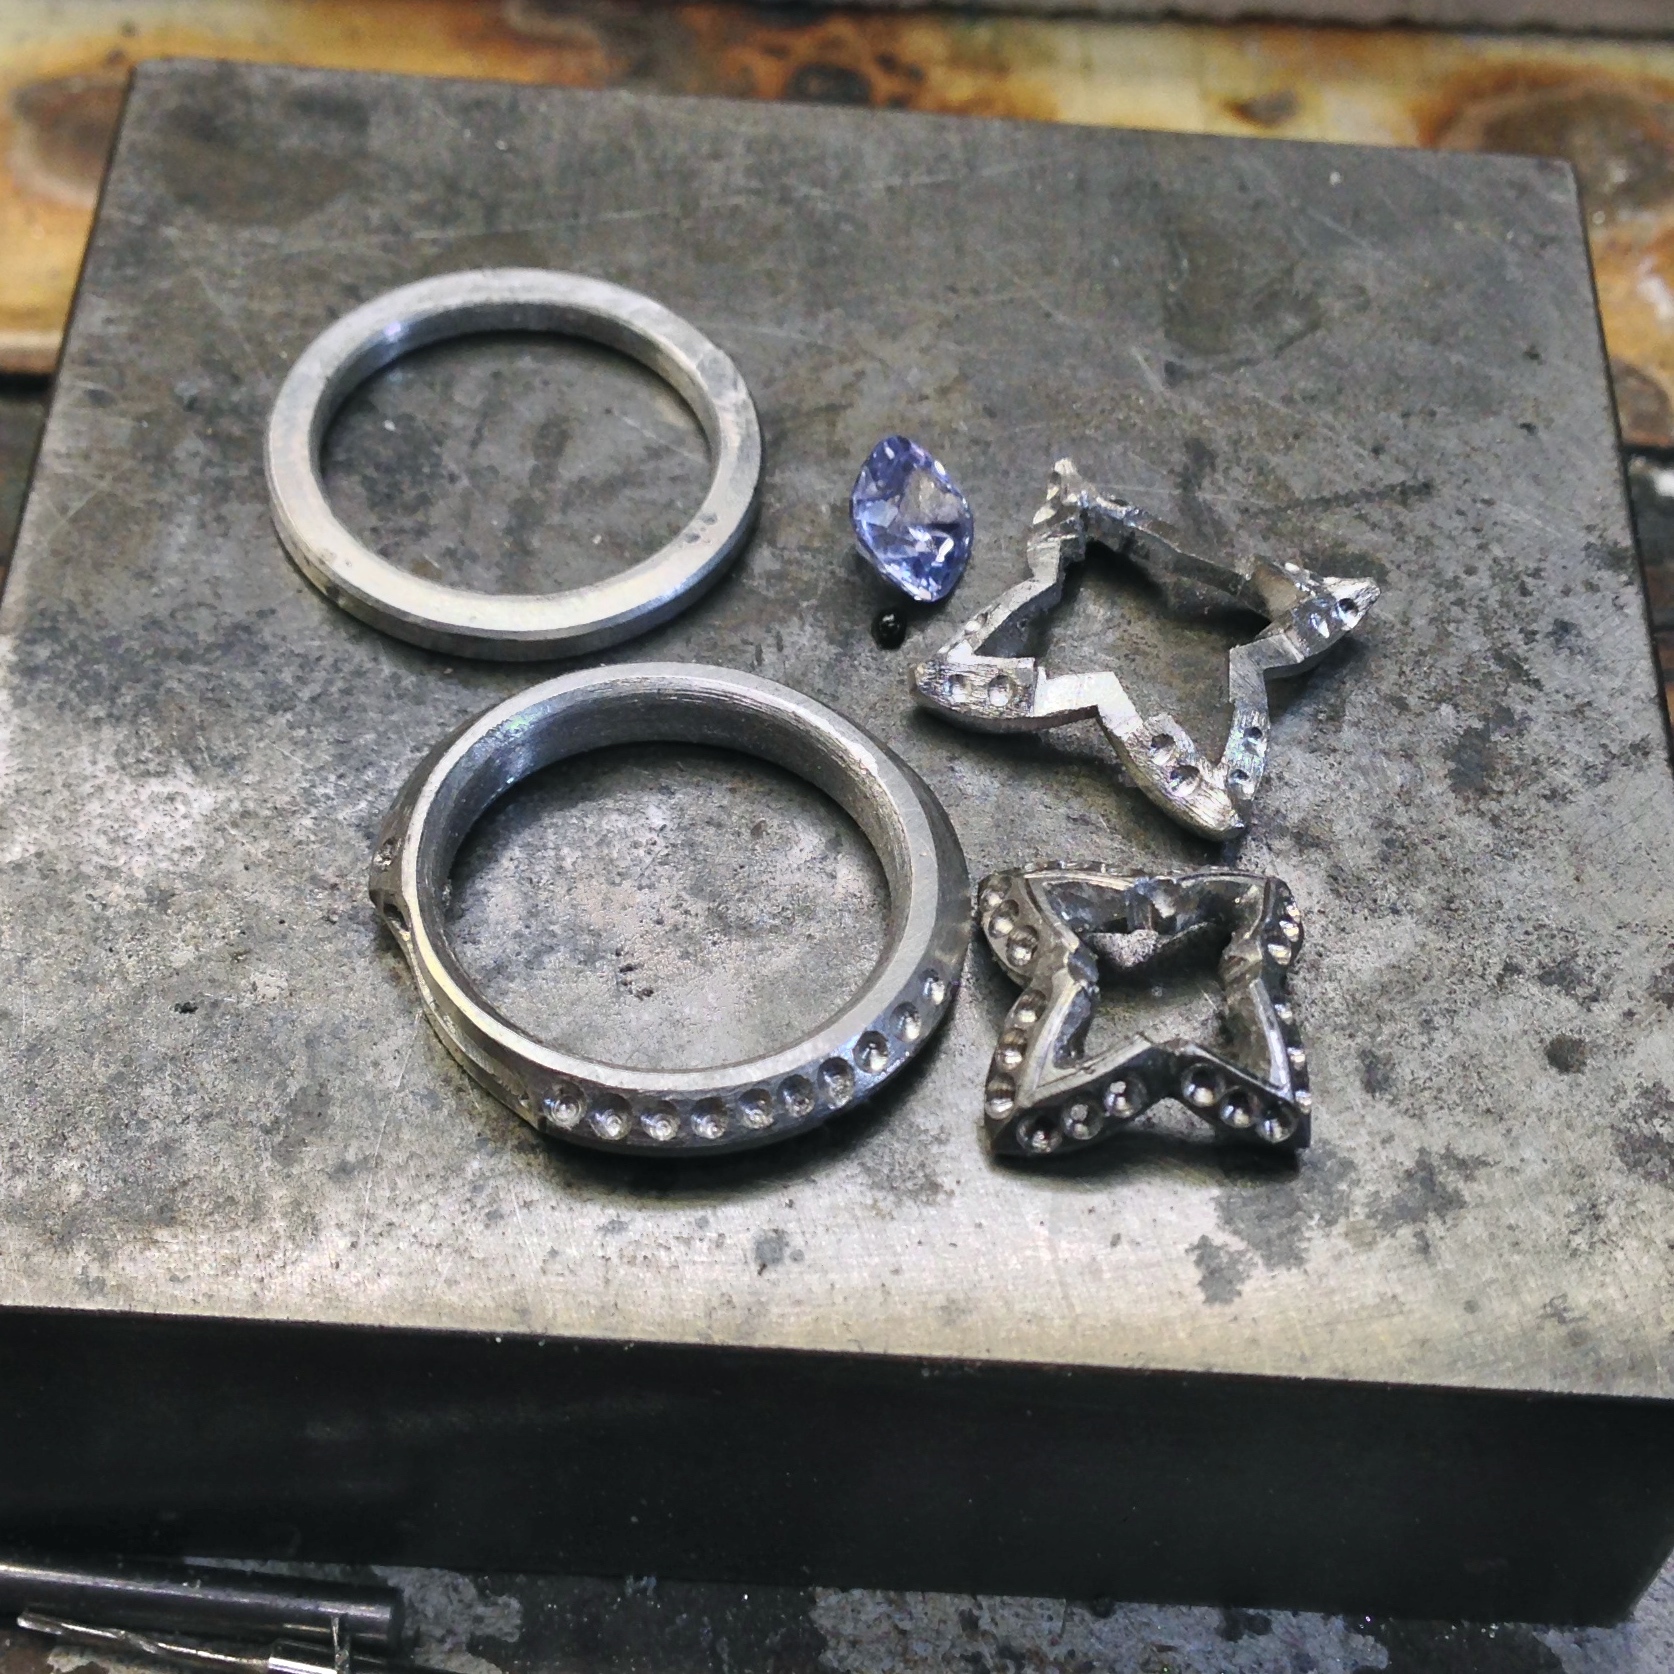
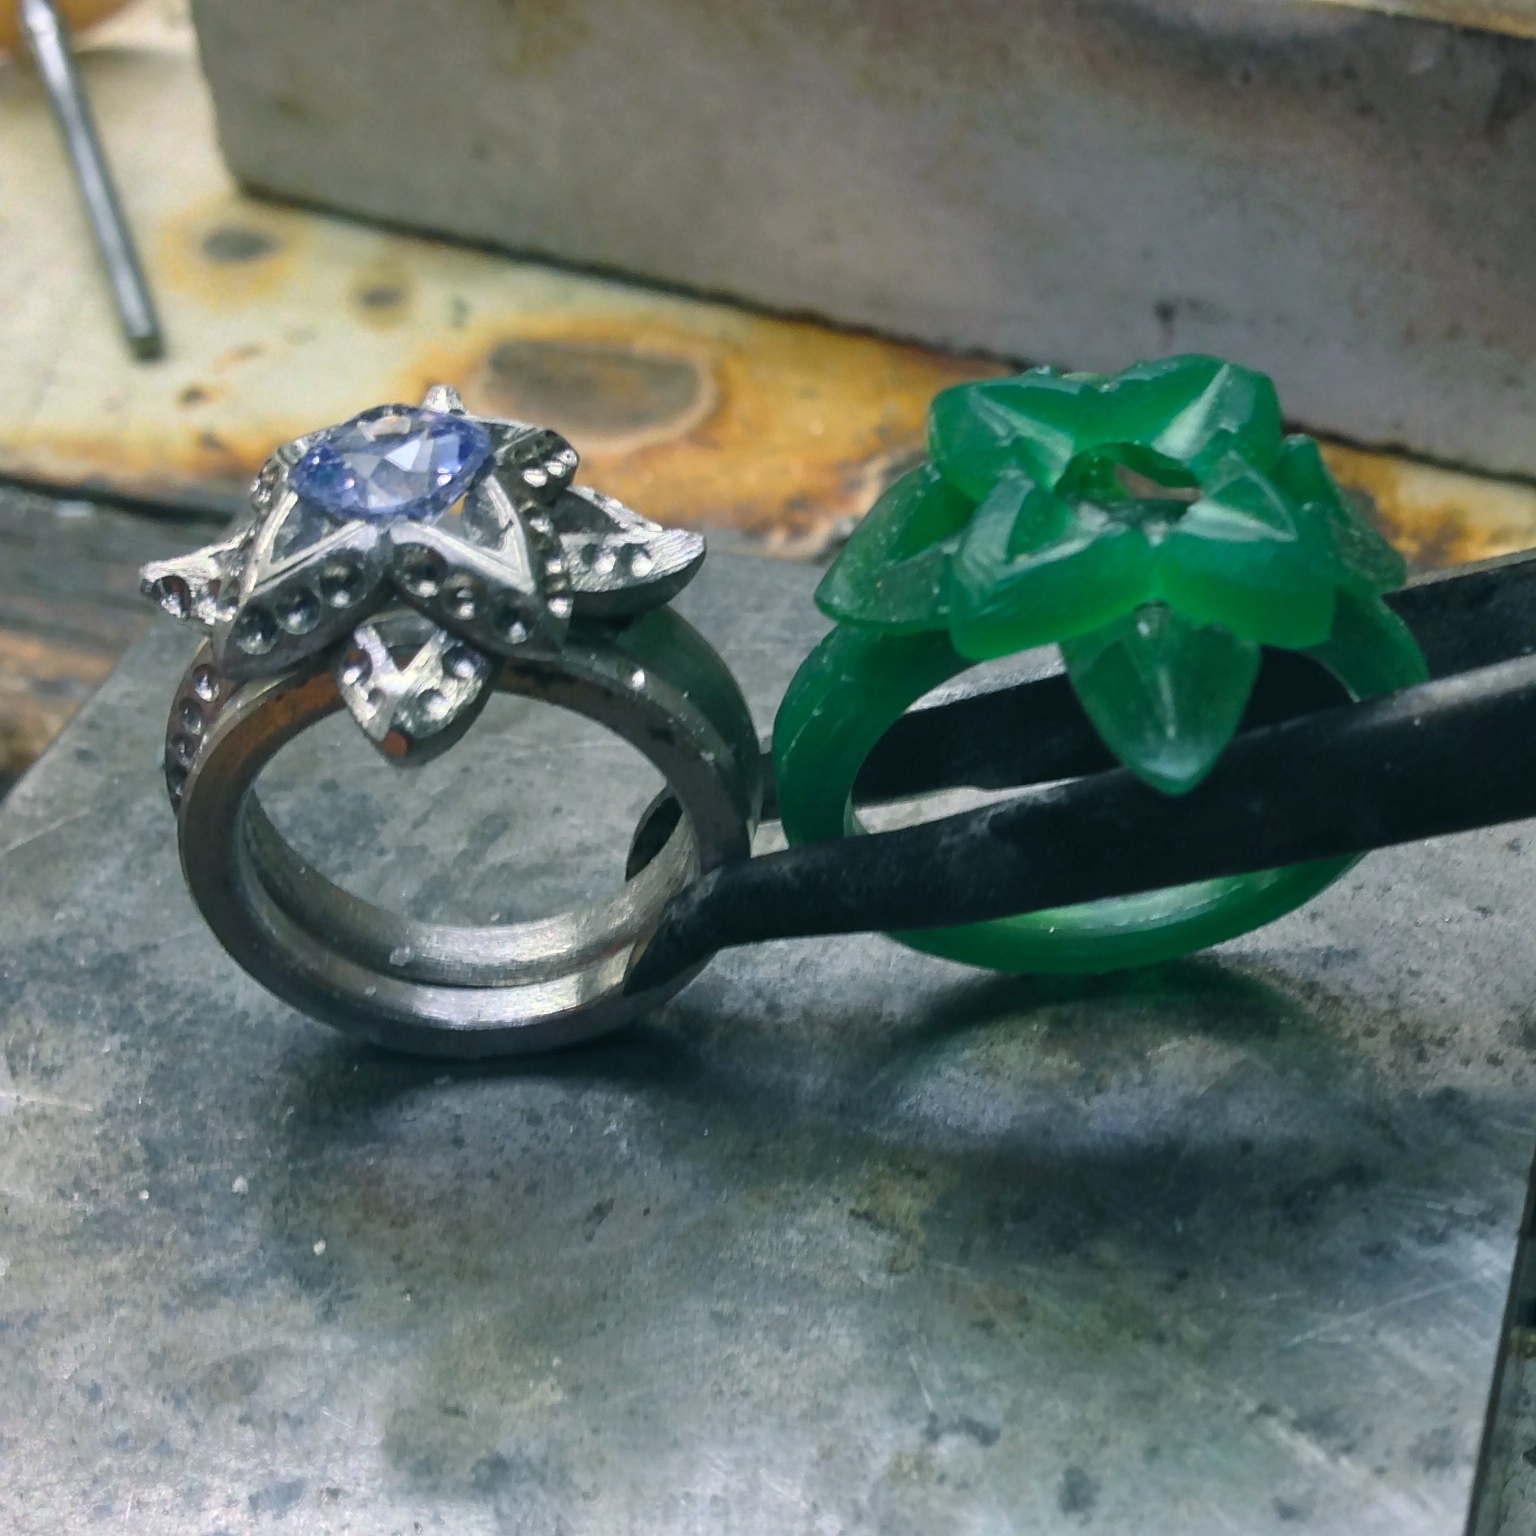
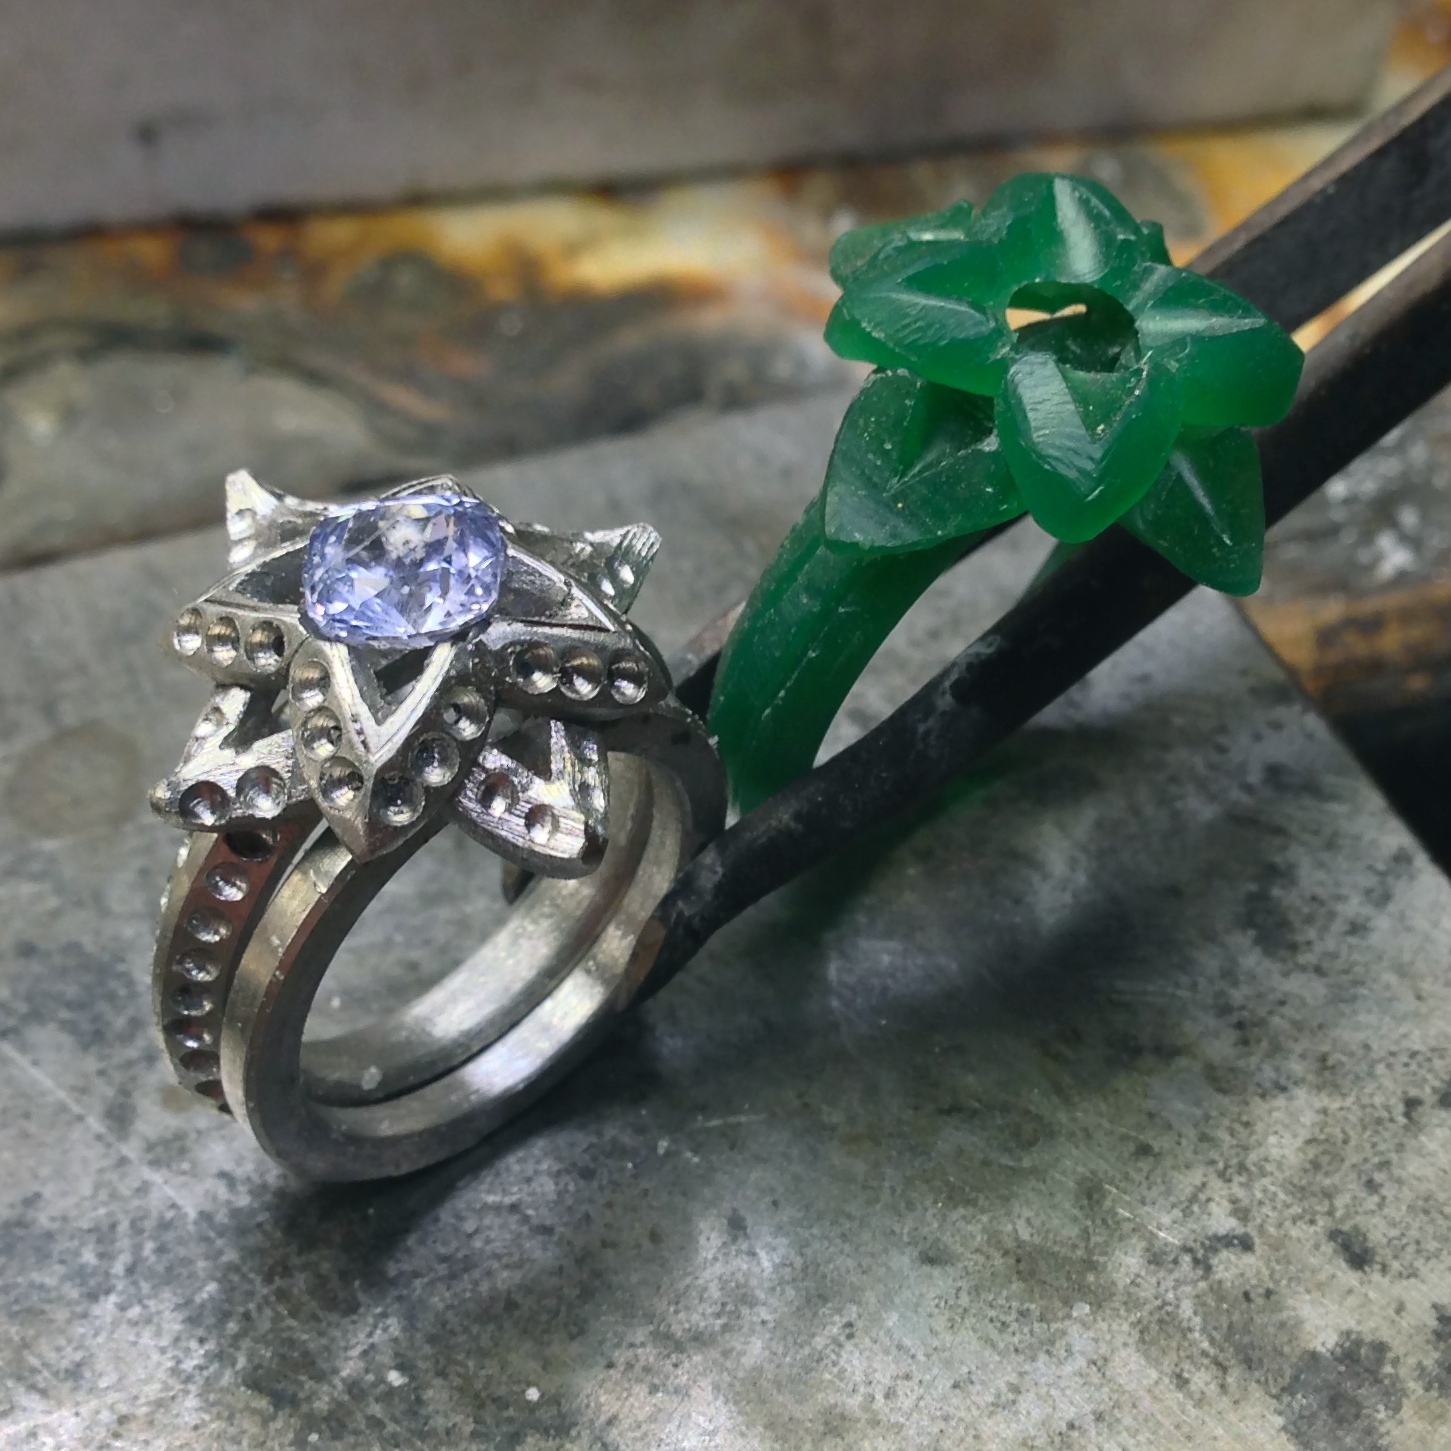
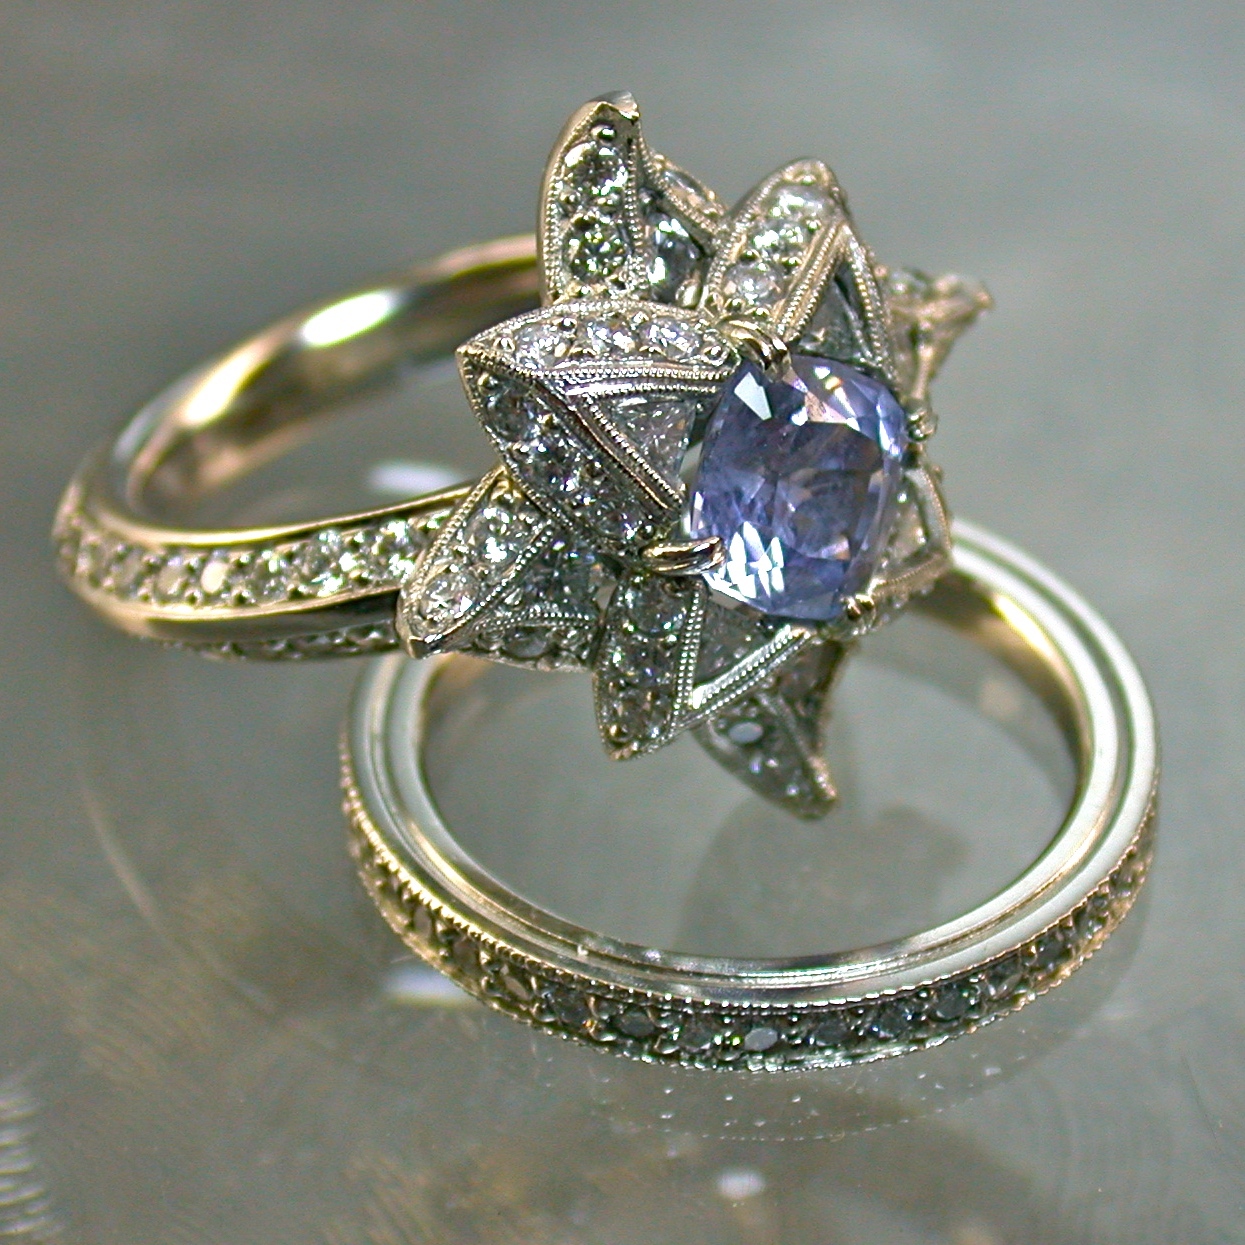
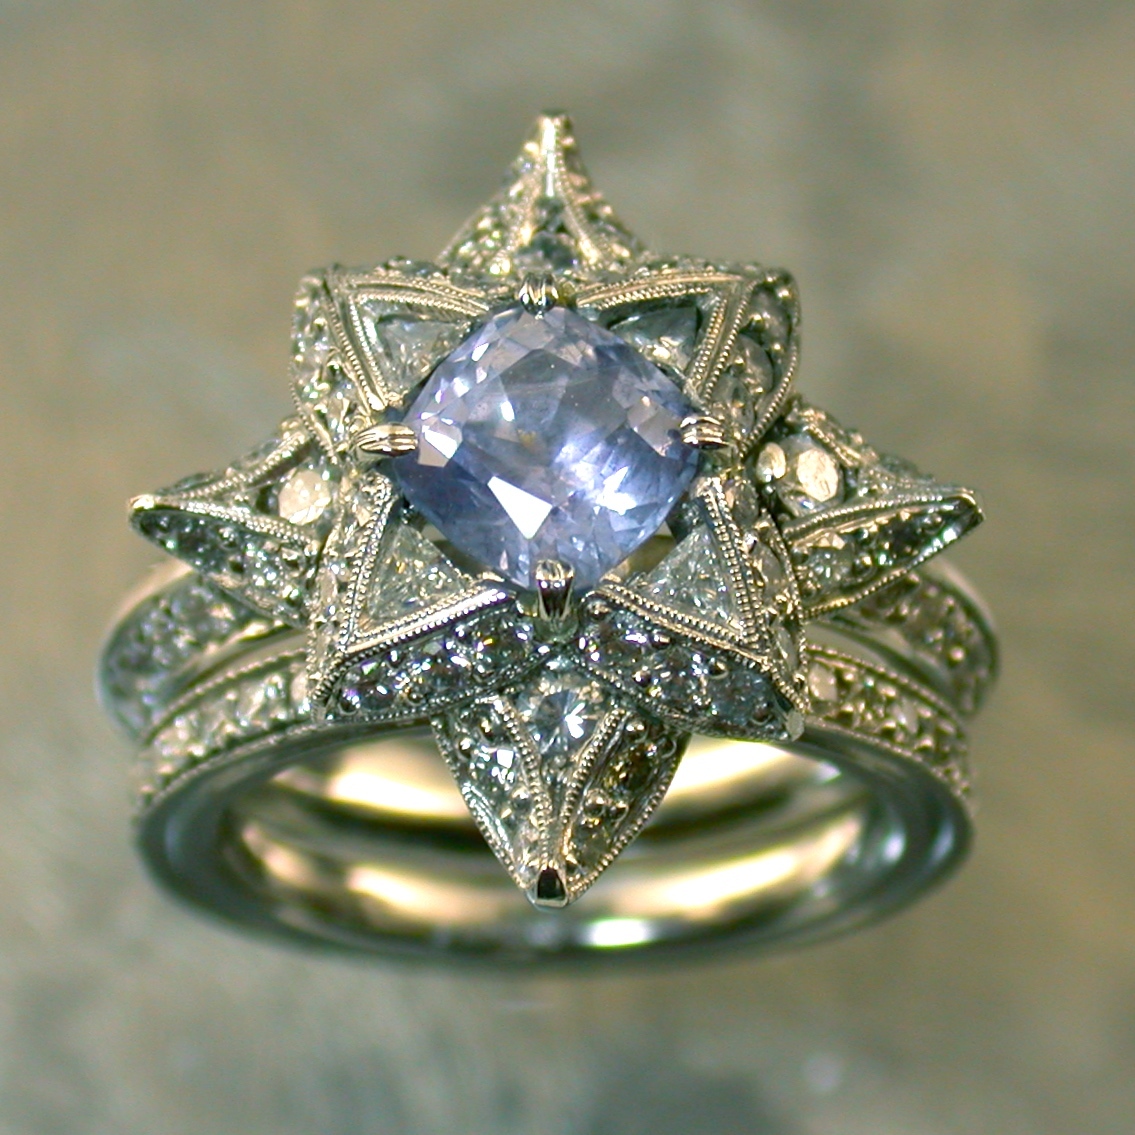
These shots walk through a few of the stages of development on a , rather unique, diamond and sapphire wedding set. All fabricated in 5% r.Plat.
This was done to fit a design that a customer supplied with a bit of Lotus flower influence.
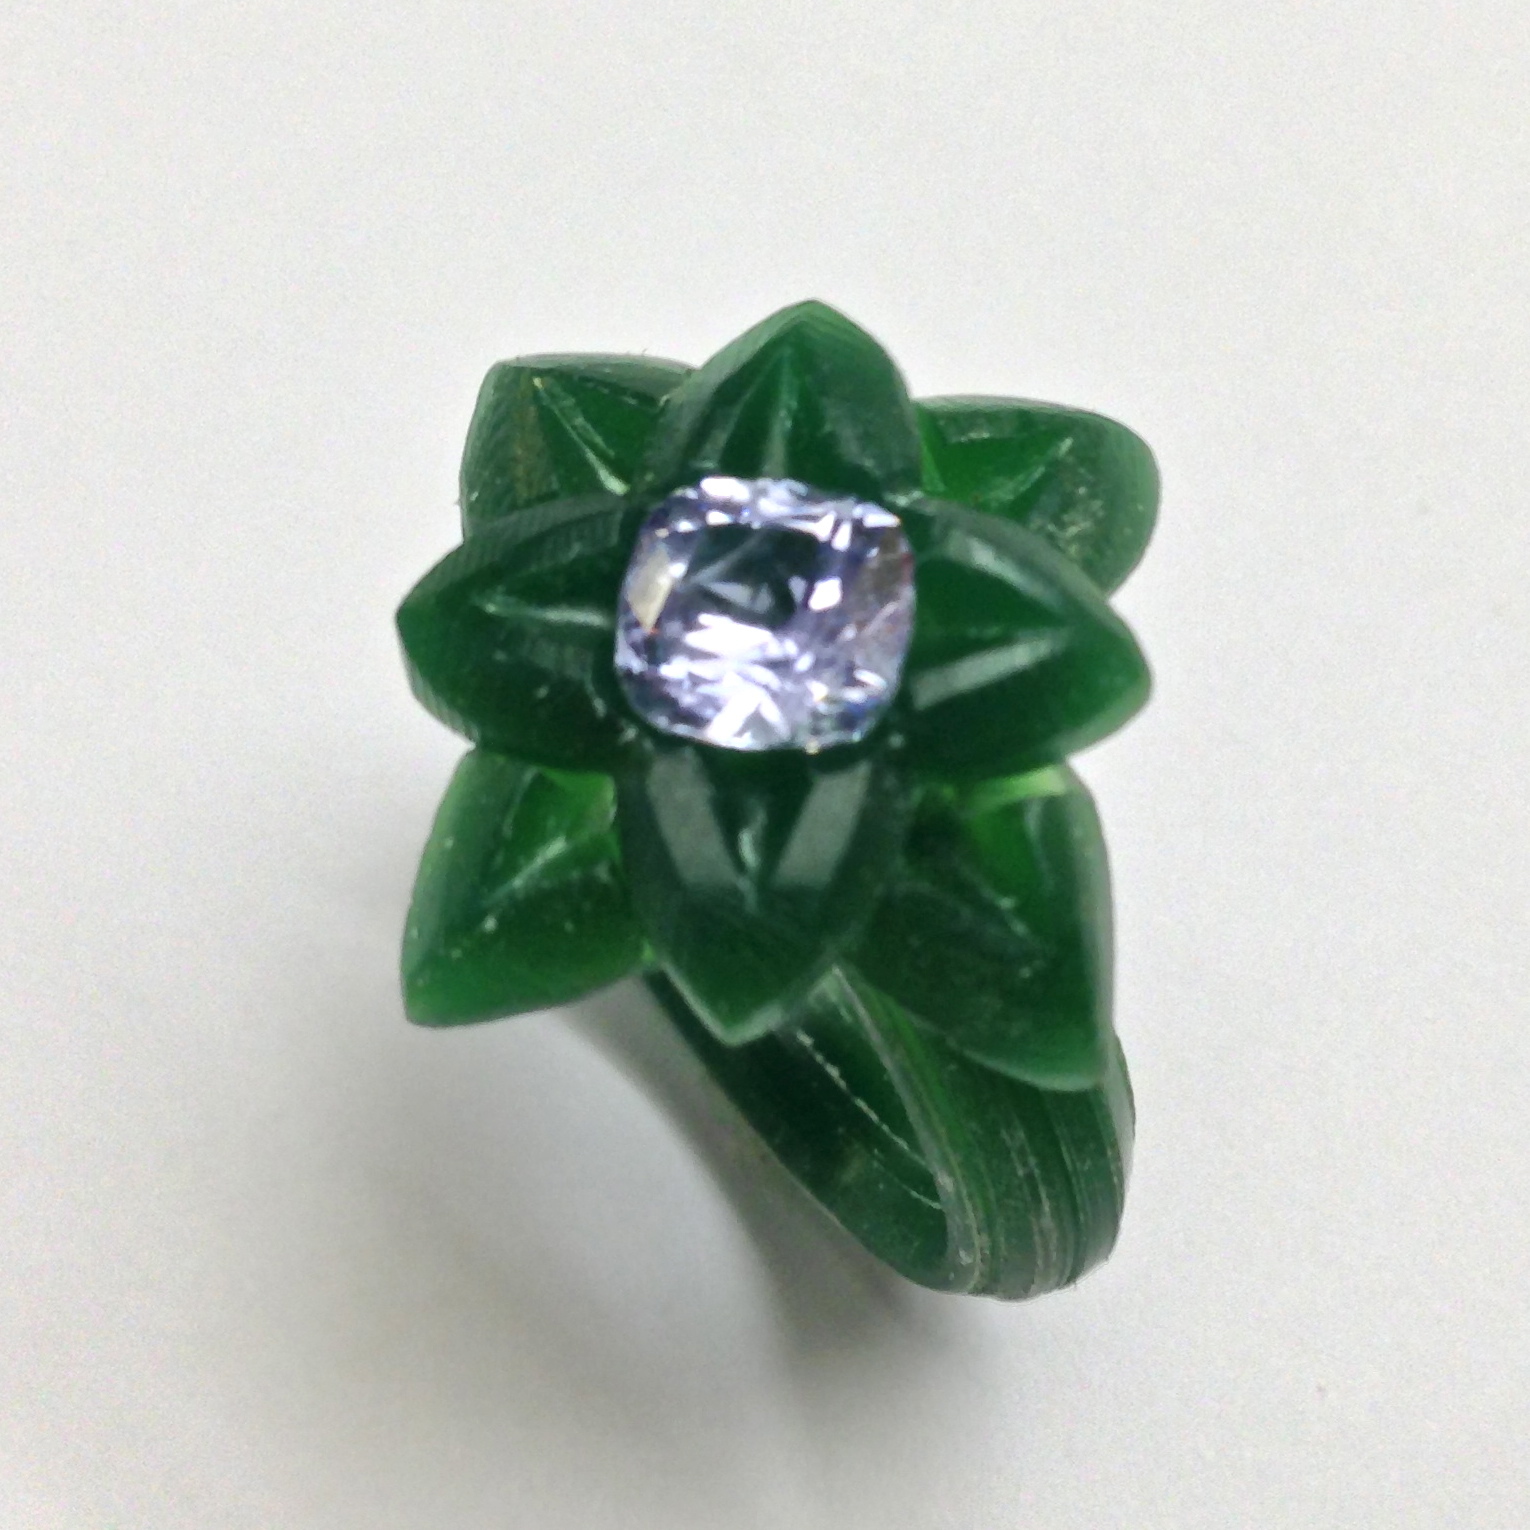
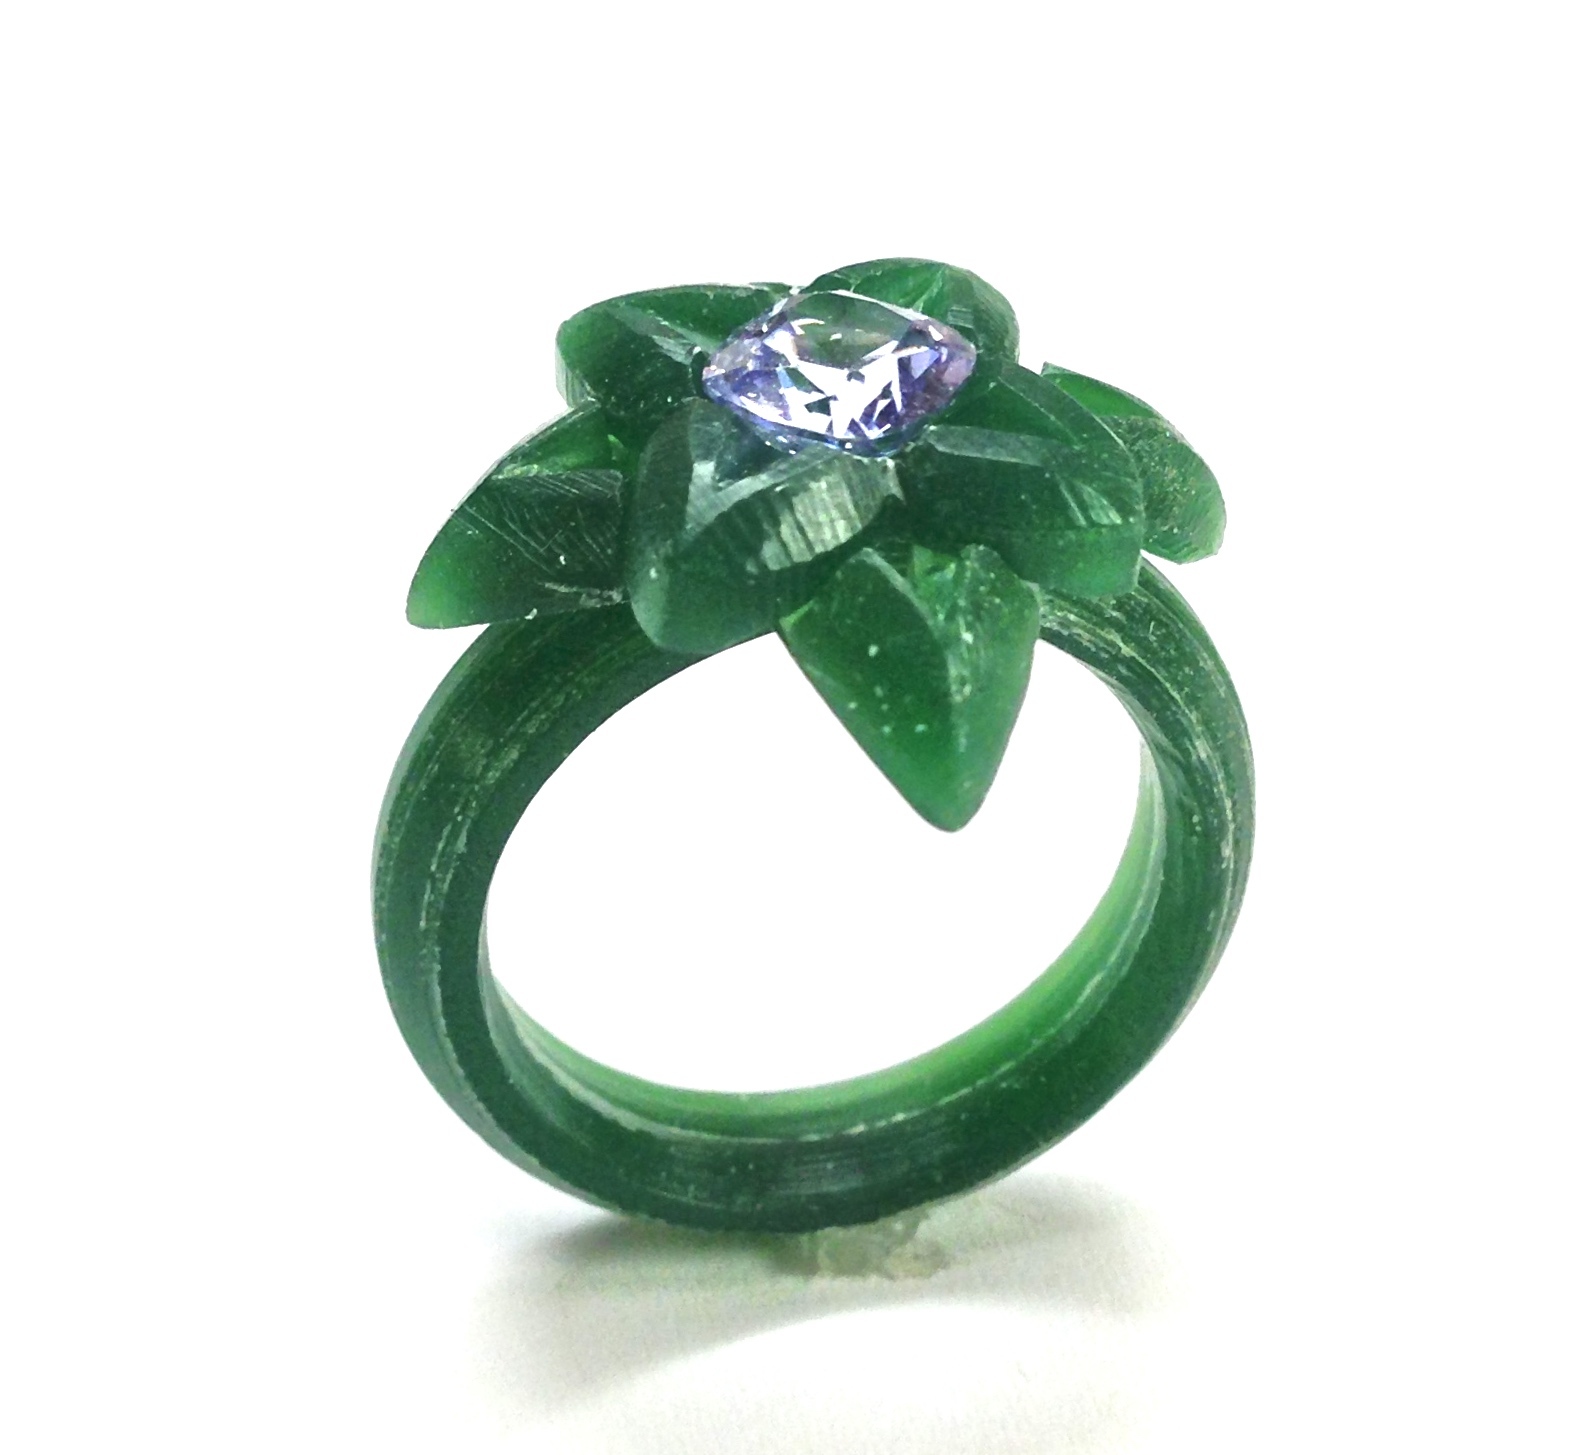
The wax was roughed out after the sketch to check scale and general proportion.
You’ll notice the old bench has taken quite a beating over the years, they get re-finished periodically. The loss of formica top was due to my earlier enthusiasm with a Hydro torch… great tool but a Hydrogen flame is harder to see and projects heat much farther out in the flame front.
For me, it was overkill, for the benches… torture.
Enjoy,
Jim


2 Likes
what a fantastic photo study Jim
Thank you very much for sharing this. The photos are great and the record of steps is inspiring.
I like the fact that you work out issues in wax even if you are not going to use the wax for a casting. I am also intrigued by the fact that you have not fully drilled holes for your settings. I do this sometimes when need to but for the most part i drill right through. only drilling part way defiantly improves strength and lessens possibility of failure.
Seeing how someone else solves problems and looks at a project adds to and improves my mental tool box.
Les
Hi Les.
There will be holes but when I’m prepping for pave’ I start a bit undersize, kinda nudge things around a bit if needed, then, again, still a bit undersize, re sink the seat with a ball burr.
At that point, since I have a true bottom, I’ll drill the clean-out hole & either chamfer, or azure depending on exposure and budget allowance. The seat will still be about .1 mm undersize, even with the most calibrated of stones I’ll find strays so I have to take that into account.
I try for a .05 mm gap between stones for most work, then clear the space (gap) with a grove linking the two stones (about .5 mm + or so.
Thanks, Jim
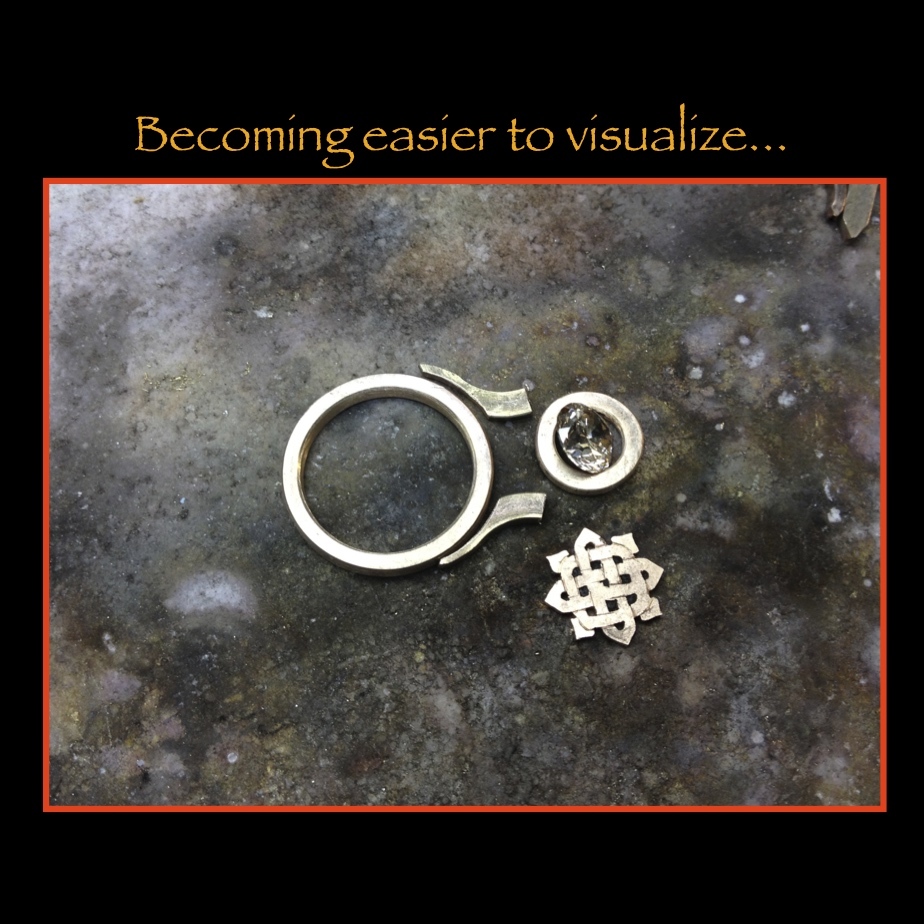
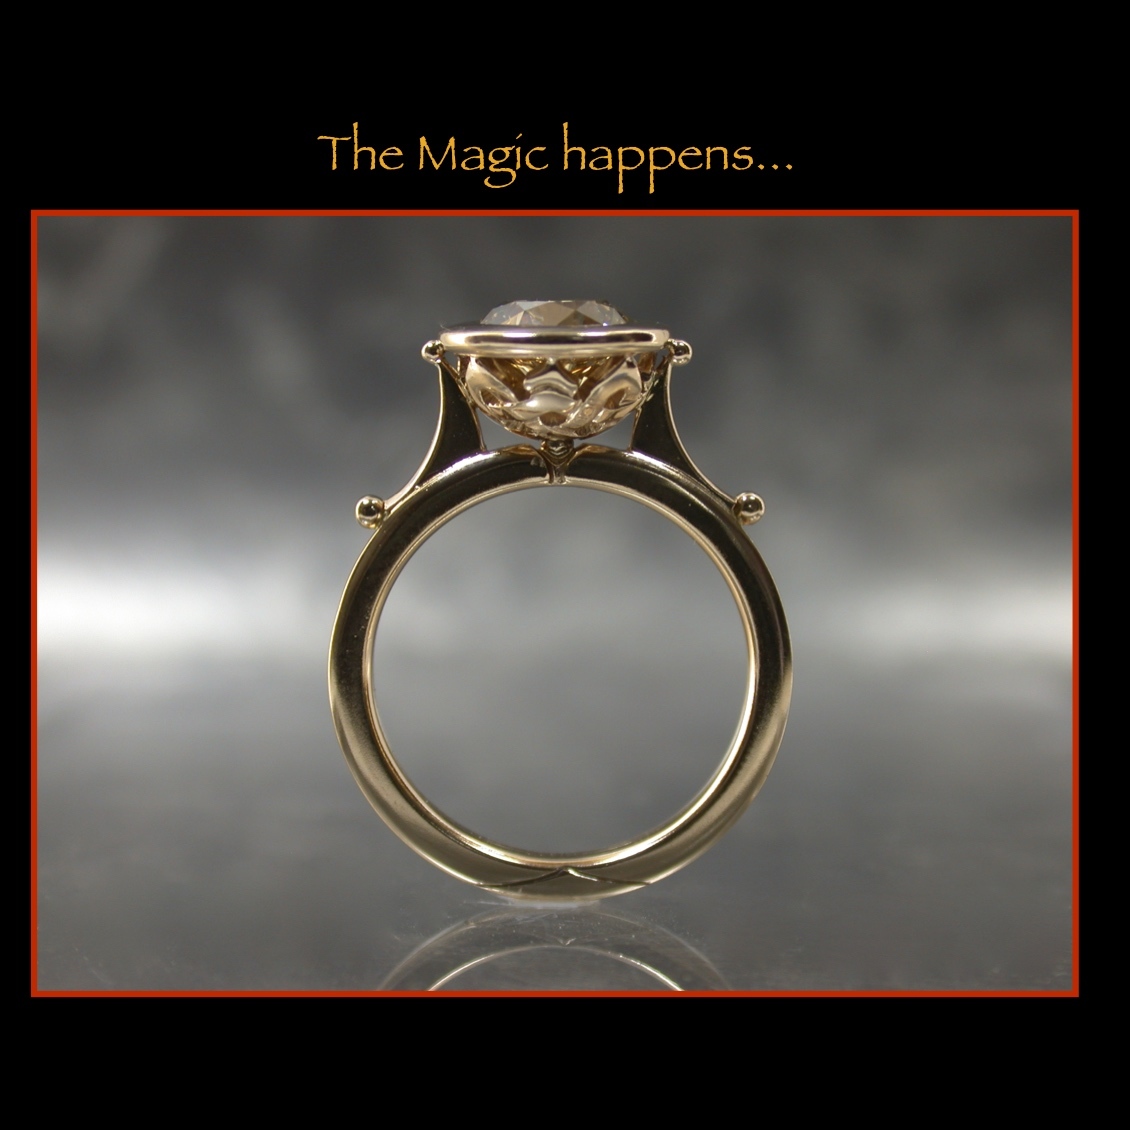
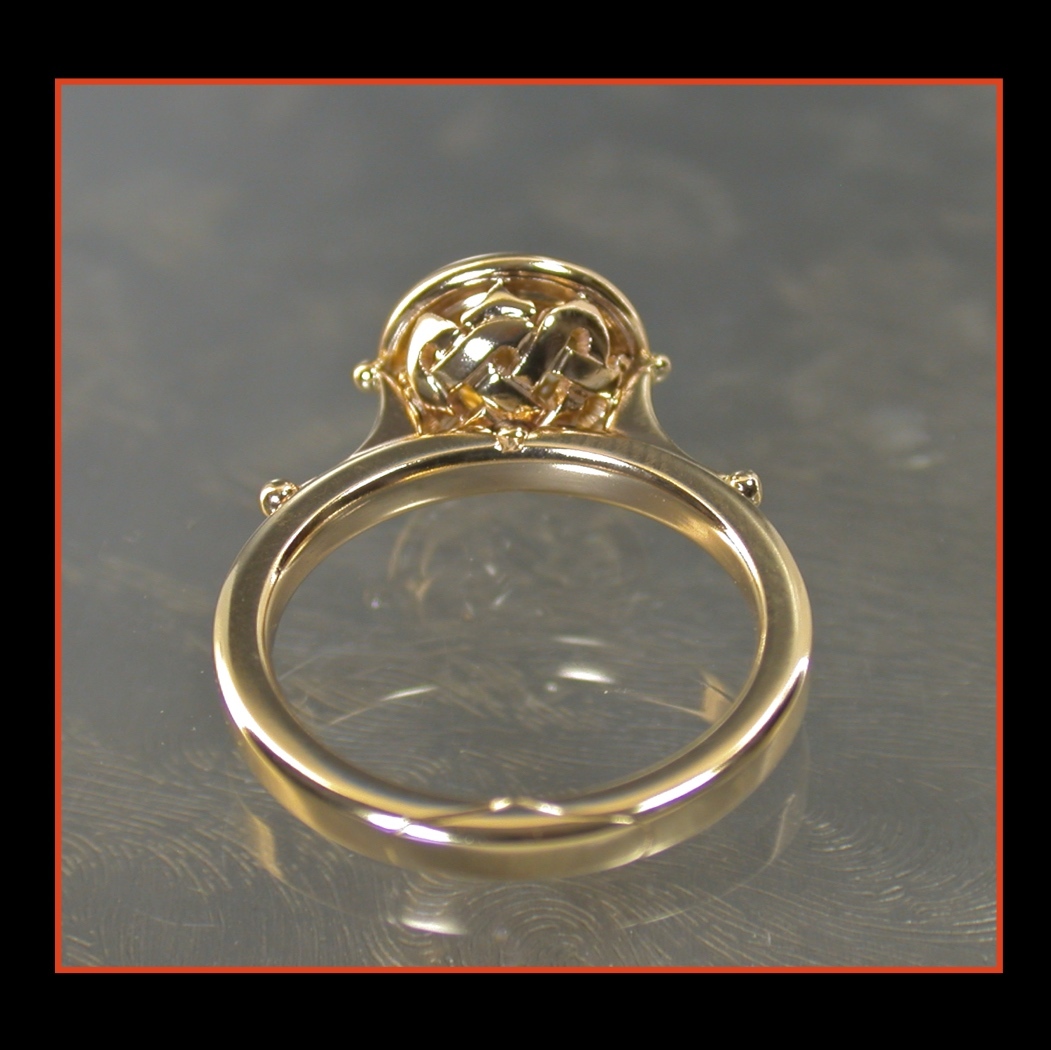
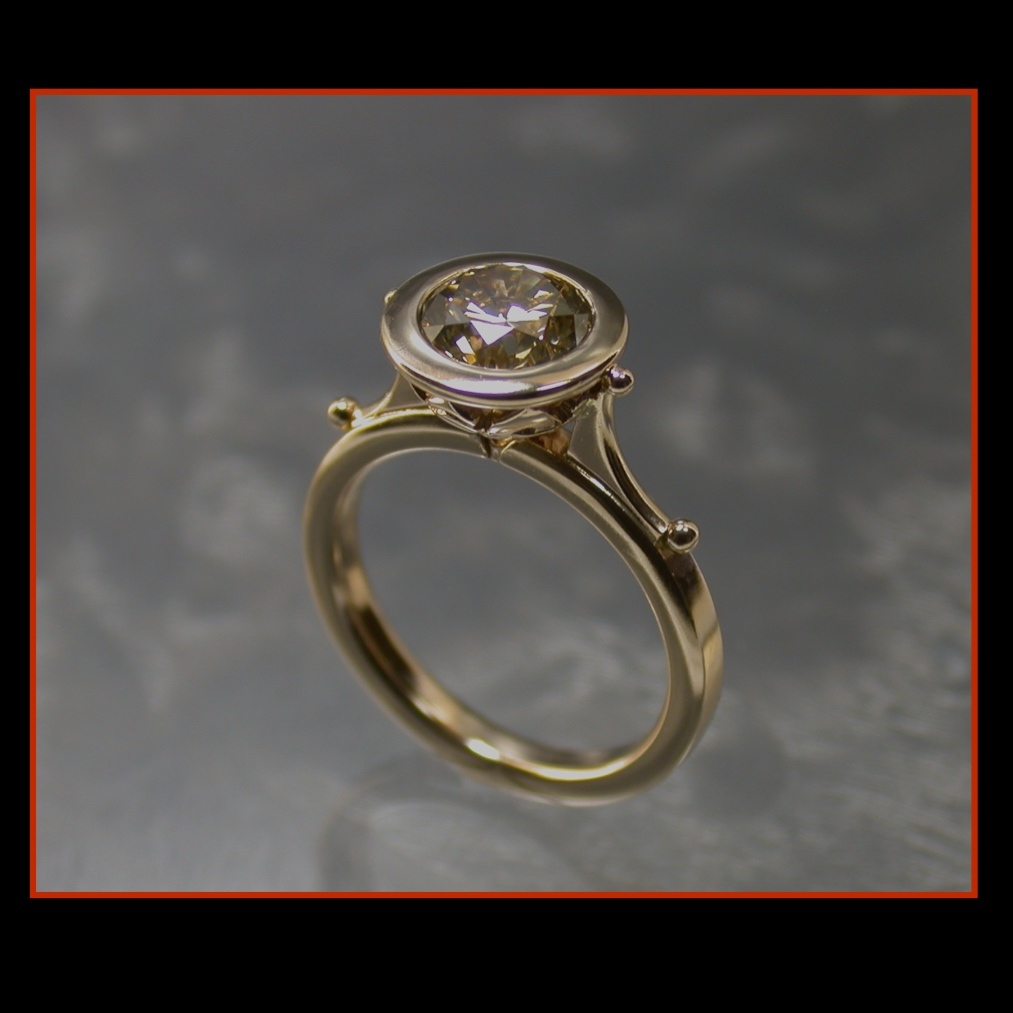
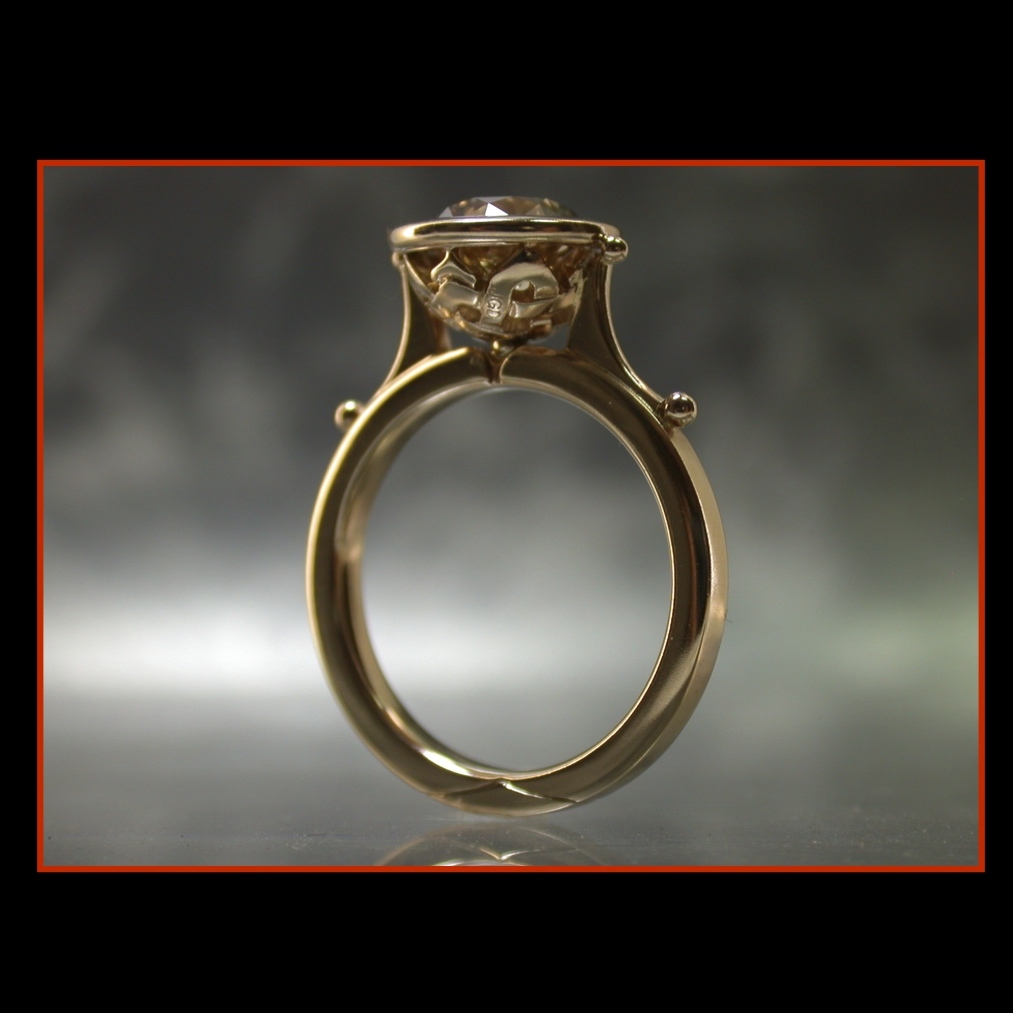
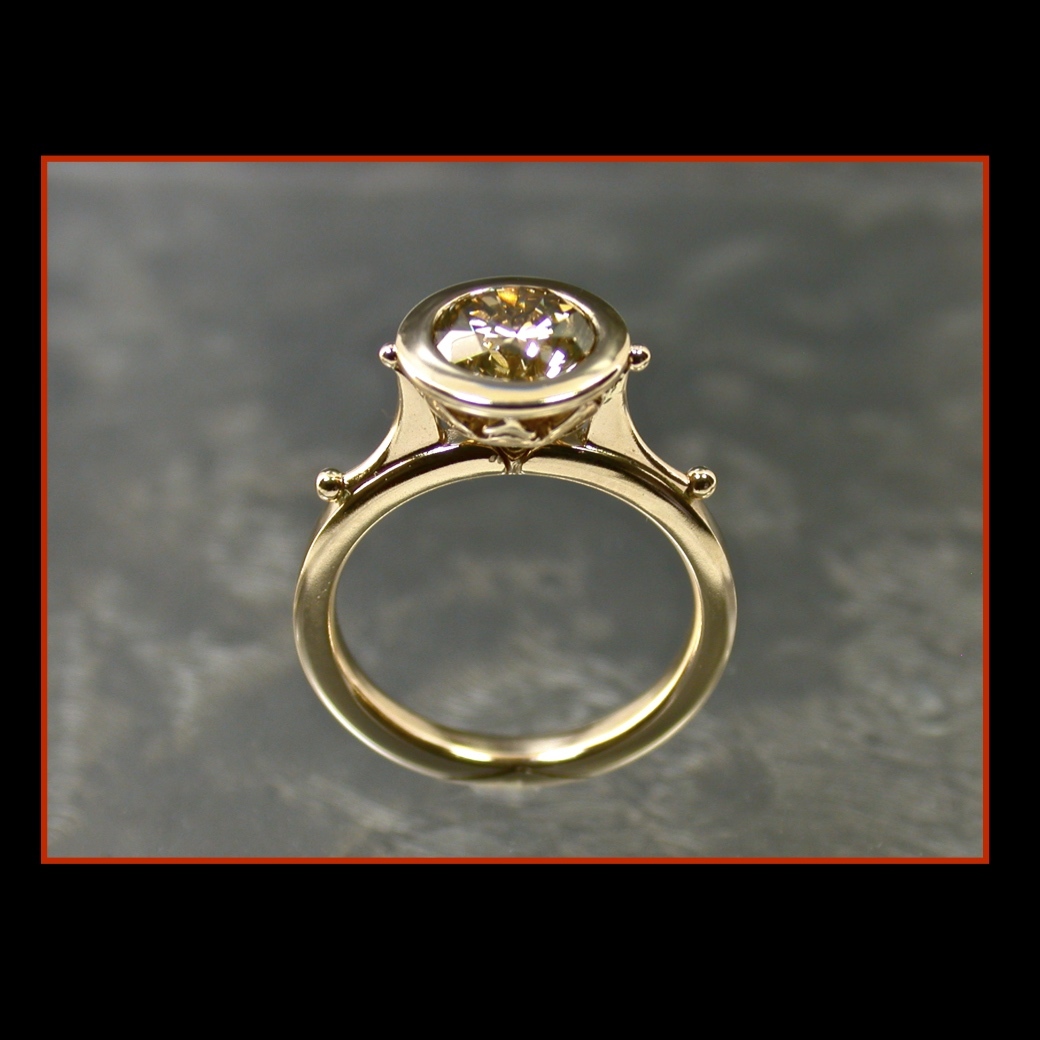
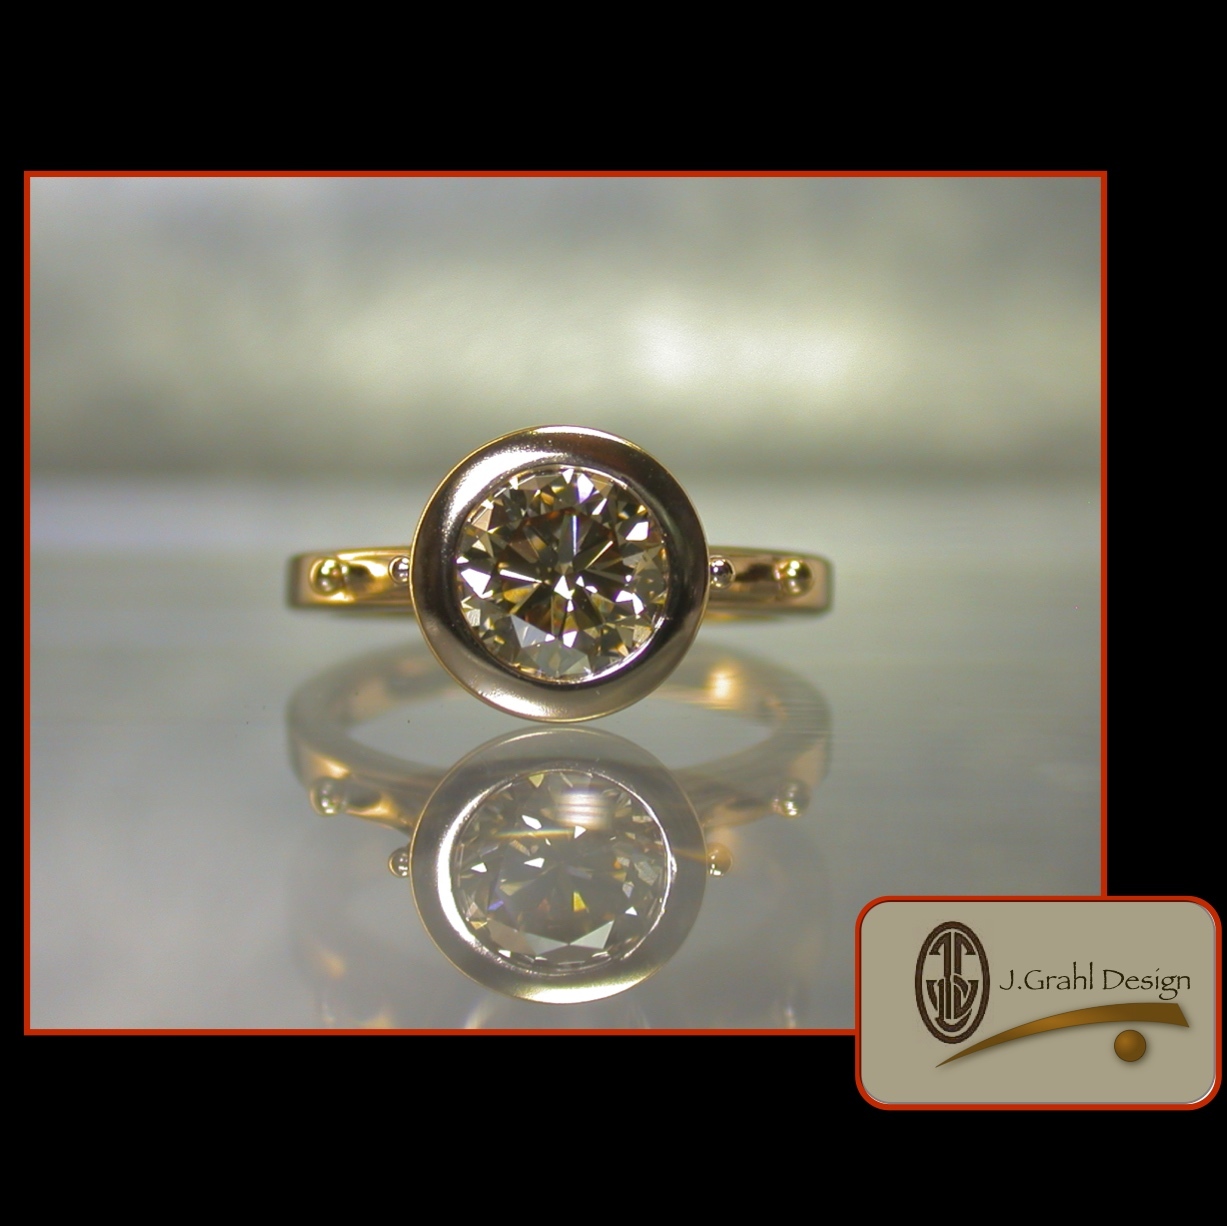
Hi,
here is one of my favorites.
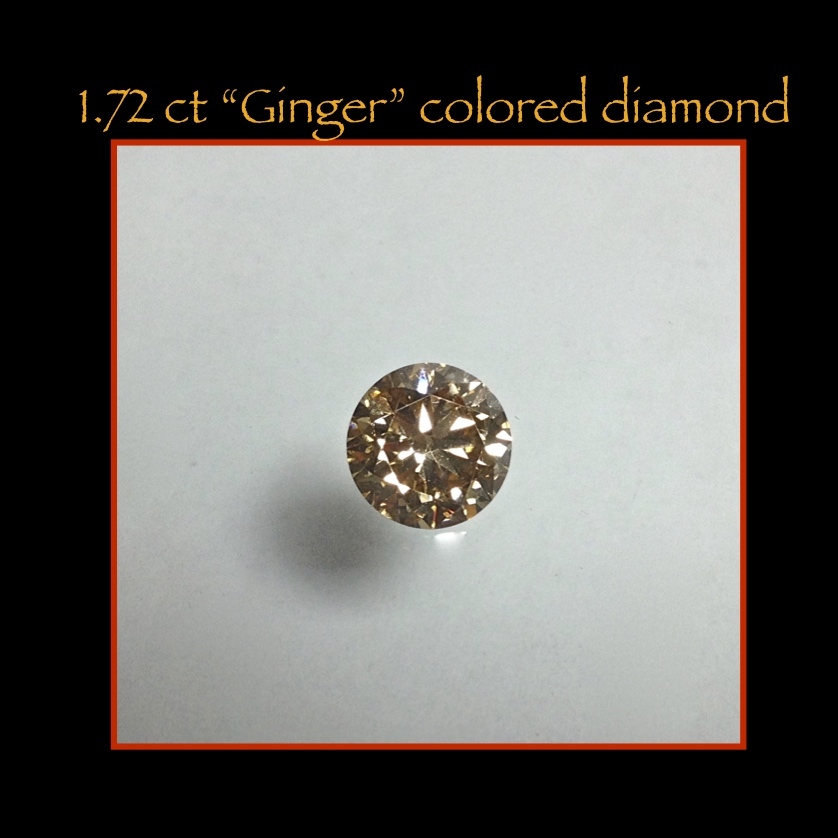
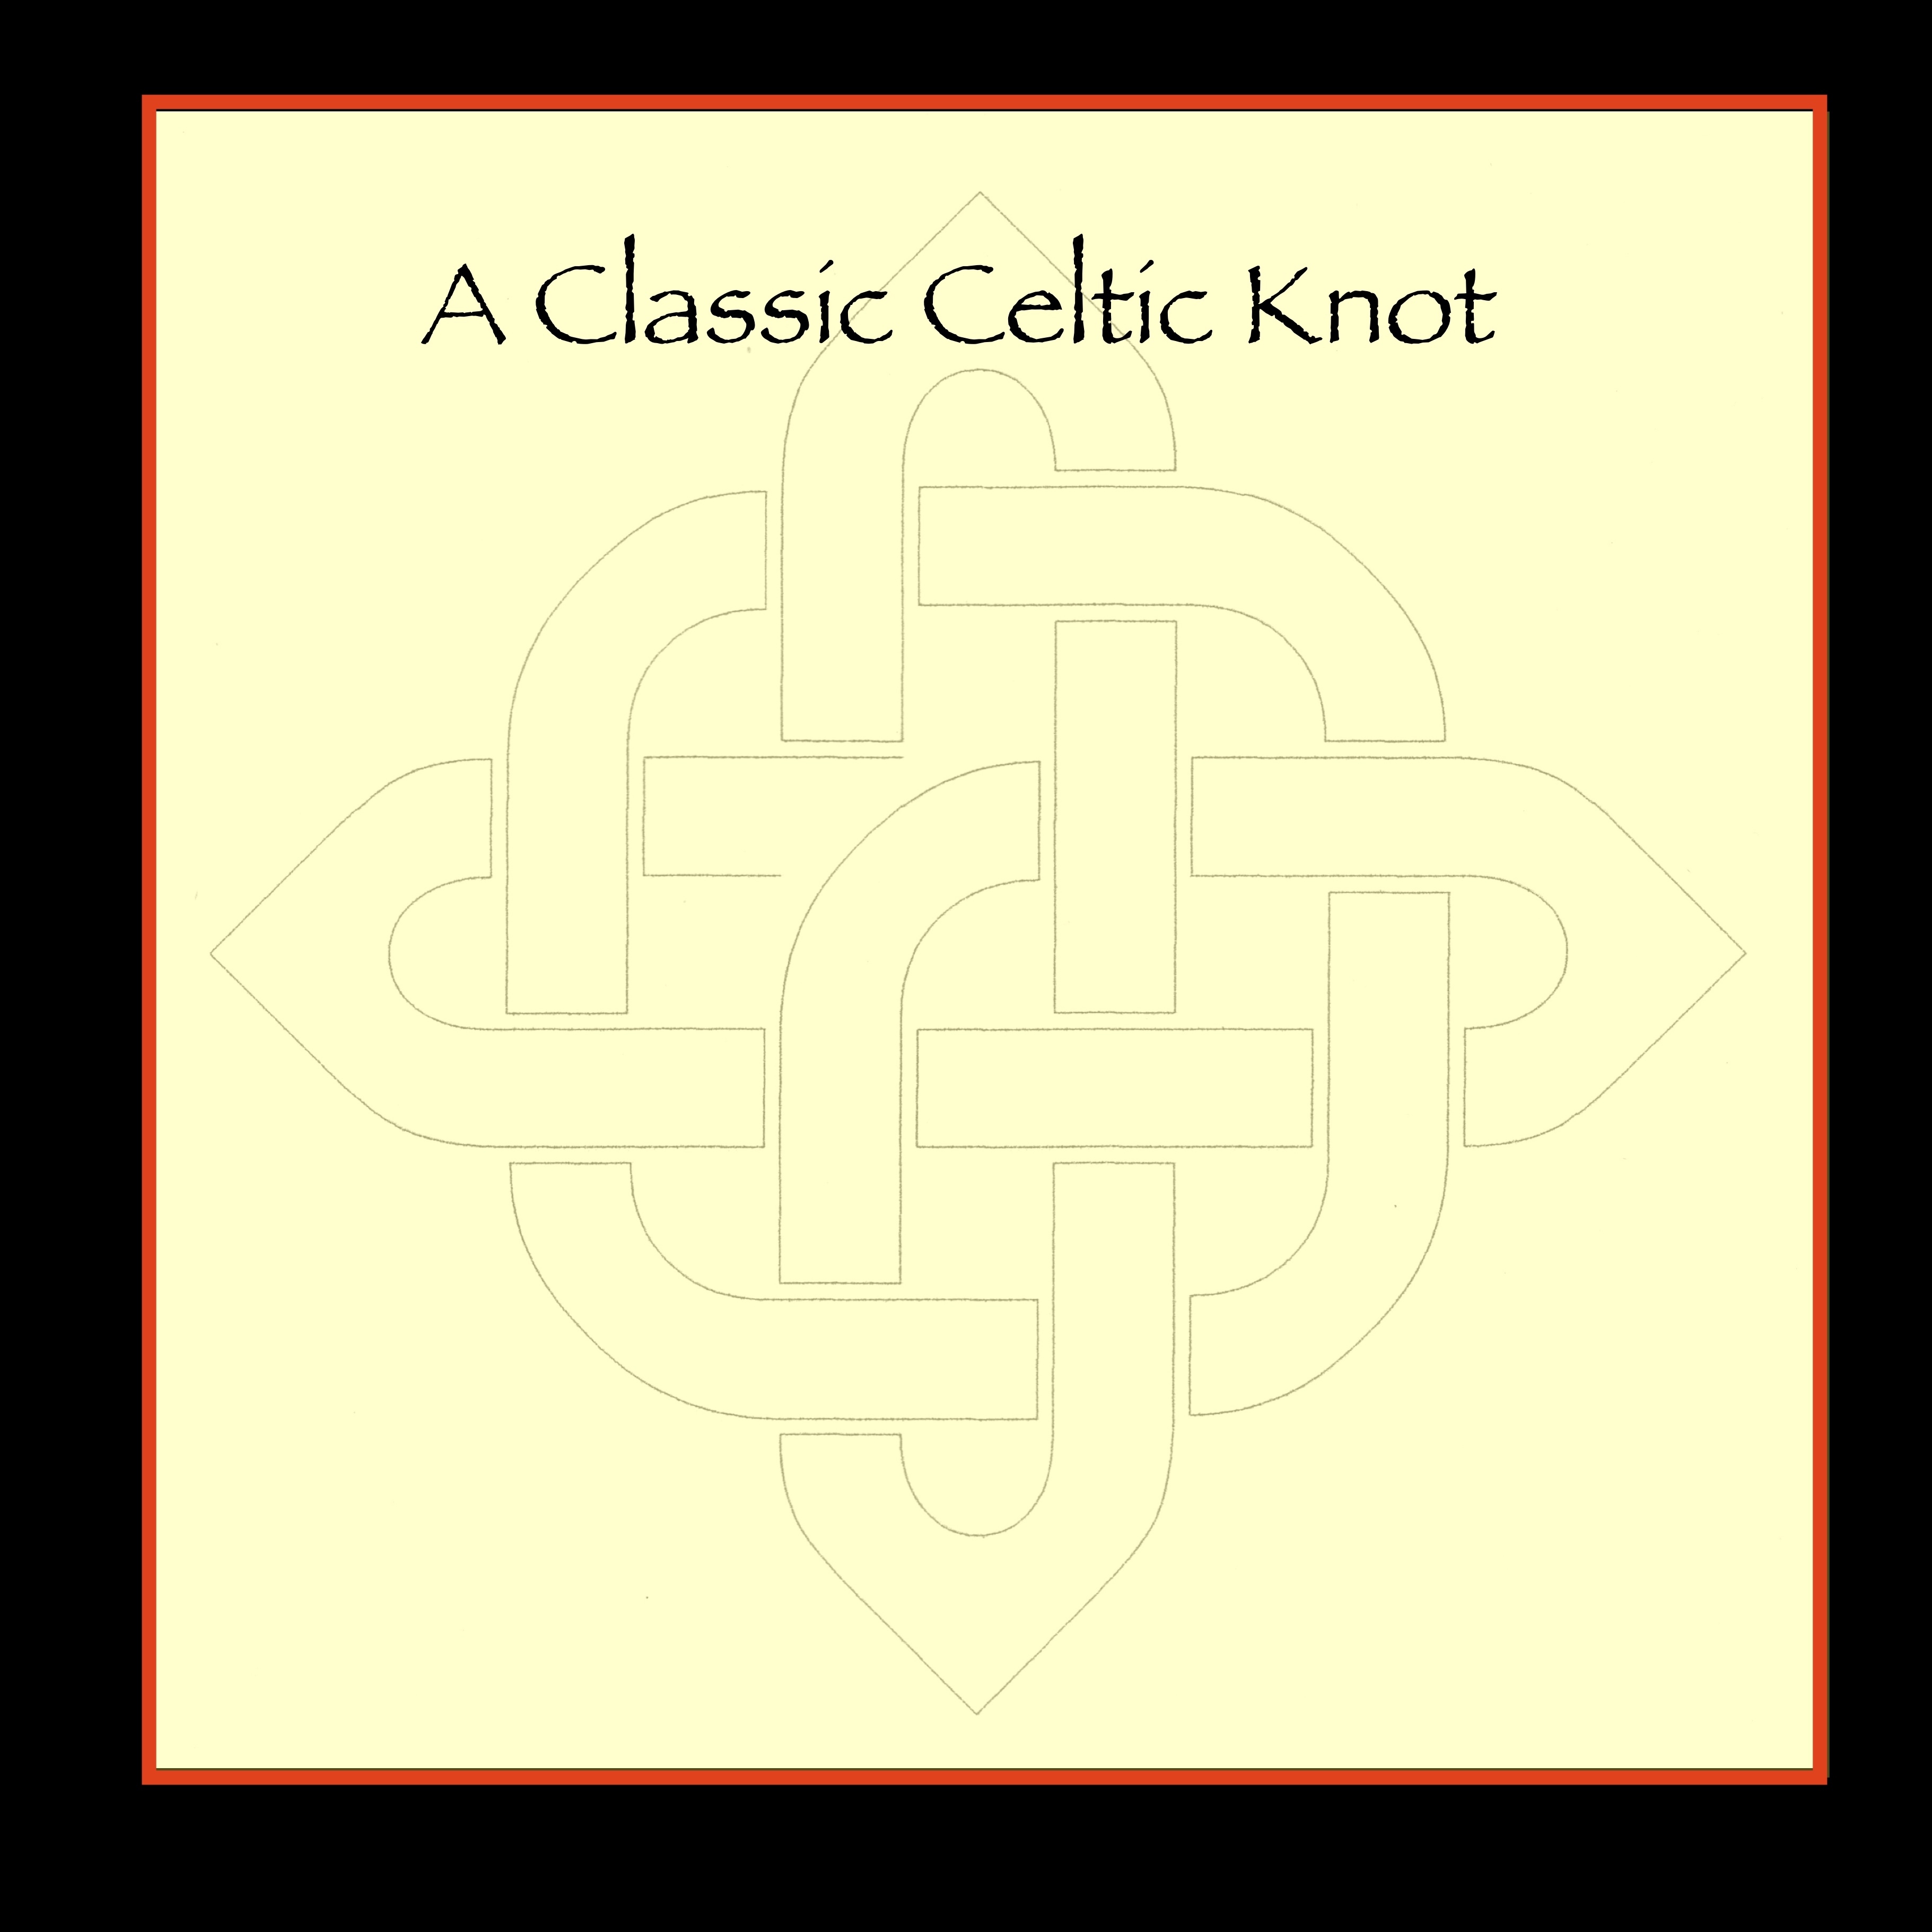
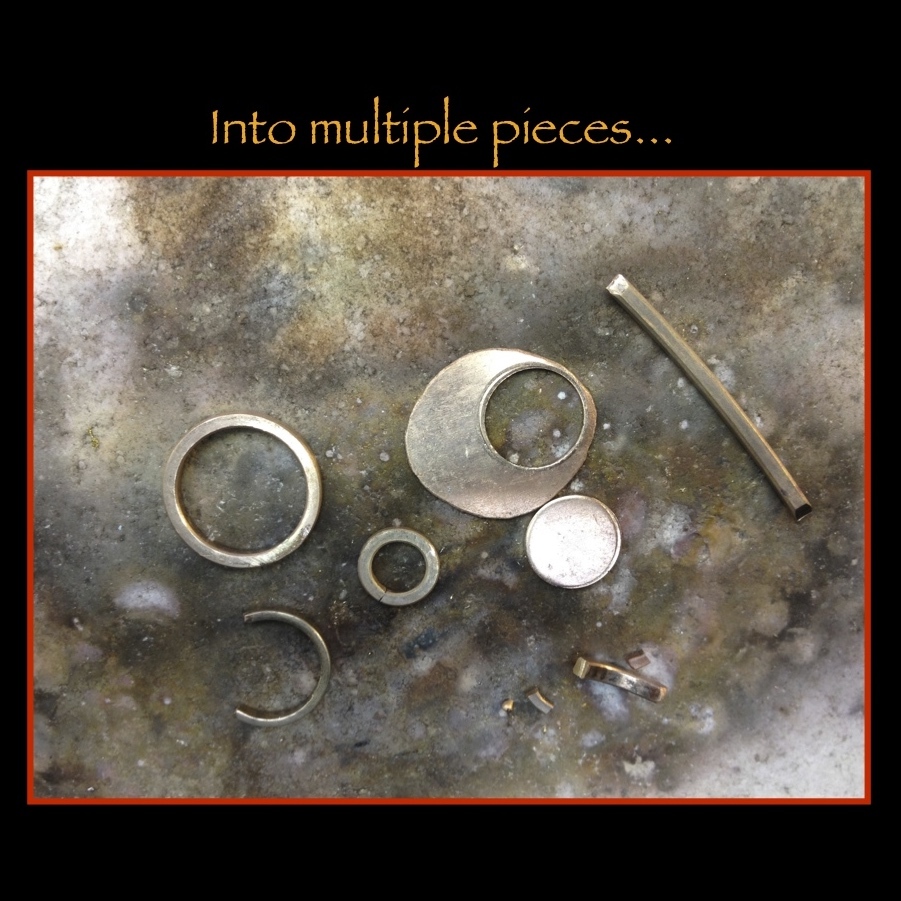
This was done for Shawn Dolan, a great friend of Seth and one of the Custom Made founders.
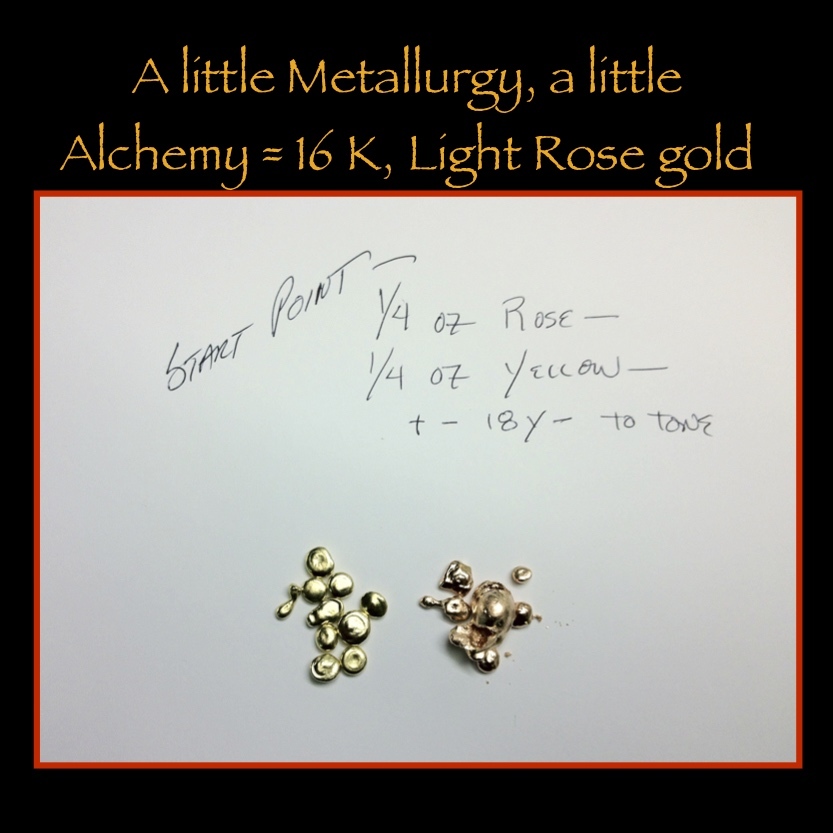
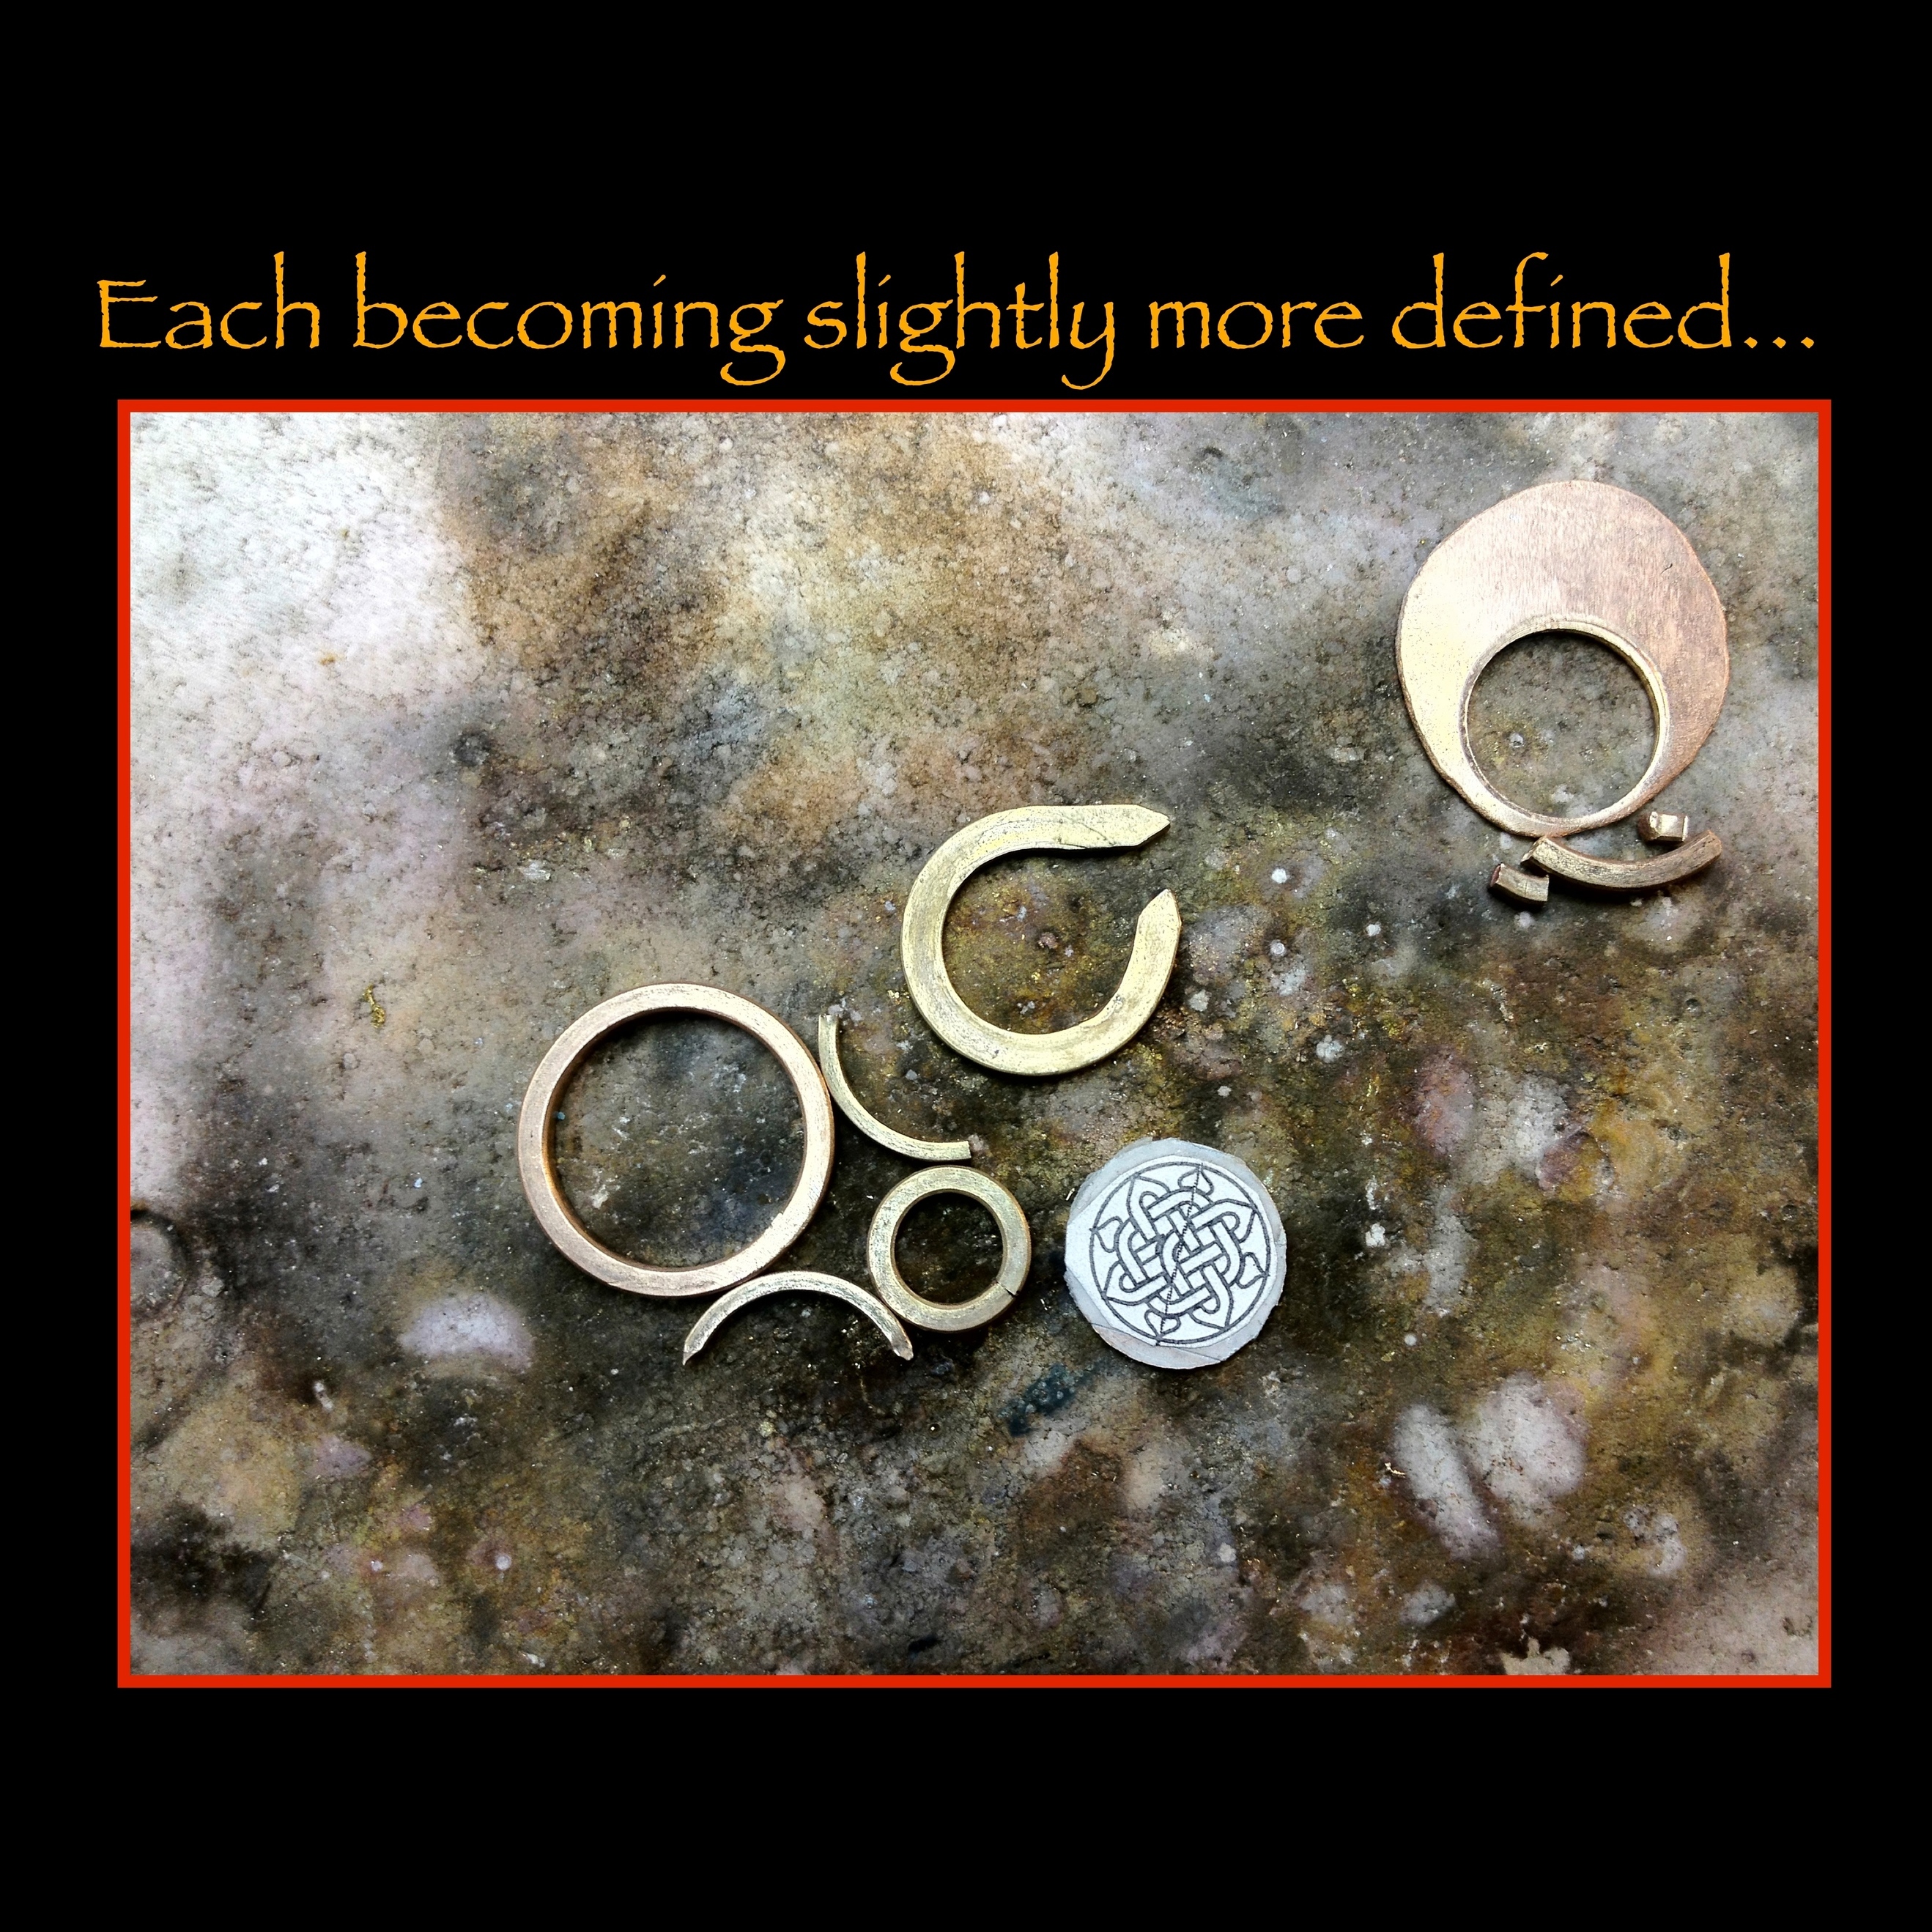
Shaun wanted a Celtic inspired piece with a “Ginger” hued 1.72 ct diamond.
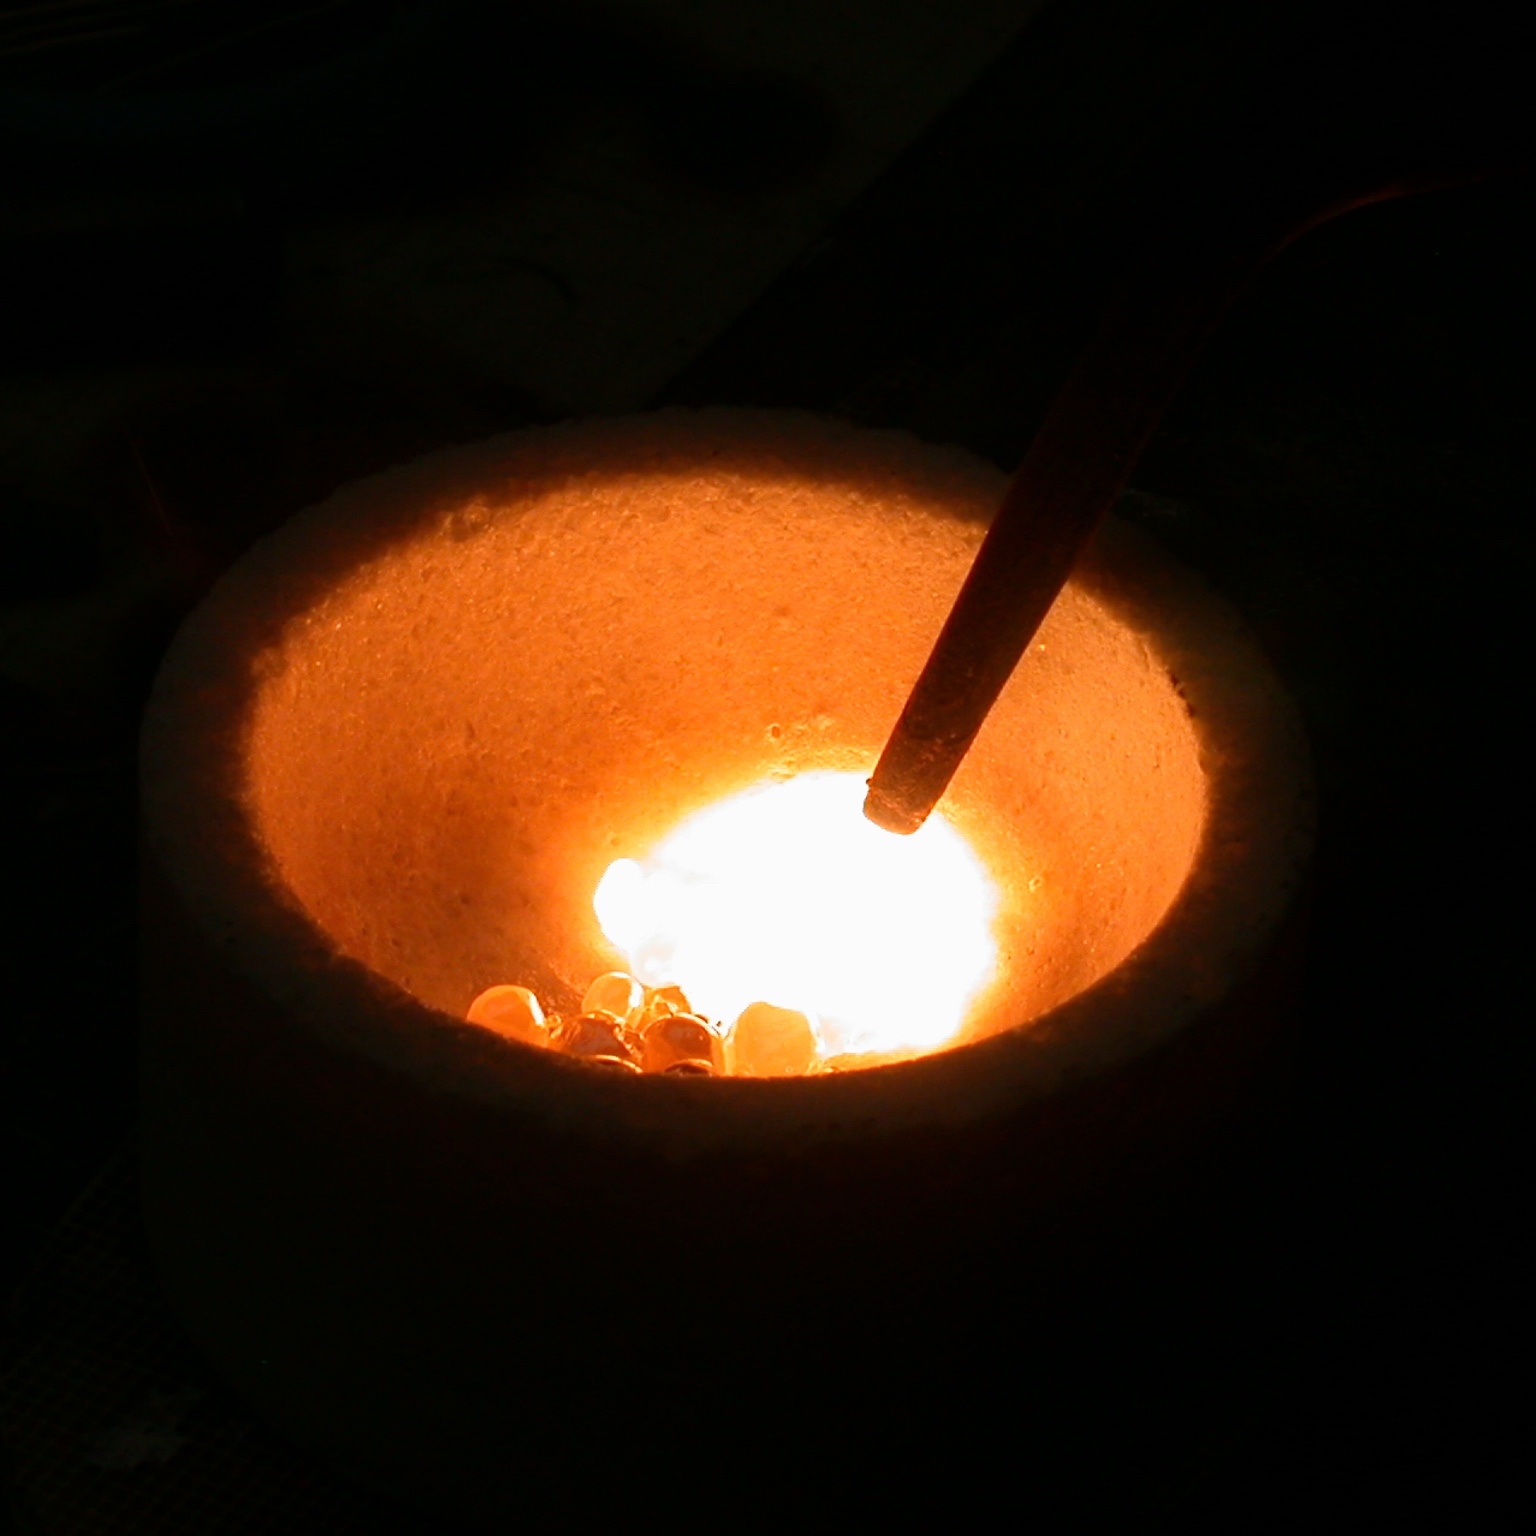
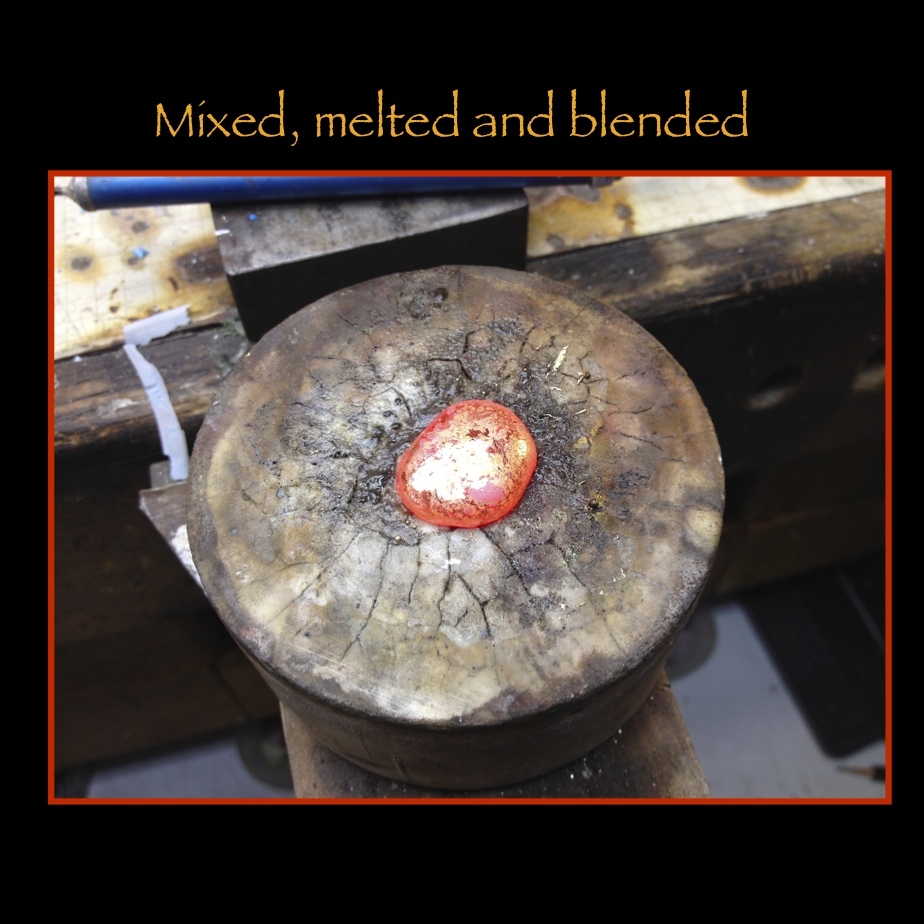
We formulated a metal mix of 18K yellow and 18K rose in a 50/50 mix and came up with a very gentle rose (ish) hue I still use often (Great fabricating characteristics).
These are single shots pulled from a youtube slide show, still viewable there.
Enjoy,
Jim


4 Likes
How did you get 16k, did some gold evaporate?
No
But I wish my typos would…
Thanks, Jim
Thank you for posting the details of your many rings, etc. I can’t be the
only one who hasn’t had the opportunity to see so many original designs for
settings. They are certainly in a different league!
Noralie Katsu
Beautiful.
A great pleasure to see your work Jim.
I always wondered where did certain designs originate and travel all around
the world.
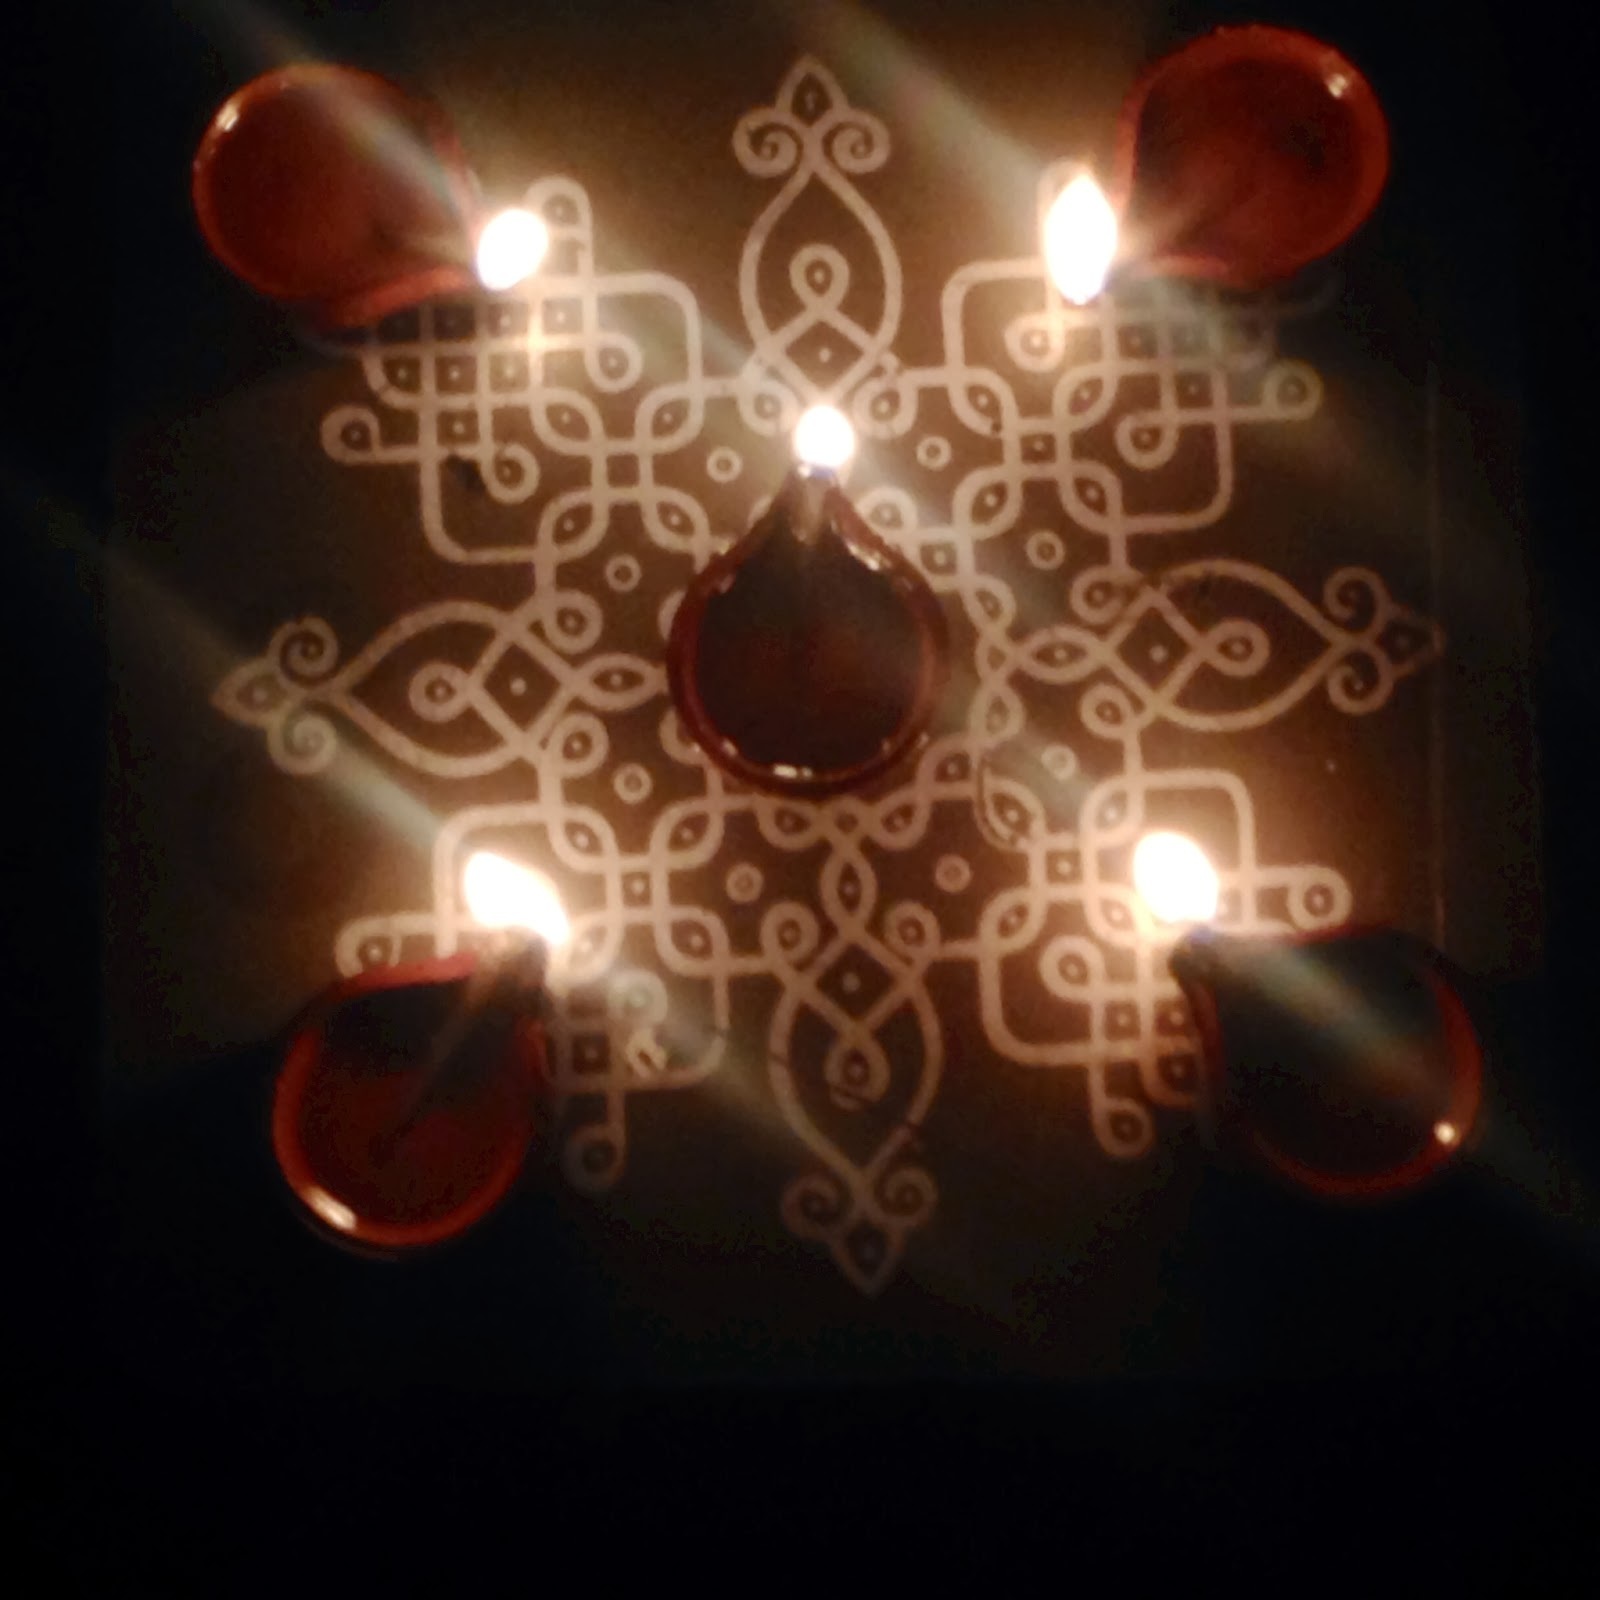
Below you can find a celtic design that we draw at the front of each house
in our state in India. There are laks of varieties drawn. Some even color
it. It is a very old custom; women wake up at 3 a.m in the morning to
decorate their entrance. It is considered a symbol of prosperity and
positive energy.
This picture is ofcourse a sticker that is in our prayer room, where we
light the lamps on it.
I have even written about it in my blog in Ganoksin.
1 Like
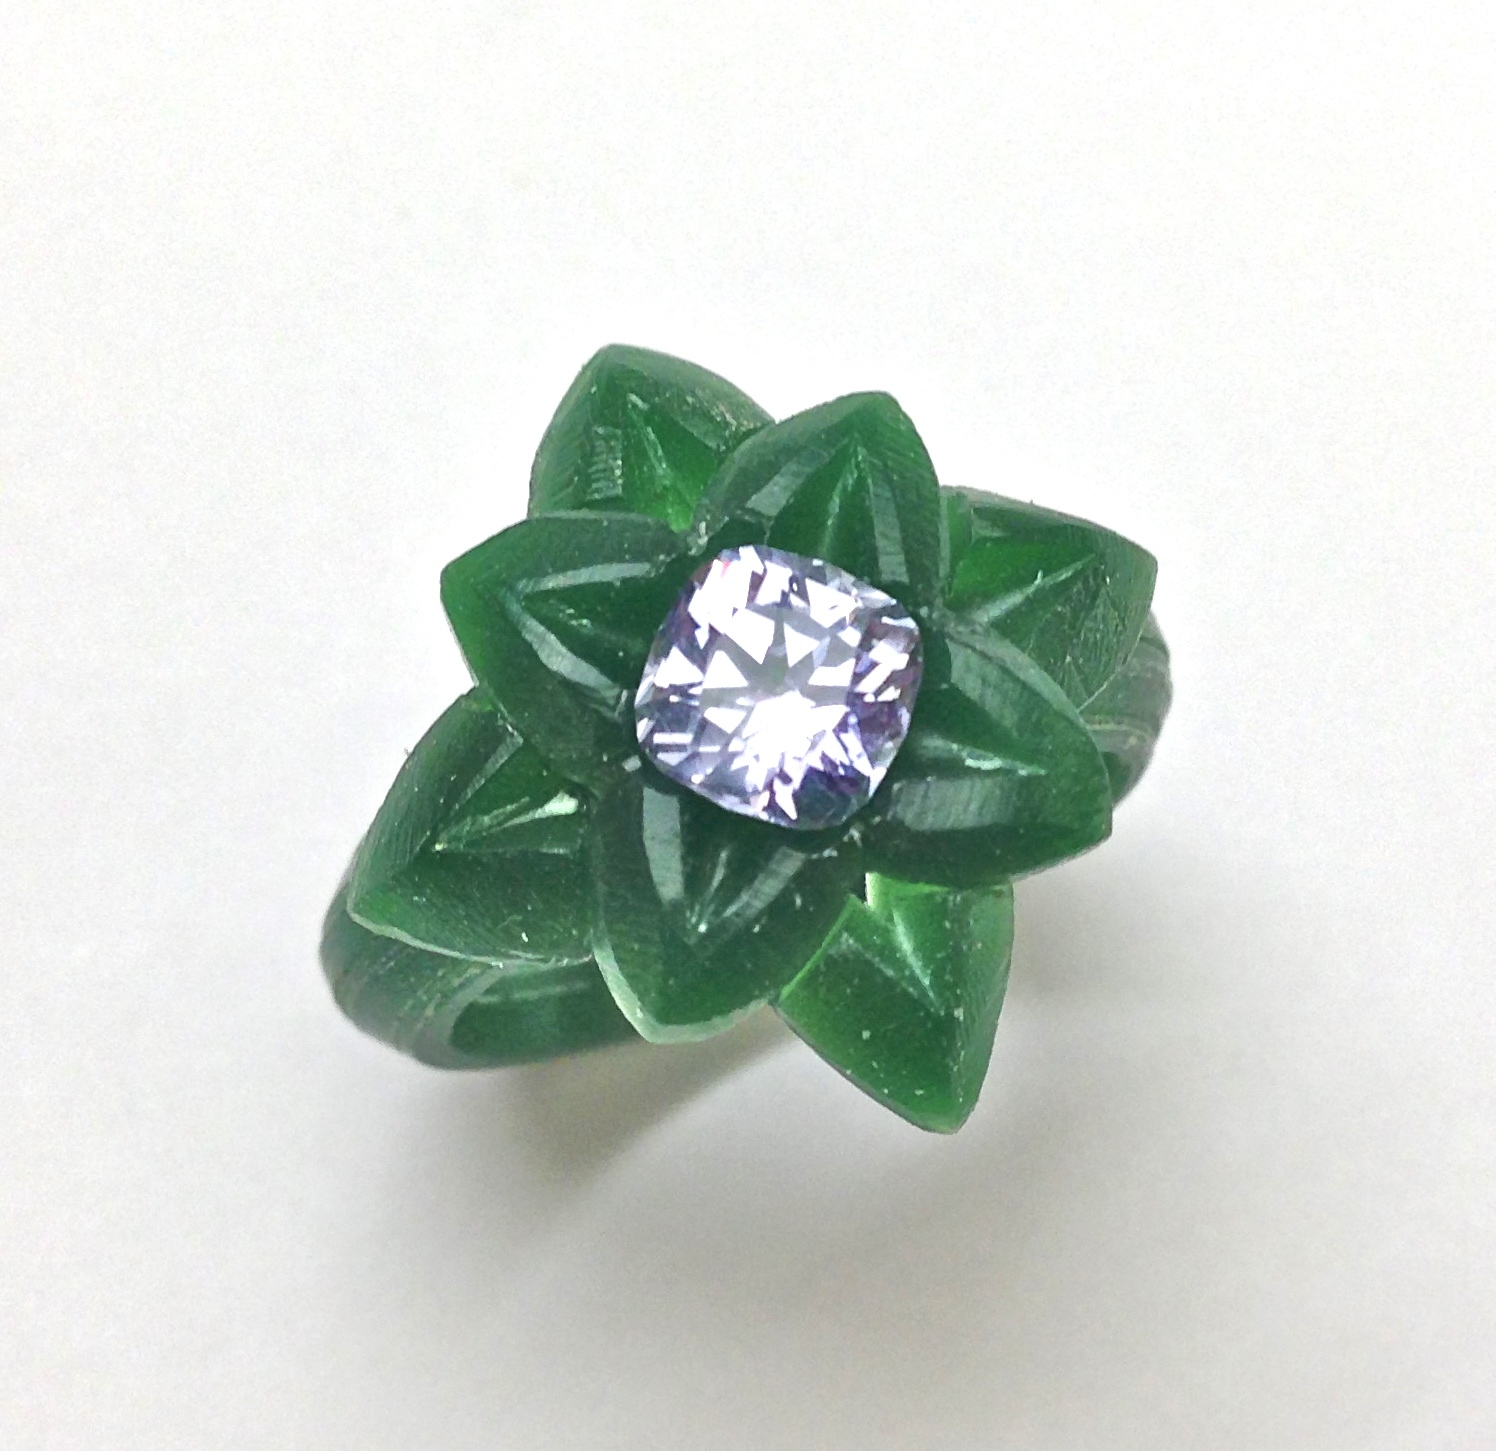
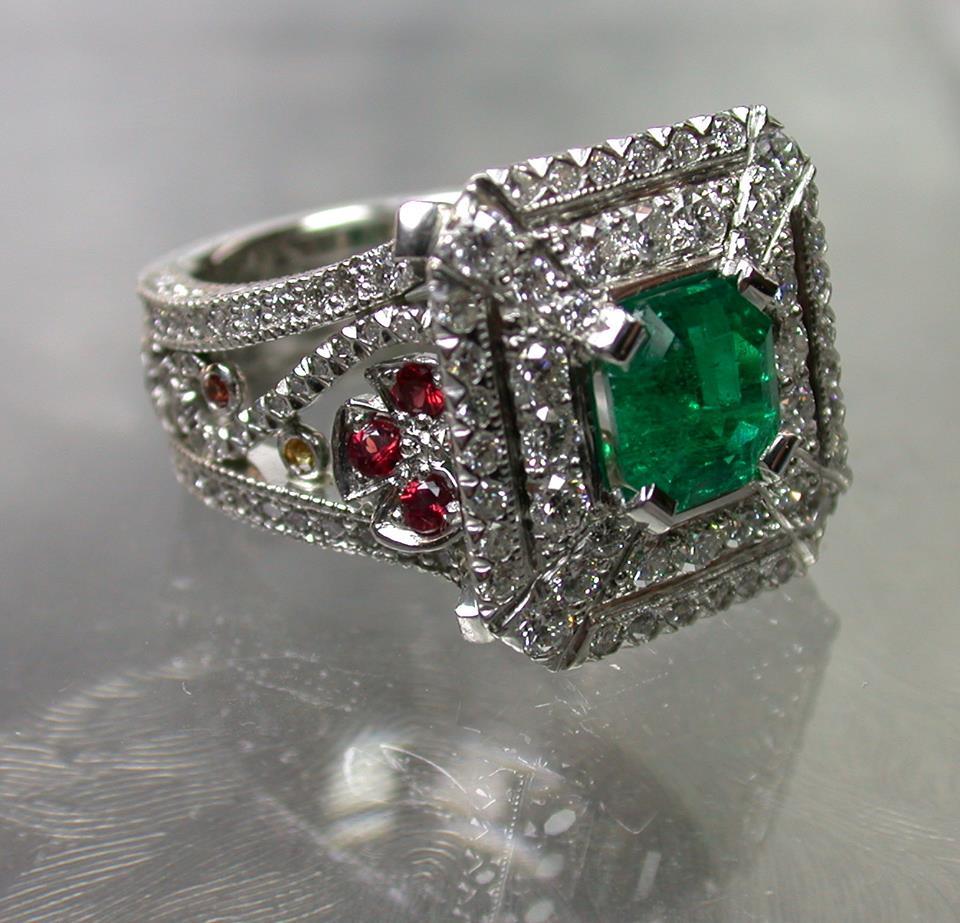
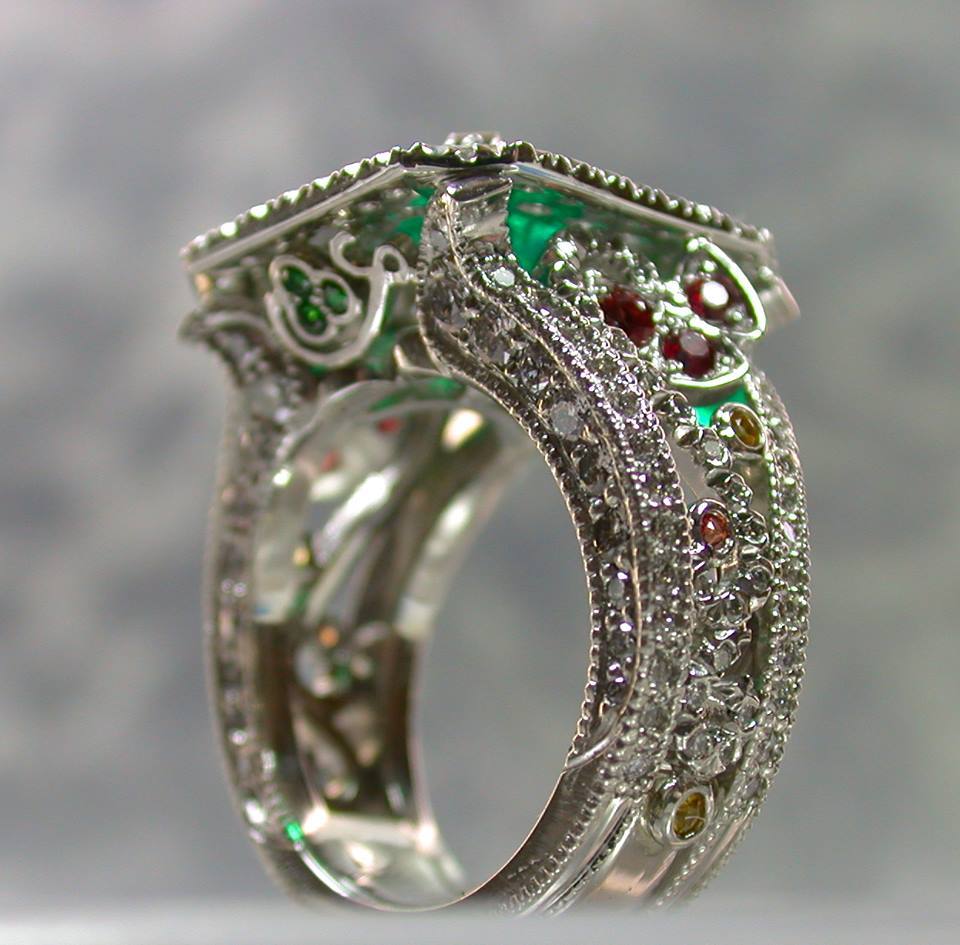
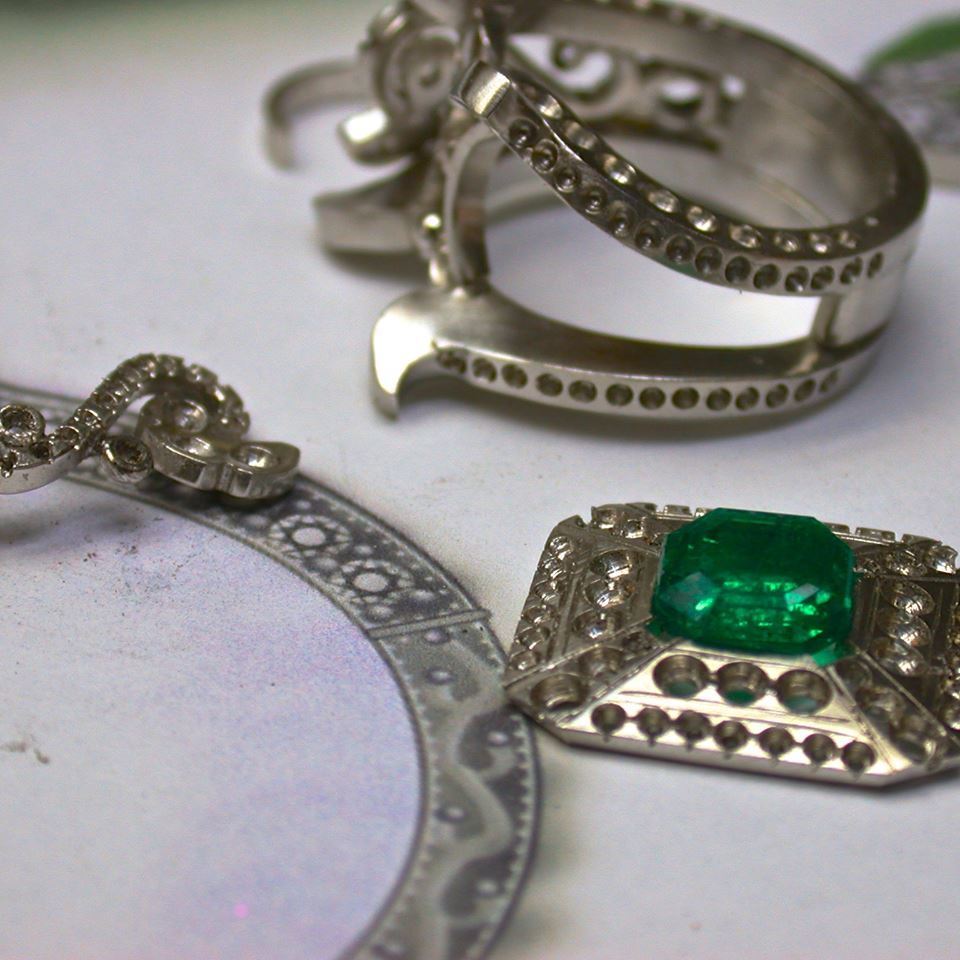
Bit & Pieces.
This emerald, diamond, platinum ring with a mix of spinel, sapphire and green garnet has been here before.
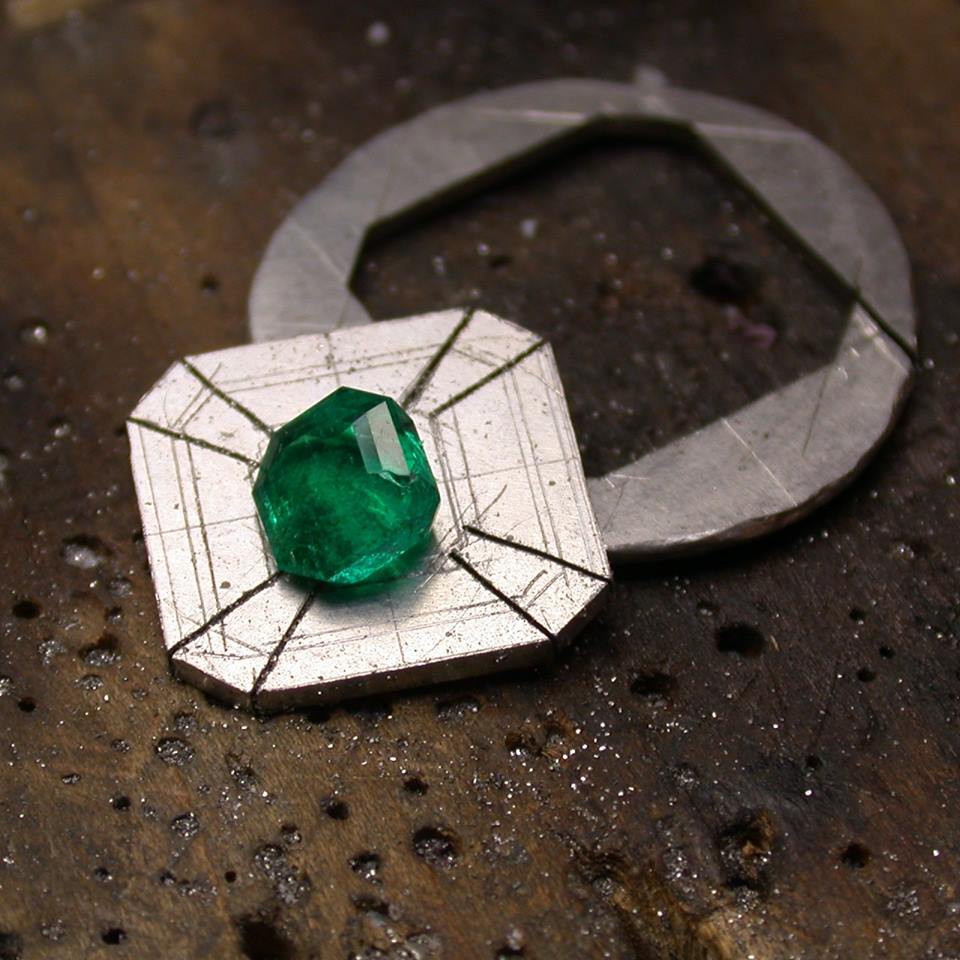
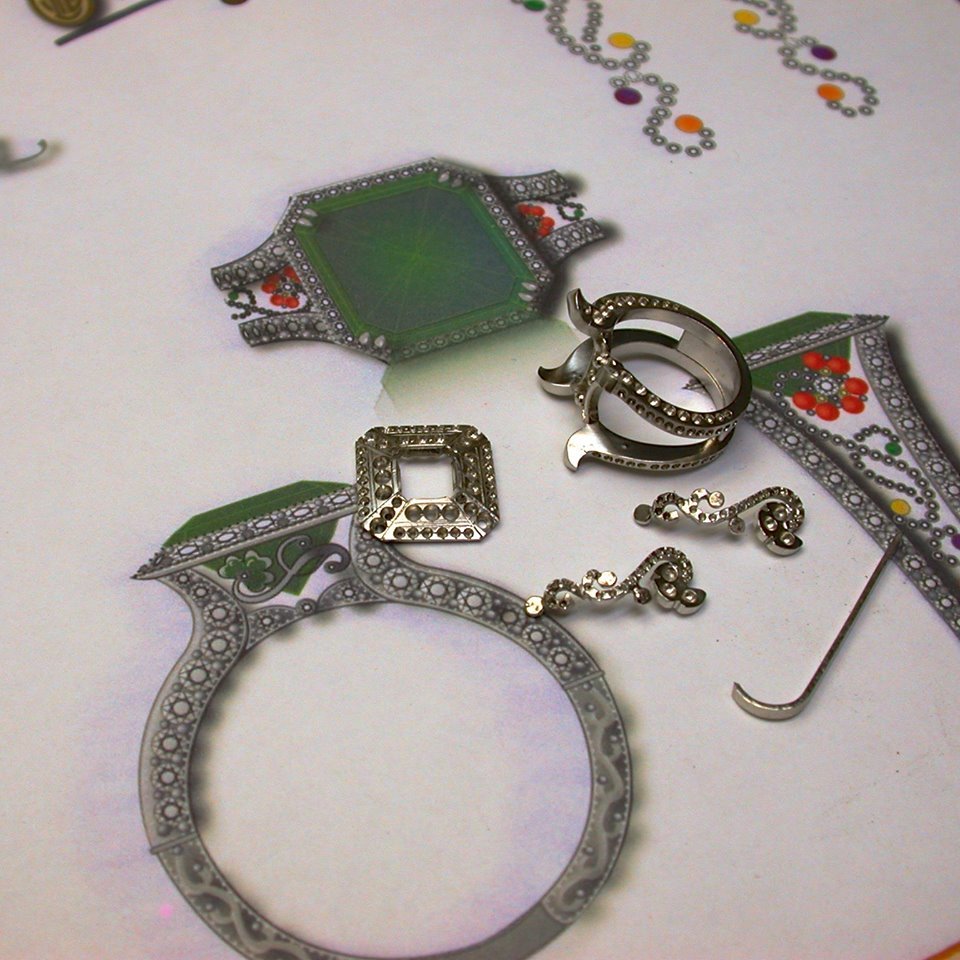
I thought it might be interesting to view some of the construction stages as well.
Enjoy,
Jim

1 Like
I’m in awe!
Jim
The little begining of the outside edge of setting is called “Fish-Tail
Setting”. This is the ‘same pattern’ as shown here in my essay, on the same
topic. It’s the “Advanced Level” of learning, but your results show it off
so well afterwards!
Regards!
Gerry Lewy
Toronto, Ontario.
Canada!
1 Like
Beautiful work as always Jim!
Out of curiosity, how did you bend/dome the upper portion of the setting after you scored the 8 lines around the emerald? I’ve wanted to mess around with something like this for a while, but haven’t been able to figure out a decent way to raise those sections while keeping the surface area flat (not creating a truly “domed”/curved surface) without cutting it open and folding it with pliers.
Thanks!
Erich
1 Like