I would like to figure out how to flush set small, fairly thin cabs and even round domed colored pieces of niobium. I know how to flush set faceted stones, but I would like to avoid drilling the usual deep hole needed to accommodate a faceted stone. I have looked at small end mills and know about flattening a round burr. Does anyone have a suggestion about what tool to use to cut the hole other than the usual faceted stone setting bits? Thanks…Rob
2 Likes
I’ve flush set cabs with cylinder burs instead of setting burs.
There’s a bunch of different ways to flush set. Some folks I know think using a hammer and punch to flush set is bad, but one of the best stone setters that I know only flush sets with a hammer and punch. That said, sometimes with flush setting cabs with a cylinder bur seat, I’ve had to hammer the metal in a little bit around the stones before using the small burnisher.
This would be hard to do with niobium, but sometimes if the metal is too thin, I’ve known folks to solder a jump ring under the setting to add a bit of depth just in that spot before flush setting.
Hope that helps!
Jeff
3 Likes
Hi Rob,
hmmm…what about…
lets say the cab is 4mm round…
lets say the shank width is 6mm
mark the stone size and center, on metal
drill a pilot hole thru the shank…say 1-1.5mm
that leaves you a 1.25-1.5mm rim inside diameter
(decide on the biggest pilot hole that will maintain the integrity of the piece of metal)
use a ball bur to remove metal to the depth you want
use an inverted cone or cylinder bur to cut/clean up the stone the seat
depending in the bottom hole size, a tapered cone reamer removes metal pretty quickly…
just my musings…
julie
2 Likes
Jeff…I don’t own a cylinder bur, but looking at one online, it looks like it might do the trick the same way as a flush end mill. To reply to Julie, I am trying to create a flat surface that goes all the way across the bottom of the hole because the base metal isn’t likely to be very thick. Thanks to both of you…Rob
Cross cut cylinder burs or diamond cylinder burs are my favorites, because they grind fairly clean.
Definitely practice, because as you know with flush setting, it’s pretty much a one shot deal.
Have fun!!
Jeff
1 Like
I recently made my wife a ring with a flush set opal. Scary. But all good. Take your time excavating.
I used cylindrical and round burs mostly. And gravers.
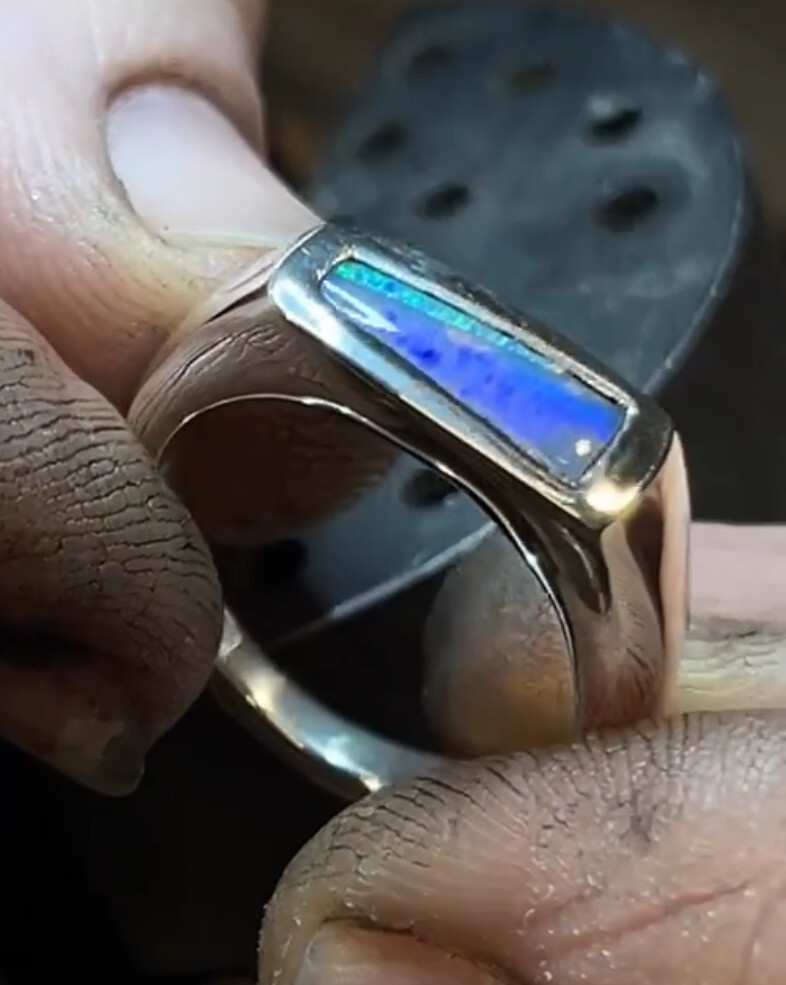
4 Likes
Looks nice. I just have to do it and stop talking about it. Thanks…Rob
3 Likes
Post the results. I’m sure you’ll do wonderfully
1 Like
Hi,
what is the approximate stone size…?
how about these…?
or a #52 flat graver
(haha i love shopping for tools!)
julie
Hi,
perhaps search “background removal” on the Lindsay engraving site…seems like it would be a similar technique…
julie
Hi,
julie
Hi
these come in handy for cleaning up seats…the side walls…
julie
1 Like
I definitely used a sharp graver to get me seat corners cleaned up. Because that opal looked better with a dark background I just oxidized the silver in advance.
1 Like
Hi,
good job! opals are sensitive!
julie
1 Like
Hi,
we need to invent a new shape for the Agilo or Advantedge peoples!
it would be great to have a short squatty broad tapered bur that had a nice gentle fat ball end…with a 45-60 degree angle of lift…
that was basically a gentle sloping almost flat sided cone , with rounded up edges to avoid gouging…not pointy, not too sharp, not too fast of a radius…
perhaps 2.5, 3.0, 3.5, 4.0mm bur length and width…i would definitely buy them!
julie
2 Likes
I’m not sure if this is allowed on here but Lucy walker has some videos on this. I’m not sure if the one I’m thinking of is free on YouTube but I’m a member of her “academy” and I’m certain I’ve seen something similar. She just uses ball burrs to create the seats.
I will say though that I absolutely love my cross cut cylinder burrs (Busch is best) and I use them on a constant basis. They are great for taking a bezel for a funny shaped stone down and even adding the chamfer to the bezel as well as so many other uses. Good luck!
2 Likes
Great points. I agree.
Hi,
is this the video you were thinking of?

2 Likes
Not exactly. The one I’m thinking of is definitely in the resources section if you join. (I have a code if you want to do that) but this one may help in a way.

I would treat the seat in this way. The princess cut one will be helpful with corners too. There was another video that I watched the other day but I can’t seem to find it now. If I do I will definitely share. I hope this helps
1 Like
Actually, it was the one you mentioned. I didn’t recognize it at first.
1 Like