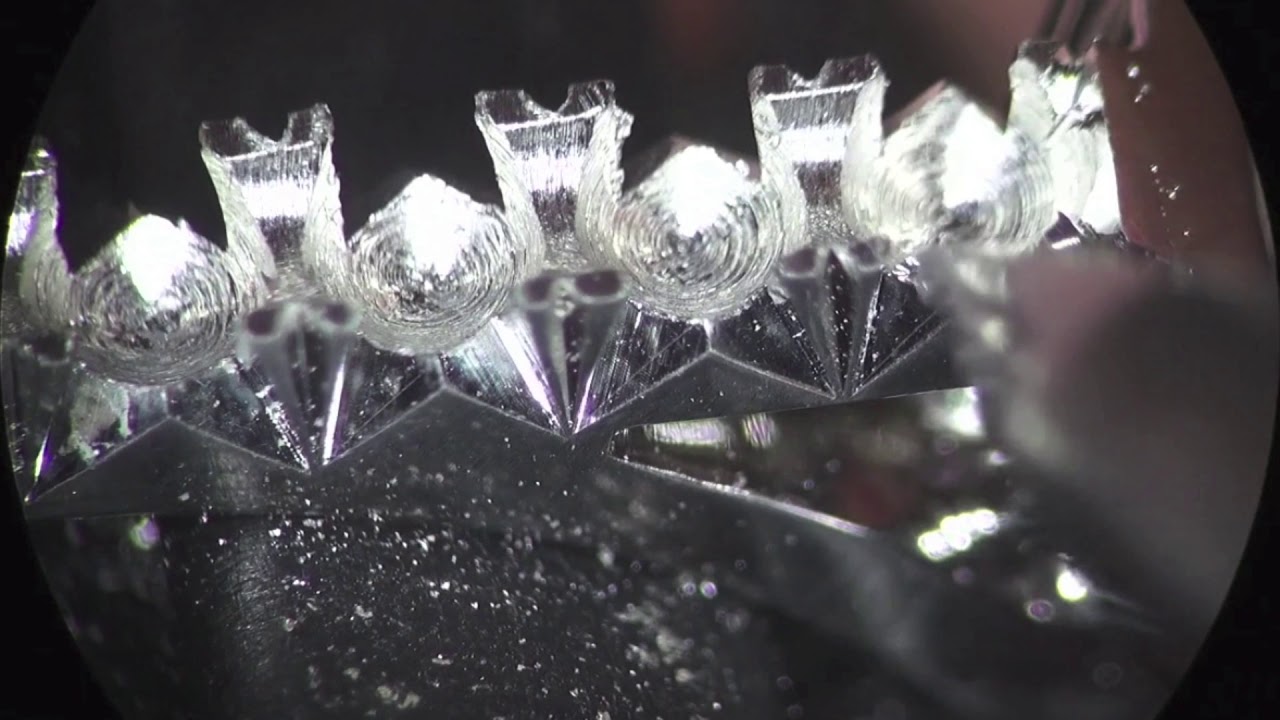
Five months into my silversmithing self-taught journey - Now onto graving. Oh god, what have I gotten myself into!?

Being self-taught is about 10,000 times more difficult than I thought it would be.

I posted here one time about three months ago when I was just beginning to learn to solder for the first time. It all worked out and really all I was doing wrong was not keeping the solder heated long enough! I took the heat away before it could actually flow. Anywho, I’m actually pretty good at it all now and am quickly wanting to advance to the techniques I really dream of doing - graver settings.

I’m determined to make a business out of this one day - but I deeply realize the total requirement in learning all techniques so that many techniques can be deployed during a single project. I’m now too bored with the basic bezeling techniques.

I am finding out the hard way that it isn’t easy to locate very good tutorials on graving. My prime interest is that I want to learn how to do the basic beading setting techniques such as bright cuts, pave, and so on. I purchased a good “Starter” pack by selecting four common graver styles (round, flat, and two different onglettes) plus the handles - I soon realized after they arrived how hard this was going to be just getting them prepared. I actually have some amazing college-level books describing how to go about preparing them - but its mostly text without real guidance visually. It can be difficult to visualize in your mind what a master jeweler is trying to say without good pictures or video.

Going on youtube has proved not very useful. While some people have fun little videos of them doing various graver setting techniques - they never actually show their entire hand or describe what they’re really doing. They will often zoom in on the piece, leaving their larger hand out of view of the video - that means I can’t see the position of the hand, how much pressure it takes, what sort of movements are taking place - I simply can’t figure this out - even with the great books I have. I need to really SEE someone do this so I can study the hand motions/movemnt in doing this manually.

I’d love to have an “electric” graver, but those are FAR too expensive. I can’t do $300-$600 in expensive automatic electronic gravers. It seems to me that people have been doing beading settings with gravers manually forever, and so that’s the way I’m going to have to learn it… I just can’t find the right resources or visual guides to get me started. I feel like I intellectually get it after months of research - but the muscle memory just isn’t there yet. You can only READ so much about doing it properly (and trust me, I’ve read all I can on it)… At some point, I really need TO SEE someone do the motions and talk out loud as they’re doing it… No one seems to be showing this in “online tutorial videos”. Lastly, I live three hours from the city so I won’t be able to train with any master silversmiths in person.

Continuing on with my struggles here - I get that I need to have the graver cut to the correct size (inner lower palm to tip of fore finger); I get that I’ll have to RE-CUT the actual shape and grind/shape it myself - but there lies another issue - I don’t have expensive bench grinders and steel cutters. Can I shape my new gravers with simple flex shaft attachments? If so, how can I get this done without spending yet more hundreds of dollars on attachments? So far, I’ve got the handles - four gravers that need to be cut to size and shaped - and a very good 23 piece beading kit for rounding out the stitches. I went with the Vallorbe on everything and didn’t go cheap. But even if I do get this far… I’ll need some serious help learning how to actually DO the graver settings…

Last but not least, later I would like to do actual ENGRAVING for designs - but there’s no way someone can do that by hand without it taking hours. Right? Are there any sort of graver attachments for an American key-lock type flex shaft which are affordable? What about hammer-hand piece attachments for the lock-key style flex shaft? I have a Prodigy.

I Know, these are a TON of questions… And I’m hoping someone would be kind enough to take some time with me and answer these questions. I’m just so frustrated and am having a real low point here - sometimes you just feel like throwing the towel in. I’m passionate about taking this path, it can just be so exhausting at times when you realize you yet again don’t have the right tools to complete your learning and self-training.

Lily

2 Likes

If you haven’t already, google Steve Lindsay and Sam Alfano. They both are great engravers, more engraving designs on metal than using gravers to set stones. I have Steve’s Classic Air Graver, carbalt gravers and various sharpening templates that take a lot of guess work out of sharpening a graver. You can find a lot about using gravers to set stones by searching for Gerry Lewy on this discussion board. Gerry offers a ton of great free information. Engraving is a deep dark rabbit hole that you can spend a lifetime in. Good luck…Rob

3 Likes

Ick. I don’t need to be an expert at it, I just want to successfully be able to say… “Hey, I’d like to add TWO little sapphires here” by beading graving them into place. I’m not even sure if I’m using the right terminology here. I mean, it shouldn’t take a life time to learn to do that. Right? Its so discouraging. My spouse asked me the other day if I know why they’re called “gravers” instead of “engravers”? I said I have no idea… I think he gets a headache trying to watch me wrap my head around it all. Ha!

Mainly I just wanted to learn to do settings with gravers first before trying to get into “engraving” designs. :sleepy: :persevere:

Thanks for your reply Rob, I’ll look Steve and Sam up right away…

1 Like

Additional note: I have already acquired all the possible sizes I’ll need for ball burs, setting burs, bud, and so on… I’m squared away on that front. What I really need now are proper visuals/video that really go over the actual act of bead setting with gravers manually since I cannot afford fancy electronic graver equipment. I just really want to avoid sinking many more hundreds of dollars into yet more equipment just to do some basic settings here. Surely that isn’t necessary, I hope!

1 Like

Engraving is the process, gravers are the tools. You might explore making small bezels and setting cabochons in them. It is a fairly inexpensive way to start working on the smaller scale of setting faceted stones…Rob

Search Ganoksin and Orchid for Gerry Lewy…Rob

Hello LilyMarie,

I am going to do some stream of consciousness replys to your comments!
(I will state here that these are all my personal opinions and experiences, so I do not have to preface my below comments with that :wink:

graver preparation:
sharpening:
a properly sharpened graver is a major key to successful engraving. (more on this below)
If the cutting edge is sharpened properly, it should “cut like butter” with very little push pressure. When a graver is not sharpened properly there can be a tendancy to try to push harder, and this can be ineffective/ less effective and very dangeroius as well. the graver cutting edges need to be sharpened regularly…how often depends on how one is using the tool, the type of metal the graver is made of, etc…

preparing the graver- length:
First, I put the wooden handle on the graver. Be mindful of direction/ orientation to the handle if the handle has a flat spot (to keep it from rolling of the bench). To do this, I use a drill to make the hole in the handle a bit larger. Then clamp the graver into a bench vise, tip down, put the handle onto the tang end and tap it down firmly but gently onto the graver until it is firmly in place. (unless of course I am using collet style quick change handles, in which case that is a difference process.

Then I need to establish the appropriate length that I want the graver to be (graver and handle combined). There are rules of thumb on where the handle should hit the palm (to provide the best ability to move the graver forward) as well as where the tip of the graver should hit on the fingers (to provide the best control).

Once I establish this, I mark the graver with a sharpie line, put it into a bench vise jaws tip up), and take a hammer and break the excess graver tip off. It should break with one good whack. (I put an empty cardboard box near the vise to catch the flying graver tip.

preparing the graver- shaping:
once the graver and handle are the proper length of , I will take a sharpie and mark of the tip end of the graver where I will want to be grinding it down with the bench grinder. Bench grinders start at approximately $50-100. I use the side with the coarser wheel. I always use eye protection. I always stand to the side of the grinder when I turn it on, in case the wheel is cracked and flies off. I have used a heatless mizzy wheel on my flexshaft to shape my gravers, but it will take longer, and the graver still needs to be cooled in water to avoid overheating.

The reason for grinding/ shaping the tip end, is to remove metal, so that the actual tip cutting edge is not too big/ “tall”. This makes the frequent sharpening faster because there is less metal to sharpen. Also, the area I will be removing will no longer be there to get in the way when I am engraving. If the graver is too “tall” and the graver is at an angle, that tallness can make contact with the cuts or obstruct the line of sight. This will become more apparent later as more engraving practice is done. I often have “right-s side” and Left side" gravers, where the front edge is angled, and not perpendicular. they are kinda “directional”.

A critical point to note while grinding is that as I remove metal and make the tip narrower, it will heat up faster due to less metal (heat from friction with the grinding wheel. I dunk my tip into a cup of water after a few seconds on th3e wheel to keep it cool. If I get a blue/ purple discoloration on the tip then I have over heated the metal and will need to start over and grind down past this area.

preparing the graver- more on sharpening:
The cutting edge cuts…how smoothly and free of metal striations, and how polished the bottom of the graver is, determines how mirror bright the bright cut is…to get a mirror bright cut, the bottom and face has to be polished to a mirror finish…this is achieved a few different ways (diamond wheels on the flex shaft, ceramic wheels and diamond spray on the power hone, rouge or pencil lead! on crocus cloth glued to a flat piece of glass…the surface needs to be flat so the corners of the cutting edge are not softened…I think I am getting in the weeds here…but it is important…follow me it you can;)…

I struggled with breaking the tip off of my 52 round graver in the metal when lifting beads during bead setting, until I learned that I needed to move from the coarse india stone, to a finer stone after…this solved my initial problems. I bought various hard arkansas stones and surgical stones…not sure how useful they really were to me.

I attempted to learn how to hand sharpen for a few years, but I was never able to get a good edge. I was determined to learn and be like my mentor;)…but alas I came up short…My hand would rock…I could not correct for it…Other people are able to master this no problem…still others use various available fixtures and templates to help maintain concise alignment when sharpening…I ended up buying a GRS power hone, a dual angle fixture (to dial in the angles) and grinding wheels…it was not cheap, but it was one of the best tool investments I made. The precise and repeatable sharpening is hard to match, and the cutting edge is critical…you do not need a perfect edge, but it makes work and life easier.

with regard to your comments about power assisted engraving apparatus. I personally feel that it is not neccessary, per se…although I now use one. again, it is not about brute force and pushing the graver…it is about a beautifully sharp edge cutting through the metal like butter…if it is not cutting like this…I stop…and sharpen the graver…(learn to sharpen gravers better/ correctly…or buy a fixture/ templates/ sharpening stones…or buy a power hone set up…add all this up and compare to the price of a power hone set up, just so you know the difference in costs…) I try to stay really in tune with the connection between my hand and the graver cutting edge…if I lose the flowing feeling and start to push and do not catch myself, slips can occur…determination sometimes gets in the way of the intuitive zen relationship…

bead and bright setting, raising beads, pave, etc:
I took a stone setting class once where the teacher used an interesting setup to explain what is going one when you raise a bead!..she had a small altoid tin…filled with clay…she took a cylinder (i forget what it was) and pushed it into the clay to cut out a hole…then she used a wooden stick-like thing…possibly a pottery tool, to imitate a round graver, and demonstrated how to push the stick down into the clay, near the hole, and then move it forward to “raise” the bead of clay, up and over the edge of the hole…it was big and easy to see and understand…a bulge is created just inside the hole that will go "over the stone…the (jagged edged, sort of half spherical metal bead is then burnished down over the bulge and rounded smooth using a beading tool.

I started out using 52 round gravers to lift the beads and 40,41,42 gravers to cut the beveled bright cut “frames”. I also use square gravers alot. I have only recently started to use onglettes for other stone setting work.

Stone setting is one thing, and western engraving is another…

layout, marking, and drilling:
I would start with brass/ jewelers bronze/ nugold practice plates, and packs of different sizes of cubic zirconia…maybe…1.50mm, 1.75mm, 2.0mm, etc…

with pave, where I are aiming to set the stones girdle to girdle, with little metal in between, layout, marking, and drilling becomes critical as well…practice and developing good strategies helps here.

If I I are setting 1.5mm stones, and my centerpunch/ scribe mark is off, and then my drill “wanders” ever so slightly, or my holes are not spaced precisely, then when I go to set the stones, I will run out of real estate, or have too much…

when I drill out the pilot holes, I start with .5mm drills in a spiral hand drill, and then move to progressively larger drills…there are ways to “correct” alignment when drilling…

after the pilot holes are opened up, when I bur out the seats, I use round burs, in a pin vise, and hand twist to cut the seats…this allows me more precision…I am sure others use faster methods…I preimarily use this process for very small stones, where metal removal lis minimal at the seat stage…I use rotary tools with larger stones where there is more metal to remove.

I just mention this to emphasize how important layout/ marking/ drilling/ burring is to increasing precision…in the beginning it can be helpful to go slow, and really see what is happening and why…,make corrections with process as I go…

I am sure l will think of more things to say…but that is it fornow…

look up www.jewelrytrainingsolutions. videos by Peter Keep as well as some beginner ones by Soham Harrison. The training is set up like curriculum in a school…Peter has stone setting curriculum…a full access monthly pass is approximately $40-50 USD and in my opinion well worht the investment. I have taken many classes, etc and I feel this website is great, and the videos are close up, and Peter goes thru step by step, uses basic tools when possible, defines materials used, etc…I highly recommend.

Julie

6 Likes

Julie,

Hi there! :hugs: I think you had replied to one of my old posts some months ago and it was awesome to receive advice from you…
So, basically, I have actually learned much of what you’ve written already due to so much of the intellectual studying of it all - running it through over in mind over and over - but as I said, what I really need is to actually see someone (visually observe) do this. There’s nothing quite like watching the subtleties of someone’s body movements as they work this technique. Youtube isn’t turning up results, and I discussed in the original post why those videos on Youtube just don’t suffice. I get it, I mean in a way, these techniques (graving settings in particular) are sort of a “trade secret”… Plus, many go to really fancy colleges to learn these more advanced techniques. I just never had that luxury nor could I afford it. I think because of this, people are not as willing to train others on Youtube videos on how to do these things… I don’t blame them. It took them years to acquire that knowledge; why train other “free loaders” to become your competition? I guess if I had paid thousands to learn all of this in school I probably wouldn’t offer up all the information for free on Youtube.

Anyway, that said - I WILL absolutely go to the website you recommended and check out what he has to offer. Most people who have “classes” on their websites are charging many many hundreds or thousands of dollars. $50 for the month - I could do that. If that’s still his rate to review his tutorials.

Luckily, I did get a #52 round. I also purchased one #41 flat and a #1 and #2 onglette. It was a guess on what I might need to start out. I’ve already successfully gotten two fitted to their handles using the “burn” method of heating the tang up in a vise and gently hammering down the handle (in proper alignment of course). I did align them so that they’d not roll off the desk. I purchased an Edenta Sintered Diamond Cut off wheel, thinking that would be enough to cut off what I needed during the grinding phase… Now I see that probably won’t be enough. Bench grinders that are as little as $50? Really? I’ll try to look into that, then… I hate how much time all this takes! When you get your gravers you think you’re going to figure it all out in a day - silly wishful thinking on my part. Back to the purchasing board…

Even though I’ve read SUPER detailed instructions from very high quality manuals on shaping/grinding of the graver itself, it just isn’t the same as watching someone do it. I hope I can find some sort of videos somewhere that will show someone actually doing it. I’ll begin with the website you recommended.

Lily

Edit to add: Ah, and I purchased an Arkansas Stone… Sounds like that isn’t going to get it done on the sharpening front…

2 Likes

Hi Lily,

Alot of it is practice, and muscle memory. You can watch videos, but then you need to get to it and “feel” the metal! and learn from that…

I realize my diatribe was long! it was the backdrop for my main point…sharpening the graver is critical…and professing my love for my power hone setup!..and maintaining layout precision.

I did not even touch upon holding devises! haha!

good luck, be mindful of you hand position in relation to the graver and pay atttention!.. while trying to also be zen!..slips can be dangerous!

(I once saw a woman slip and jam a 52 round graver into the space between her thumb and forefinger…not a good thing to have happen)

Julie

2 Likes

Hi Lily,

I totally forgot to mention …youtube search some of the following:

stone setting
bead and bright stone setting
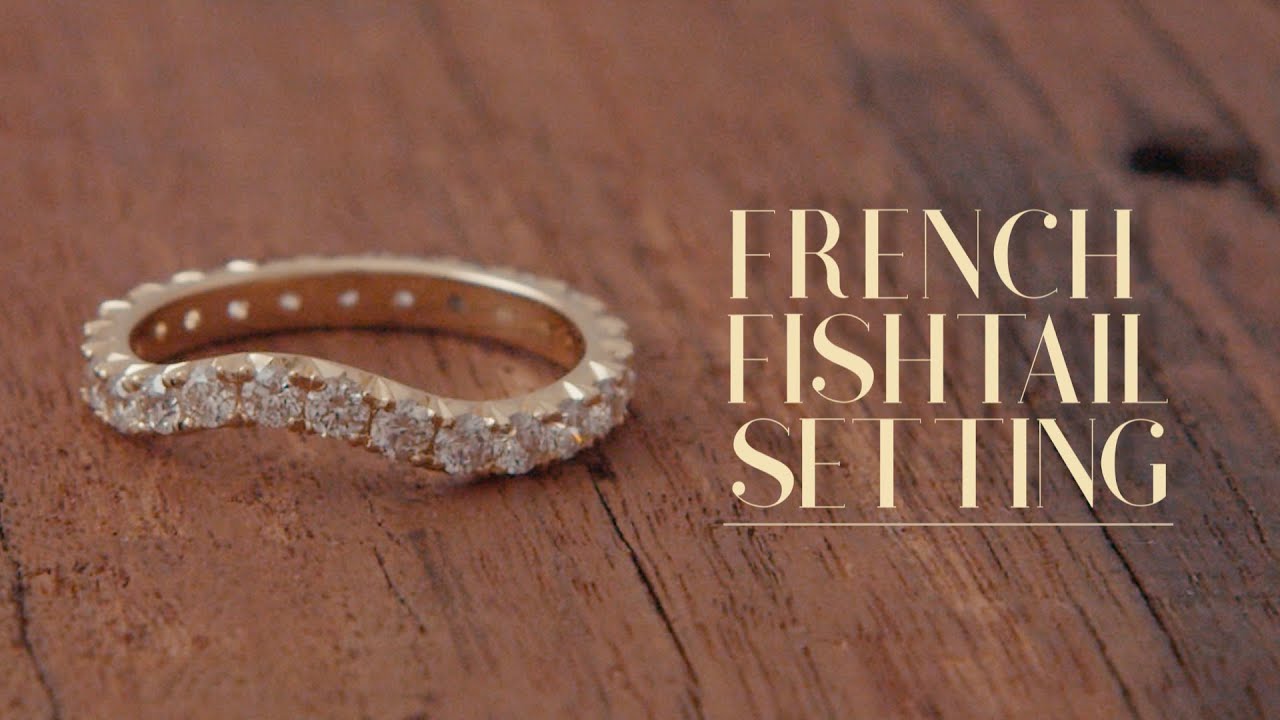
fishtail stone setting
cut down setting
french setting
diamond setter
diamond setting

there are a few channels that video stone setting thru their microscopes…

and you will see as close up as if you were looking thru the scope…and how pristinely shaped smd polished their gravers are, and what shapes they use…

i will link some later

julie

2 Likes

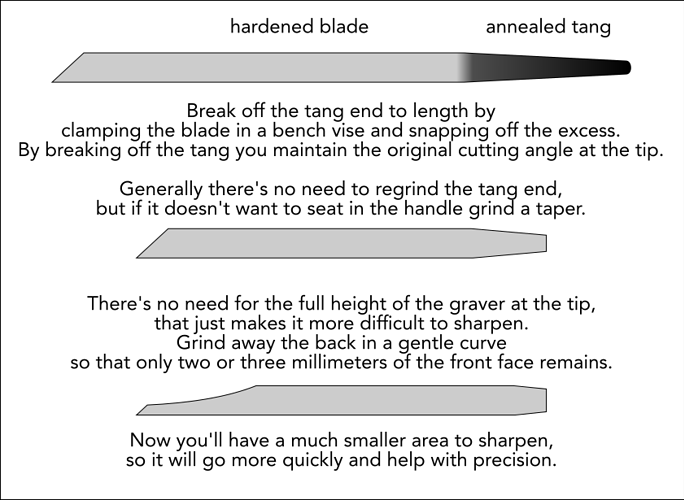
Here’s a little diagram.

You should absolutely invest in a bench grinder, an inexpensive one will suffice for the kind of work we do. We’re not blacksmithing, after all. You can even remove one wheel and fit a polishing spindle to the shaft, making a combination grinder/polisher.

Also a sturdy bench vise is a must. An inexpensive one is good enough for the uses you’ll put it to. I recommend getting one with 3½" -4" jaws and a swivel base. That should only set you back $40 or $50.

As you’ll also be using the vise to hold draw plates, having a solid bench on which to mount it is essential.

HTH,
Elliot

3 Likes

Gerry Lewy worked with me over 2 days to begin my learning of graving. We started with exactly what equipment to acquire and what to skip, how to make a graver and how to use it and when. You might want to contact him directly. Contact him through almost any of his previous posts.

2 Likes

Here’s a YouTube video that may be helpful,

His channel has quite a few good videos.

Here’s a channel whose focus is engraving Hobo Coins, but there’s a lot of useful info on sharpening, etc.

Pam

3 Likes

Hi Lily,

India stone first, orange side (coarser grit)
this more quickly removes metal

then arkansas stone (finer grit)
(which one did you get?)

white, black, surgical?

if you look at the tip and belly (bottom) of the graver, you will see microscopic striations/ grooves in the metal…vertical/ lengthwise …from how it is made…

when you sharpen/ polish the face, and the heel, you will be eliminating these…if not polished out, the bright cut will have the same striations and not be a shiny smooth reflective surface…

heels are very specific to the need at hand and affect how the graver cuts…either smoothly gloding/ moving forward…or diving into the metal making it harder to move forward and achieve a smooth vut…

julie

Hi,
edit: when i say the bottom has to be polished, I am orimarily just meaning the heel portion….not the whole bottom

heels on flats, squares, and rounds are usually tiny…like .5mm
heels in onglettes are a bit more blended in…

julie

Hi,
Haha, i knew i would rant more!

Peter Keep uses hart burs to cut his seats
undercuts in at an angle, then drops down

he puts the stone in at the slight angle, and applies pressure…when that stone clicks into place, level, and at the perfect depth, it is Nirvana…

the stones and seats can be so small…lack of control and the seat can be ruined…

i used to use round burs…now more-so hart burs…I still like the control of hand twist in a pin vise…but i am learning to control cutting the seat with my micromotor…

a lifelong process!

julie

1 Like

I have read thru this thread and then looked at Youtube again and I find lots of graver videos. I think that what you are looking for doesn’t exist because you are expecting everything to be clear at an intellectual, reading level without all the doing and trial and error. As others have noted, there are many steps, esp. to graver prep. All of that will have to be right before the actual graving (cutting) will work right. I am at about the same puzzling point as you are. I have all the tools and have done all the reading. I understand the process, but after that it is just diving in. IDK when I will do that…seeing as I have a lot of other projects and a lot of “stage fright” about all of them…but eventually it will just be a matter of trying until success to get the graver sharpening right and then on to setting some stones on a copper plate or in some cheap silver settings.

I don’t think you can watch someone’s hands on the graver and get it. That’s why the videos focus on the graver tip…that’s where your mind has to focus. The process of moving the hand has to be come intuitive as you watch the grave tip. Good luck! -royjohn

4 Likes

Hi Lily,

an a related note, when you are searching, type in “engraving”…versus “graver”

graver is the tool
engraving is the process
engraver is the artisan
engraved is the work product

perhaps that may make your searches yield more relevant results

even i forgot to include those words in my above word string suggestions!

and i fogot pave!
thats a confusing one for me…i think pave is multiple rows, whereas bead setting is one row…

and! fishtail setting!

here is Peter Keeps free youtube channel!:
just to give you an idea of what his much more comprehensive longer “training” videos are like…and i emphasize “training”!

here are a few other channels i watch:

and Jura!

and! GRS!

julie

julie

1 Like

Just an observation, I found the GRS Quck Change hand piece to fit my hand very comfortably, and a jewelry instructor was impressed by the feel as well:

Quick-Change Manual Graver Handle with Three Tool Holders - RioGrande

The Quick Change gravers such as the following save a lot of preparation time and hassle if the graver and handle fits your hand:

GRS® High-Speed Steel Quick-Change Round Gravers - RioGrande

I agree with royjohn that understanding and doing are not the same. My understanding is pretty good, the doing, not so much.

Good luck with it,
Neil A

3 Likes

Hi,
I just realized I miss-spoke…after pilot holes, I do use my flex shaft/ micro motor with ball burs, to open up the seats almost all the way…but then i use burs in pin vise to hand twist the final way for the stone to just fit…for better control…although after getting the micromotor i am getting more comfortable using it all the way…if that makes sense…

julie

1 Like