Dar…Thanks for your very detailed and precise reply to my questions. I am not an engineer, but worked for years as a product specialist for a couple Hi-Tec manufacturers where we designed, built, installed and maintained milspec gas compression equipment on US Navy combatant ships. I enjoy the world of engineering. That being said, my shop is more a place for imagination, creativity, having fun, solving problems, designing and making my own tools and continuing the line of jewelry that my father started over eighty years ago, has been a big part of my life for 45 years and my brother and I continue to build on today. As a result of this experience, I understand your passion for something that has consumed your life for years. As stated previously, my interest in pancake or blanking dies is practical. As my designs evolve, I find myself sawing or cutting out the same or similar shapes more and more often. I am also nearly 70 and find the rigors of handwork to be limiting. This all results in my interest in pancake or blanking dies. The shapes that I need are fairly simple and in the 18 gauge and thicker range. They will eventually be the base to which I will add other pieces, especially bezels and the lapidary that I cut. I hope to go about this in as simple a way as possible without buying any more equipment other than maybe a better saw, saw blades and possibly an adjustable bench pin. Again, I like to make my own tools and the bench pin is on that list. I also have a brand new MIG welder waiting for something to do with it. If a straight cut die works, it is simpler to make or cheaper to buy. If I need to go to a more precise angled die to make what I want, I will figure it out based on your very detailed description of how to make an angled die or pay you to make one. I don’t see this as competing methods of making dies but more as a continuum of possibilities where you apply what works and then get on with making jewelry. I tend to buy tools with a specific purpose or need in mind only to have their utility peek my creative interests finding all kinds of new things to do with them. This was especially true of my rolling mills, lapidary equipment and hydraulic press. Who knows, I may find myself in need of very detailed dies that will punch out very thin pieces. I now know what they will look like and thank you for your help in figuring this out. Please don’t let your passion get in the way of your health. I know what this looks like too and you need to manage it. I will post my progress. Feel free to comment as I, and I am sure others, will appreciate it. Thanks…Rob
Thank you so much Dar.
Hopefully I haven’t missed this information in your posts, and if this is not proprietary information:
Would you describe your bench pin or your method to achieve the angle at which you are sawing?
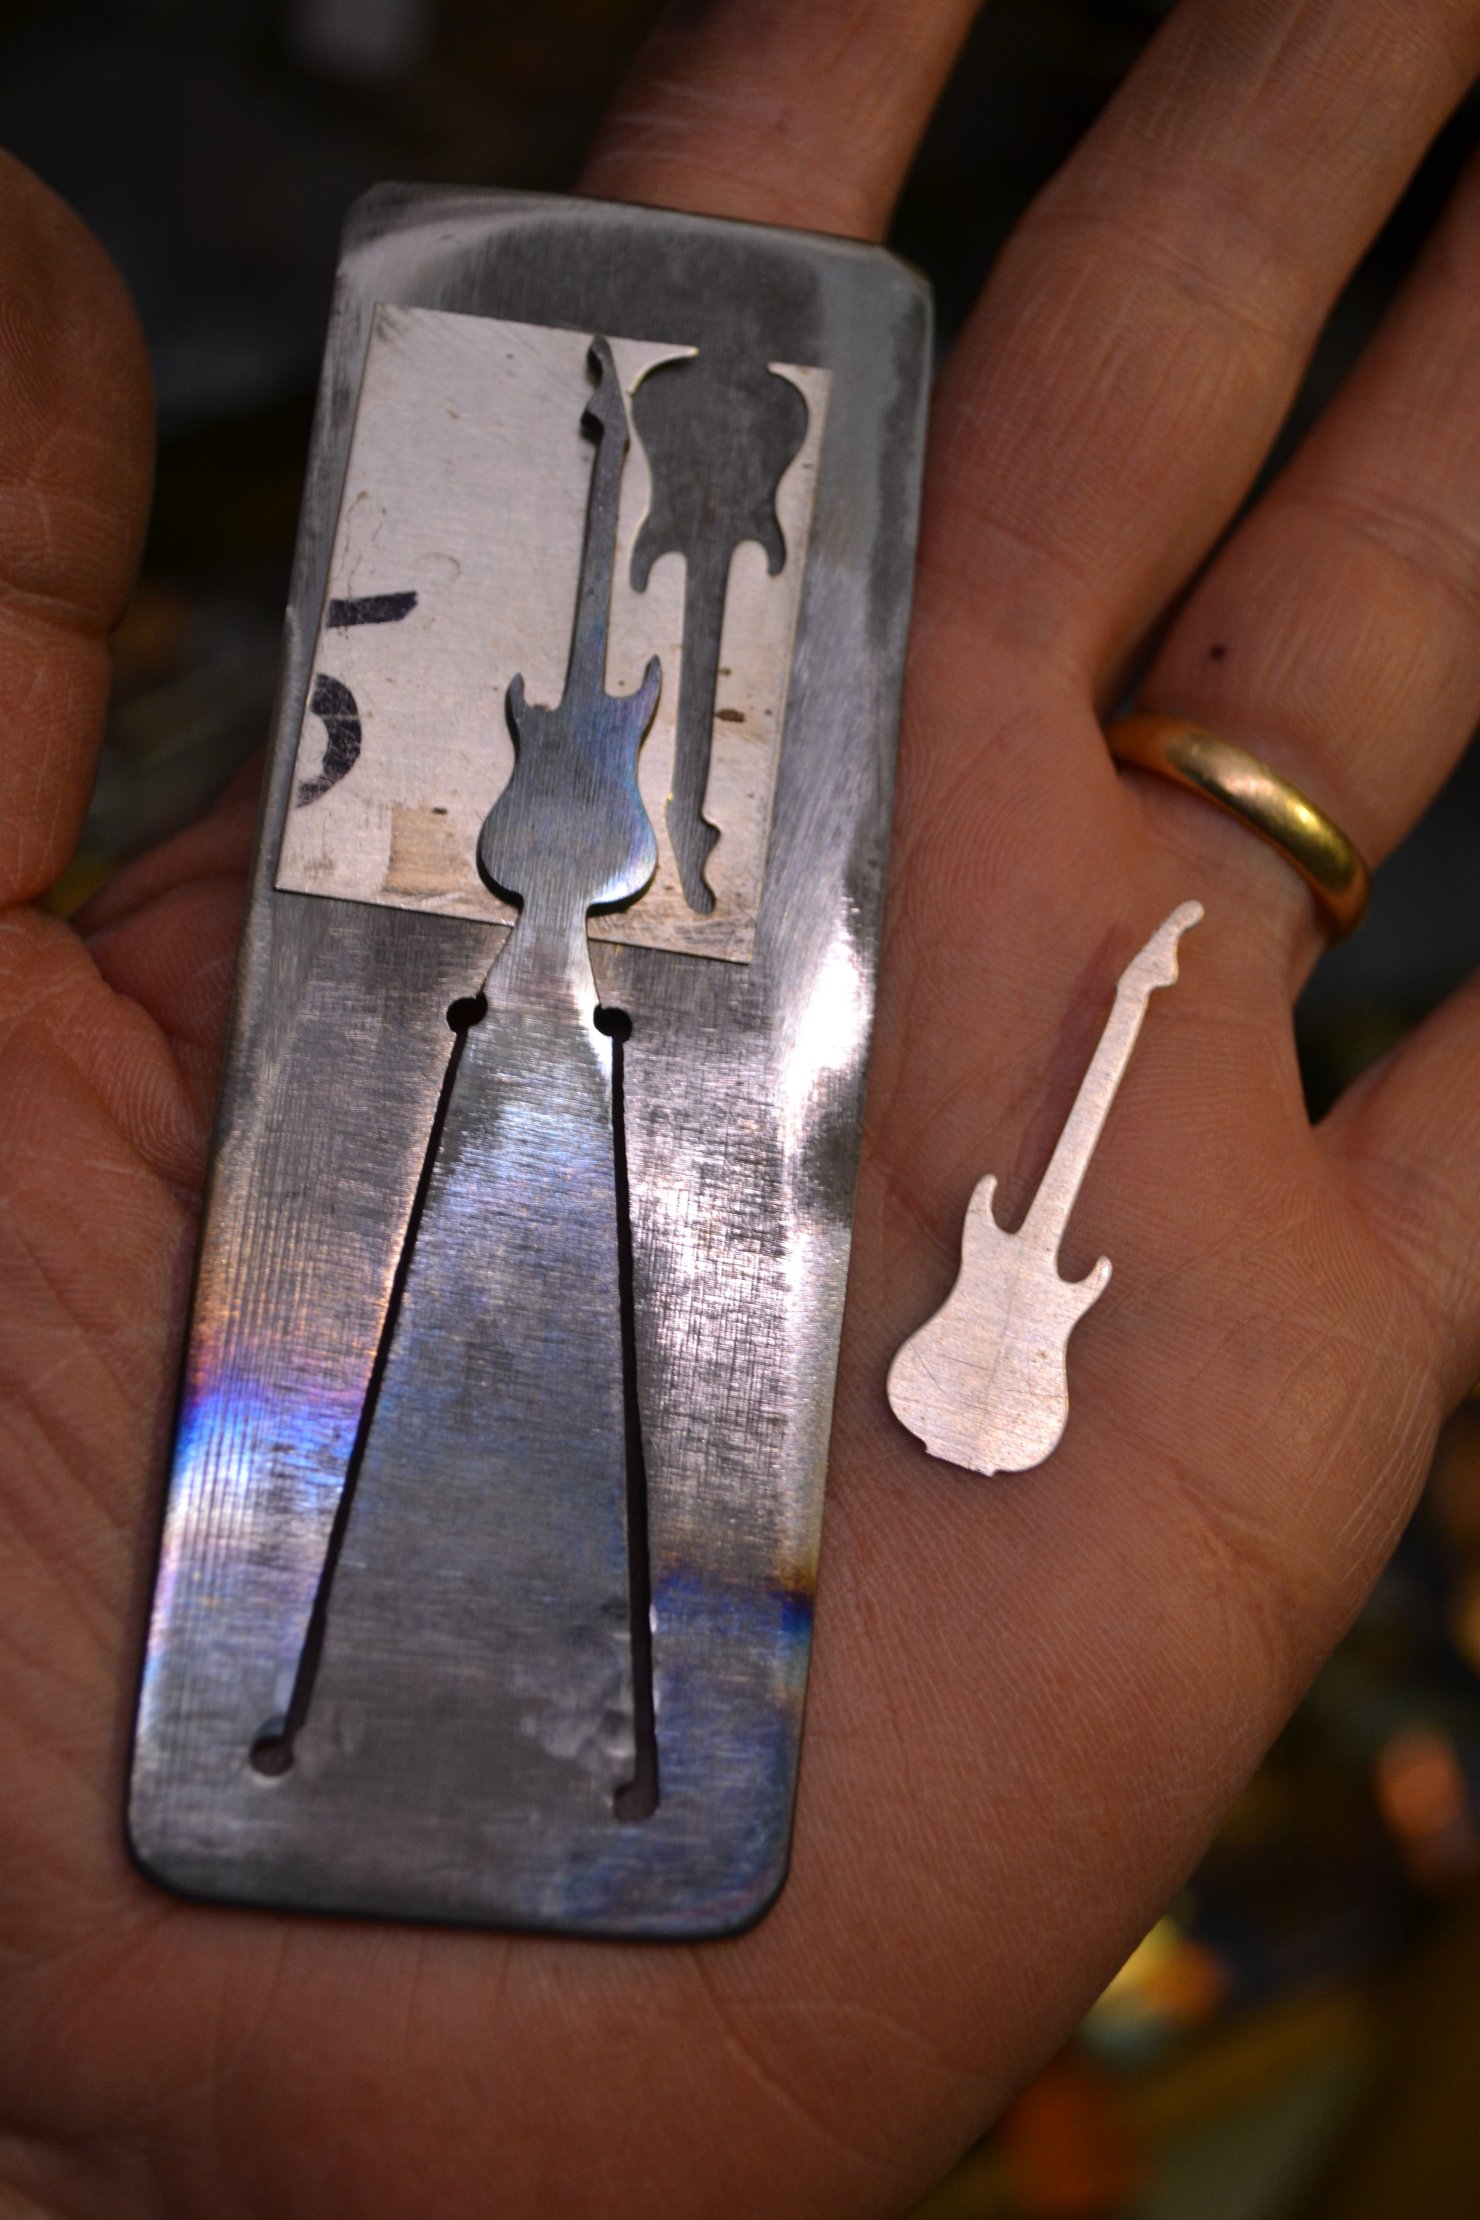
I’ve made around 20 of these dies. I had the RT Blanking system. Take a look: fluxplay.blogspot.com On my first attempt I broke 4 dozen blades, learned to order them by the gross! I set the angle on the saw platform as shown in the website above, I cut on the angle until reaching where the hinge joined the desired cutout, then cut out the hinge part perpendicular to the tool steel. I remember that it was recommended to make the hinge twice the length of the width of the cutout. I would drill a saw blade sized hole at the beginning and ends of the hinge and I cut 20 to 30 pieces from each die, no hardening done. I can be contacted off list donwil44 at Yahoo. Com. I could send a couple of photos of the dies to anyone who wants to see. I don’t know how to post photos here.
Donna
Hi,
It might indeed be “better” for you to use Kevin’s dies , given what you just described , mostly due to your using 18 ga. and thicker . It’s your call, and
it is good to experience firsthand the results of both kinds of pancakes (and there was another guy , ‘TinkerTools’ that was selling pancakes cut on a wire EDM; not sure if he’s still around, but his were not cut at enough of an angle for me) . You get to decide if the cleanup work on parts from straight-cut dies outweighs the cost of my angled and hardened dies, because it just may very well do that, since you don’t need large quantities.
If you do saw your own dies, I think you can get by using maybe a cold rolled steel, because the 0-1 is extremely hard to saw manually in the thicker sizes needed for 16 ga and thicker. Sawing 3/64" seems like nothing to me , compared to 5/64" or 3/32" and even thicker, and those thicker pieces in mild steel (CR) seem like butter compared to the 0-1 tool steel . I wouldn’t necessarily encourage you to run out and drop a lot on a motorized saw, either, unless you try it first, after also trying others, and of course, hand sawing some things for comparison. I’m not overly fond of any motorized saw expect the one-of-a-kind one I have (posted about recently).
ps : work passion interfering with health is not a problem. I re-create via music and
fractals .
DS:sunglasses:
Hi,
Nothing I write about is proprietary . I had a little confusion when I bought the (patented ) RT System from Rio way back when, because it’s papers said I had purchased the rights to use the system, so I wasn’t sure it was okay to make dies for other people. I called Rio and they said not to worry : I had the rights to use it, so I could use it however I saw fit. By then (1986) other people were already making pancake dies regardless of the official RT System and equipment, and once I went out to the old Bonny Doon and taught a class at Lee Marshall’s shop
(1991-ish ?) , I’ve taken the attitude that sharing knowledge is the way to go. I’ve just never really had enough time to write in great detail about much more than the basics . Hopefully I can get around to detailing the making of donut pancakes , matrix and blanking sets (puff and cut) , and more about one-step dies that cut and shape and/or emboss all in one pressing . I’ve touched on these subjects here in the past , but there’s a lot in my head that wants to come out , if I ever manage.
For now, I suggest looking up my older posts , about the saws (no bench pin for me) . the one about the saws is only a couple months old and shows a lot . They are modified Bonny Doon Saw Guides (discontinued (long ago) item from Rio Grande). Video :

Dar ![]()
Hi,
The link says fluxplay is shut down . The Susan Kingsley book has a basic table of angles that I helped her with , but I use slightly more tilt than what’s listed there , because I know how to get away with it (it can be tricky, and I still screw up sometimes by making them too tight) . I make hinges longer than 2x the height of the design, but 3x is the limit, and sometimes there isn’t even enough room on a plate for 2x . Shorter (than 3x) is good because the hinge is less likely to shift sideways, but longer is good because it’s easier to open dies for loading .
Lots of pics of dies here
http://sheltech.net/
and more video

and let’s see… looks like the old drag-n-drop method for posting pics works here.
Nice ! ![]()
Dar ![]()
OH YEAH, PS : I use a plasma cutter on the hinges
Hi Dar, and Rob,
Following this thread has made me realise how lucky? i am.
In that I bought/took on/took over a B’ham jewellery w/shop from 1851 with all the machinery , screw presses , tooling and dies that no one else wanted, back in 1987, most of it being kit prior to 1900, then built that up and added to what I now have.
This means Its no problem having an idea, pulling together the appropriate tooling and making 100, 2500 off if my judgment decides theres a market for it. If it comes off its a real satisfaction and pays for more tools! and minting dies.
As to blanking dies, all mine are traditional, in that there used by either a 6 or 25 ton crank press I have here, or simple hand operated fly or screw presses from 2 to 10 tons.
these dies are held with a bolster onto the press bed with clamping dogs, and the punch has a 1in by 8tpi thread that screws into the moving part of the press. This is accurate enough to run of 500 blankings in any metal up to 1/8in thick.
Its called open tooling and dates back in B’ham to the 1880’s, so nothing new here.
The punch is always parallel sided for the first 1/4 in and half hard and the die is not less than 3/4in thick, being dead hard.
these will cut 20/1000th in thick soft metal clean! if the clearance is set right. thats done by upsetting the punch with our old friend the hammer, then broaching it through the die.
this HAS to be parallel for the 1st 1/8 in then opens up so the blank drops through by itself into a container under the press.
all 1880’s again.
I guess that for a bench? maker anything that speeds up the basic chores like having pancake dies and a hyd press, helps to keep the door open buying time then to experiment with new ideas. What the Victorians did in the 1875’s onwards was to mechanise all manual work a far as possible. thats what i have here in addition to the space age stuff. like TIG etc.
Dar, i was going to suggest EDM but you beat me to it! for angle cutting p/dies. Ive had many done this way and in metal thicknesses that you couldnt saw,especially if its already been hardened. They have cut them at the right angle and all i have to do to finish the tooling is to arc weld the cut out punch to a suitable piece of threaded rod etc! to complete the tooling.
My EDM co, fits it in over a w/e as a cash job. everyone wins.
where I spend the real money is in proper 3d minting dies. thats another story.
Dar, youd love these!. the ultimate in silver smithing/minting and jewellery making.
Ted
Hey Ted,
Yes, you obviously stepped into a great situation !
You’ve read about the Continental Process? Something between
what you describe, and pancake dies . Interesting stuff !
DS
I found a RT Blanking system still in the box on Ebay and bought it. It has its book, and other stuff with it. Pretty excited, it will take like 2 weeks to make it all the way down here, but I also bought the platinum blades as well. I think I am on my way to producing these. Thank you Donna Wilson for offering help. I am sure I will come to you once I get going!
Sincerely
Laura
Hi,
I didn’t ever have much fun with the official RT saw , so don’t feel bad if you find it awkward to use ; you are not alone. Not that it won’t work , but the old Bonny Doon Saw Guide was a big improvement . If you get the Rio Screw Press in the deal, now that’s a great little piece of gear . The instructions that come with the RT System are
a good basic intro to the whole concept , but overall, for what my needs were when I started, I found them incomplete : the angles were not really tight enough , in my opinion, they did not cover heat treating , and they are more of a general overview than specific instructions. Those criticisms out of the way , it is something to be excited about ; I sure was back in 1985, and I became obsessed with perfecting the process , and that was more or less the end of my career as a jeweler 
I did dig up the instructions online recently, as I was getting back into writing about these dies. It was interesting ; a real deja vu , nostalgic thing . As I mentioned, I did have to figure out a lot of details ; how to do a lot of little things exactly right , to make the best dies , but the concept was nothing less than revolutionary , and life-changing for me . It’s not easy to saw dies well at first, so don’t feel bad about that , either . One of the first things I did was start using different thicknesses of steel, and different sizes of blade . The System starts you out with 4/0 blades , which I hated at the time . Anyway , I’m here with assistance if you need it.
DS 
Hi Dar and Rob,
As usual, Im thinking about your p/dies and Rob in particular’s need for 01 hardenable /annealable steel sheet.
Well, the old grey covered b/box woke up this am and on asking who uses this type of metal? it has to be old hand saws. From the 1930’ and 40’s. youll find them usually rusty and blunt at scrap yards and boot/garage sales.
Especially the old ones like Disston Millers falls etc. Also there tapered from tooth to back ,which might be an advantage.
As there just fileable to sharpen so much better than mild steel. also, then thicker blades, old as in 12 to 24in dia circular saw blades. there 1/16ths to 1/8 in thick. Ideal id have thought. What do you think ? Dar?
Ted.
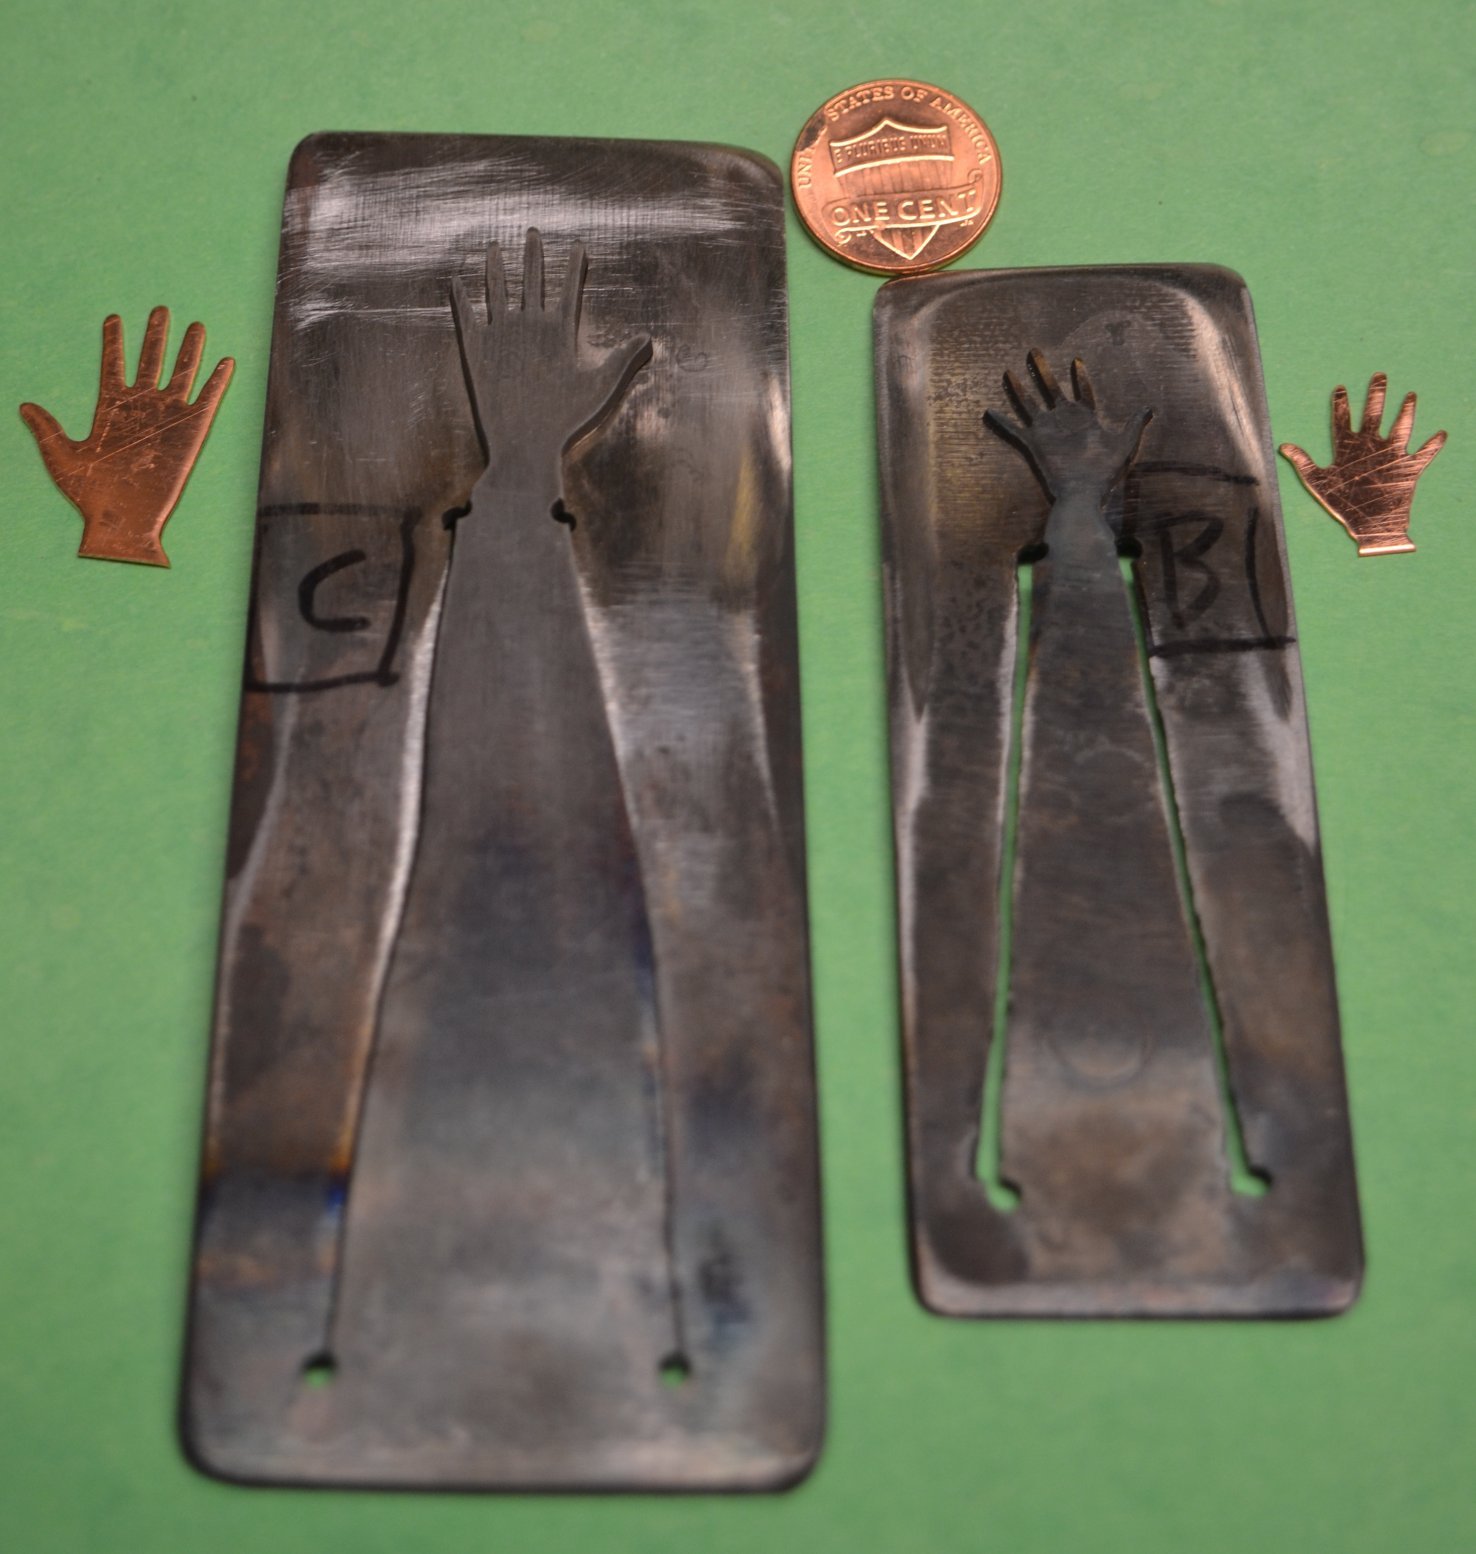
After seeing Dar’s photo, I realized my measurement of the 1 mm cut width is only around the spring.
The cut width around the design appears to be less than 0.2 mm. It’s so small I don’t think I have anything with which to measure it.
Old hand saws … I think it all depends of how hard the steel is , and if it’s too hard, how easy is it to anneal. I talked to a tool steel producer once, and found out that annealing the 0-1 is not very practical , since it comes fully annealed. I tried annealing a harder piece once, and even when cooling slowly for many hours from around 1400-1500 F (I forget exactly) it barely made a difference.
My guess is that anything with heat treating having been done to it is going to be nightmarish to try and saw dies from . Even in the annealed 0-1 (fresh out of the wrapping) after I drill holes , the drilling work hardens the side of the hole enough so that I have to start the saw cut angled forward, or the side of the hole will keep the saw from starting the cut. Not exactly a direct correlation , but one example of how any added hardness makes sawing difficult .
Stainless steel is one option for something that’s tougher than mild steel , but soft enough to make dies from. I am not familiar with SS alloys and tempering to be able to say what kind to go out and get, but I have made a few using SS that was lying around . But anything that’s been manufactured to have some rigidity to it , like circular saw blades or hand saws, I would automatically stay away from, myself , unless, of course, I was having someone EDM cut the die .
Also, as far as the tapering (a variation of thickness from one area of the sheet to another, right ?) goes, I don’t really see an advantage , and any significant variation would change the blade -size , steel-thickness equation, which, of course, means you might have to think about changing the sawing angle . Overall : too much trouble for me, lol ! Also, if the thicknesses are not the same as those of stock 0-1, you’d have to figure out the sawing angle yourself , which takes trial and error to get perfect (assuming you want best results).
[[ Hahaha… I need to smack that onto every paragraph I write : "assuming you want to get the best results " . My little joke to myself (mostly) because we have determined here in this thread that the BEST results are not always needed . But I need to get them for dies I sell to people ]]
Not everyone wants/needs hardened tool steel dies , but it is interesting that those saws you mention , if the steel anneals easily, and can then be hardened some , could be worth someone fiddling around with . I would never have thought of it simply because of my expectation that the material would be too hard to saw , or hard enough to make sawing hellish, and it’s bad enough already.
Dar
Hi,
That sounds about right for the laser cut. It doesn’t seem like much of a gap , but if you ask me , it’s more than enough to be a problem. With thinner metals the gap has to be zero , and as explained (and as Ted briefly mentioned when talking about “broaching” ) I start out with angles that give less than zero clearance, and let the die edges shear (broach, effectively) themselves in by passing over each other when breaking in after heat treating.
Any looseness (increased gap) or misalignment (creating extra looseness to one side of the design) gives the metal more room to either leave a burr behind in, or get stuck in. This problem is more acute with certain metals (some brass , and nickel silver , and stainless steel) as far as non-ferrous metals) that have a “gumminess” to them (I’m not sure of the correct technical term that applies , but it’s a resistance to shearing mixed with a tendency to bend instead of break) . This
can be exacerbated even more when metals are textured , and the gummy metals that have deep texture to them can be very problematic unless the dies are very, very tight , and perfectly aligned .
This is all just my experience with the problems that do happen in various situations, and what I’ve learned to do to prevent and minimize the problems .
Parts that have burrs and metal that sticks in dies is The Big Problem with pancake dies, and loose-tolerance dies are the biggest cause of those problems . That’s my mantra, and it will echo for eternity ![]()
![]()
![]()
Dar
ONE MORE THING
I’ve said (repeatedly) that the old RT Saw isn’t great (or even good) , and that the old BD Saw Guide was actually quite good , and that I use modified ones to this day for all my sawing. What I need to add to this particular thread is that the KNEW CONCEPTS manual saw (sold by Rio Grande) is the improved saw that Lee Marshall designed after the old BD saw guide was discontinued. I don’t have one, but I’ve tried it out , and it’s THE manual saw out there that’s good for sawing pancakes. It has a guided saw frame to keep your saw cut vertical. It has the required tilting table, and it’s easy to operate .
Tilting bench pins and freehand sawing do work well enough for some people in some applications , but aren’t accurate enough (assuming you want to get the best results , ar ar ar  )
)
Dar
I don’t think Rio sells the manual saw anymore, I had looked around alot for something like this but didn’t find it. I don’t think Knew Concepts sells it anymore only the motorized $2000 one! While I am sure this is nice, I cannot afford that at this time. I can always modify the RT I bought, my brother is pretty good at tweaking things when needed…hehe (HA! my spell checker wanted to change tweaking to twerking…haha too funny)
The Knew Concepts manual saw is in Rio’s 2017 catalog. I don’t know why they’d discontinue it !? ![]() I checked online and it’s not there …what the twerk !?
I checked online and it’s not there …what the twerk !? ![]() . That makes even less sense than discontinuing the old BD saw guide without having a replacement , and discontinuing the Rio Screw Press . They could explain it to me why, and I’d still say “como se llama , AY, CHIHUAHUA , porque ???” (oh, the humanity …)
. That makes even less sense than discontinuing the old BD saw guide without having a replacement , and discontinuing the Rio Screw Press . They could explain it to me why, and I’d still say “como se llama , AY, CHIHUAHUA , porque ???” (oh, the humanity …)
Anyway, yes, the RT saw needs tweaking. The 2 things I remember not liking first
(it was a loooong time ago) was how the bushings on the saw frame were too loose on the vertical alignment shaft. Then, the little tab of a “handle” for driving the frame is just silly, so I suggest commandeering a real saw handle and sticking it on in the appropriate place , so that it’s a more normal configuration. Blade clamp problems and me go way back ; I don’t even use normal saw ones , and the ones on this saw are not even that good , but may be usable . After that, my improvements were mostly about… building myself a bigger saw . Bigger table, more clearance for bigger dies , using a similar overall design . Later, I kept using the original tilting base part for a saw that simply held the back rail of a normal saw frame in a vertical slot. After that , I got my first BD Saw Guide . And so on…
Dar ![]()
Edited out by me (sorry again)
Yeah the saw is not there, so this is why I ended up with the RT one. I figure I can make modifications if needed, maybe or maybe not.
Very interesting to hear about how your experience was, and yes I will change the handle right away… I am sure, hope I don’t offend you with the twerking thing
Sincerely, Laura
Oh no! I was writing to Dar (I thought privately) so please please ignore my link in my post about the word that came out in my corrector.