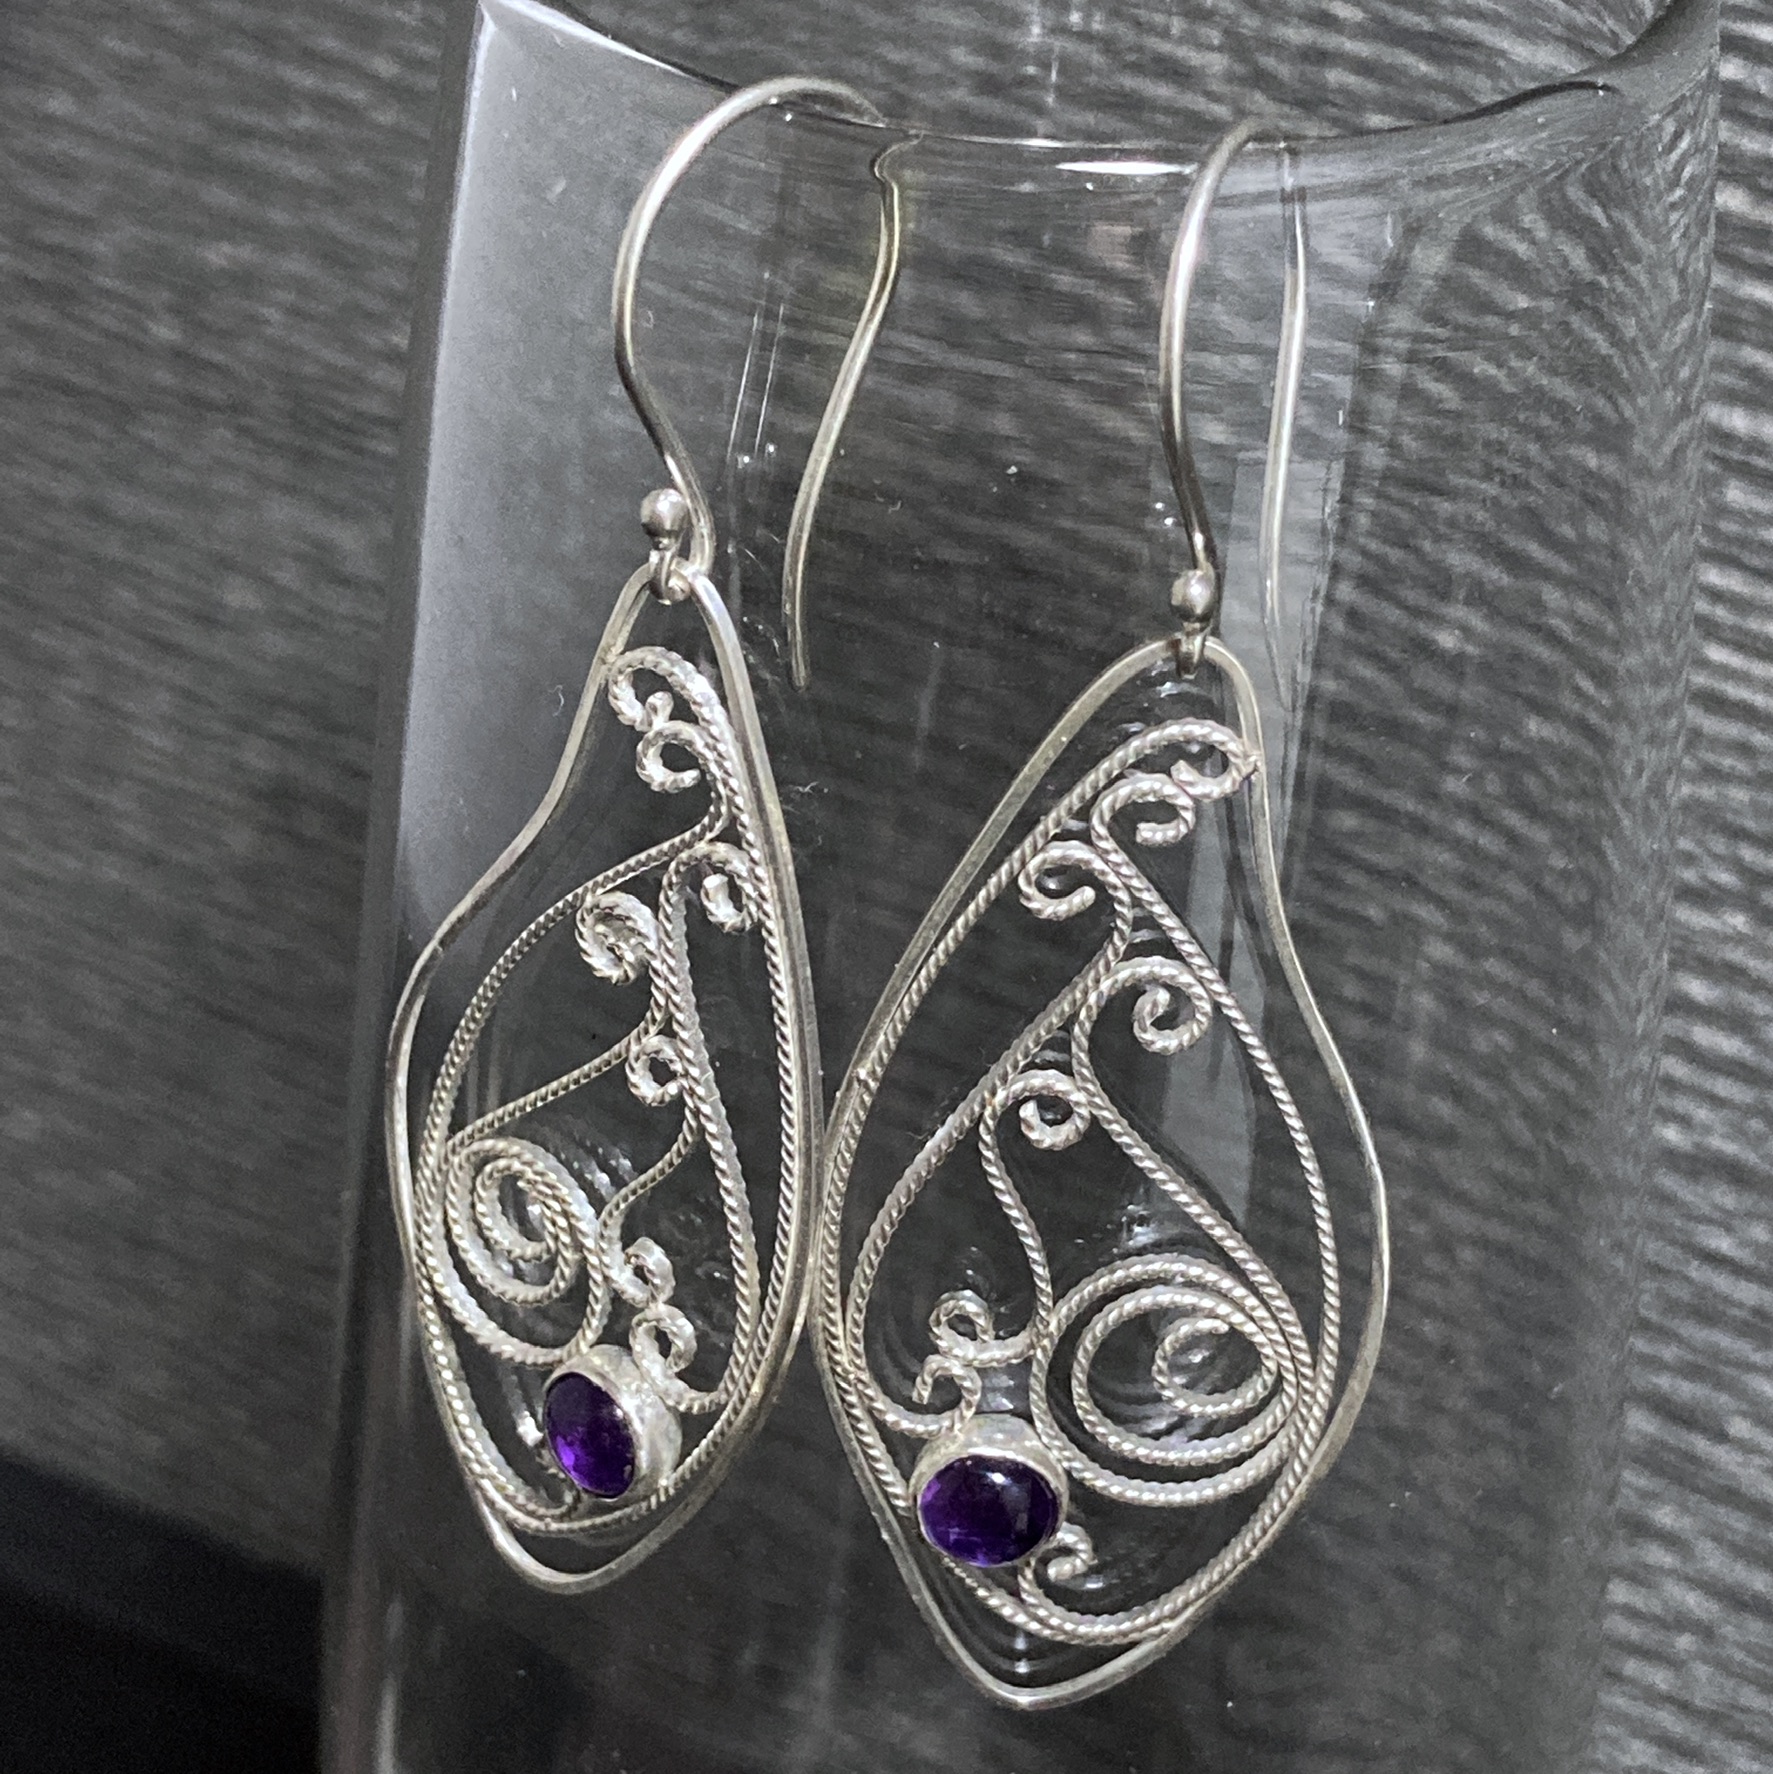
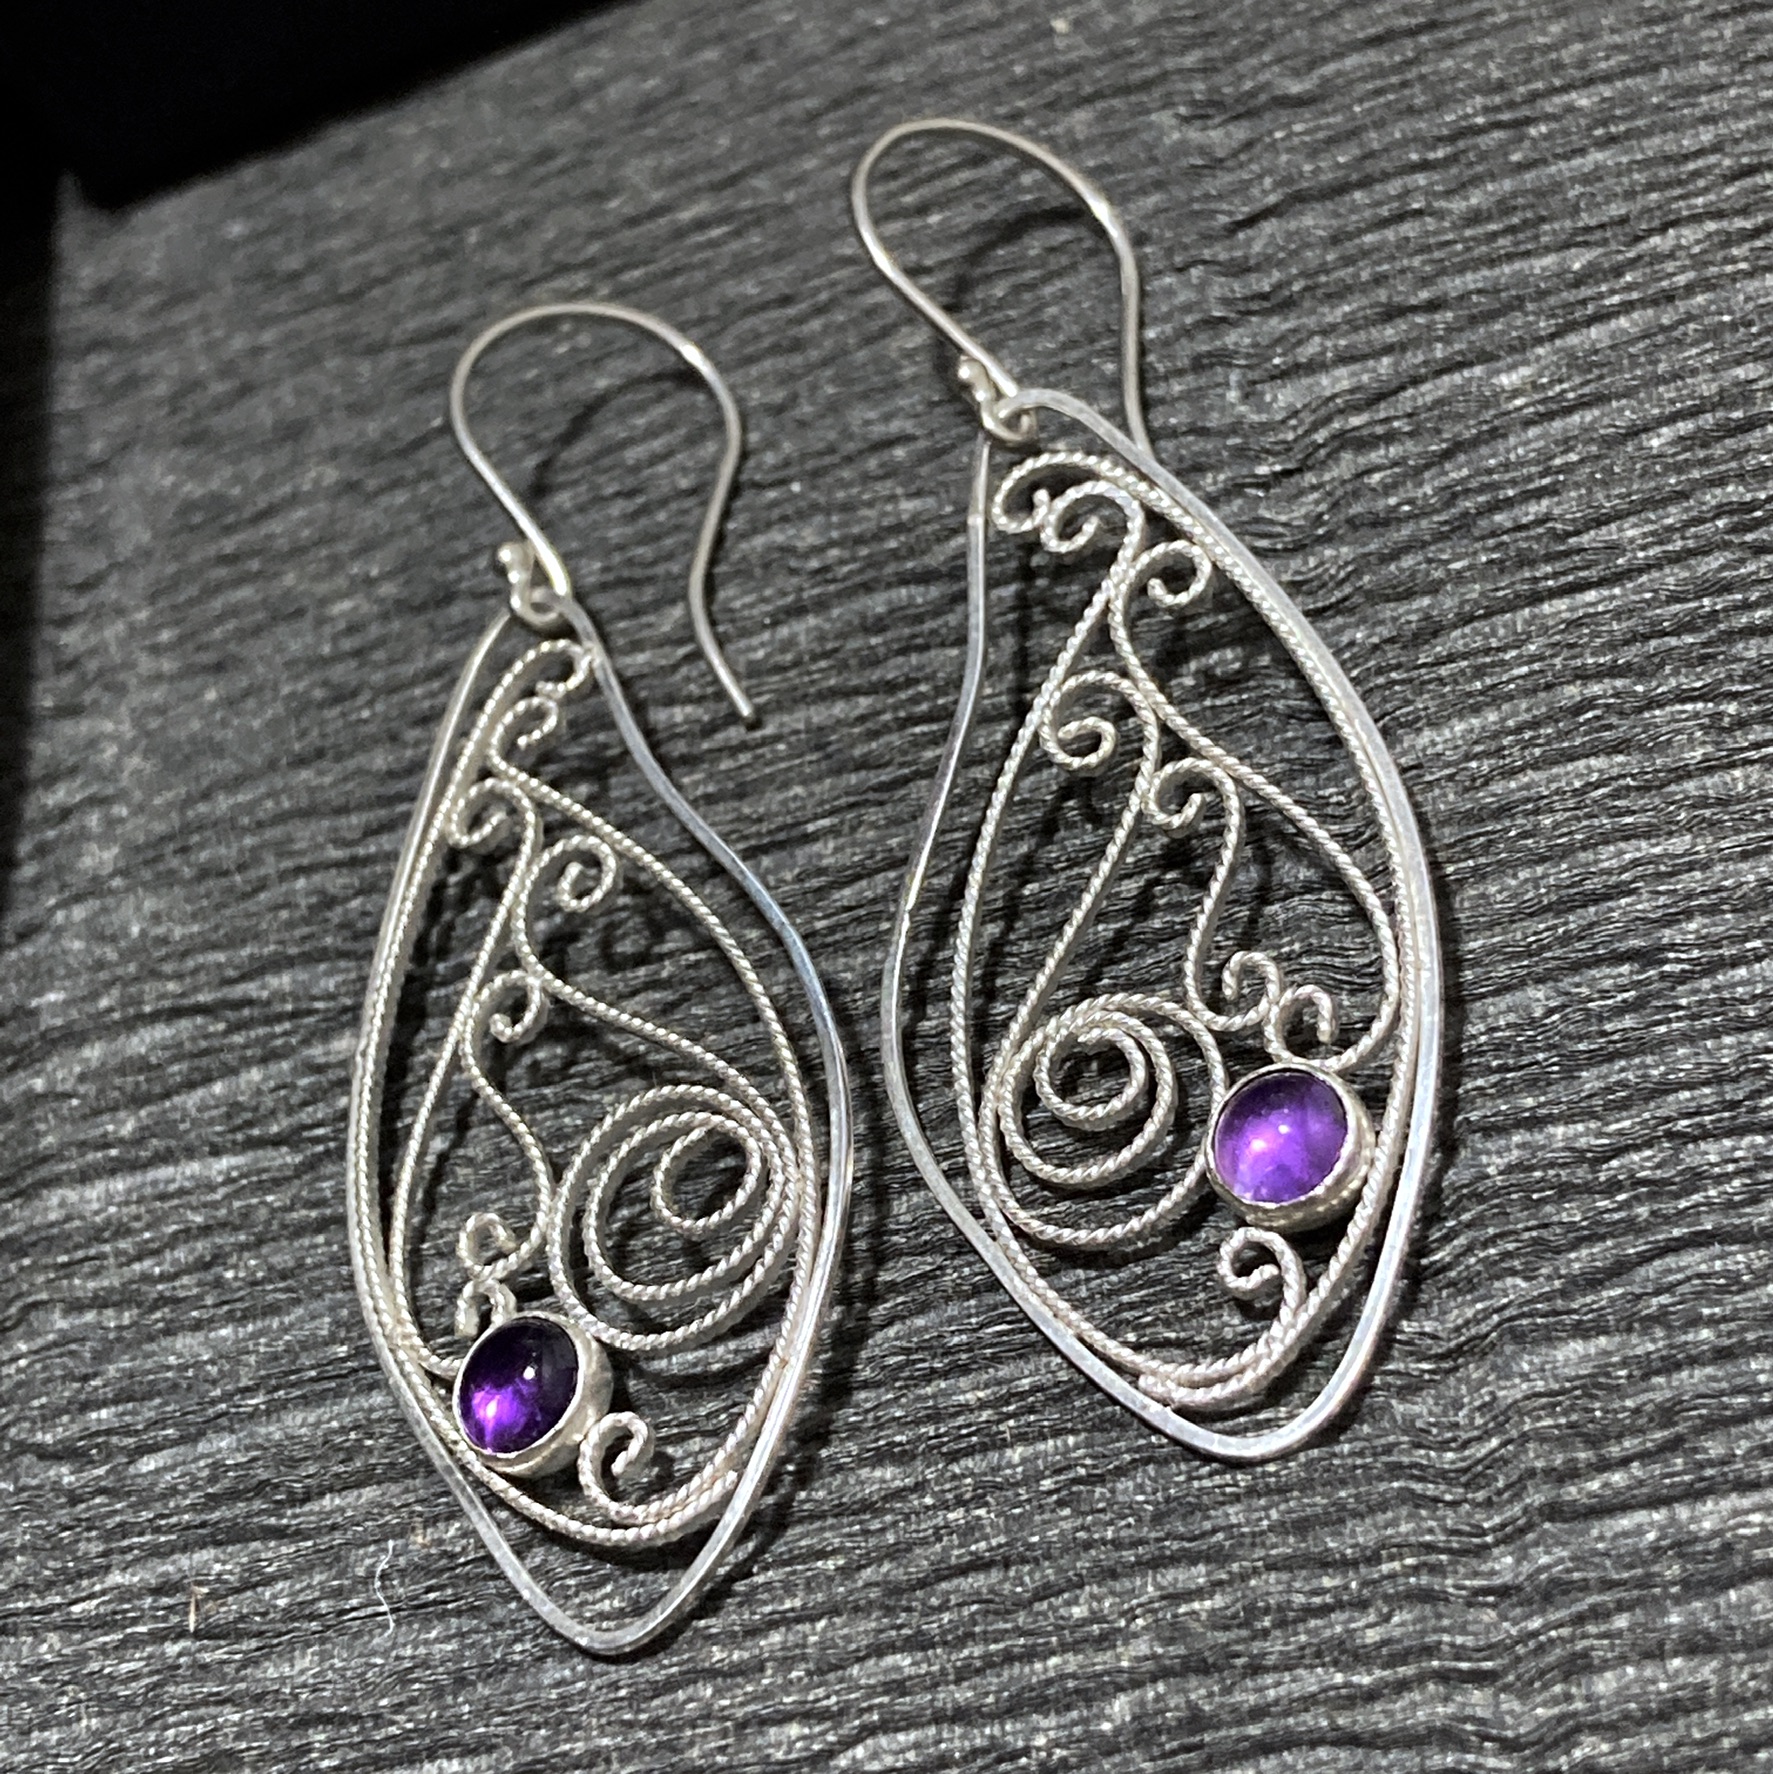
I’ve had that little bit of filigree wire stashed for probably a year and never tried it until today- now I only have a few inches left and I’m sad because I want to keep going! These earrings were very fun, if a little nerve-wracking trying to get them to match. I guess a single piece would’ve been the more sensible first project but hey, I managed! They’re not perfect, but as a friend once said to me “I do art, I don’t do perfect.” They’re structurally sound and stayed that way even after I set the amethysts, I didn’t melt anything into oblivion, and I love them! I’m sure my mother will too, they’re a birthday gift for her. Now I need to go order more wire, and go back through the archives for all the good Orchid wisdom I know is waiting for me.
11 Likes
Look nice, just starting to get into filigree. Enjoy the whole process from making the wire to finish. Haven’t done much hope to work on it this year.
I got into filigree several years ago. It is a lot of fun and very different from my typical heavily forged, fabricated and twisted bracelets. It also requires very little tooling, which probably explains why it is such and old and geographically diverse art form. It can also be very frustrating. there is a lot online to look at, especially from Victoria Lansford. You can also look at Milt Fischbein. He may reply to your post. If you can roll and pull wire, you might consider making your own filler wire. I make it in both sterling and fine as there are places for both. A rolling mill also helps you make your own frame wire. Look at soldering paste. It is a quick way to apply an even layer of solder to your filler wire. I am 71 and need magnification. You might consider an optivisor if you don’t already have one. You are correct about making identical but reverse image earrings. It is a real challenge. Good luck…Rob
5 Likes
Thanks! Rolling mill is on the someday-list. I’ve already got paste solder and will likely be sticking with it given how expensive the powdered kind is. Someone once suggested that the pasta machine I use for polymer clay may be able to roll twisted filler wire flat so I might give that a shot.
I didn’t buy a rolling mill until maybe 12 years ago. I first bought a small economy mill ($300?). It was more than adequate to get me hooked on having a rolling mill. When one of the keyways failed, I took out a loan from my wife’s savings account and bought a D130 from Durston. I can’t imagine not having a rolling mill now. As tools go, my torch, rolling mills and flexshafts are those that I would just go into debt to replace if I had to. Other pieces I would save to replace. You can buy 22 - 28 gauge fine and sterling wire and then twist it yourself. Without a rolling mill you may be challenged to get it uniformly flat, but try your pasta machine and see how it goes. Flattening the frame wire is a bit easier with a hammer, but still a challenge. My tinkers brain is imagining a small filigree specific rolling device made from a pair of roller bearings mounted on a piece of steel in such a way that you could pull your wire through to flatten it. It needs to pass through a pair of rolling surfaces otherwise you will just stretch it. I am not sure how it was flattened 1000 years ago, maybe someone else knows or I will research it. Good luck…Rob
1 Like
I am hoping to try filigree someday in the future and only hope my first attempt comes out close to yours. I do hope you continue posting your work. My congrats on a great first attempt!
2 Likes
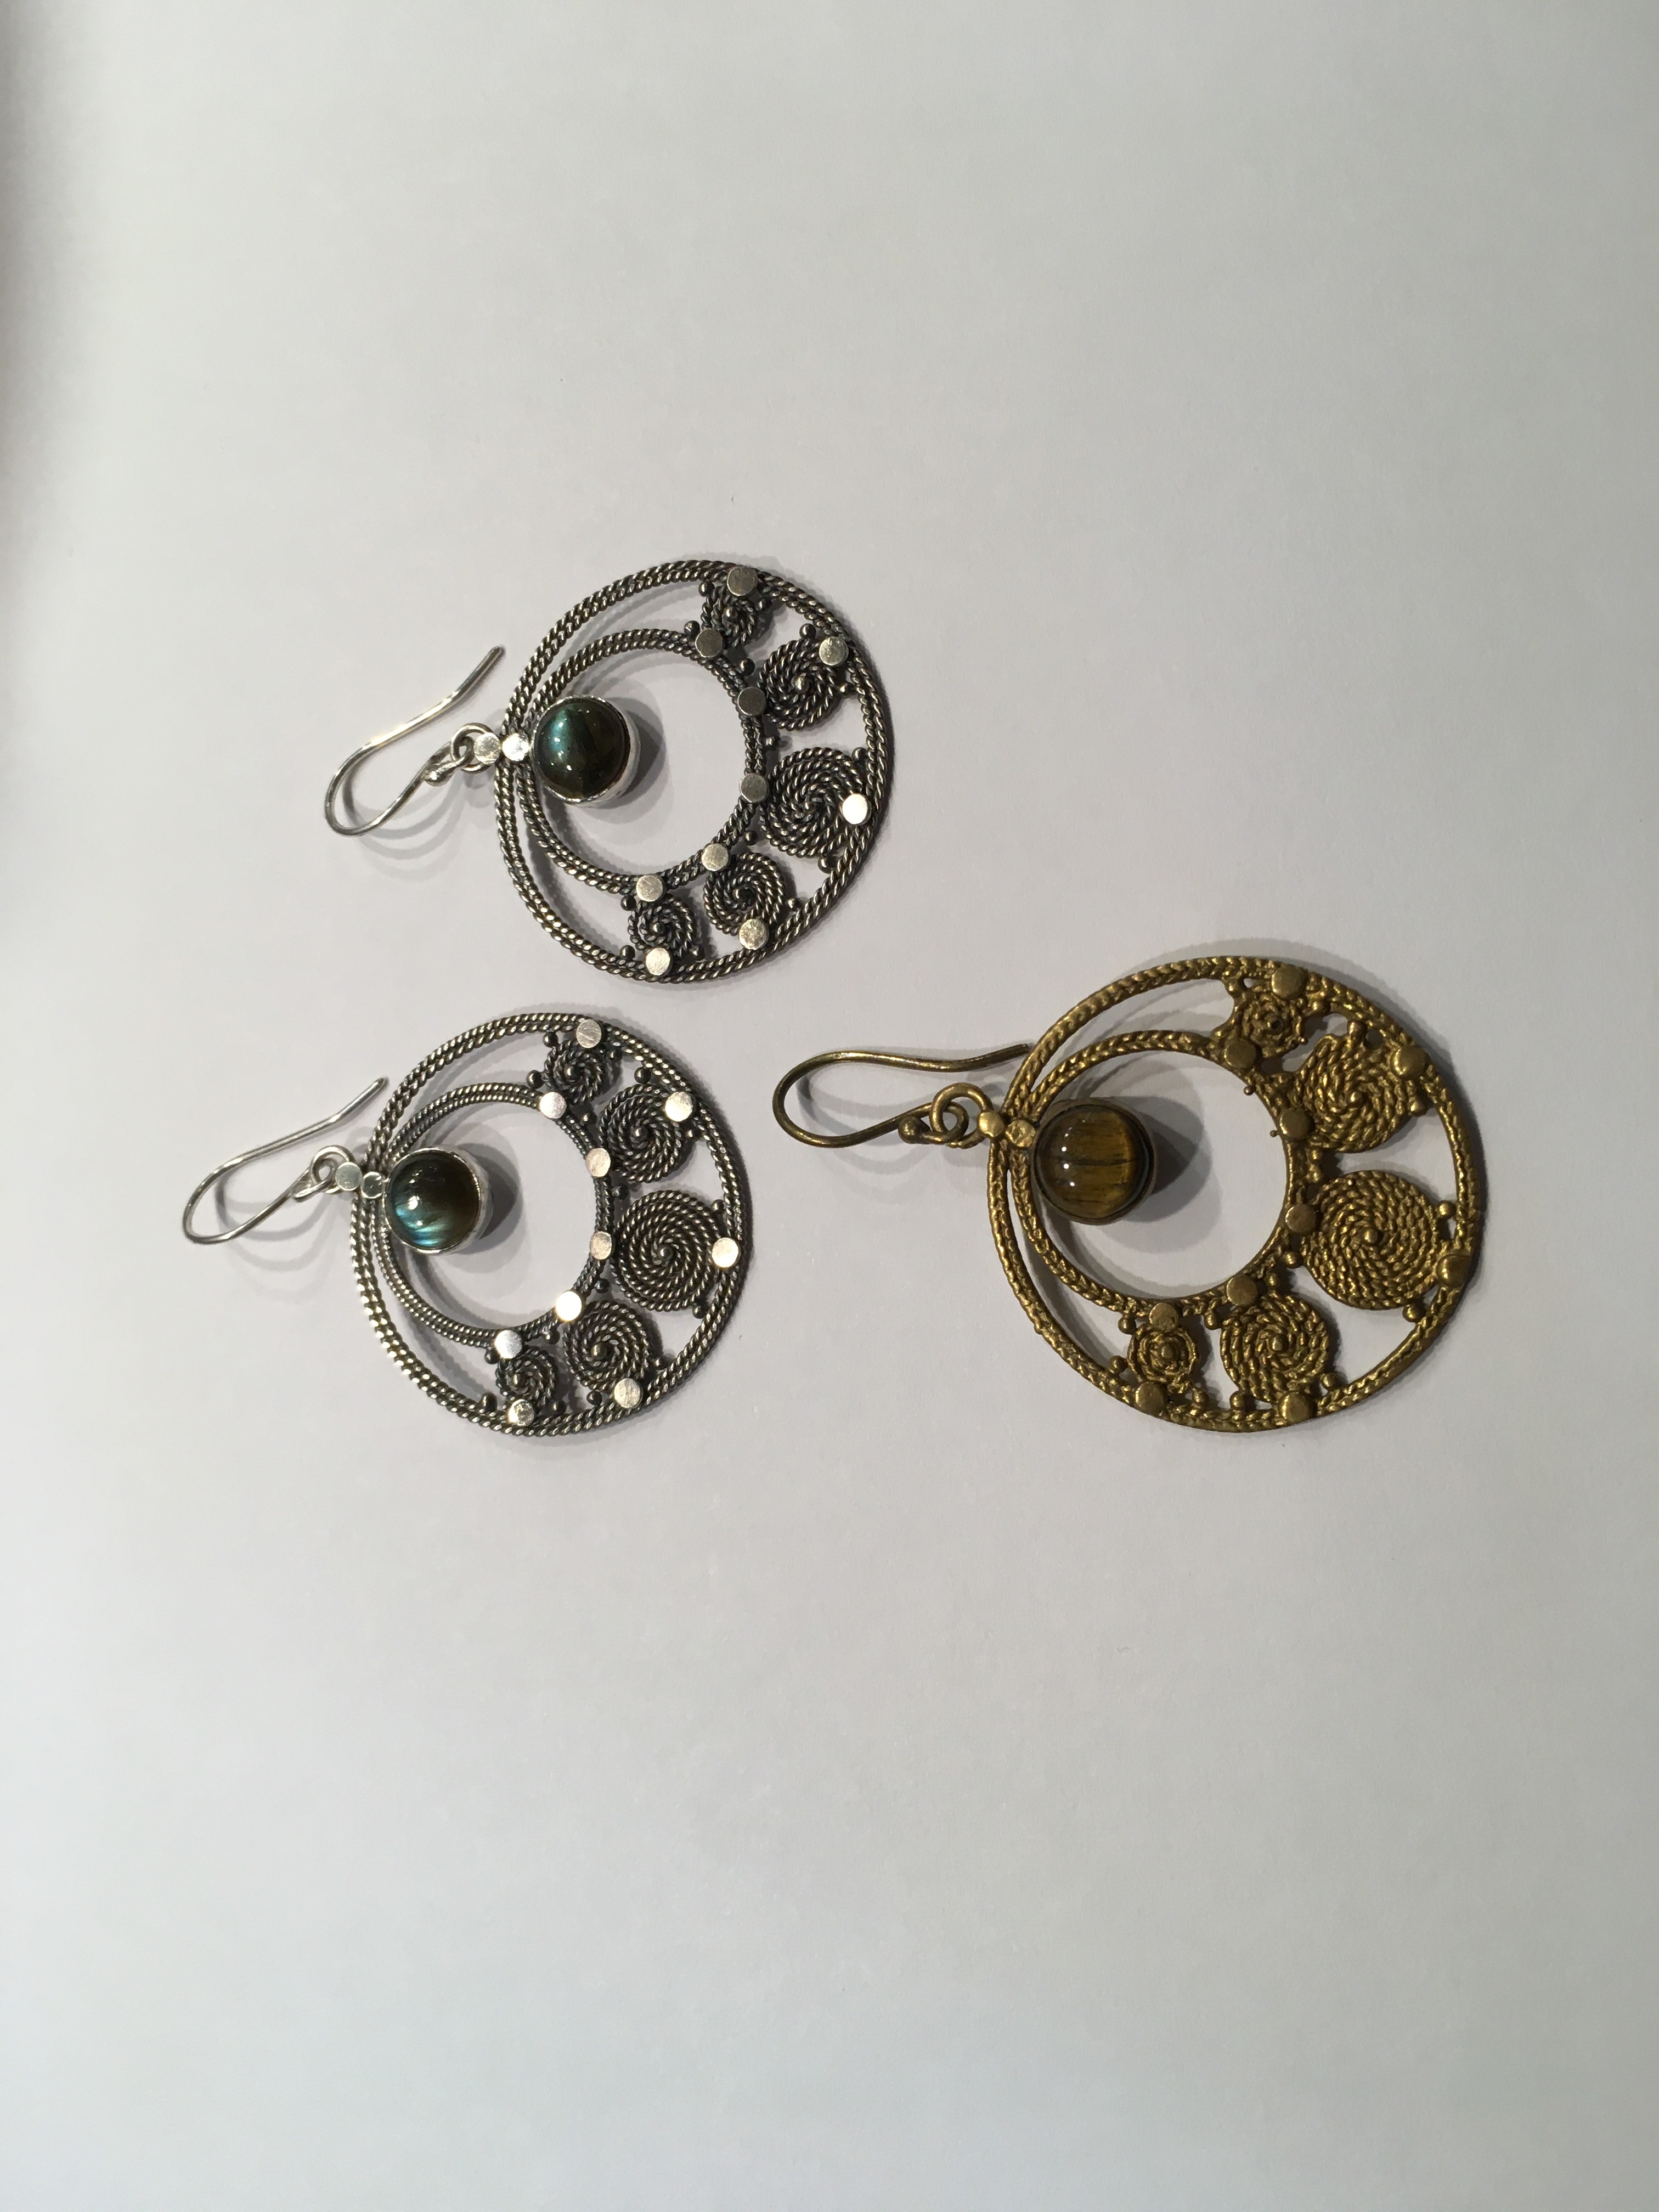
Thought I would share my first filigree project which I just completed a few weeks ago. A dear niece lost a brass earring her boyfriend had purchased in Thailand and asked me to reproduce it. I don’t usually work in brass so I offered to try to reproduce a pair in sterling. I have a rolling mill and draw plates, so I cast a wire ingot and drew and twisted my own wire. It was a fun challenge and very different from my usual style. She says is happy with the final outcome. This is also my first attempt to upload an image to this site so hopefully, I got it right. IMG_2069|375x500
Regards to all the wonderful Orchid community,
Melissa
Hi Melissa, Looks good. Yes your pasta machine will work to flatten the filigree wire but not the gallery wire for the outside. Trick is after you get it tightly twisted, you will wind it up so you can anneal it. Then it will be soft enough to use the pasta machine on the wire. use 26 ga for the filigree wire when doing a necklace. switch to 28 ga for earrings. I agree with what V. Lansford says about those gauges for each use. Where I differ is when making a bracelet. Some I want the delicate smaller gauges. Most I use 14 ga sterling for the outer gallery wire, and 24 ga. for the filigree wires.
here is another trick, and you just might switch to the powdered kind of solder. get a fine piece of screen of any type metal. make sure it’s big enough to fit over the top of a container bigger than the piece you are making. set the screen on the container upside down. flux then with a small line sifter used in enamel work, sift the powdered solder onto the piece. gently tap the side of the screen, and any loose bits of solder will fall through the screen. Now you can save the solder that was collected in the bottom container for reuse. I get my powdered solder from a lady in south Florida. With enough of us on here that do filigree she has done group bulk orders. It was a great savings to buy it that way.
1 Like

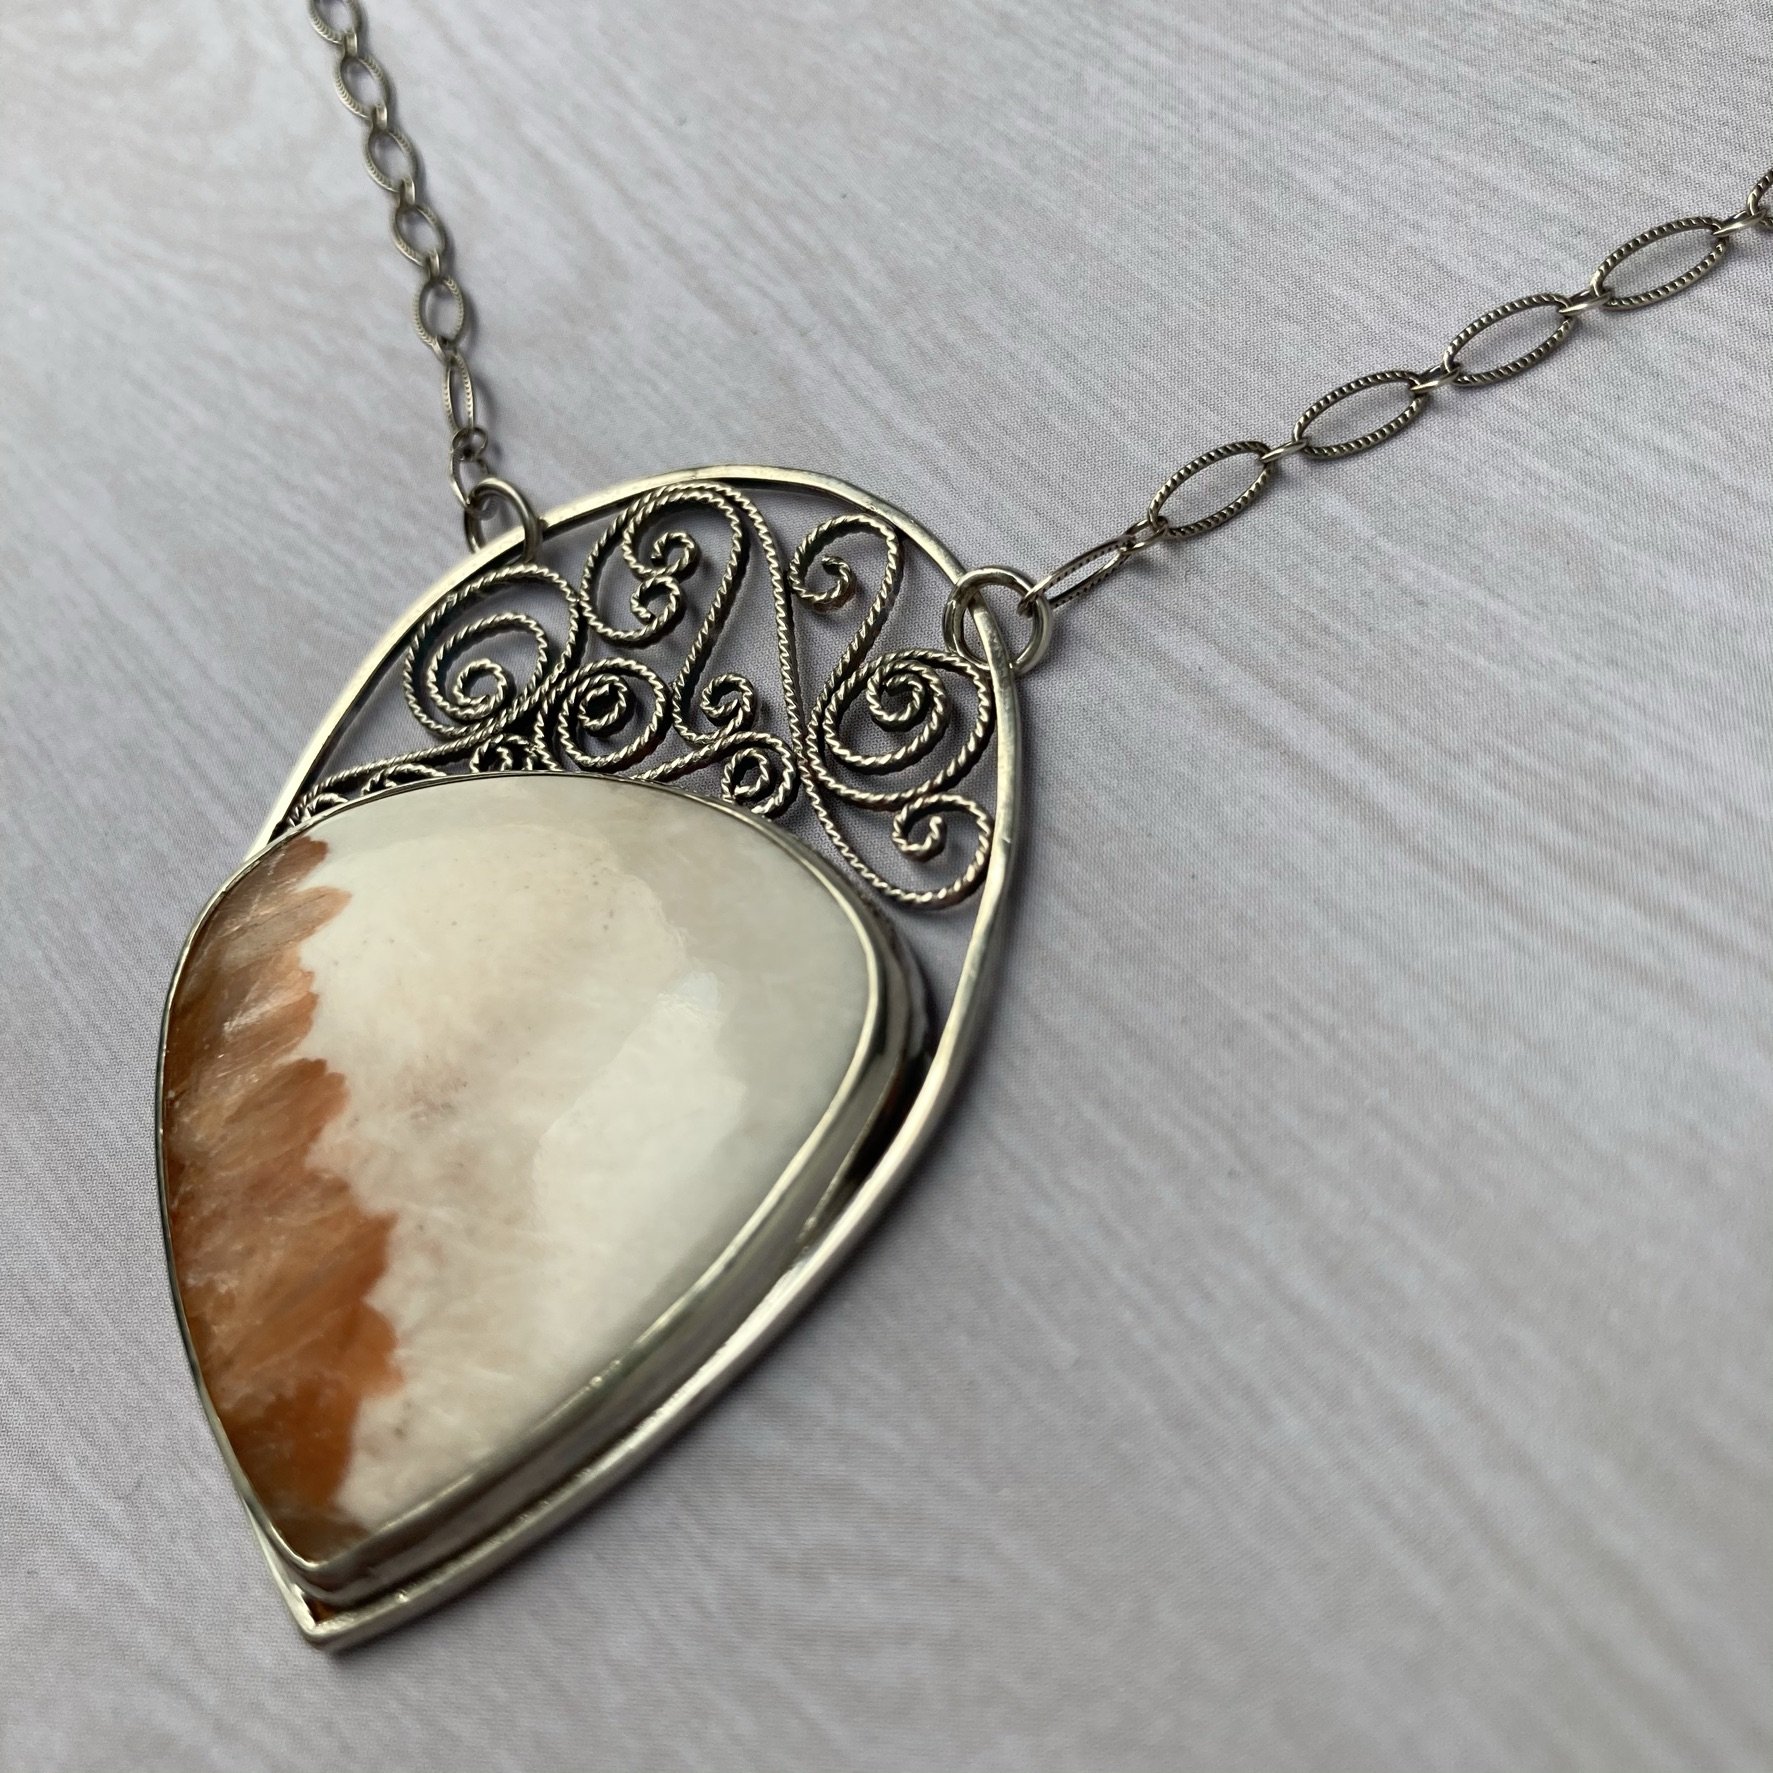
Did I mention I’m completely hooked?! This one is for me since it’s a little wonky. I used some 22g square wire for the filler this time and that works great too with a very different look.

My bezel strip was too tall for the stone by exactly the thickness of the wire so I filled in the back of that too. Gives a cool effect through the chalcedony when held up to the light.
Now I’m imagining getting some reference photos of antique wrought iron gates and mimicking those patterns with the square wire…

Wait what do you mean it’s 4:30am?!
6 Likes
Love your work…have done some filigree myself so I truly appreciate what you have done. Victoria Lansford has a really good video course on the subject. Check out her website
2 Likes
I adore this comment… we are kindred spirits.
Your work is lovely!
1 Like
Ha! Thanks. 
1 Like
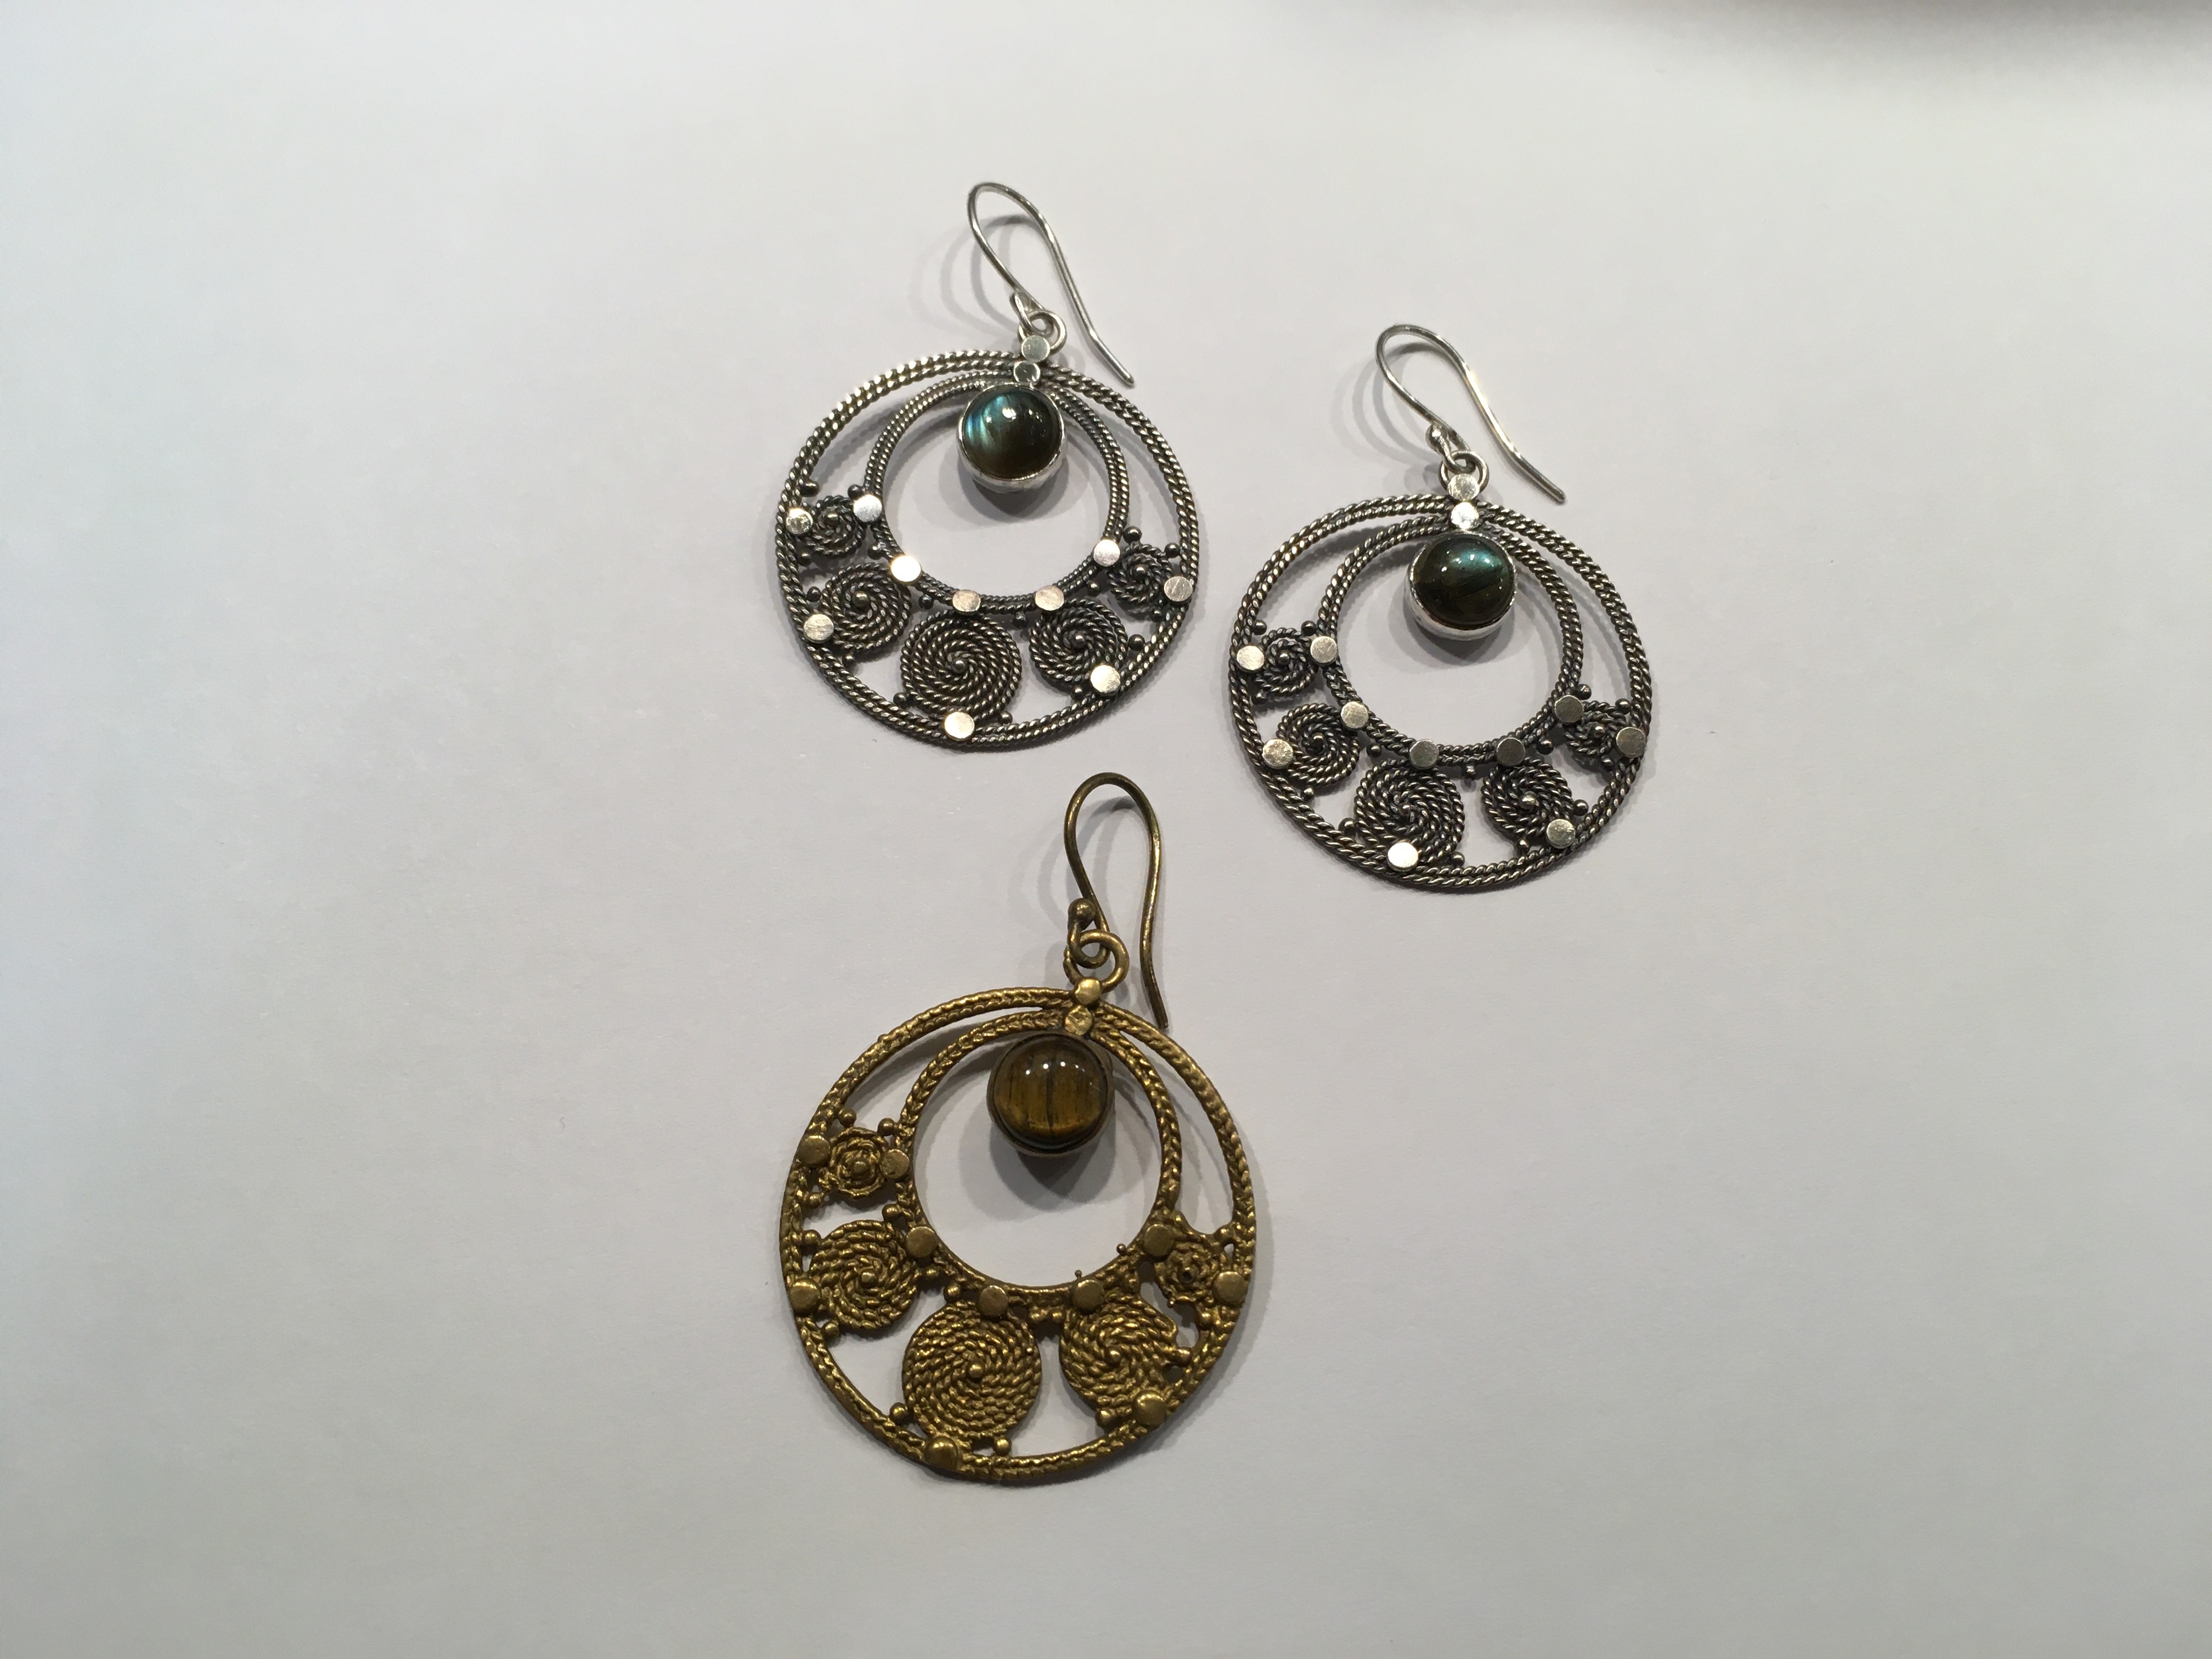
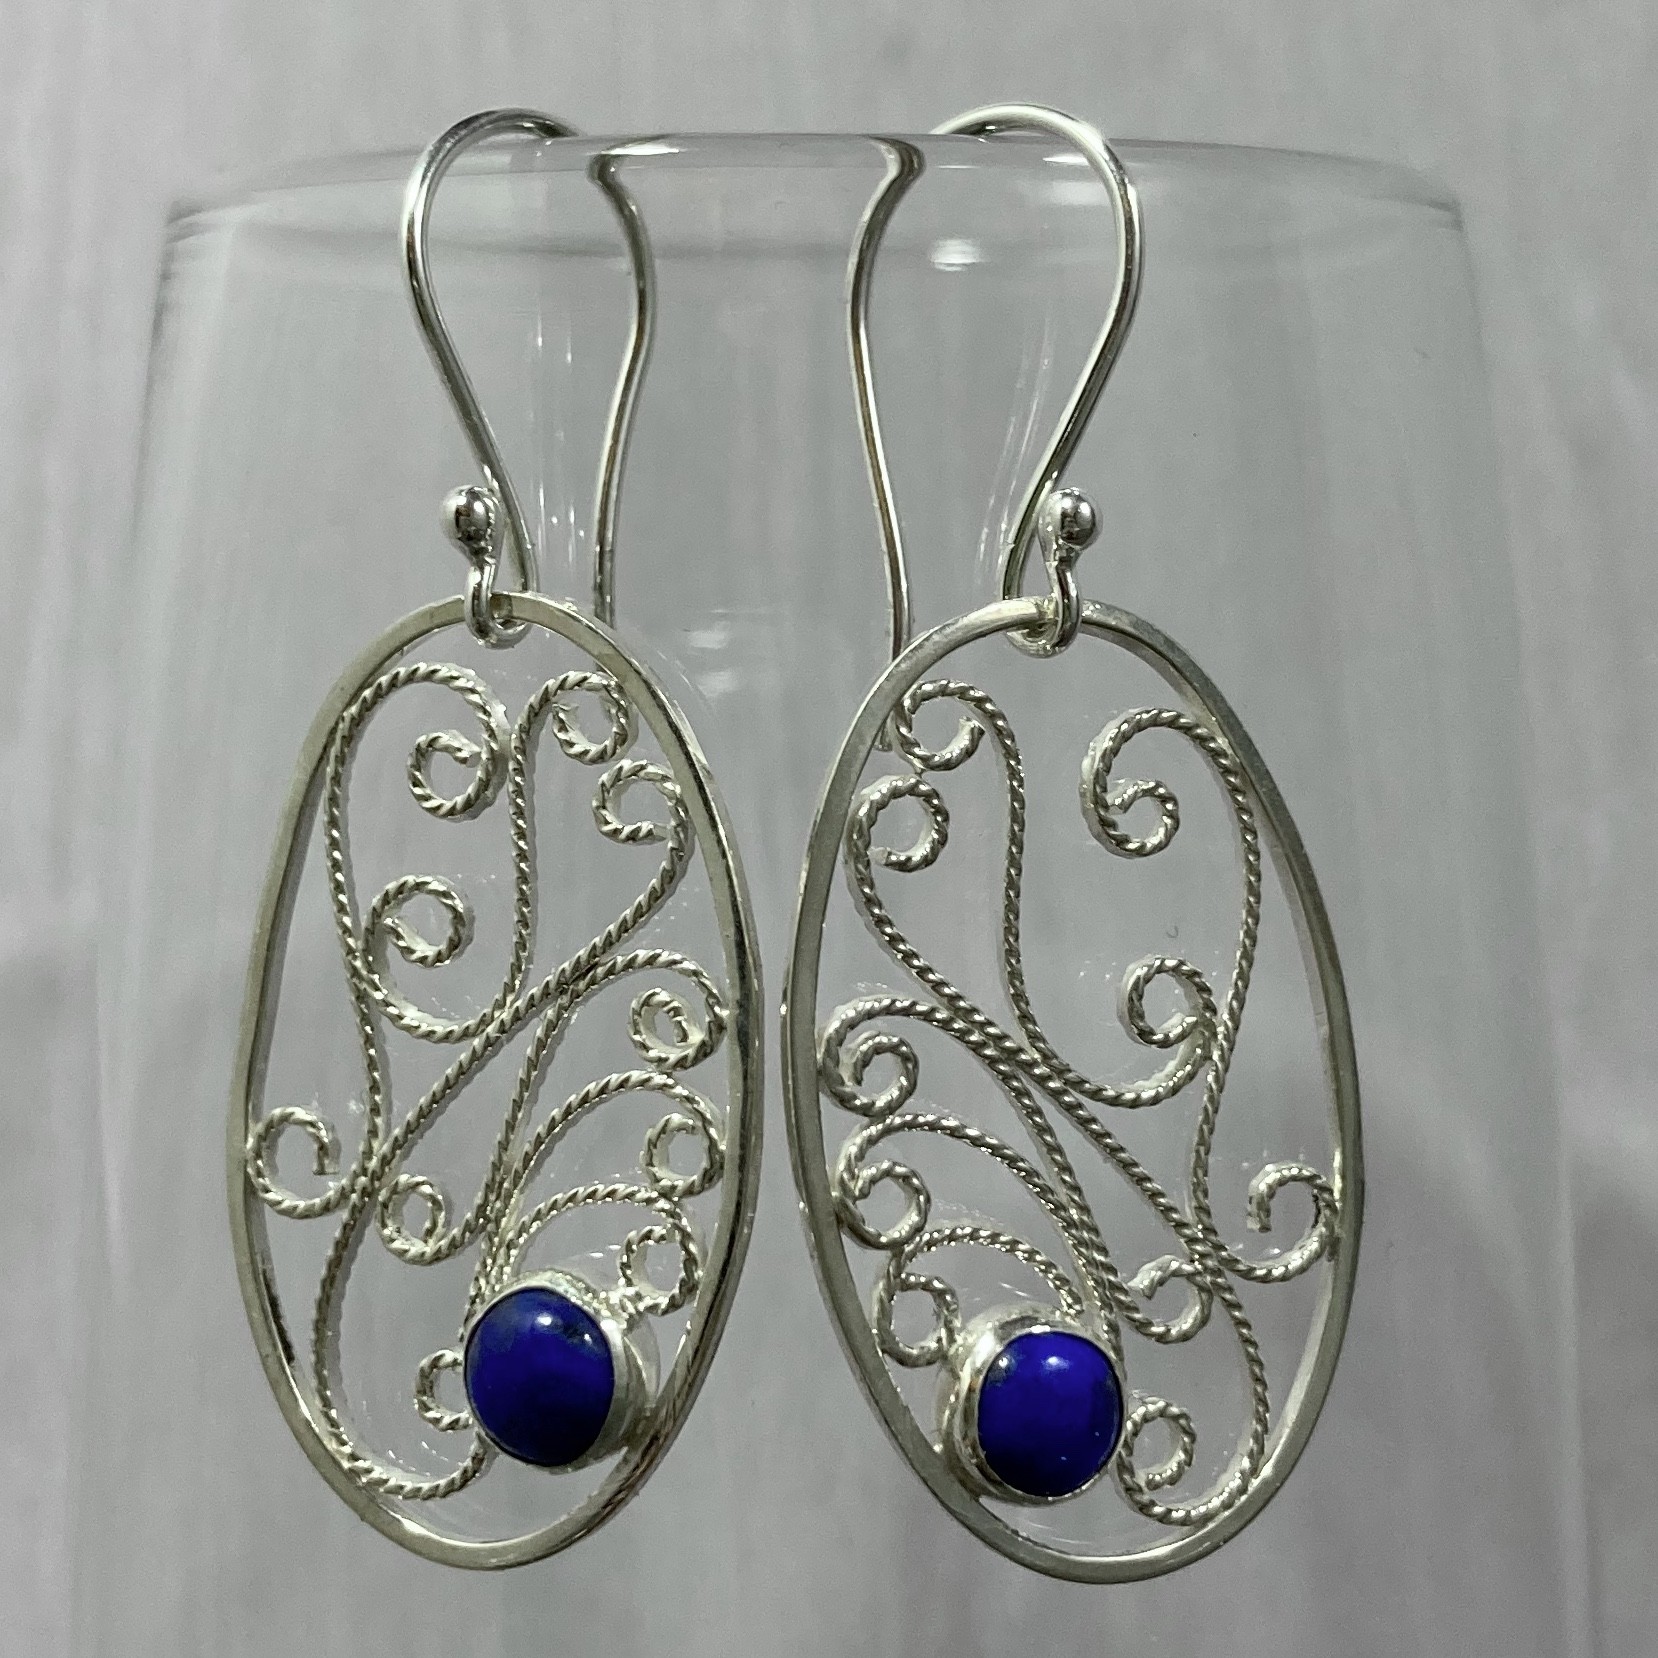
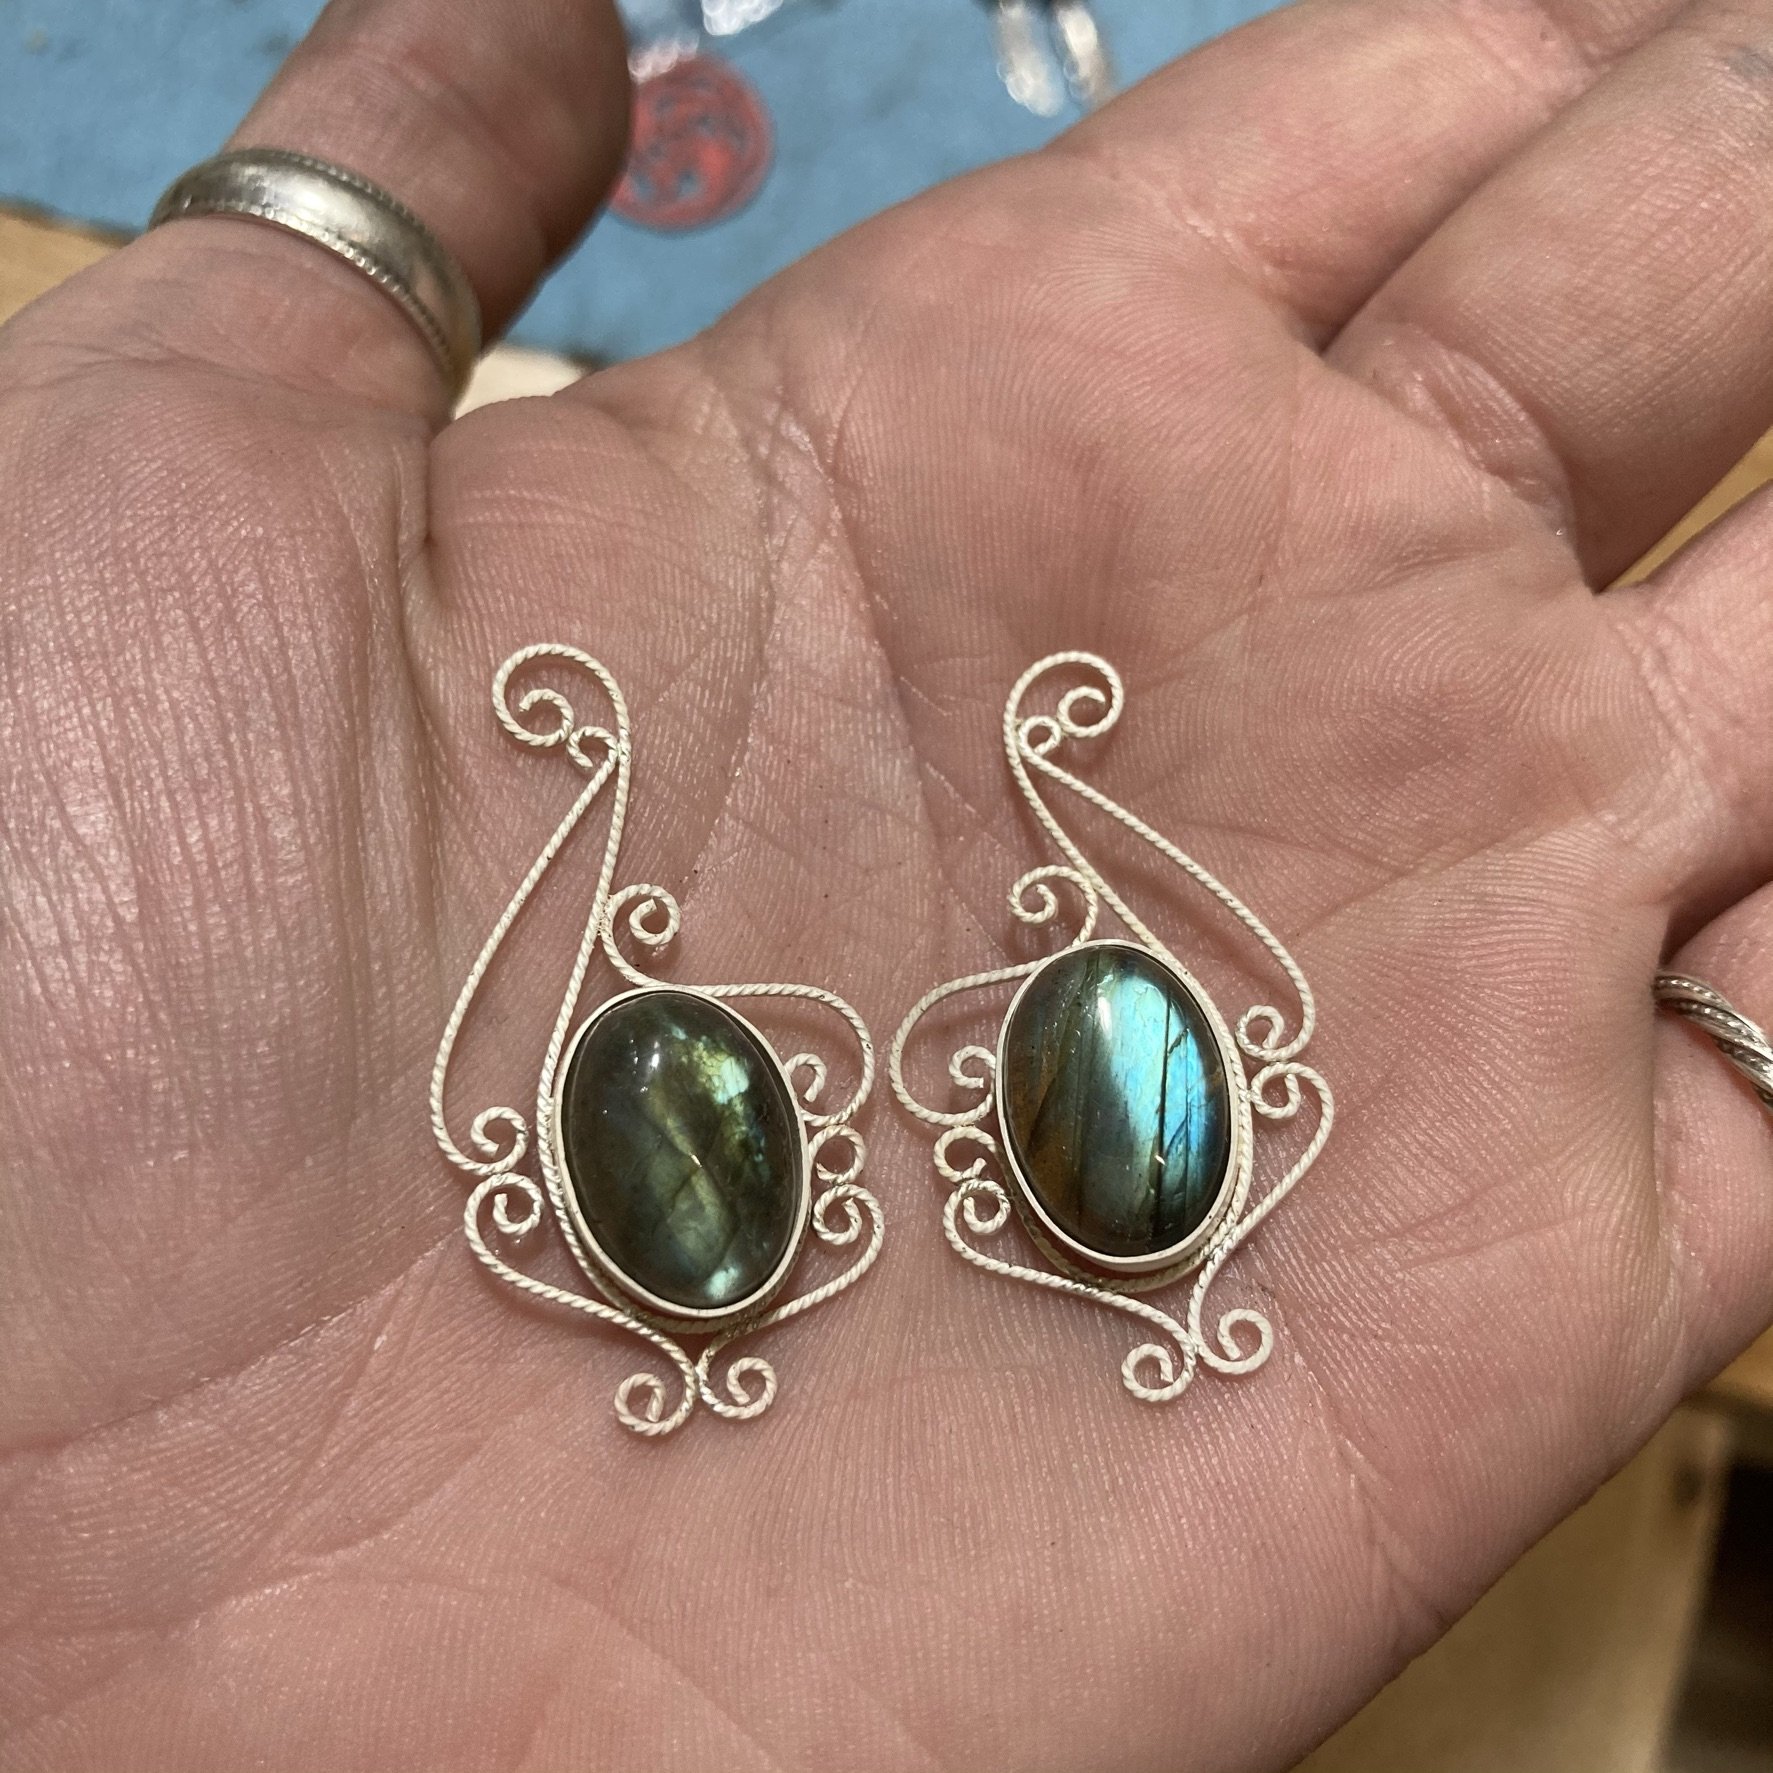
Still at it with the filigree, still having a blast.
That last pair with the labradorites is for me. How I got three years into silversmithing and still only owned one pair of labradorite earrings, I can’t fathom. A little bit of polishing in the morning, set the stones, and I’ll be up to two in my collection. 
I’m still using paste solder syringes. I’m not as hesitant to invest in the powdered solder since I appear to be sticking with this, but I feel like the syringes are better suited to the no-frame type designs like my earrings here. I can place a dot between the wires as I lay them out on my soldering board, and it actually kind of sticks them together temporarily while I keep building onto the design.
3 Likes
Looks like you are still having fun with filigree. It can be addicting. I use paste solder and smear it over the surface of the piece that I am putting together to solder the filler elements and use a soft bushy flame to melt it. I sometimes go back with medium wire solder that I have rolled out to .5 mm or less and touch solder whatever spots still need more solder, especially where the filler wires and frames meet. You do need to be careful that you don’t run more solder in than needed and accidentally fill in desired detail with solder. Do you use sterling or fine silver filler for the pieces without frames? Thanks…Rob
2 Likes
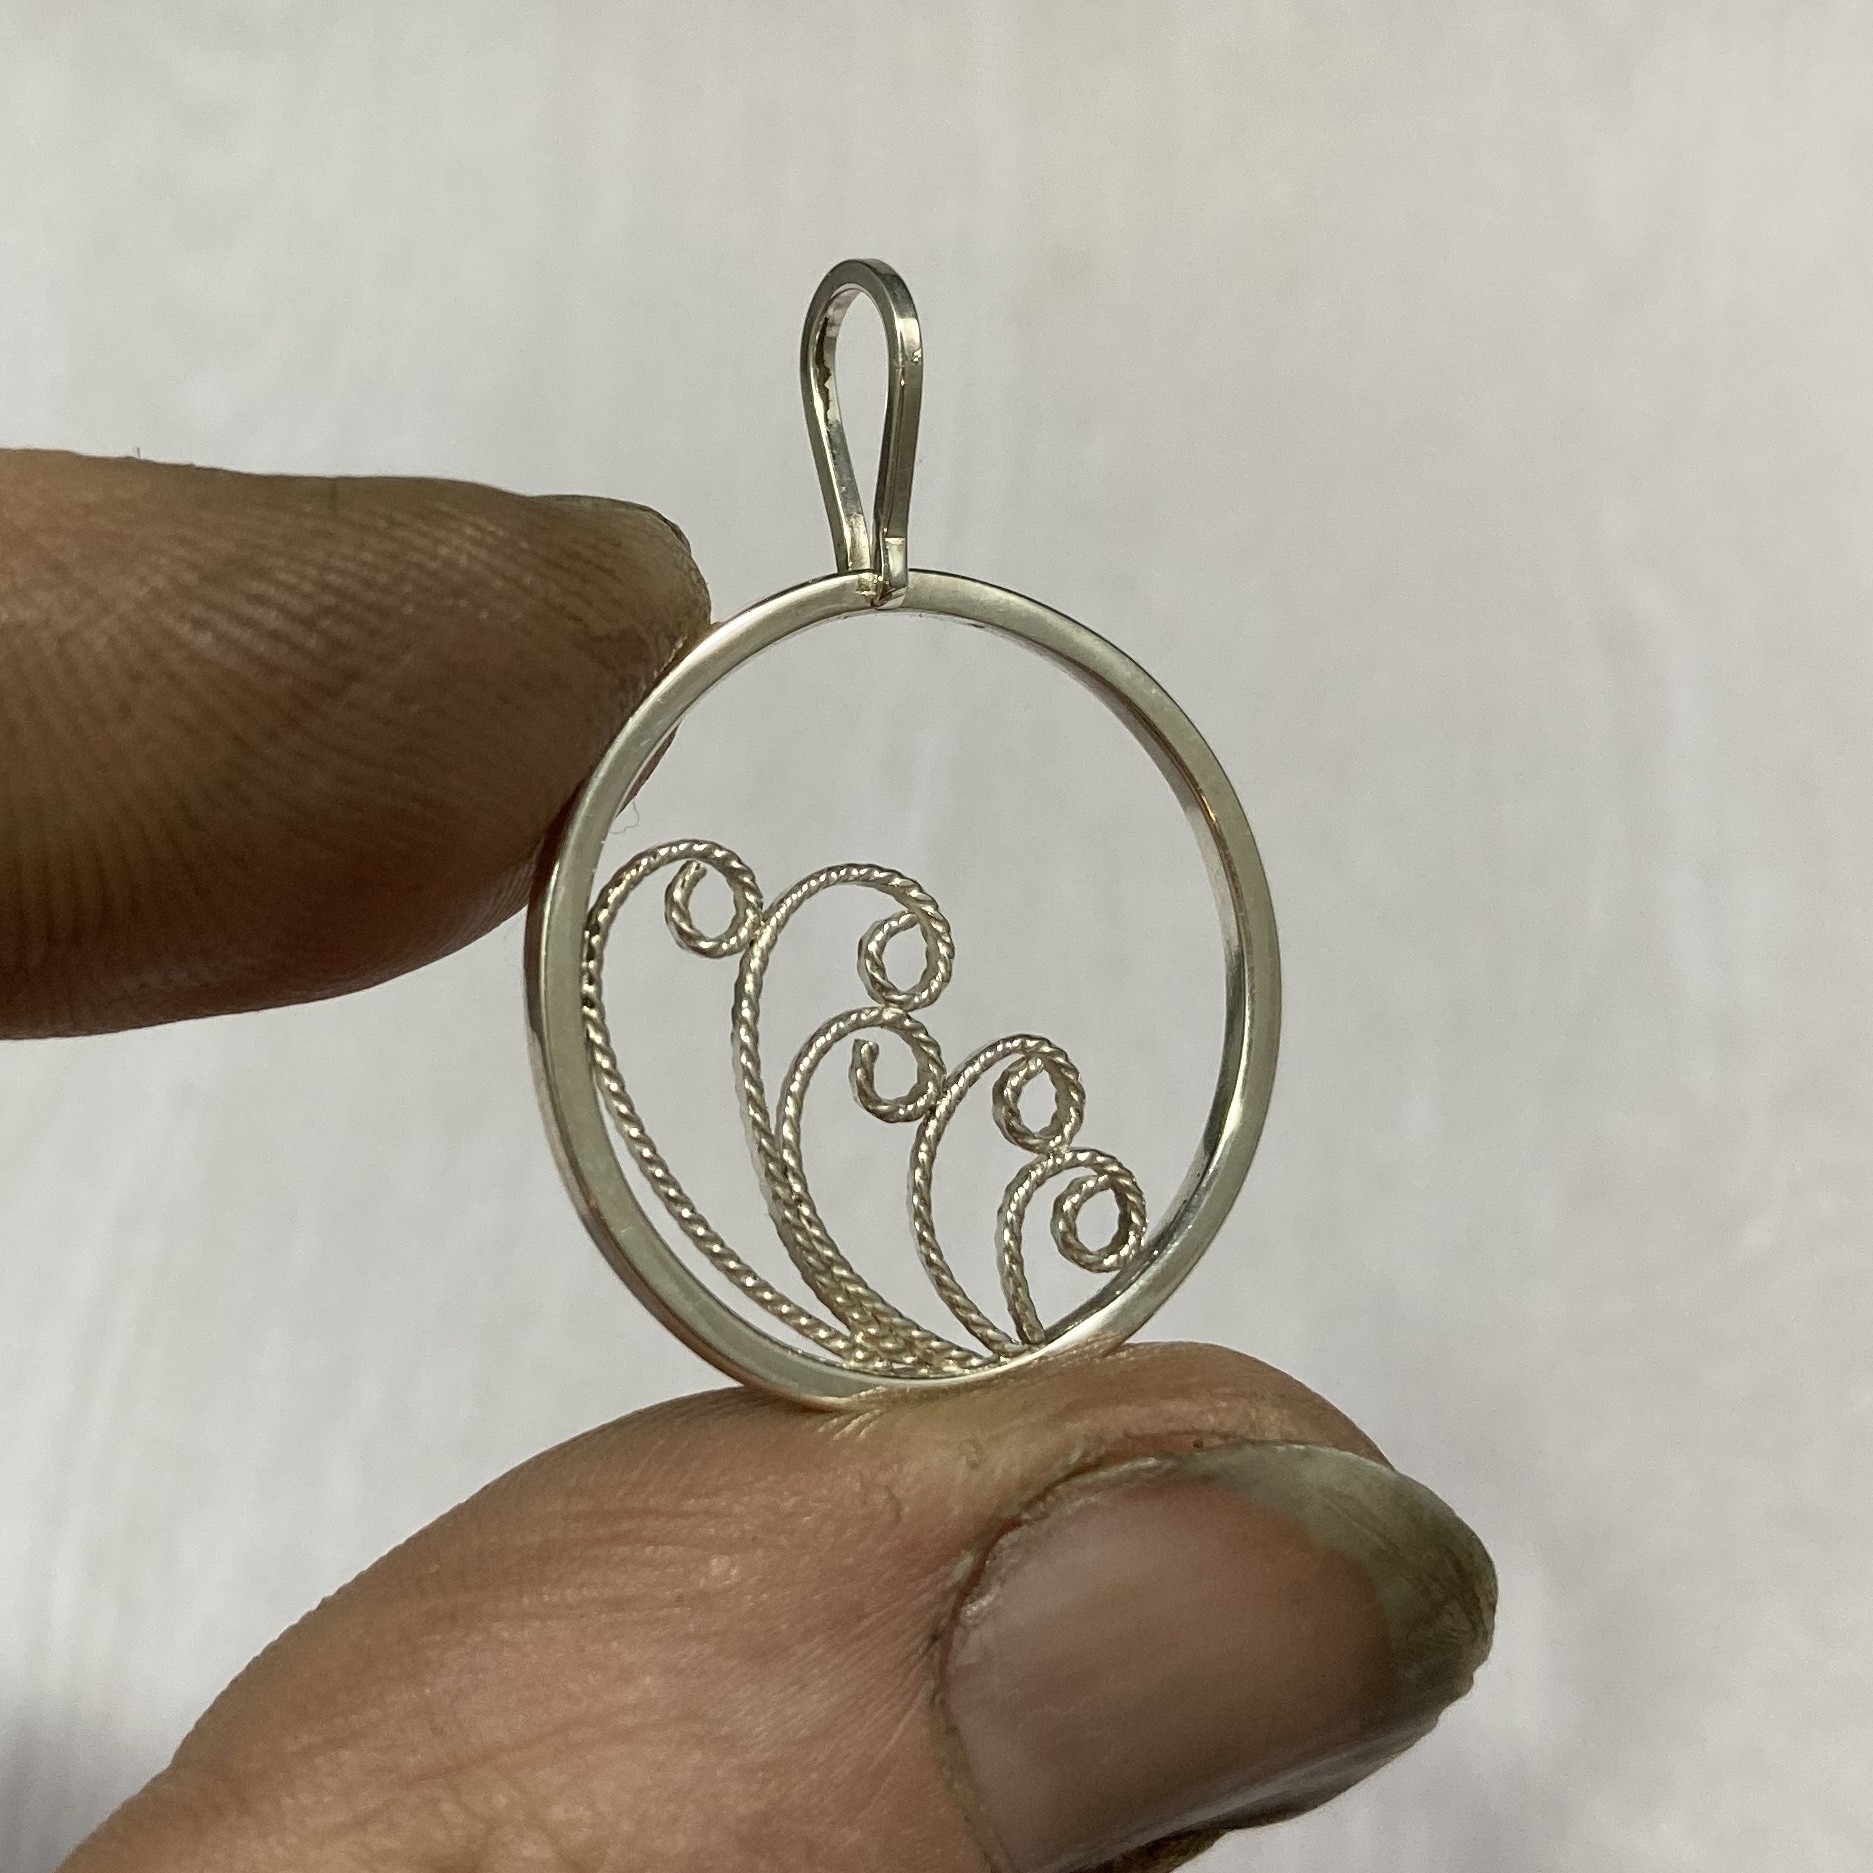
You are doing great. Some tips for the future. see where your little circles at the end of the wires almost touch. Those are points that if not soldered together will catch on something. If it’s a necklace they will catch on fabric especially knit. earrings can get caught in hair. even sitting in your jewelry box, gremlins can come and snag those pieces. Seems small to consider but it helps to ensure whoever buys your piece doesn’t have problem. Next is the lapis earrings. The right one is the one that I’m looking at. see how the top filigree wire on the outside, leaves the last circle of the wire hanging out in mid air sort of speak, where the one on the left is soldered in. It’s not that we have all struggled with trying to get our earrings to match, but again it is the getting caught and pulled out problem on a larger scale. It’s best to solder the end into another filigree wire to prevent any accidents in the future. If you look at your circle necklace with what looks like waves, you soldered it in to each other very well.
unlike Rob who has a system that works for him, I learned many years ago from Victoria Lansford. Thus I lean towards the powdered solder. I put my piece up on a screen mesh above a tray. I brush on liquid flux, then with an enamel very fine sifter thingy, I sparingly sprinkle the piece where I want to solder with the powdered solder. The liquid flux catches the powder. What doesn’t stick falls off and through the screen to be recaptured. I find paste and regular solder over powers the filigree wires. But that is my method, and if works for you don’t fix it. We all have our little ways and the point is to get the best we can with what we do.
Keep up the great work. I’ve been sidelined for a few years with first a smashed hand and arm, then by an antibiotic reaction that blew out many of my joints, followed by just in the last year 3 surgeries followed by blood clots. Seeing the work on here and eager minds and desire to achieve like your doing has got me wanting to work again. If you have any questions about filigree just ask. I probably have hit all the snags and boo-boo’s over the years.
Aggie in Florida where the temps are in the 90’s and the mosquitos are back.
2 Likes
Aggie…I have some of Victoria’s solder, but never really gave it a chance. What you describe makes sense and I will try it. With filigree you want just enough, but no too much. Thanks…Rob
Aggie…What is the mesh of the sifter that will sift Victoria’s solder. I don’t enamel, but it looks like you can buy from 80m - 325 mesh sifters. Thanks…Rob
Have tried to reply to this before but it doesn’t seem to go through… I’m guessing with the style you are doing, you may have learned from my book, silver threads. they look good! especially for a frist try! would suggest you make sure you solder that big spiral so that it can’t catch in hair and pull out… and make sure any place separate wires touch, that they are soldered, it makes the overall structure stronger.
1 Like
You make some excellent points, thank you. I’ll keep them in mind going forward.