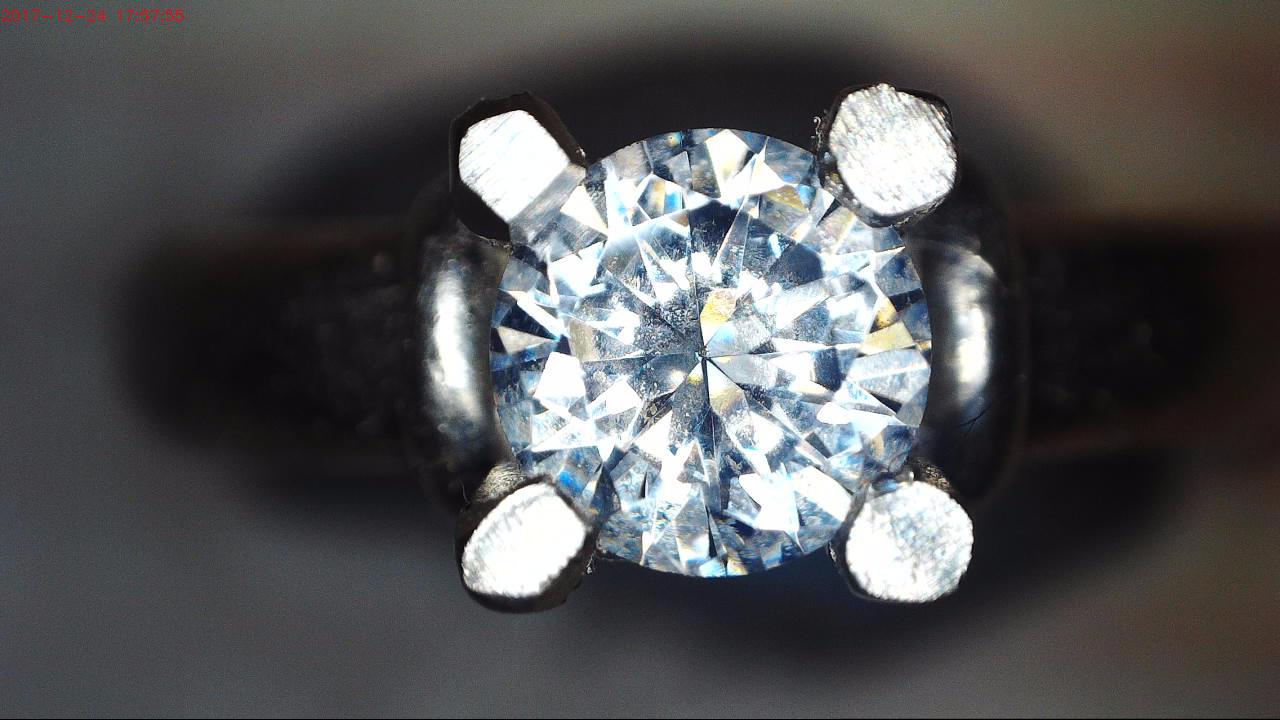
Engagement Ring”… 4-Claw Setting!
This essay contains the same techniques that my students learn! The only difference is, that these are in a text form! In my classroom or studio, this demonstration will last for one hour.
(I am introducing for the first time four stress-reducing techniques that have not been seen in any text books, nor used in any video. I, as a Diamond Setter, have improvised some basic tools to make this setting process much more easier.) They are a #4/0 saw blade, #40 Flat graver, ‘serrated jaws’ on a pair of pliers and lastly a Bud bur #007.
With many Diamond Setters, I noticed that some steps that I use are being totally avoided, or even missed. They are making ‘short-cuts’ or just not knowing how to set these larger stones. I will enlighten you on four of these relatively easy techniques, in the great detail. **These are just simply amazing in their simplicity, these are the “WOW & EASY” steps!
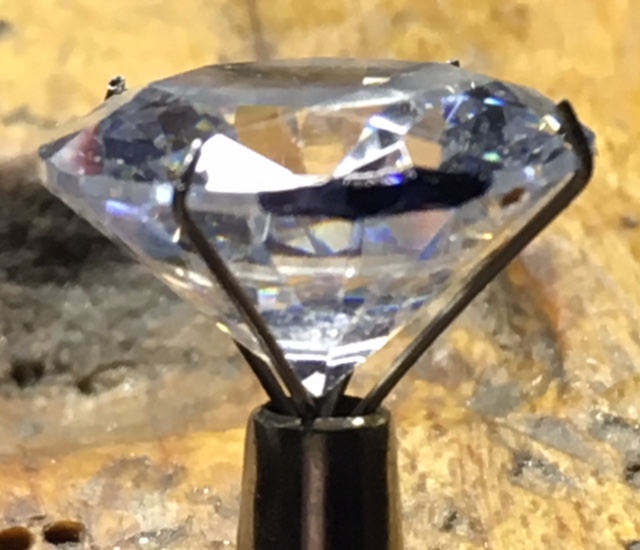
In my many decades of setting and as well as teaching how to set 1.00 carat stones_.I purposely avoid ‘going the easy route’, a.k.a. by ‘rounding the tips of the claws’. This is not gemstone setting for an expensive diamond._ The customer wants a beautifully finished “Piece of Art”, not a large diamond that is just ‘slapped into a ring’. “We are gifted Artisans who continually strive for perfection” and I will show & teach you the ‘correct way’ to set a diamond, or any faceted gemstone. I am showing you the Rounded Claws and my version! You can decide which one is best.
Let’s just walk through the normal procedures in preparing the claws, prior to the setting. When I reach one of these very important steps, I’ll explain them in great detail with using about (15) photographs.
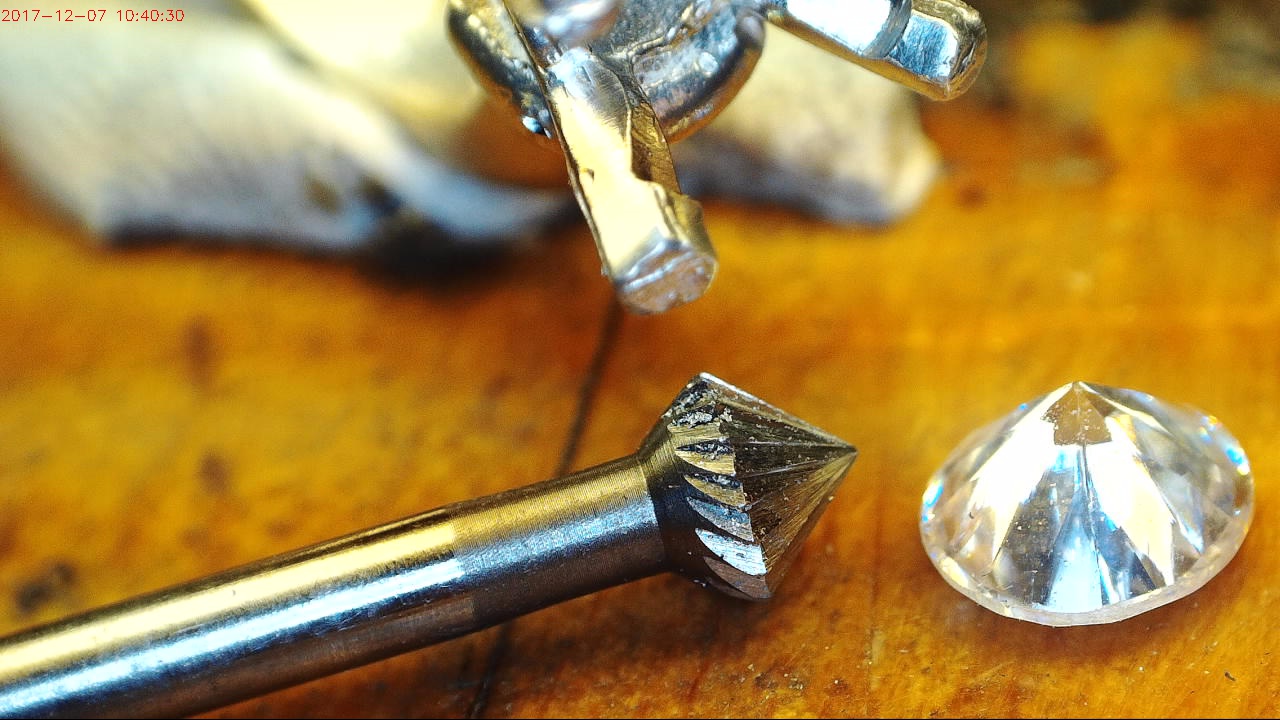
If our stone width is 6.50mm, I would use a “High Speed Steel” bur that has a 90-degree angle, with a diameter of 4.5mm. What other tools would I be using in this project?
Here is the Diamond Setting list:
1) Triangular File, #4 grit at 20 cm’s (8 inches in length)
2) Pillar File #2 grit (8 inches in length)
3) Thumb Guard
4) Flat Graver #40
5) Pumice wheels Flat & Tapered #180 grit
6) Pumice wheels Flat & Tapered #1,000 grit
7) Emery, Sanding Disk, “Medium” grade, 7/8” diameter
8) Wax Dob. Used to pick up stones (please, no tweezers)
9) High Speed Steel bur, 90-degree angle, 4.5mm’s wide
10) Pair of pliers w/serrated lines inside the tips of the jaws.
11) Bud-shaped bur, #007
12) Saw Blade at #4/0 cut

During this essay, I will be using & describing all of the tools listed. I am unable to say which tool supplier is best, nor give any indication of the costs. But to suffice to say, your judgment is required. By learning these many steps, it will be easier for you to know ahead of time which tool to buy and what to ask for!
Examine your expensive diamond (closely) for any small or major inclusions on, or near the Girdle of the stone, why so? The “Girdle” is where you will be doing all of your setting & filing work. If there are any defects in that stone, stop! Immediately tell your client and make them aware of any inclusions!
I suggest contacting your diamond appraiser, and for a small fee, ‘have them plot’ any defects. As well as have the appraiser print two out for future reference. Please keep a copy for yourself.
Give the original to your client for him to sign that ‘you have received a stone with inclusions’.
If your client has any Laser engraving from the Appraisal Laboratory with their numerical I.D. mark them with a felt coloured pen, as shown. This is the only method in keeping that I.D. noticeable when you are placing the stone finally in your mount. Thus, keeping these important I.D. numbers in between two of the claws. There was a fee in engraving with the Laser, give your customer the satisfaction & security that they need. (As shown)
Put your ring into your clamp and secure it ‘very tight’. Keep your ring centered in your clamp, at all times!
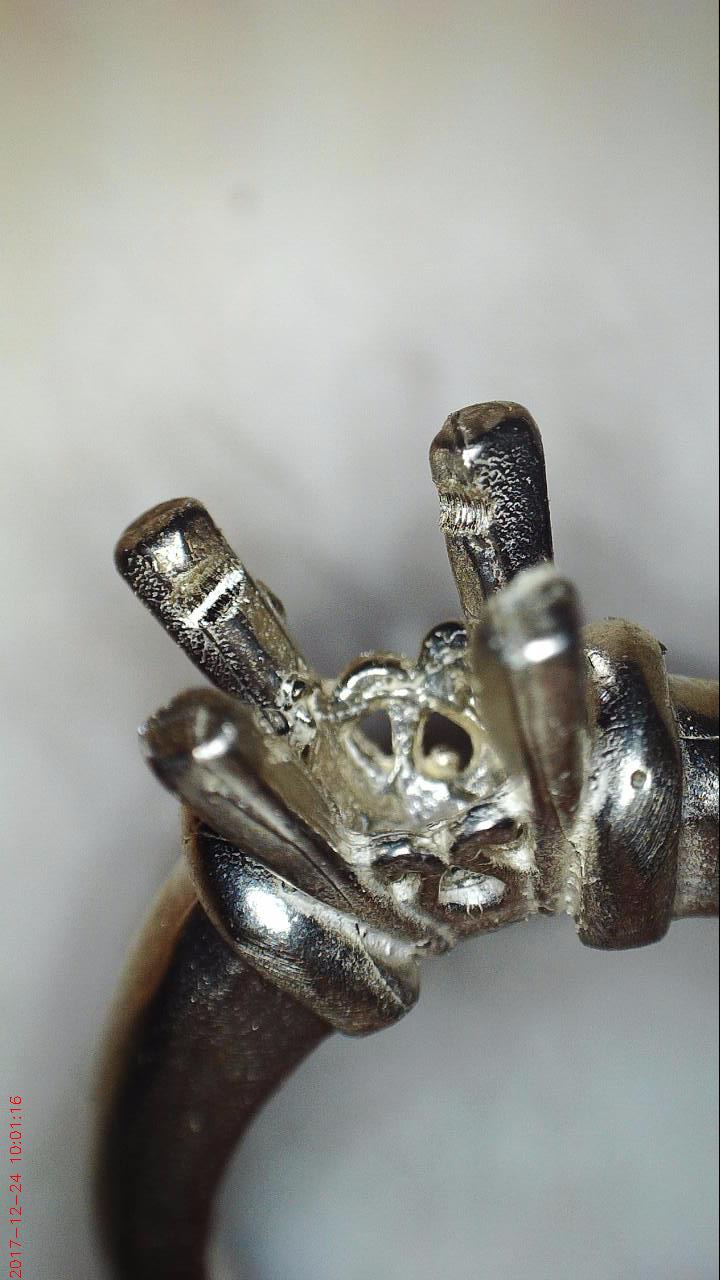
I would like you to spread your 4 claws further apart than when you made the ‘head’. This will give your more ‘room to navigate’ your hand-piece with your many burs. I prefer at least a ‘15-20 degrees away from the vertical’.
I suggest to polish the 4-claw arrangement, the ‘gallery’ and not to mention inside of the ‘basket’ where the claws originated from. Once your stone is set & finished, there is little possibility that anything can be ‘polished’ afterwards.
Using your new bud bur of #007, cut a horizontal groove ‘across’ the inside of the claw. This will be just where the stone will be touching. How far down from the tip of the claw? A little technique of mine. (As shown)
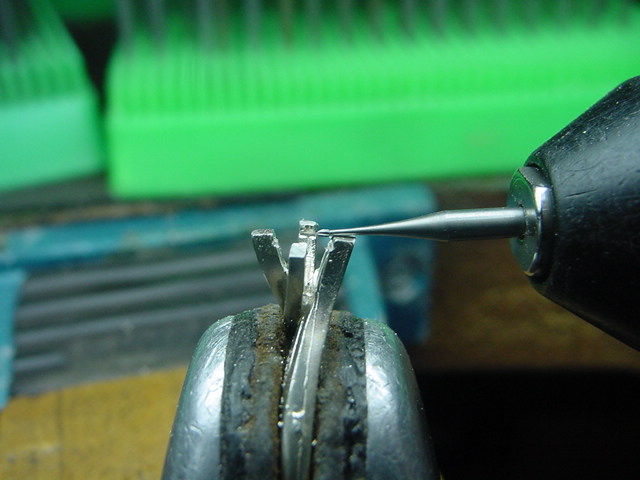
There are multiple reasons, one is that when you are using the cutting with your High Speed Steel bur, the “up & down cutting” action won’t ruin and go over the top of the claw.
I’ve seen this occur so many times! The other reason is that you are limiting your ‘cutting action’ to where it is required.
From my many years of setting experience I suggest at least 30 percent from the tip…that is where you should be making that groove. I suggest that for your first of many rings, use a pair of dividers and scribe the distance from the claw tip to where the bearing cut will be made.
The depth of the ‘groove’ should not exceed 30% into the thickness of the claw. Here is a much easier method to remember… “Down 30 and into 30!” Easy? If you go into the claw @ 50% OMG, you will be actually removing much of the security of the claw. That ‘remaining claw-tip’ might just break off due to many years of continual use. You don’t want that, do you? So let’s leave the depth of the groove at 30%.
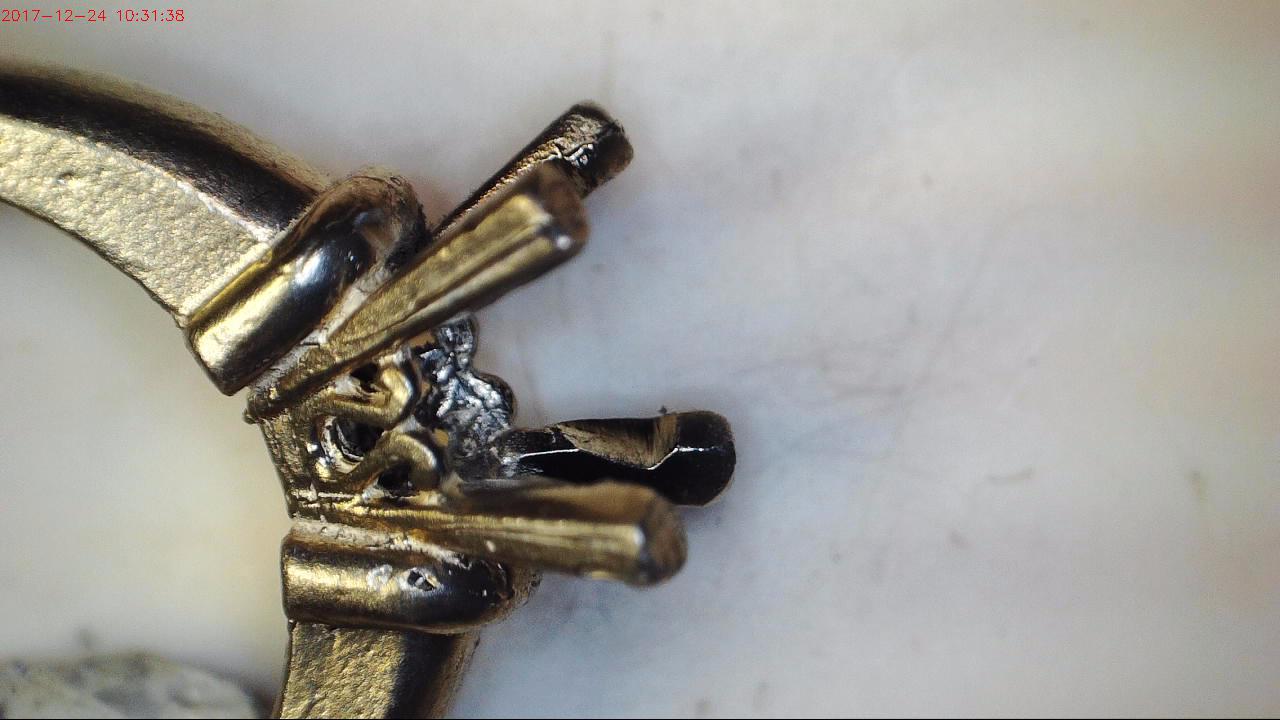
The difference from the ‘groove’ or ‘bearing-cut’ to the tip of your claw, is your “working area”. No any part of your claw from the ‘bearing cut to the claw base’ is to be touched.
Consider this area just totally “out of bounds”.
To start your Pavilion cutting with your HSS bur, I would have your ring resting against your bench-peg, at a 45-degree angle. The first claw to cut, is the one nearest to you!
I’d even start the cutting in between the ‘bearing’ and halfway from the middle of the claw. There is no need to cut all the way down to the base of the claw, why? Your stone is not resting there! Draw your bur-cutting up to your “Bud-Bur cut (As shown)

Here is something interesting. The ‘upper section’ of your HSS bur teeth that are situated above the widest section, will be shaping a resting place for your “Crown-Facets above the Girdle” each time you bring up alongside of your Pavilion cutting. Basically, this bur is making two bearing cuts at once. (As shown) this is just so-o interesting!
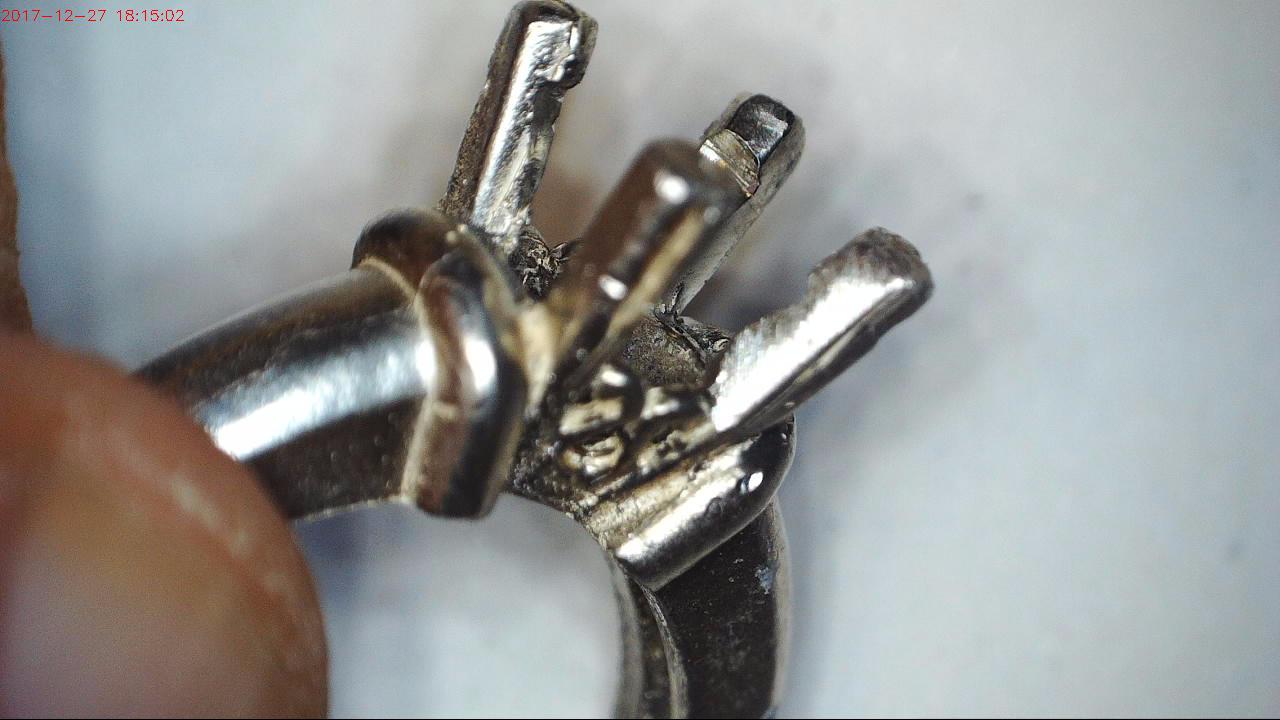
You will now notice something that is very common with this kind of setting, is that there will be on one side of the claw, some ‘residue of metal’! The metal shaving is caused by the rotating bur extruding some of the metal, as its rotating. This ‘residue of metal’ will occur all the time and it isn’t your fault!
Now it has to be delicately removed, right now! But how do you do this? Let me just say, don’t use your Triangular file #4 grit. This file will leave striations on the side of the claw. (As shown)
You could use a Pumice Wheel of #180 grit, but the finish will be of a ‘semi-smooth’ result. Not always nice & no help!
You ‘could use your Emery, Paper disk’, still not nice and it will leave a very rough & textured surface. Just a very BAD move!
What is remaining? One simple answer and that is your Flat #40 graver. _(As shown!)**__My little technique!

Start your ‘one & only’ Bright-cut starting from just above the “Bearing-cut” until you have reached halfway down to the bottom of the claw. Your ‘one cut’ will remove all of the metal residue and continue this bright-cutting action until you’ve removed any & all of the offending remnant from your HSS cutting. Not need to use any other cleaning tool … DONE!
The result is a very clean bright finish with no rough spots, anywhere! Now you’re ready to place your stone in the 4-claws, but wait, I’d like you to bring your claws back to the ‘near vertical’. Once done, now put your stone into its new resting place.
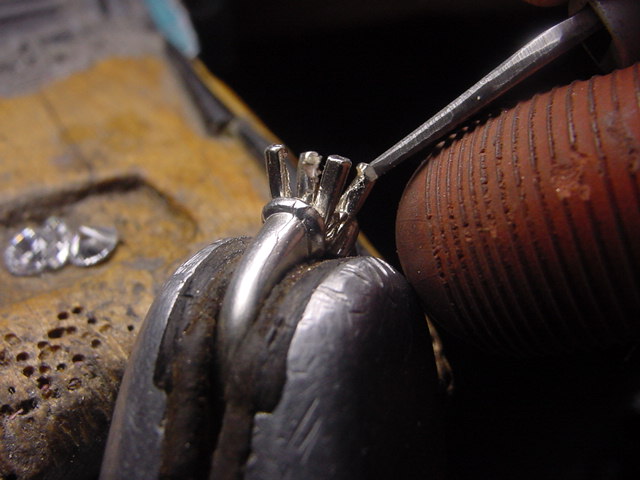
Your pair of pliers should have a ‘textured surface’ just near the tip of the jaws of your pliers, why is this? This ‘textured surface’ needs to grip to the claws and avoid any slipping. (As shown).
This is another interesting little technique.
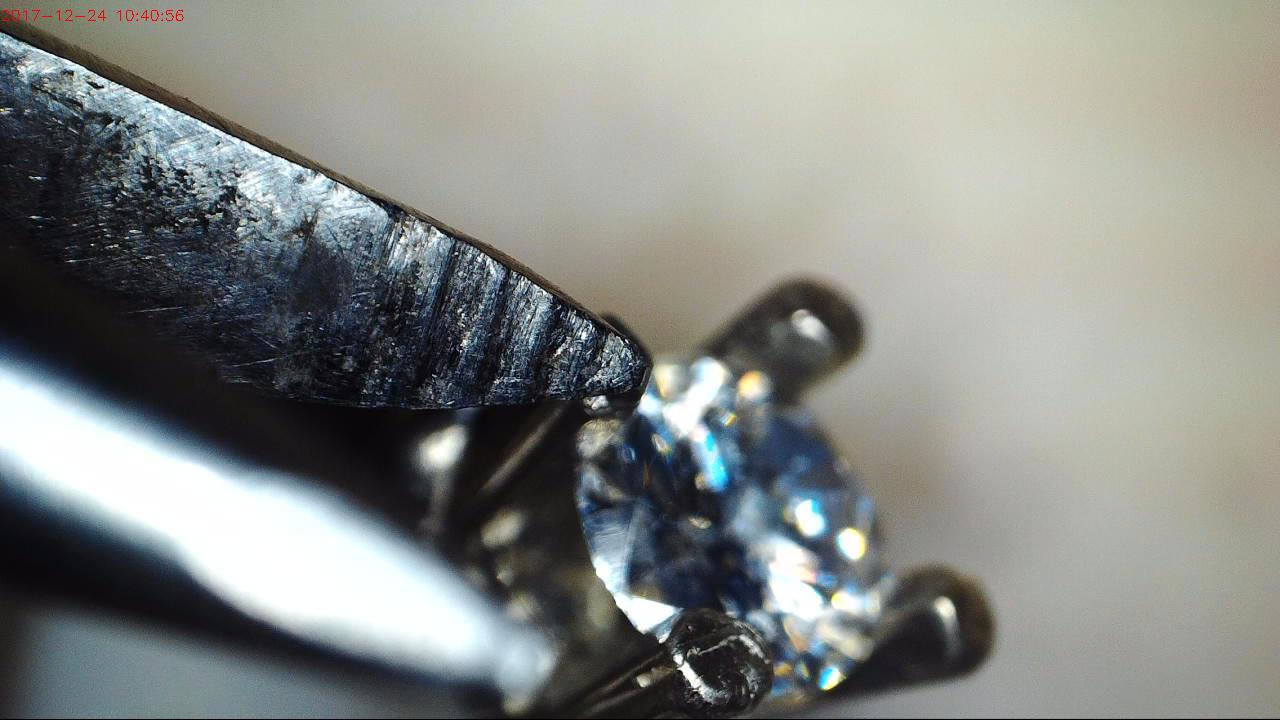
Once you pull the claws together you notice that the inside of the tips of the claw are not aligning well to the stone, what are you to do? This is one of my little techniques.

Now get your #4/0 saw-blade and use this blade as a ‘mini-file’. Rest the blade, (As shown) and cut in between the claw tip and the stone, for at least ‘3 draws’. Let the blade cut along the surface of the stone, till it clears the girdle. (As shown) Another technique!
You’ve now removed the offending piece of unsuitable metal inside the bearing and making a nice smooth surface to meet the claw to the stone.
NOW, you can move the claw over the stone much more easily! When one claw is ‘not meeting the stone’, I’d check other claws as well, with a 10x power loupe.
The ‘method of finishing’ is now easy, I’d lower the tip of the claw to be 1.0 mm ‘above’ the stone. I’d use a “Medium” grade Emery paper disk to reduce the height. Shape the claws to be like a Rectangle, with a Flat cut-shape over the stone. I’d like a half-rounded curve on the outside. (As shown).

To totally finish everything, use your Flat Faced & Tapered #180 grit Pumice wheels. Then you may use your #1,000 grit Pink, Flat & Tapered Pumice wheel also. Remove every little mark on the claws. Don’t leave this finishing process to the polishing Rouge & Tripoli buffing wheels!

There are many setting details to follow, as this is not a 'no quick setting job’, so many techniques & extra tools to use…Gerry Lewy!
