Does anyone have any advice about the drilling of holes in sheet
sterling? I want to do some riveting. Plan A was to use the
flexshaft, with the workpiece on my bench pin. I thought it would be
easy if I did it in stages. First I use a punch to mark the space,
then drill a pilot hole with a #60 wire gauge bit, then use
progressively larger bits to increase the diameter until I had the
hole I wanted. In this case, it would be a #37 bit, making a hole
that will receive a piece of 10 gauge wire.
The pilot hole worked fine. Unfortunately, I find drilling the
larger holes difficult. The bits frequently don’t turn, or turn just
a bit then stall. I have to make several attempts and usually have to
resort to going from zero to full throttle on the foot pedal. I guess
that makes me nervous, with my other hand being so close, holding
onto the work piece. It took me an hour just to drill 8 holes.
I do have a drill press I bought from Rio Grande. However, I’m also
a bit nervous about it. A machinist told me that holding down the
metal with my hand is exceedingly dangerous, because of the chance
that the press will spin the piece out of my hand and slice me in the
process.
I’m working with 12 to 18 gauge pieces that are less than 2" x 2".
The basic idea - Get a cheap, simple C-clamp and clamp the piece
down to the surface so it can’t spin. Use whatever piece of wood,
leather or other suitable material as a pad to protect the workpiece
from being damaged by the clamp.
There are a few simple refinements to make things easier and more
perfect…
If the support platform on the drill press, the “bed”, is adjustable
side to side, adjust it off to one side or other so the workpiece
can be held close to the edge of the bed so you don’t need a large C
clamp to reach over to the workpiece as you would if you placed it
in the centre of the platform.
OR - You can hold the workpiece from spinning and / or being lifted
by the drill bit by placing it on a small piece of wood, say 3/4"
thick, 3" wide, 12" long - and surrounding the workpiece with a few
small nails or screws around its edge so it can’t spin. The heads of
at least some nails or screws should overhang the edge of the piece
to hold it down as well and keep it from being lifted. Don’t drive
them in so deep that they dent the edge of the work, just drive them
down to barely touching the surface. The piece of wood can then be
moved around on the bed of the drill press so you can get the
location of each desired hole under the bit - then clamp the wood
down to the bed with a c-clamp or two. It is good to have something
like wood anyway under the piece so the drill bit has something to
go into when it goes through the workpiece instead of hitting what
is (I assume) the steel or iron bed of the press.
You should NOT need to drill a series of successively larger holes.
You do NOT need a pilot hole. Tiny bits are fragile and you will
break lots of them for no good reason. Mark the location of the
centre of the hole with a centre punch - a light tap will do so you
don’t make a big dent in the work. That tiny ding will keep the drill
point from wandering until it gets a bite into the surface. As soon
as it starts to bite and dig in, increase your pressure - a good
steady, not strenuously hard - pressure - and the drill cut right
through. Use a drill bit which is the desired final size of the hole.
For small holes as you are making, fairly high speed is good. You may
lubricate drill bit with light oil, or wax, or spittle - to help keep
the bit cool and to clear the chips out of the hole and the flutes of
the bit more easily.
You should not be holding small work in hand when working with sharp
moving cutting tools -
PS. Drill bits much more likely to catch and grab suddenly (and
break) if you are drilling into a smaller pre-existing hole. That’s
why i said just use the final size drill bit and not to make pilot
holes.
Drilling into sheet is touchy just for the reason you gave. Once you
get a pilot hole I might suggest finishing with ball burrs. Keep them
lubricated and a slower speed. If you use drill bits you have to not
do so many steps in size. Get your pilot then go with one a little
smaller than your finish size. Go higher speed with light pressure.
Lubricate often, don’t over heat. Let it cut through little by little
with a block of wood behind it. Try to keep it from grabbing. Put the
sheet flat on the wood. You can clamp that if there is room. SD
According to my tables, gauge 60 is 0.039" and gauge 10 is 0.1019".
Drilling a 0.1" diam hole requires more torque than your flex shaft
can deliver.
Your drill press should cope OK, but your friend’s warning is
correct - you will need to hold your 2" pieces in a drill vice or
hold them on a larger piece of wood to avoid injury.
I use a piece of flat wood or MDF into which I’ve inserted an
appropriately sized screw to act as a stop. The workpiece is
positioned for drilling with one edge against the stop, so that the
stop can resist the torque. That way your hand can hold the wood and
the workpiece, and the wood, being larger than to workpiece, acts as
a lever to resist the torque, plus, should the drill catch, the
workpiece cannot harm you.
This is a classic problem. the drill bit has 2 sharp edges that
catch in the metal as you try to ream out the hole. This is
especially a problem when the bit you are using is just larger than
the hole you are drilling. My thought is you are using drill bits
that are to close in size.
After I have marked the holes, I would clamp a wood block to my
bench andclamp the metal to the block so that it cannot move. I
would try a 1/16th pilot hole and go directly to the #37 bit. there
is no need to step down. Either flex shaft or drill press should
work well, but please keep your fingers out of the way. If you use
the drill press use wooden blocks and screws to hold your work down.
I would also use beeswax to lubricate the bit soit cuts cleaner.
Ok one thing you must get over is the fact that you might cut
yourself. justmy over 40+ yearseit happens all the timeemost of the
time it is very minor and some superglue and Caine pepper will solve
the problem and a bandaid. That said…
I fairly use a pilot drill. I go to the center punch and the drill
bit I amwanting for the final hole. if needed a little wax or oil on
the drill bit will help it cut and keep it cool while drilling thick
pieces. Just make sure you buy good quality drill bits and not the
cheap ones. you do get what you pay for…
Now back to cuts. I ad enrage one or two a month. have never
required a stitch. love Super a Glue
Enjoy what you do and please try something new if only to see if it
will work or not. you might surprise yourself. Make lots of jewelry
and have fun. after all when you sell things people arepaying you to
play at what you love…
To hold things in place while I drill them, I found that a layer of
JETT SETT (p.310 in Rio Grande Tools Catalog) in a shallow plastic
container that your pieces will fit flat into, works great. You don’t
have to buy the kit. You can buy the plastic tea kettle at CVS, and
look around the $1 store, or thrift stores for shallower plastic
containers to melt it in; they eventually become distorted, because
you heat the JETT SETT to make it pliable, and the plastic teakettle
does it very quickly, so you have to turn it on and off sometimes to
get it thoroughly melted, especially when just starting. Just
throwing the JETTSETT in the water didn’t really work for me.
Then you implant the metal, about 1/2 mm down into the JETTSETT, and
let it cool completely. Then I brace the box with my hands under the
drill press, and it holds the metal parts for drilling perfectly. I
stop when the drill gets clogged to clean it off, and also use a bur
wax before I start it up again. Put the power on high (are you
wearing glasses?) before drilling.
Low speeds don’t work at all. After, throw the plastic case with the
metal in it upside down back into the teakettle, and by turning on
and off, the JETT SETT will gradually turn soft, and you can easily
remove the pieces.
Just leave the JETT SETT in the plastic cases for next time.
A tried and true method, I’m happy that every time I do it now.
perfect results. There’s also a training video at Rio Grande on the
compound.
P. S. Rio GRande also has a two pages on riveting equipment, and
probably a video on those, too (p. 134- tools catalog)
I like that you dap your metal first and are stepping up your drill
bit sizes, but it will be faster and cleaner with the drill press.
You can do several things to make using the drill press more safe.
If you are holding your work in your hand, make sure the sides are
not sharp, if the edges are going to be sharp you can tape them or
buy a clamp to hold your work.
Also lightly starting the hole and exiting then going back in
several times will lessen the chance of your metal getting caught on
the drill bit.
I don’t know what you are making but a 10g rivet for a 2" piece of
metal sounds awfully large. If it isn’t for aesthetics you may want
to look at smaller rivets as a time saving option.
If you are using a flexshaft to drill, It needs to be a model that
has full torque at all speeds. Foredom model CC or similar will do
exactly what you say is happening.
You can use a CC model, light touch when starting the drill, slow
speed which is a bit hard with a CC.
With a drill press, block of wood, four headless nails, one in center
of each side so you can put pieces in and remove easily.
Use a lubricant. Slow speed, light pressure. Heat ruins drill bit
faster.
Have you tried drilling the hole with a smaller drill, then a larger
one, larger one, until the hole is the size you need?
I’d learn to use the drill press safely, sorry the machinist scared
you. He’s used to steel, you’re just drilling sterling. As long as
you wear safety protection and have been taught how to use the tool,
you should be able to use it safely.
A machinist should have told you to drill at a very slow speed. If
you’re worried about slicing your hand wear a glove but if your
holding down the piece with downward pressure from the top, not
holding by the edges don’t quite see how you would slice up your
fingers. If your press had a speed set a very slow setting should be
used. Use bur life or a similar product on you bit and make sure
your bit is sharp.
Marie, since you have the drill press I would use it and use clamps
to hold down the silver for 2 reasons, so they won’t spin and very
importantly so that the hole won’t drift.
With clamps you don’t need a pilot hole either so the whole process
is quicker. I would not use the drill press with out clamps because
the bit might catch and the piece would spin and the possibility of
finger cuts from that is great. The pieces can catch when hand
holding and using the flex shaft and cut you too.
After breaking a drill bit off and having the remaining piece of the
bit drill clear through my pinky, I no longer hold sheet down with my
hands when I am drilling it. I hold it securely in a ring clamp. Much
less dangerous.
As for the drills binding up, you need consistant speed and lube.
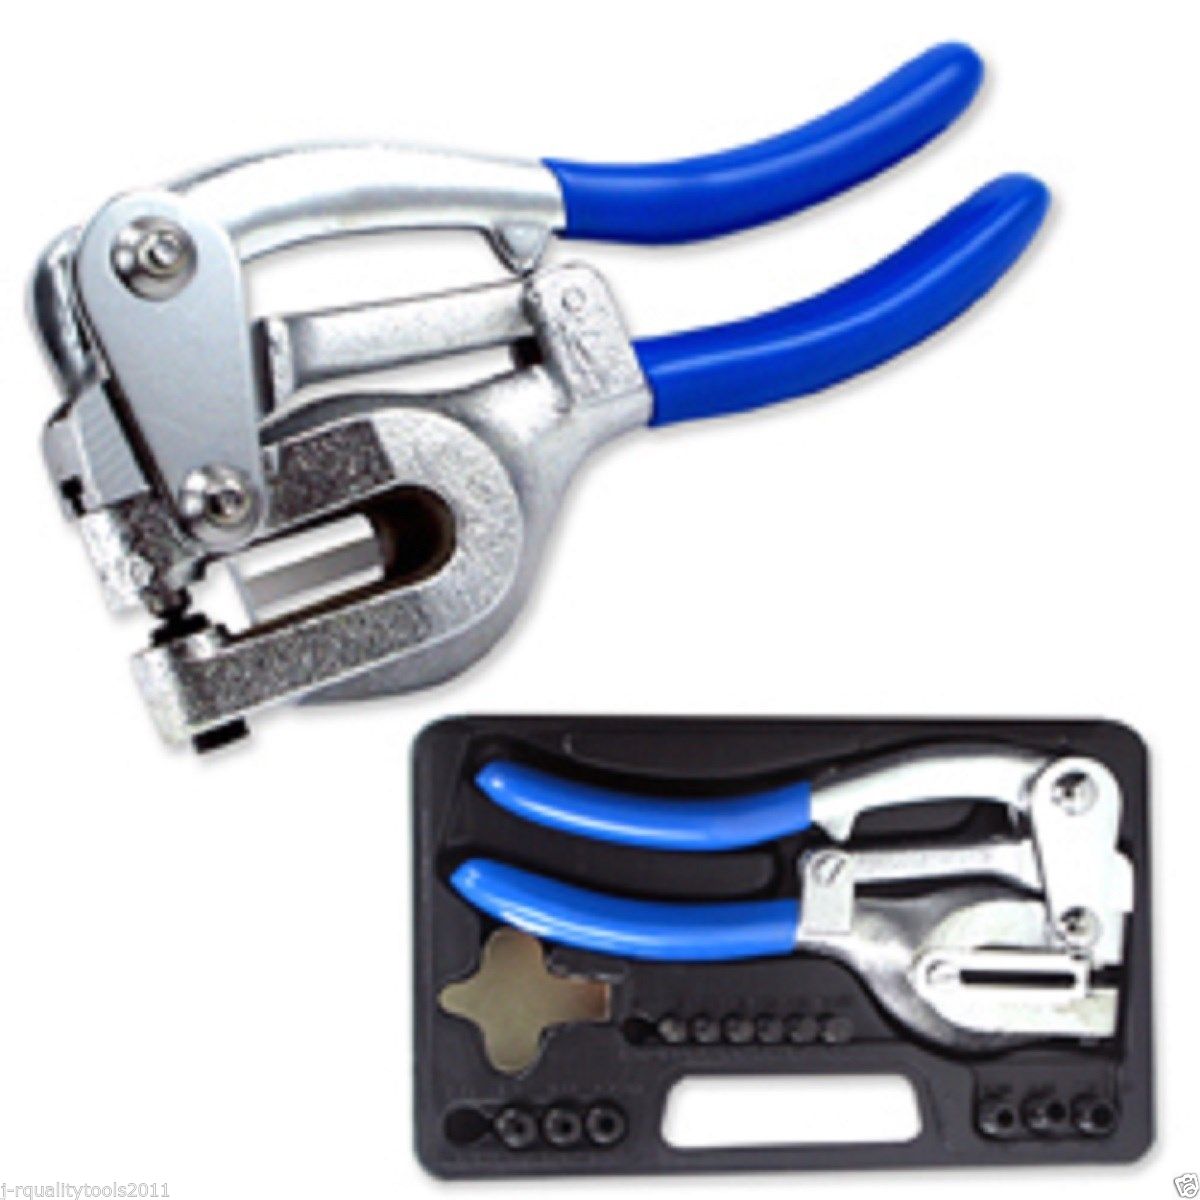
You can buy hole cutters. I use the punch to make a dimple to start,
and then use my hole cutter. This has the advantage, on the slightly
larger holes you are describing, of leaving you with lovely little
circles of silver that you can save and use as decorative elements
on other pieces. If you Google sheet metal hole punch you should
have lots of options… here is one on eBay that looks very similar
to mine:
I prefer using a drill press rather than a flexshaft for aproject
such as you describe, but you are right that you should never hold a
piece of sheet metal in your hand whenusing a drill press. You can
use a ring clamp to hold small pieces like your 2x2. Clamp larger
ones to a piece of wood, then hold the wood. Both methods work great
for meand I’ve never had a problem. Make sure you put burr life on
your drill bit which will help it drill smoothly and not grab the
metal. Your method of using a punch first, starting with a small bit
then working your way up soundsright. Hope you have success with
your drilling
Hello Marie Meyer. Drilling holes in sheet sterling, do you mean
sterling silver. First, since you do have a Drill Press that you
purchased from Rio, that is the way to go. Yes, it can be a little
dangerous, if you don’t do it in a safe way. I have a machine shop
and we have over the years had to drill into thin gauge stainless
steel also 12 to 18 gauge which is a little bit harder than your
sheet sterling. When we do have to drill into this material, we do
have to hold it down, most times by hand so that it does not ride up
on the drill (and begin to spin) when your going thru and we also
use a stop of some type mounted on the drill press table so that the
piece your drilling can lay up against the stop so that the piece
can-not spin. Marie, no reason to get nervous, once you have your
set-up in place, you could possibly drill 8 holes in less than 1
minute…“its a piece of cake” If you should have any questions
on this, please feel free to give me a call Toll-Free
1-(800)-332-5573 Richard Lucas LUCAS DENTAL CO. or Lucadent@verizon.net
Marie, I am a fan of jigs. I like the idea of a wooden surface and
pins or screw heads that locate the work piece for you. If yours is
the $ 79.oo mini press like mine you should be ok. I also like
consistancy. I am so used to punching a locater mark before I drill
I just always do it.
It isn’t always necessary but it helps to ensure accuracy. And one
pilot hole.
Setting up your drill press (if you have one) This is an often
overlookedstep. Start by inserting your drill bit and checking the
rate of travel. What does that mean? The distance between your drill
bit and contact with the metal should be very short. You want the
maximum torque for your bit for the cutting flutes to do its job.
lubrication is critical. I use oil over wax. Dip the bit into
oil, or paint it on with a little brush. Once the flutes become
jammed with scrap, I dip the bit directly into a container with oil
and spin. This action will castoff excess metal shards and sink to
the bottom of your oil container, leaving your bit clean. Wax will
eventually be filled with little shreds of sharpmetal and gum up the
works.
Centerpunch or it not? As a rule, I do. Adjusting the force on
the Centerpunch will give you a nice “burple” (my word with
students). Too much force on thin metal and you bend it. Too little
and the bit can skip.
bit loaded and ready to drill After inserting your drill, give it
a little spin too see if it’s inserted properly in the chuck. Lube
up and begin.
with your bit spinning, lower the bit and with one slow but
steady action, go through the metal into the wood. Add oil if
necessary. Lubrication is really important.
IMPORTANT! Your bit should be spinning when it hits the metal. If
not, it can catch and snap. Bears repeating.
Lastly. inserting an accessory into a flex shaft: those three
indentations in the jaw are there for a reason. A Jacobs Chuck
requires all three jaws to be evenly tight when securing a bit.
Access one port and begin tightening, then the second and finally
the third.
Doing this will extend the life of your handpiece. If you use a tiny
bit andthen a heavy one, securing the bit at one point eventually
throws the rotation off due to uneven weight distribution.