I’ll try to describe my process as best I can 
First off, Investment.
Our current lineup of investments is comprised of Ransom and Randolph’s Solitaire (for stone-in-place), and Certus Prestige Optima (for everything else).
The R&R has additives that make it more safe to use for stone-in-place casting (likely just boric acid, but I’m not sure), and seems to have just enough strength to avoid the expansion forces put upon it by the resins we use. Its downsides, however, are a couple-fold: It isn’t strong enough to avoid the expansion forces from ALL resins (ex. the PowerResin Black expands too much, and causes cracking and finning, whereas the FormLabs resin and PowerResin Wax don’t expand as much, and cast fine), and it isn’t a fine enough investment to create a really clean, smooth casting. I’ve found there’s quite a bit more finish work required when working with that investment, but all-in-all, it’s pretty good. Plasticast, as far as I am aware, has the exact same base investment, minus the additives, so it should perform similarly.
We just started using the Certus Prestige Optima (recommended by FormLabs). It’s a decent investment. It’s strong enough to resist expansion forces, without being so hard that it’s impossible to get out of the flask when you’ve cast (like BlueCast X-One…holy moly I had to hammer each piece out of that stuff; it’s hard as concrete!). We’ve also been experimenting with adding boric acid to the mix to make it viable for stone-in-place casting, with some pretty good results. It produces a better cast finish that’s far closer to the finish the model had.
I follow the same mixing method for both investments.
For a single flask: 90ml of water added to my mixing bowl, and then I add investment while mixing until I get the consistency I’m looking for; in most cases, the consistency of slightly thin pancake mix). It’s by no means precise, but I’ve yet to have any problems with it, and the best part is no scale needed! 
Mix that for 3 minutes, throw it in the vacuum chamber and run it for 30 seconds after it starts to boil (for our setup, this is about a 50 second operation). Then take it out, fill the flask about 3/4 of the way (or at least above the highest point on the model, whichever is higher), and vacuum again for between 60-90 seconds. Take it out gently, top it off, and set it aside for around 2 hours.
Burnout:
We have a pretty old oven, without a lot of the fancy functions newer models have. It has 8 programmable temperatures, and a switch that lets us do 1, 2, or 4 hours per step. No ramp control or individual hold control or anything fancy like that. We set ours at 2 hours per step.
I got tired of changing the temperatures back and forth between stone-in-place (which requires a lower temperature as to not burn the stones) and normal casting, so the following temp schedule will definitely seem lower than anything else you may find, but it still works for us.
(all temps in Fahrenheit)
Step 1: 350 degrees
Step 2: 500 degrees
Step 3: 750 degrees
Step 4: 900
Steps 5 and 6: 1000
Step 7: 1100
Step 8: 950-1000
This allows about 8 hours at the highest temperature to ensure the plastic melts out and the ash burns away. Previously, if we weren’t doing stone-in-place, the only change would be that step 6 would go up to 1150, and step 7 would go up 1350.
Casting:
I use centrifugal casting, but have had success with vacuum casting as well (granted, I’ve done very little as our setup isn’t really laid out well for it). One thing I have found with vacuum casting though, is that it works far better if you use the wax web that Rio sells.
Otherwise it’s just heat the crucible, toss in the metal, once it melts take the flask out of the oven, little pinch of flux in the crucible, and let 'er spin.
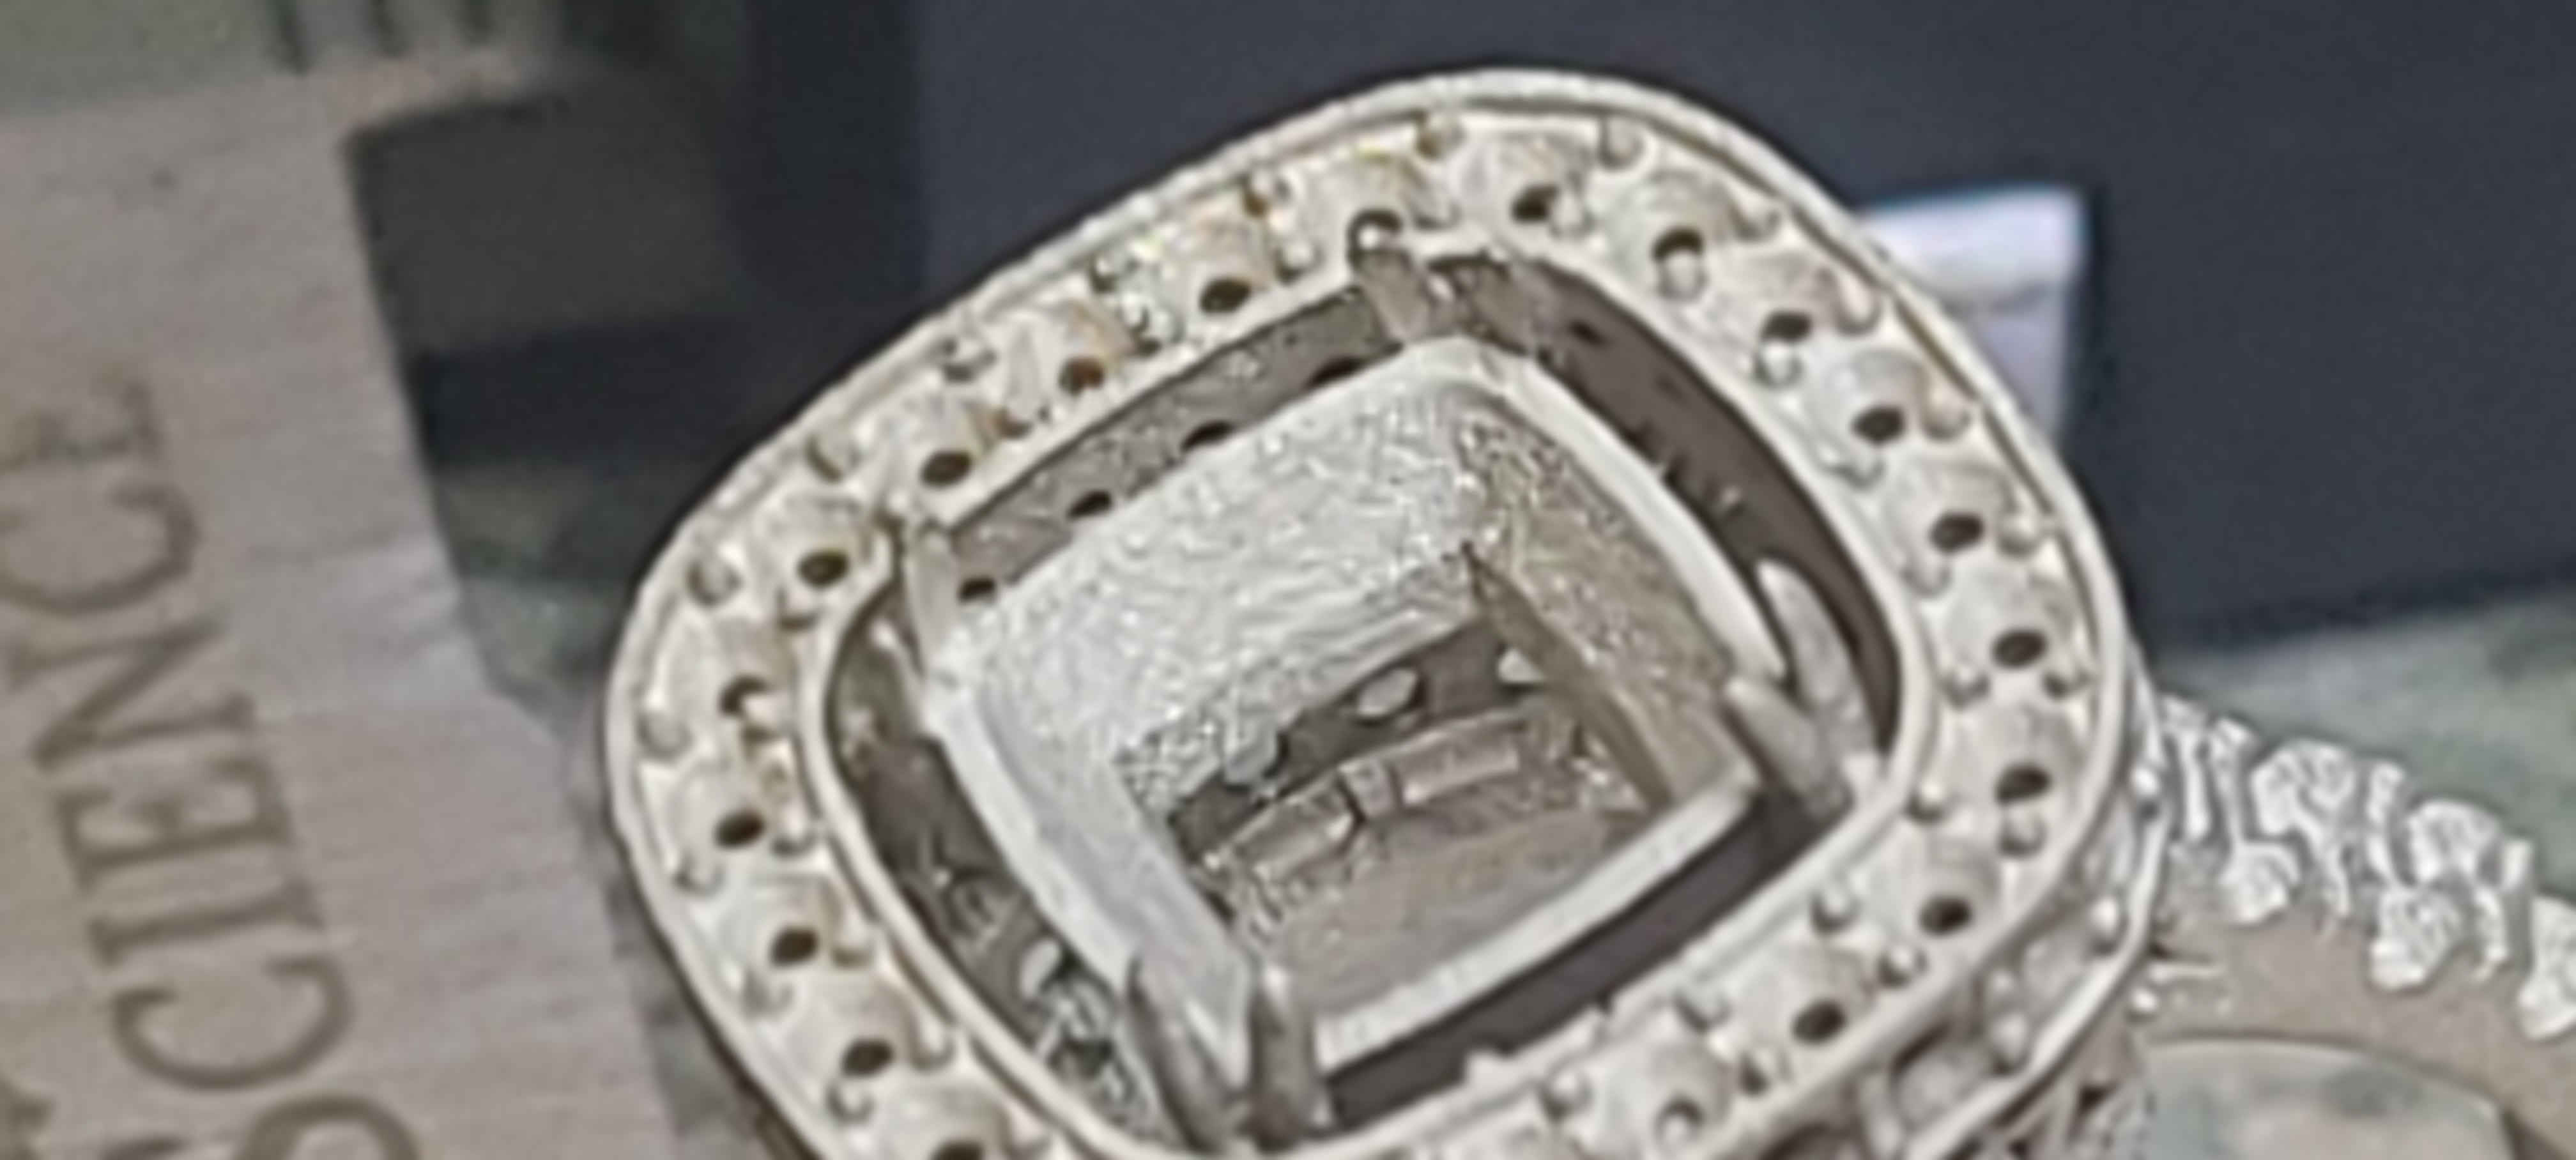
One note on sprues: I’ve found that you have to use far larger sprues for resin casting than for normal wax casting. The stuff likes to have a nice big channel to flow through as it melts. For example, on just a standard solitaire, my sprue at the bottom of the shank will be typically 5mm or more wide (but still only as thick as the width of the ring, if that makes any sense). Also, orientation matters. You want to give a good path for the melted wax to just kind of pour out, instead of relying on it to burn out. So that means something things get put at an angle, and sprues go to anything that may hook back on itself (I don’t know how to describe that better  )
)
So that’s my process. Hopefully it helps you get some better castings, or at the very least, gives you a base-line to go off of.
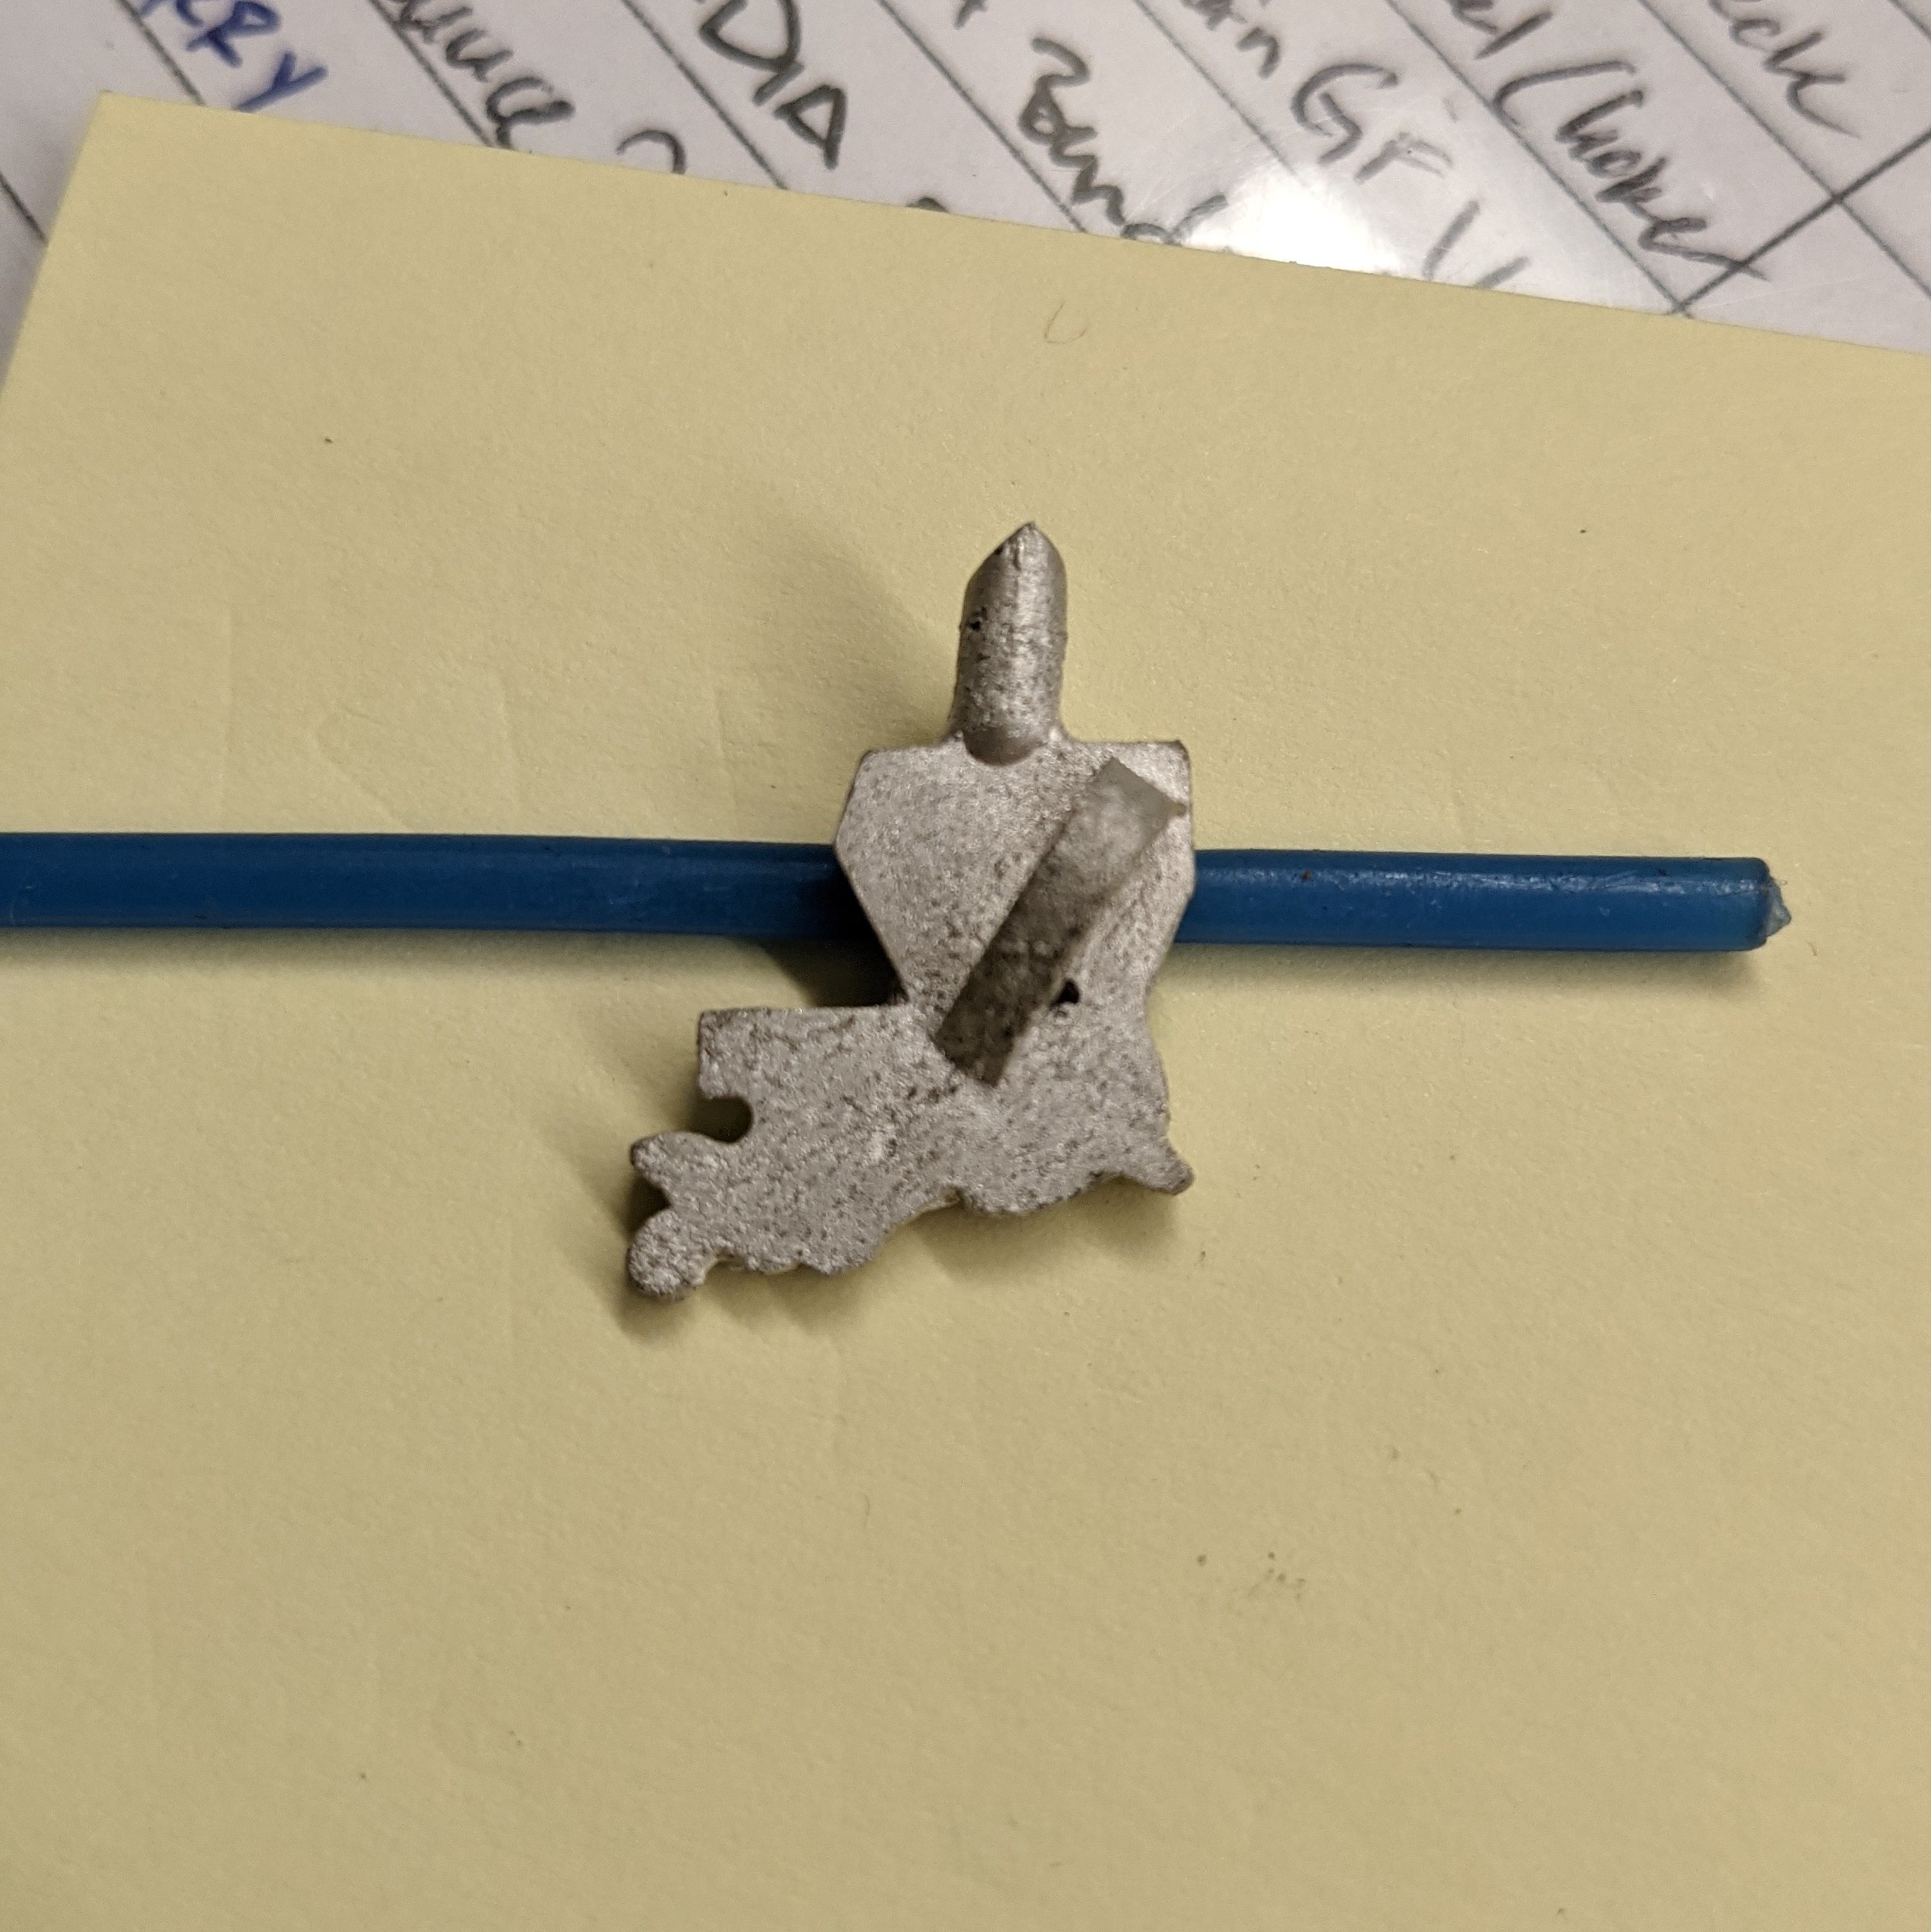
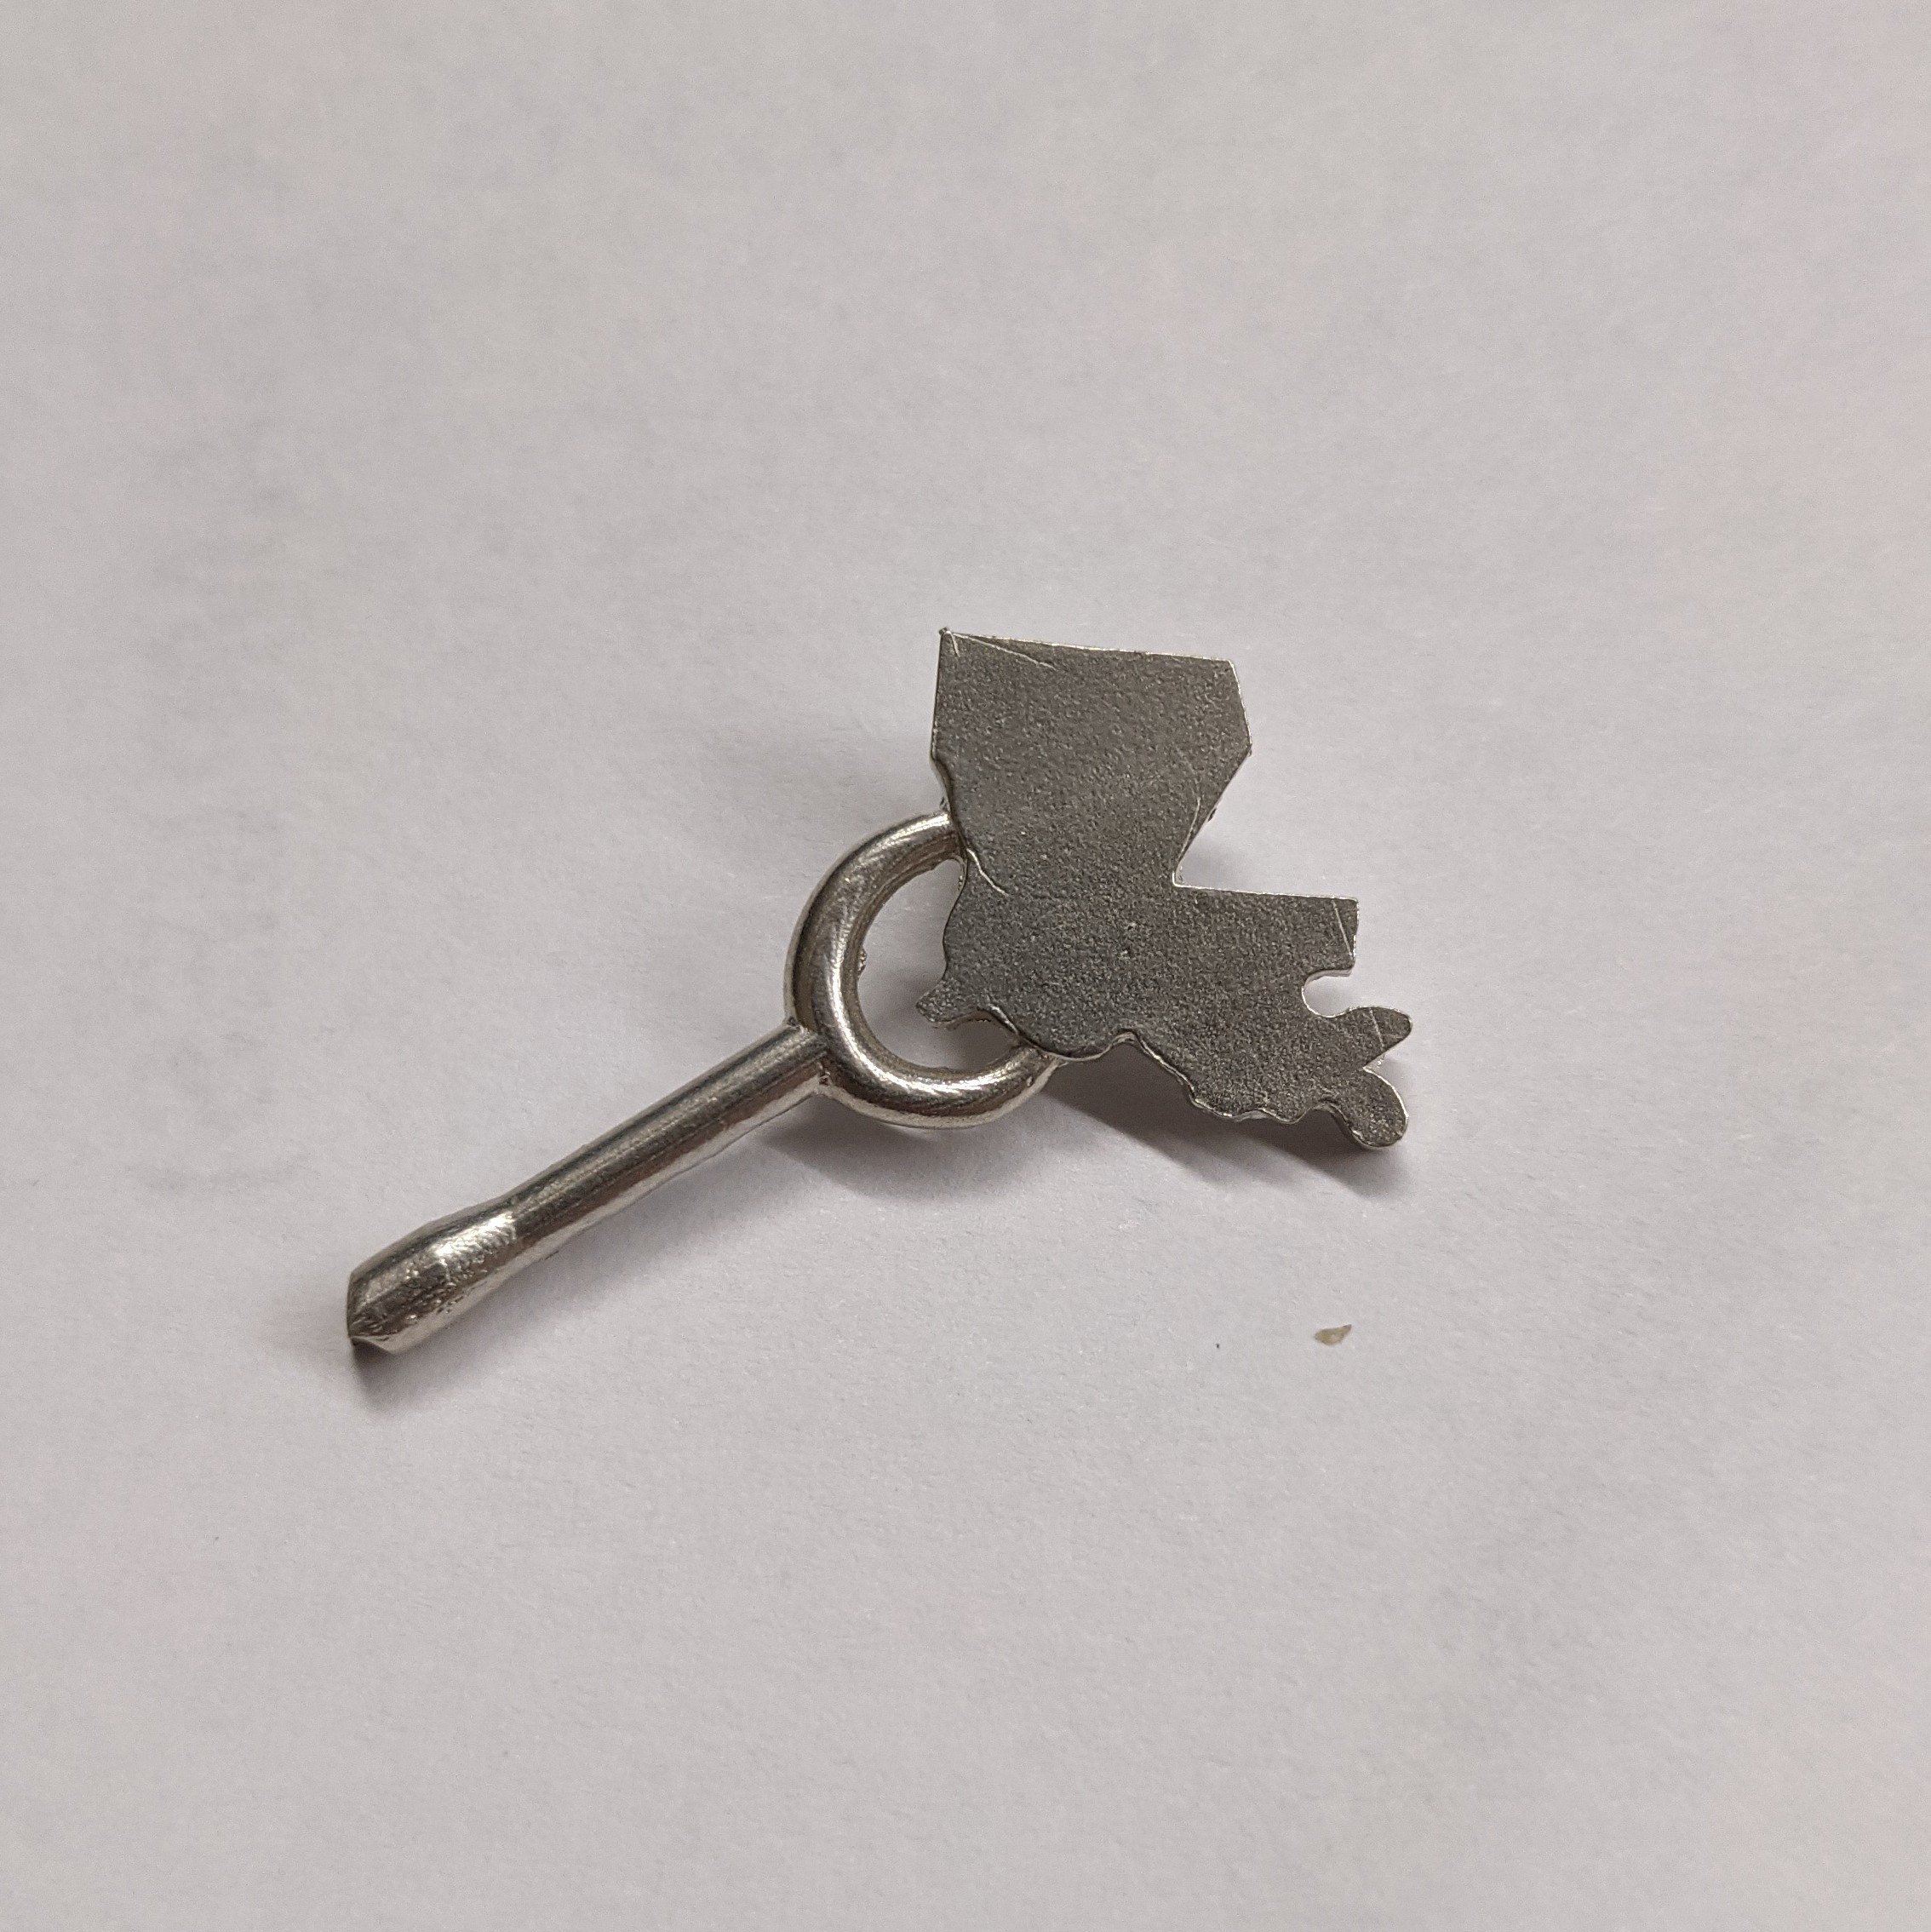
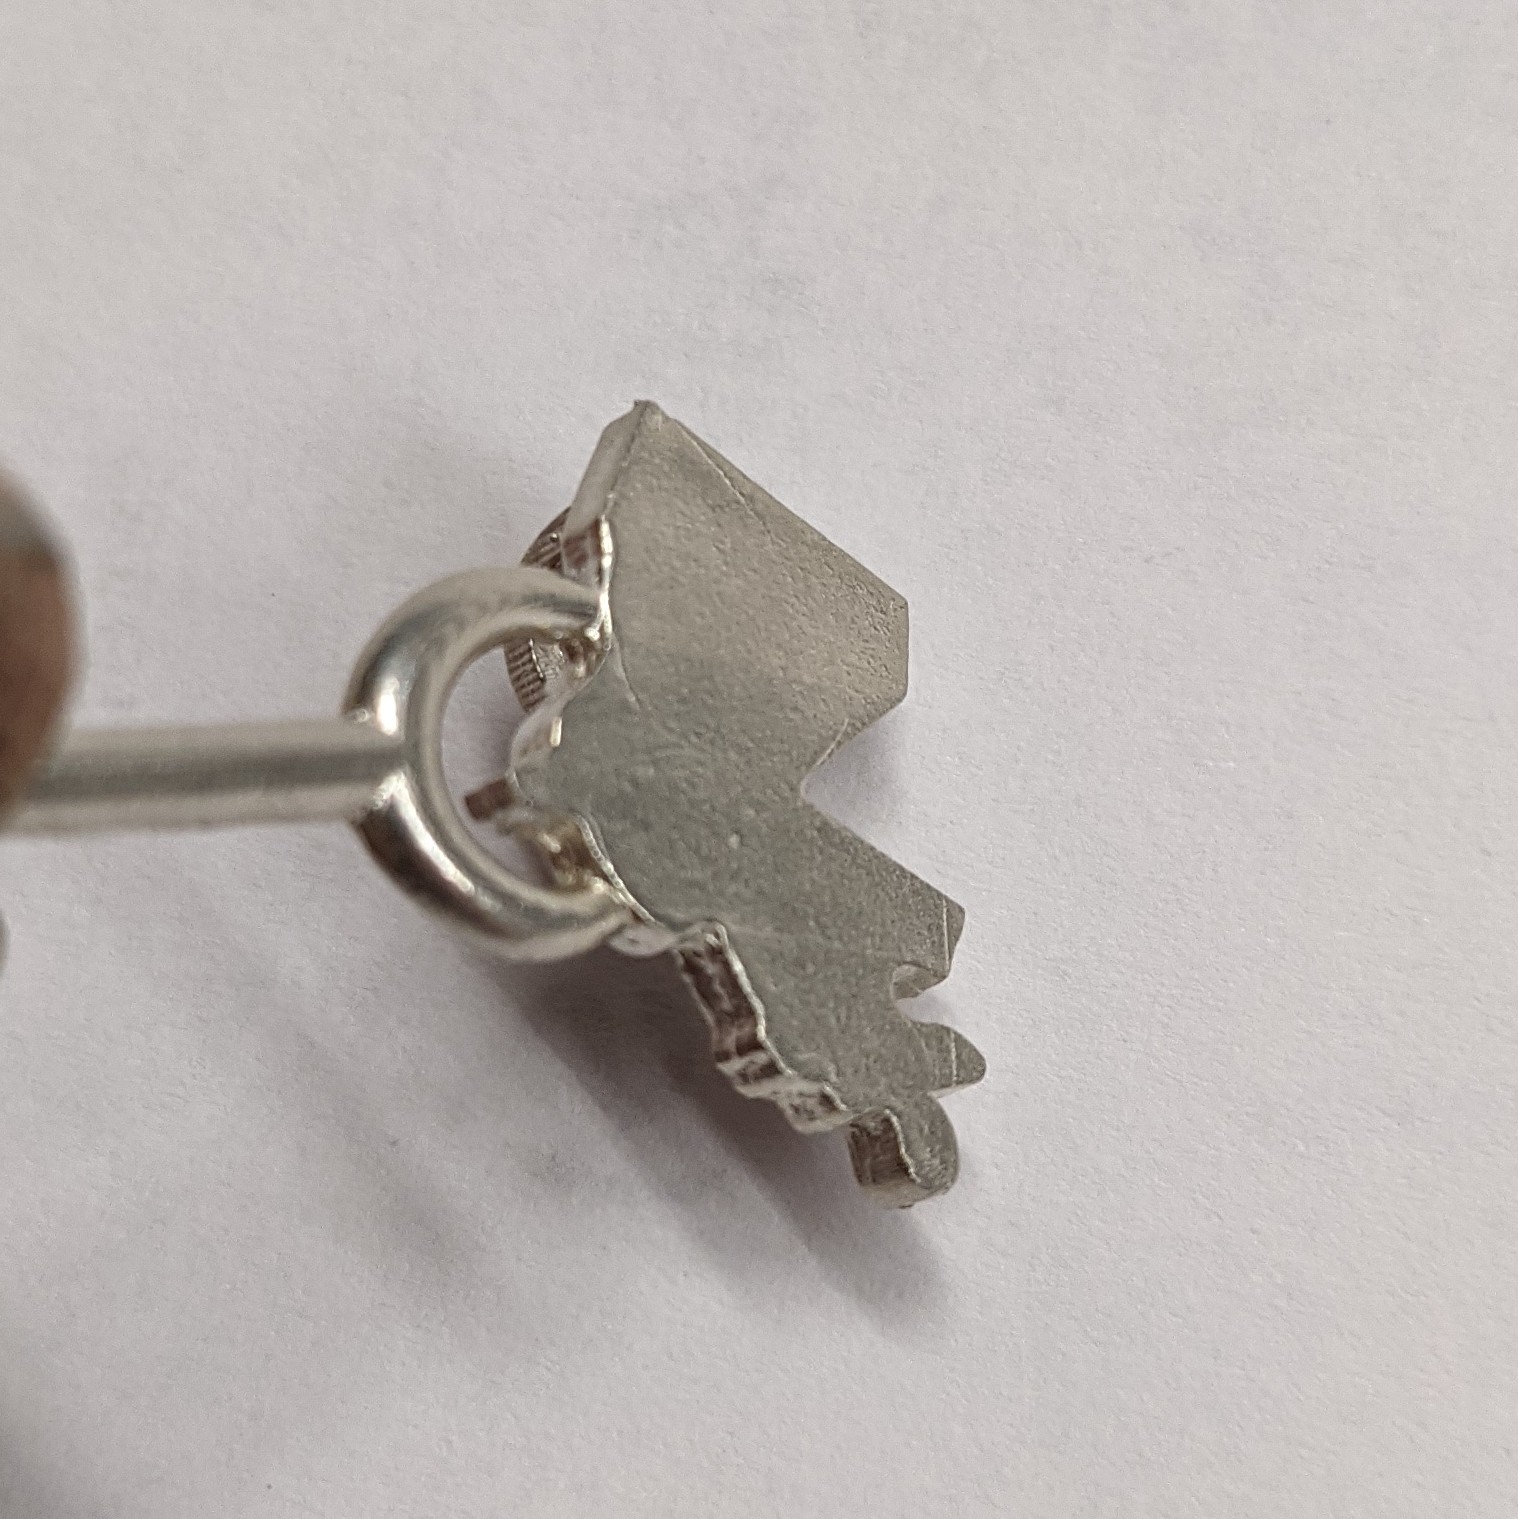
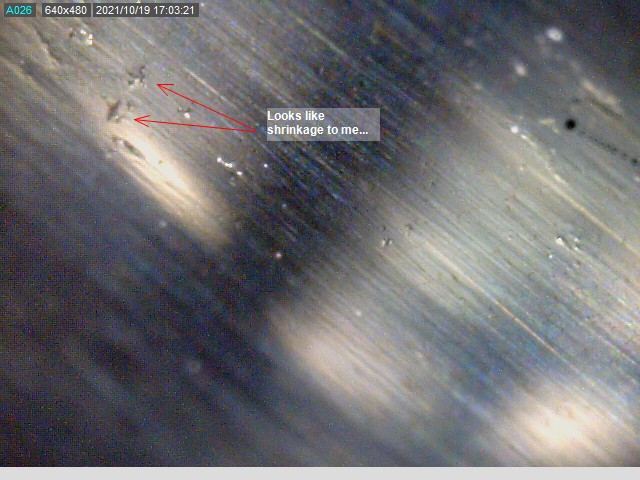
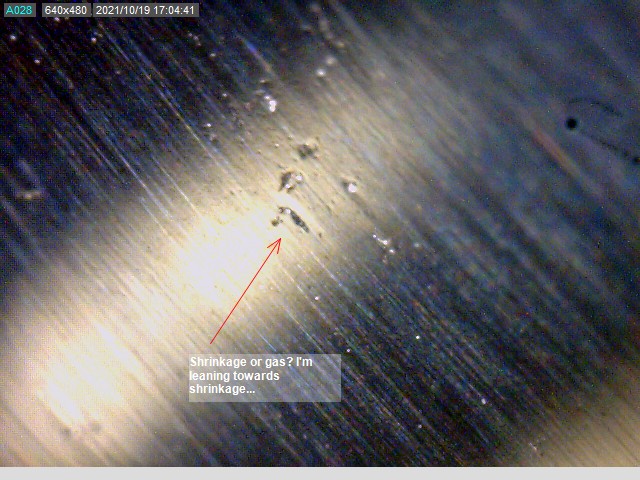
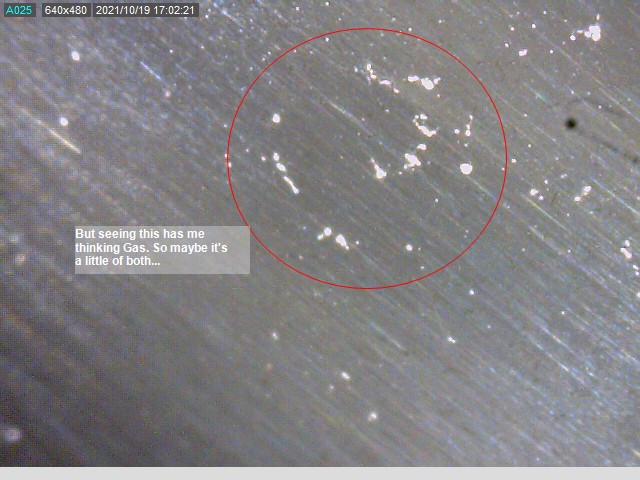
As far as the stuff you’re casting: I personally haven’t ever had much luck casting flat pieces without porosity no matter what material I use (wax or resin). It seems to be in the hands of the jewelry gods every time. We don’t cast a lot of flat pieces, however, so my ability to experiment with it has been limited.
One thing I’ve yet to try, that you could definitely experiment with, is something I learned when I worked at a titanium casting house that made aircraft engine parts. If there was an area that was flat and/or thin, we attached a kind of feeder bulb to those areas. Think of it like tear drops attached with the thin part contacting the piece. This allowed the thin areas to pull hot, molten metal from them as they cooled, preventing stretching and porosity from forming. I just wish I could remember what the heck we called them.
My experience casting silver isn’t vast (and I’ve never cast in brass), but I have found that I have to get it way hotter than I expect. It seems as though silver will appear molten, but still have a chunk within it that hasn’t reached the appropriate temperature for casting.
So, there’s a very long read for you
Let me know if you have any other questions!
I’m contemplating just making a thread about resin printing and casting so we can have all the questions and answers in one place as well.
Cheers!
-Scott