I am a new member, but have been reading this forum for some time now. I was hoping to find answers to a few issues that I am experiencing that stop me from being able to make wearable jewellery.
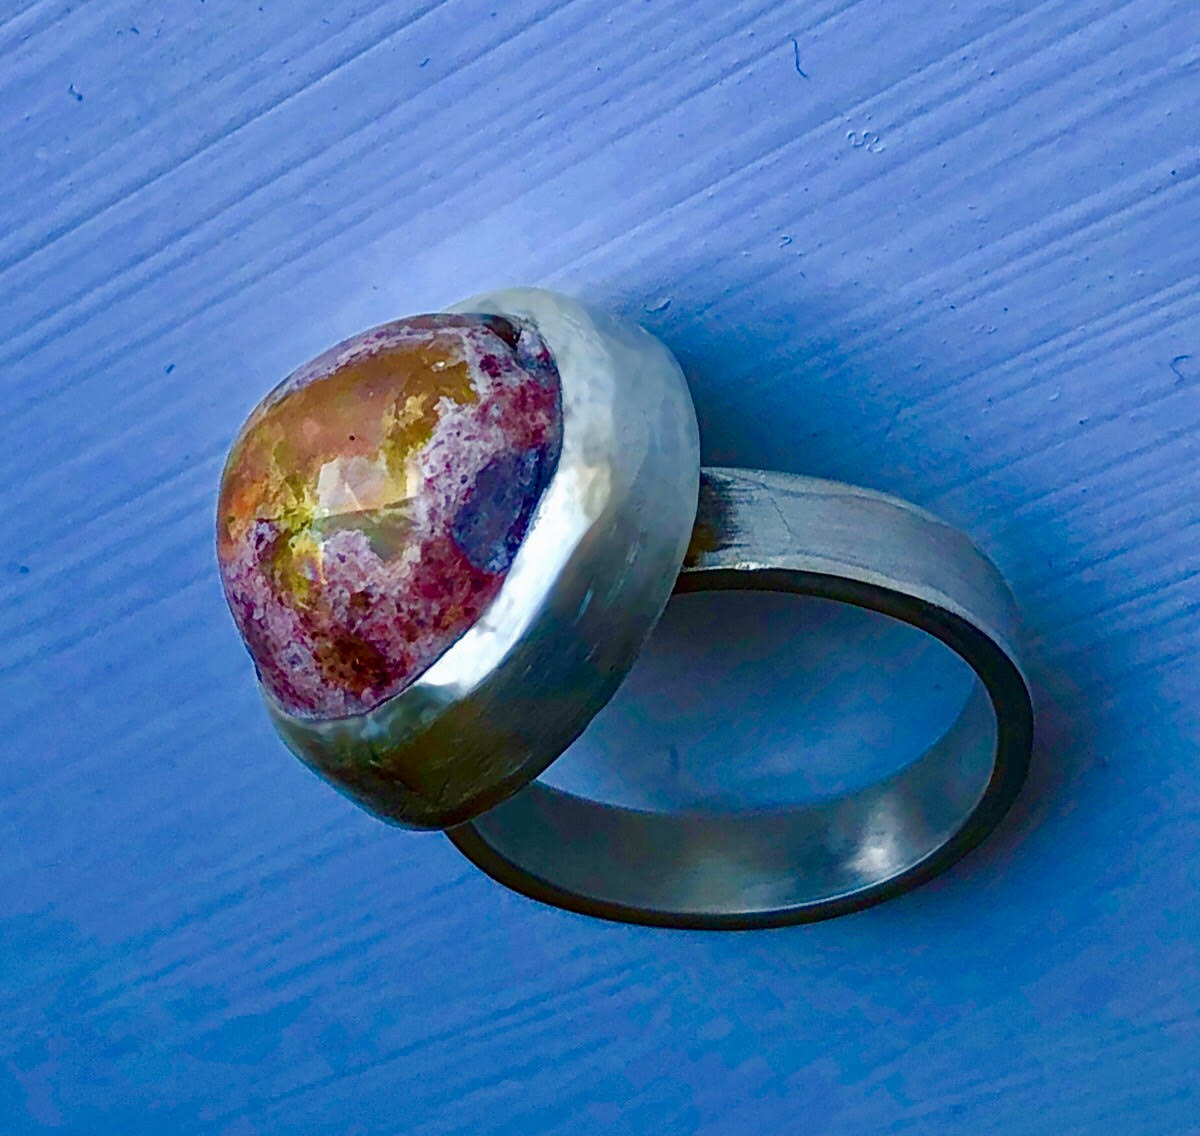
I have only been to a number of silversmithing classes where I was briefly shown the basics of working with sterling silver. I am quite shy so working with strangers is not ideal. So, I didn’t finish the class and started trying stuff out on my own at home. I have made a few pendants and a couple of rings. Generally, what I found the biggest challenge is closing the bezel tightly around the gemstone. I like chunky items, so I prefer if I could use 0.8mm for the bezel. However I found, that when I use 0.3mm the bezel is easy to close around the gemstone. At 0.8mm, absolutely impossible. These two photos illustrate what I am talking about. I tried all I could to close the bezel on the pendant, short of hammering it like a mad woman. It only went as far as the photo shows. With the ring, after trying everything, I did resolve to hammering it, although gently, and even though it looked like it was closing , the stone was still moving around, and eventually the stone broke. I used glue as I really love the damn thing and would wear it at home. Anyway, sorry for the long post, but this is something that is going to really stop me from producing the look and quality I would be proud of, so if anyone can point out what I am doing wrong, I would be really grateful.
I have heard that fine silver is softer, but also less durable, so I really want to resolve my issues with sterling silver. I’ve seen artists on IG who work exclusively with sterling silver and their bezel’s are as tight around the gemstone as it can possibly get. I don’t think it’s a matter of physical strength as most of them are ladies.
There is a lot of information in the archives about closing heavy walled bezels. Search my name as a way to get at some of this information as I was asking the same question you are asking not too long ago. You first need a way to secure the piece so that you can, as you say, hammer on it because that is basically what you will be doing. Buy a small machine vise that will allow you to move the piece around as you work on it. Better yet, an engraving ball, but they are expensive. Also buy some thermoplastic that you can embed the piece in before you put it into the vise. The vise will damage the piece if it isn’t embedded in the thermoplastic. GRS, Otto Frei and other sell the thermoplastic. Go to a hobby store or any place where you can buy small diameter brass rod (.25" work for me). Cut the rod about 4" long and then experiment with forging and polishing the end to fit the curve of your bezel. Once the piece is secure in the plastic and vise, carefully use the brass rod as an extension of your hammer and work your way around the bezel until it is closed. You can try gluing the stone down first, but it will likely let go after your first couple hits. Your hammer should be fairly light and I like a short handle. You will find a brass hammer like this in most tool
catalogs or even AC Moore or Michaels. I also use it to do my stamping. Space your hits 180 degrees apart to start so that the stone stays centered. You then have some cleanup to do as there will be dings and dents. Using a small file with a safe edge, then pumice wheels and finally polishing wheels, you should be able to clean up the bezel. If you want to get real good at it, learn to use a graver to bright cut the edge next to the stone. I have yet to learn how to use a graver. I know that this sounds like a lot, but it get easy and works. Good luck…Rob
How did you measure the bezel to the cab? Maybe it’s just an illusion in the pendant photo, but it looks like there’s space between the bezel and the cab.
you will have to hammer/compress/ move the metal…you can make a steel tool/stamp with a tapered rectangular flat top face to use…strike with a light hammer…angle so you do not hit stone…(i made my first one out of a thick nail…sawed and filed tip to shape…) or you can buy something like a badeco reciprocating hammer hand piece (with tips) for your flex shaft…like a tiny jack hammer…you caress the edge with it…
you are more like smushing down the metal…spreading it at the edge, over the stone rather than just pushing the whole wall over…
select stones that are easier to set, to start off…nothing with really steep vertical sides…nothing with sharp edges around base which can chip with pressure…start with harder stones, that are not partial to cleaving/ fracturing…some are more so than others…
you only need a tiny bit of metal to hold the stone, so do not make the part you are hammering over, too tall…
you can file down/ bevel/ thin out the too edge of the bezel so that the metal moves easier
you can file/saw out a pattern on bezel edge to reduce the area to be moved…like prongs in concept…and combine with #4
you can buy fine silver strip/ sheet/ wire to make your own custom thickness bezel wire
lastly, check out At The Bench, an online jewelry paid subscription based video tutorials by Andrew Berry out of the UK. relatively inexpensive (monthly, or annual) huge archive of videos… can be watched in the privacy of your home, and he is an awesome instructor. you can email him questions and he sometimes uses viewer questions as topics for new videos
Thank you for taking the time to answer! Basically, there is no magic solution
I did secure the ring in the thermoplastic (photo below) but I will definitely invest in one of the cheaper version of the engraving ball as I needed the assistance of my poor husband to hold my work in place.
I used first a curved bezel pusher (didn’t help), then a flat-ended bezel pusher and then started hammering on the back of the bezel pusher, which worked but broke my stone when I got the silver too close to it. I used a Rawhide Mallet and you are right, I think a shorter handle would have helped. Can I just ask you if you think that truing the brass rod would be easier than trying to hammer the flat-ended bezel pusher?
Definitely not an illusion! I don’t measure (which is probably part of the issue) but rather wrap the bezel around the stone and then cut. I tried measuring with paper (as shown in class by my teacher), but then found that this is not very reliable when I use thicker bezel such as 0.8. As far as the pendant does, there was an issue with the stone -one side was at a completely vertical angle, and the other, at about 30 degrees inverted angle. So one side needed a lot of pushing the bezel in, but not the other. Regardless, I did struggle on both sides, so can’t blame the stone really. I haven’t tried to hammer the pendant yet. I love the gemstone too much and after breaking the opal in the ring, I am twice shy.
Thank you for the time you have taken and the valued points.
Re point 1 -I used Rawhide Mallet to hammer over a flat-ended bezel pusher. Yours is the second suggestion to adapt something like a rod/nail so I am guessing what I did is not best. I think I might try a nail.
Re point 2 - I did think, wrongly perhaps, that if I file the top of the bezel at an angle, and therefore thin the silver sheet, that it would be easier to push in. You are right, that when I started hammering with the Mallet , the bezel ended up moving towards the stone horizontally. I think I was just desperate at that point. I take again, that jewellers don’t do that? I mean, taper the top of the bezel to push in easier.
Re point 3 - I will definitely look into stones hardness. I’ve used turquoise , lodolite, labradorite and cantera opal so far and the turquoise has responded best.
Re 4 -is this the case even if your stone is tall and has completely vertical walls?
5 and 6 I couldn’t quite understand
At the Bench with Andrew Berry is a great suggestion -I have watched some of his free YouTube
videos -(I am also based in the UK) but didn’t know he has a paid option. I will definitely investigate further.
Thank you so much for taking the time -your comments are so helpful. I have a stash of gemstones that I am dying to make into something and really felt like I have hit a wall as I knew what I did wasn’t right, but didn’t know why.
I use brass because it is softer than steel and harder than silver. You can forge a shape into the end of the brass rod (pusher) that is close to the shape of your bezel, that way you are spreading the contact over a larger area and less likely to cause a deep dent that will have to be removed. I sometimes use several different pushers as I move around the bezel and the shape changes. This process tales a long time to get any good at it at all. Just when you think that you got it, you don’t. There were a lot of good pieces of advice offered above. I especially like thinning out the bezel near the top. Good luck…Rob
Another good source for instruction is Soham Harrison. He has a utube page with a lot of free video. If you are going to get bit by the bug, you might as well get bitten good! You can learn all sorts of techniques and skills.
Save your first pieces and then go back and look at them in a year or few to see your progress!
as an exercise, take a piece of square wire, and hammer/ forge down the top.
you will see the top spread wider
you can experiment with just the hammer, and also hammer and setting pinch you make.
you will see how the metal spreads and get a feel for the force needed with the hammer…start with light taps snd go from there.
for the thick bezel look you want, you will definitely be moving the metal…not pushing the wall over at an angle
you see how your thick bezel looks beveled after setting…you can sort of file the top of the bezel that way, prior to setting, then the top edge will be thinner and mover easier, but still look thick
yes, tall vertical stone walls are challenging. I try to avoid as i do not like super tall bezels…i have seen nice settings that use unique large prong/ basket designs…that might be fun to play with…
measuring for the bezel is the same process as measuring for a ring shank…need to account for the thickness of the metal…
sometimes i use waxed dental floss to wrap around stone for measurements…
bezel needs to fit closely, with no gaps…
when i say not too tall bezel wall height, i am more thinking just about the part past vertical…dont need much…the taller it is, the farther away from the stone it will be…
Another point no one seems to have mentioned is the height of the bezel. My teacher is always making me file down the bezel height so that the metal doesn’t have to compress so far as you hammer it. I measure the highest or thickest part of the edge of the stone and try to use bezel wire just enough wider to give some metal to push over the face of the stone. Also, if the stone is uneven in height you may have to file the bezel to follow so that the amount to push over is consistent.
And it wouldn’t hurt to practice with harder stones, like agate or jasper. And try to find stones with slanted sides - life will be much easier!
Thanks Rob, I will try with a brass implement. Can I ask, when you position the base of the brass rod (the bit that makes contact with the bezel), is that flat against the side of the bezel (hoping to move the bezel parallel to the stone? I am sorry if I am asking stupid questions.
Charlie, I will definitely search for Soham Harrison. I found a very cool dude the other day https://www.youtube.com/watch?v=QCJ7mUX-Nwc that makes everything look so easy.
Hi Mila,
I’m addressing the part of your question about being shy and perhaps not getting as much out of in-person training or classes as you could have. When I first started making jewelry I found that I learned quite a bit by watching Nancy LT Hamilton videos on youtube. They’re fun to watch: she has a crazy-cat-lady-old-hippie persona, she covers practically every basic skill, and her web site also has a ton of useful resources, like where to get cheap tools. Plus you can always replay a video if you didn’t quite get the technique the first time. You can get to them from her website https://nancylthamilton.com/ or by searching youtube. HTH,
Makena
I am with you 100% in loving more chunky bezels! I often use 1mm thick sterling to make bezels. Lots of volume for it to take the necessary compression forces. I agree with all the above advice regarding holding your piece in thermoplastic so you have two hands free. My husband bought me a bench vice fairly cheaply from Machine Mart. I can turn it and lock it in place - although it’s not quite as moveable as an engraving ball.
One thing that will help you enormously is not making your bezels too tall. I literally just eyeball the profile of a cabochon against a small steel ruler and set my bezel height at only just above where the metal needs to be to secure the stone - difficult to describe as it depends on the stone’s profile. If the bezel is taller than it needs to be, then you will be hammering forever and maybe never close the bezel.
Also the stone needs to fit snugly into the bezel with no gaps around it. Your pendant bezel is far too big to get the bezel to close. However, when it is made just the right length and just the right height, you will have an easy job of hammering it home with your hammer and brass setting punch.