Actually, I wouldn’t need to pickle it as I would be opening it enough to put the ends inside my rivets, nevermind
the wire needs to be a minimum of 1/10th in thick. Again you need to ask yourself, not me! who uses s/steel wire?
stainless wire come best from a welding shop, find one near you and ask for a couple of feet to play with. Its TIG welding wire. you dont need a 50lb coil!
As for understanding one has to assume as its you 1st buckle your experience is limited.
Ted.
Well, I mean, that I know what the mechanics of a belt buckle are. Like the leather going into the loop between the one end that snaps onto the loop and the buckle.
Rachel,
This one has been working like this for quite awhile. You need clearance from the bale to the buckle of twice the thickness of the belt and maybe half as much to three quarters thickness again. This allows the belt to slide through and not bind up.
Don
Sent from my Verizon 4G LTE Droid
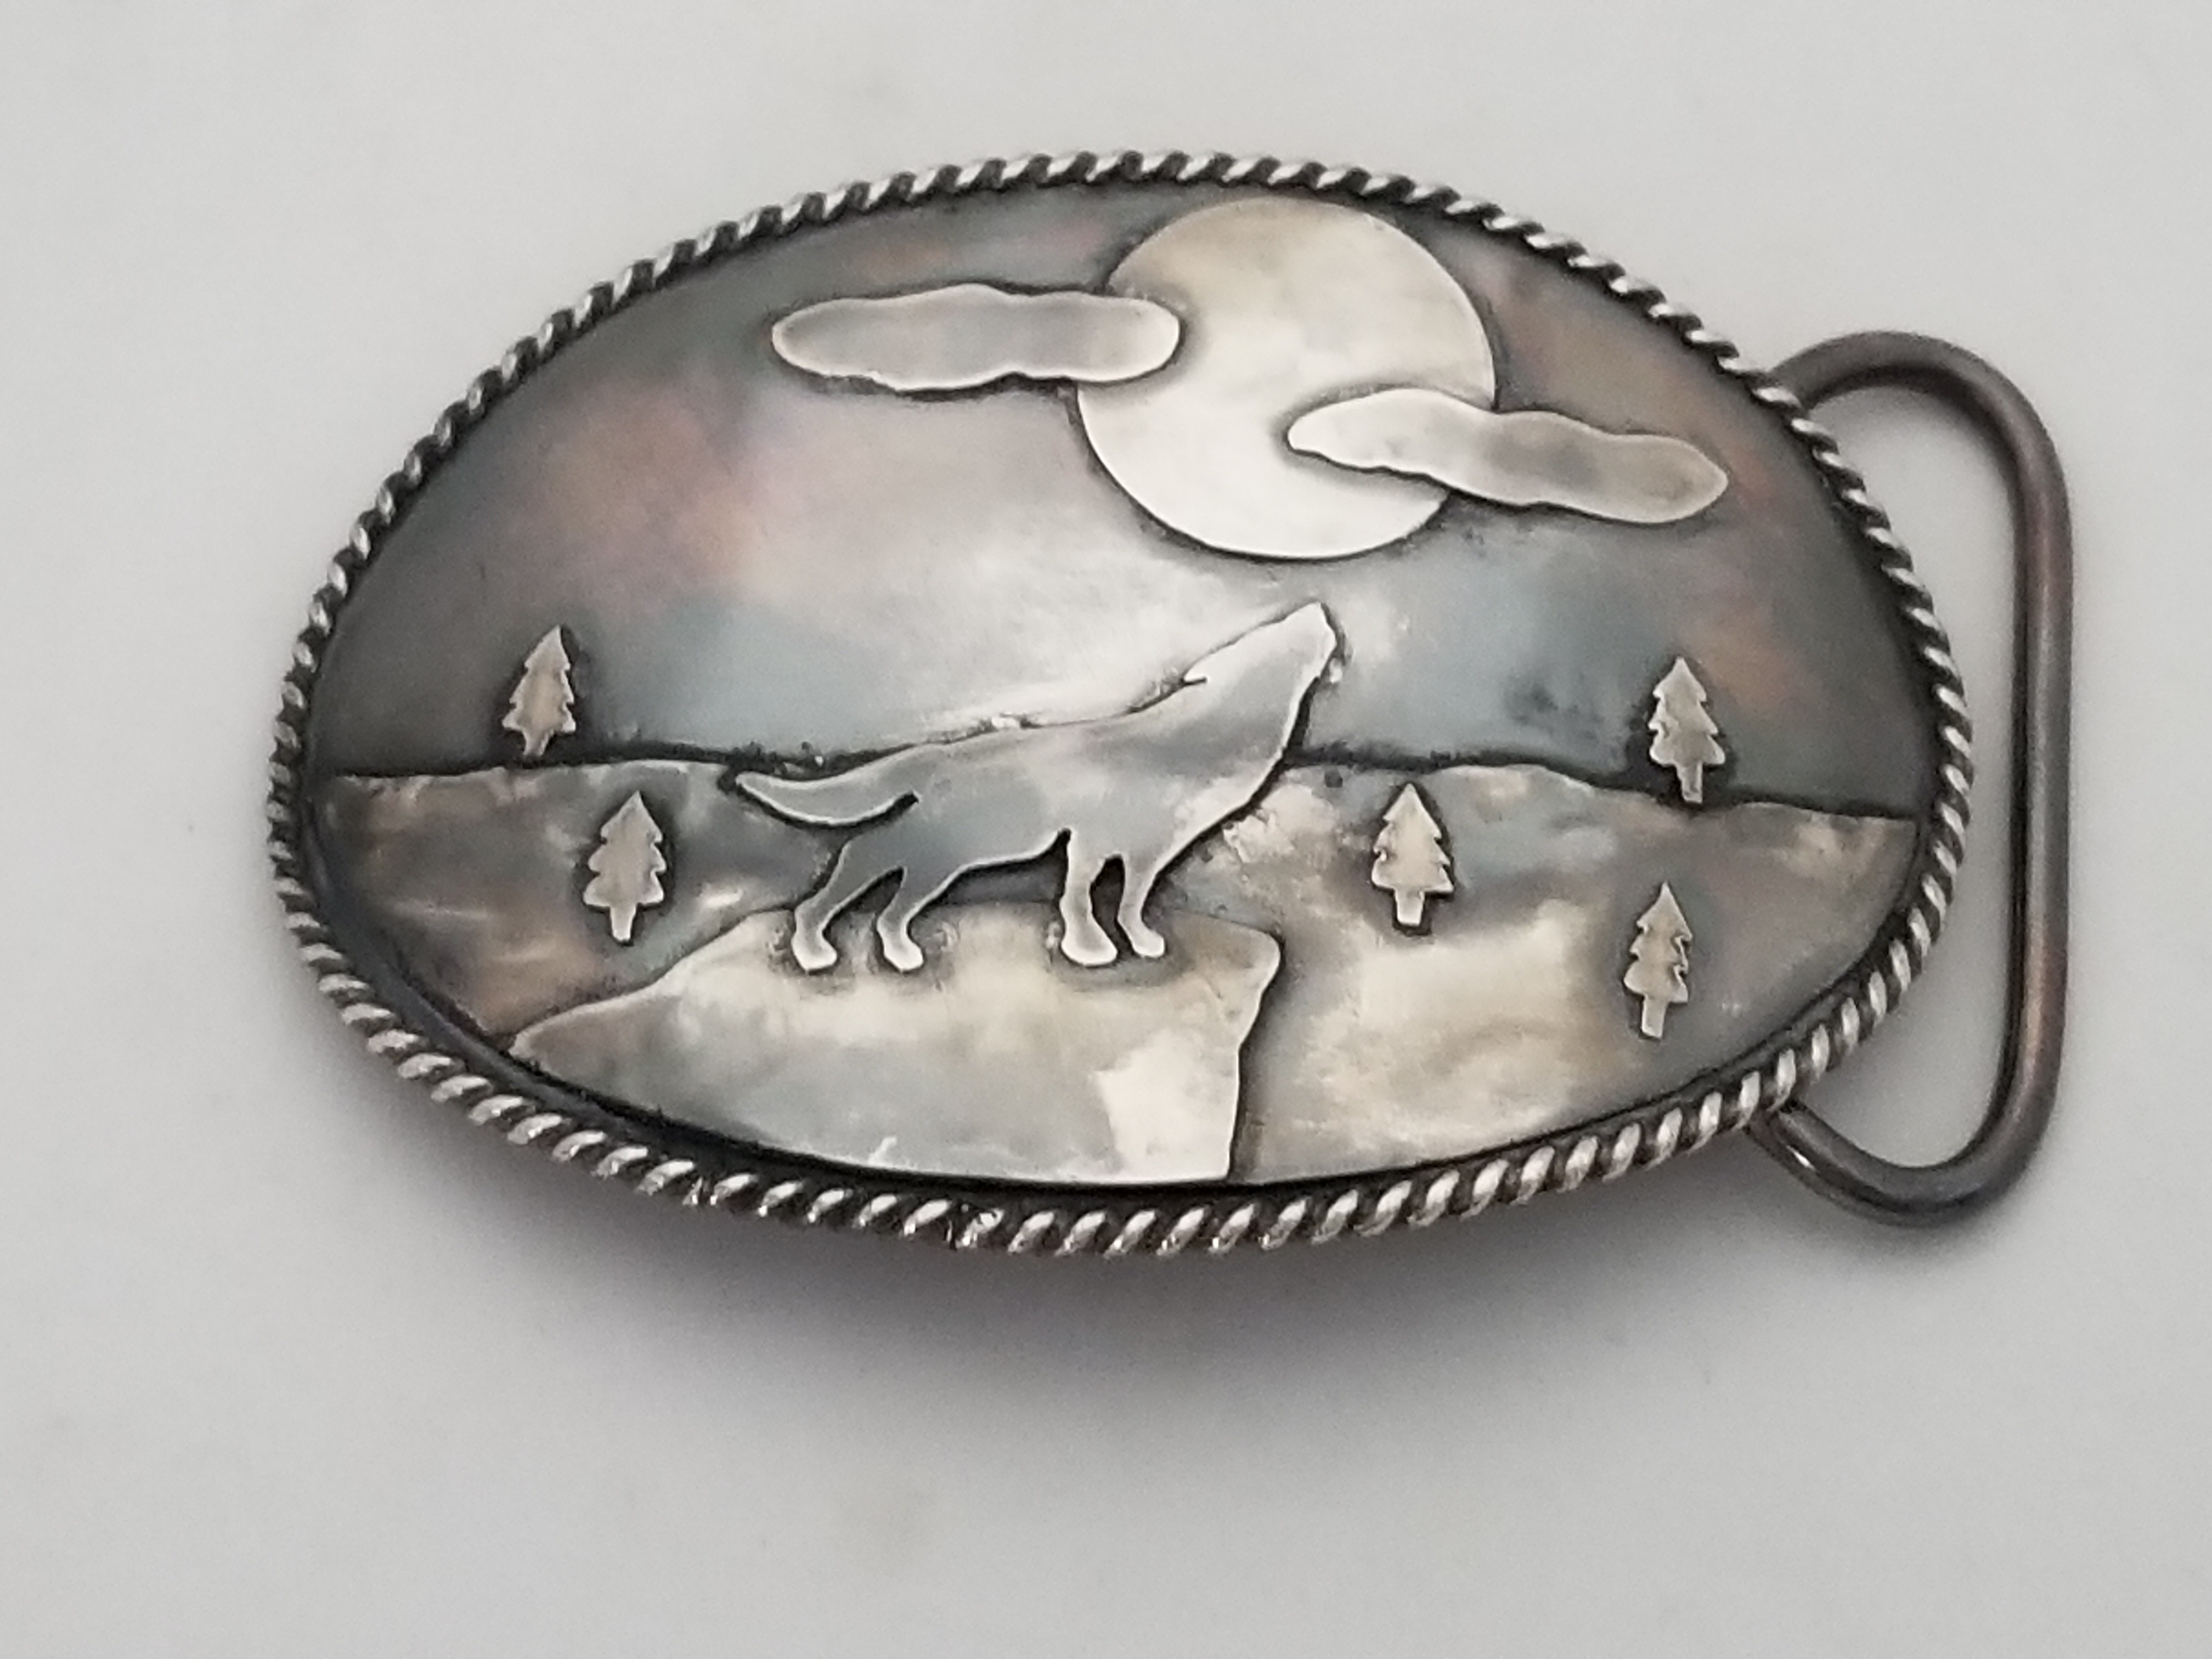
Finished it at the last minute. I seriously felt like Santa when I was boxing it up and putting it under the tree 
Again, thank you all so very much for your help through this whole process! I couldn’t have done it without you! I hope he’ll love it!
1 Like
Rachel Firestone, beautiful buckle and an
outstanding achievement!
1 Like
VERY nice, Rachel. Congratulations.
Jerry in Kodiak
1 Like
As its Christmas, all ill say is the following.
first, your imagination far exceeds your technical ability.
Second, the balance of the elements and the empty spaces around these in the design are good.
third, the perspective youve achieved is also excellent.
The edge twisted strip is nice and minimal.
Finally the oxidised parts compliment the bright areas.
Altogether for a first effort, very good.
You may need , in the near future make a couple of small additions after its been worn a few times, as in its use it will show you what these are…
Ted.
1 Like
You did fantastic! What a wonderful gift. Something made from the heart with love.
1 Like
Beautiful!
Denny Diamond
1 Like
Hi, It’s a bit late but I found this u-tub that might help beginners
The Complete Metalsmith by Tim McCraight (Part 2 of 9) - YouTube
by Tim McCraight
1 Like
Edward, your work is amazing. Buckles have always been on my want to do
list. One day, one day. Again, thank you.
Aaron
1 Like
Hi Aaron,
Thanks for your thoughts.
Where are you? Europe? Far East? USA?
Re your wish to make buckles, happy to send you some thoughts too! Write me via my email addy which is vladimirdotfrateratgmaildotcom to comment on this long running thread.
Ted.
1 Like
Thank you all so much for your incredible comments and compliments!  I was so relieved that I was able to finish it in time. Definitely a weight off my shoulders and he loved it! Thank you all again, so much!
1 Like
Nothing like making something you’ve never done before right before it’s due! I’m guilty of that probably more often than I should be. Well done though! Perseverance is paramount.
1 Like
Hi Billy,
This thread has had its ups and downs, if you have followed it through from the beginning?
yes?
If you have, then you will have read my involvement in this project for a couple of reasons,
- Im a buckle maker on and off for 45 yrs, and have had serious demands on what I chose to make, for example, someone who has a 45in waist,
- not only holding up his pants but holding in a gut !!
So the strength requirements have been challenging to say the least,
No problem if approached from an engineering point of view.
all my buckes for this client type will stand a 250lb weight, and I test everyone, this includes the horse harness leather (with fittings) some 1/4in thick by 2in wide.
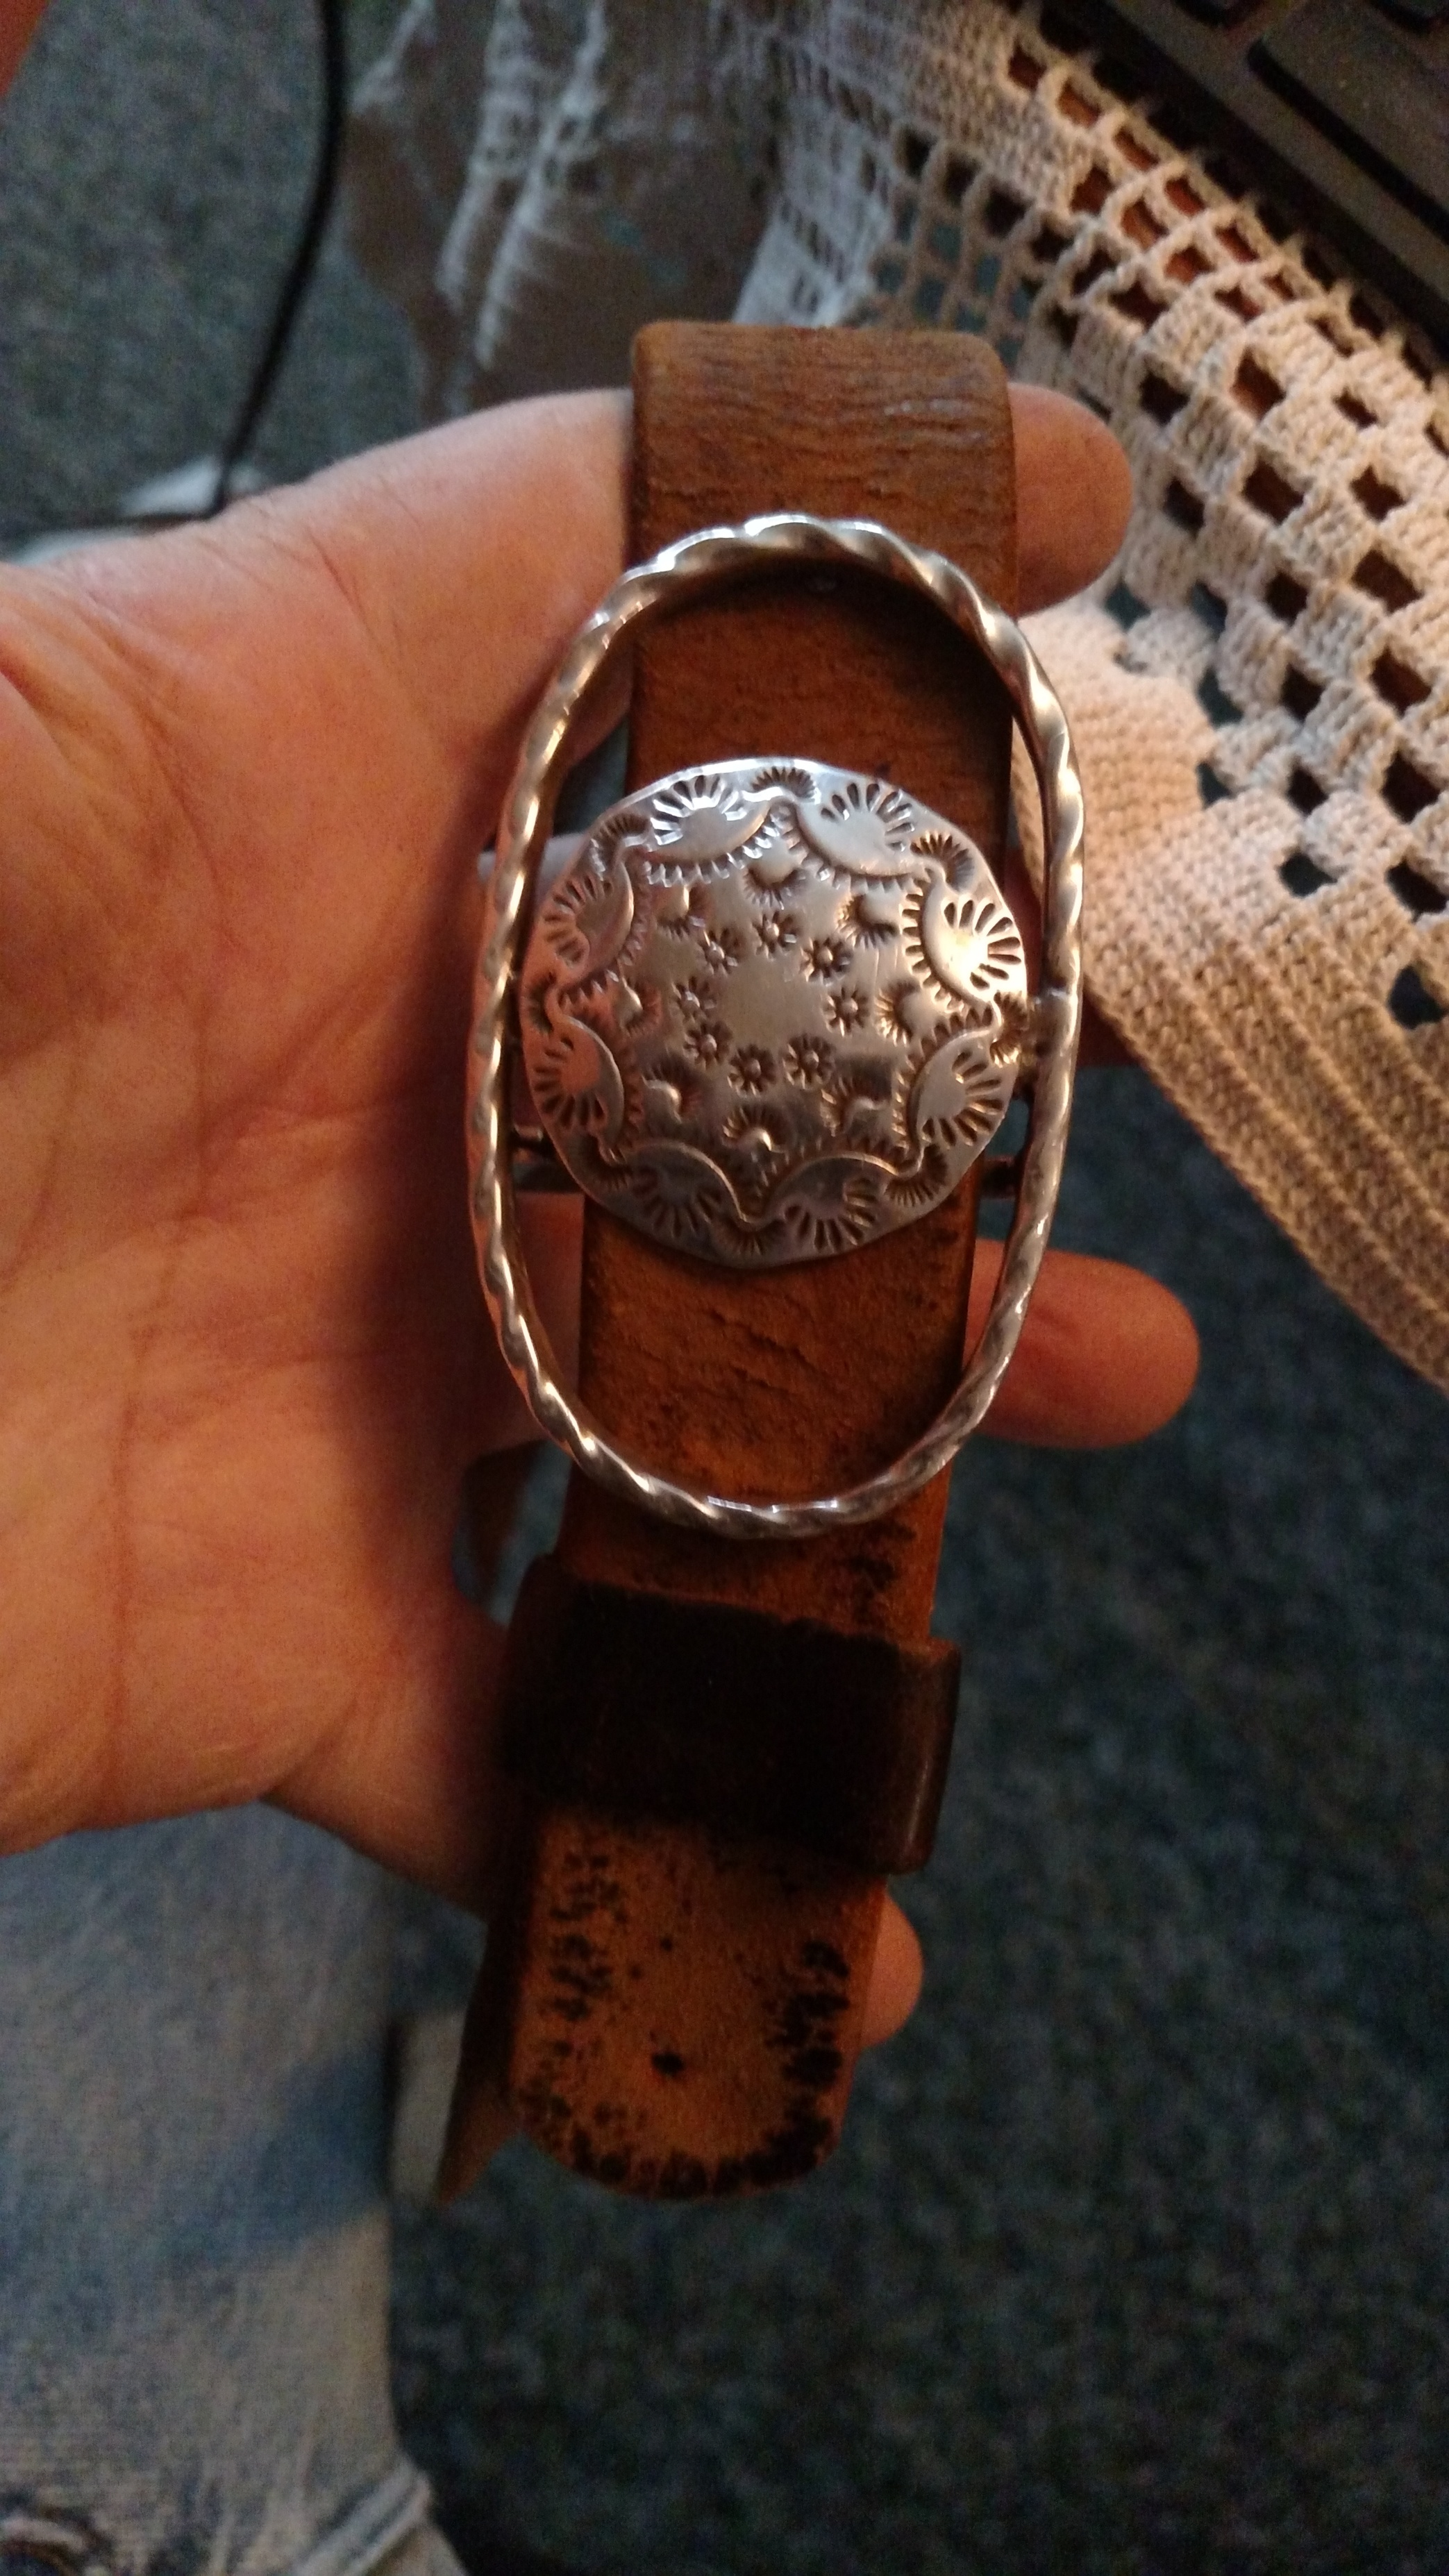
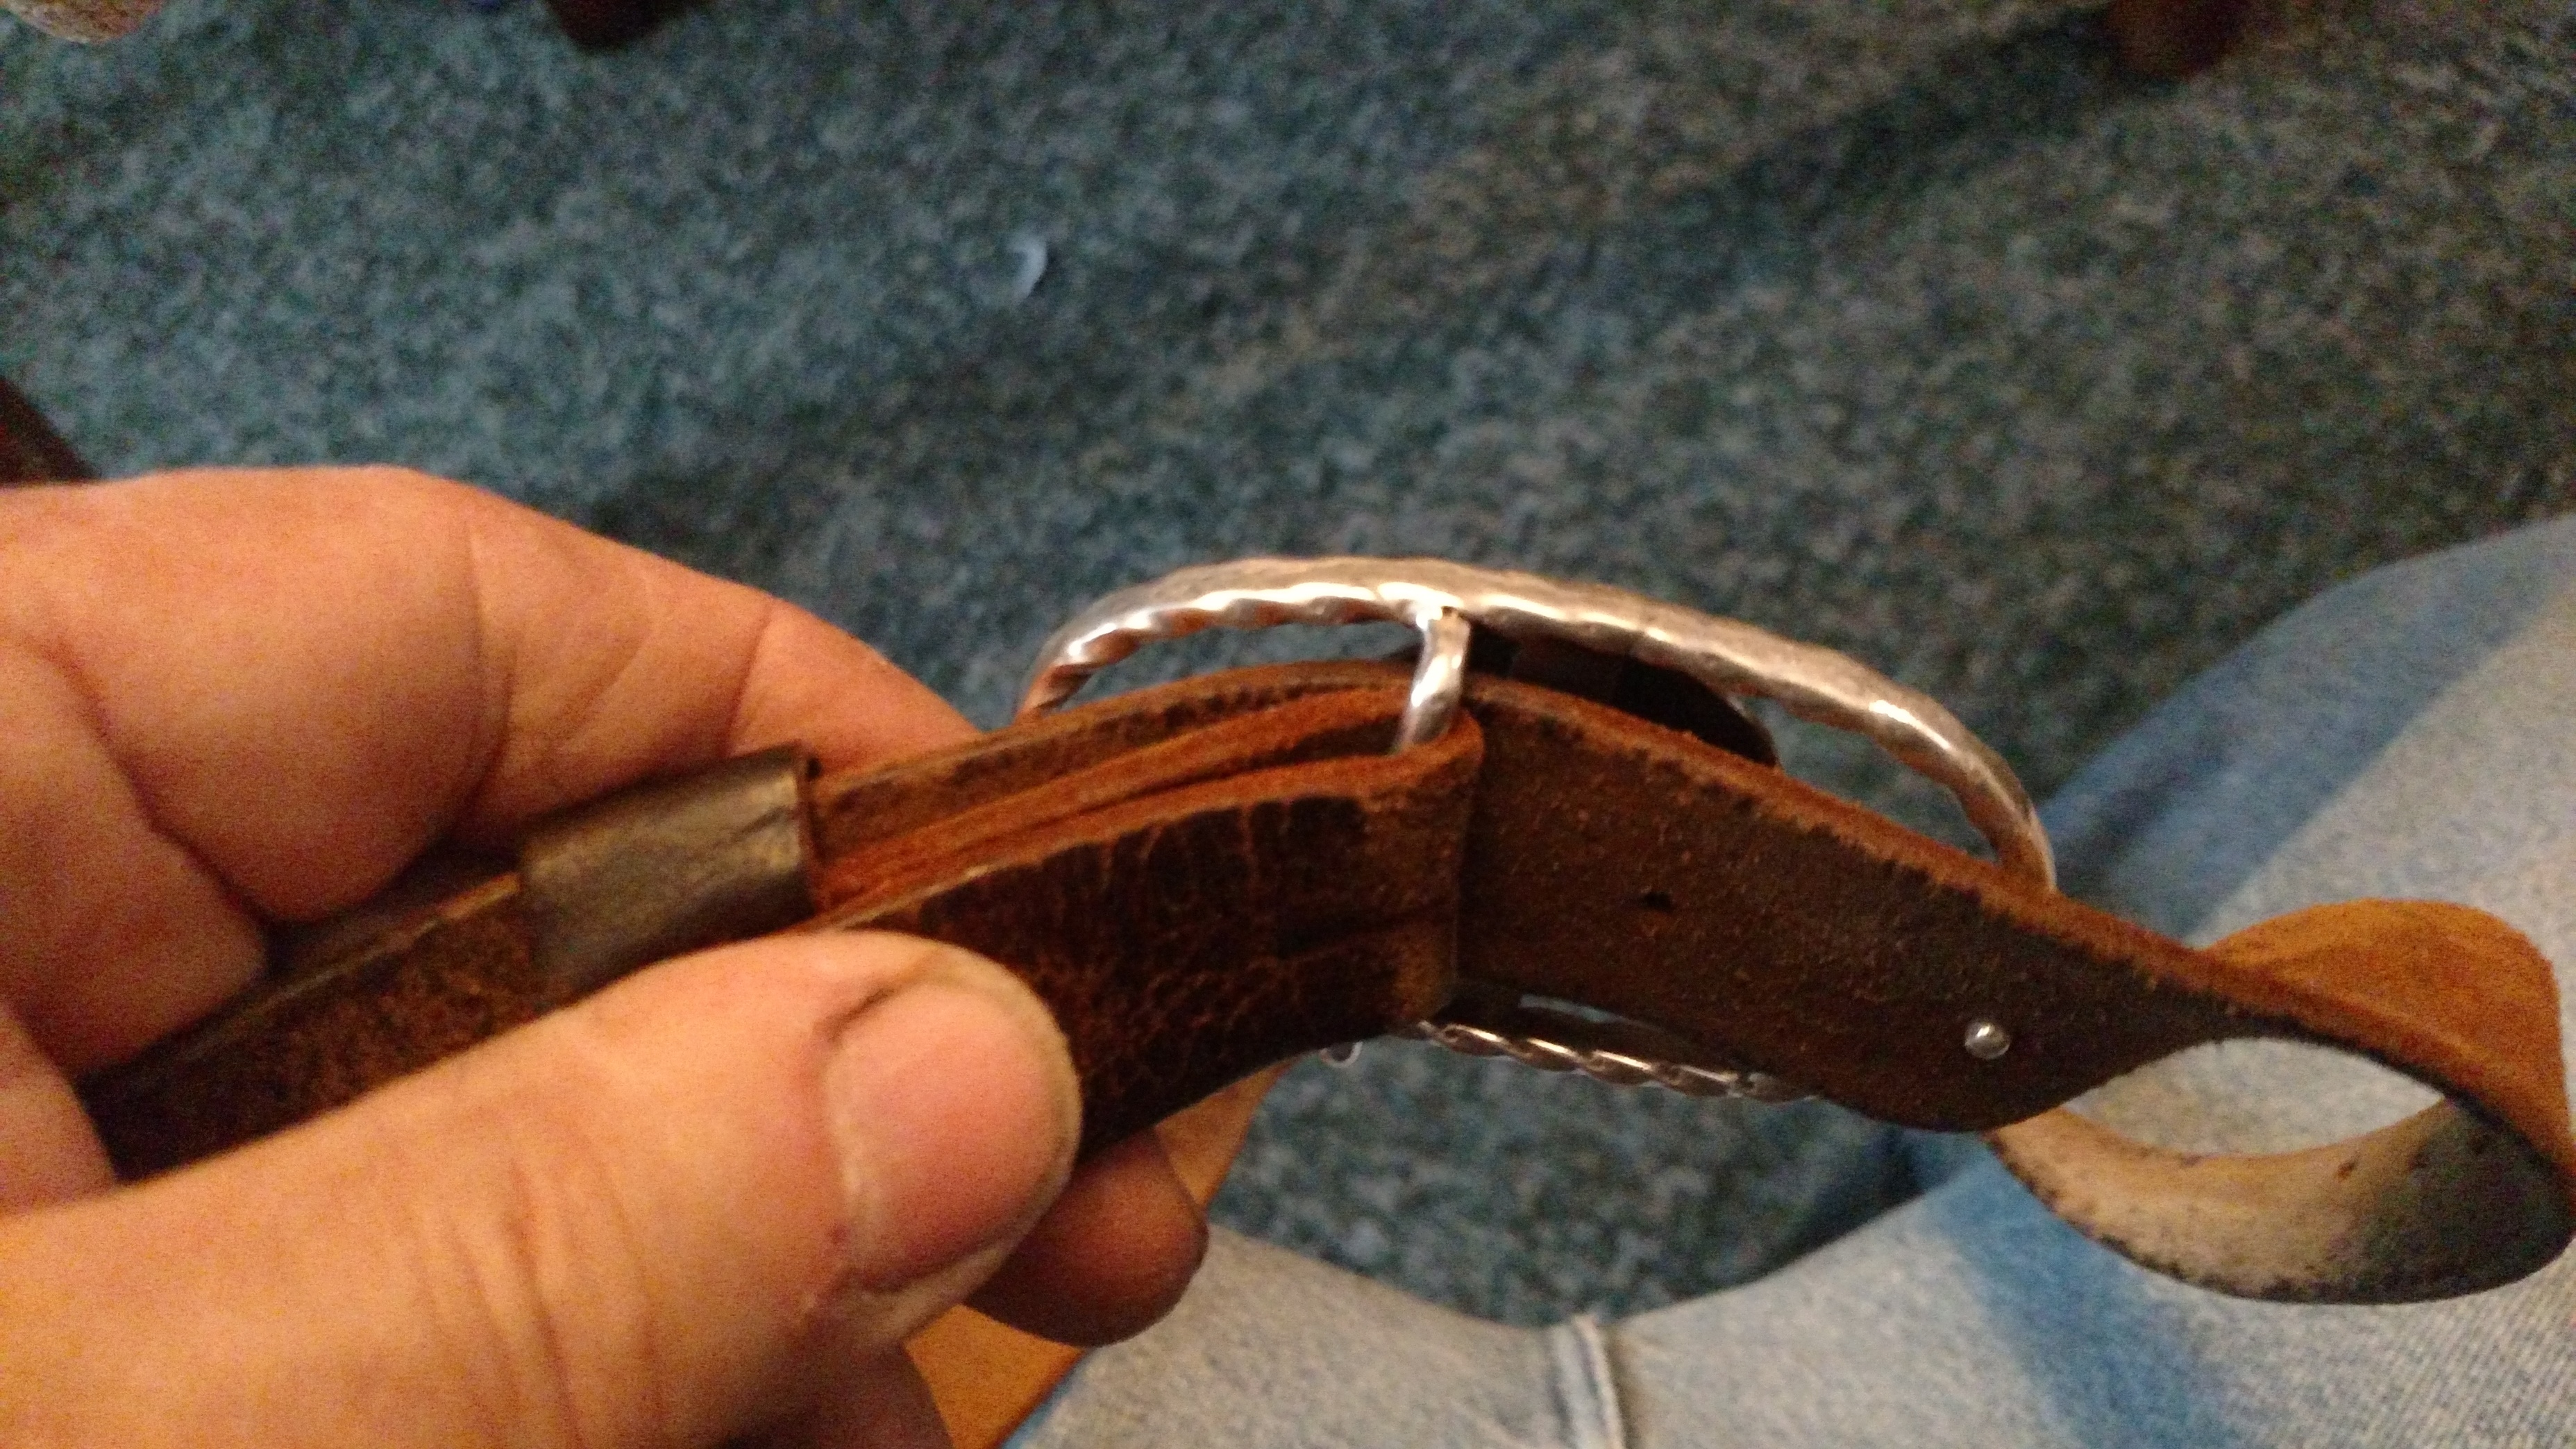
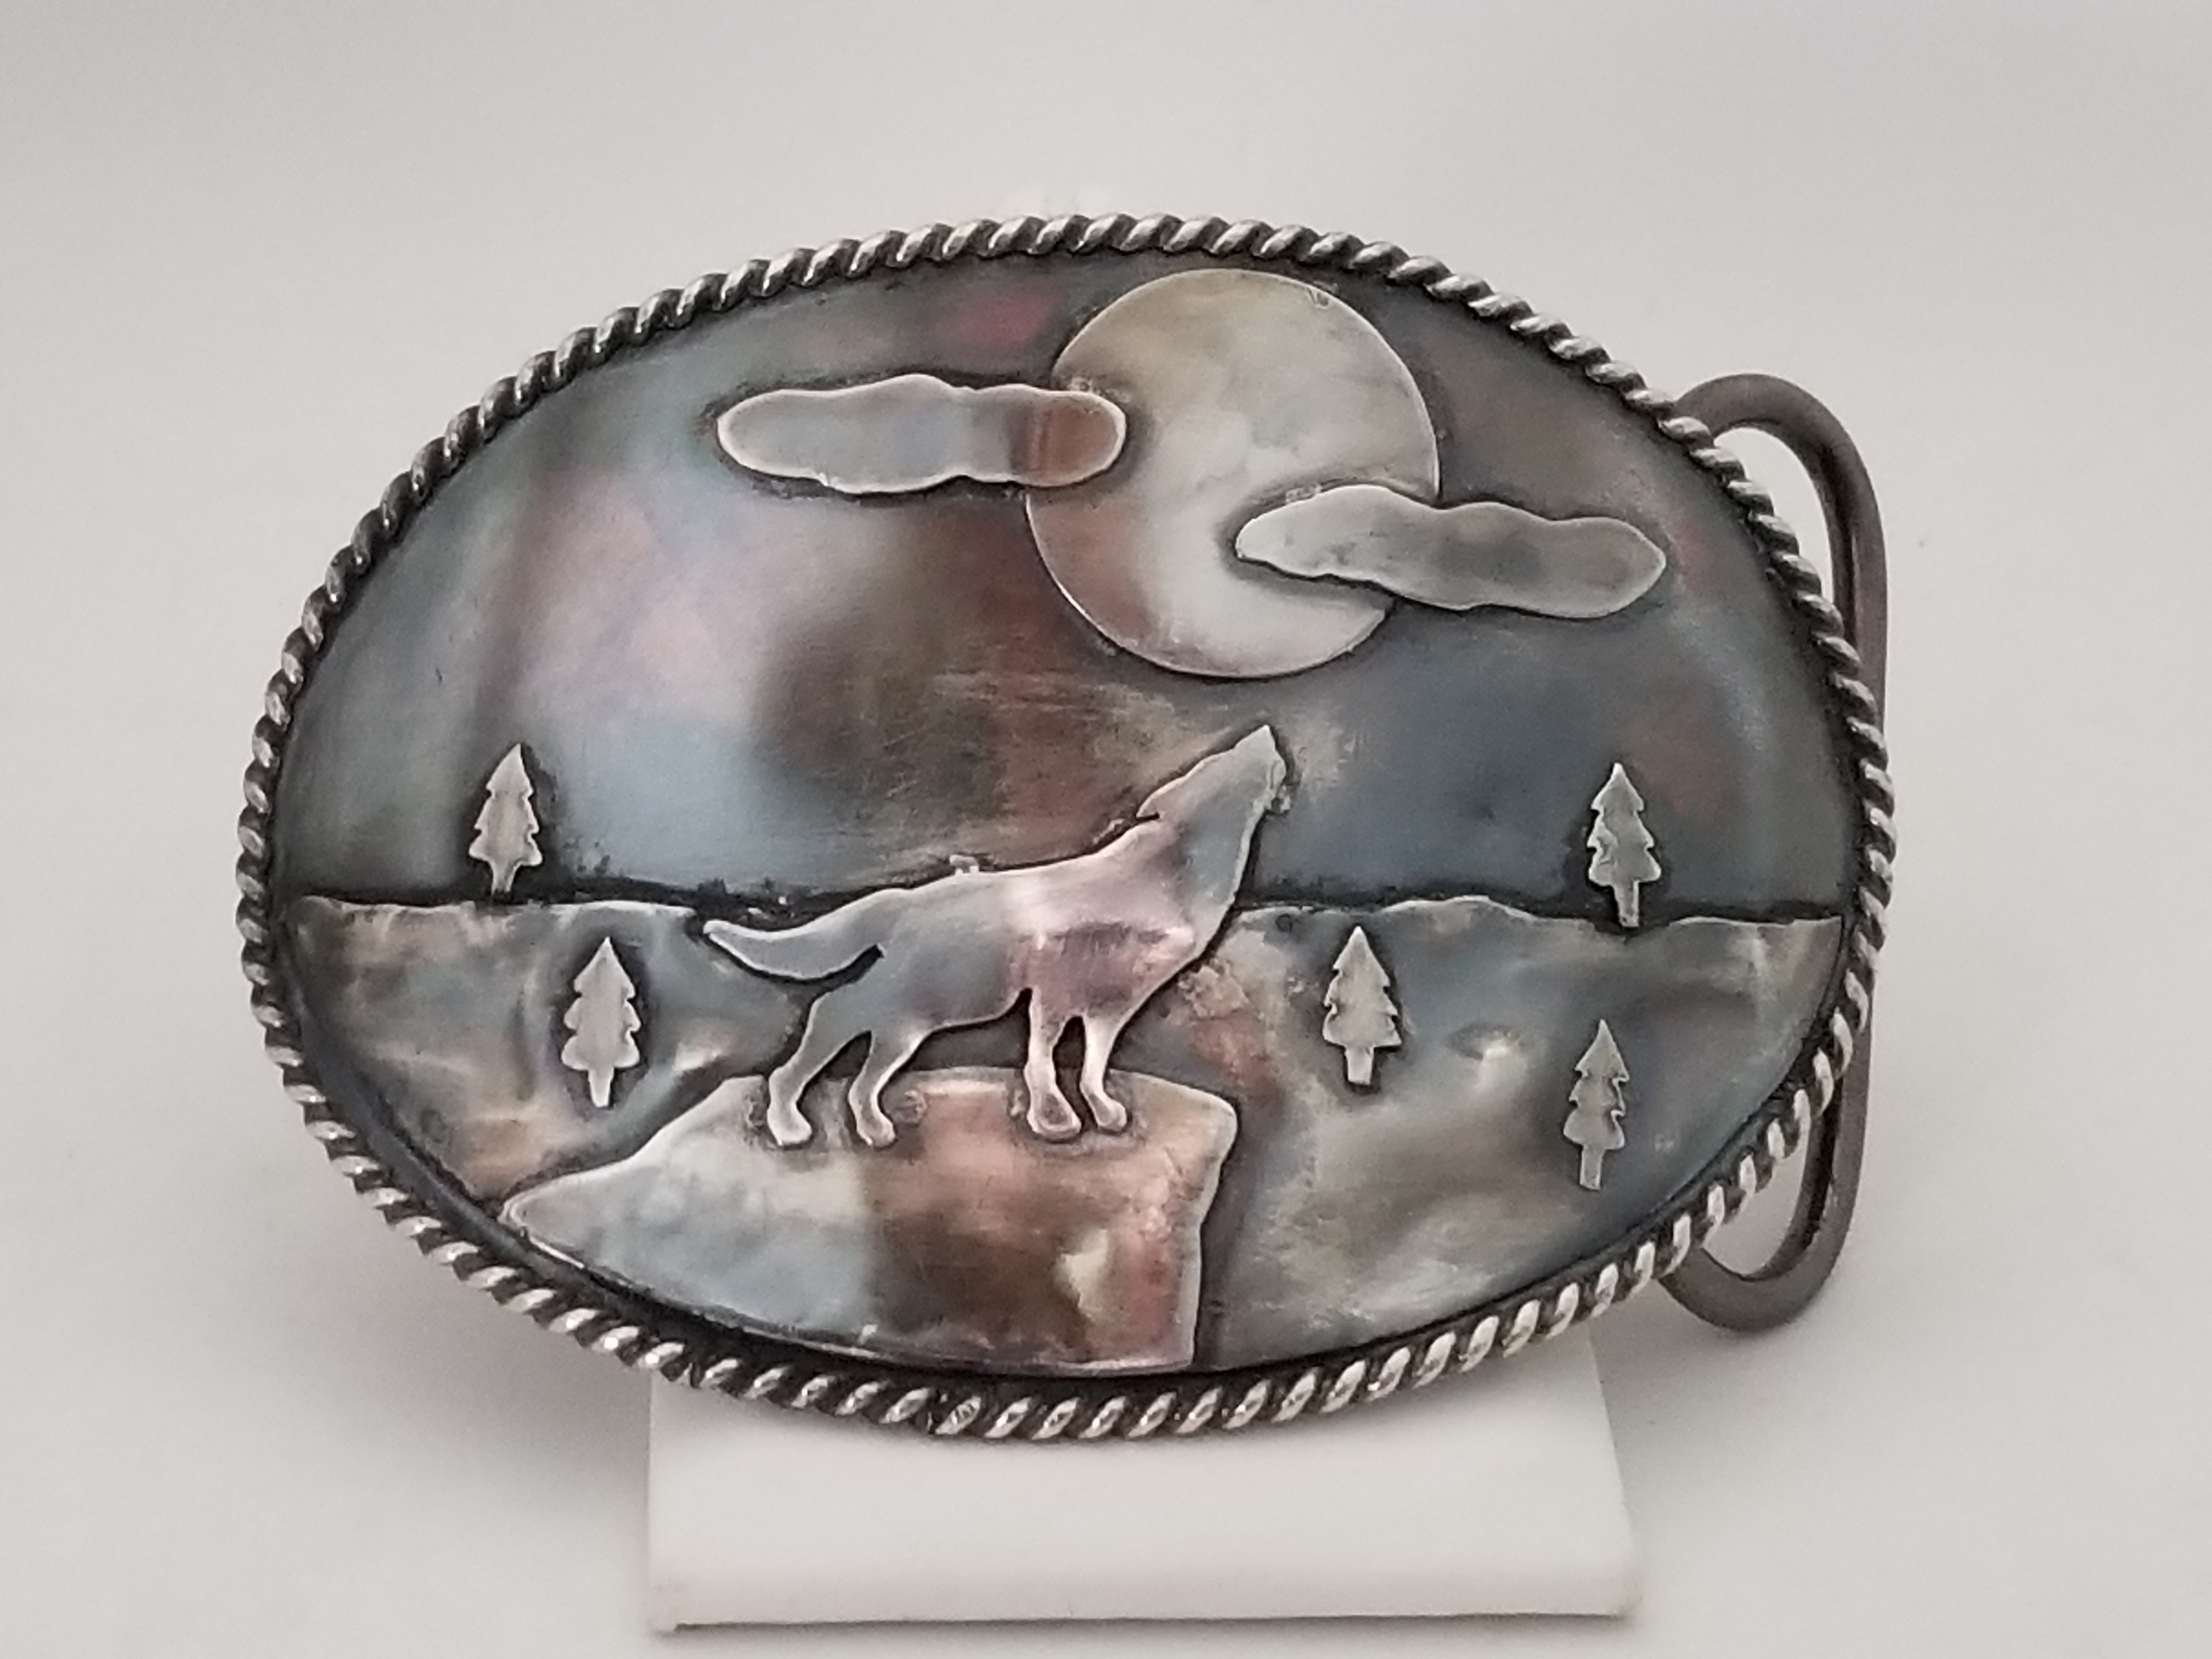
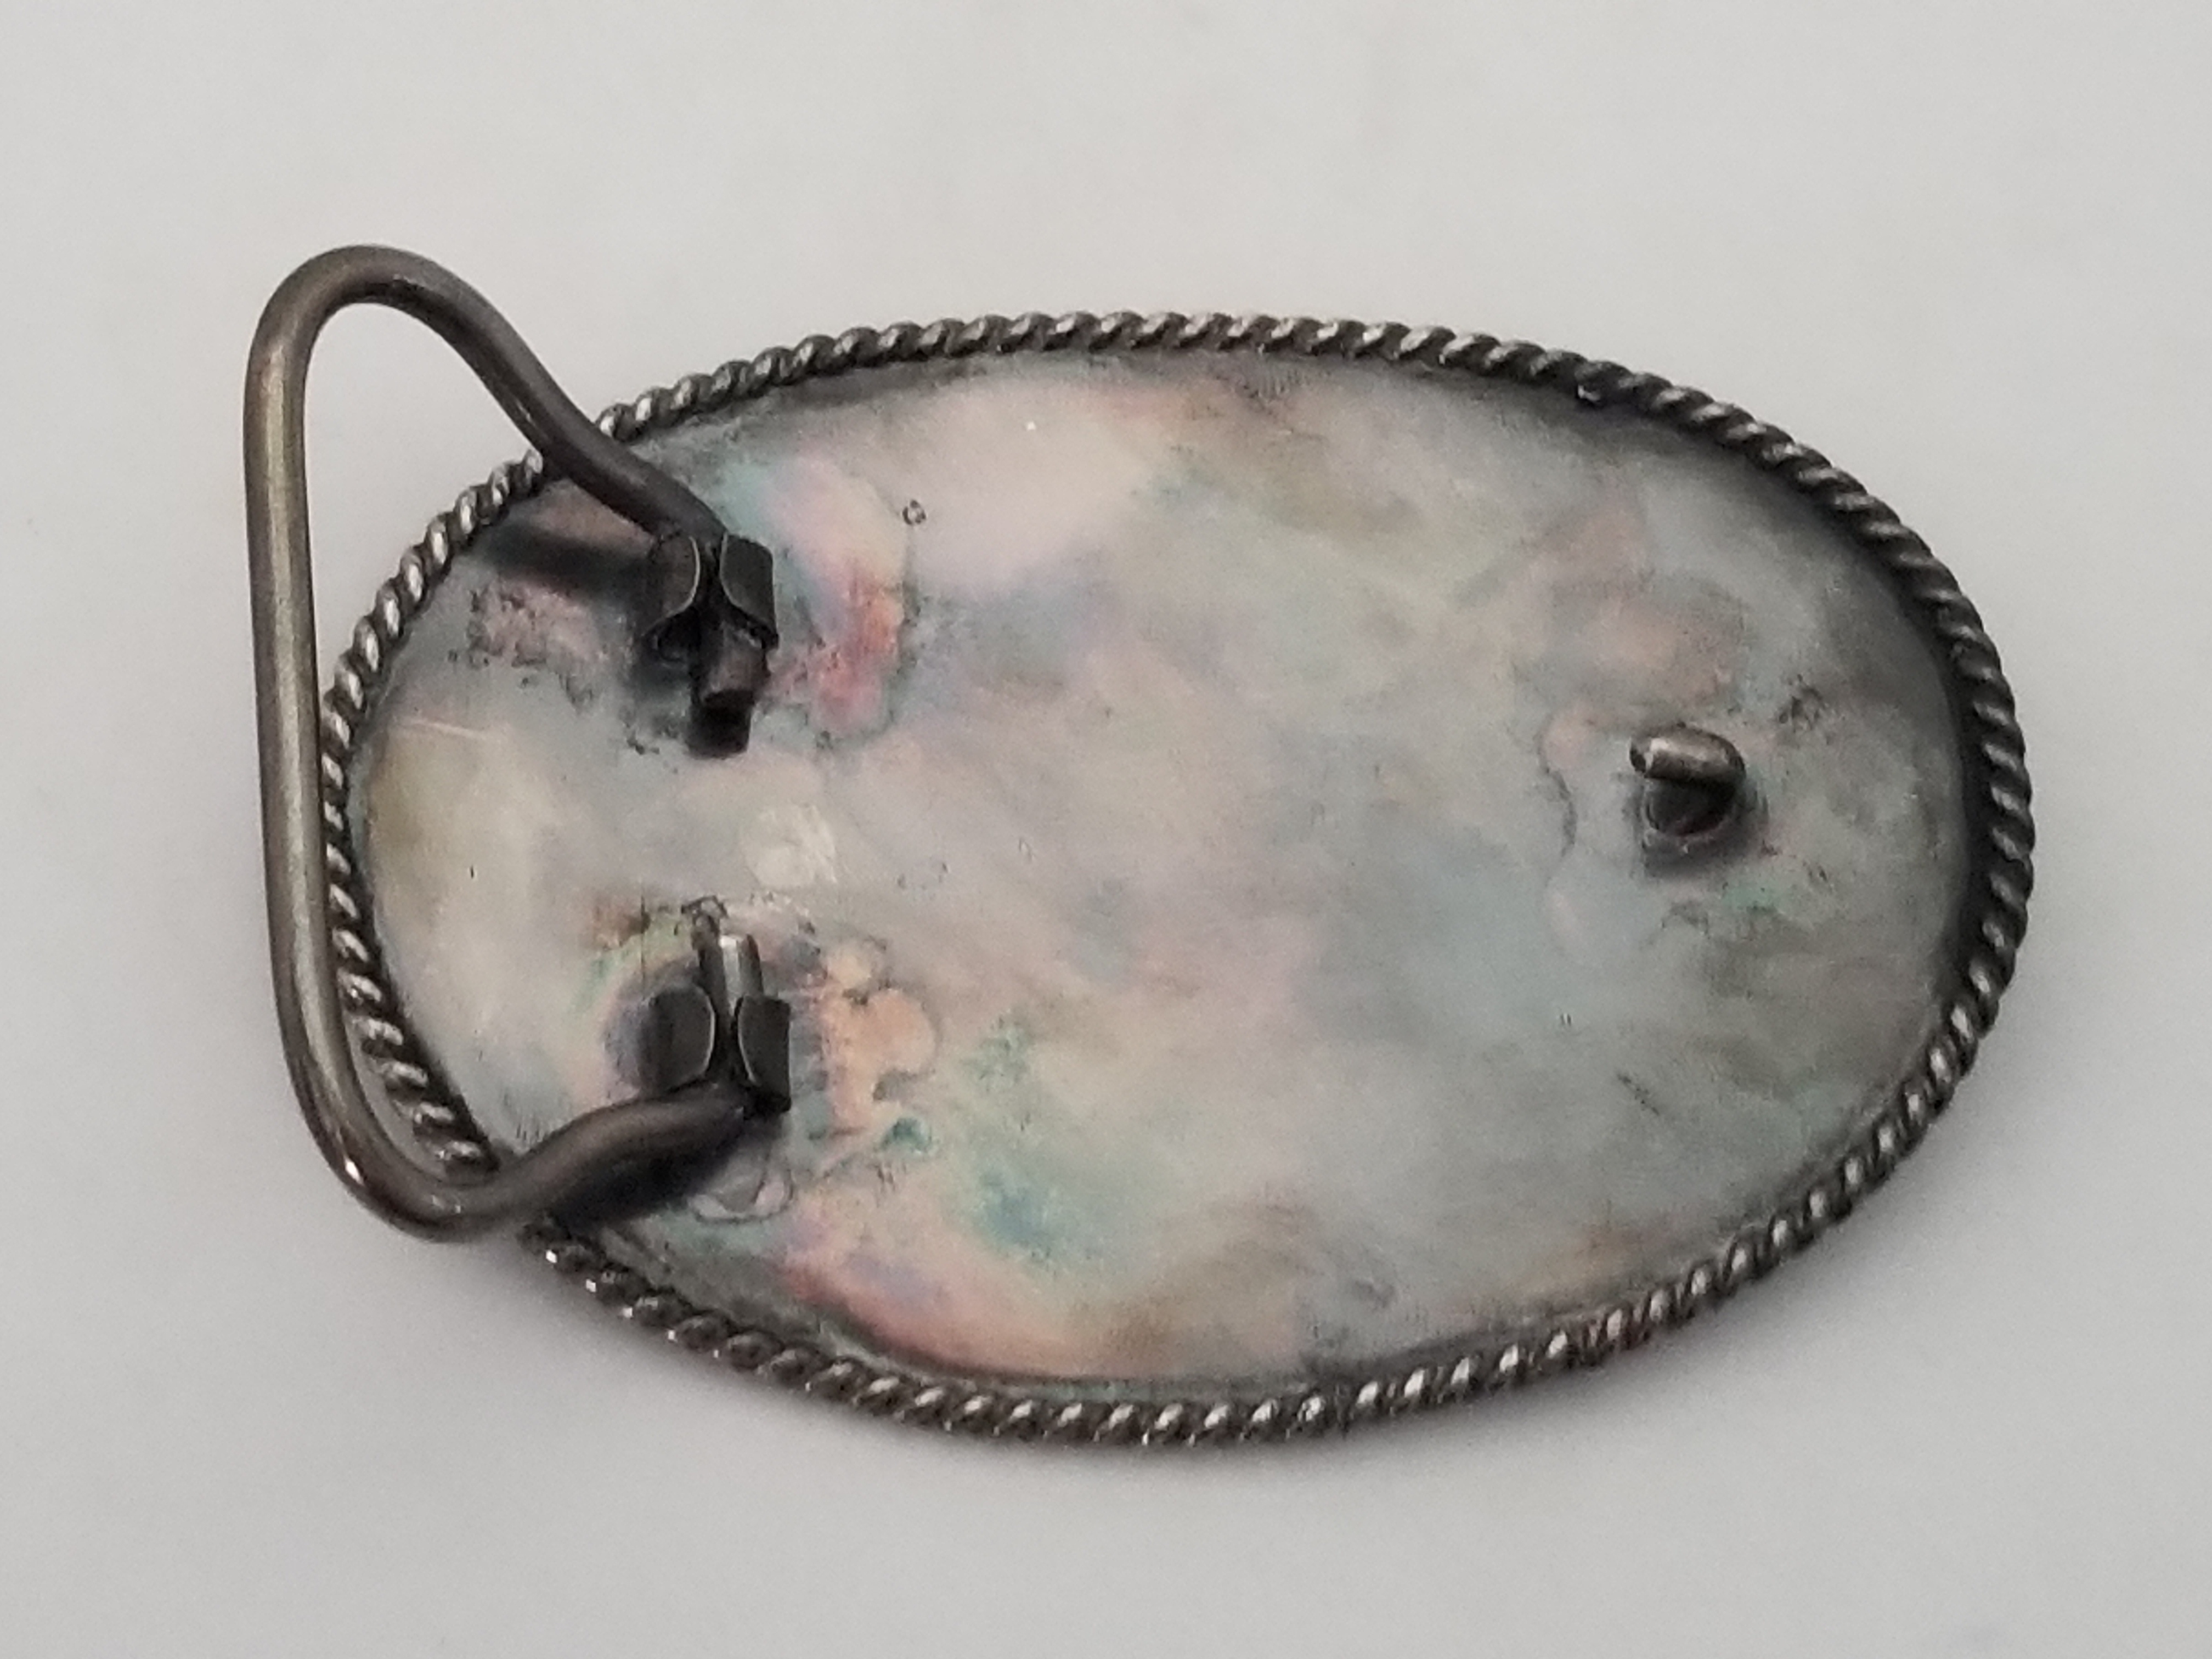
With regard to Rachel Firestone’s buckle project, I tried to guide her to a successful outcome so my final obsevation was put in writing when she posted here the front and back pictures.
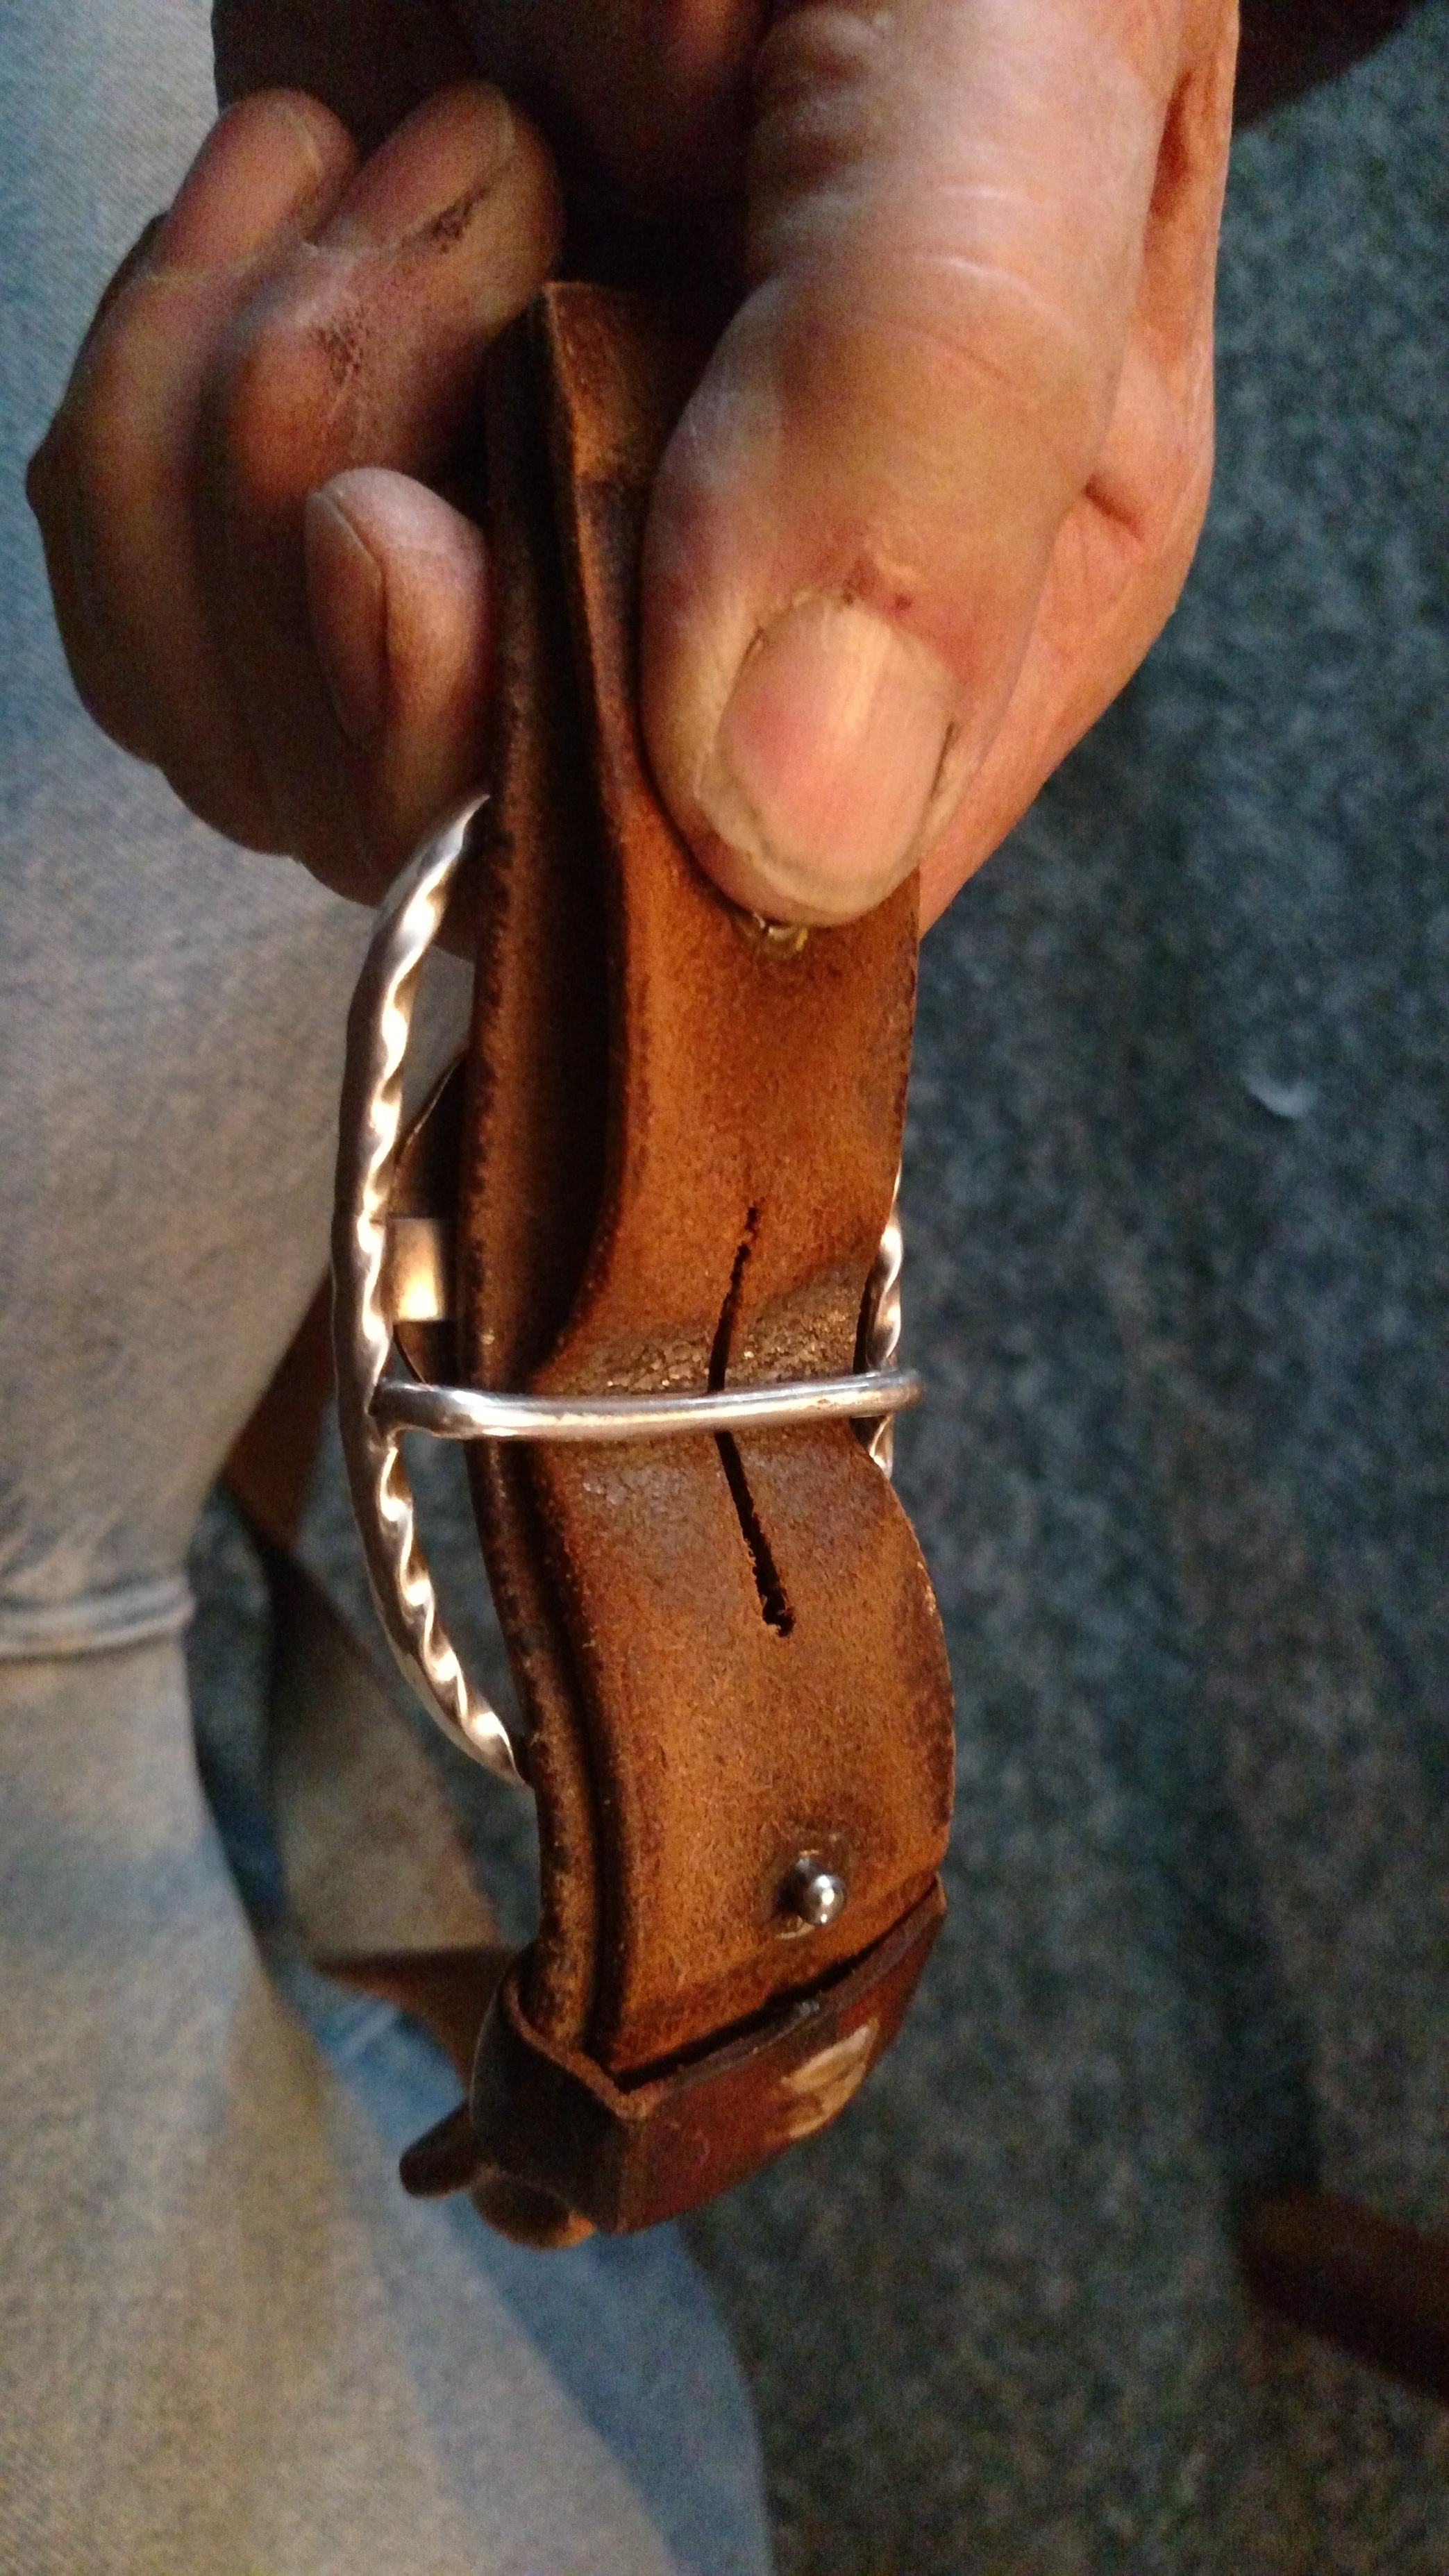
Alas, I wondered from the beginning when the rail crash would happen not that I wish that on any worker, but the 3rd picture is where it will be a disaster. - she chose to put the loops that hold the steel loop to the buckle back with the “U” shape upwards facing, despite me writing it had to be up side down!.
- Also she spoiled the ship for a ha’puth of tar as we say here in the UK, by using a steel loop from the nastiest cheapest pot metal buckles that are everywhere. I recognised it right away.
So my final thought is one I mentioned before. what happens when the buckle fails, perhaps when her “Hubby” (unquote) is at a business meeting? and his pants fall down?
Hilarious laughter all round, and perhaps grounds for divorce?
What do you think? Every other commenter said what a nice job, a case of emperors new clothes?
Back to your fire pull down buckle, tho I dont follow what you say re the L side? mod?
Nicely thought through with proper technical solutions as well. .
Ted.
I’m always trying to consider points of failure or how someone might abuse a piece and designing with that in mind. Not that what I make is indestructible or perfect, but as close as I can get and then learn from.
Always a fine line with critique to make sure the comments are there to help improve one’s work, and I agree with your points on the construction. An easy enough fix though, now that the deadline is out of the way.
In regards to the buckle I posted, the key idea behind it was that the lever was a necessary feature without being (overly) complicated. And it does work as intended; to remove it you can pull the lever down which disengages the hook. However you can also just take it off like a normal buckle, something I don’t really like for it. So I wanted to add another loop on the left side for the belt to slide through while the lever was down. Then reengage the lever at the proper hole to keep it on. This would serve to make the mechanism a necessary part of the buckle’s wear, while also ensuring it won’t fall off on accident. I can pm you a sketch if this doesn’t make sense.
Morning Bill,
its 3 am here , wake up about now to do the wood fires, currently a s/w force 8/9 gale with gusts to 65mph!, , temp 8/9C so check whats up on the forum.
Thanks for your prompt reply, and your constructive thoughts on the buckle beginner.
Re your buckle, your description is clear. I like that.
For what its worth, the rt hand loop is the standard way in the US it seems, to connect the leather to the buckle, by folding it back on itself ,fixing with snaps or sewing or rivetting. That makes 3 layers of leather on one side.
I have chosen to do it another way by having 2 hinge points on the buckle back, then a rectangular wire loop, then a flat metal strip same width as the leather, folded back on itself with a hole through both metal sides? with the leather in between. fixed with a nut and bolt, suitably decorated. If you cant hide it make a feature of it!!. If youd like some pics will oblige. Reduces the 3 layers to 2. This would work on your buckle, tho youd need to use round wire for both loops to match, instead of your rectangular silver strip.
thinking about it some more you may not need the hinge points nor rectangular wire loop, just the folded strip, as this strip moves like a hinge in any case. Did that from 1989 onwards.
Ive a book here on the history of buckles, 1250 to 1800 by Ross Whitehead isbn, 1 897738 17 X pub 1996. Lots of pictures and descriptive texts. In that, the flat folded strip of metal was 1st used in 1350. nothing new. I didnt copy that, just thought it was a logical solution before I bought this book in 2016…
As for making something perfect, it has to be a pleasure to use, and really functional, and speak for
itself. Early on in this thread, i seem to recall I posted some pictures of my buckles, did you see them? As you rightly say the functionality is a separate issue to the bit you see when its being worn. I consider the back of a piece of work should have the same care as the front, even if it only for the owner to see.
Ted.
1 Like
Ted,
When it comes to bad weather you’re not alone! 75 car pileup near where I live due to blizzard conditions.
I’d love to see any photos or info you have, post away. When it came to the loop on my buckle I decided on the KISS method to try and mitigate headaches. Saw your photos as well, love the variety of methods you used for the backs, which are just as important as the fronts! The sign of thoughtful design.
Hi Bill,
after the xmas tidy up couldnt find my camera till now!.
took the following new one plus front view of this yrs anniversary project.
50 off of these ist the production run.
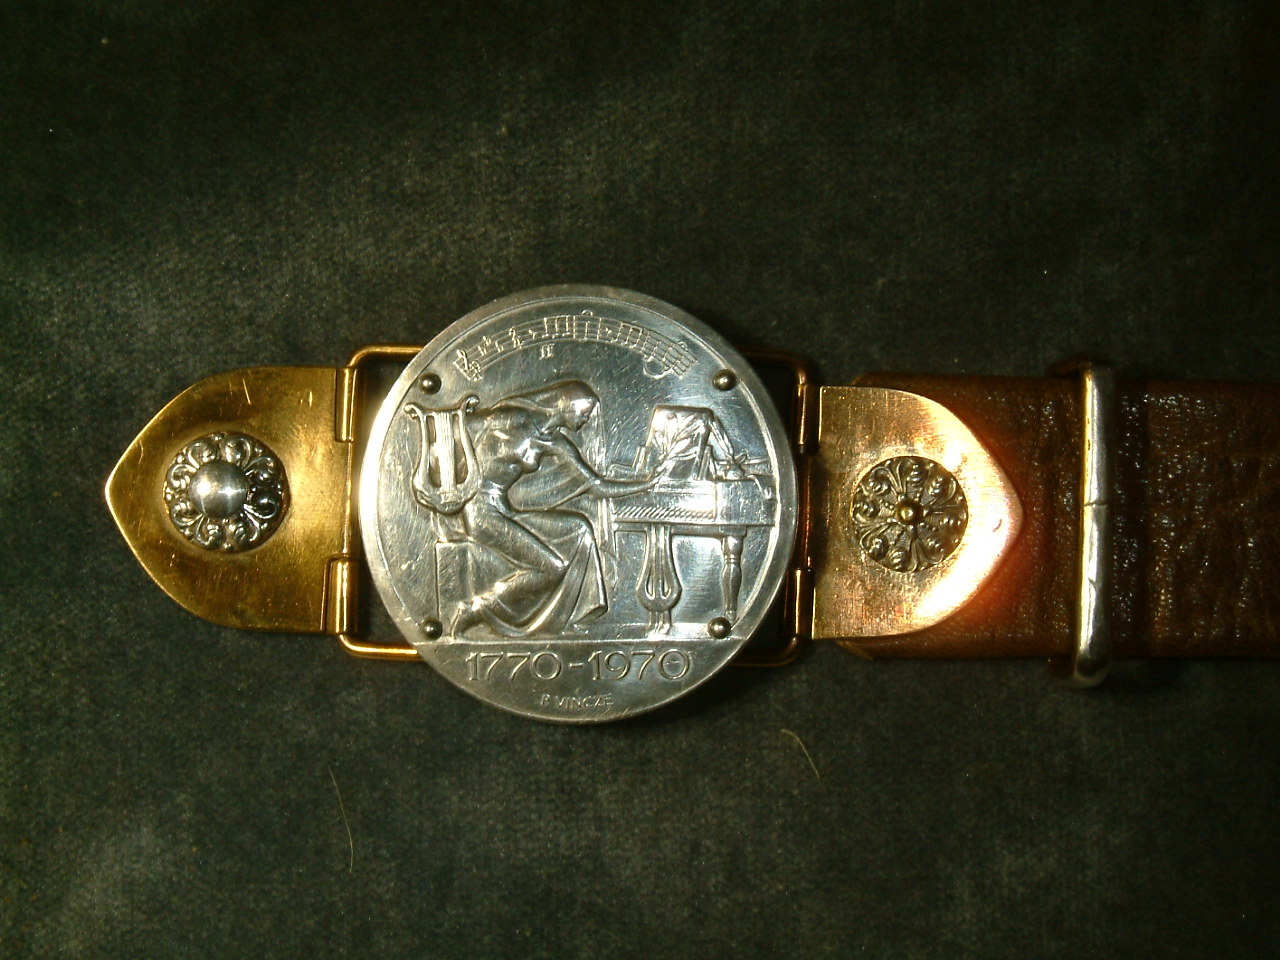
The finished prototype front view shows what is involved, tho the minted design is another of 2 , These are “Night” and “day” by Bertel Thorwaldsen the danish sculptor who carved these in bas relief in Rome in 1830. I now feel good enough to interpret his reliefs in sterling via the minted die route. AND the dies are here, tech superb and artistically faithful to the original. sizes 2.25, 1.5 and 1in in both designs.
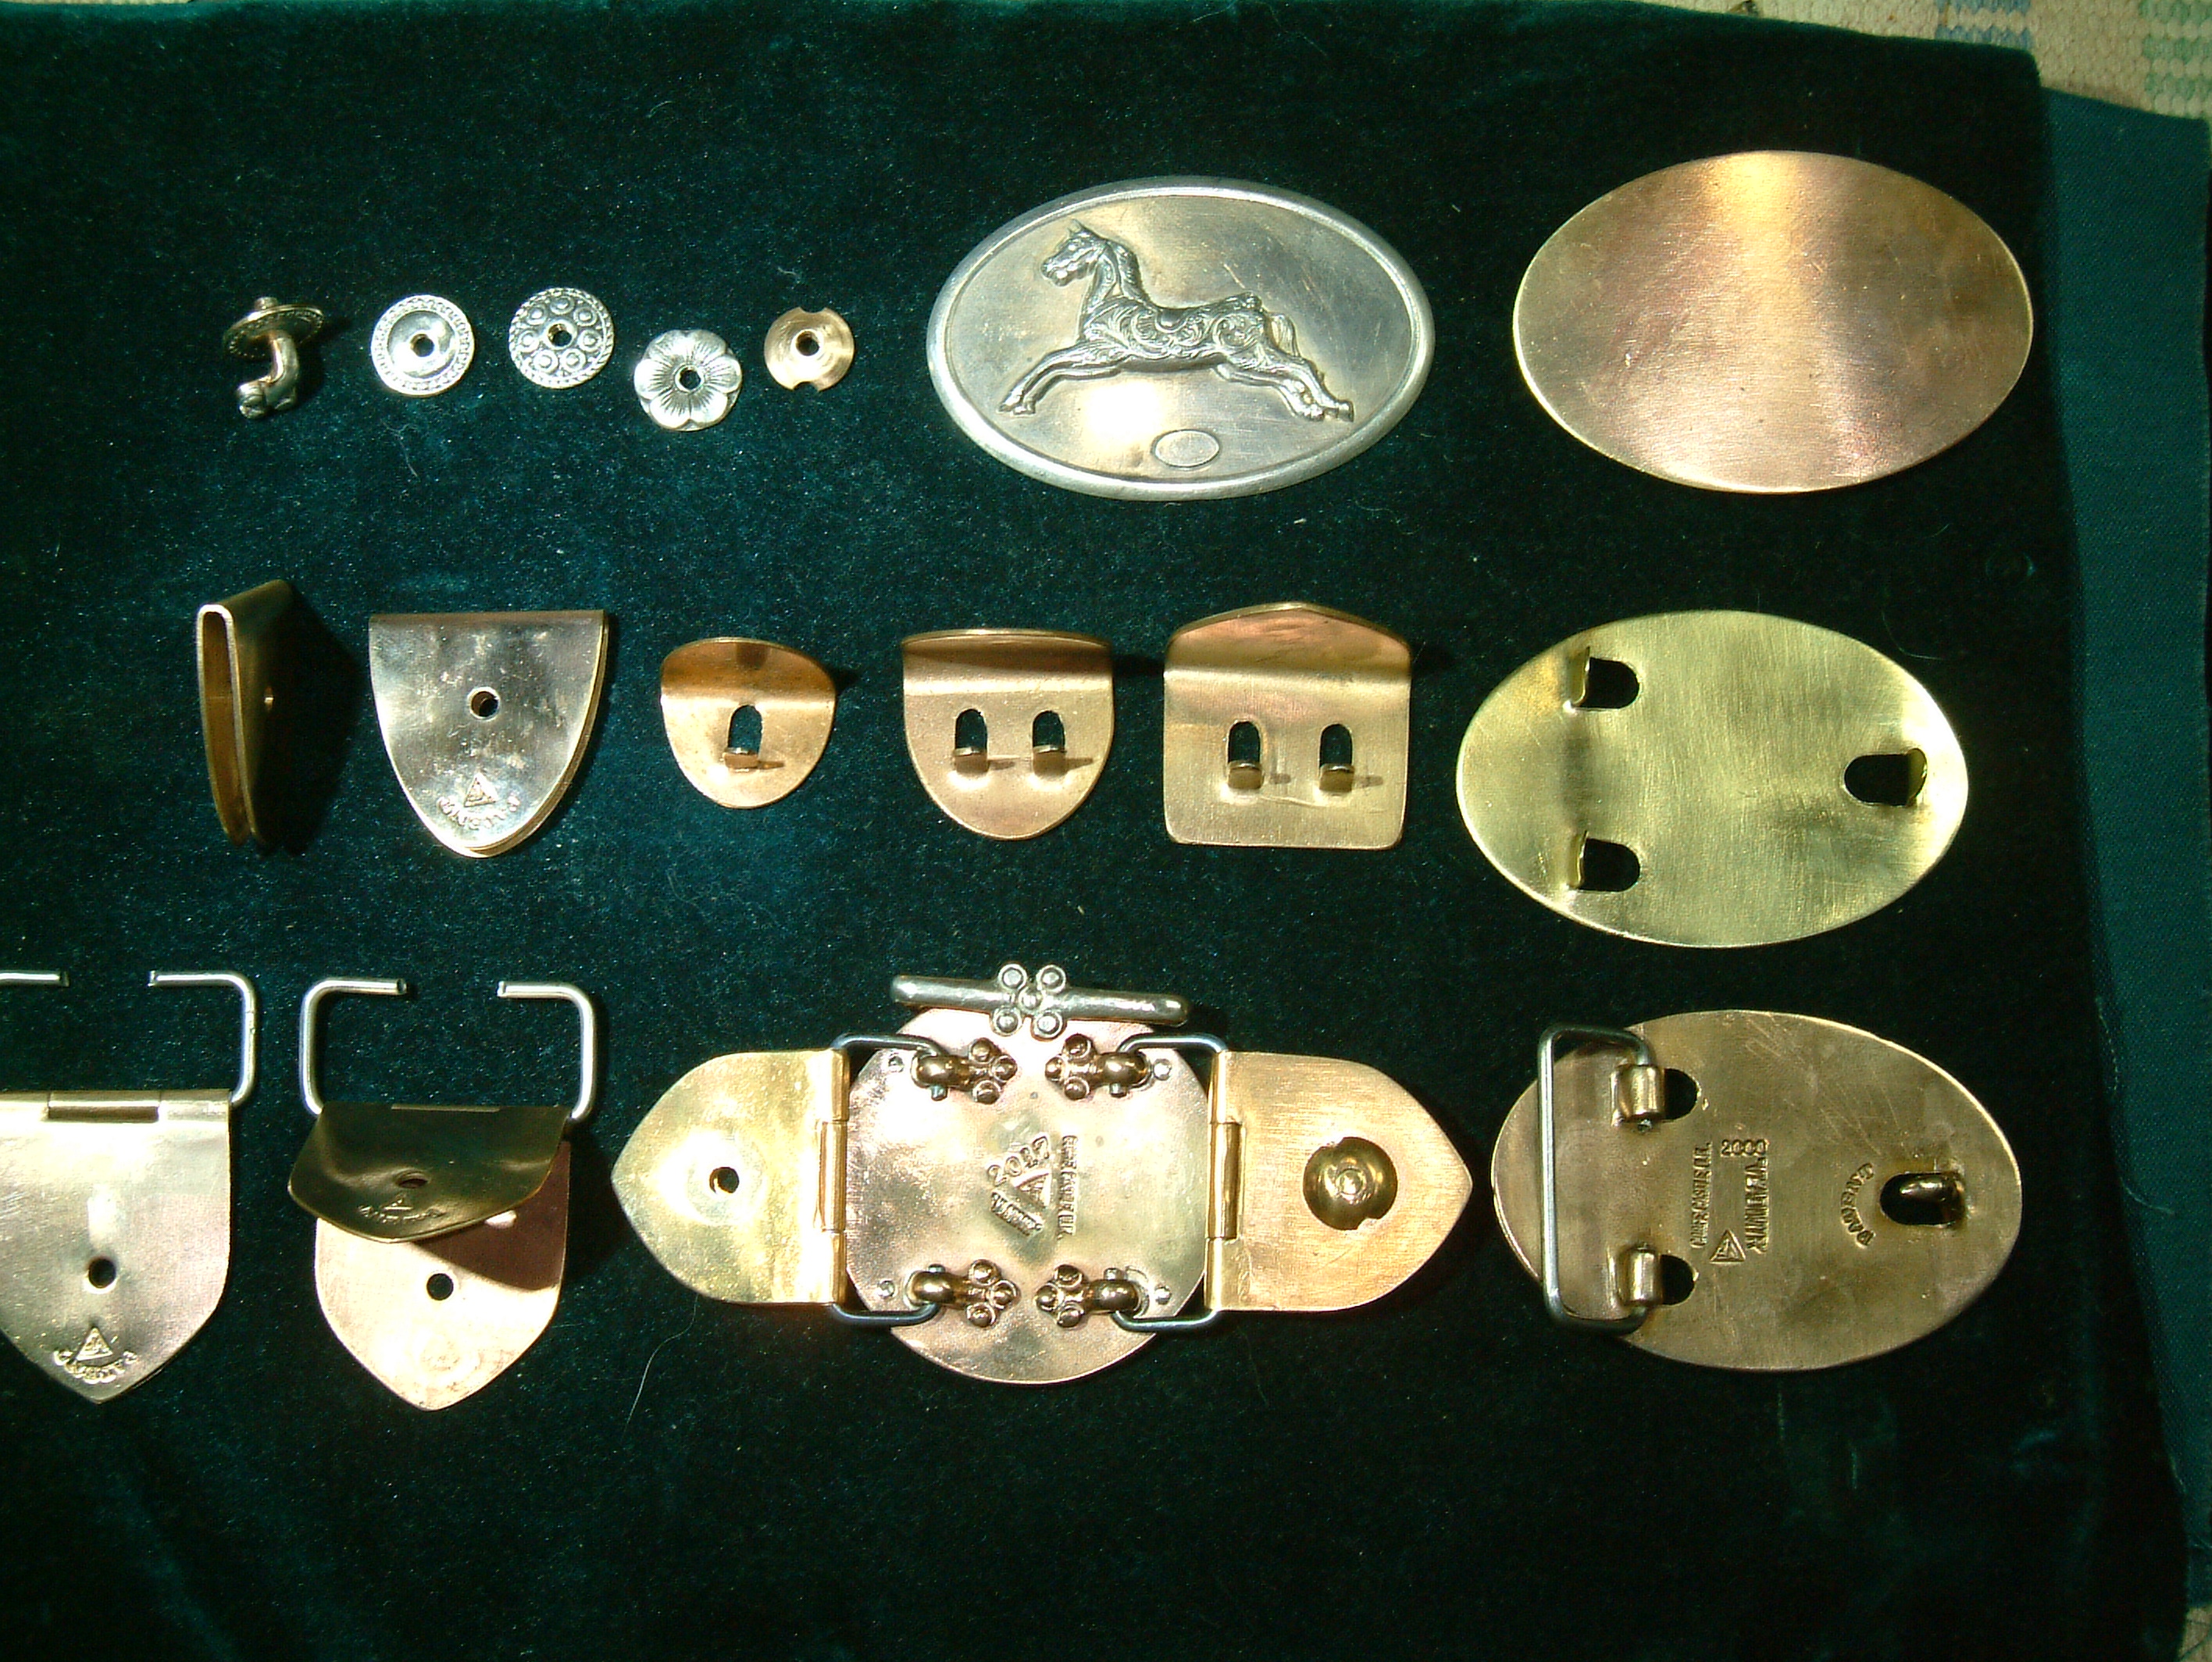
The second pic is of the various ways of joining the leather to the buckle, as well as the reverse of this yrs work in progress.
note the right hand vertical images, this details the process of cold working the buckle back all cold no soldering needed. . This was designed for my outsid in 1989/90 expos where I take the blanked back and process it to a finished buckle in 20 mins in front of the customer.
See the middle row for leather end fittings to the wire loop.
bottom is the hinged type.
top row left are the decorated nuts in duble’ material. minted in button dies!
Drilled and tapped 4mm metric.Only thing dont make is the pan head c/sunk screws…
Enjoy.
Ted.
3 Likes