Why Do My Bezels Keep Separating From Backplates?

Rob –
Nice piece, btw. I have attached a photo of a piece that I made some 20 years ago that used a ~28mm dia. x 4.4mm thick slice of deer antler set in an open back “bezel” of 2mm sterling. Facing the same issue as you, being unable to form the bezel over the sllice (+ there being no back) I simply drilled 3 radial holes around the circumference of the bezel and into the antler slice then used brass wire “pins” to fasten the antler slice into the bezel. No adhesive was used (pins fit rather snug.)

Whether or not this might work for you would probably depend (at least) on the thickness of the cab and whether or not it was opaque (wouldn’t want to see pins sticking into the cab!)

– alonzo

1 Like

I love your style here, Rob. (I may be a little biased – Easily Distracted by Shiny Objects - Alec Kercsó - #39 by Alec) But truly, a beautiful bracelet.

I’ve struggled as well about epoxy adhesive. I don’t know how to create an otherwise invisible connection. In the following piece, I did exactly what you describe, roughing the bezel and the base of the cab to create a stronger mechanical bond. So far, it’s been very stable.

Interestingly, I was recently looking at the SWAIA standards for Santa Fe’s Indian Market entries, and for chip inlay jewelry, they prescribe a ratio of no less than 85% stone to 15% adhesive.

Best,
Alec

Morning Rob,
Ted here,
I read your question and thought that setting from the back is the way to go. Then Lorainne suggested the same.
Id go the engineering route by replicating the spring steel circlip used to retain ther gudgeon pin on a piston, using a s/steel wire. cut a 1/2 round groove just above the base of the stone, then spring in the wire. any possible slop id just fill with 2 part epoxy.
If at any time during making youd need to try the spring wire and need to get it out, possibly too short! then a small vertical groove into which you can push a pin punch to spring out the wire as per a piston would work.
hope this helps.

Rob, maybe you could move the bezel wall with a hammer or a hammer handpiece.

Betty…I have tried. It is sterling and I can’t get it to move even after embedding the piece in thermal setting plastic to hold it. I intend to buy some fine silver (.999) wire and try that. I make the bezel wire by just rolling a piece of 10 gauge wire until it is about .75 mm flat. thanks…Rob

Rob- How are you bezel setting? Using a rocker or burnisher or hammering?
We do heavy bezels all the time out of various metals. We just set them
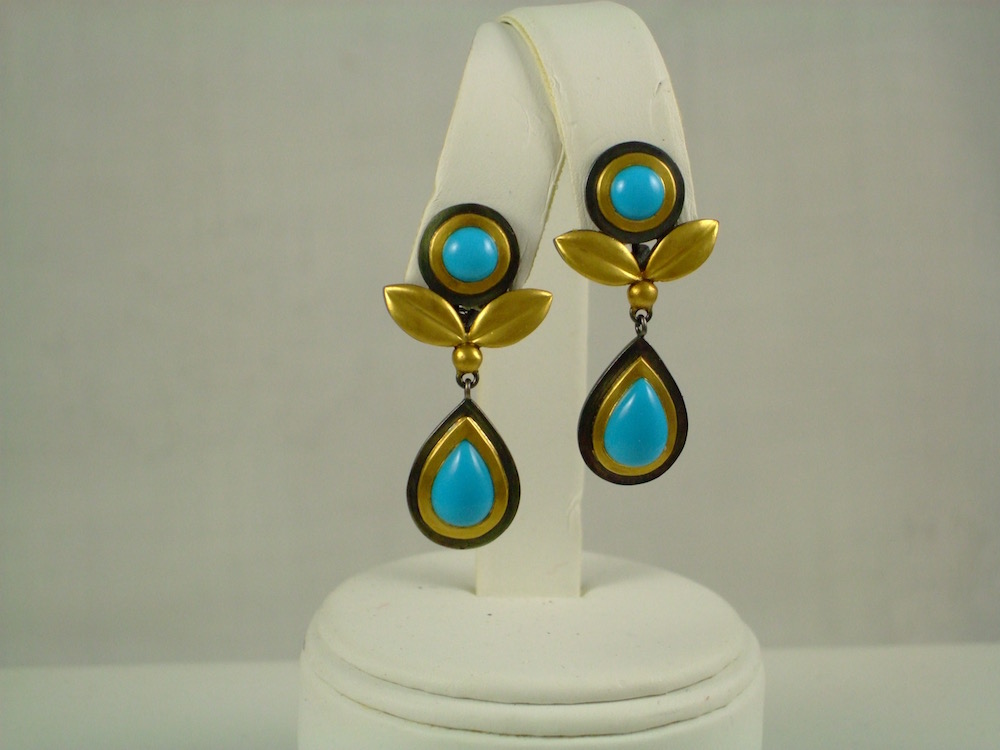
with a chasing hammer and a setting punch. . Attached see a shot of a pair
of earrings I just made. Hammered bezels. 22kt gold and sleeping beauty
tourquoise. “But that’s 22 kt gold.” Yes but we do it all the time in gold,
silver and platinum. The trick is to bevel the outside upper edge to a 45
degree angle. That way the metal will want to move towards the stone and
not just mushroom out in both directions on the upper edge. The bezels in
the earrings were 1.5 mm thick.
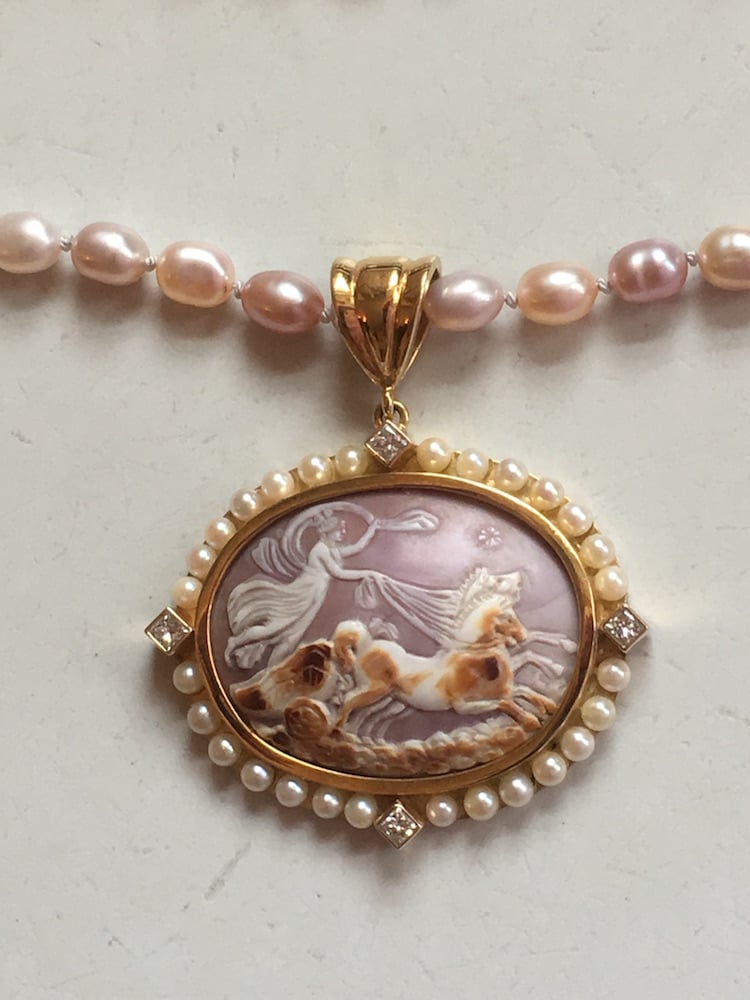
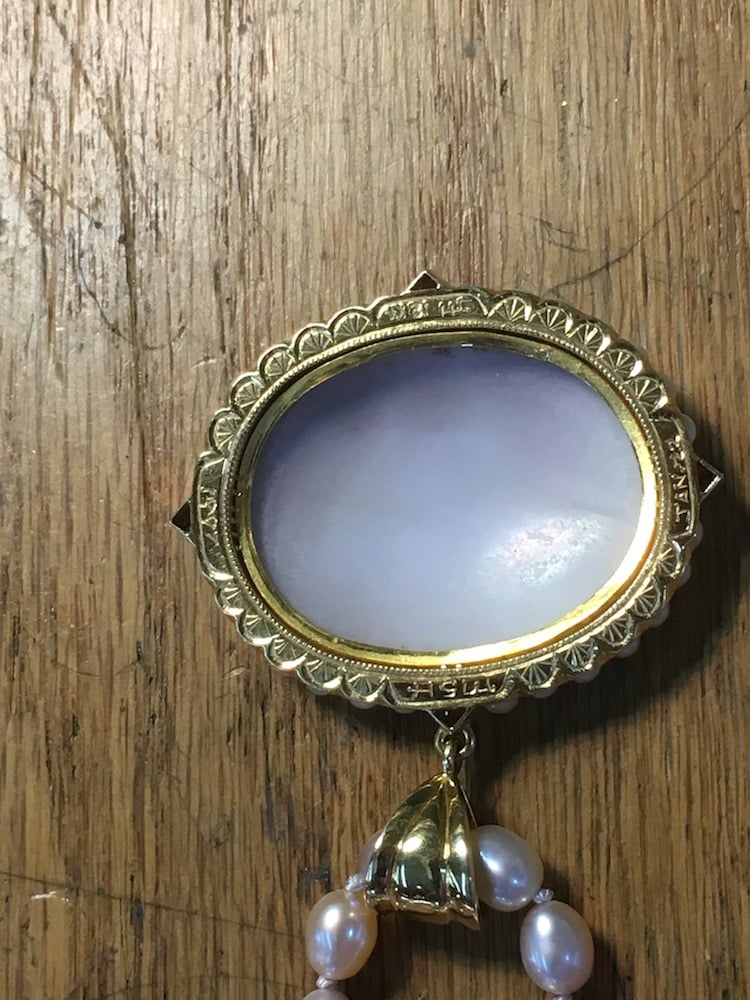
About the only time I set from the bottom is if the stone is too fragile
to hammer on like the example below. In that case I made a 24 kt underbezel
that was fully annealed. I’ve done it in fine silver too for very fragile
cameos. The underbezel is so soft that it contours to the uneven bottom of
the shell cameo. After it is in place then I raise beads to hold it in
place from the back. A very old school technique.
Have fun and make lots of jewelry.
Oh, and step away from the glue son:-)
Jo Haemer
www.timothywgreen.com

2 Likes

Rob, I quite agree with Jo that a hammered setting is your best bet for your bracelets.
I wonder if the reason that you’ve not had luck with a hammer is that you’re trying to push the bezel over the stone from the outside rather than upsetting it from the top. 0.75mm is rather thin for a hammered tube, not enough metal to work with. On those occasions I’ve made tubes for hammer setting I’ve made them at least 1mm thick so the setter has plenty to work with.
I don’t mean to teach my grandfather how to suck eggs, but on the off chance that you are unfamiliar with the technique for a hammer set tube I’m including a diagram.

1 Like

I am enjoying this discussion of bezels. I believe that in 30 years I have set five cabs. Three in bezel cups and two in bezels I made start to finish. While my pieces tend to be all our combinations of Sterling, Gold, or Copper I have left the stone work to Rob which as you can see he is very good at it.

Recently I have decided to go adventuring in the direction of bezels and cabs of one type or another. Largely to work in with my kilt pins and Sporan fixtures. For my set pieces I am looking at horn and mother of pearl. I believe I have deluded my self into thinking it can’t be a lot different than the MOP inlay work I have done in some banjo head stocks.

I will try and add a photo of a Bolo Slide I am finishing this weekend and a piece of Sporan flash with a horn tip. The MOP us just setting in the cup.

Very basic bezel work I assure you.

But the start…

Don Meixner

Sent from my Verizon Wireless 4G LTE DROID

Don, did you polish that horn? If so, what did you use?

Jo…I was hoping to hear from you as I remember you writing several times that you regularly set stones in wide bezels. I just can’t get the metal to move, but the top surface is flat. That is the look that I was trying for, so I glued it just to see how it would look. I agree with you about glue. Fortunately, a little heat and the glue lets go and I can start over. My plan is to try and finish the surface at an angle and then see if I can move it. I have both a hammer on my flexshaft tool and have made small punches. The other idea is to make the bezel out of fine silver. I like the back being closed, but could also taper the inside of the bezel cup and solder tabs on the bottom. I do this when the stone is translucent. I don’t set any faceted stones so, I have never learned to raise beads. I know that this is basic stuff, but Dad never did it, and I haven’t taught myself how to do it yet. I am nearly 70 with too much to learn and not enough time to do it in. Thanks all for your comments to mine and the original posters questions. This is the beauty of Orchid. Anyone at any point on the curve can give and get. Thanks…Rob

Jo, the bezel on the earrings looks flat, as if the bezel wall is thick and short.

So if the bezel wall is 1.5 mm thick, it appears to be only half a mm tall.

Beveled edge or not, how are you able to push on such a short, thick wall?

Sent from my Verizon Wireless 4G LTE DROID

Betty and Rob- To set very wide bezels I bevel the upper outside edge at a
45 degree angle. As I hammer down, the metal wants to move in and
eventually becoming flat on top. If I try to just hammer a flat top heavy
weight bezel down it will move both out and in leaving a mushroomed edge
and very difficult to get tight. The bezels are 1.5 mm wide and 1mm tall. I
hammer the bezel most of the way down and then bright cut the inside edge
where it will touch the stone. After bright cutting I then gently hammer
the bezel down til it touches the stone. The setting punch I use is just a
piece of key stock that I cut, shaped and polished. It’s rectangular about
2 mm by 2.5 mm. The surface is very slightly convex. Think the slightly
domed side of a planishing hammer. The edges slightly beveled so as not to
gouge the bezel and the surface is brightly polished. I hammer very very
lightly to slowly and evenly bring the metal down without heavy marks.
Have fun and make lots of jewelry.
XO-Jo
www.timothywgreen.com

2 Likes

Jo…Thanks! Not only do I need to learn how to bead set, but how to bright cut as well and the clock is ticking…Rob

Bead-setting & Bright-cutting is so easy… it’s a “piece of cake” some big cake!!!..contact me if you wish

Gerry! from my mobile-phone!

Jo and Tim are amazing craftsmen! I would absolutely follow Jo’s advice!
I would offer a couple of other suggestions.
You mentioned that rolled your wire through the mill. Do you thoroughly anneal it? “Dead soft” metal is easier to move. Try buying some 4 X 2 MM flat stock or something that works for you.
The other thing I thought about was you mentioned that you do your own lapidary.
I’m in Santa Fe and there are many inlay artists here and they all use some sort of epoxy. If you’re concerned about the epoxy letting loose, cut a groove on the inside of your bezel with hart burr. Cut a groove near the bottom of the stone with a separating disc. It doesn’t have to go all the way around. You’re just making a physical “lock” that will hold even if the glue doesn’t. Just make sure the stone fits well.

I listen very carefully to whatever Jo and Tim write as I really admire their work. I also appreciate that they are wiling to share. I know that I need to add to my skill set. In particular, I need to learn some of the skills that are used by fine jewelers. My work is more art jewelry. Yes, I know, we have discussed these terms at great length, they just work for me. I am almost completely self taught other than what I learned from our Dad years ago and there is really no place nearby where I can go to learn more other than to go back to school and get yet another degree as they won’t let me audit. I do anneal the bezel material before I try to move it. I have also set hundreds of cabs in thin fine and sterling bezel material using a burnisher, roller or hammer piece, I am just having a bit of a problem transferring this same technique to wider bezels, hence my post. I have done exactly what you describe in securing transparent stones to an unbacked bezel. I have also cut a groove around a stone and rolled the bezel into the groove. I will keep on experimenting and look at some of Gerry Lewy’s notes to see if I can teach myself how to raise beads, bright cut and other skills that I currently lack. More when I know it. Thanks to all…Rob

Gerry…I look at your blog and have read most of what you have posted on or via Orchid. You stress a right side graver. I am left handed and would likely go around a bezel in a clockwise direction. Does this mean that I need a left sided graver? Thanks…Rob

I’m left handed as well. When I bright cut the inside edge of a bezel I go
in both directions. If I get a high or low spot or a bit of chatter in my
bright cut cutting in one direction I go back over it from the other
direction and it smooths out. There are both right and left onglette
gravers. I also use a highly polished 42 flat graver for this.
Have fun and make lots of jewelry.
-Jo Haemer
www.timothywgreen.com

Following is a series of pictures where I have tried to do what Jo and Gerry suggested in the setting of cabs. The stones are a couple of practice lapis pieces that I had. I have an interesting way to cut round stones that I will describe sometime. The first three pictures are of a setting where I tried Gerry’s suggestion of using a small hammer to move the bezel. The hammer is actually one that I made in 7th grade shop class. Since I am about to celebrate my 50th high school reunion, 7th grade was a while ago. I was so sure that I would wreck the stone that I didn’t bother adding a bail. I should have as the small hammer that I used did a good job of moving the metal and required very little clean up since I polished the head first. I actually made the bezel from triangular sterling wire that I rolled. This also gave me the 45 degree side that Jo suggested. The second three pictures are of a slightly larger stone where the bezel material was rolled flat sterling about .75 mm thick but higher than the smaller piece. I filed the 45 degree angle and moved the metal using a hammer piece. This required a lot more clean up. Now I just have to figure out bright cutting the inside edges. I will order some fine silver wire to see if that makes any difference. Wish I had put a bail on the smaller piece. Thanks to Jo and Gerry. I will keep on experimenting…Rob

3 Likes