This delicate setting project is now ready for you all to read. This is a definite must-read, why? One day, so very soon you might be needing some information on “How to set Three Round stones in Three Bezels!”
This essay covers all of the necessary information on Bright-Cutting, repairing of a graver, making bearings, how deep your bearings must be and lastly filing where necessary in making this wonderful looking ring a “Piece of Art”!
***Gerry Lewy ***
In this essay, I’m not discussing anything to do with stone-setting. I’ll be explaining rather where and when & of course, which Pumice wheel that should be used in the ‘clean-up’ process.
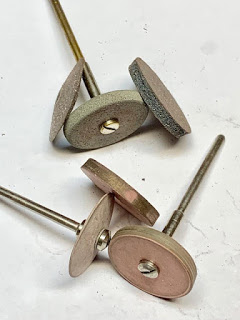
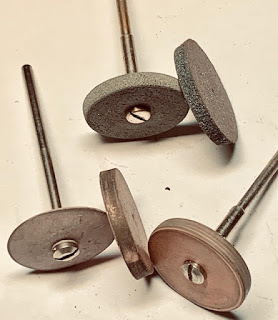
There are basically only two Pumice wheels that I use constantly, they are both the " Flat-Faced " and the " Tapered " edge.
The next question is which ’ grade or grit ’ is commonly used? I’ll use my experience as a Diamond Setter to guide you further!
My choice is a #180 grit, with a “Medium” texture! Nothing more than these for the clean-up.
The colours are a “dark-blue” in your tool suppliers office. There is ‘light-blue’ these are not mine!
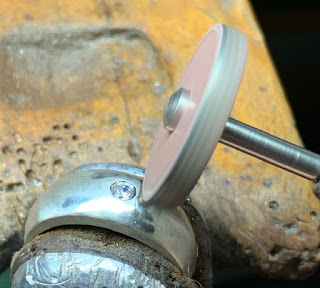
The next is a “Pink” colour-wheel, with a grit of #1,000 . These wheels will cancel-out any further meticulous cleaning to your metal then using the cloth-wheel polishing.
These two (Tapered) styles of pumice wheels can get into so many crevices that no file or “Tripoly, or Rouge” polishing can get into. The catch-phrase is " keep your edges and surfaces flat & sharp! " The cloth-polishing wheels just usually ‘round off the edges & corners’…:>(
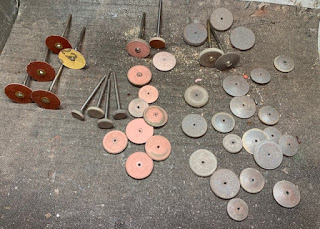
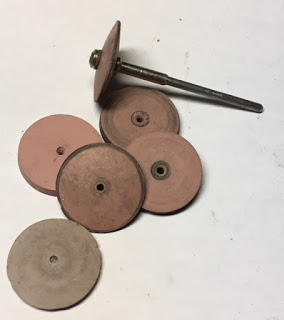
Here are only a few of my assorted Pumice and Emery wheels of all shapes and sizes.
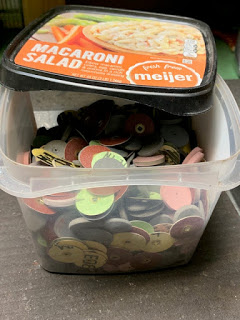
On some of my teaching classes, a few of my students didn’t need all of the wheels I purchased for them. One night I had no container to use…after my dinner, I kept the box, but I ate a great salad!..:>)
So here is a large size container and it came with a tight lid.
"Alas, poor pumice wheels, where for art thou?"
I always have a “back-up” of assorted-wheels in case of any emergency and so should you!
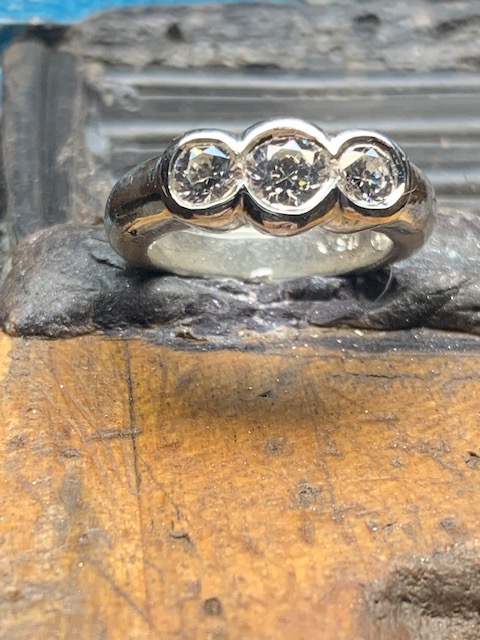
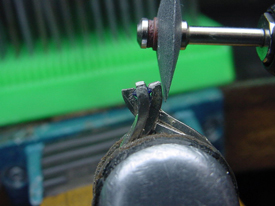
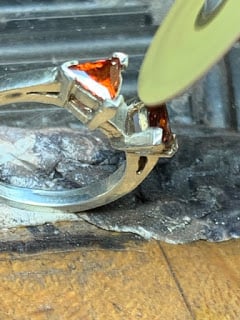
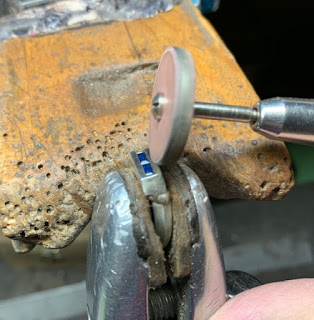
In this interesting photograph is the exact process I used in cleaning delicate areas of a basic flat-surface engagement ring. On the back of the claw/prong, I would be using the side of the ‘Pumice wheel #180 grit’ as shown.
I totally avoid any use of a file! I need to have the surface of the metal smooth and no remnants of striations from the teeth of the file.
Try and have extra ‘mandrels’ for those wheels, timing is of the essence when you are rushing to get a ring finished. Two mandrels the #180 grit (Flat & Tapered) and two more for the #1,000 grit of the same.

This previously written (2016) essay supports my present ideas on ‘which’, ‘where’, and of course ‘when’ to use your Pumice ‘cleaning’ wheels.
(For this essay, I’m posting many photographs to better explain each mini-topic!)
“Pumice Wheels @ #180 grit!”
There are many tools on the market these days that is now used constantly in the “Diamond & Gemstone Setting” processes. The one that I believe is most important, is not the Pillar or Triangular file, but the often ignored is the “ Pumice Wheel ”. I, and with most setters that I know, use only the #180 Grit. There are many too smooth grades a.k.a. #240, I prefer the basic #180, why so? It is not too aggressive, but still, it cleans and is really very gentle around anything that you are setting & even cleaning.
Let’s suppose that after you complete your filing around Claws, Bezel and even Channel-Setting. It is imperative that you should use an even smoother textured-apparatus, namely the ‘ Pumice Wheel ’.

If you are not using them, you have just nothing to lose, the results are just fantastic. You could even experiment on where you could find other uses for them. In your jewellery fabrication, these can be a ‘real life-saver & gift’ for your cleaning, even prior to the polishing with your wheel-buffs.

I’m using the side of the wheel to get close to the claws as I can.
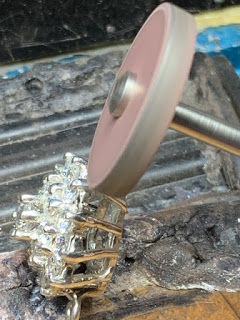
I’m using the very tip of the Tapered wheel but now at a much slower speed.

After your filing, there are even little striations left on the metal, so how do you remove them? Don’t polish them off, why so? Easy answer, you’d be then making all the ‘squared-off’ claws or flat surfaces, actually be then rounded, not too nice after your hard labour . <= ( I type and use the “Canadian spelling” version, in all of my essays.)
To continue on; let’s suppose you’ve used your ‘Emery Disks” just to do some last-minute cleaning and you still notice some rough surfaces. You say to yourself, “ What happened, these marks weren’t here before? ” The ‘Fine’ or ‘Medium’ grit on the sanding disks are to blame, then STOP!
Get out your Pumice wheel and ‘redo’ those ‘rough-textured’ surfaces!
In the following photographs, many of them are ‘staged’ just for this essay. Of course, I wouldn’t be holding the rings in a soft material that way, they are only to demonstrate how the wheel will be in contact with the claws and other surfaces.
What stones can I use these wheels next to? With great care and experience, these can be used literally beside any soft stone! Although it does need some practice to use them near Blue Zircon, Turquoise, Opal and very carefully…Pearls! ( Sorry I don’t have any photo’s of these rings in progress ). I have a multitude of ‘wheel mandrel’s, why so many? All the time you are using the wheels, you might be wasting time removing one wheel shape to another…just buy many of the mandrels and keep your mind on your work, not stopping to remove, put another wheel on. AKA “time being wasted”!
I, even at times, use the ‘worn out’ wheels to clean the inside of the ring. There are so many other uses, all you have to do is to be creative!!
After a short period of time, you need to keep your flat surfaces FLAT , How would you manage this? You could use your ‘sanding disk’ or a Corundum (separating disk) and just reshape your pumice wheel, as needed.
Just keep those wheels ‘trimmed and cleaned’ & ready to be used again.
In my opening remarks, I did say that these wheels are a ‘gift’ to the jewellery bench. Learn to use them as often as you can, use the Tapered wheels to the little areas.
BTW, I use the #1,000 grit Pink wheel as these could be used in lieu of the polishing cloth-wheels. Why use the (aggressive) “Tripoli & Rouge” as you have been using? When you could have been using the Pink #1,000 grit instead!
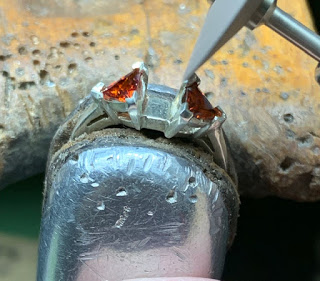
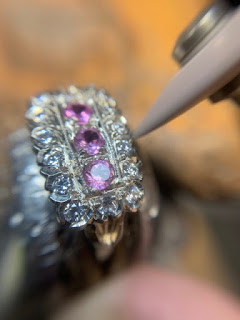
Stay alert as to where your wheel is touching the metal or you will have ‘scratches’ put on to the ‘Facets’ of the stone.
Be very gentle and have your wheel rotate at a slight angle AWAY from the stone.
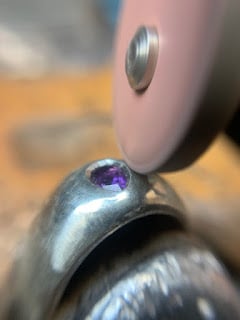
These wheels are just great for Gypsy Setting . Avoid any filing, but use a “Fine” texture Emery & Pumice wheels extensively.
I always set my stone further into the metal, just to avoid any unforeseen ‘catastrophes’ when cleaning near the stone.
Now you can ‘save’ those delicate stones in any kind of setting patterns.
I sincerely hope you have ‘found a new friend’ and they are the Pumice Wheels! Two words for you to remember, they are; " Experiment often !"