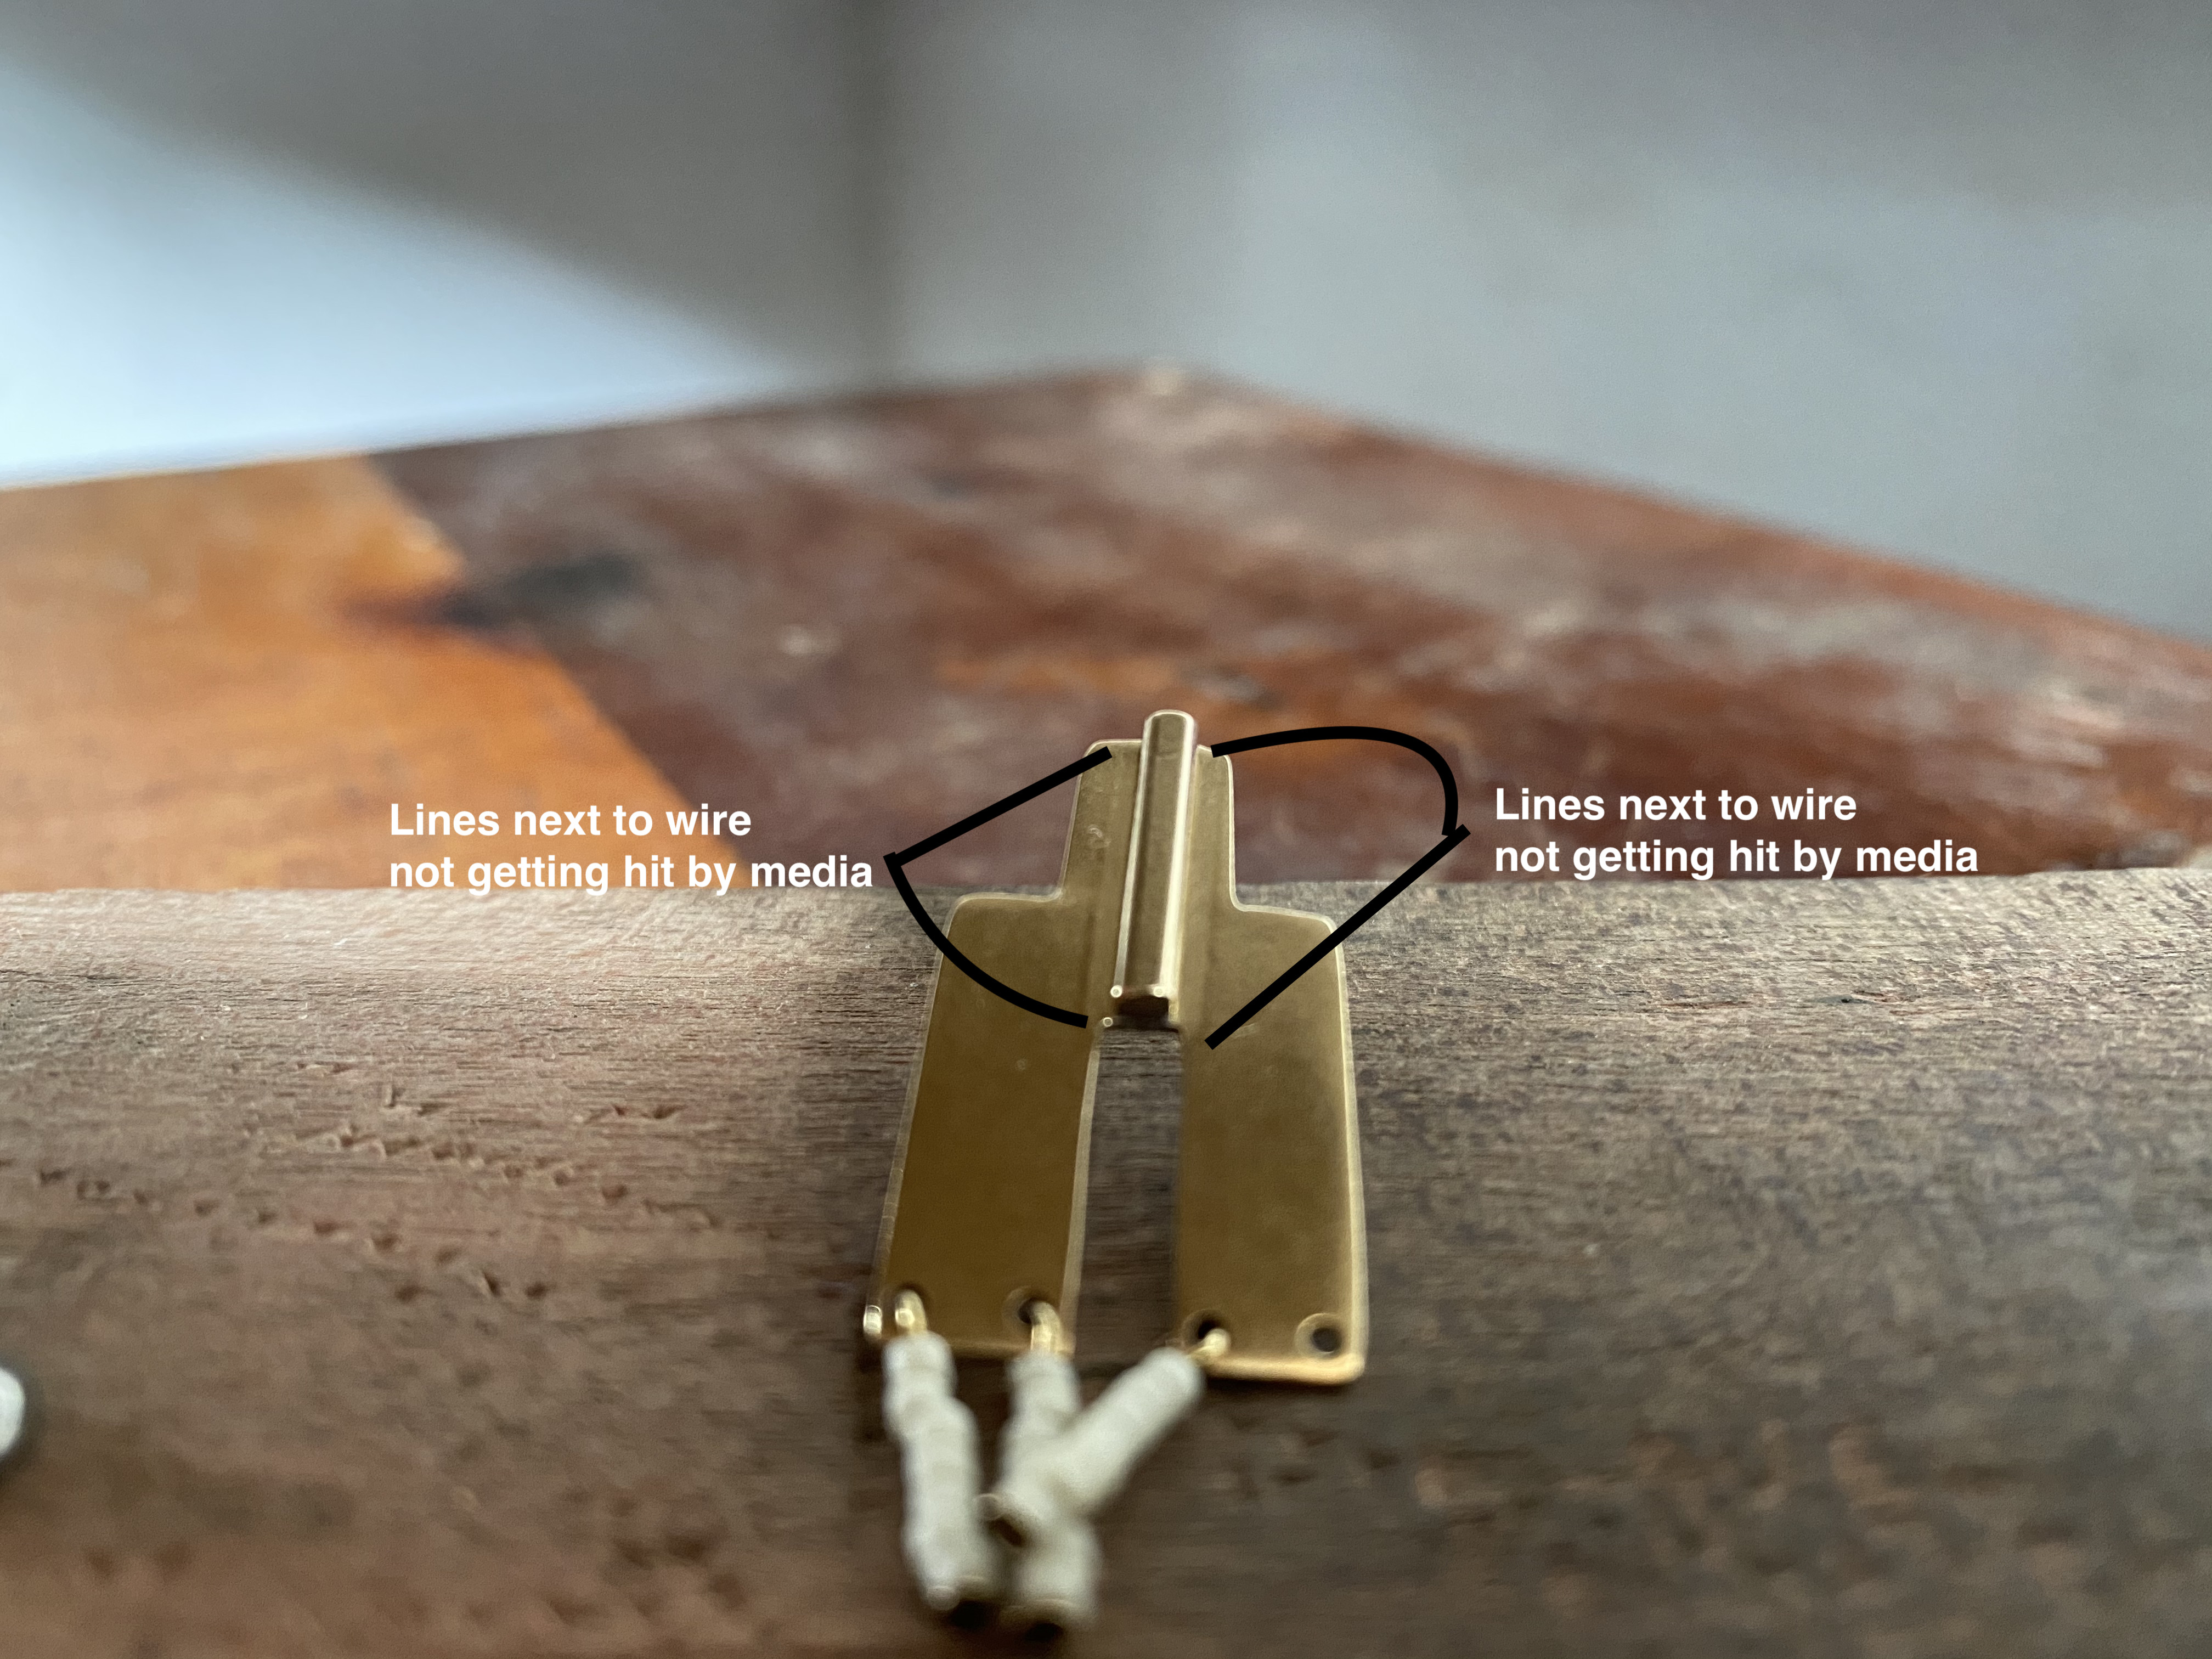
Excited to finally have a tumbling setup at our workshop and get some nice finished on our pieces! We are currently using a vibratory tumbler with 2 types of plastic media inside followed by a rotary tumbler with 2 types of stainless steel shot inside. Most of our pieces are coming out looking great, however with certain style where we have soldered two pieces of brass together or a wire on top of sheet, a line is appearing around the boundary where the two meet. (see picture to understand much more clearly than my explanation).
I’m guessing the line are due to one of the media not touching that area therefore not finishing it properly. If that is true, what shape media does anyone suggest to get in there and do the job? I have heard that people veer away from pins in their steel shot as it can result in an orange peel look, but i’m open to trying things out.
My understanding is that this is going to happen if your media isn’t a shape that can get in there. Maybe short, closely monitored rounds with the pins just until it blends, but not long enough to orange peel? And I tend to go in with a bit of hand-polishing in those areas too. Either steel wool on a toothpick, sharp silicone points, or my 3M abrasive cloths folded to a point or over something like a toothpick or credit card as suits the shape in question.
I frequently have this issue when using Hone & Highlight ceramic media, and it’s crossed my mind to grab a small handful of them out and take a hammer to them so they’re smaller, but I don’t know if that’s actually a good idea.
It looks like your steel shot is the culprit. There are several more shapes normally used in mixed shot - angle cuts, ball cones and some long angle cuts. I do not recommend using pins - they create a sandy look. Get a couple of pounds of mixed shot, no pins and add to what you have. If it comes with pins, take 'em out.
Judy Hoch
ifutswithfire - Get rid of the hone and highlight - it is suitable for finishing steel, not silver or copper. The silicon carbide embeds in the surface of softer metals. It is sold because folks only have a rotary tumbler and want to abrade off highlights after sulfuring. It creates every kind of problem you can imagine.
judyhoch
I think your first suspicion is correct. Due to the shapes of both media and the part, you are not getting burnishing in that tight area.
My suggestions would be to do an intermediate step of a bench operation between the vibe and shot tub. This would be my top choice and the most economical. The radial discs from 3M are quite handy to get into odd areas and used correctly impart no disceernable “directionality” lines to the surface. experiment with the grades blue thru light green in the 9/16".
Note that the grit in the various diameters are a bit more aggressive as the diameter gets larger. That is, blue in 9/16" will perform more gently than blue in 1"
For a second suggestion you might experiment with a rotary pin polisher set at a very low speed, such as 1/3 to 1/2. The low speed will attenuate the orange peel effect of a higher speed peening.
[While you’re experimenting, you might want to think of a polishing media, “Dri Shine” sold by Gesswein. Its walnut shells or corn cob impregnated with rouge. Runs in the magnetic tumbler machine, however, you will need a special bowl.]
We have some new shapes of steel shot on order so hopefully that will help! In the meantime we are experimenting with an in between step as you say, but i haven’t managed to get a non-directional finish with the bristle discs, how are you getting this to happen?
Judy, That’s a point. I should have been more specific.
Raytech [maker of universally sold mag finishers] sells a dry bowl designed for Dry Shine VII polishing media. This mounts on the base of the magnetic finisher and has an impeller that is driven by the base’s magnetic action causing the media and pieces to whorl around.
As a last step in the mass fininshing process, I’ve found this to impart a uniform and fairly high finish to pieces that are not to be hand polished.
Jeff Deegan
Just got a pin finisher 1 week ago. Nothing to worry about with brass. Make sure there is a speed controller (I set mine on 4 or 5) and don’t set the timer for longer than 20 minutes, maybe 10 minutes is fine. Put some Rio Super Sunsheene in there and your in business. Everything comes out bright and beautiful…its brilliant! Also, call Rio for advice, keep the box, you can return it if you don’t like it.