Wax models for faceted stones

Hi Folks, I’ve been struggling with a problem and hope to gain some
insight about how the experts “do it.” I’ve got a bunch of beautiful
but unusual cut faceted stones. I decided the best way to set them is
to carve a wax model and have it cast, rather than fabricating. In
this situation would you try to carve the seat (bearing) for the stone
in wax, or wait until you had the casting and then cut the seat? My
trouble has been cutting the seat… I eventually end up putting all
the wax back and trying again. Finally settled on “shaving” the seat
with a small X-Acto swivel blade rather than trying to use a wax burr,
but still wonder if this is the best approach. Any insight
appreciated, as always!

Also, any suggestions on fabricating settings for large (~5 ct.+),
faceted, unusually shaped stones would be appreciated. By unusual, I
mean keystone, “sail” shape, trapezoid with curved ends, etc.

Thanks in advance!

Dave
Dave Sebaste
Sebaste Studio and
Carolina Artisans’ Gallery
Charlotte, NC (USA)
dave@sebaste.com
http://www.CarolinaArtisans.com

perhaps you might try gently heating the stone (depending upon what
it is), and then melting it into place in the wax. this creates a
true seating that will need to be slightly cleaned up in the metal.
good luck!

Drill a hole thru the wax. Carve out just enough so the stone doesn’t
move. melt the stone into the wax. When you pop out the stone thru
the hole your seat fits the perfectly, then you carve from the outer
edge in to the thickness you want for the bezel.

1 Like

Hi Dave,

For unusual shapes I was shown to cut an approximate seat, set the
stone into the space then apply heat to the stone with an electric
wax spatula. Gently and evenly push the table down and the stone
will sink into the seat. Happy carving.

Marta

Mr David; If these stones of yours are are larger than 25points, I
spray the back/side with ‘spray glue’, when dry, I melt CARVING WAX
along stones girdle, file to shape, place in acetone, remove stone,
file finish wax bezel, reset stone in place–attach to the wax
design, When finished, remove stone and cast. Do enjoy---- Dave.
(ausmitty@icqmail.com)

1 Like

Hi Dave,

Take a few sheets of wax, depending on the stone thickness, keep the
stone on top and mark. Remove the stone and cut the wax in the centre.

Keep the stone back on the wax.

Use a low wax iron on top of the stone to melt the wax on the sides
and a little below and take shape of the stone. Let it sink to the
depth necessary.

If the stone is larger than 4.0 mm, use a teflon tape in between the
stone and wax, rolled to the appropriate thickness - 4% of the stone
diameter, to compensate for the casting shrinkage.

Hope this works well for you.

Regards,

Shishir Nevatia

Dave, Unless it is a heat sensitive stone I heat the stone enough to
let it sink into the wax.This is easy with diamonds.I drill a hole in
the wax that will allow the stone to sit upright then I hold my wax
pen on it.You have to experiment with the wax pen temp.It will heat
the stone enough that it will start to melt once it starts to melt you
have to keep it from slipping this way or that.There is a residual
amount of wax after the stone is pushed into the wax this is easily
cleaned up with a scalpel blade.I would get a CZ and some scrap wax to
play with.You will still have to do some cutting after it is cast and
you will have to allow for shrinkage in the casting process.If the
stones are calibrated and heat sensitive you can use a CZ as a heater
stone of the same size as the stone you wish to set.Best J Morley
Coyote Ridge Studio

Hi Dave,

I’m not sure about the “correct” way to make a seat for a stone in a
wax model but I have figured a way that works for me. I carve a
space for the stone using a bur or knife as you did. I make the
space a little smaller than the stone. Next I place the stone in the
space and with a warm wax tool I gently heat the stone until it
"melts" its way into the wax and becomes slightly embeded. I use an
electric waxer so my temperature is constant. I am VERY careful not
to scratch the stone with the wax tip. When the wax cools I very
gently go around the stone with an exacto knife to free the stone and
clean away the excess wax from the setting, trimming it slightly
larger to allow for shrinkage. I look forward to hearing how other
folks accomplish this task.

Susanne Roberts
East Side Concepts, Inc
Providence, RI 02906

Dave you didn’t mention if you were prong or bezel setting the
stones. For prong settings I always leave the cutting of the the stone
seat until after casting and pre polish ( I usually polish to zam and
then do the setting) this allows for finish loss in prong thickness
and width.

For bezels I usually leave a fairly heavy bezel to cast and cut the
seat after casting although I will cut the wax so the stone fits
exactly in the bezel before I cast. I use a 45 degree heart burr to
set the angle of the seat but do not cut into the bezel itself. I cut
the area at the foot of the bezel so there is no excess material
touching the stone under the girdle. depending on the fit and the
quality of the cast bezel I sometimes replace the cast bezel with a
fabricated one soldered in place after the cast bezel is filed away.
This lets me create a design with actual bezel dimensions in place in
the wax and a very precise fabricated bezel or a different color gold
bezel. The cast bezels never seem to be quite as precise as the
fabricated ones. hope this helps. Frank Goss

  I've got a bunch of beautiful but unusual cut faceted stones. I
decided the best way to set them is to carve a wax model and have it
cast, rather than fabricating. In this situation would you try to
carve the seat (bearing) for the stone in wax, or wait until you had
the casting and then cut the seat?

Hi Dave, I’ve been carving wax for 23 years now (yikes! I’m getting
old!)- I always carve the seat in wax. It is much quicker, and easily
reworked in wax if necessary.

I use two approaches depending on the stone, and demonstrate both
techniques in my Wax Carving Workshops. If the stone can take heat:
Rough out the wax under the stone, open up a hole through the bottom
of the setting (you can enlarge this later). Place the stone on the
roughed out opening. Put a wax pen on the stone (CAUTION!!! only do
this with stones that you KNOW can take heat!!!) and heat the stone
until it sinks down into the molten wax. With the wax pen push the
stone around until it is in the proper position. When the stone almost
fits, take the wax pen off the stone, let the wax cool a tiny bit but
not until hard, and from the bottom opening push the stone out of the
wax. When cool, clean up the excess wax, open up the inside of the
setting more. Now, put the stone back in place and melt it into it’s
proper depth and placement. Take the heat off the stone, and when the
wax is not molten any more, and before it is really hard, push the
stone out of the setting from underneath. This technique gives you an
absolute accurate fit.

For stones that can not take heat: Using burrs, rough out the
opening under the stone and all the way through the wax; so the girdle
of the stone is just slightly above the surface of the wax. Smear a
bit of warm utility wax on the bottom of the stone and push the stone
into the roughed out opening (the utility wax acts as a temporary
adhesive to keep the stone from shifting). With a pin or needle in a
pin vise: scribe around the stone - being careful to keep your scribe
90 degrees to the surface of the wax. Take stone out. Rub china white
or white opaque paint into the scribed line. For the rest of this I
use a VERY sharp small custom knife , but you could use an Exacto
retractable #9RX stencil knife (I’ve thinned this knife down
considerably with a snap on disc- if the knife is too fat it acts as a
wedge and cracks the wax. If the knife is thin and sharp it cuts much
cleaner without cracking the wax). Now it is time to open up the
walls of the setting. With the knife: I make relief cuts from the
corner to the center of the opening. Now I make cuts from corner to
corner to remove wax from the inside of the setting, being careful to
not go over the white layout lines. I do these two steps (relieving
the corners and cutting from corner to corner) 2 or 3 times, placing
the stone in the setting to check my progress. When the stone starts
to fit in the setting I carefully push the stone into the setting,
remove the stone. Look to see where the stone marked the wax- it
scrapes a mark into the wax where it is touching- this is where you
need to remove more material. Continue pushing the stone in and
scraping where it leaves contact marks on the wax until the stone fits
nicely into the wax. Make sure you open up the seat under the stone
enough- you really don’t need more than a millimeter of wax for the
stone to sit on, and when you leave this seat too wide, it makes it
harder to fit the stone into the setting. To cut the seat to the
proper angle (matching the angle of the pavilion facets) I use a sharp
scraping tool I’ve made that matches the pavilion angle, and scrape
around the inside of the setting with downward pressure. You could
also do this with the bottom of an inverted cone burr and a VERY light
touch.

If anyone wants to see these techniques demonstrated live (and best
of all- magnified 10x- 20x on a video monitor so you can really see
and understand the techniques demonstrated) there are a few spaces
left in my Wax Carving Workshops here in Maine: July 23-26; and at
New Approach School for Jewelers in Virginia Beach: September 23-26.
At the beginning of class each student makes a set of wax carving
tools that are infinitely better than anything available commercially.

Happy Carving! Kate Wolf http://www.katewolfdesigns.com ps. Thanks to
the student who have given me their tips and tricks over the years!

1 Like

When you are ready to remove the stone, rather than using an exacto
knife, because I am somewhat of a klutz, I put it into the freezer for
about a half hour. Unless there are enhydro type inclusions the
freeze won’t harm the stone and it comes out very easily.

walt

I have only one caveat regarding heating stones by any means to press
them into wax models…

Don’t do it if you cannot afford to replace the stone.

This is a true story, and only one of several that I have heard of:

A local tradeshop, working for a well known retail chain, was given a
2 carat marquise diamond and requested to make a wax model. This
bench jeweler had had almost 20 years experience at this point. He
carved the model to the customers’ specifications, and then began to
do the final fitting for the diamond. He warmed the stone, using an
alcohol lamp. Got the seat fitted up perfectly. Reheated the stone,
so as to “wiggle” it a tiny bit in the seat, and allow for
shrinkage…

At this point the stone flew out of the tweezers… it had broken in
half! As most of you independants know, we are responsible for every
item we accept to work on - no matter what happens. He took the stone
to a lab in San Francisco, hoping to find that it was not really a
diamond. It was. He was told that when larger diamonds are cut, they
sometimes reach incredible temperatures from the friction of the lap.
This induces stress inside the stone. If the stress is not relieved,
and the stone is otherwise flawed or has an invisible cleavage
problem, you are working with a time bomb. If it hadn’t broken when
it did, it could have broken in the setting, or even in the
ultrasonic… but then again it might not…

Needless to say the retail store was not sympathetic. He wound up
taking out a second mortgage on his home to pay for a replacement. I
decided never to take that risk. I have a pretty extensive supply of
synthetic corundums, and cubic zircons lying around the shop. I can
usually find one the same size and shape as the stone I’m working
with. Cost next to nothing. I’m sure there are hundreds of other
horror stories out there… and the odds of them happening to you
are slim to none. But, I have had a lifelong battle with “Murphy” (of
Murphy’s Law) and if I can cheat him or slow him down a little, I
will. He wins enough as it is! Handle high priced, rare, or delicate
stones by using something else in their place…

Murphy may still win in the end. You may break it setting, drop a
tool on it, or have it slip out of your fingers while buffing and
crash into the hood, to name a few other fairly rare occurences. Why
take an additional chance?
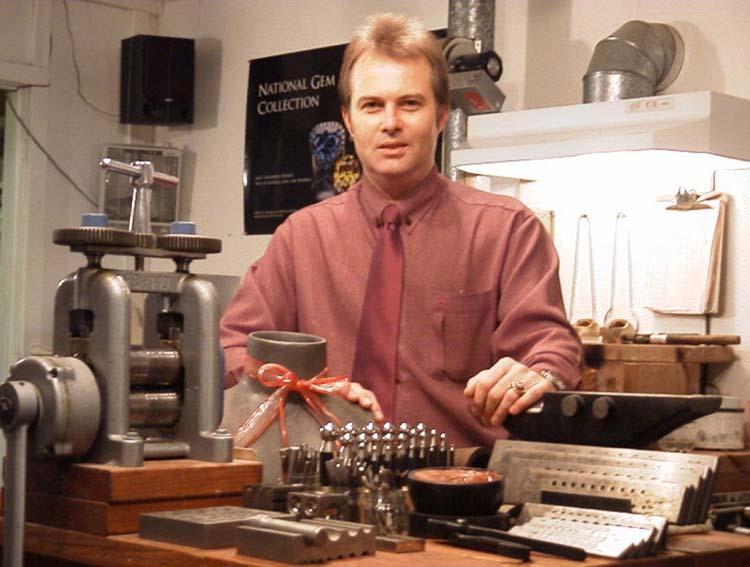
Brian P. Marshall
Stockton Jewelry Arts School

Sometimes when I want to make a perfect seat for a particular stone I
take a piece of heavy metal sheet and cut out a replica of the stone.
After I get the basic shape done I solder a heavy wire to the top and
then use it as a way to hold it and do any finishing. Generally the
stone is faceted and if the metal is thick enough I shape the bottom
to match the profile of the stone below the girdle. I then heat the
metal replica and press it carefully into the wax. I save these
replicas, and over time have been able to reuse them as is or by
modifying them slightly.

Steven Brixner - Jewelry Designer - San Diego CA USA
mailto:@Steven_Brixner4
http://www.brixnerdesign.com

I am in agreement with Min Azama, I often create a wax setting for a
stone by building up the wax directly on the gemstone’s pavilion.
Sometimes it requires applying a substantial amount of wax and then
filing or carving it down to the appropriate size and thickness. It
can be a little more time consuming process but it results in a
perfect seat, which needs very little final adjusting once the
setting is cast in metal.

Michael David Sturlin, jewelry artist @Michael_David_Sturli
https://www.ganoksin.com/orchid/sturlin.htm


Michael Sturlin Studio, Scottsdale Arizona USA

Michael, What kind of wax are you using to build up on the stone?
Annette

Hi Gang,

FWIW:

Rio Grande has sets of stone shaped tips for wax hot pens. To use
them the tip is attached to your wax pen. When the tip is hot, it’s
pressed into the wax, leaving a hole the size and shape of the tip.
If you work with calibrated stones this may be an option.

They come in: square, marquee, pear, triangle, trilliant, emerald,
oval & heart shapes. There a 9 different sizes in each set at
$36.00/set.

Usual disclaimer, don’t work for Rio or the tip maker. In fact I
don’t even have a set, but it sure looks like it could be a time
saver. Saw it demo’d in Tucson.

Dave —

Brian, A friend of a friend of a friend once told me not to believe
everything you hear. Your story about the diamond snapping in two
sounds like an urban myth, the sort that is so prevalent on the
internet. I have been setting, retipping on, waxing around diamonds
and generally beating the heck out all sorts of precious stones for
more than twenty years. I do very clean fine work and I make money
while doing so. If I were to take every precaution possible to insure
that no heat or pressure were put on any gemstone I worked with I
would be out of business. Diamonds, excluding highly included or
fracture filled stone are very durable. And while patience and a
certain level of bench skill should be acquired before working on
diamonds and diamond jewelry It is not the scary activity you
describe. I feel that your letter does a disservice to all the
newbies out in orchid land. Perhaps your story was true and the stone
did break while in this jewelers shop. It would not be the first time
I had heard of some hack making up some asinine story in order to
cover their tail end.

John Sholl In Littleton, Where just today I sucessfuly set over forty
thousand dollars worth of No Wimps

Annette, for build-up sculpting in wax I usually use yellow block
wax, an injection wax. I found it to be easy on the eyes as far as
executing the finer detail is concerned. Recently I switched the wax
in my wax pot to a pink injection wax which came in pellet form
rather than a solid block. I’ll probably begin using it for my
build-up as well. In this case since it’s in pellet form I will melt
some of it into a tin and then gather it on my heated tools from
there. Using the injection wax has the benefit of melting at a lower
temperature than the harder types of carving waxes, so it is easier
to apply and it cuts well with gravers or an exacto blade. The main
disadvantage is in the stickiness of this type of wax, which makes it
clog up files and burs, requiring more frequent cleaning of the
tools.

Best regards,

Michael David Sturlin, jewelry artist @Michael_David_Sturli
https://www.ganoksin.com/orchid/sturlin.htm


Michael Sturlin Studio, Scottsdale Arizona USA

John, Boy, are you ever setting yourself up for a fall ! Your smug
hauteur about never buggering diamonds is totally naive and ignores
the fact that Diamonds have pronounced cleavage, an attribute that
has been used in perpetuity for preparing them for cutting. Yes, you
can abuse and badger them ad infinitum, but , sooner or later, it
will catch up with you.

Diamonds deserve the utmost respect. They are fickle demons. They
will seduce you into believing that thay are indestructable. You can
easily destroy their polish by overheating them and they can readily
be chipped, especially when they are cut with a thin girdle. If you
quench too soon in pickle, they too will crack

Brian Marshall is not a fabricator of “urban myths”. He is an artisan
with decades of experience. He has learned the value of
conservativley approaching each job on the basis of risk. Ergo, if
you are re-tipping a Diamond ring you wait JUST THE RIGHT TIME before
bringing the stone from 3,000 degrees f. to 75 degrees f.

The moral of the story is that if you assume responsibility for
customer diamonds you had better be VERY realistic about the risks
involved. If you take in a two thousand dollar ring for retipping and
charge twenty dollars for the job, you had better be prepared for
replacing the diamond if you bugger it ! Ron in Reality Land,
a.k.a,.Mills Gem, Los Osos, CA

Hi All,

I have to agree with Ron, I have had the pleasure of meeting Brian
and he doesn’t seem like someone who would fabricate a story, he too
busy fabricating beautiful work. He’s very talented, knowledgeable
and helpful. About the time we say "that has never happened to me"
is about the time it does happen! The Universe listens and needs
entertainment too!

Happy setting and be careful out there…

Marta