“Tube-Setting” a.k.a. ‘Full Bezel Setting’, in a Round Frame!
(Whatever you want to call it, it’s still “Tube-Setting”)
Difficulty in Setting Scale is @ 6.5/10
What tools are generally needed for this exercise?
1) Tube Setting-holder
2) Wax-Dob
3) Onglette-Graver #2
4) Oil-Stone “Arkansas grit”
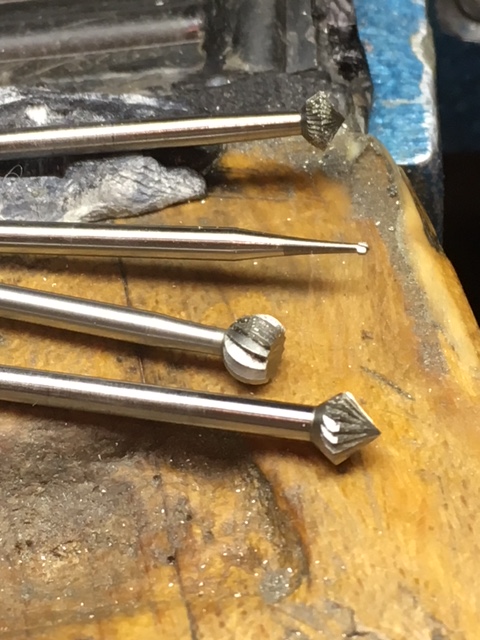
5) Round bur #007 (size is depending on the thickness of the Girdle)
6) High Speed Steel bur (75% of the size of the stone)
7) Reciprocating Hammer (first choice)
8) Riveting Hammer (second choice)
9) Polishing Papers, for your Onglette #2 graver
10) Pillar file, 20 cm’s (8 inches) #2 grit
11) Triangular file, 20 cm’s (8 inches) #4 grit
12) Pumice Wheels, “Flat-Faced’ @ #180 grit
13) Lubricating bur-oil (Medium Viscosity)
14) Ten-power Loupe
In writing this technical essay, I won’t entertain going into the processes of graver-shaping (for #3 on this ‘list of tools’). That alone, is another detailed essay just on this interesting & challenging topic!)…“Graver-Modification & Shaping is a definite 15, on the 10 Scale!”_
Many of these setting photographs must be ‘staged’ during the creation of this essay. Here is how my bench setup looks midst of the setting and picture taking.

The very first thing is to examine your stone for any defects or inclusions of any nature.

Advise your client if there are any, and plot them on your ‘service-envelope’!
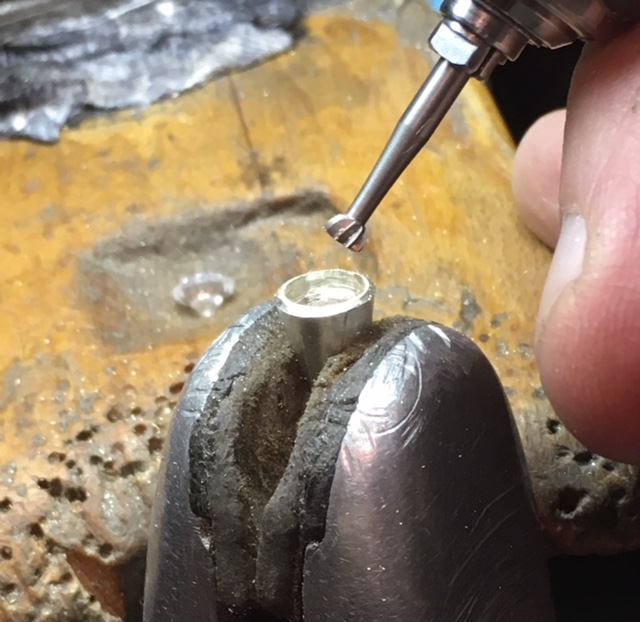
Observe and calibrate the thickness of the Girdle
This can be done by placing your round bur next to the Girdle of this stone.

I’d like to have a slightly larger bur just in case of any peculiar girdle irregularities caused by the ‘faceting & polishing’ of that stone.
What stones NOT TO SET? Emerald, Opal, Amethyst or any stone that is softer than on the “7 on the Mohs Scale of Hardness”. I prefer just the basic stones, namely Blue Sapphires, Rubies, Diamonds and I prefer CZ’s made by “Swarovski”. As these stones are high on the ‘Mohs Hardness Scale” of (estimated) 8.75+.
These “Swarovski” CZ’s are a confidence-building stone, imagine that you are setting a stone for the first time and it breaks, do you need this to happen?
White Spinel’s are an estimated 6.0, the White Spinel’s cannot take the rigorous and aggressive hitting. As these will shatter is a few moments of the bombardment from your hammer, basically these are very soft stones!
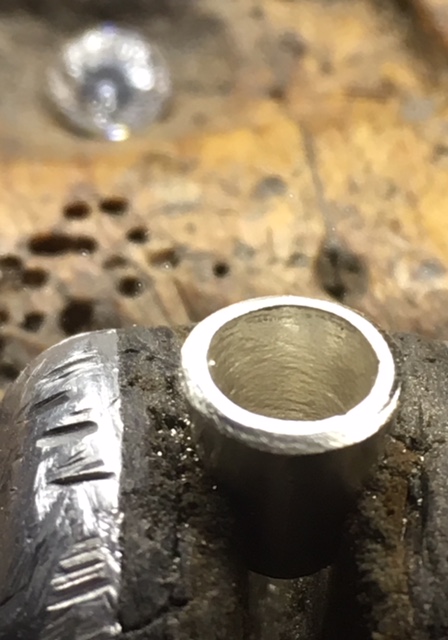
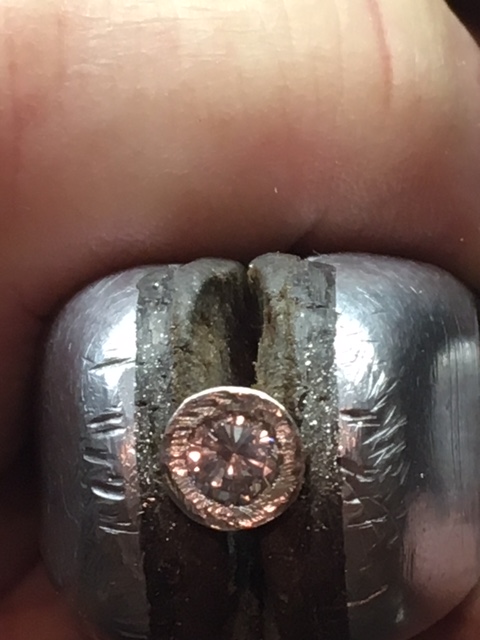
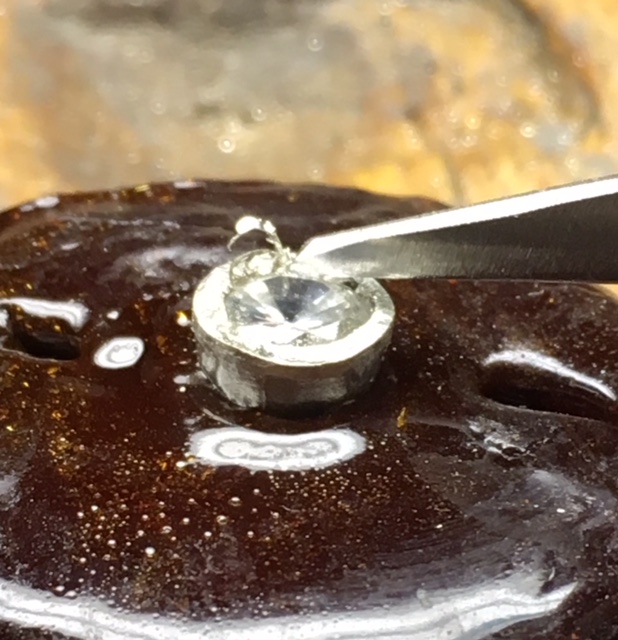
Select a stone (of your choosing) and the girdle of that stone should just slightly cover the tube.

The ‘opening of the tube’ must be at least 75% of the diameter of the stone, the remaining 25% is what is to be carved as a bearing-cut into the tube wall.
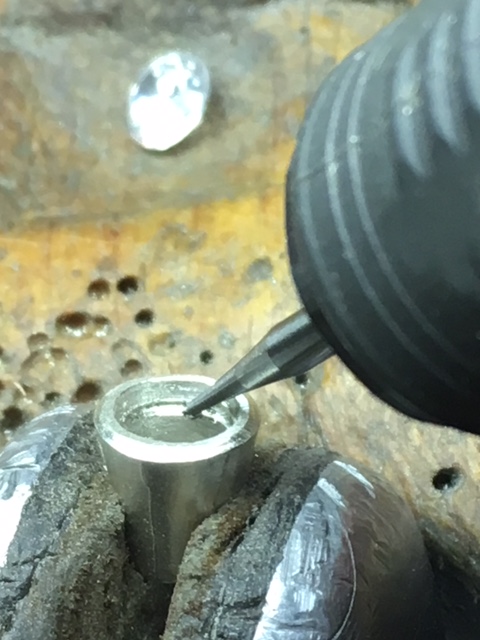
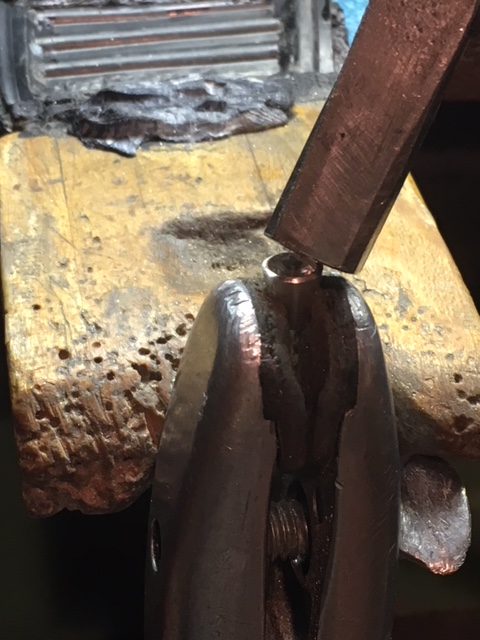
The tube-bearing/carving is what we will be doing now! As you must now attempt to “Create a seat for the Girdle” of the stone. How deep do you go? This question is so important, just as much as the answer!
My technique for you is to lower your HSS bur (High–Speed-Steel) into the tube opening, just deep enough as the have the ‘bur-shaft’ rise just directly above the outside wall of the tube! _** Although these are similar photographs, there are two steps being covered.

The teeth of that bur, MUST now be able to cut without any effort into the wall. Then instead of using your dividers, just use this method and you will find immediately easy it is, so easy and yet to helpful!
Start your “bearing-cut” at your desired depth, and make a curved-cut in three (3) increments around the round tube. As where you start is just where you will finish your cutting. Please examine your cutting all during this process.
If your Girdle of the stone is thick at any area, then select a round bur at just the widest thickness of that stone. Start to increase the bearing cut, examine the “Modified, Bearing-Cut” make sure your round-bur cutting is exactly just where your Girdle will be now resting!
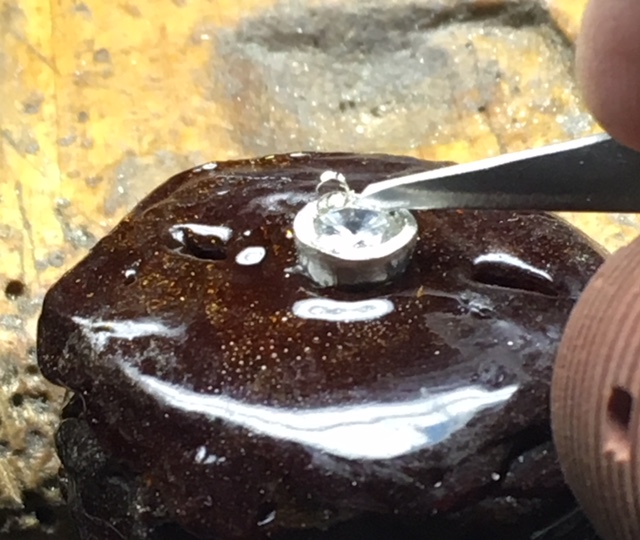
Place your stone on the tube edge, are you satisfied with the opening? If not, here is a great idea!
Get a round bur and have the end of that bur broken off from the remaining shaft. With this modified bur, ream open on one side of the tube and let the stone gently slide or drop in at 45 degree angle into the new round tube!
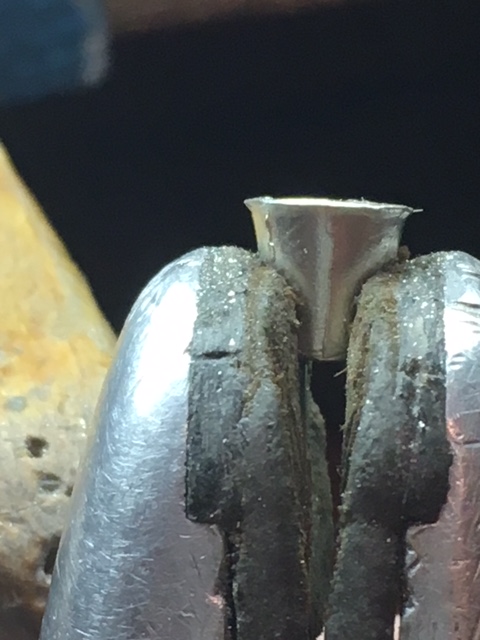
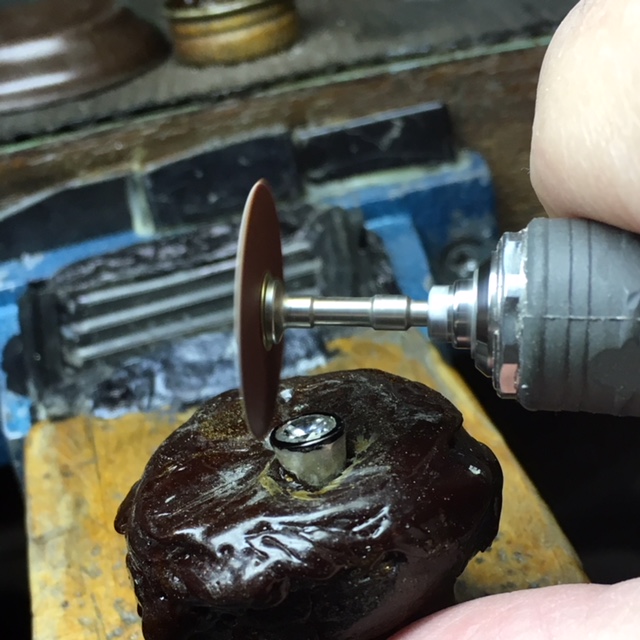
Filing, or trimming the outside edges of the tube!
We will right now, start the ‘gentle hammering’, the outside angle must be at a 45 degrees and this is just where your hammer will make contact.
You can use your “Pillar File” of #2 cut and file all around the outside of the wall! If your tube is small, you should use your Triangular file @ #4 grit, but ‘just remove the metal’ at this point!
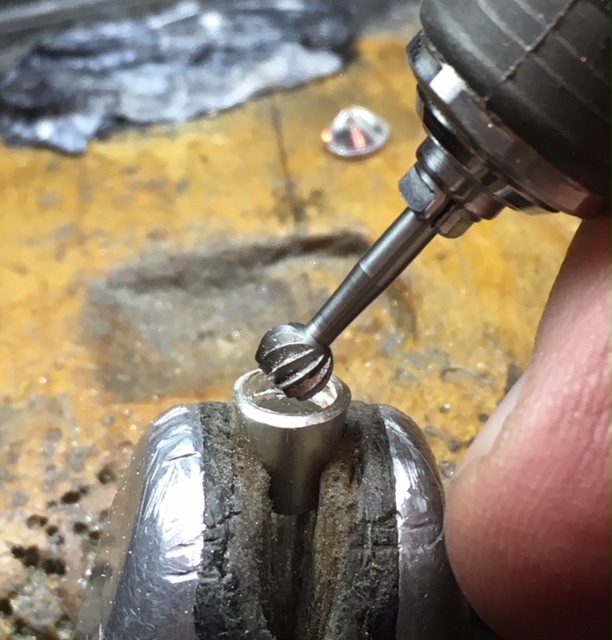
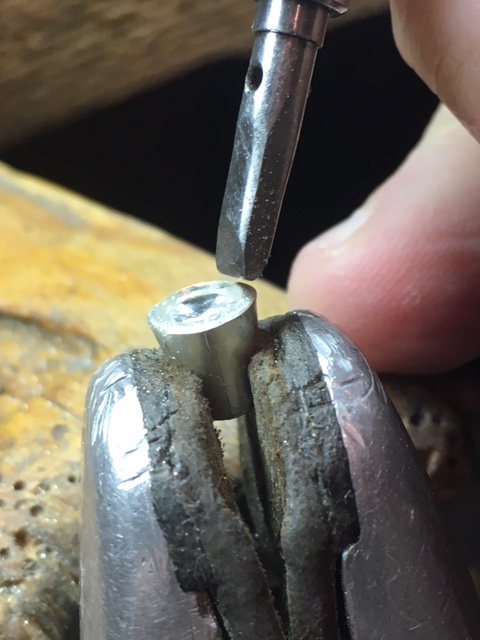
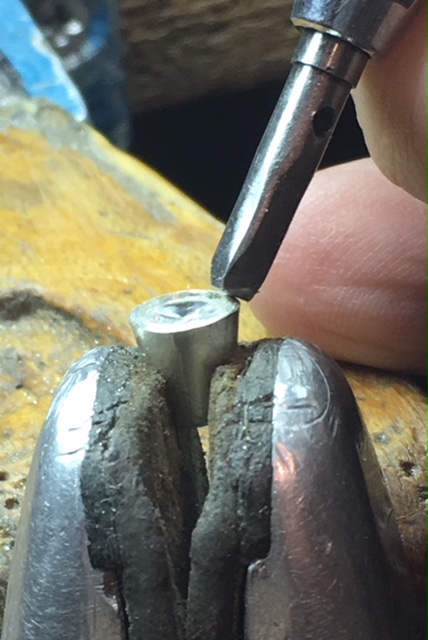
I have another fantastic idea and that is to remove half of the round bur and when you are cutting a seat with just the half-round bur. This will also make a seat for the girdle of the stone, but still you should make the bearing as wide as the girdle.
In this exercise I am using two sizes of ‘half-round’ burs. One is at the ‘bearing-cut’, the other is to make the ‘inside of the tube’ uniform in shape
When your tube is held secure, then you can now start your gentle tapping or light-hammering.
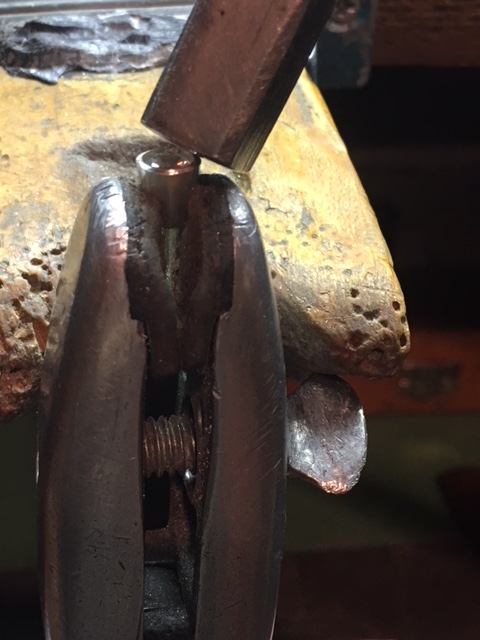
Don’t hammer with ‘heavy pressure’. Any heavy hammering will ‘ruin the top of the tube’. Be gentle, but be careful where your hammer meets the metal. Be very wary of any direct hitting on the ‘wall’ at direct downward contact. You might just hit & break your stone, no matter what the Mohs’ Scale is! Hammer but not enough to damage the bezel.
The other method is to use your Reciprocating hammer!
I find that this has “one serious negative”. That negative is, that with each downward powerful hit, the metal now has a little recess in the tip of the bezel just where the anvil has made contact.
“Gerry, we have a problem, ‘the anvil’ has landed!” This sounds almost humourous, but it can cause many problems while in the clean-up stages!
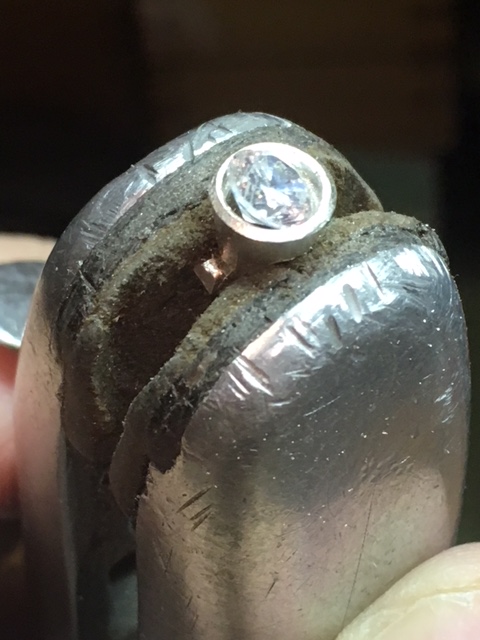
In this photograph, you can see just how flat the stone is…and also to see where the ‘table’ is in relationship to the tube-bezel.
You can see something rather interesting, the reciprocating hammer has squeezed the metal over and onto the stone…but look here again! The metal has been been squeezed so much it has been displaced and expanded while in the hammering procedure!.
Never hold the anvil at a vertical position, only have the anvil hit at a 45 degree angle away from the stone. Using this method you are ‘moving’ the metal over and down to the stone.
Do not let the 'fast-acting & hitting cut a deep hole anywhere along the curved surface. This is one negative that no setter wants not to have happen. By removing the ‘deep hitting’ marks with any Emery wheel, you will be removing much of the metal for ‘Bright-Cutting’. You should have a rather thick bezel to allow enough metal to Bright-Cut!
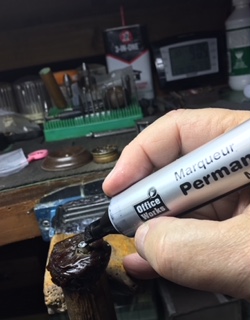
I would use a “Black Marker” and now paint the tip of the wall, any hammering contact even with your reciprocating hammer, will remove only what is there.
Using this ‘proven method’, you can just see where either of the two hammers are hitting, just how simple and easy is this?
I suggest to tap in 4 areas as in the 12:00 => 6:00, then 9:00 => 3:00. Once you’ve just done is your stone is in bearing-cut nice and level & not crooked. Once this has been accomplished, finish off your tapping in the remaining areas. DO NOT HAMMER TOO HARD, why so? You will be then hardening the soft metal. Not nice!
So what’s next? Just file & trim to smooth the outside metal. What is my preference in hammering this tube…a basic & not expensive riveting hammer. This is my very own hammer that I’ve had for only 50 years and to this day I look after it like a good friend!
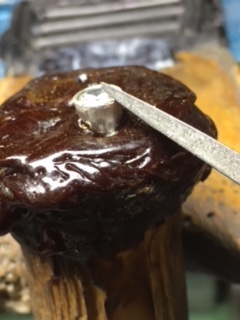
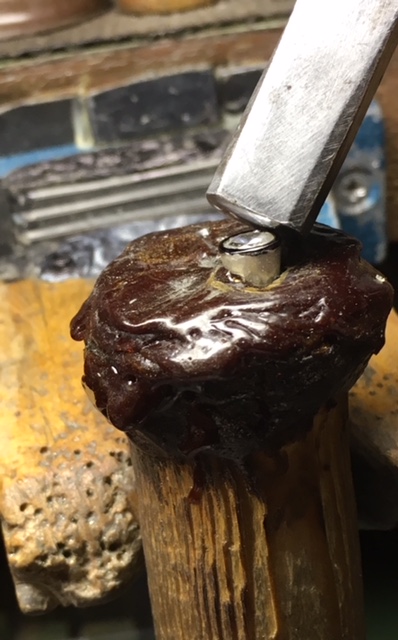
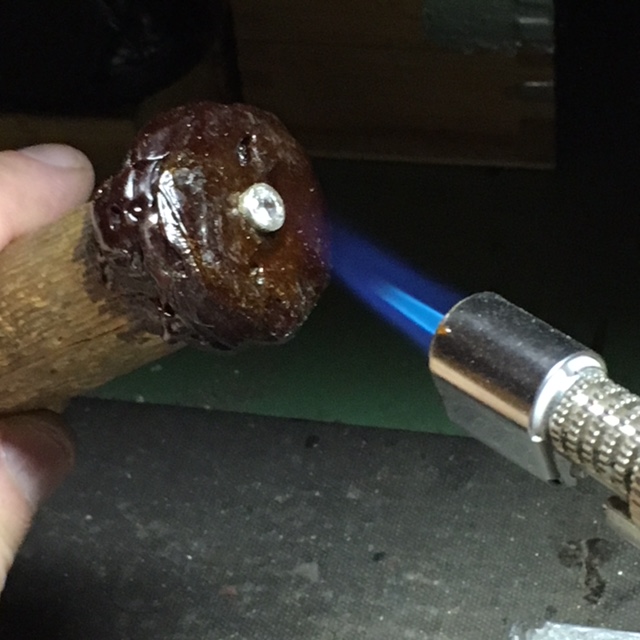
For this display I removed the little tube and placed it on a shellac stick for easier metal carving!
Bright-Cutting is the next step/process. Using your Onglette, #2 Right-Sided graver, initiate your cutting, but with your graver to be held at a near vertical position.
Start your cutting, in again 3 turnings of the tube, as your graver hand is cutting and turning, so must your left hand rotate in unison to the “Right-Hand of Cutting”. _
This is almost like a “Ballet Dancer” rotating and turning within a small circle._
Once all of this Bright-Cutting is finished, we will now start the final trimming! I prefer to keep the 45 degree angle on the outside of the wall, this looks so nice and appealing.
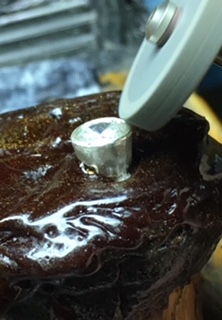
I might suggest using a “Snap-On, Emery Wheel at Medium grit to remove any deep marks in the metal, anywhere!
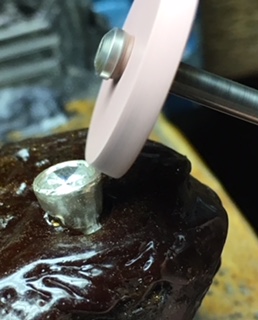
The last step on this Tube-Setting project is now using your Pumice Wheel, #180 grit with a Flat-Faced wheel.
 Great care is now needed, all around the tube-wall there should be no hammer marks anywhere!
If you wish to use your Pumice Wheel #1,000 grit, please do so now.
The reason is, you now have less polishing with your "Tripoli & Rouge Polishing cloth-wheels" as these could cause you stress with all of your hard labour & well defined edges. Remember one thing, you need to continually experiment with new burs of all kinds of shapes and sizes. The new idea of using a “Half-Round bur”, these will literally save you much time.
Your new tools are only a beginning in setting any stone. don’t give up if you made a mistake…that now is your experience!