Can anyone point me at some instructions/tutorials for fabricating spinner bails? My searching yielded only wire-wrapped styles (lovely, but not what I’m after) and readymade findings (also lovely, but I want to at least try making my own). I can see how and why they work, but I’d feel a lot better diving into this if I could see someone else’s process and make sure I’m not missing any details or tricks. This is another situation where I don’t know what I don’t know.
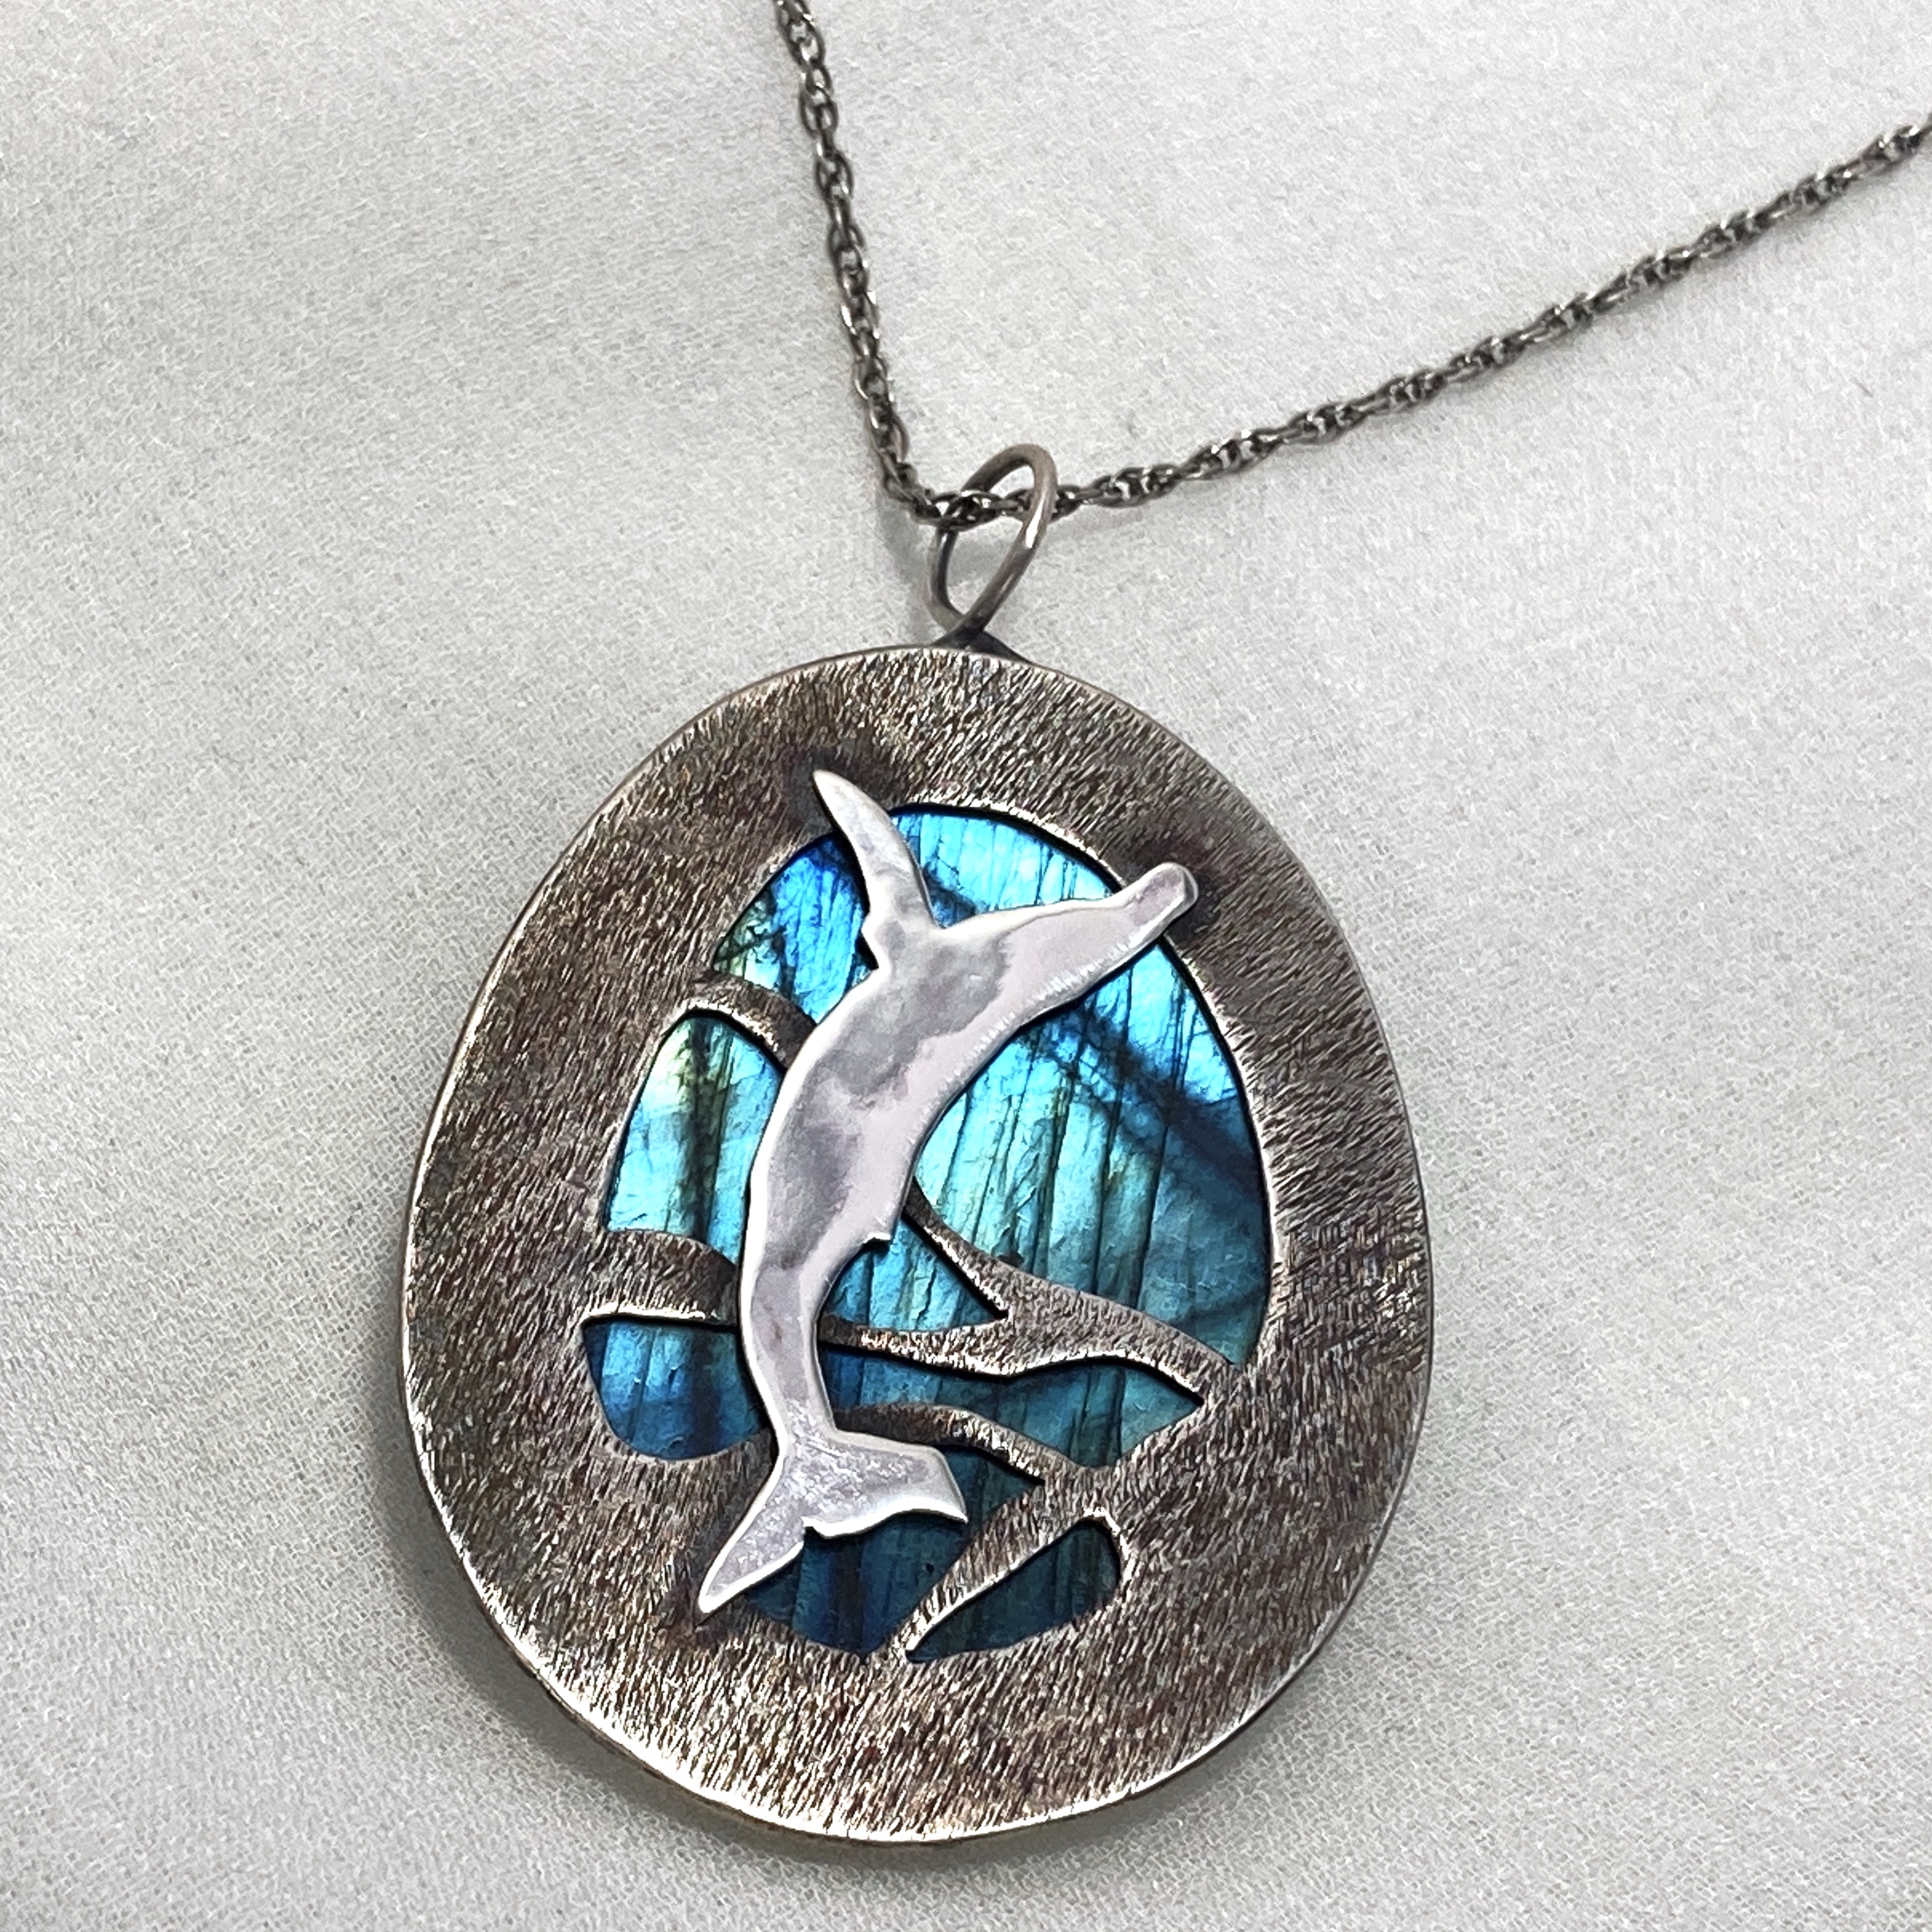
Why this is important to me: pendants like this one with a beautiful stone on one side and fun details on the other. I’ve done a few and the clients have been reasonably content to just flip the necklace as desired, but they should swivel, really.
I often look to industrial sites for ideas for a function like a swivel. Fishing lure swivels have the function you are looking for although they are not that pretty from a designers point of view. However you could create a ball at the end of two wires insert them through a hole smaller than the ball on opposite sides of a 5 sided cube (constructed out of decorative material). Then create a closed ring from the wire protruding from each side of that cube. Then solder on the 6th side. The balled wire would swivel inside the decorative box.
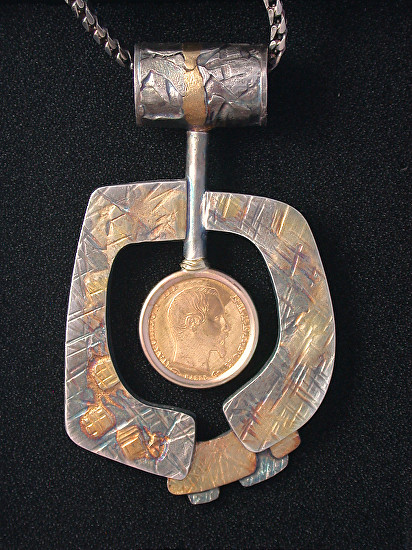
This is a spinner bail that I made. The coin bezel is attached to a heavy wire that goes thru a fixed tube. Inside the pendant bail is a flattened ball attached to the wire. The result is that the coin can be turned over without turning the pendant over.
I thought a lot about your question while I was walking today and came up with an idea. While I have never done this, I may try it just to see if it works. Attached is a link to a very quickly drawn and crude drawing of my idea. It is conceptual and you can substitute various styles elements. The key is a ring with a hole drilled through only one surface and then the ring is split partially with a saw or slitting disc so that the two ring halves can be carefully pushed apart. A piece of wire slightly smaller in diameter than the hole is headed so that the head is larger in diameter than the hole. The split ring is soldered to the edge of the pendant bezel and the unheaded end of the wire is soldered to whatever you might use as a bale. The head is pushed throught the ring and then the ring halves are closed around the wire so that the head is free to spin but trapped inside the split ring. Let me know what you think…Rob
I modified the design a bit after looking at my scrap pile. Sometimes I get my best ideas looking at scrape, if nothing more than what not to do. Anyway, I found an old earring that I had gotten too hot and a couple pieces of wire and put together what I would do to create a bale that allows you to both hold the chain and let the pendant hang with either side out. I was able to fish the small wire with the balled end through the hole in the bale without sawing or cutting a slot and then solder it to the pendant (melted earring in this case). Attached are some pictures. I finished the piece enough to know that it can be finished as this is always a consideration in anything that I design. Good luck…Rob
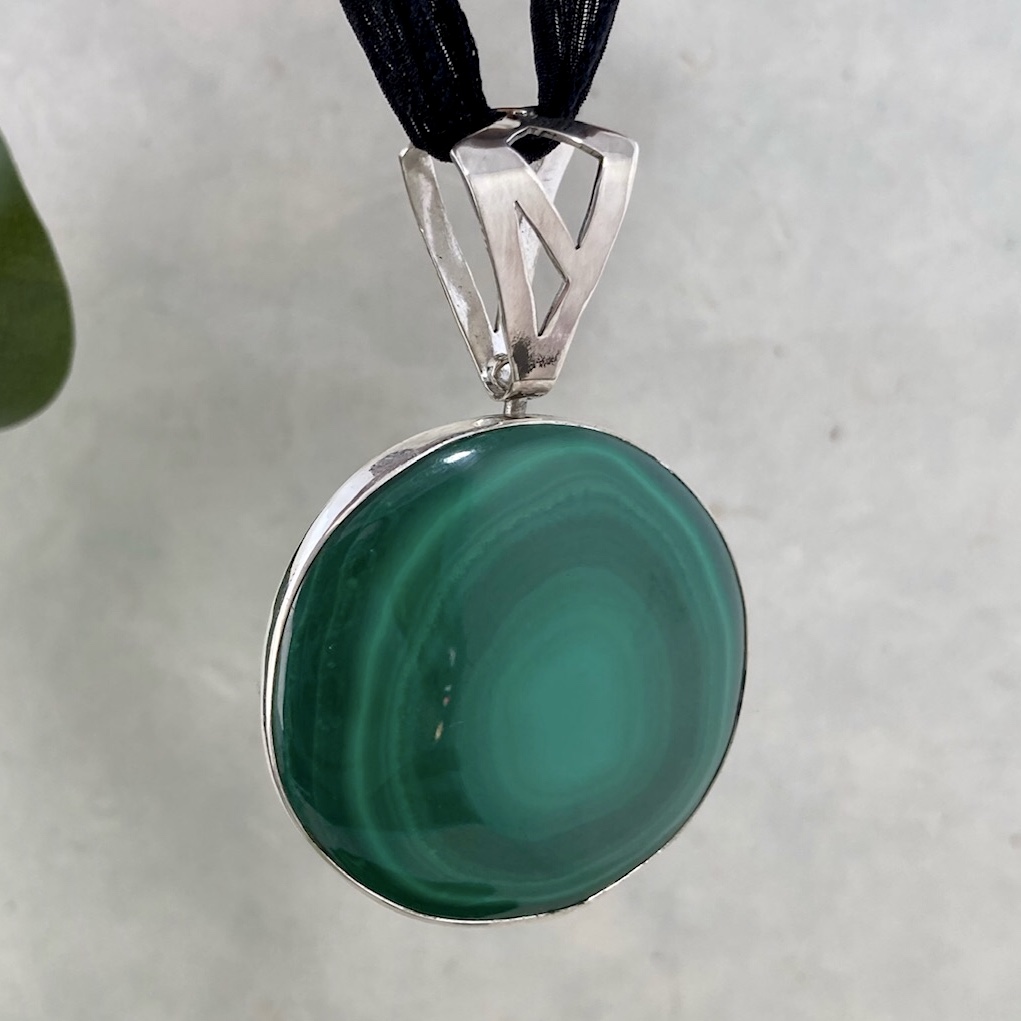
I did it! I used 14g Argentium wire for the swivel stem and my plan had been to ball the end, but it wasn’t melting * and the surrounding parts of the pendant were getting too hot so I sawed down the wire lengthwise and curled the two halves down instead. It actually looks cool, so fine by me. I’ll probably use thinner wire next time, but I wanted to make it good and strong.
*This is the first time in a long, long time I’ve run into something where an acetylene torch would have been better than my butane torches.
A little late to the party but I was looking for exactly this kind of solution today and stumbled across your beautiful design and solution. Now for me to give it a go and hope I don’t melt the bezel!
Thank you for sharing the end result and how you got there.