Even though you can prepolish, once you set gemstones you will still need to remove metal, refinish and polish the metal holding your stones, where the setting process has scarred that metal.
Sapphires, you’d have a hard time damaging with polishing compounds, or even most rubber wheels. Tourmaline, you’re going to use need a lighter touch, but you will always need to do a little touch up, and a final polish.
I work with a lot of soft cabs (turquoise, lapis, opal, etc.) There will always be the need to touch up after they are set. If needed, use a needle file with a safe edge, then very carefully a silicon carbide rubber wheel being careful not to touch the stone. Finally a blue pumice rubber wheel. As a previous poster stated, pumice will not bother your harder stones. Tripoli may be a problem, but rouge will not be. You can always mask the stone with tape or even your finger. This all takes time and experience. Spend the time, have the experience. Good luck…Rob
In regards to rubber wheels (rubberized abrasives) and stones: The lion’s share of the abrasives found in most rubber wheels (pumice/silipum) aside, is aluminum oxide, followed by silicone carbide. Aluminum oxide (Al2O3) is the mineral corundum which is also called ruby or sapphire. I use rubberized abrasives extensively and I am always cautious about working with rubber wheels around any stones save diamonds (again, pumice wheels are the exception). Diamond cuts diamond and sapphire cuts sapphire. I speak from the experience of slipping more than once and barring a stone. Just my experience…
I am not a great stone setting expert, but it would seem to me that if you plan correctly, you can try not to mar bezels and prongs right where they meet the stone. Then your rubber wheel or whatever will not be near the stone when touching up. At the edge of bezels, using a burnisher doesn’t require any polishing and if there is unevenness to clean up, it could be bright cut with a graver rather than polished with a wheel. Since the graver slides along the stone and is not harder than most stones, there shouldn’t be any marring that way either. I’m a stone cutter myself, and the thought of using a whirling wheel near the carefully polished surface of one of my stones makes me slightly queasy…-royjohn
… if you plan correctly, you can try not to mar bezels and prongs right where they meet the stone.
Disclaimer. I’m a rank amateur stone setter so grains of salt may be advised, help / correction would definitely be appreciated!
The problem I have with prong setting is exactly where the prong tops meet the stone. Well, one of my problems…
When rounding off the top of the prongs using a cup bur, the edge of the bur gets really close to the stone. If you don’t get close enough the prong tip doesn’t look good - the arc doesn’t go right down to the stone - there is a bit of vertical prong remaining above the stone. Use the bur close enough to get the arc down to the stone and the bur is pretty much going to hit the stone.
I don’t want to copy and paste someone’s picture, but to show what I mean, here’s a link to Hans Meevis’ free tutorial on the process.
The first picture is what I have in mind.
This image shows a standard bur with a moderately wide rim to the bur. But even tapered Busch twin-cut cup burs have an edge that can hit the stone. I suppose you can get in the ballpark with the cup bur and then use an escapement file with a safe-edge, but I can’t get as nice a curve as I’d like with that and files are still going to leave a rough finish. It seems like you have to get in with a polishing wheel no matter what, with whatever risk to the stone that entails.
I find this kind of work really stressful. I have a world of respect for stone setters who do this kind of thing well all day long.
It was interesting to see Meevis’ tutorial…I hadn’t thought of pushing the prongs over and THEN cutting them to height. Other authors cut the prongs to correct length first, then notch them and push over the tips rather than just leaning the long length of the prong over the stone and cutting off the length that’s left. Just another illustration of how there isn’t one right way to do things. In Meevis’ method, the cup burr rounds the top of the prong and there isn’t a need to take the cup burr down to where it might contact the stone. Note that in his example the prongs are round in cross section. If the prongs are square or rectangular, there can be a problem with transitioning one shape to another and maybe this is why you’re feeling like the burr needs to come down to the stone?
Interestingly, when I consulted two old books on setting, Wooding’s on diamond setting and Wykoff’s, which treats both diamonds and colored stones, their approach was different. Maybe because it’s less likely to mar a diamond with a burr, Wooding rounds prongs with a burr after they are pushed down. Wykoff, maybe because of his experience with colored stones (he was a faceter as well as a jeweler), says you should prepare the prong completely, including notching it, thinning the back if needed, and shaping it with a burr BEFORE pushing it down over the stone.
If you’re going to use a burr after pushing down the prong, you should make sure the edge of it is smoothed and polished, which will make any scratching or marring less likely. Then rotate the cup burr as needed as you spin it, but don’t come down to the level of the stone. Clean up any flakes or metal burrs with a barette file or graver and polish with a wheel (eek! careful!) or pieces of very fine sand papers or even a scotch stone and burnisher…any method you can think of that doesn’t use an abrasive surface against the stone.
Me, I’m going to prepare my prong as much as possible before pushing it over. Realistically, there may be some smoothing of the edge of the prong to be done so that it doesn’t snag on clothes. I have a very fine cut barette file to use for this and then the surface filed is actually on the bottom surface of the prong, where you don’t really see it. you can use some kind of very fine sandpaper (crocus cloth) or hand buff there if needed. Or use a knife graver…diff’rent strokes for diff’rent folks, I guess. -royjohn
I hadn’t thought of pushing the prongs over and THEN cutting them to height. Other authors cut the prongs to correct length first, then notch them and push over the tips
Well, next time I’ll have to actually read the directions rather than just look at the pictures.
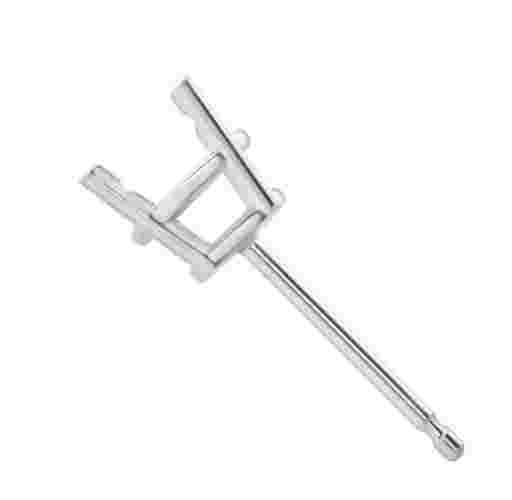
In my defense, Hans was showing how to set with a setting one fabricates, where the prongs can be made long to start with. I’m trying to deal with purchased settings like this:
where I don’t have the option of taller prongs.
The picture might be a bit fuzzy, but isn’t it nice and large? That would be so much easier to deal with than the actual size!
If the prongs are square or rectangular, there can be a problem with transitioning one shape to another and maybe this is why you’re feeling like the burr needs to come down to the stone?
No, I haven’t located a picture to post, but I like the look of very tiny, rounded prong tips. Maybe I’ve been looking at too much diamond jewelry? Much less risk to the stone with diamonds compared to the stones I generally set.
If you’re going to use a burr after pushing down the prong, you should make sure the edge of it is smoothed and polished…
Thanks for the reminder. It is amazing the obvious things I can overlook.
I find it easier to make the prongs the right size. And use the cup bur before and after setting.
If they are the right size it’s easier to get the indentations for the stone at the same height. Top of the burr at the top of the prong. I never had this problem of damaging the stone after using the cup burr again. Polishing the burr might help. There are pumice wheels that work well on metal and do not damage stones. I buy them in Europe H.M. Eve pumice.
I learned to set stones from incredibly skilled master craftsmen who learned before WWII. I was taught that you should not shorten or finish the prongs before setting. The inside of the setting as well as the sides of the prongs should be pre polished after the seat is cut and the sides of the prongs have been de-burred where the seat was cut. The longer the prong the easier it is to move and maneuver and the less likely you will be to slip and nick the stone when pushing. Think of levers and fulcrums. Once the stone facets are properly lined up wth the prongs and the stone is level and tight the the prongs should be cut shorter with an 8/0 saw blade. It’s important to have the saw blade tight in the frame and to not nick the stone with it. Sometimes I use a little oil or spit on both the blade and the file edge to help them slide over the stone. I was taught to never use clippers to shorten as sometimes the shock of the prong being clipped will chip the girdle of the stone. I have actually seen this happen more than once. Once the prongs are cut to half way between the girdle and the table of the stone a highly polished safety edged three square triangle needle file, (preferably a #4-#6 cut), should be used to shape the prong. I use cup burs only on diamonds and very small ones at at that. I got lazy once and made the error once of using a cup burr on a bunch of white sapphire melle. That was a very expensive mistake. My students love and often repeat my teaching motto “If I can’t be a good example I might as well be a horrible reminder”.
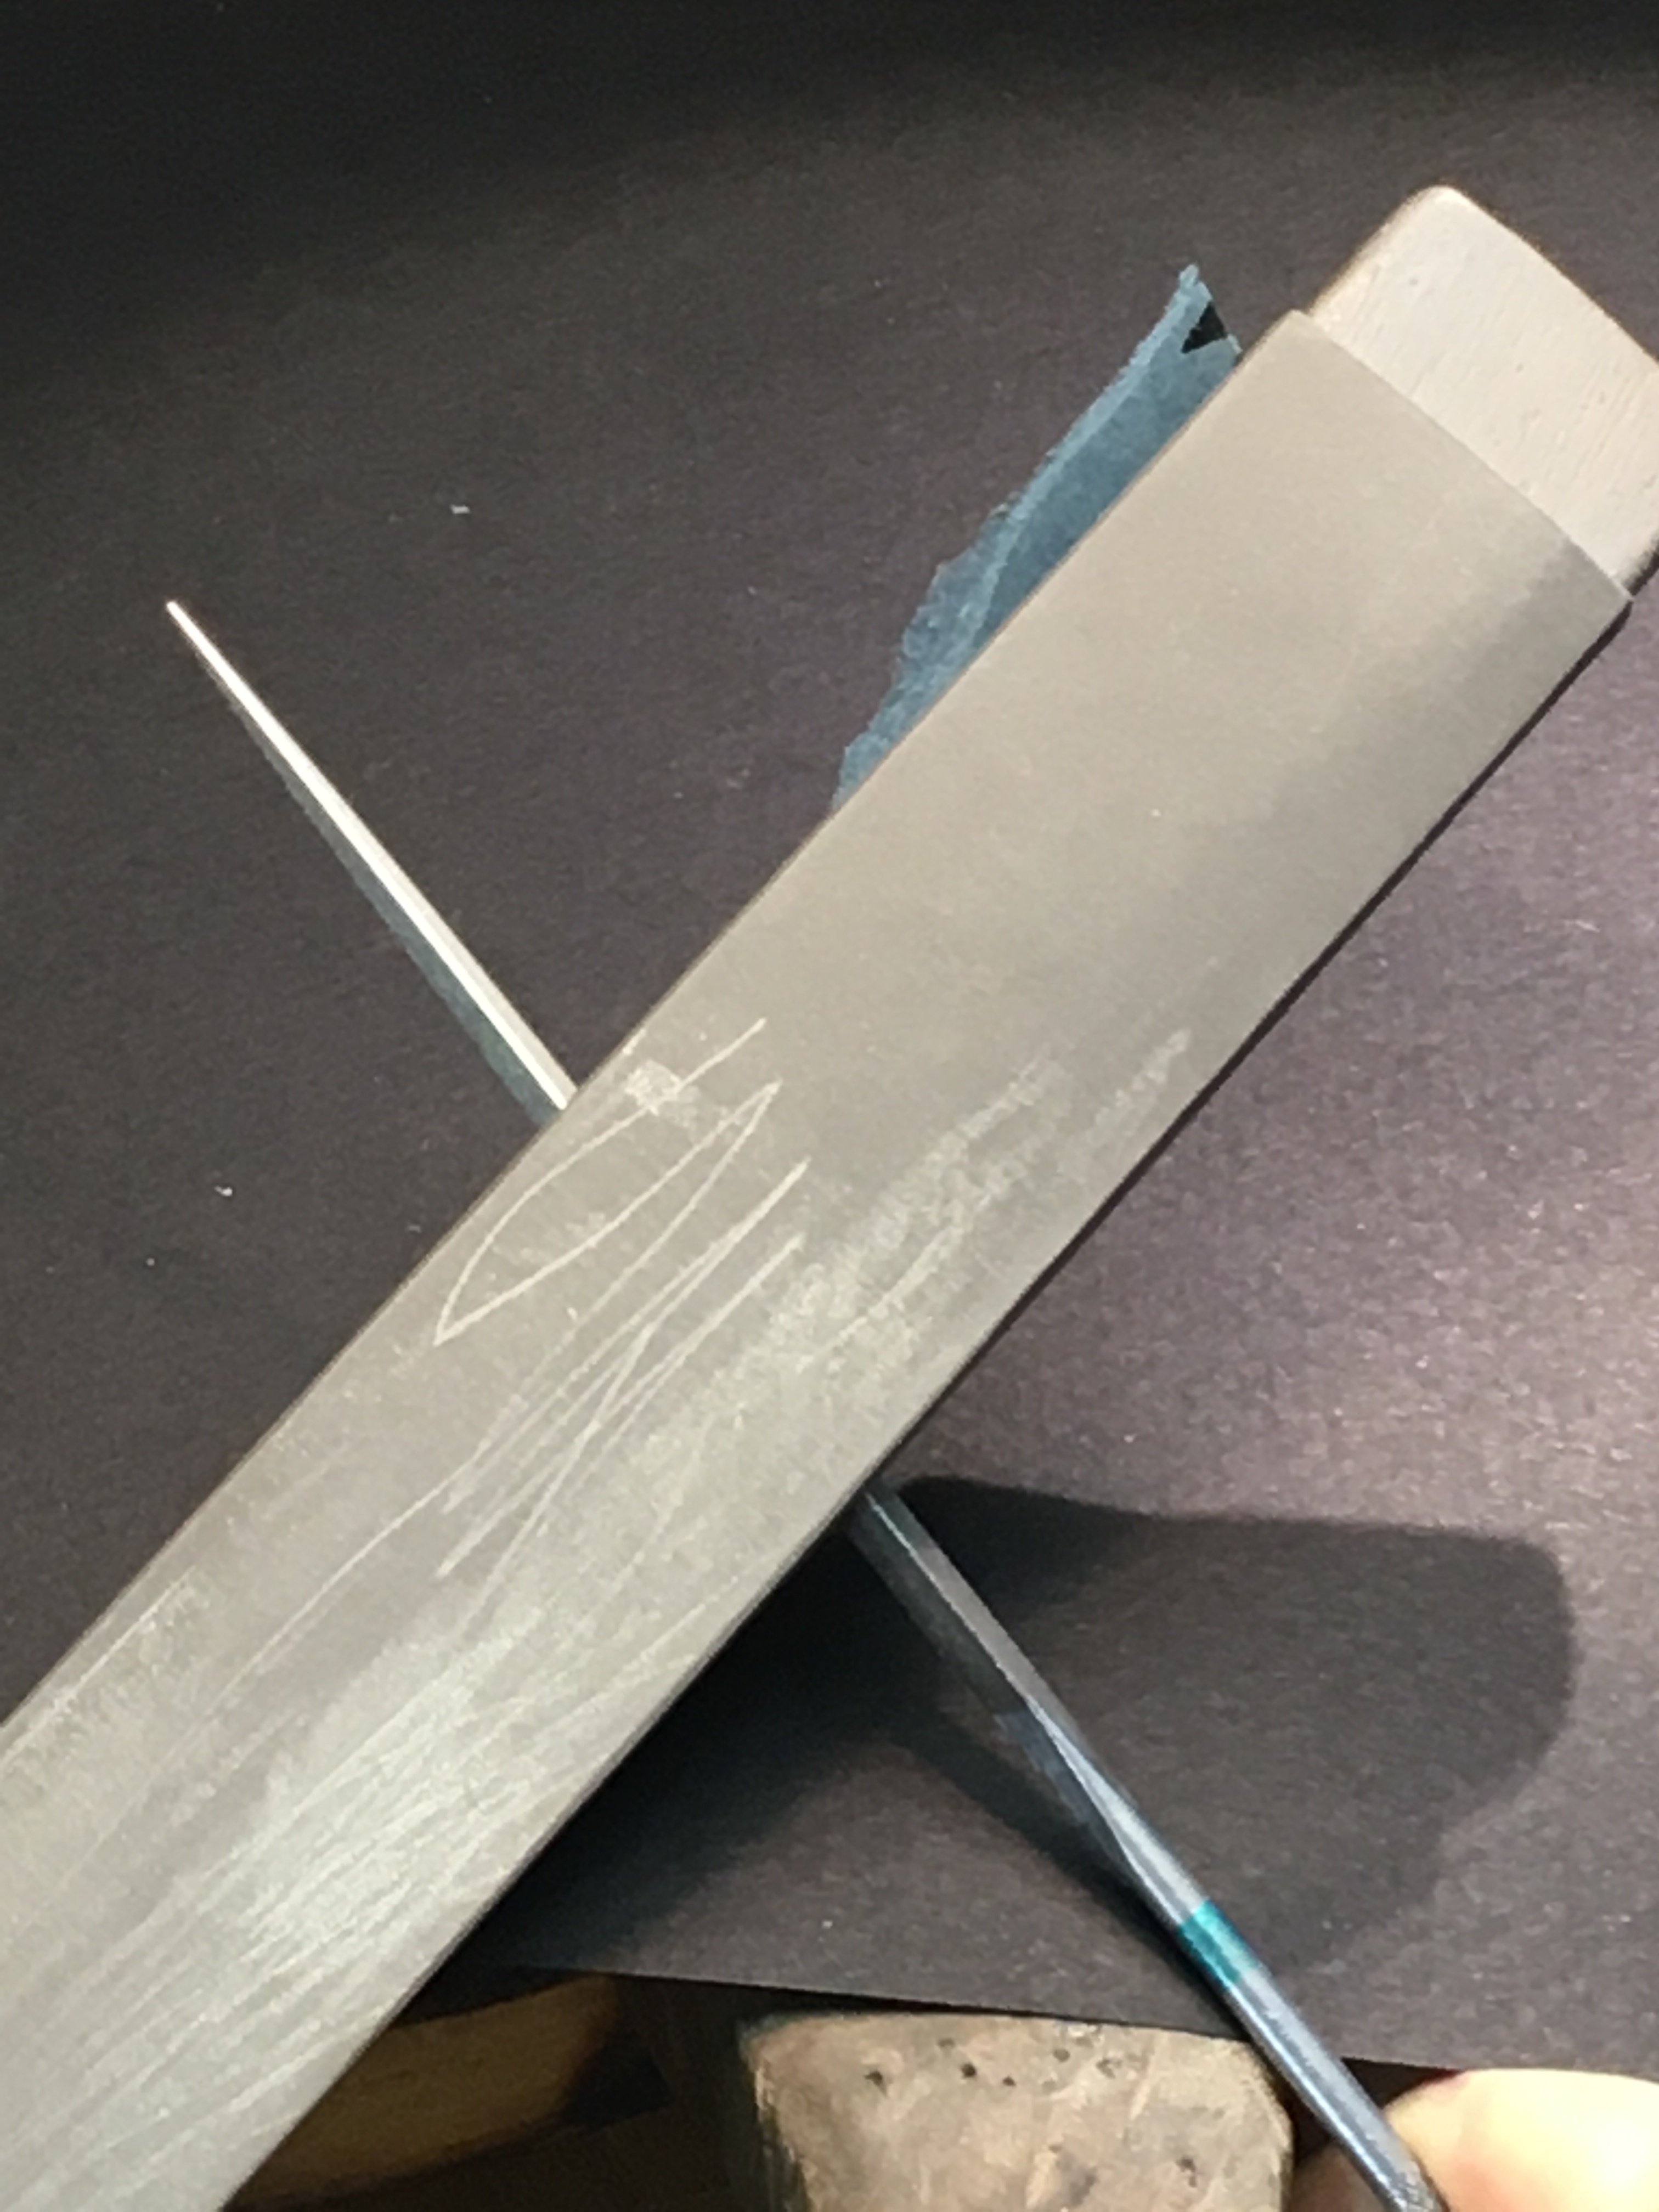
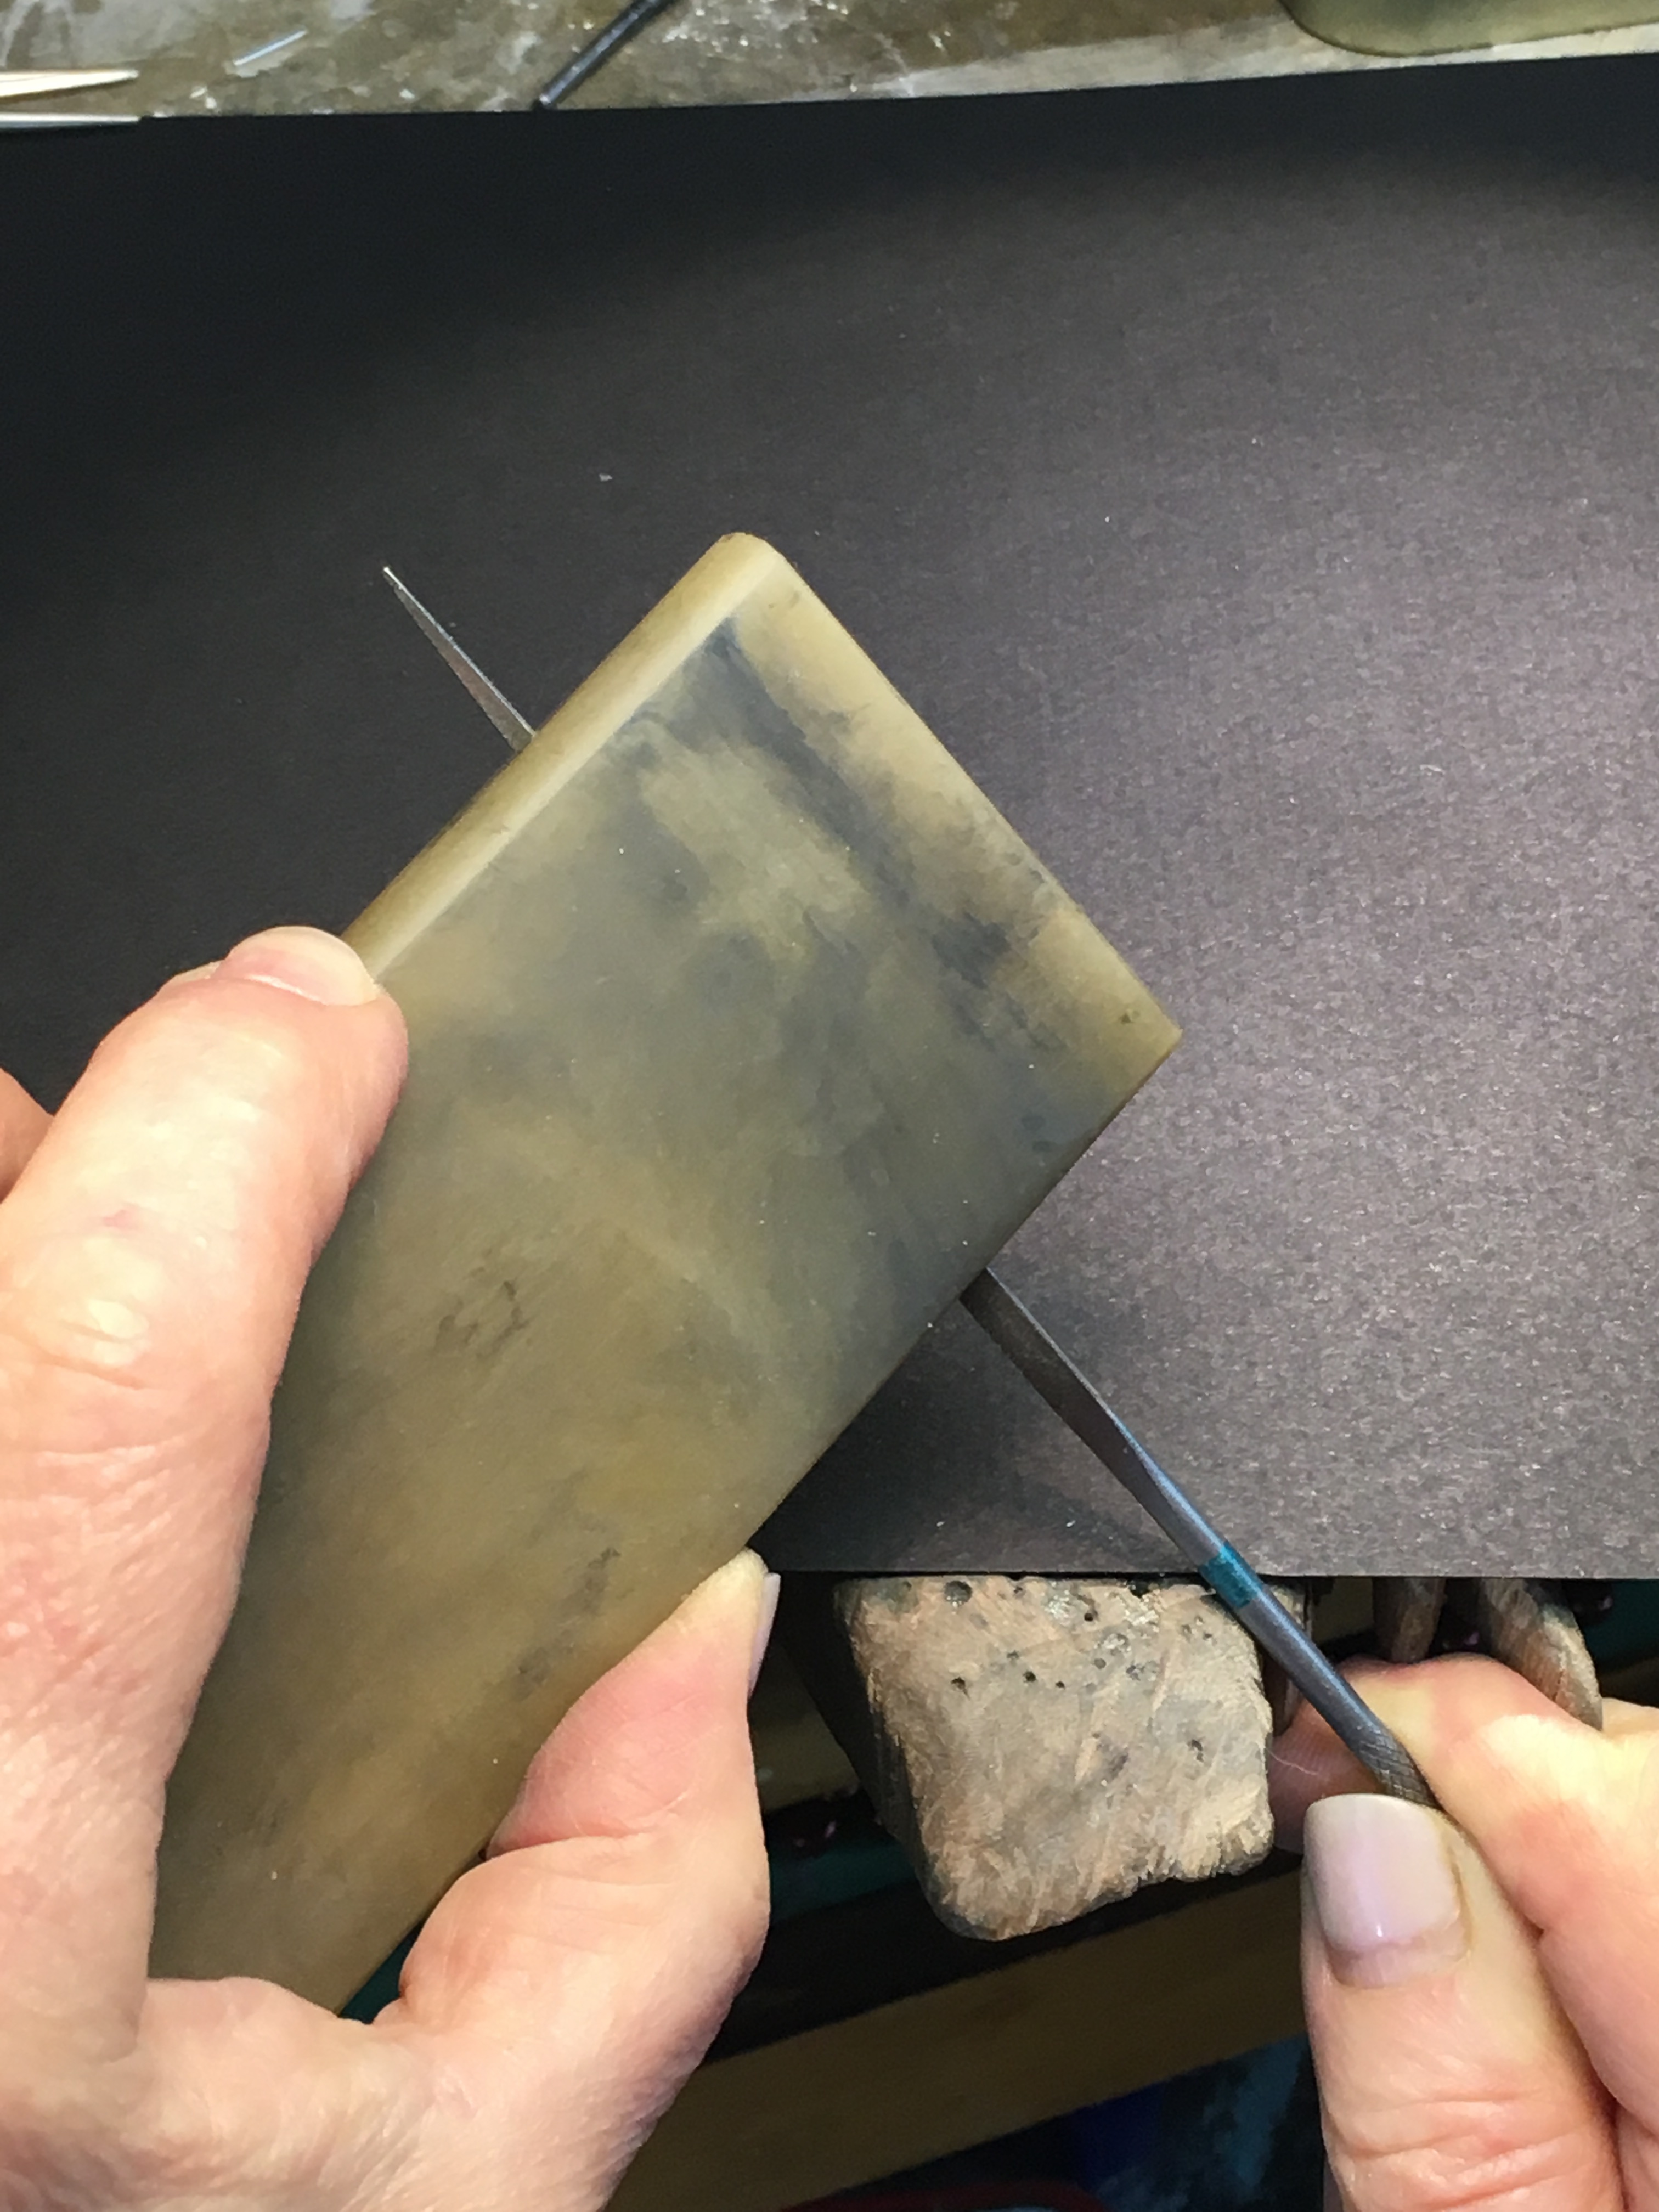
I have attached photos of how to make a safety file from my setting classes. Get a very good quality #4 cut three square file. Using emery paper on a stick smooth only the sharp edges on the file. Remember the whole point of this is to only smooth the edges and not dull the flat cutting surfaces. I emery down to 400-600 and then use a very fine arkansas stone with oil to put a mirror polish on the edges. I do the same with my barrette needle files as well. I rarely use rubber wheels because I like a nice crisp look to my prongs regardless of the shape. When I use a very fine cut safety file I can go straight to polish with a small bristle brush and rouge. I’ll attach photos of the file modification.
I use the burr before and after setting.
About the tutorial, it only work with hard stones. If you leave the prongs long, you do not have a clue as to where to make the indentation with softer stones. Also when you bend the prongs outward it’s tricky enough to have them bend out exactly evenly on all sites. Helpfull is an els (I dont know the word in english) in different sizes - a point with a rounded end, you stick it in the setting and push the prong open from inside out. The els is also usable for rubbed? settings.