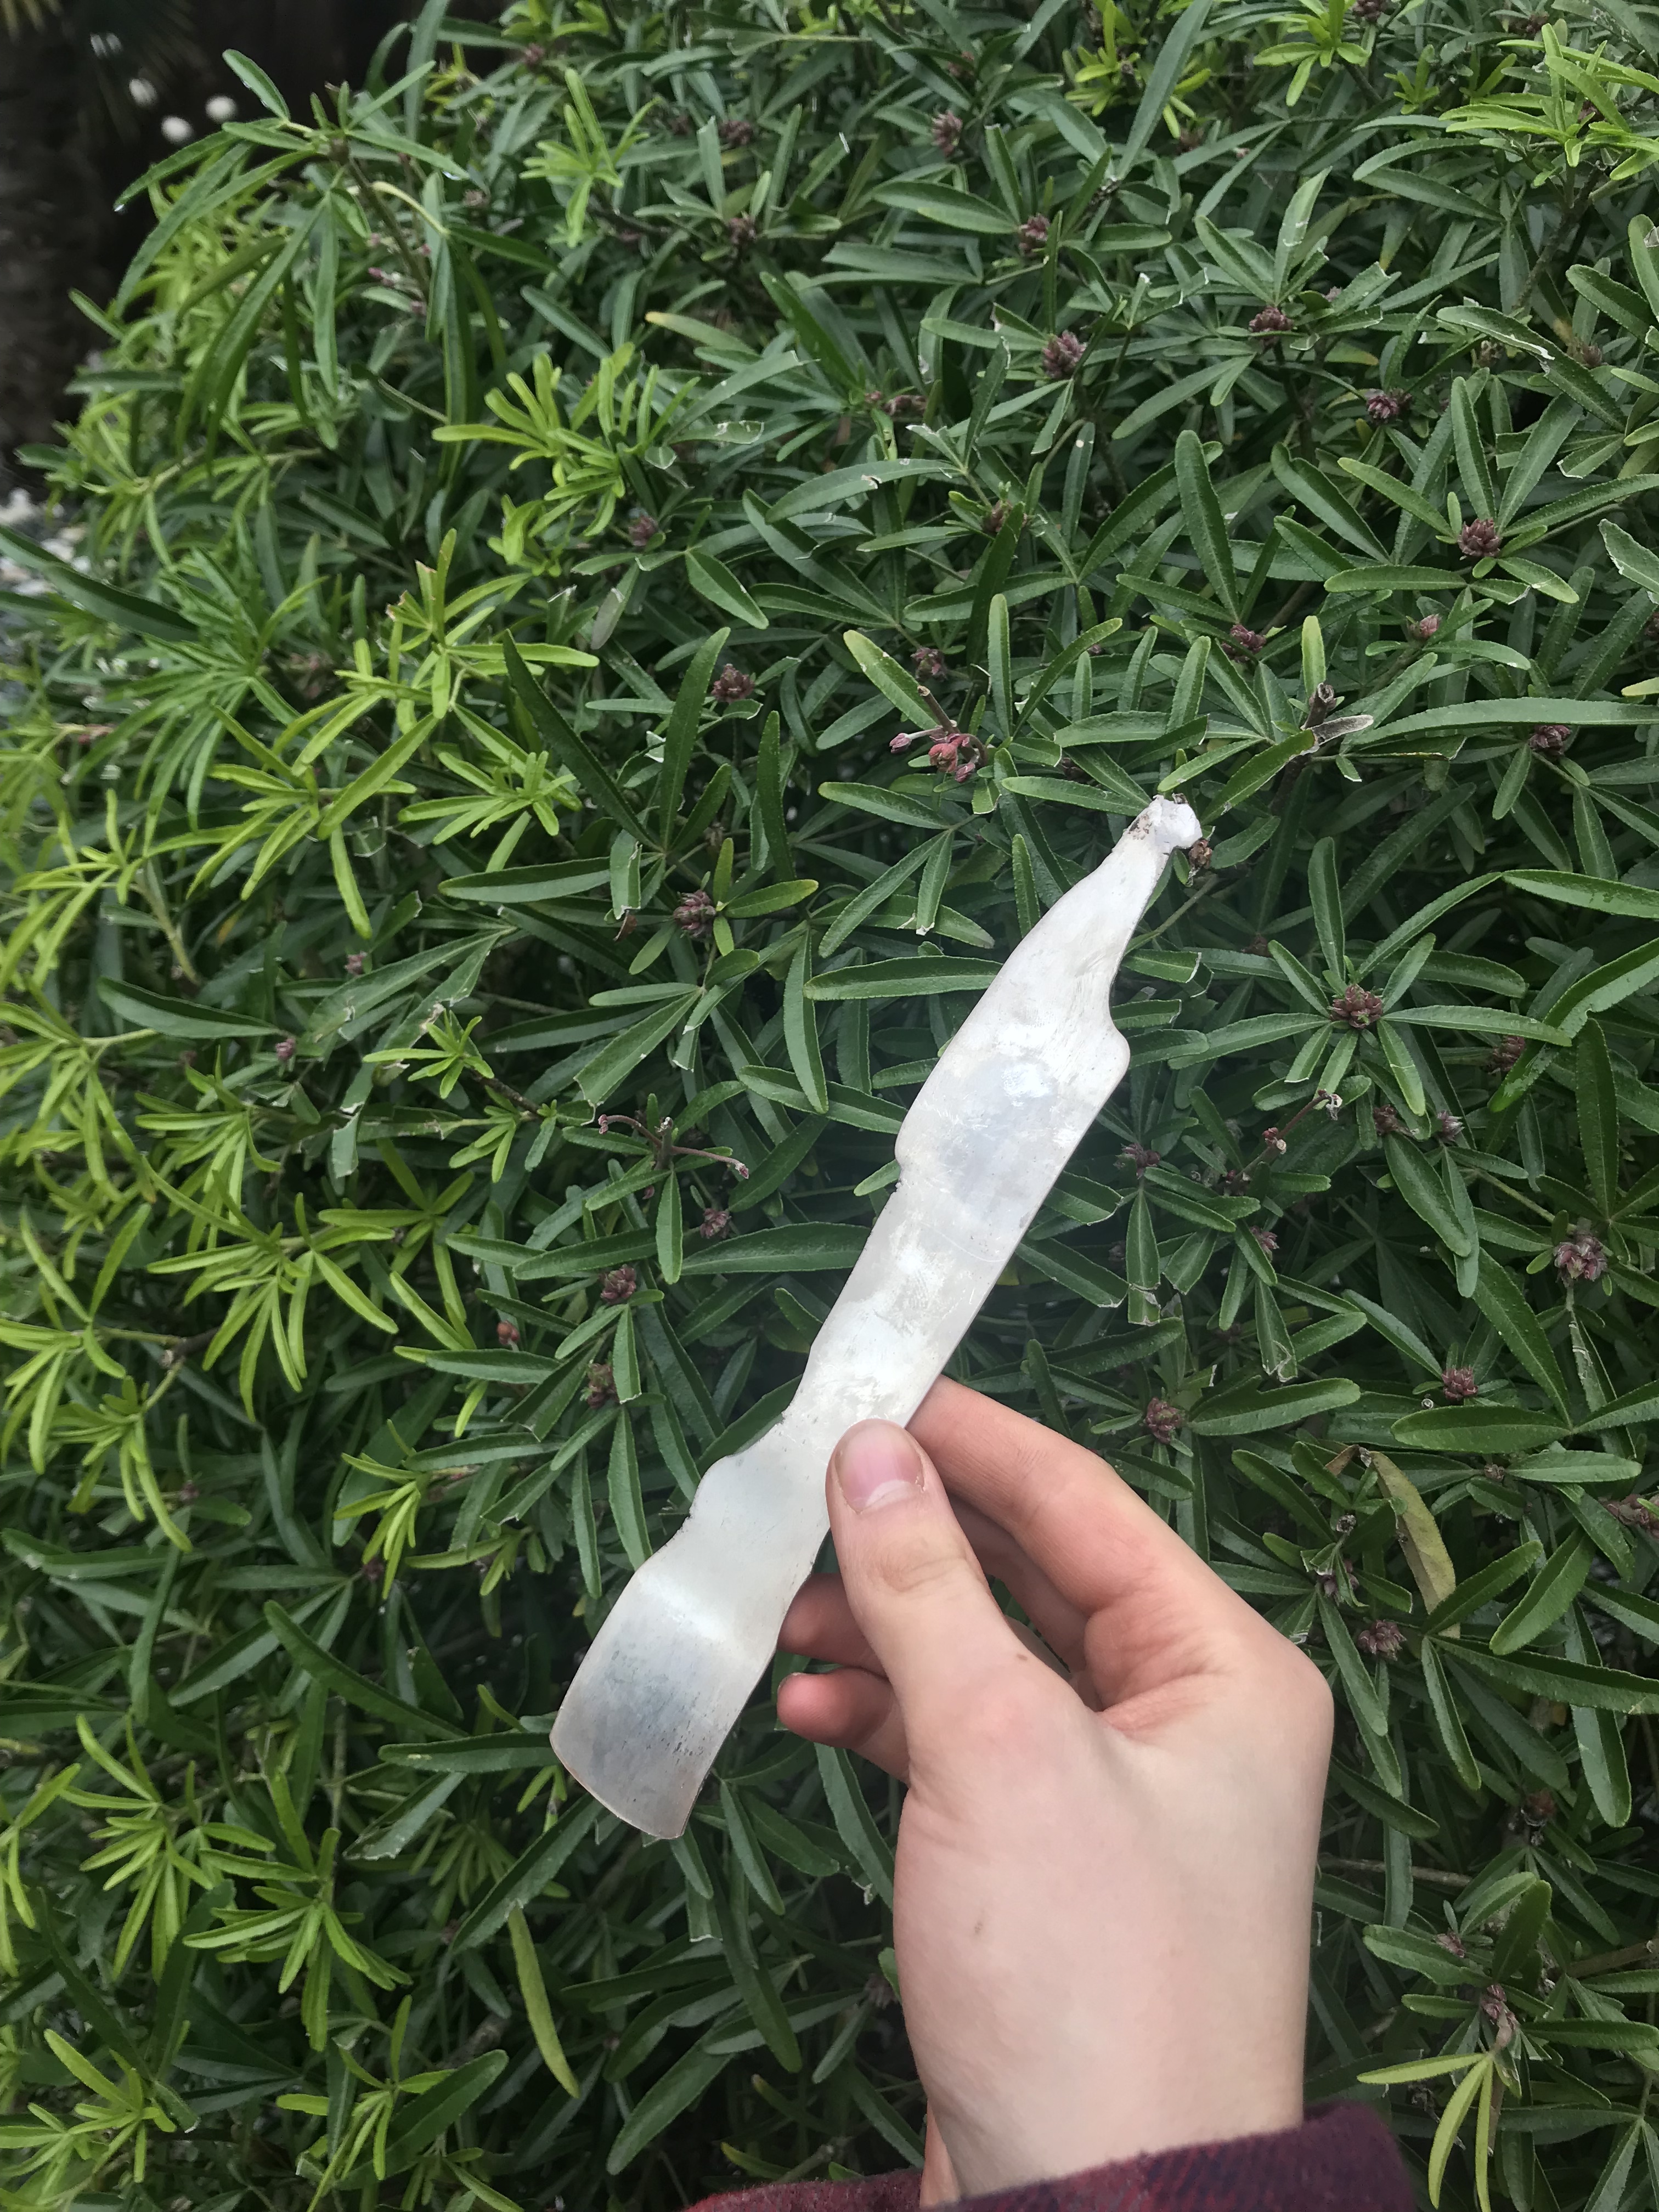
I am not sure exactly how to describe this, but ingots I pour to roll into sheet are never solid. It seems that as the metal pours it solidifies into this wavy shape, not giving me a solid rectangular ingot. I pre-heat the mold and make sure the metal is heated past it’s melting point so I do not know how to fix this. Here is a picture of the finsished sheet.
Good Morning,
I have had this and other problems with poring and rolling ingots over the years. There is a learning curve and experience is the teacher. A couple things come to my mind.
-
What is the material you are melting? Is it new material or is it scrap? Is there any solder in the
melt?
Are you mixing any new material with the scrap if you are using scrap? -
What kind of ingot mold are you using. Are you annealing and forging the ingot after you pour it? If
so what hammer(s) are you using?
If you have any contaminating material in the melt you are sure to have issues. Don’t use scrap with solder attached. If you are using bench sweeps are you cleaning out all the junk? Are you adding a pinch borax or boric acid to the melt? Are you stirring the melt with a graphite rod to collect the contaminates and remove them?
I think forging the ingot is critical. It allows you to shape the ingot some but it also breaks up the crystalline structure in the metal. I think this is done best with a cross peen hammer and not a plannishing hammer. I anneal and then forge on two sides and then I anneal again and forge the other two. Making an attempt to get some consistency of shape before it goes through the mill. The ingot gets washed and scrubbed in very hot water to remove any residue of flux from the surfaces and set to dry before it goes near the mill.
This is my process before I get ready to roll anything. Other peoples process will vary and some may disagree with my process. I am pleased with my results.
And rolling itself is another discussion entirely.
Go back in the archives where this has been covered to greater degree. Also I can’t say enough for Tim McCreight’s book The Complete Metalsmith.
Don Meixner
Shooting from the hip, I would say to experiment a bit. The problem is that the metal is cooling as you are pouring creating the irregular ingot. So to fix it, I would suggest trying to either pour it faster, heat it higher before pouring, or heat the ingot mold more (should be smoking hot). . . Or a mix of the above options. My best guess (having dealt with this in past), would be to heat your metal significantly more.
Hope that helps!
Erich
I think that several things may be contributing. The metal may indeed be cooling quickly. Or there could be air trapped. Remember that the air inside the ingot mold cavity must leave as the metal takes its place. Try tilting the mold a little. Like pouring a glass of beer.
I have several two part ingot molds but I almost always use a simple open faced strip mold. I pour sheet and wire ingots nearly every day in the studio. Best of luck.
Please excuse any typos-- curse my clumsy digits…
Get your mold hotter. It takes a lot longer than you’d think. So long that I always go pee before I start:-) Really. You should feel heat radiating off of it like a cast iron skillet before you sear things in it.
Heat your metal in the crucible so that when you swirl the metal round in the crucible it should be splashy like water. Not thick like honey. Do not over heat it. You can tell because you can see sparks of alloy burning off. That will leave pits.
Pour the metal as fast as you can.
And I always tip my mold like Andy C says. It reduces trapped air bubbles and makes it easier for me to hit the opening at the top when I pour.
Quench, pickle, rinse, dry, and forge before rolling.
Good luck. You’ll get it. it just takes practice.
Oh yeah and one last thing. When pouring an ingot…Don’t wear flip flops:-)
2 Likes
Or shorts.
D
1 Like
On ingot forging, is it really necessary or just done to reduce minor cracks along the edges? If necessary what sort of hammer? Would a bench block be a sufficient surface to forge on?
I think forging is critical. I use a 14 ounce cross peen hammer and I forge on a piece of Foundry rail on a stump or a heavy bench. I think the hammer is the best choice. As to the foundry rail it may not be necessary but it is what I have.
Don Meixner
I heat my mold with a torch to drive off any moisture then put it into my kiln at 300C while I am preparing the melt. Do the melt once adding some borax and stirring with a graphite rod to remove whatever it will remove. You should also pass a magnet over the scrap. Take the mold out of the kiln, coat the inside surface with torch ash to polish it and assemble it. Remelt the metal and pour as quickly as you can but do it safely. Remove the ingot and sand off any flashing, burs or sharp edges. Forge with a chisel shaped hammer on all sides, anneal and then forge, roll or draw or whatever. Lots of good advice in earlier posts on this topic…Rob
I never used to forge ingots. My results were fine. But I decided to try forging a bit first. Can’t say that I see any difference in the product. But I see it in the process. I can feel the ingot- wire or sheet-roll more smoothly. I can feel it through the handle of the mill.
Forging breaks up the crystalline structure of the as-cast ingot. It also saves wear and tear on the mill.
Please excuse any typos-- curse my clumsy digits…
Andy…I know what you mean. Before I forged prior to annealing and doing whatever was needed, everything was fine for a while and then it all went to hell. Now that I forge prior to doing any work, I can pretty much predict what will happen when. The neatest thing is when it all starts to just roll straight. I think that this is when all the unequal stresses are ironed out and I am dealing with a a homogeneous mass. I am not a metallurgist, so I have no idea what is happening at the molecular level, I just know what works for me. For me forging and removing any flashing, sharp edges and cracks prior to rolling makes a big difference. I also almost exclusively work in silver. Gold seems to be a lot more forgiving, although I treat it the same as silver. Preparing your scrap is also important. Remove any solder that you can. Adjust with new silver (sterling or fine depending on how much solder you think is in the melt). Use a magnet to remove any ferrous metal. Add borax and stir with a graphite rod to remove whatever else you can. I once found a spring from a clasp that I had missed. Heating and polishing the mold also seems to make it go better. I do a lot of ingot casting in Delft clay either because I need a custom ingot shape or because none of my ingots will work. In some cases, I make a frame work out of 1/8 inch square tool steel in my anvil and hold it in place with small magnets. I then pour directly on the anvil. This is all a lot of fun and will generate new shapes and ideas for new work. I still have a lost wax centrifugal arm that I bought years ago and have never used. I would like to try it using delft clay rather than investment. I suggested this a while ago and several of you reported that it worked. Have fun and Happy New Year…Rob
Happy New Year to you too, Rob!
As I said, I really haven’t noticed a difference in the product, but the process is nicer. I work a lot in sterling and pour all of my ingots in an open faced strip mold.
You couldn’t be more on the money, I think, when you talk about removing flashing and cracks. Small cracks become bigger. My understanding of cast iron is that no sharp inside corners are engineered in. All of those corners are radiuses so that a crack won’t begin at that corner point. Not sure if it is just for cooling or as the finished product encounters day to day stresses. Flashing just rolls in and then peels back off as soon as you bend the metal.
The one thing that I don’t do so much, is add fresh metal to the melt. I reuse almost all of my scrap, unless it somehow has been contaminated. Sometimes I’ll melt clean filings into small ingots, especially with gold.
Be well.
Andy
Do you forge with the cross peen or the flat part of the hammer?
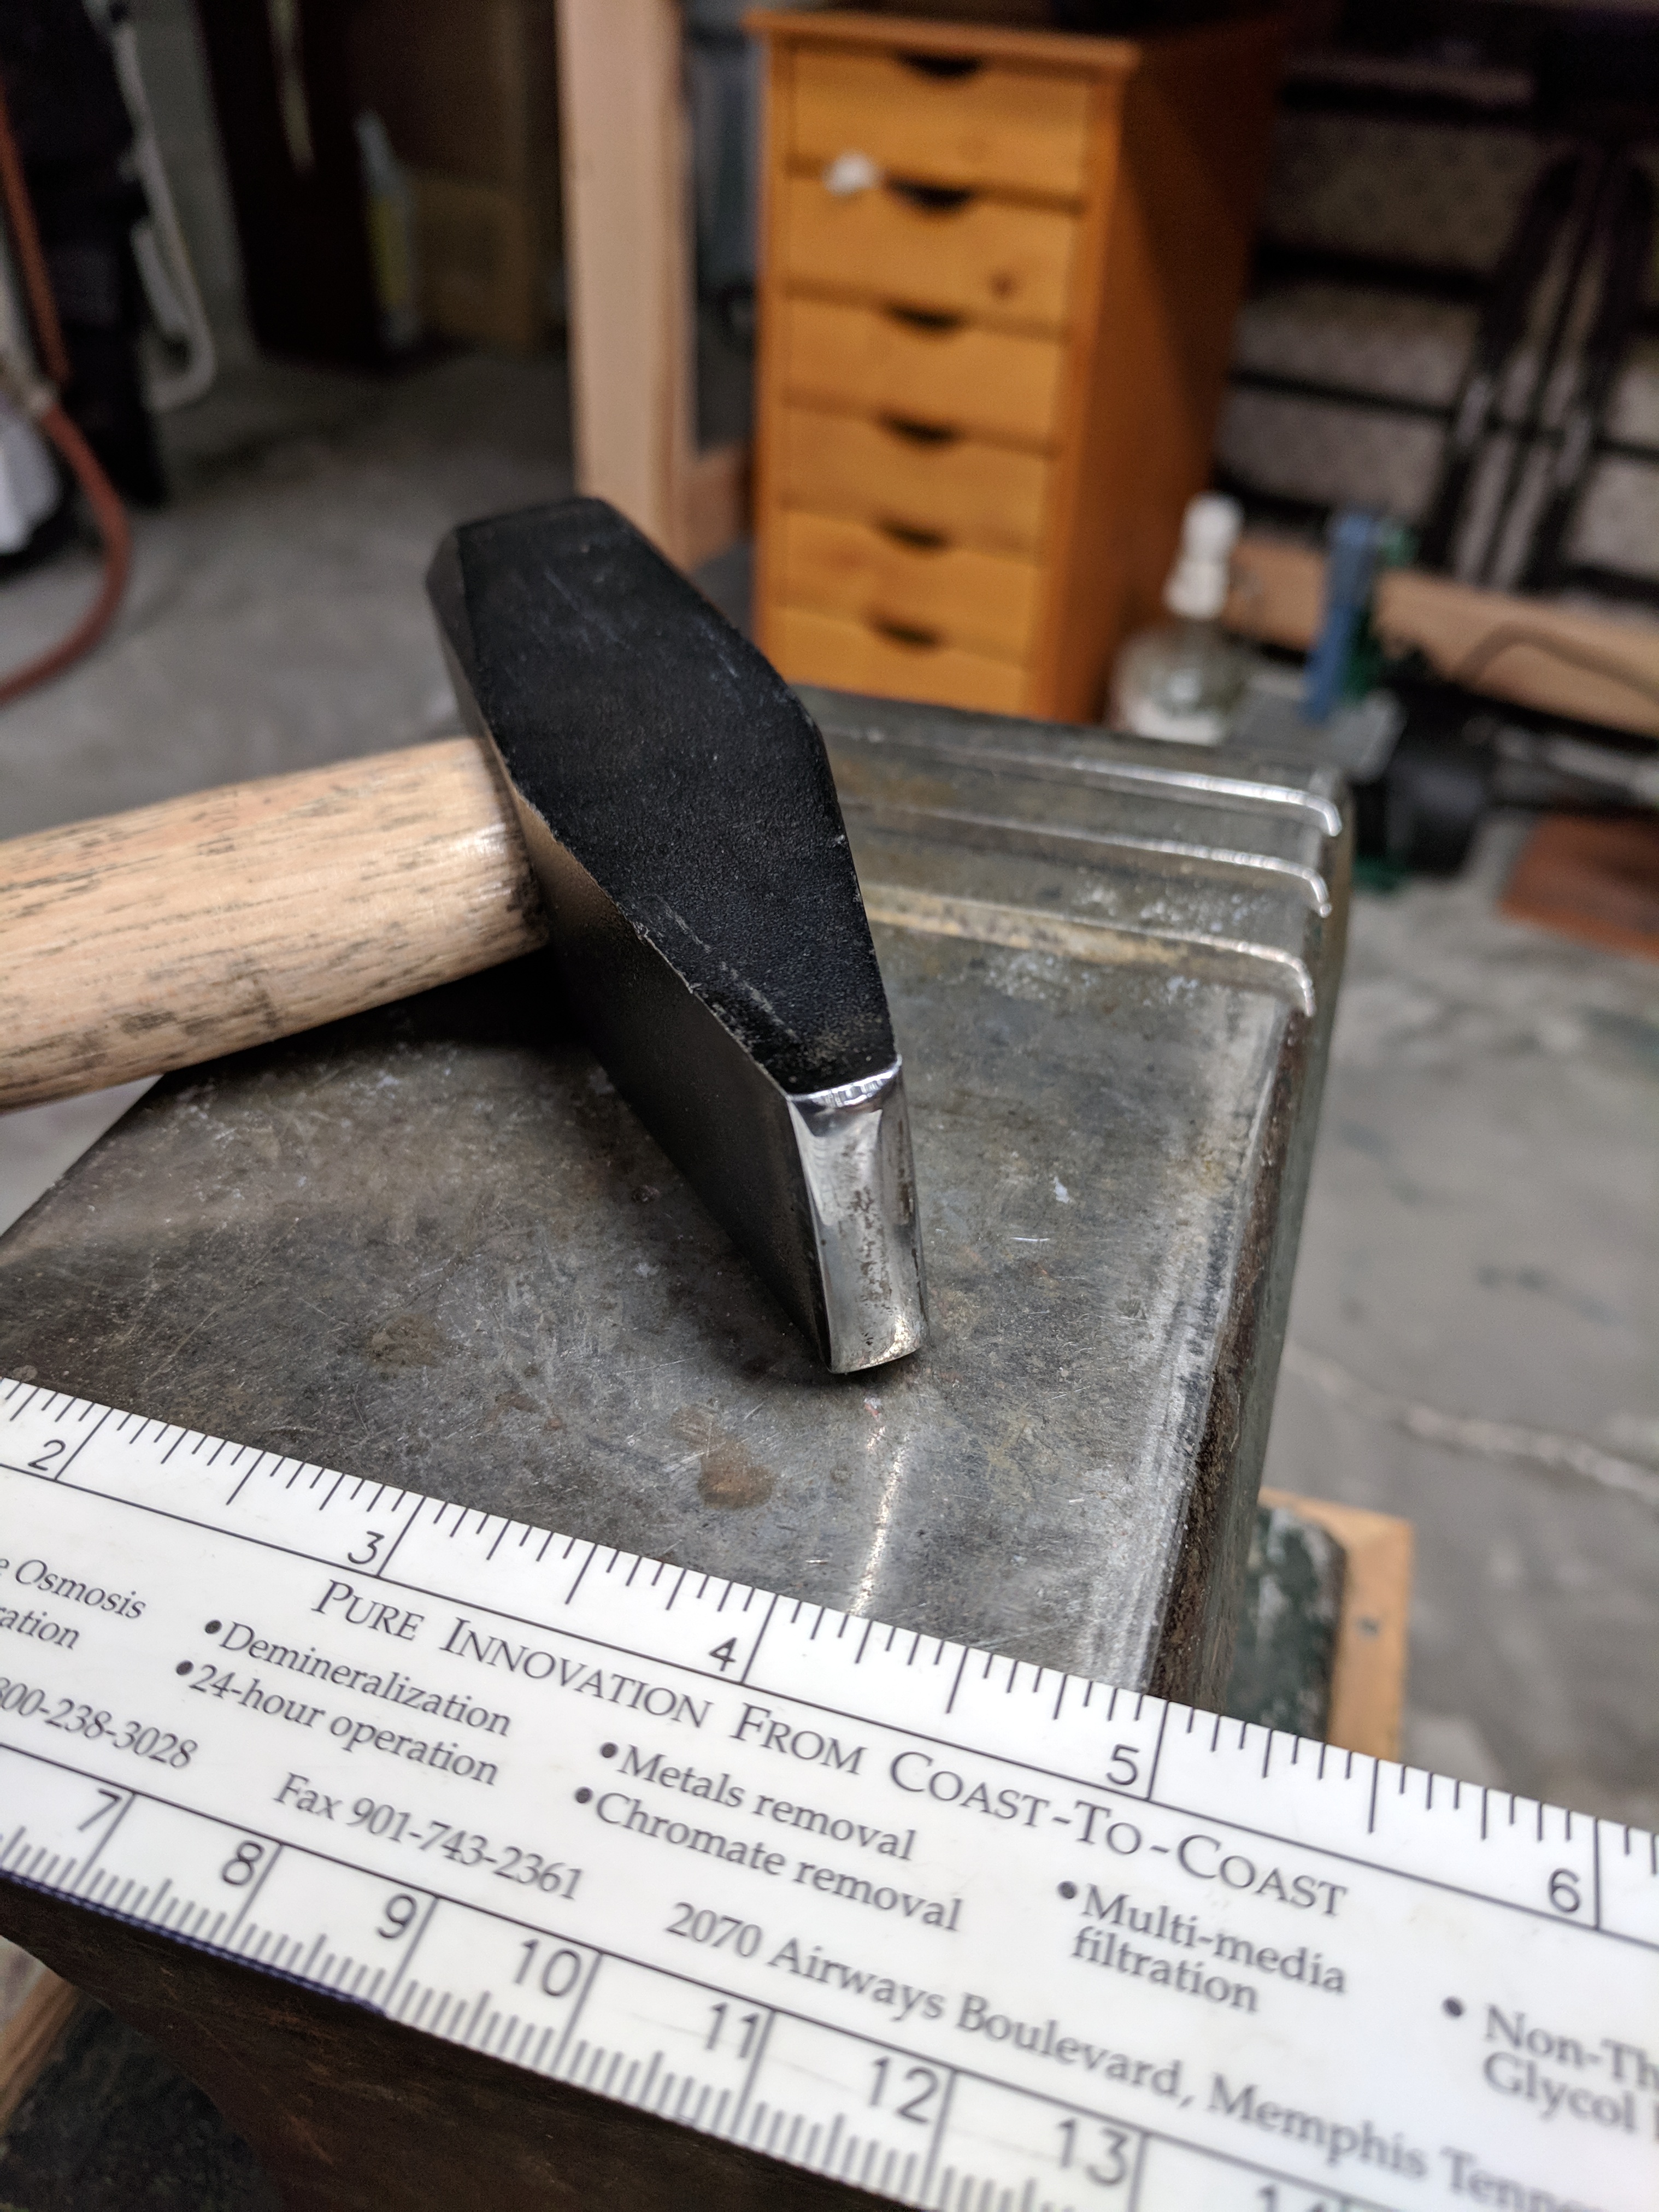
You should be able to see a picture of the hammer that I use for most of my forging. I also have smaller hammers for smaller stuff…Rob
I never thought about tipping the mold to release air. Good idea. I do know that you shouldn’t pick the preheated mold up with your bare hands after it has been in a 300C kiln. Did that a couple weeks ago and just got over it…Rob
Jeepers Rob.
I use the cross peen face to forge an ingot. I clean and scrub the piece to get to shiny metal. When I forge I start nearest to me on the anvil and I forge moving away pushing the work away from me. Then I flip the piece and repeat on the other side. I anneal scrub with soapy water and a brass brush and then forge the sides with the same process. I try and keep the forging blows consistent in distance and depth.
Don Meixner
Yup, forgot all about the oven mitts that we’re right on top of the kiln.
@rmeixner, re: the photo of your hammer and anvil …how do you use the cuts on the surface of your anvil?
We Meixners have been making heavy forged and twisted bracelets for nearly 80 years. A common element is for them to be triangular in profile or to include triangular elements. The grooves are for forging the profile. For a long time I also forged 8 gauge wire into a triangular profile using the smallest groove. I now either buy it or draw it. You can see that the grooves are well used and really need to be redone, but I haven’t found a machinist who I trust to do it. I have used this anvil (heavy piece of rail) for 45 years. It was originally twice as long. Our Dad said that I could have half of it if I paid to have it cut in half. Sorry for the long answer…Rob
1 Like
I would be interested I knowing how heavy the ingot pours weigh and if a heavier bigger ingot results in a tighter better formed ingot.
Also for those who cast into delft, do you get sand inclusions which ruin your rolling mill rolls?
Thanks Marty
Thanks Marty