I’m making an animal pendant in sterling silver and I want to use 2 small 1mm diamonds for the eyes for the recipients birthstone. I don’t have a hammer handpiece to be able to carve out the surrounding metal. How could I make a flush setting or even a prong setting with as little metal as possible so the diamonds are visible?
2 Likes
Rachel
I think using a larger size of stone. 1mm is a tad too small to navigate
in doing any form of preparation for setting. I might suggest at least
1.5mm’s, or even larger, if you can!
For claw-setting, the mini-claws might be covering some of the small
stone. I might suggest Gypsy setting, but even these may be even too small
& will be covering about 15% of the stone. You might have to increase the
size of the stone to get more ‘eye-appeal’. I have setting essays on these
varied techniques in my archives, when you are ready…
Contact me directly 'Gerrylewy18@gmail.com Gerrylewy18@gmail.com" and
I’ll be glad to help you further…Gerry!
*Gerry Lewy *
Toronto.
- (905) 886-5961 *
1 Like
I think I can fit at least a 2mm in the space (I love the eye pun, by the way!)  I’ll have to try that. I might practice with another stone on a separate piece of scrap metal. Thank you It looks easier than a flush setting
Practicing on scrap first is never wasted effort.
I am going to be setting 2, 1mm round Rubies into this little fellow’s eyes later this week. The stones will be flush set into the raised eyeball area, using small burnisher made from a polished burr shank.
Another method that you could use would be to raise 2 small beads on opposite side of the stone. The added appeal of doing this is that the beads can be oriented in such a way as to accent the eye effect
Like this. ·O·
2 Likes
I love this! It’s funny, I was sitting here looking at my piece and thinking the exact same thing as you just mentioned with the 2 beads. Her eyes are ovals, so the beads would add the shape that I need to the stone since they’re round diamonds
What type of bur could I use to raise the 2 beads?
After cutting the seat so that the stone sits just below the surface, you use a round graver to “raise” a burr of metal near the edge of your gemstone, pushing these small bits of the metal toward the girdle of your gemstone, then using a beading tool, gently push, and round the raised bits of metal into a nice round beads that just cover the two opposite edges. It is a nice clean look, that will really accent the eye.
Practice this on scrap, and make sure your graver is sharp, and your beading tool is polished.
2 Likes
You need a round graver to raise beads for this setting technique.
oops just like ringdoctor mentioned. 
1 Like
Awesome I definitely have lots of scrap to try this. Thank you so much!
Lol, no worries.
What size graver would I need for this?
Try using a #52 half-round! In my younger daze, I used an Onglette #2…Then I’d round off the underneath point with emery paper. BTW, I still have this graver in my collection!
Gerry! On my Teaching iPhone!
2 Likes
Thank you Gerry i saw one on Rio Grande but wasnt sure which one I needed. I guess I can solder all pieces together now since the gypsy or bead setting will be the last step
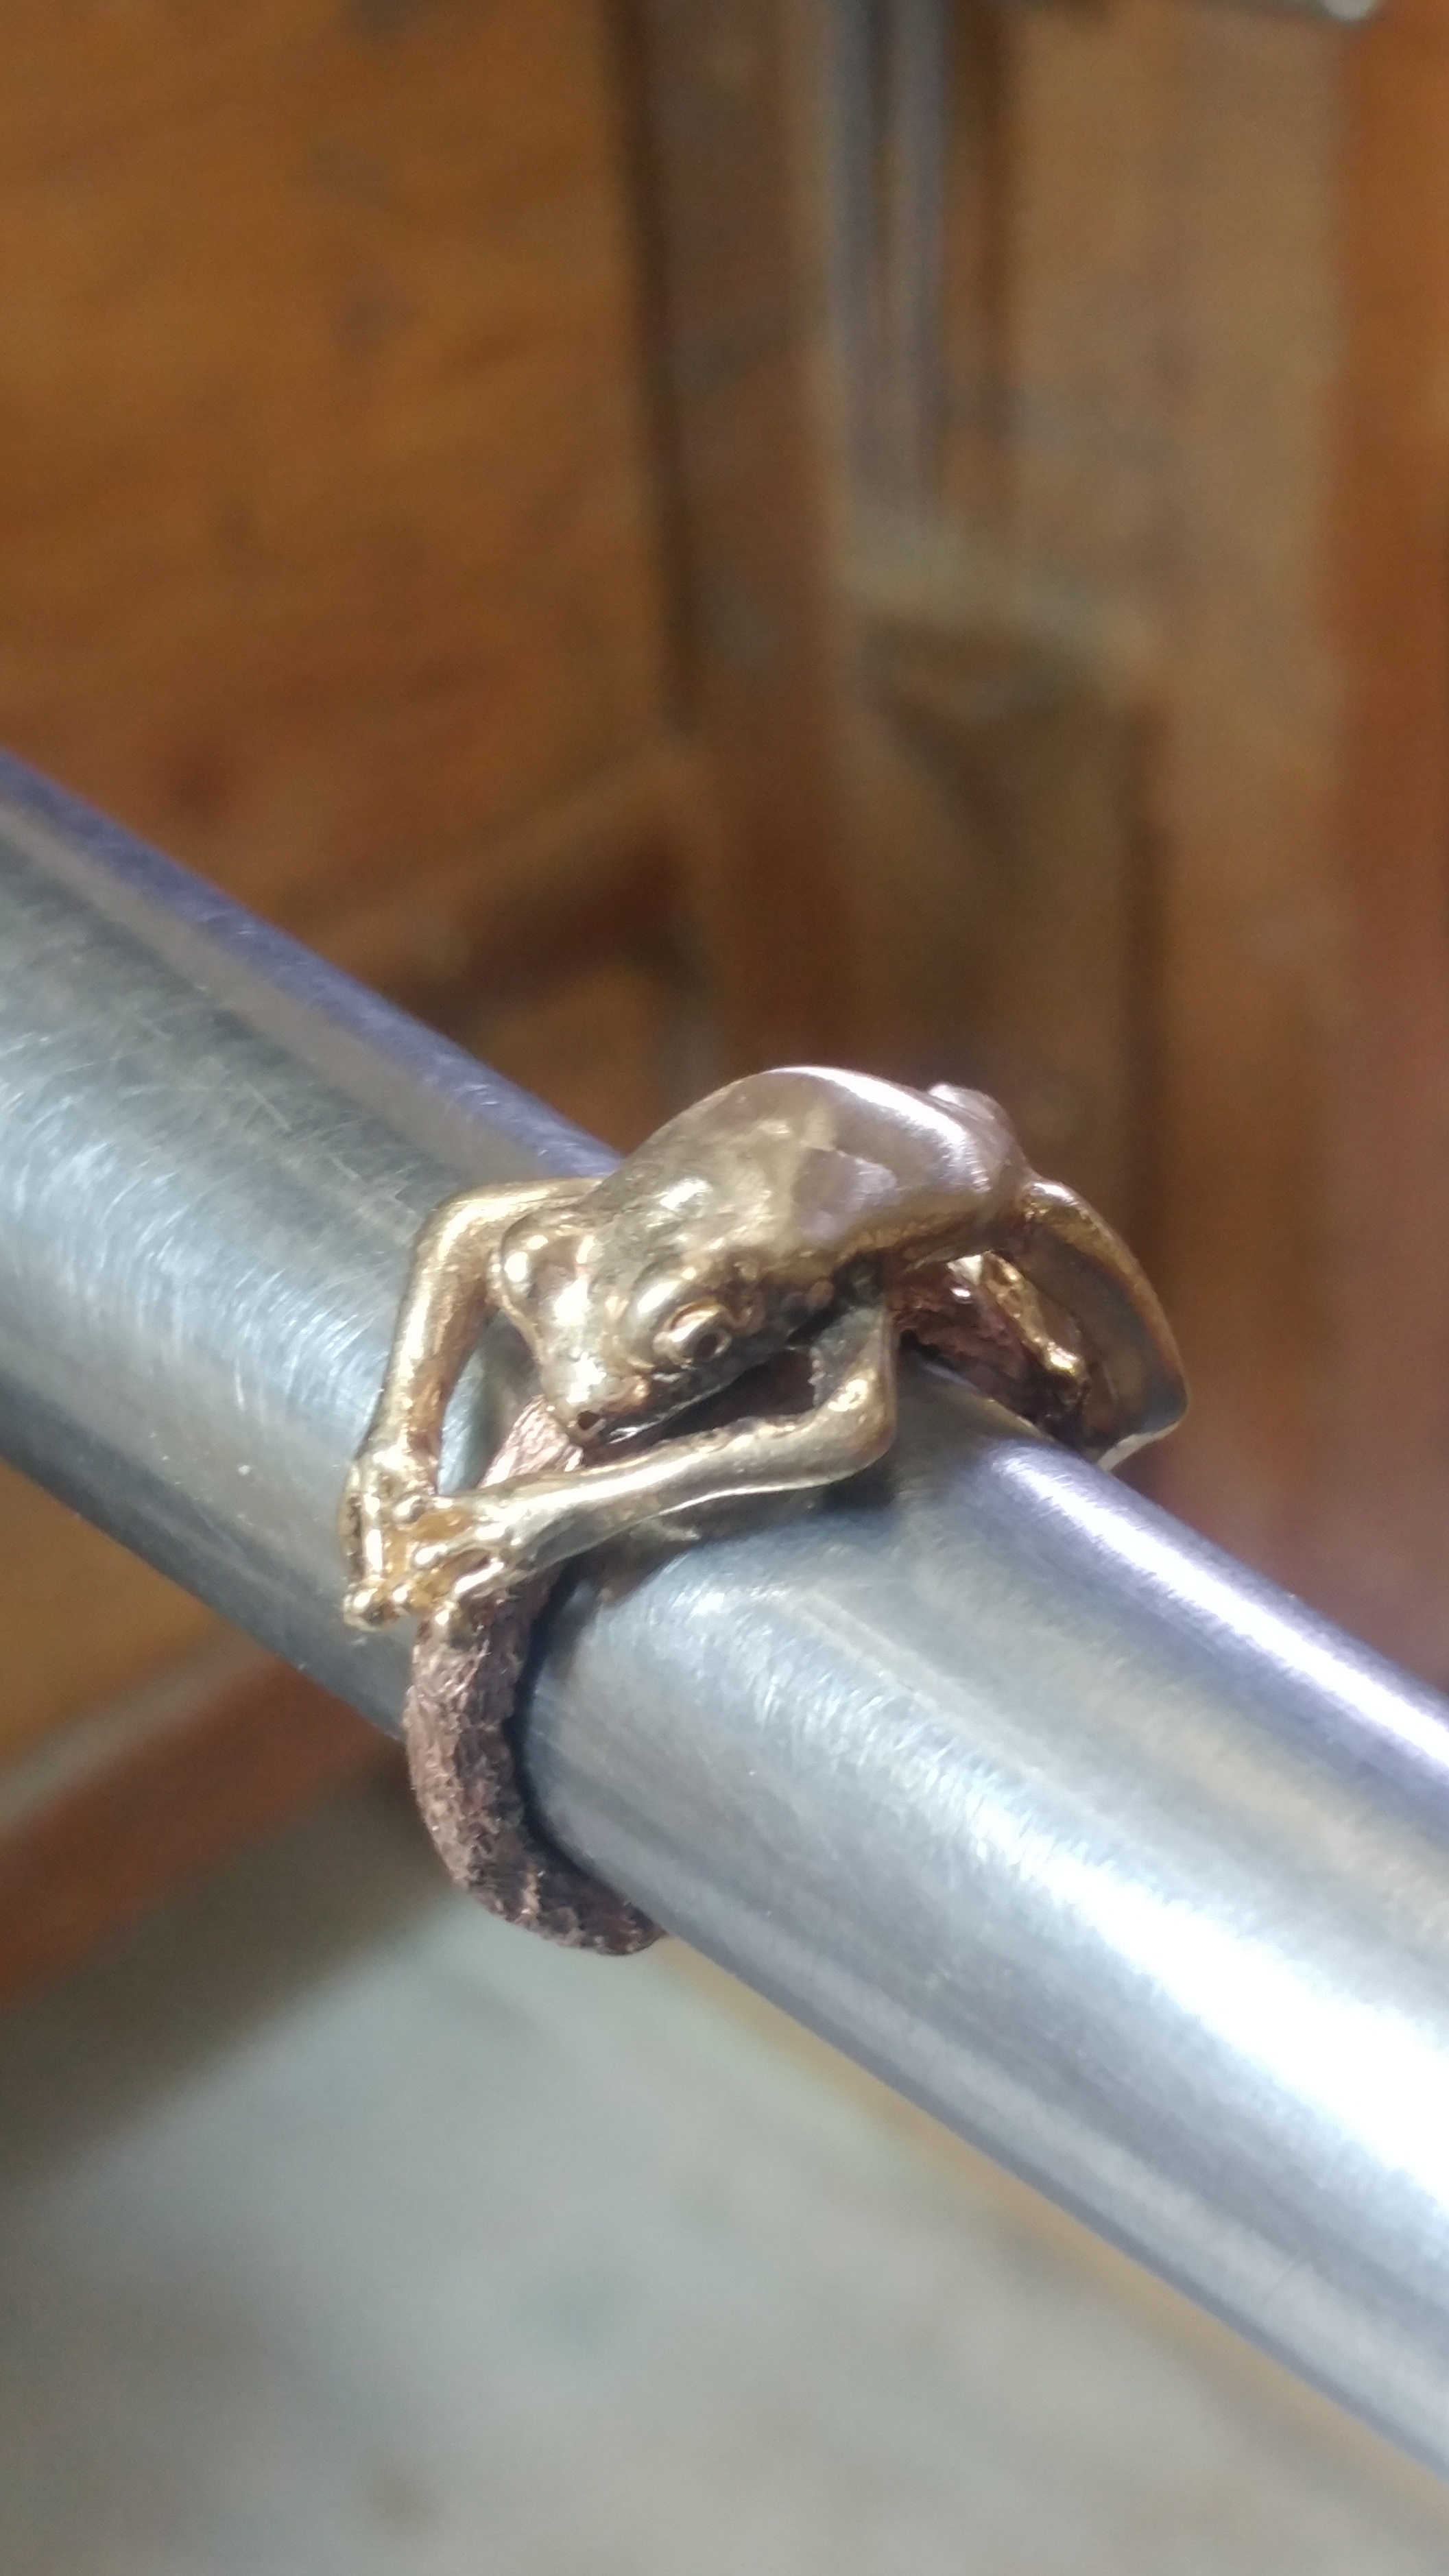
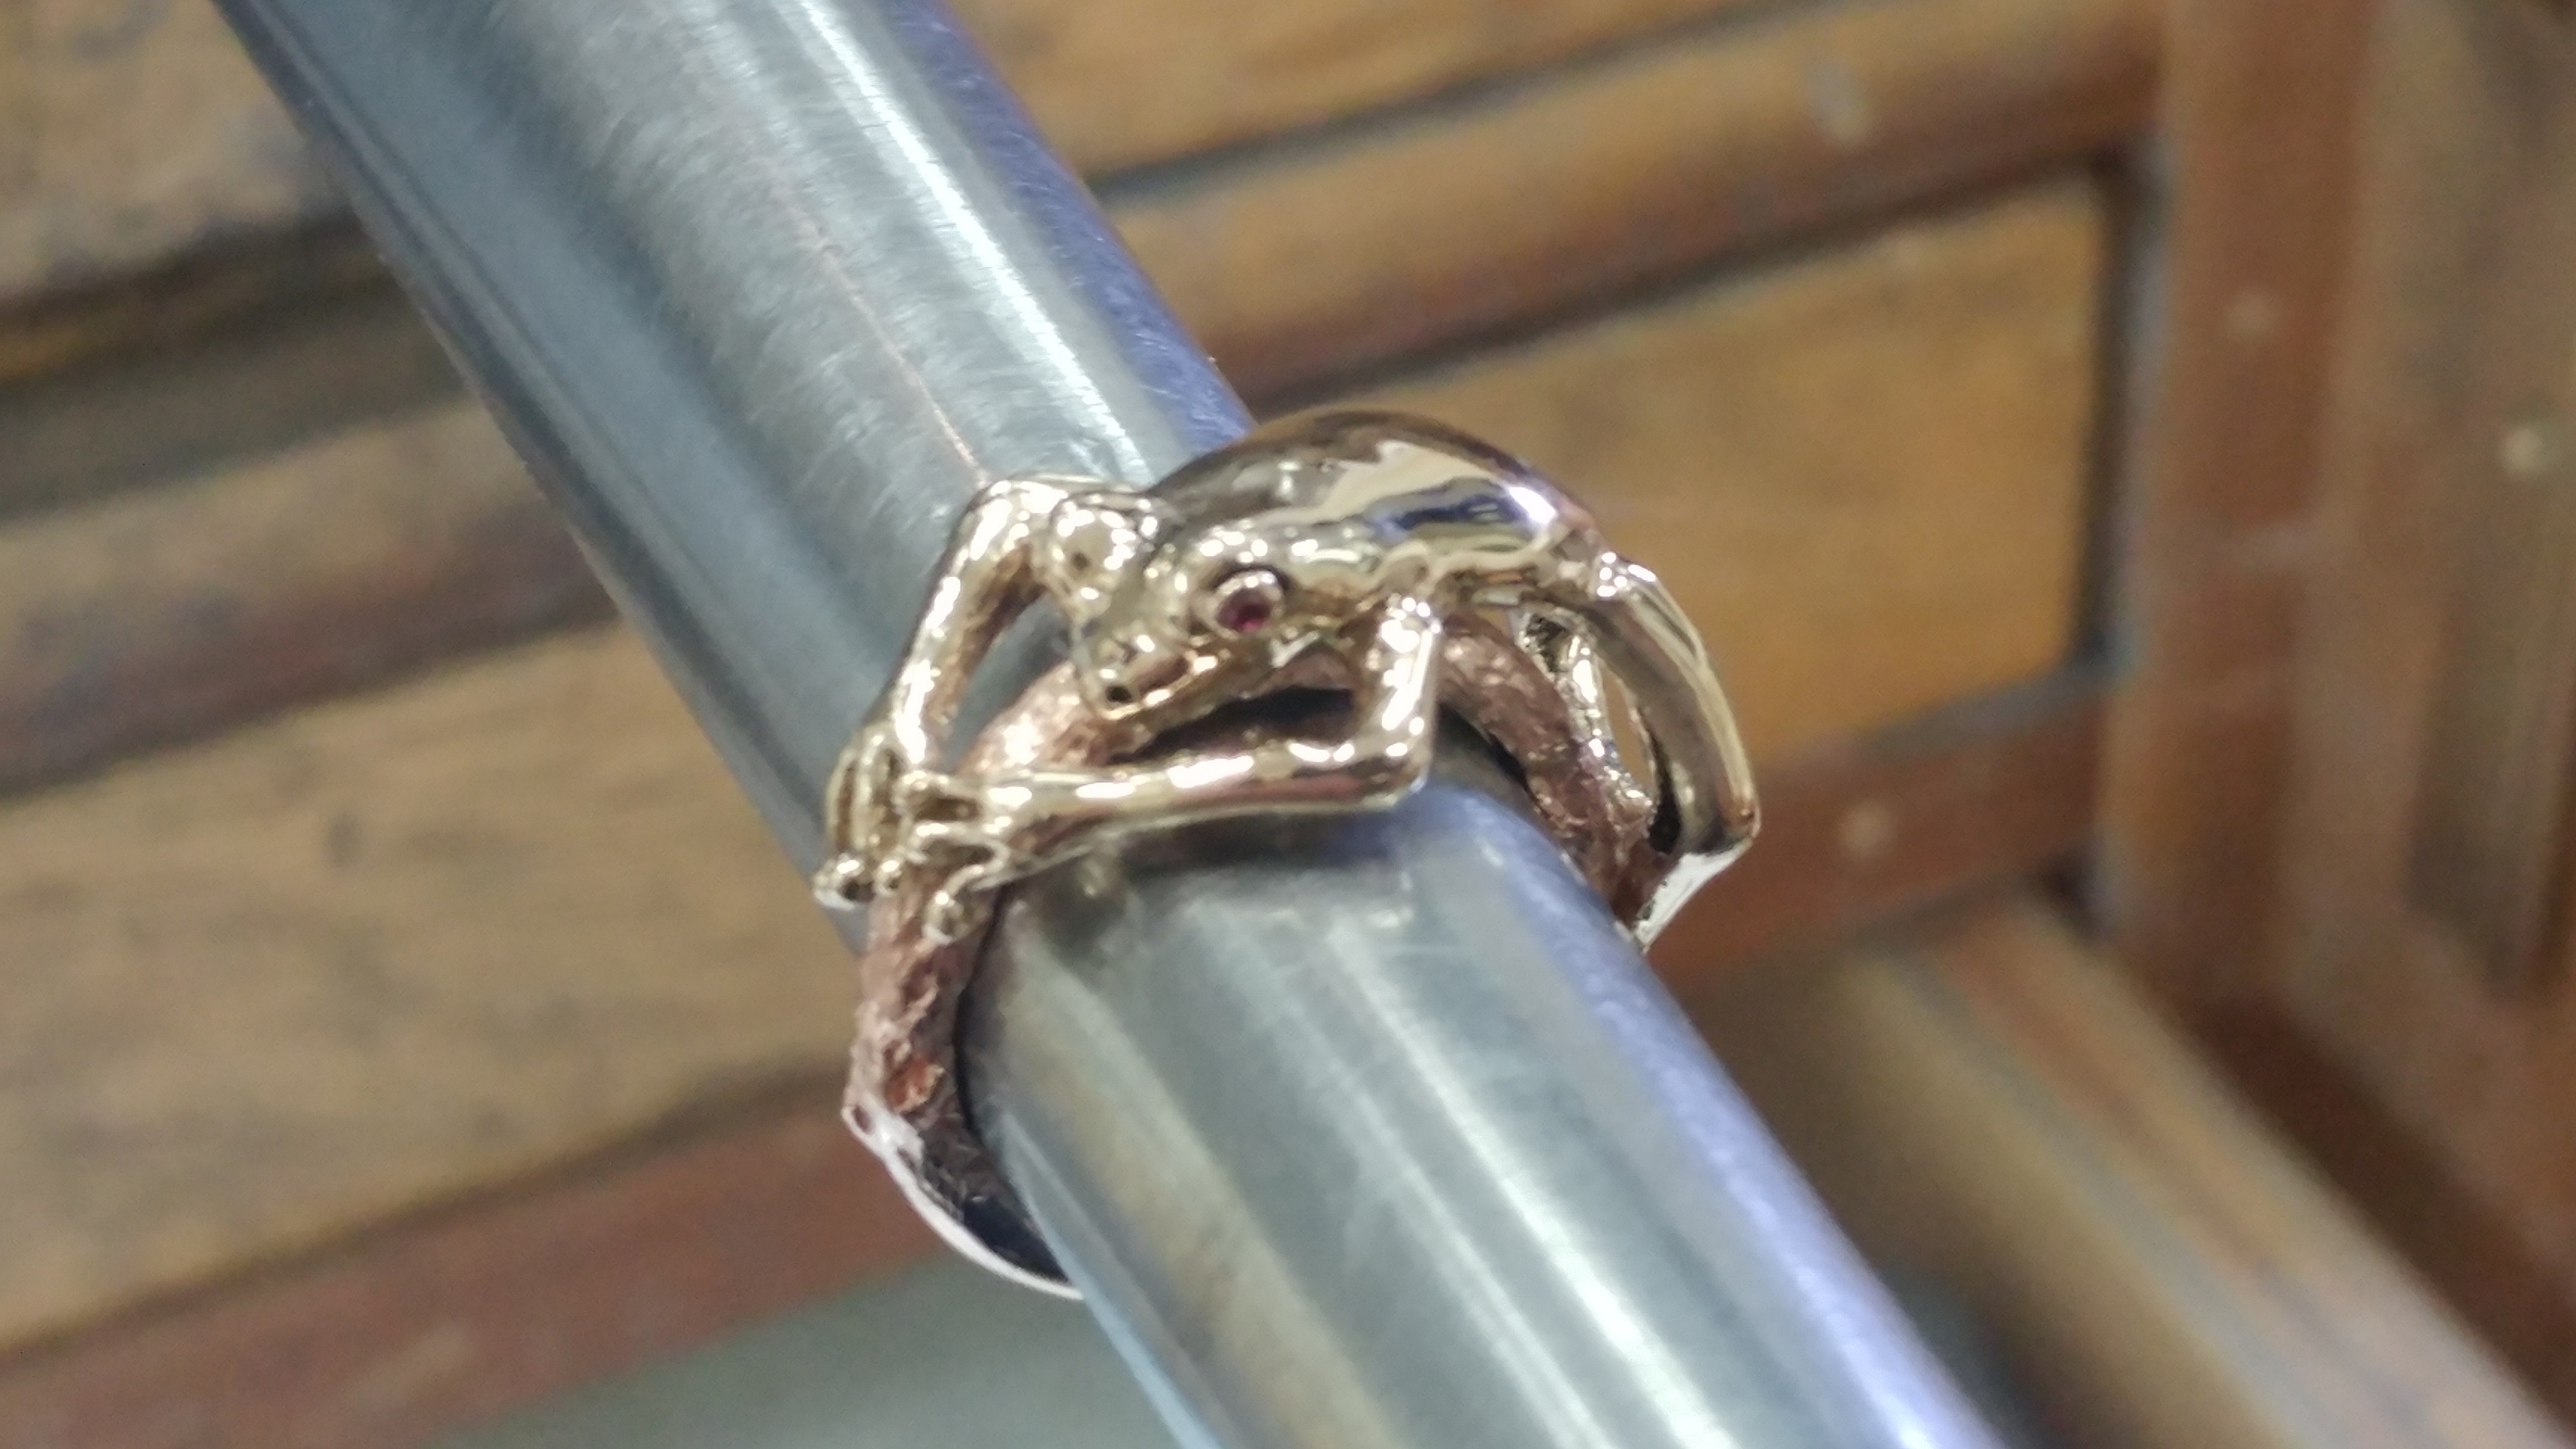
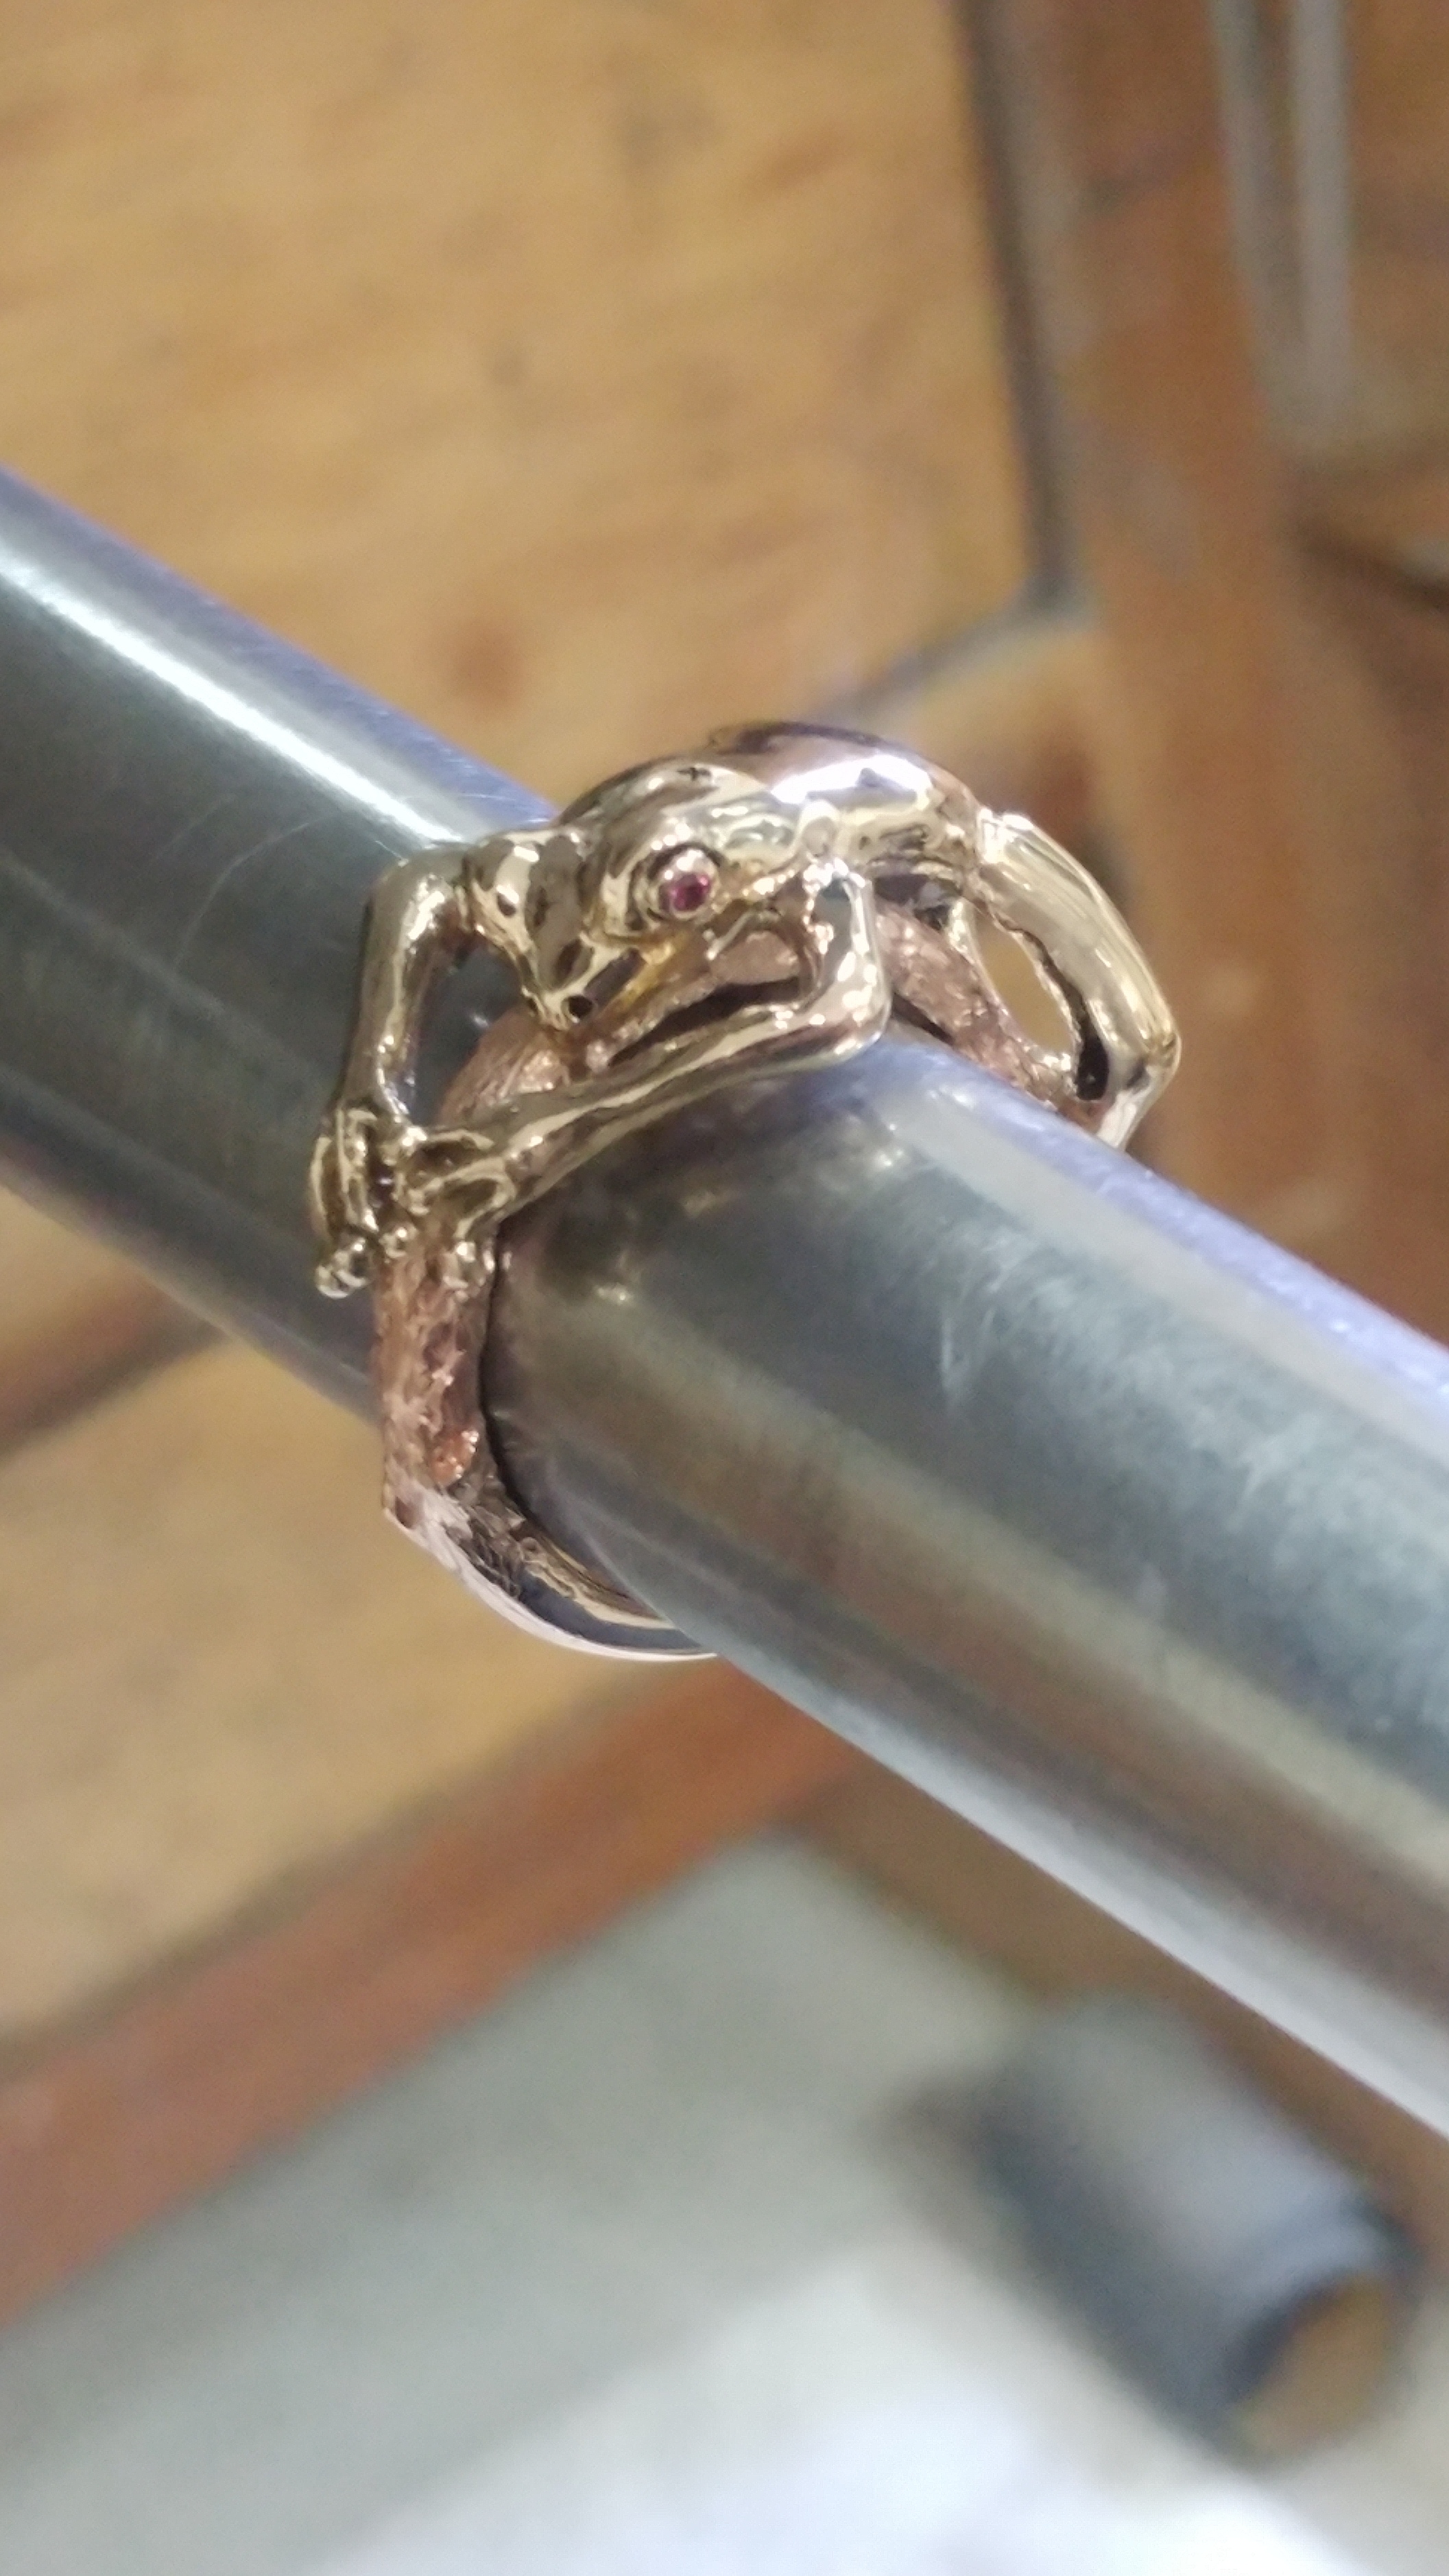
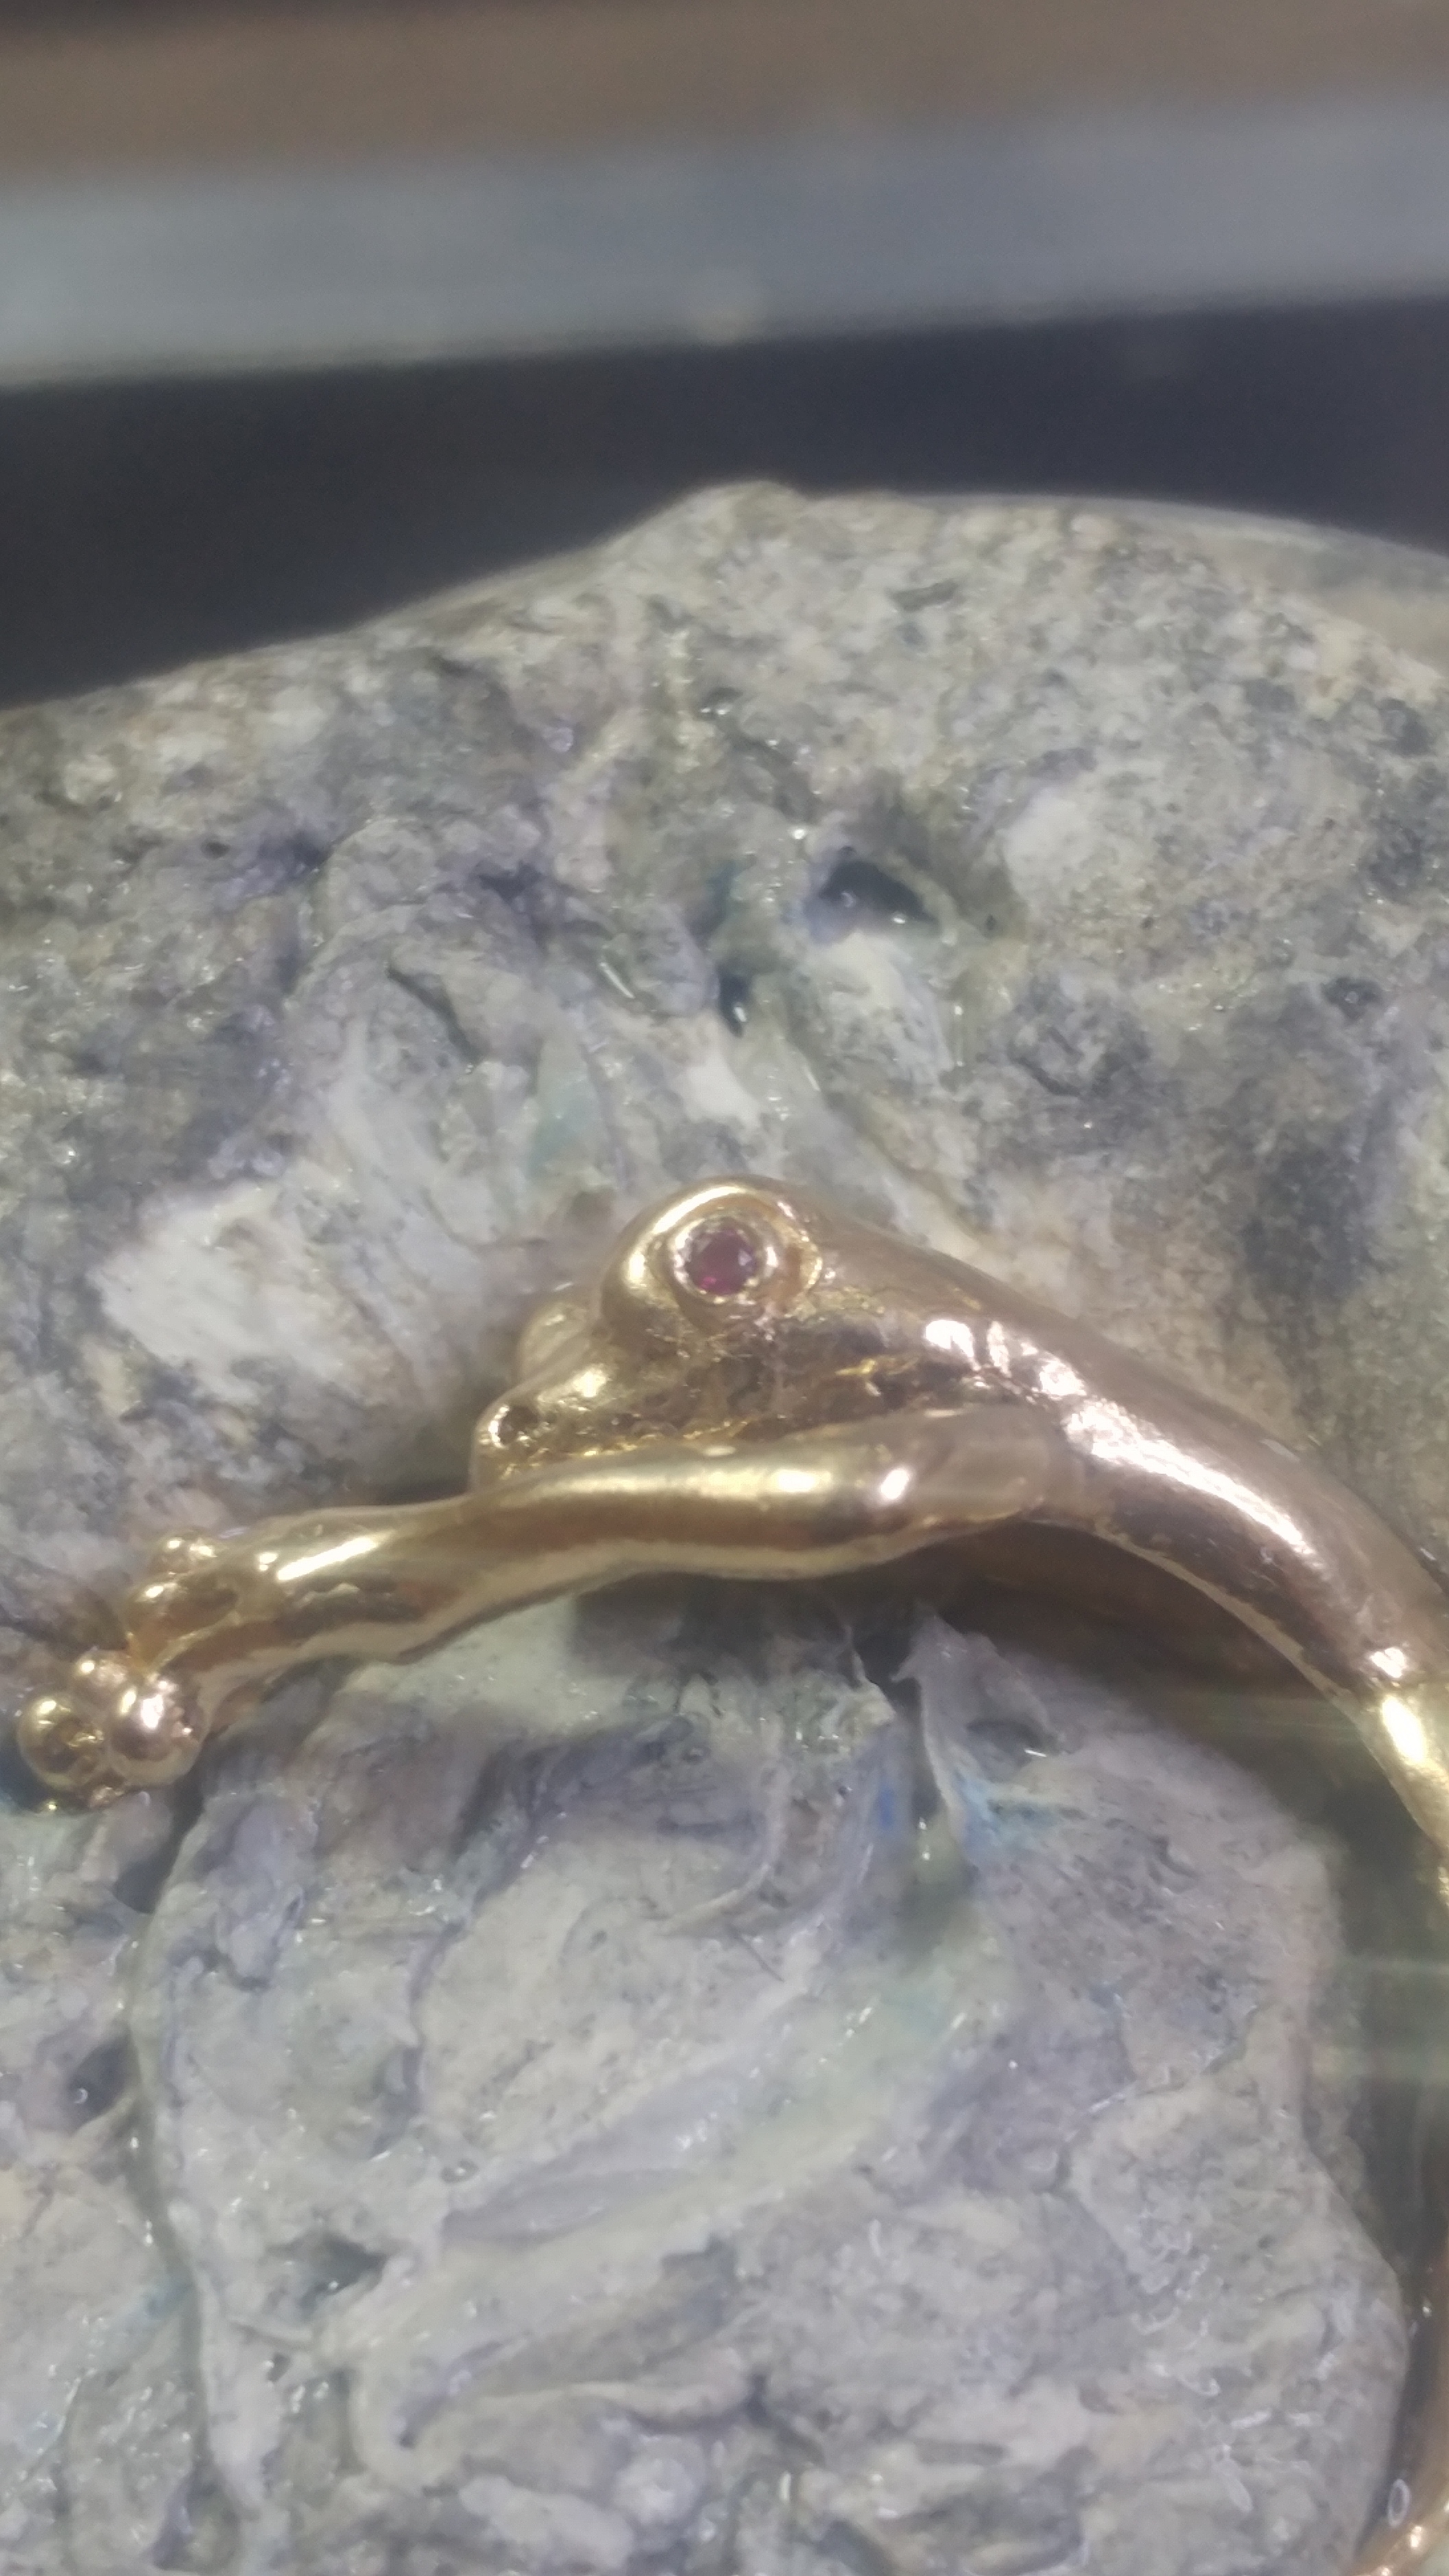
I spoke of flush setting 1 mm rubies for eyes, and I did this is earlier today, flush setting the stones in the raised eyeball area of this tree frog.
The Rubies were burnish set using small burnished made from broken burr shafts, and held in a pin vise.
I had to turn the critter on his side and hold him in thermos plastic. Reaching past his front legs to flush set was a bit of a challenge, but as you see, the 1 mm stones were the correct size for the frog.

2 Likes
Oh my gosh, I just got my round graver today and practiced on a piece of scrap…and I set the diamond on the very first try! I’ve never done this before in my life! It was so simple!! Thank you all so much for your amazing advice…AGAIN!!
Rachel
When I set the very first diamond at the ‘ripe old age of 17’, I was
scared like hell. I just leave the ‘fear factor’ outside the room and
concentrate on what I’m doing, so should you. The anticipation is worse
that the actual doing, but when you’re done…“WOW, I did it”…:>)
Now go and have a good cuppa coffee and celebrate!..(mazel tov!)
*Gerry Lewy *
Toronto.
- (905) 886-5961 *
1 Like
Congratulations!
A couple weeks ago, late on Friday afternoon my employer handed me a Platinum mounting and @3ct Diamond, saying he had just sold a $40K Diamond, which I could set on Monday morning.
Before I left work on Friday I handed him the job, done, and he said: “But I told you it was OK to wait till Monday!”
Like I wanted to spend an entire weekend knowing that first thing Monday I would be setting a $40K Diamond. Just sit down and do it. The more time you have to worry, the more you fixate on risks of a project, the more likely you are to have an issue.
4 Likes
Also a way to easily set small stones is making a small hole for the point of the diamond and a slightly bigger hole where the diamond fits inside, edge of the diamond a little lower than the material; Rub the setting close with a easy to make tool. A point just not sharp, (a ball shape point) and well polished in a pearshape handle. Set the point against the diamond and rub around it. The metal pushes inside and holds the stone. You do not need to make a setting, just drill a hole.
We call the ball shape tool an Els, One can make them in different sizes, so e.g. 1,5 mm for a three mm stone.
It’s called a rubbed setting. When stones are bigger it is better to drill a little edge straight under de surface, Push the material first up, stone in and rub it down over the stone. Just rub around against the stone. The stone does not get damaged if the tool is well polished. The toolhandle is always at an angle outside the circle of the stone.
1 Like
In English this is called a burnished setting. You can find some tutorials on youtube.
2 Likes
For more in depth instruction on flush setting there was a very good video I have seen by Blain Lewis
2 Likes