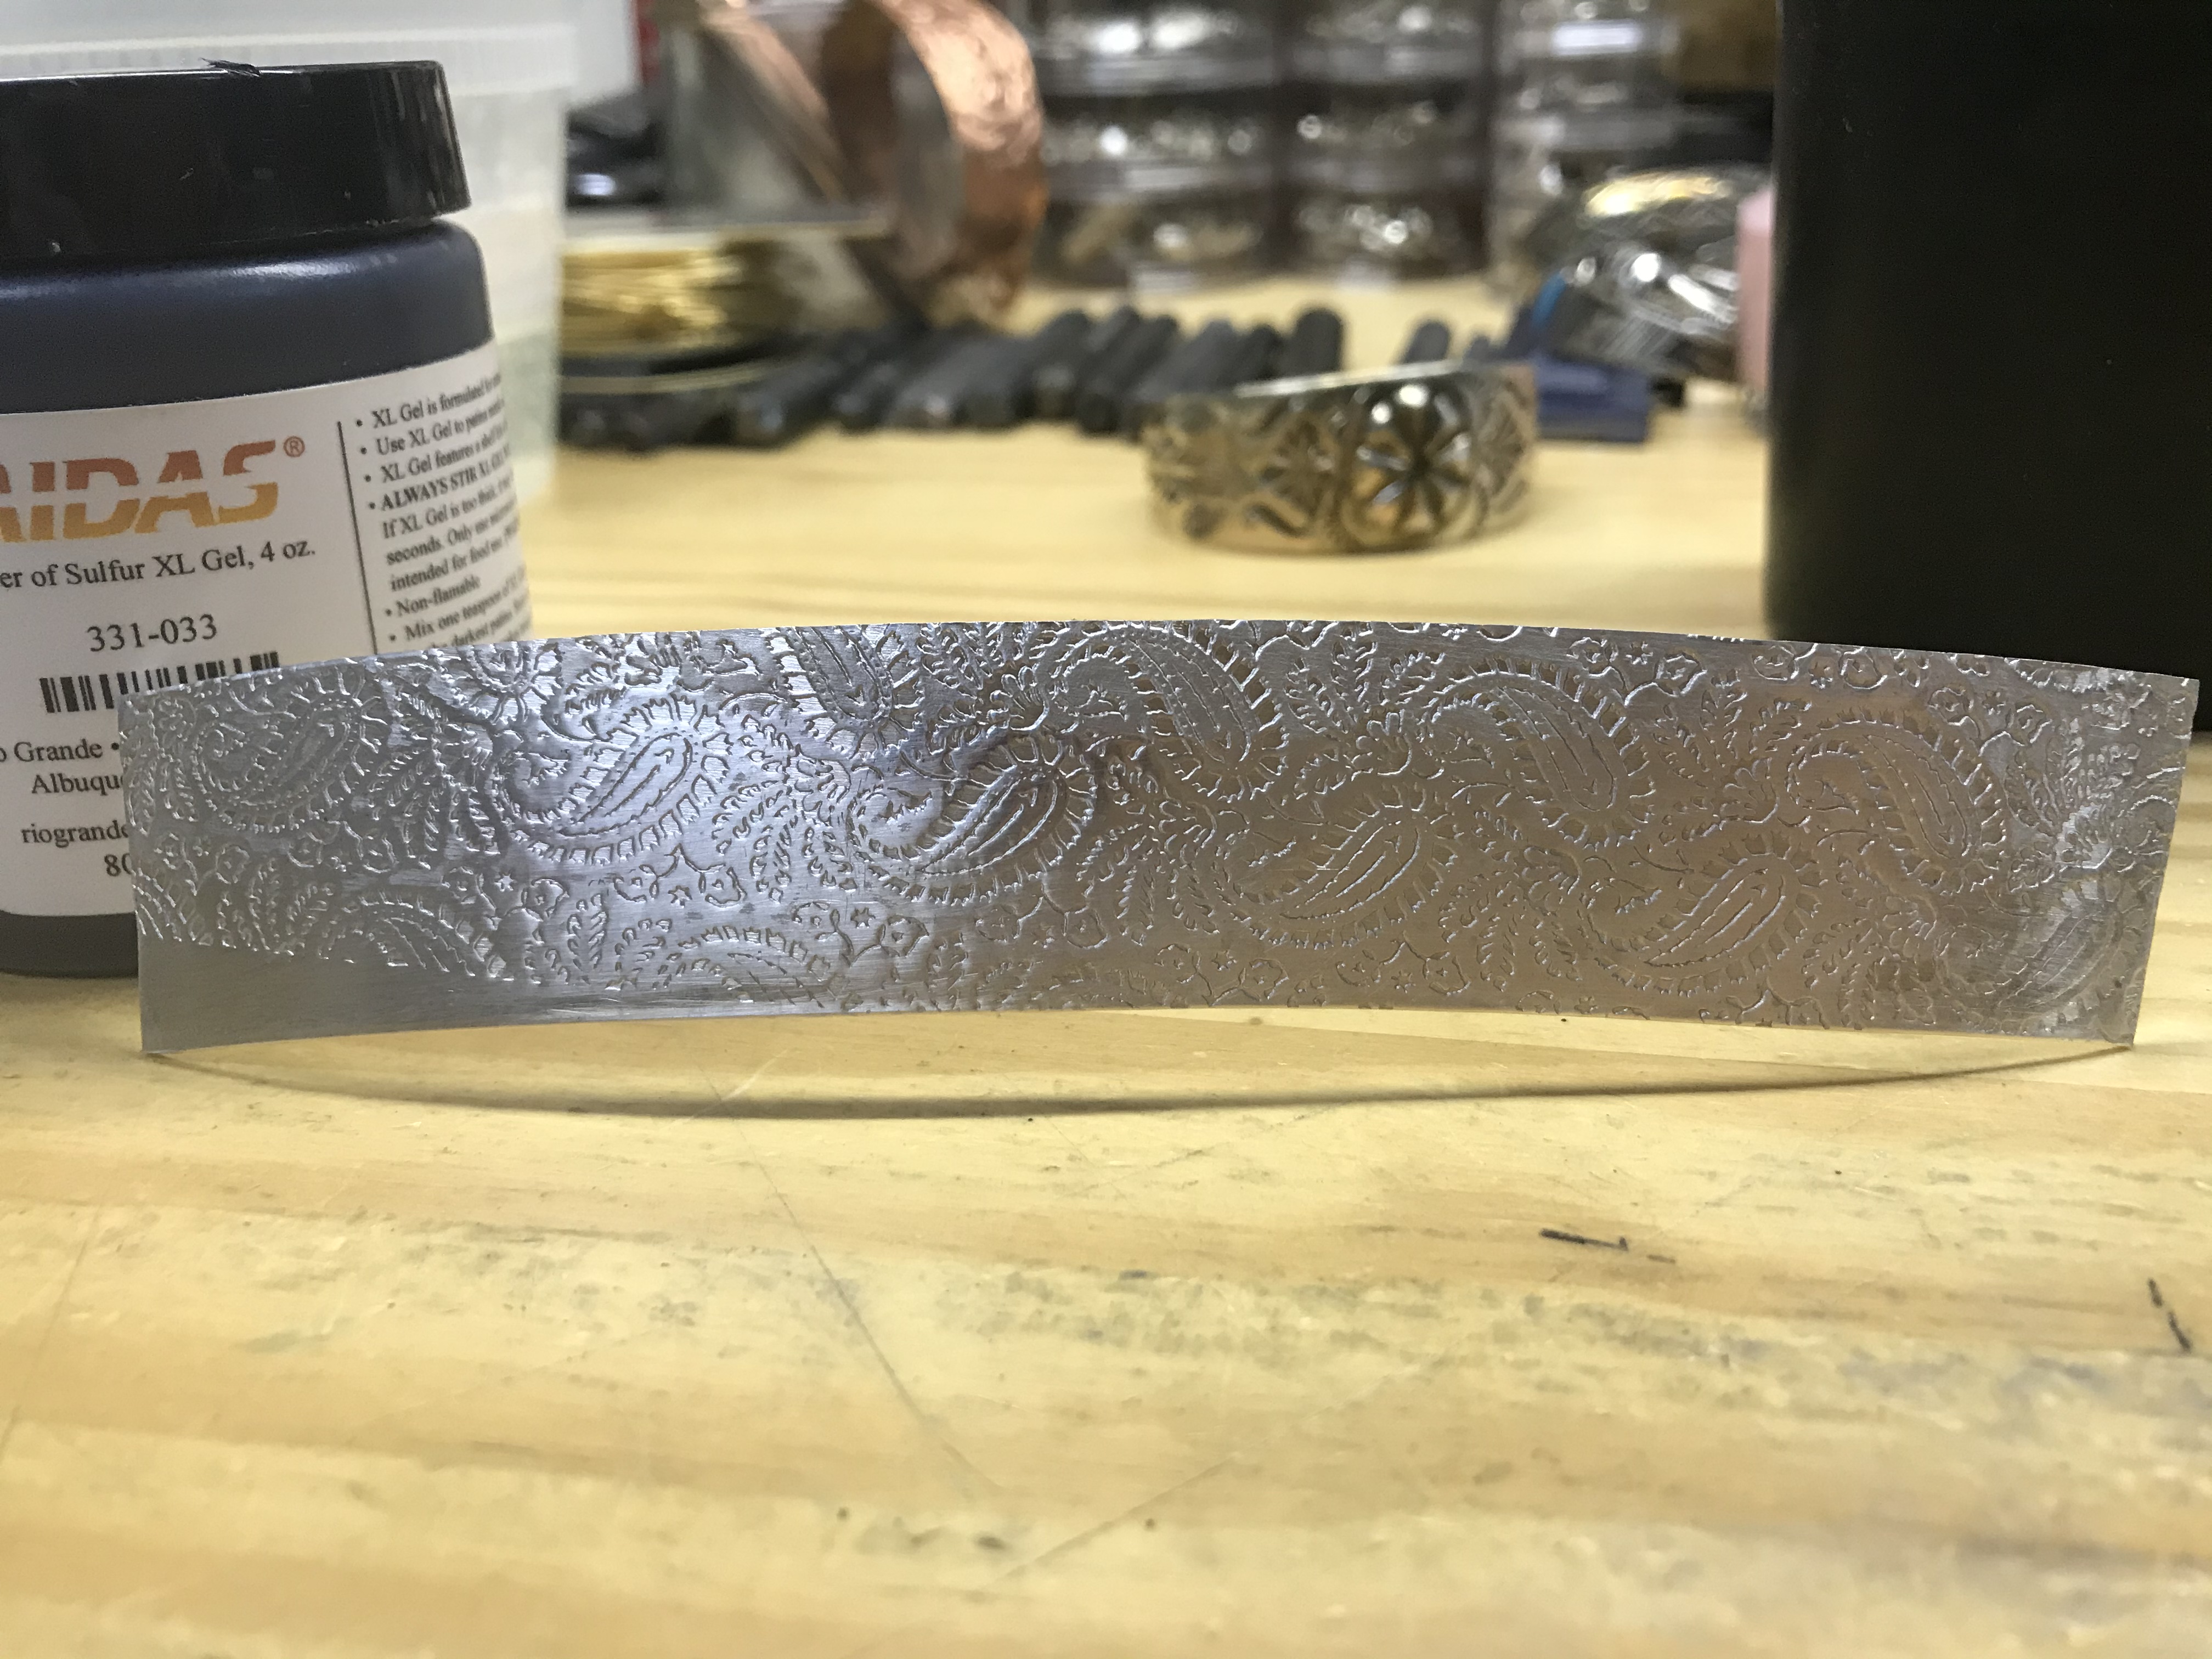
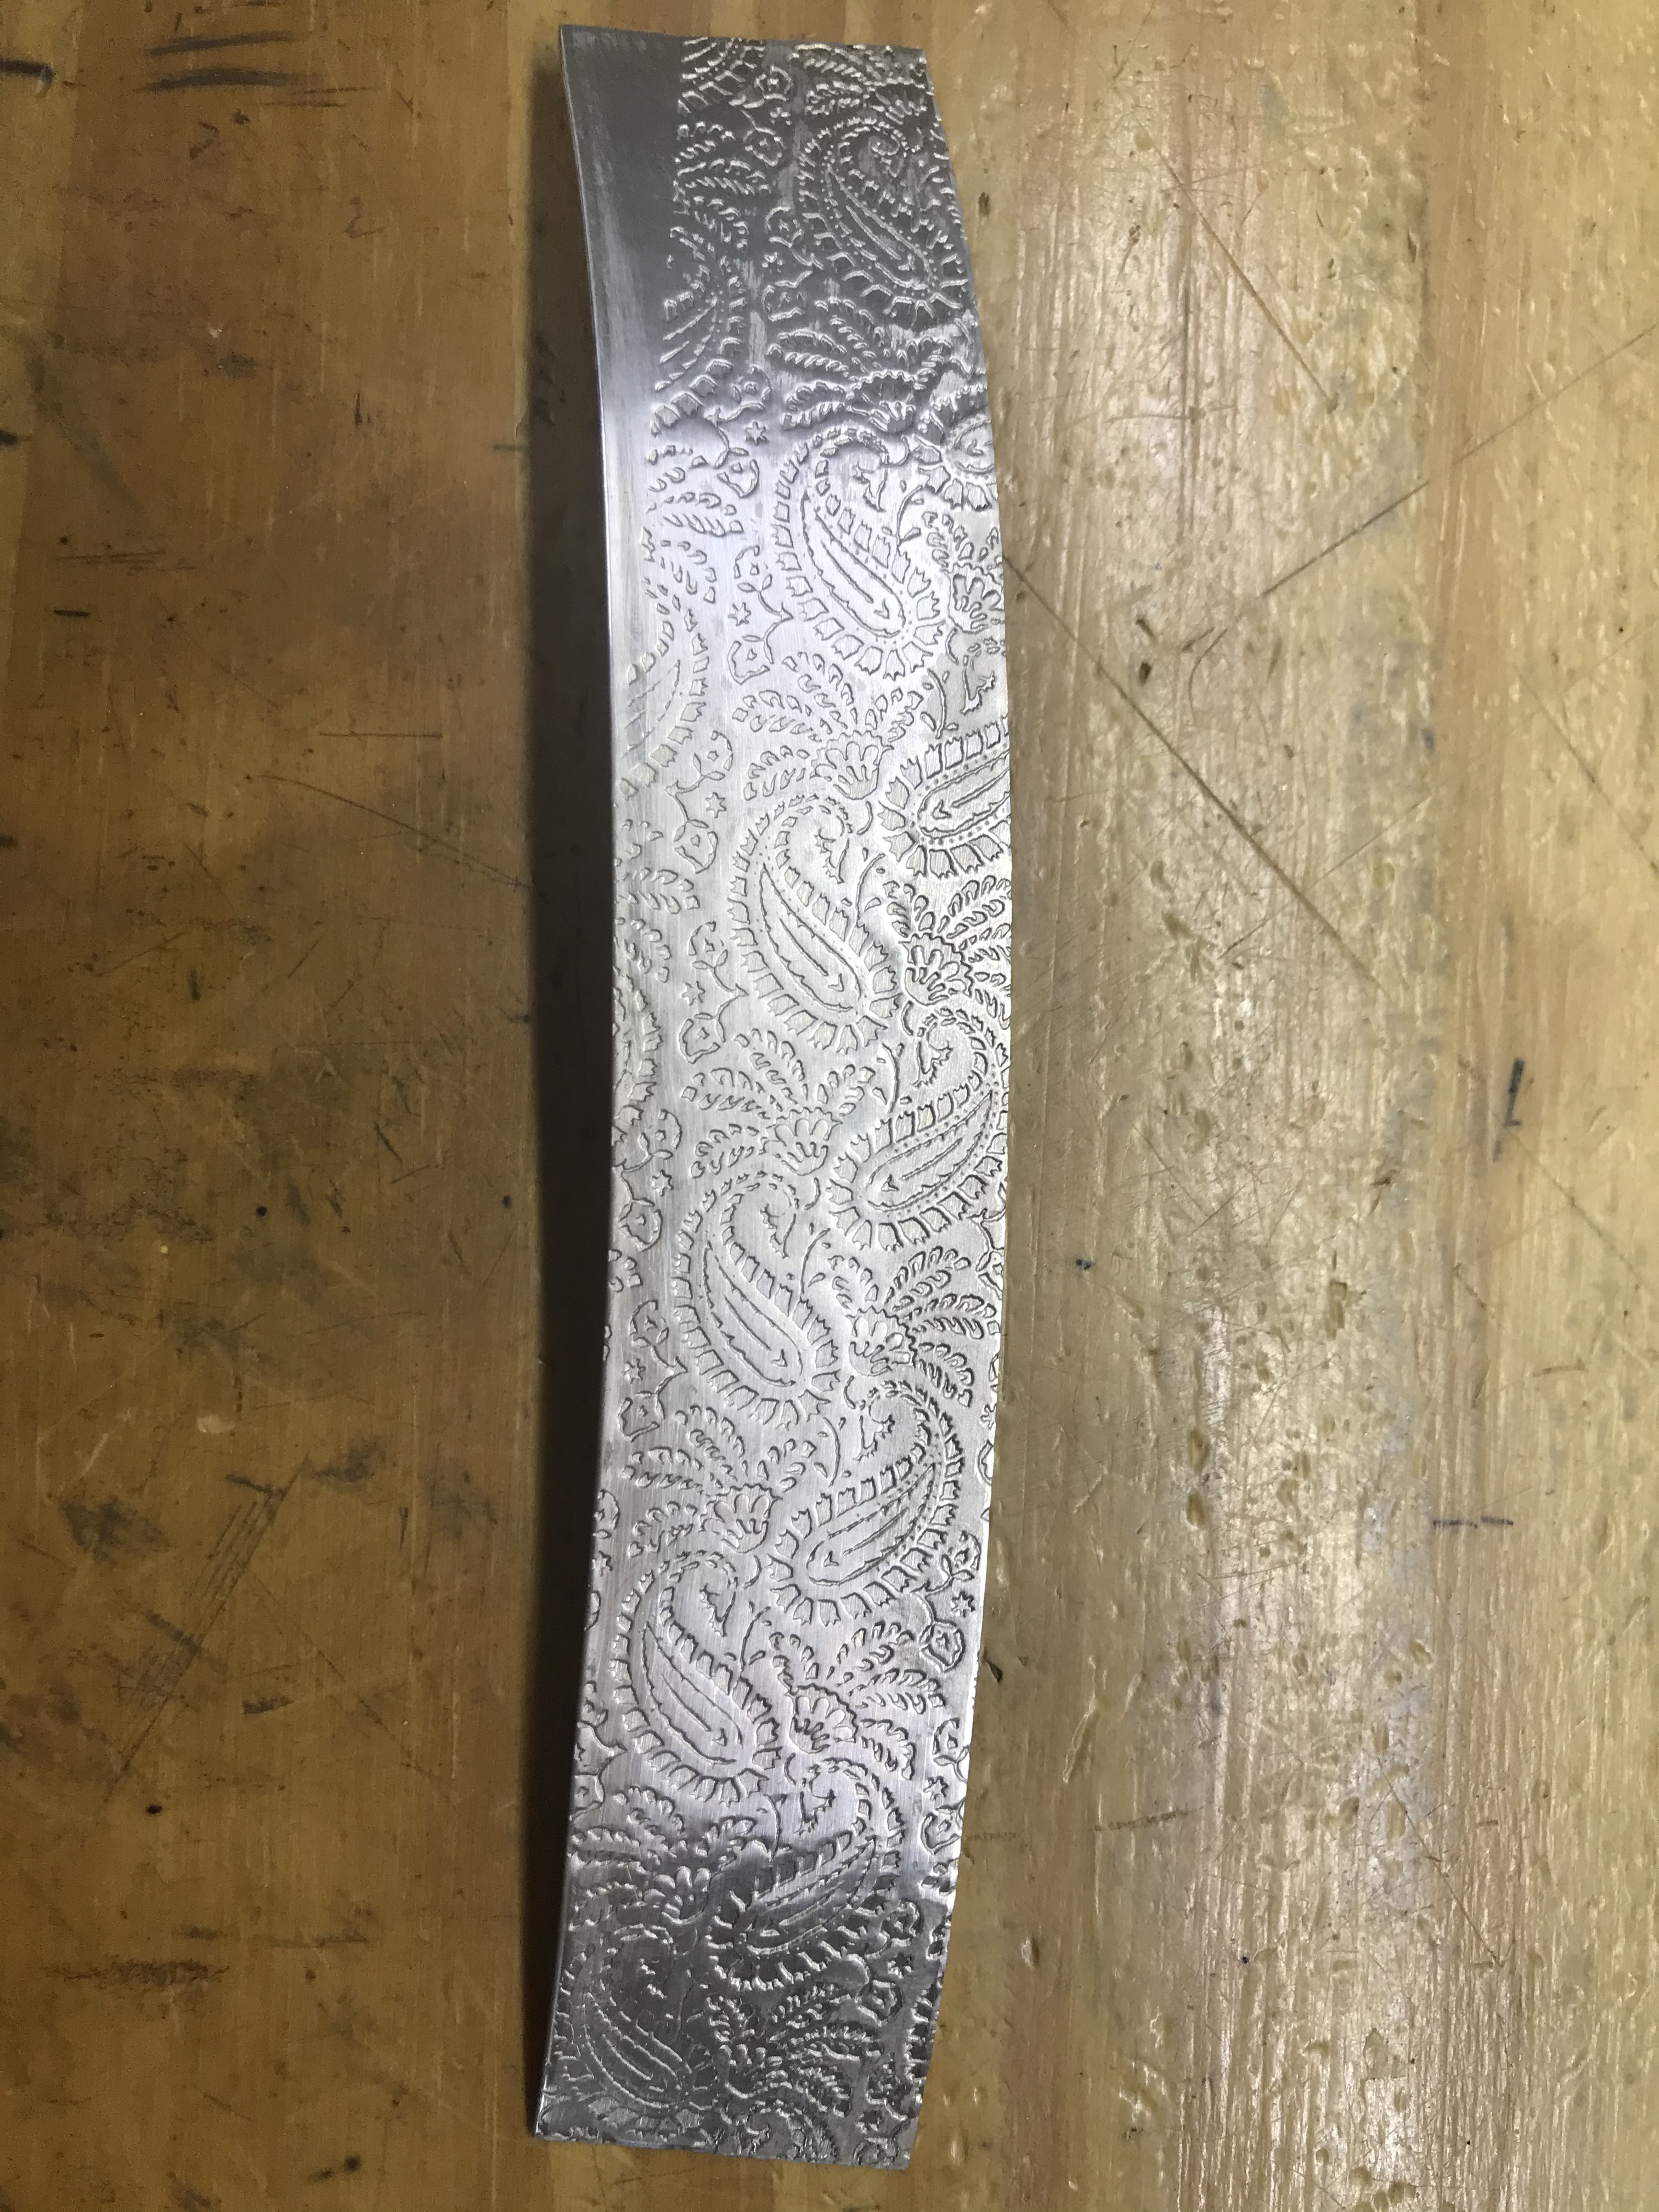
I haven’t been using my mill in awhile so I had to do some tests to hopefully get a great impression BUT when I finally tightened the rollers to get a great impression, unfortunately I also put an unwanted curve in my metal. It was going to be a cuff. As you see in the picture, I have a curve that I’m not sure how to correct. Yes, I’m in need of help.
check that your roll mills are even. when placing the sheet into rolls make sure they are square to the sheet- 90 degree entry if you skew off there will be a curl. if your roll too heavy sometimes the curl can be more accentuated… there are many sweet spots …work your copper/brass bracelet sheet to make & learn where you can "practice and correct "these latter premises. make sure all your guages of the sheet silver,brass,copper are the same to make the comparisons. it takes a little sweat and tears to get it write and make notes as a reminder for the future pressings. hope this helps
1 Like
There is a mechanic’s tool called a “feeler gauge” that will allow you to calibrate your rolling mill very precisely. Not an expensive tool, either.
1 Like
Following are a couple thoughts. You can’t re-roll, so cut out of what you have that is good and make a cuff out of it. I will often times make a wide cuff that tapers towards both ends. I like them even better when I press them into a synclastic shape. When rolling plain sheet, I will flip side to side each pass just in case they do curve. You can set your gap in a couple ways. Remove the center wheel and turn both gears until the top roll bottoms out on each side. Do this to each side at the same time so that you can feel when they are set. This takes practice and you are looking for the same amount of resistance on both gears as the roll sets into place. You can, as was suggested,use a set of feeler gauges to measure the gap on both ends of the rolls adjusting as needed. You can accomplish the same thing by passing a piece of stock through the rollers that is almost as wide as the rollers. Then use a micrometer or similar measuring devices and measure both sides to see how close they are to the same thickness. You can drive yourself crazy with all of this to the extent that you count gear teeth passing a reference point and see how much the gap changes with the passing of each tooth. It isn’t a bad idea to, once you get everything adjusted, put a sharpie mark on each gear where they touch. In the end, your goal is to successfully roll a piece of metal. Take your time, do some occasional re-calibration and adjust as need. Good luck…Rob
2 Likes
As any one who mashes on metal knows (see fold forming), when you squeeze only one edge of metal, thinning it, the metal moves in a curve away from the thinned edge. It looks like the top edge was not fully engaging metal and pattern. The right edge was squeezed more than the left causing at least some of the curve. I am not sure how to straighten the curve without damaging the pattern. Perhaps some hammer blows (or better yet a substantial press) to the back side where the pattern missed. This is a delicate operation, but try it on some scrap. Good luck
2 Likes