Hi everyone
I need some advice. Is it possible to rivet two enamelled pieces together without damaging the fired enamel? Each piece will be enamelled on both sides except for the part that needs to be riveted together. I’m making a flower with two layers of petals. Thank you.
1 Like
Maybe a tiny nut and bolt instead? Wouldn’t have to hammer.
1 Like
Best bet. . . tube rivet
4 Likes
If you search the Ganoksin archives for the work and comments of the master goldsmith James Miller you will see exemplary pieces, some of which include multiple petal flowers, I think he describes the fabrication techniques he employed in some of the gallery examples. In any any event a worthwhile examination of a true masters work.
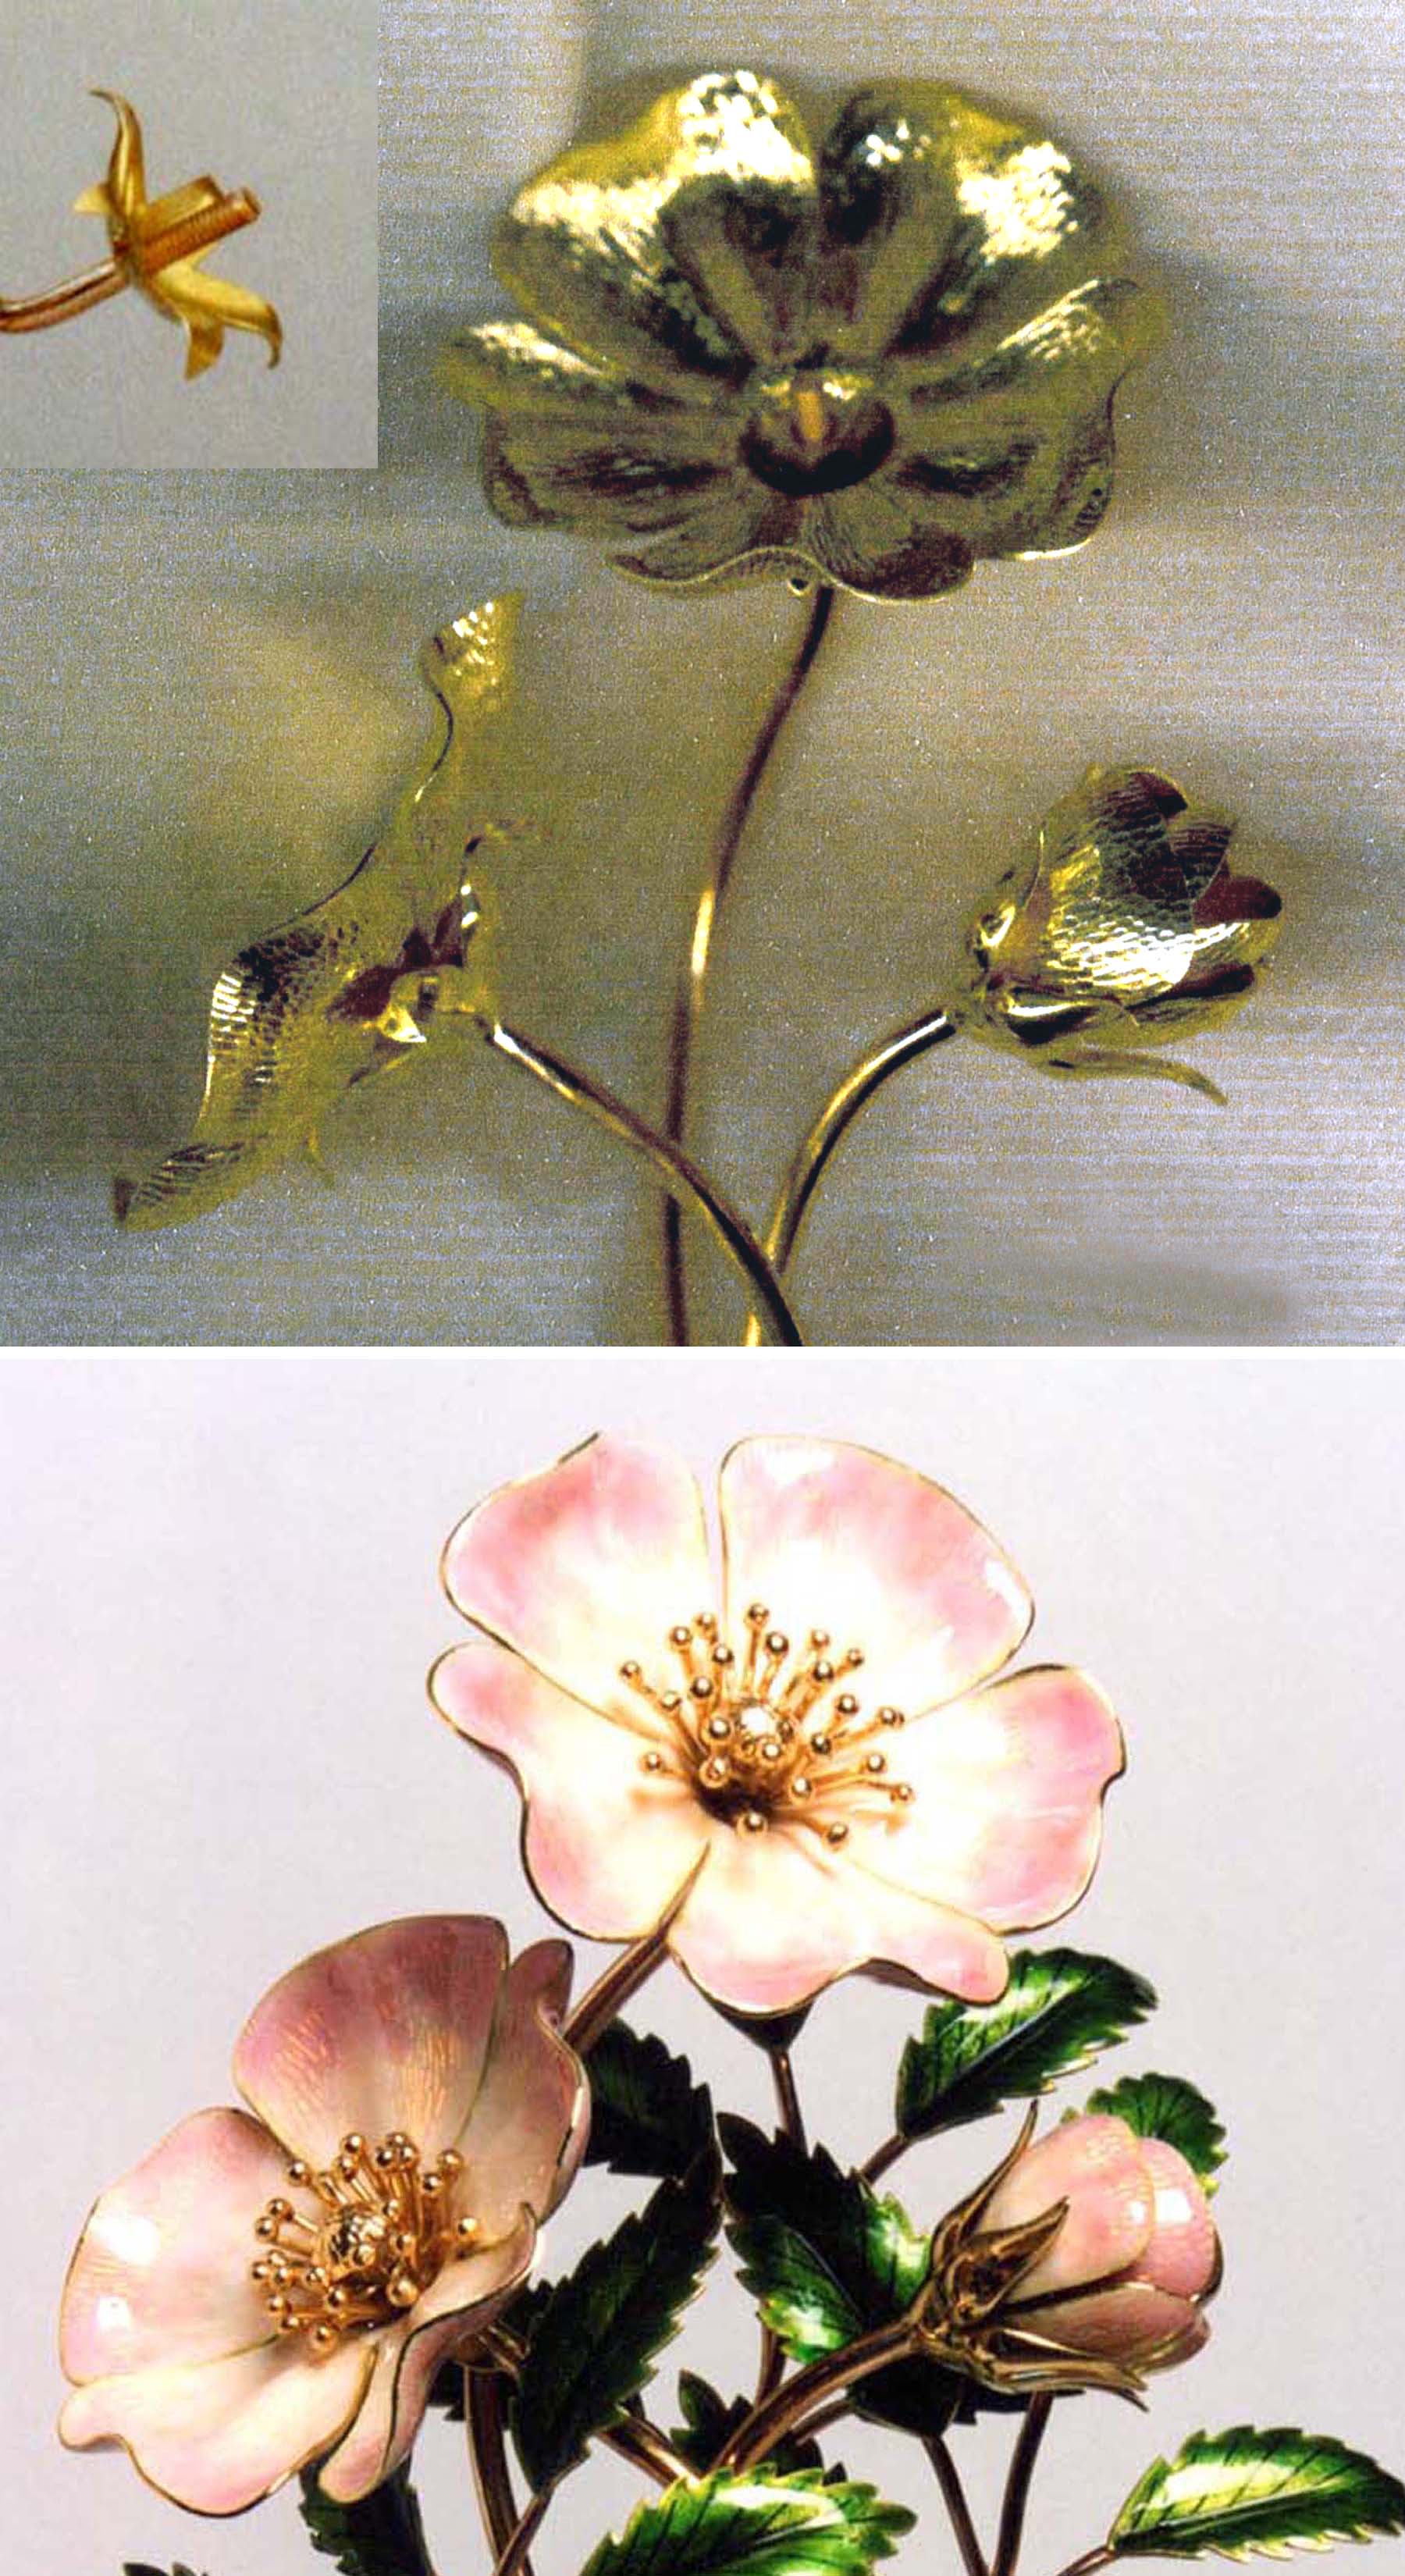
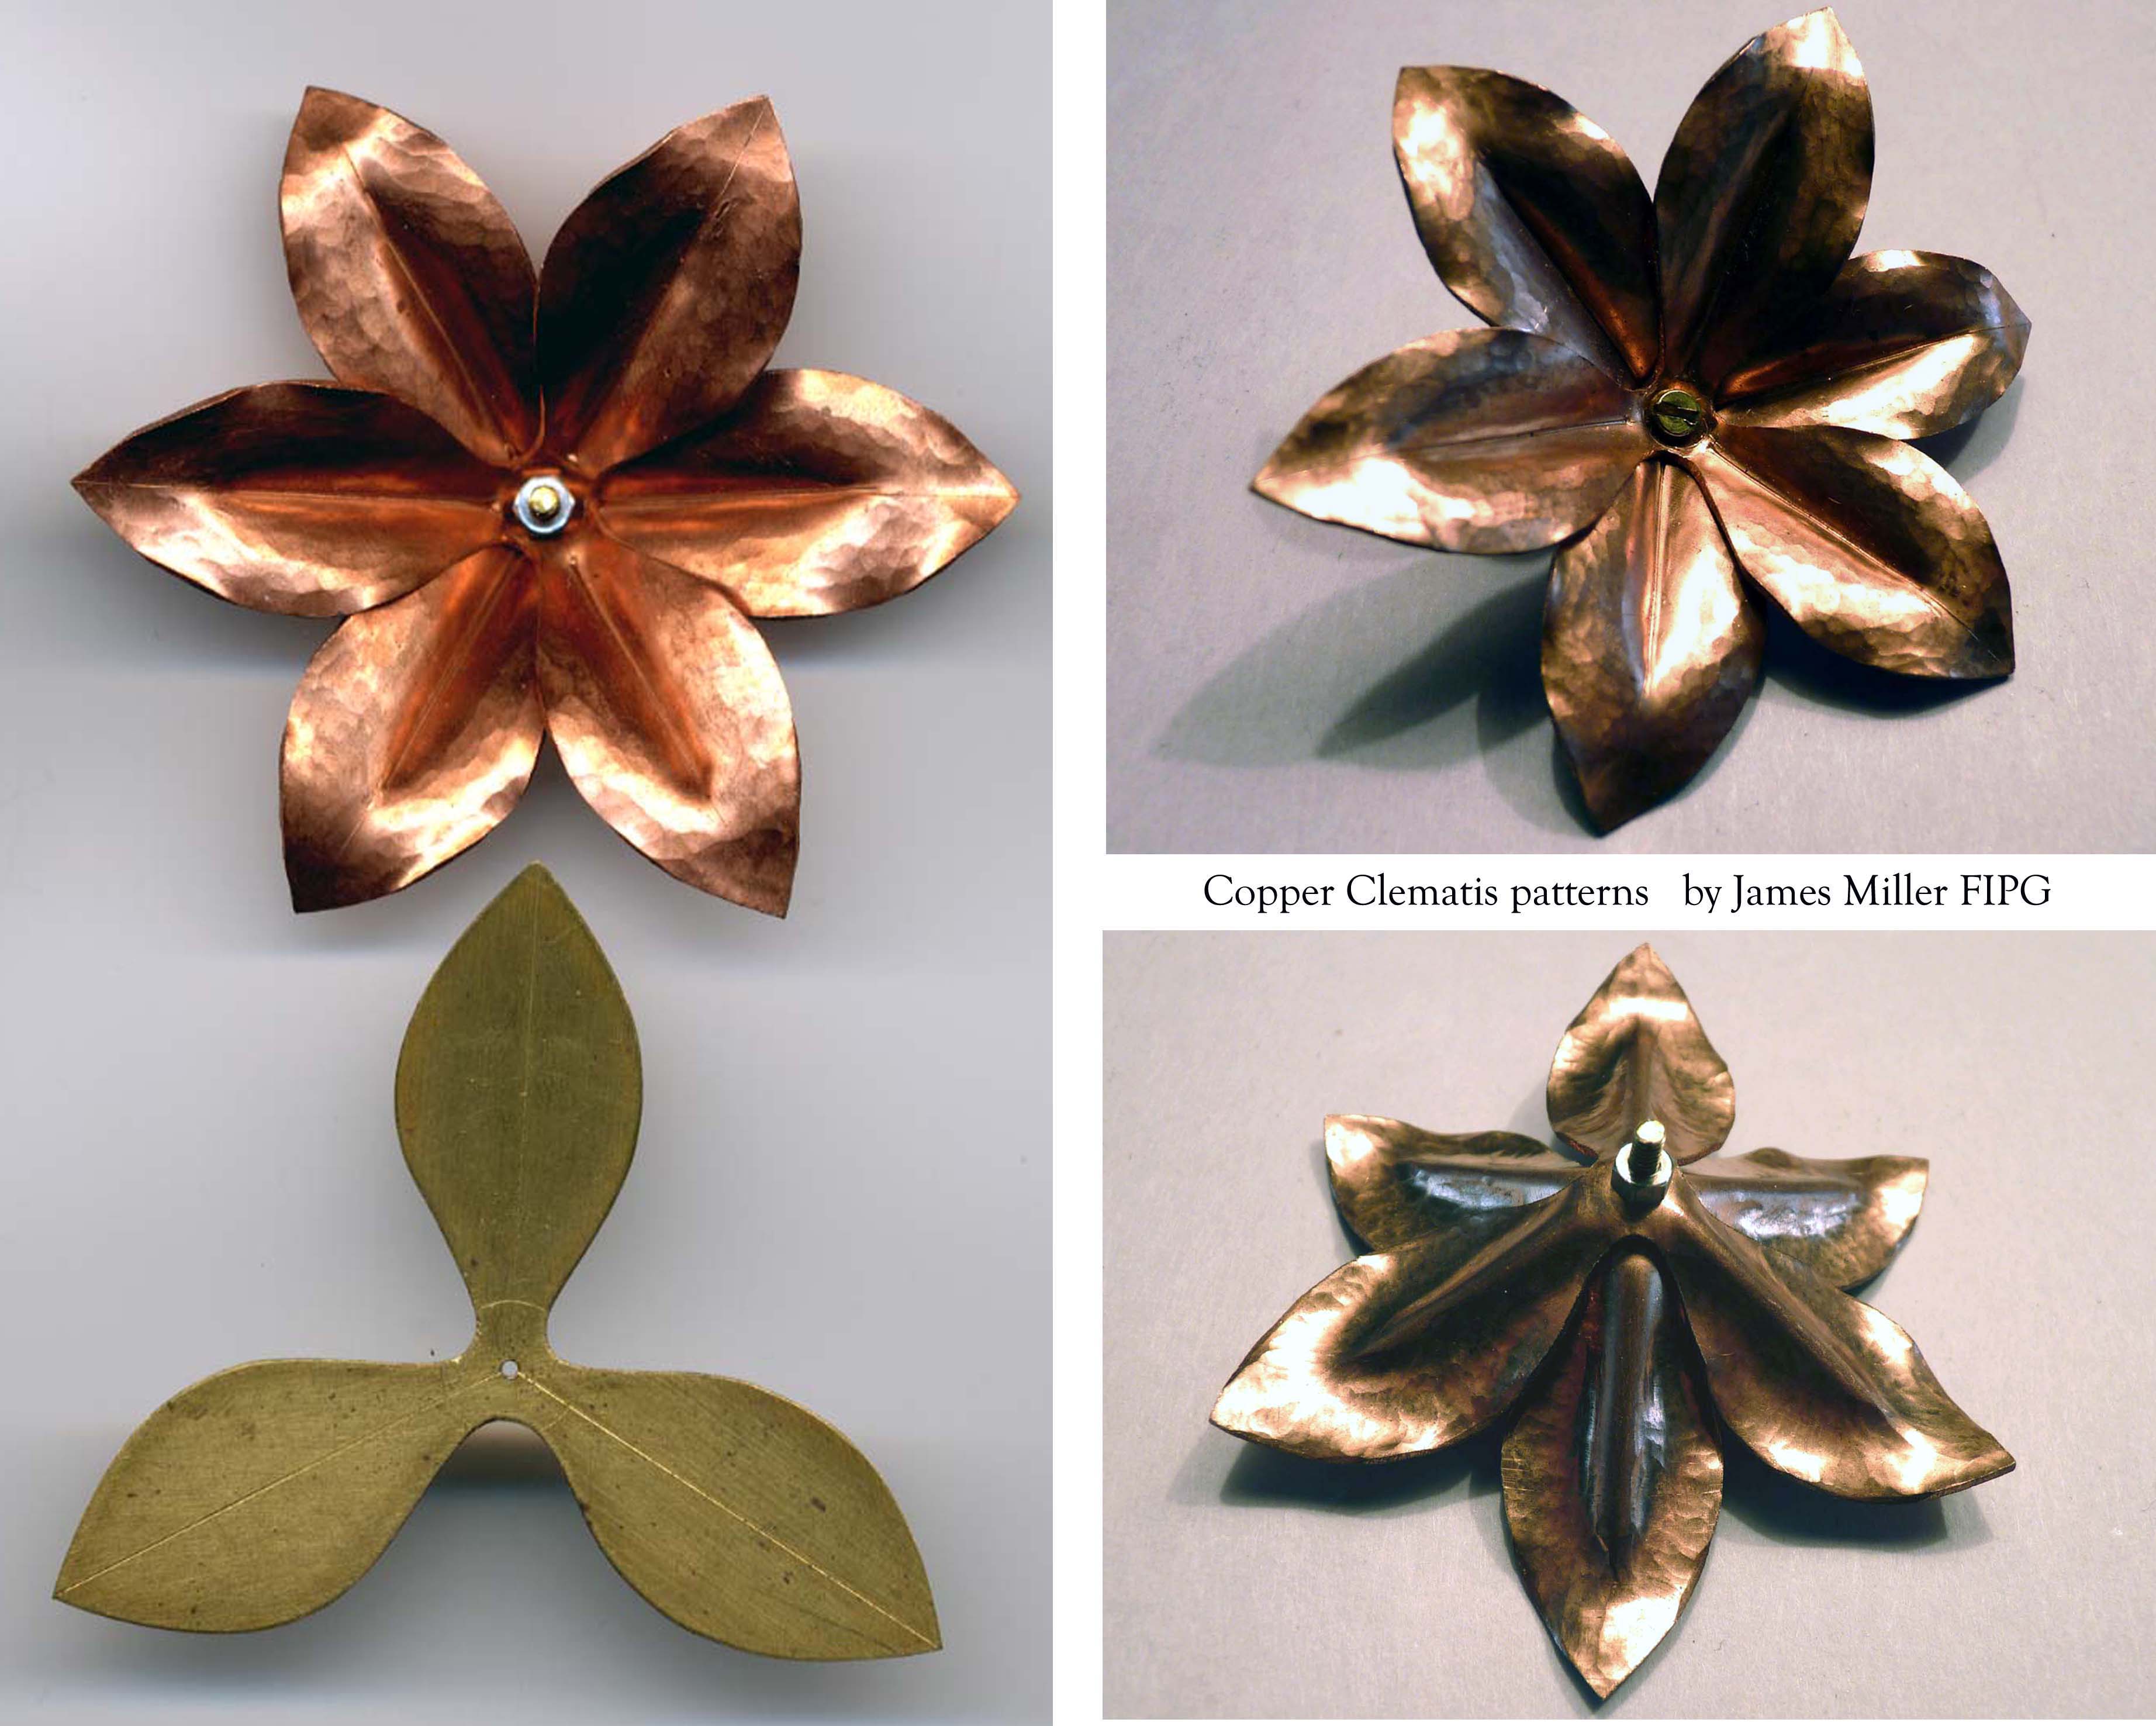
When I make enamelled flowers I thread the flower stem,solder on a sepal then the petal sections are enamelled and held on the flower stem by means of a nut in the stamen which screws onto the threaded flower stem and holds the enamelled petal layers in place, this photo will give you some idea of how I make my flowers .
9 Likes

Thanks James for sharing how your beautiful flowers are made. I do appreciate it a lot. Your method is very safe which wouldn’t result in damaging the enamel in any way.
May I know where I can buy the screws and nuts? Or do you make your own?
Thank you. I didn’t think of it.
Thanks. That was what I was thinking of doing.
Thank you. His work is absolutely beautiful.
I cut my own threads on the flower stem wires, using a model makers BA tap and die set.
2 Likes
Has anyone given it a thought to use a rivet gun, that you can pick up at Lowes or Home Depot, the same kind that a tinsmith would use when doing duct work, just a thought…PS: the works and designs that you folks create are amazing… Regards, Richard Lucas, Lucadent@verizon.net
You can make your own jewelry size nuts and bolts using a tap and die set. Here is a useful set of tips to get you started: etsy metal: Taps and Dies....the lowdown.
2 Likes
Here is a very in depth article about making and using nuts and bolts for jewelry: http://www.snagmetalsmith.org/wp-content/uploads/2012/05/TechArticle_17-1_Jan2009.pdf
2 Likes
Thank you so much, Vera. The article is very helpful.
Those “pop rivets” are a handy method for putting pieces of sheet metal together, and are great for duct work because you only need access to one side of the piece; the end of the rivet pokes through a hole and expands, then the stem in the middle breaks off on the outside.
But it’s not really suitable for fine jewelry or high-end objets d’art. It leaves an unsightly stub made of steel and/or aluminum which can’t be ground down without compromising the strength of the joint. Jewelers use a different sort of rivet, usually a piece of wire that’s been melted to a blob at one end. This can be threaded through a hole in two pieces of whatever material is to be joined, cut off close to the other side, and then pounded down to upset (widen) the cut end. This results in a secure joint that doesn’t require heating the material, which can be in whatever precious metal the jeweler chooses, and can be polished down and either made to be virtually invisible or to function as a decorative element. But you do need access to both sides of the rivet; the pounding-down won’t work unless the head end is firmly supported.
1 Like
Also you can solder the flathead screw to the back of your piece with eutectic or IT solder before you begin enameling. (Just protect the threads from enamel before counter enameling.) Same can be done with small tubes.
Also Cu rods soldered to the back of each piece and joined with Cu tubing crimped to hold…
Thanks everyone for helping out. I’ve ordered a tap and die set for my work. It’s probably the practical way to go as I enamel dimensional pieces. I’m sure it is a good investment.
1 Like