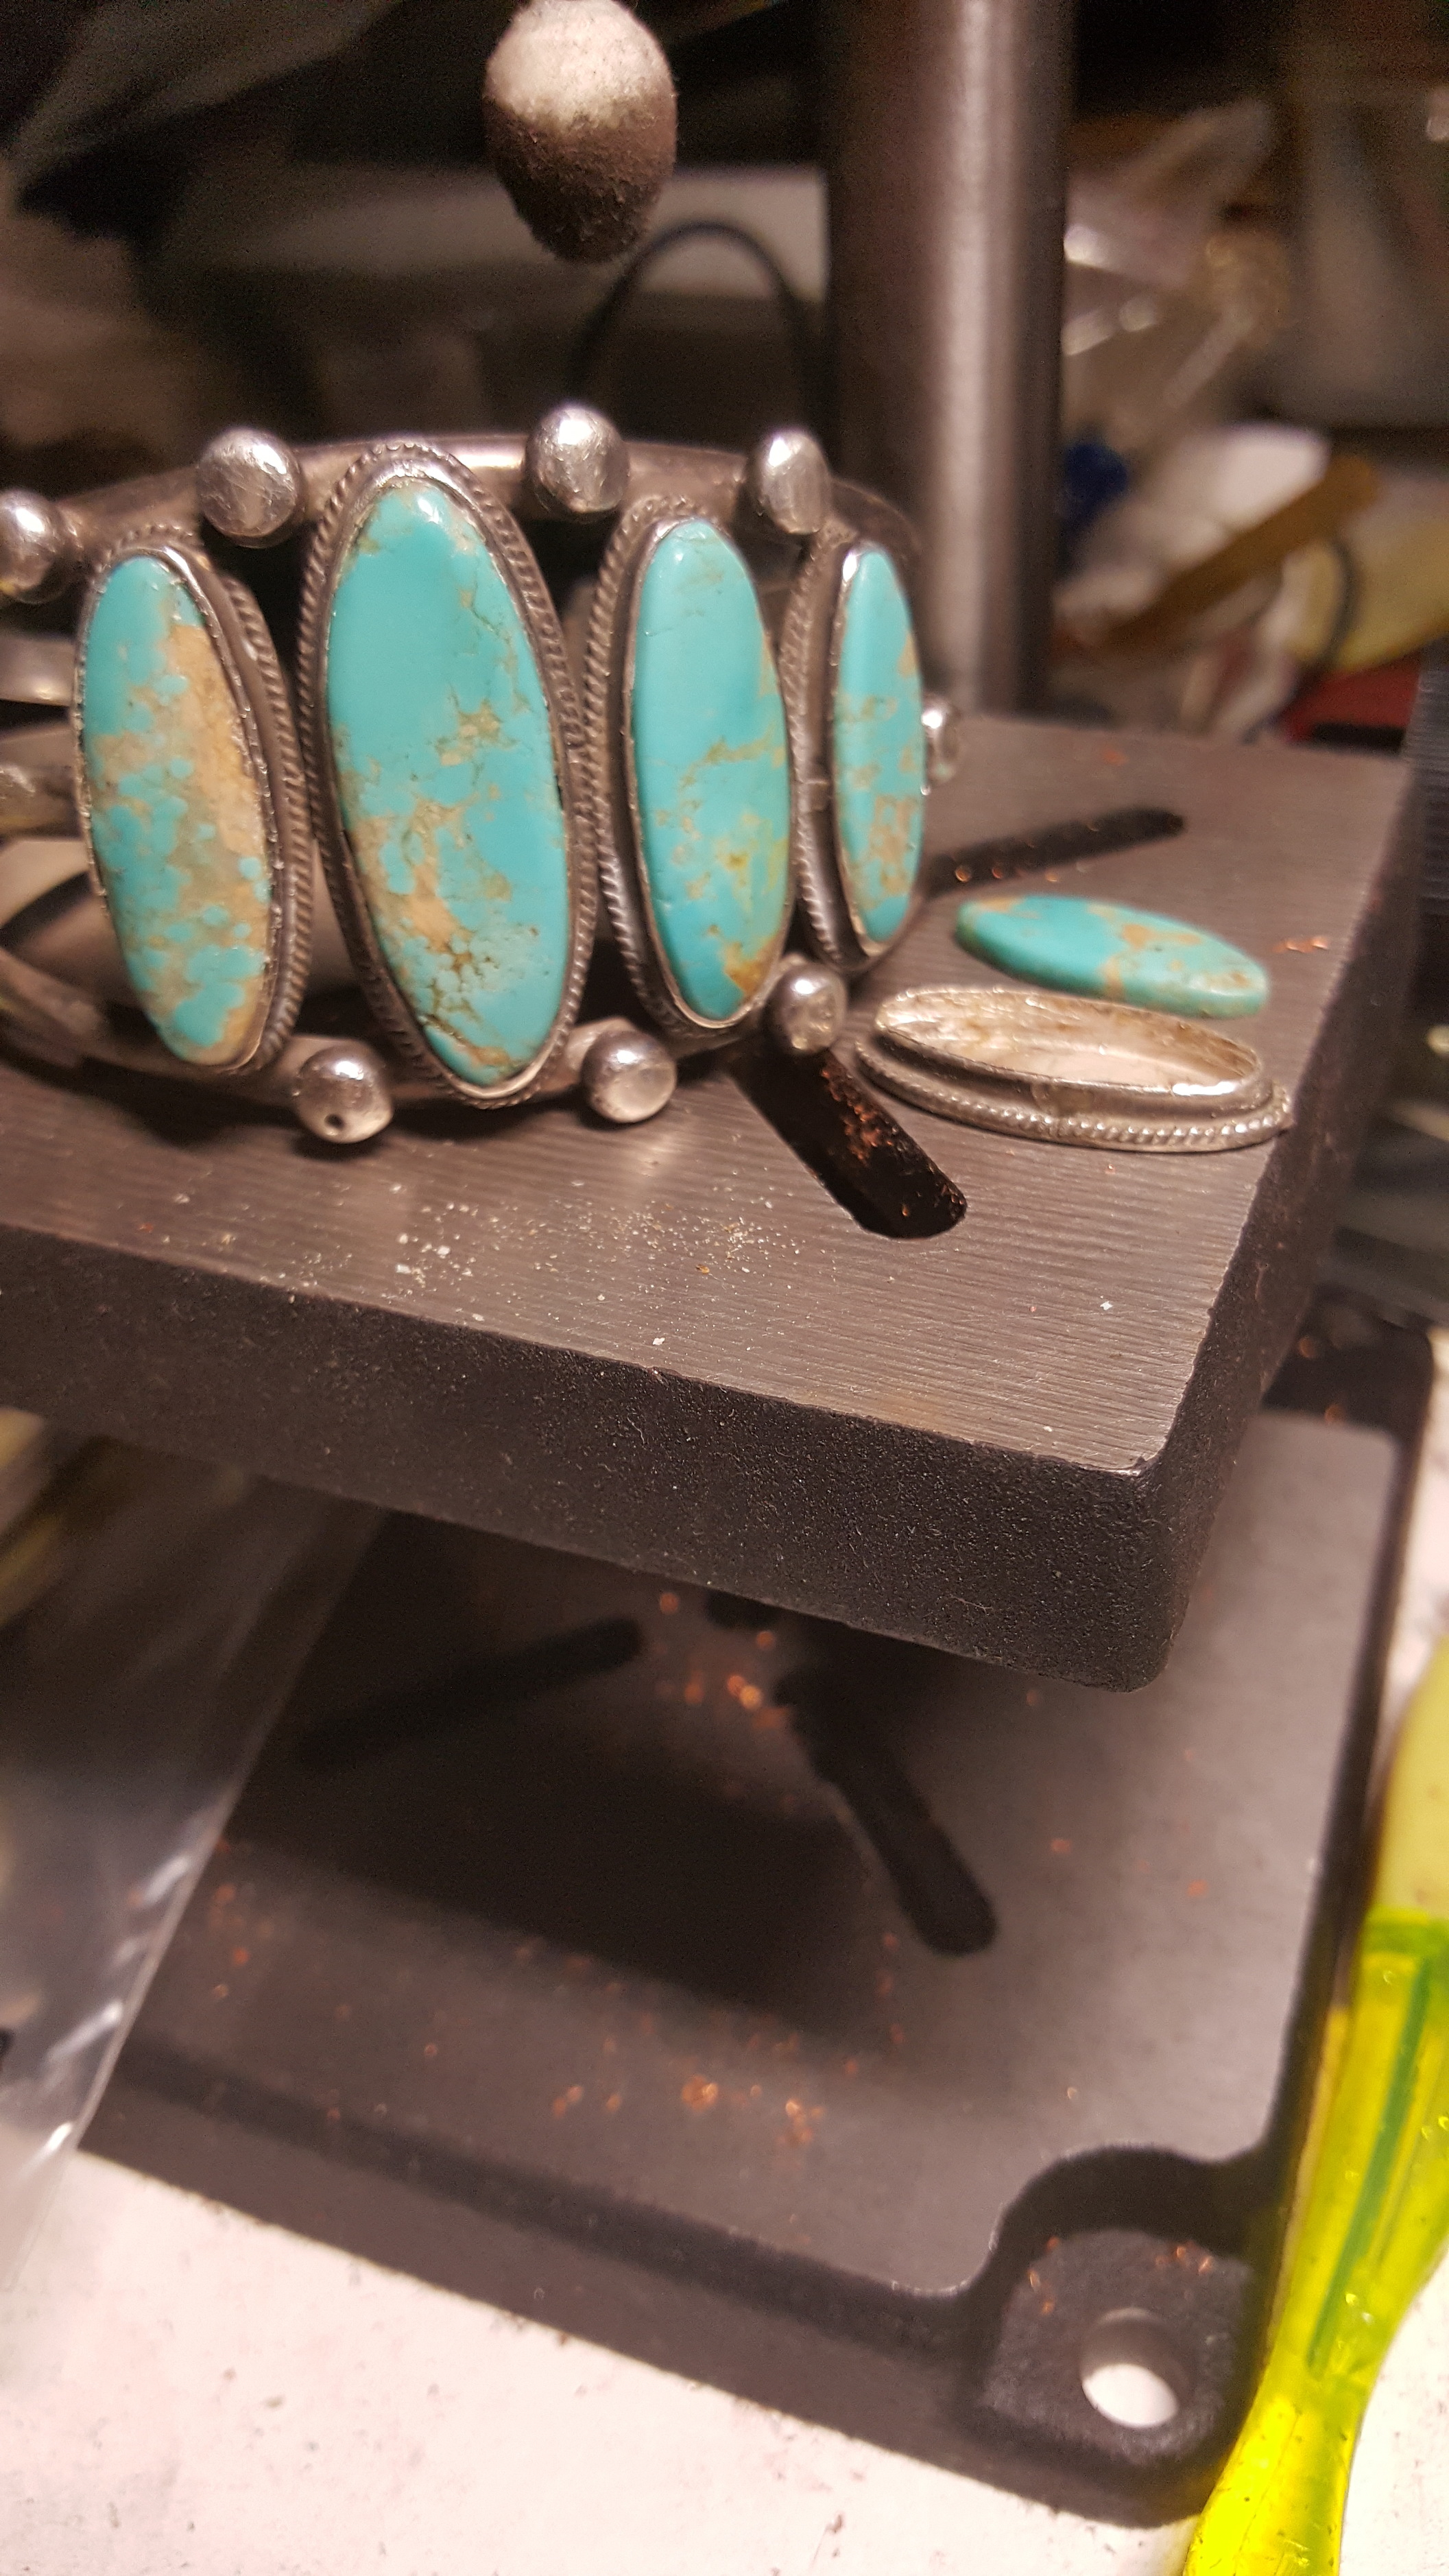
I recently received a bracelet for repair from a friend. It appears to be Native American and is pretty old. There are no markings but there are 5 elongated oval bezels across 3 bands around wrist. One of the bezels had come unsoldered so I agreed to fix it. I removed the first stone and realized that it had been set in copious amounts of what I am guessing is E-6000 with some JB Weld added in places. The bezel wire is very thick and rounded at the top and did not appear to have ever been disturbed by anyone else.
Of the 15 solder points for the 5 bezels, 8 are broken. I am now soaking the bracelet in a cup of Dawn liquid and water to dissolve the generations of hand lotion before proceeding. Maybe I will also soak in acetone to dissolve all of the gunk before heating. Anyone else seen mountings like this? I was expecting sawdust, not glue.
Yes and I wish I had not. Some of the Native American work is quite good. Others not so. I am much more cautious now.
Careful! This is the majority of my work as I specialize in this in kind of repairs.Glue is very comen in previous repairs and also original construction.Acetone soak is good if you remove all stones first You never know what kind of treatment the tuquoise has had.I can tackle these conumdruns with my laser,the only to way save piece and not your shirt or blouse and the piece.
1 Like
Ugh,I hate dealing with glue. Usually, I love working on Native American pieces, at least the well-made ones. Do be careful with the acetone, like 2audrita said.
1 Like
Thanks all. I was able to remove all of the stones prior to an overnight soak in soapy water. This morning I soaked it further in acetone and it finally looks clean. Now to gently clean the adhesive from the stones, re-solder the broken connections, pickle, tumble, patina and reset the stones. BTW, does anyone else use Oakite for tumbling in lieu of Dawn liquid detergent?
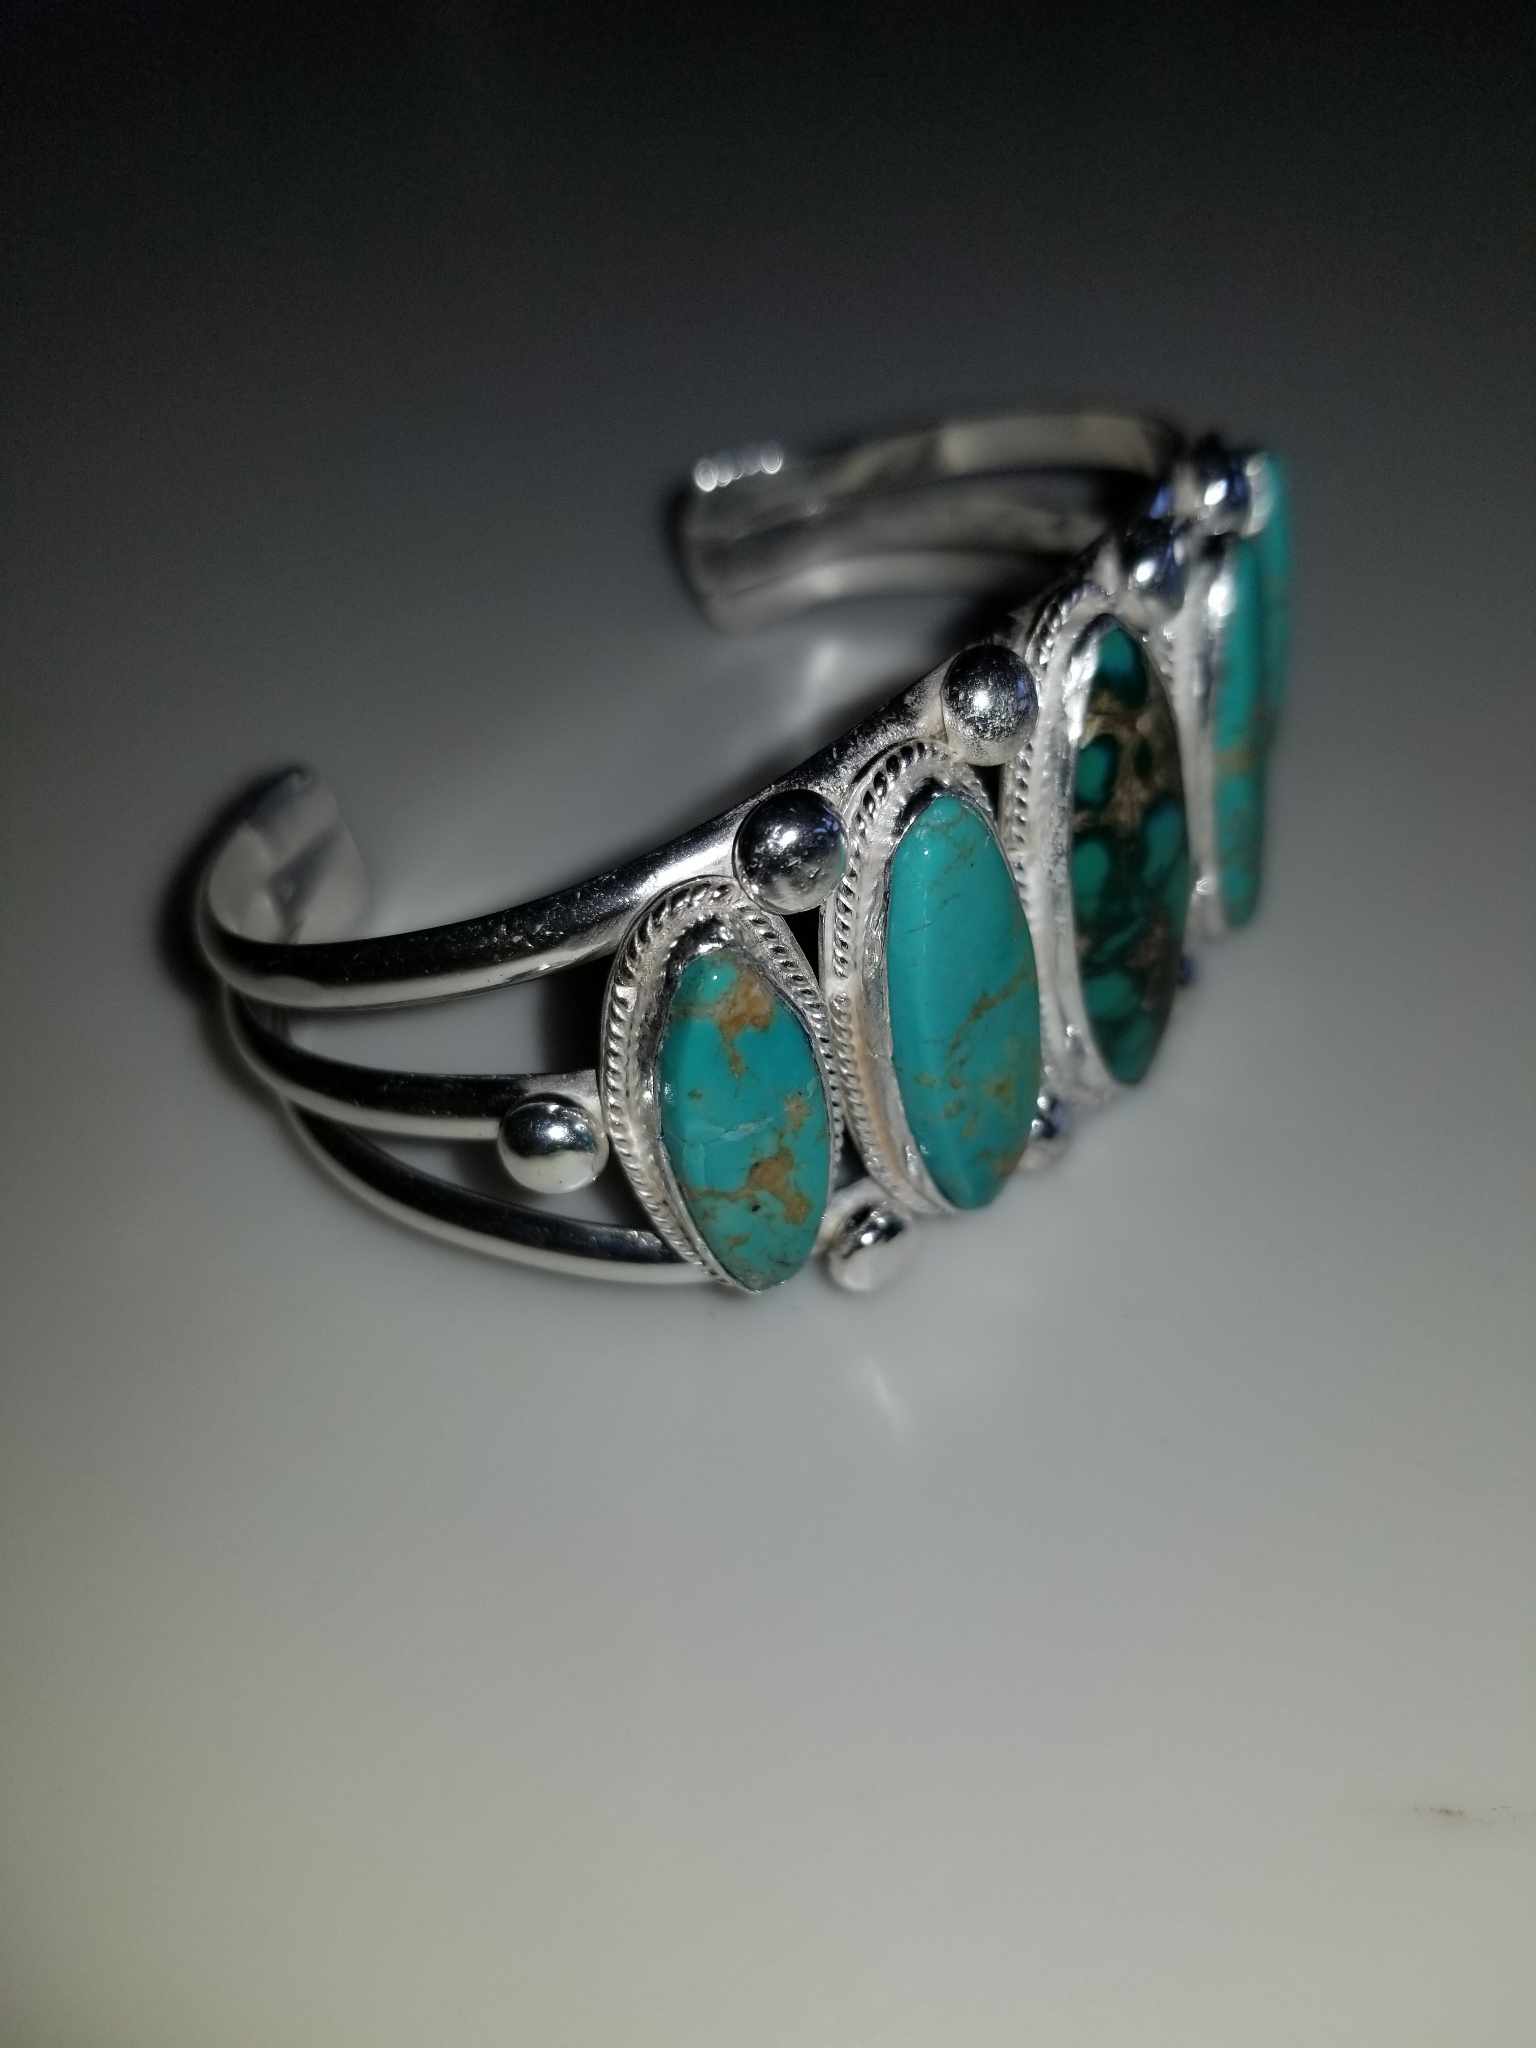
UPDATE: I completed the repair job and a week later the customer returned with the center stone missing. It appears that the bezel wires were made with <26 GA sterling and just would NOT conform to the stones. In addition, the stone were square cut with no girdles. I took the piece back, found a suitable replacement stone and then removed all of the bezels from the bracelet. I remade all of the bezels to fit each stone exactly (after gently forming a tapered side on each stone), reassembled the bracelet with the new bezels and fitted the stones into each bezel. This time I was able to re-construct it as it should have been in the first place. I presented it back to the customer and she immediately swooned and handed me 3 more pieces needing repair! Nice work, I guess! Thanks all!
1 Like
The first repair was a learning experience, so now you have a much better understanding of what it requires to do such a job.
I did not see a mention of your pricing for this repair, so I am basing this on my own experience doing repairs.
Sometimes we “lose our shirt” on a job where we priced our work far too low, considering what was actually involved in doing the repair correctly. You chalk the experienced to education.
Hopefully you informed the customer of the adjusted price on this type of work, based on your valuable new experience and education for such repairs when you were presented with 3 more to repair.
Just because you under priced 1 repair you are under no obligation to under price any future work.
Thank you sir! I completed the repair by removing all stones and re-soldering all of the bezels. Following that, I reset the stones using stone setting clay instead of sand for spacing and returned to customer. The next week she showed me that the center turquoise had been lost so I took the bracelet back and disassembled it again. This time, I refabricated each bezel (from scratch) correctly and then re-assembled the bracelet. I also re-defined the girdle on several of the cabochons so that they were a better candidate for bezel setting. I was able to locate a replacement cab for the missing center stone that is a near perfect match. Now the bracelet is bullet-proof and constructed properly. The customer is more than happy and has been deluging me with other things that belonged to her father which also need repair. I look at this experience as learning so much, much more than any book I could gave read. My torch skills also improved immensely. Thanks again for your support!
Repaired the same bracelet again due to a broken wrist wire. This time I knew more of what I was doing and it came out magnificent!
2 Likes
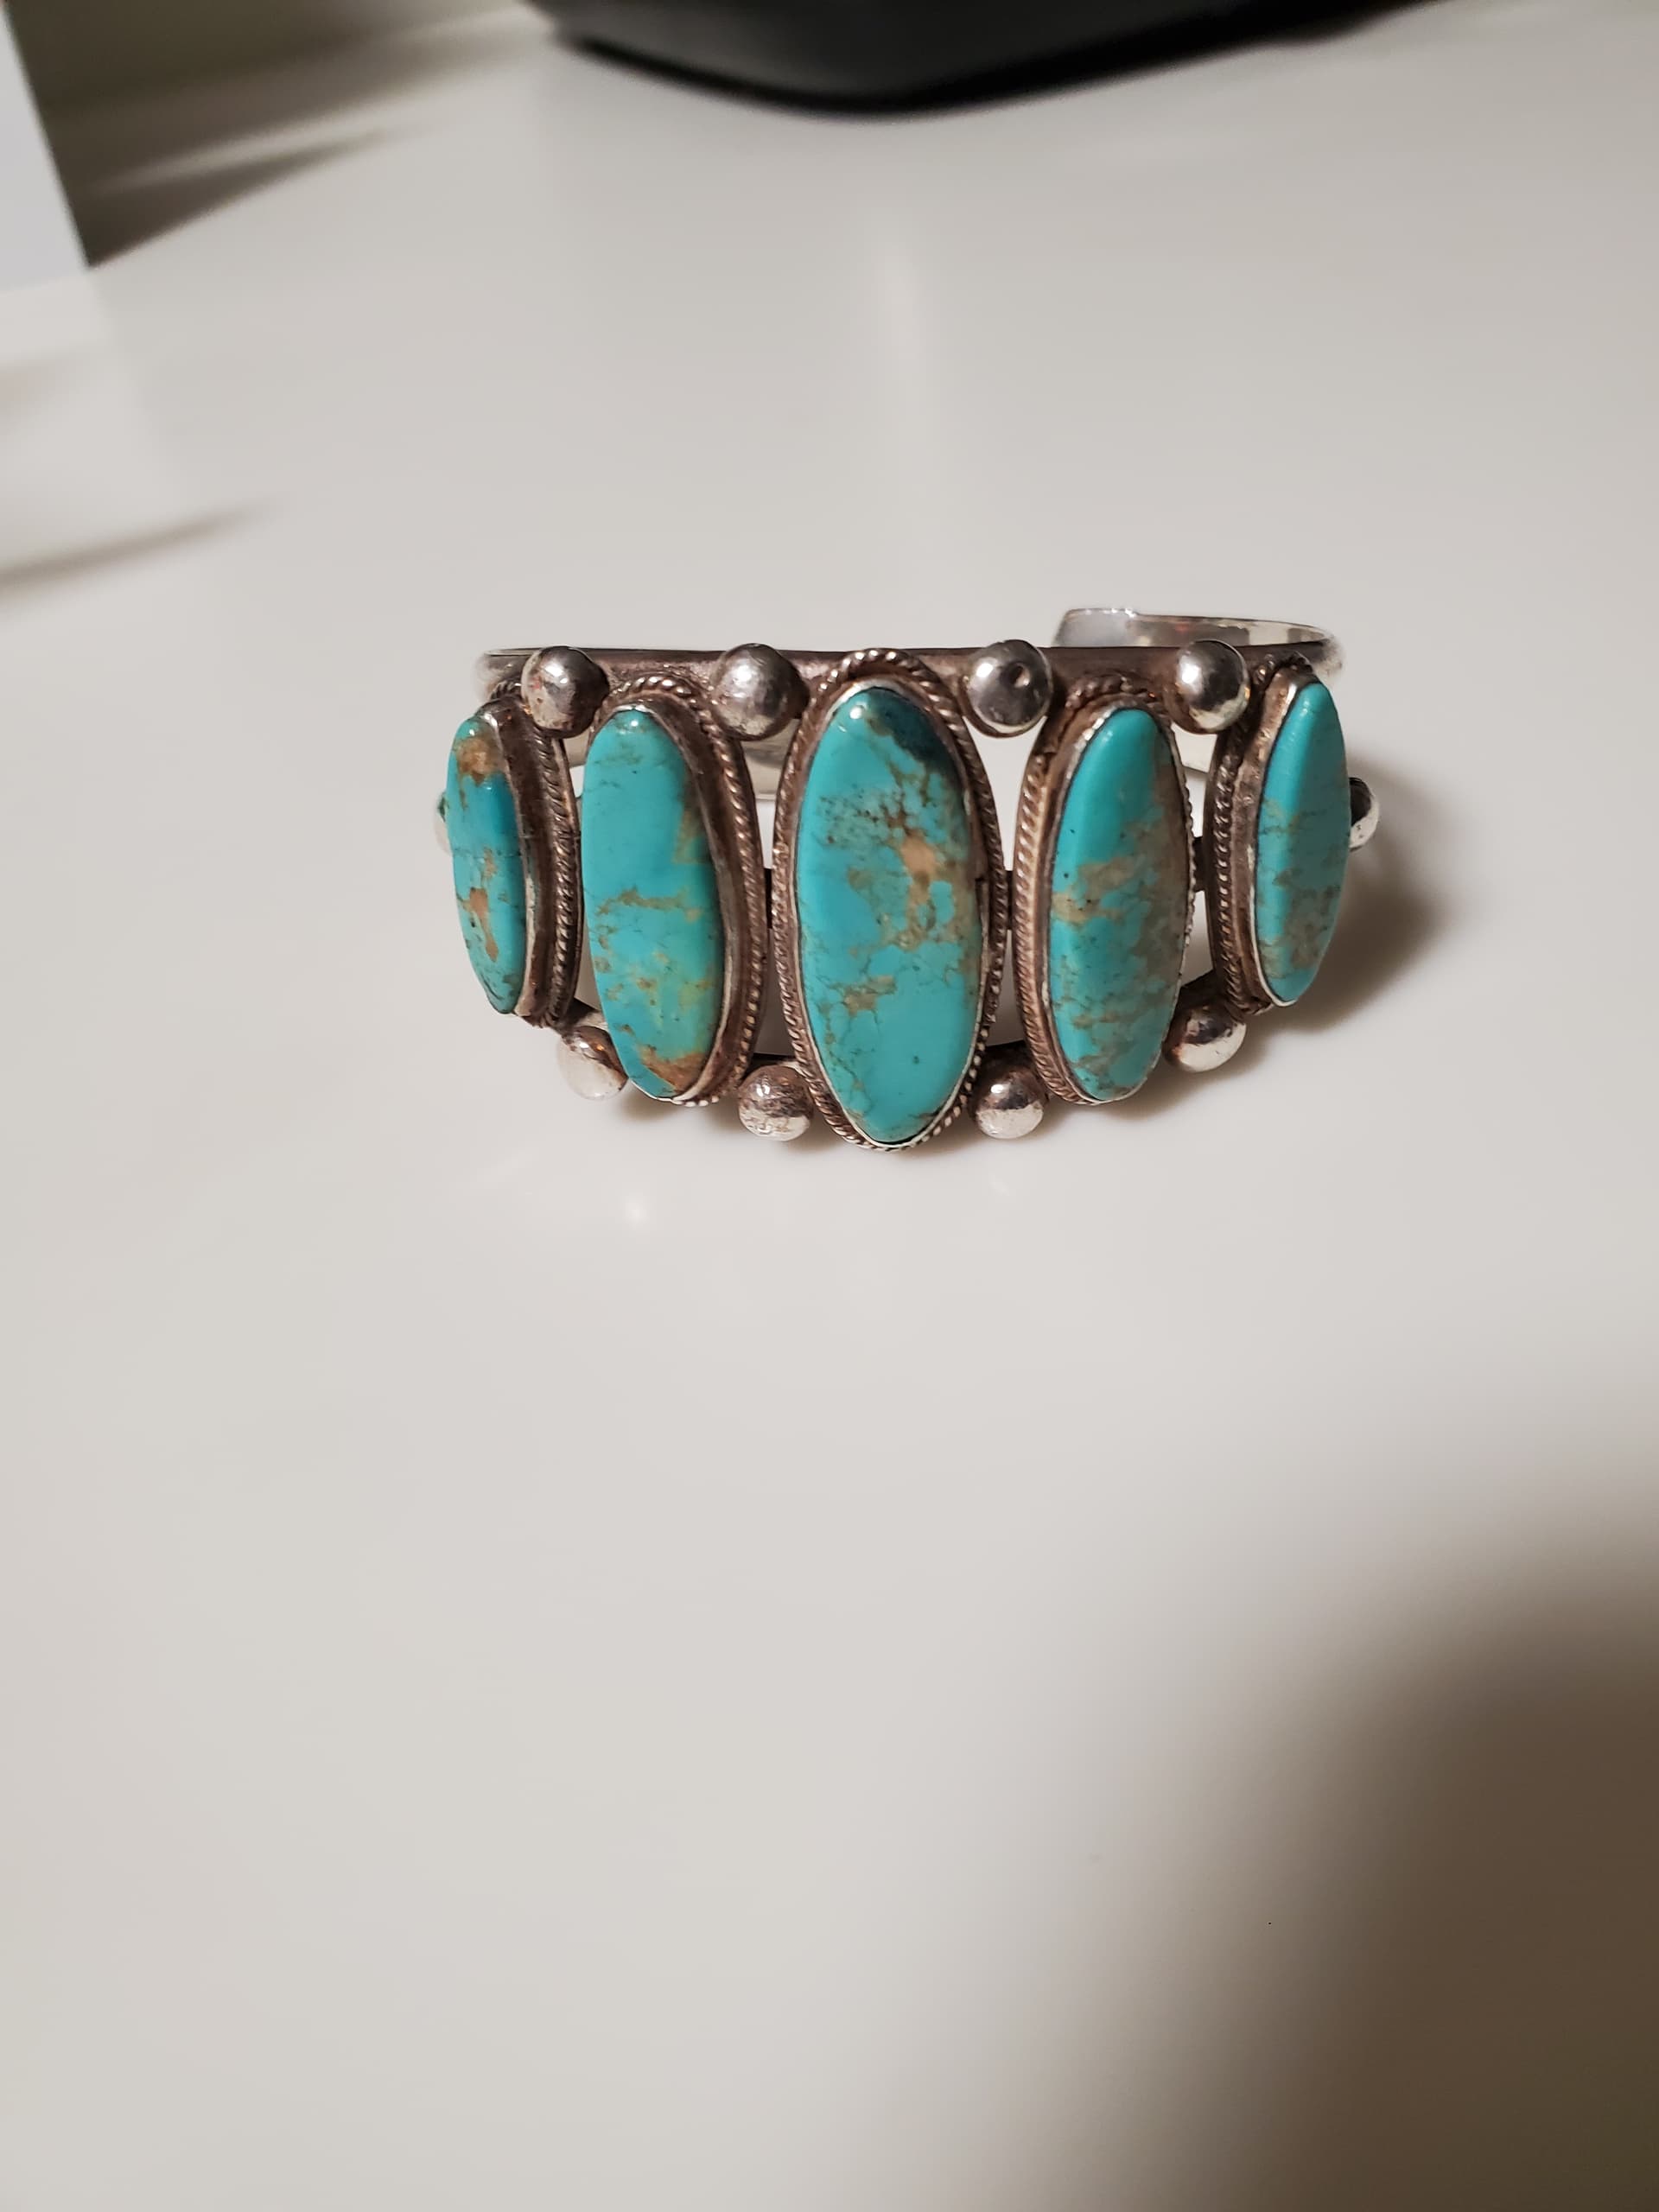
Fast forward to this week. After returning the repaired Yazzie bracelet to my friend she told me that she had found the center stone after vacuuming her house one day recently. I asked if she wanted to put it back into the bracelet and she declined saying if she ever lost the center one again, she’d have a replacement. And besides, the original cab was chipped at one end. I convinced her that she should keep the new stone as a replacement and reset the old stone with some small repairs to the chipped cab.
I mixed up some 330 epoxy and some closely color matching enamel I had on hand and gobbed some of the mixture into the flaw on the cab. Once the epoxy had set, I reshaped the repaired area and reset the stone in the bracelet. This time I set it using sawdust in order to retain some originality and history.
Here it is:
1 Like