This subject comes up regularly, so I made a tutorial mostly for my self, because every time I have to service one of my hand pieces, I forgot how it all went together.
Old age and all that. The hand pieces are all the same, one way or the other.
Mine are the T 30 Italian ones.
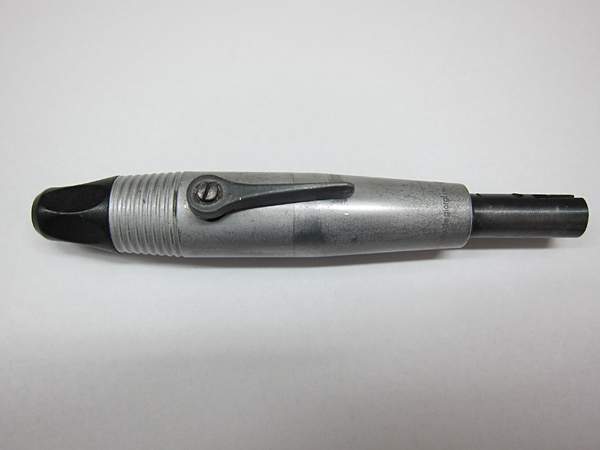
This is a standard hand piece that comes in a variety of flavors and manufacturers.
It is a very good hand piece and but it’s kind of difficult to take apart at first.
The biggest problem it that the jaw collet starts to wear a bit and this causes the burr that is being held to slip.
This is easily adjustable—sort of.
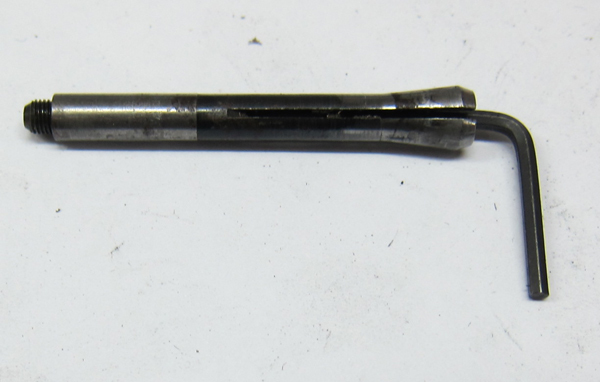
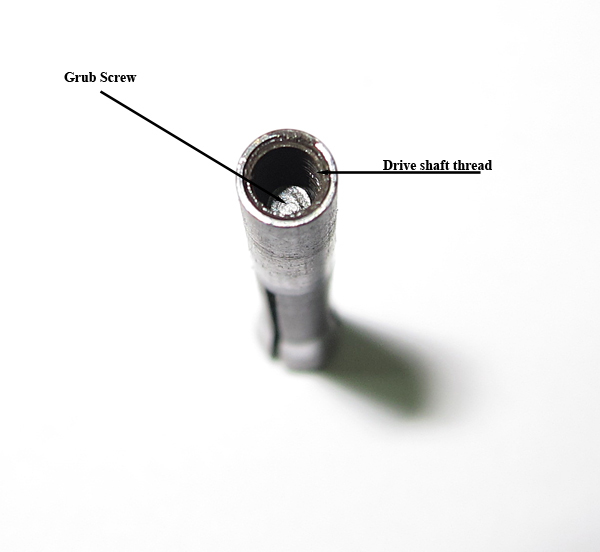
Inside the collet is a grub screw that accepts a 1.5mm Allen key, also known as a hex key.
This is problematic, because sometimes the grub screw had gunge in it and the hex key won’t go in easily.
Or, the older models have a screw driver slit.
One has to determine which is which first.
At first, I really battled to loosen the collet so in desperation I took most of the hand piece apart, and dumped the entire thing into my ultrasonic cleaner inside a zip lock bag filled with turpentine.

That cleaned everything nicely.
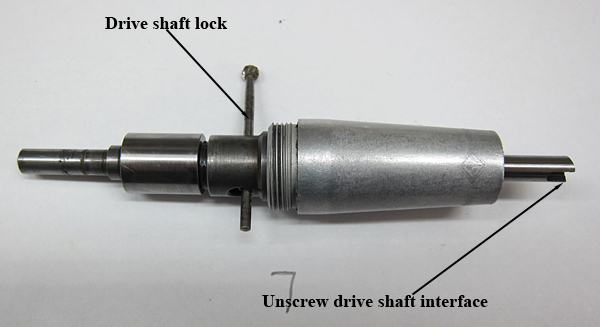
The ball burr at the back is inserted to lock the drive shaft.
So, then with the drive shaft locked and the quick release lever open as shown, the 1.5mm grub screw is loosened and turned about 2 turns out.
The actual collet should then be able to be screwed further into the drive shaft.
The quick release handle is released and the 1,5mm grub screw is tightened and the actual collet it is effectively now deeper in the drive shaft ‘cone’ and then should hold the burr tightly again.
This seldom happens though.
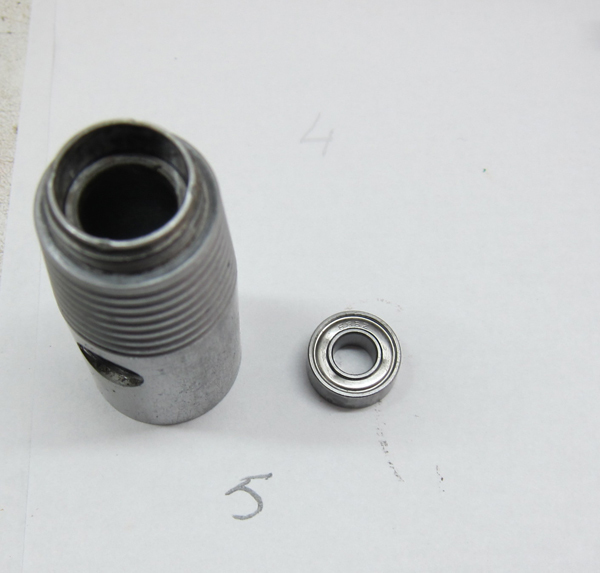
What normally happens is the entire collet turns out.
And this picture shows the collet as it normally comes out of the piece.
So: If one now turns the grub screw slightly outwards, it will allow the drive shaft to also screw deeper into the collet until it meets the grub screw again and locks the collet into position.
This effectively shortens the collet and allows the collet to be pulled in further, thus making the collet tighter.
It is quite possible to screw the grub screw to far out and then it will not accept the burr because the collet is now too small since it is pulled in to far.
Then it has to be screwed a bit back until a happy medium is found.
It’s a bit fiddly sometimes.
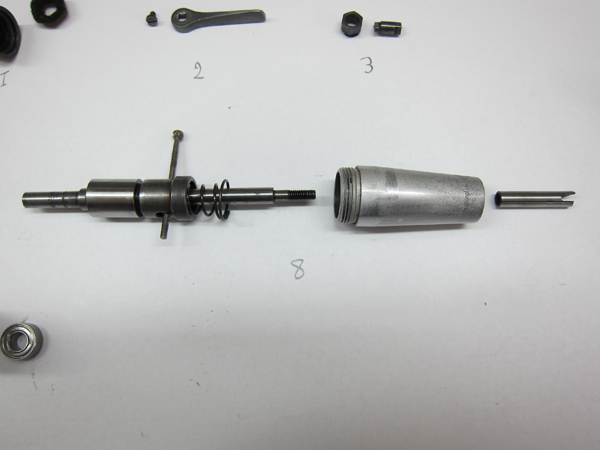
To further disassemble if one has to replace the bearings.
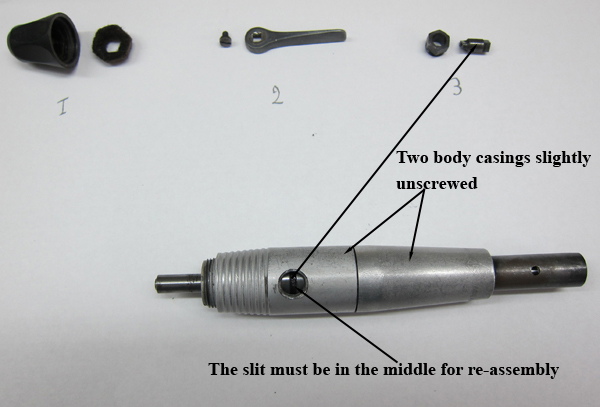
No 1: The top cover and oil felt are removed.
No 2: The lever is removed by unscrewing the holding screw.
No 3 : The opening cam is unscrewed using a 8mm spanner.
(When the piece is reassembled, the two body casings have to be slightly unscrewed until the cam slit is in the middle of the cam hole, as is shown. Once the cam is screwed in, the two body casings are properly tightened.)
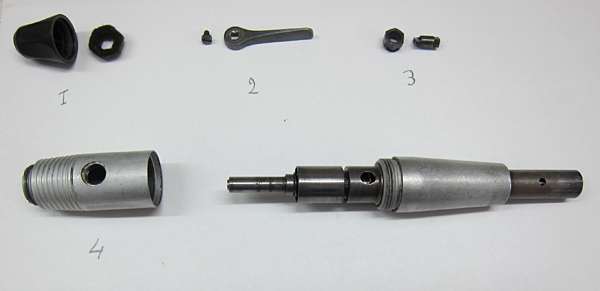
This allows the top casing to be unscrewed, which has the front bearing press fitted in it.
Should it need replacing, it is simply tapped out with an appropriately sized brass or wooden dowel.
Like this
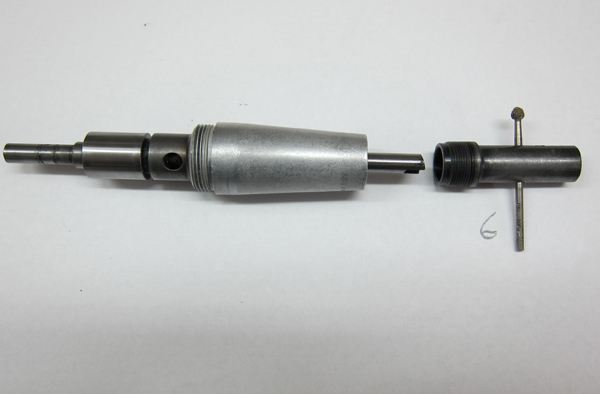
The rear bearing is removed by first removing the cable interface.
I use an old burr to give leverage to screw it out.
Once the cable interface is removed, the drive interface can be unscrewed.
Like this.
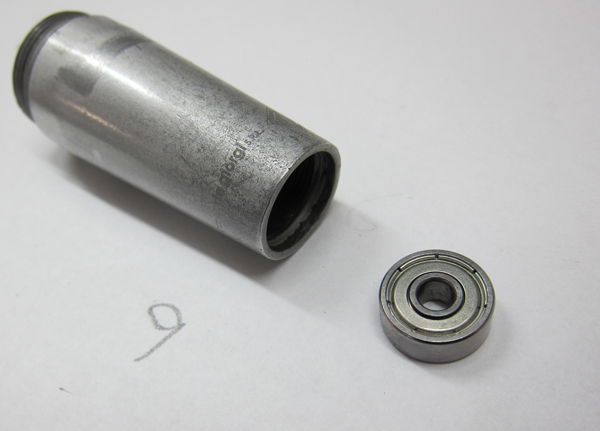
The rear bearing popped out.
I buy all my bearings from SMB bearings.
They have a great ‘can do’ attitude.
No affiliation.
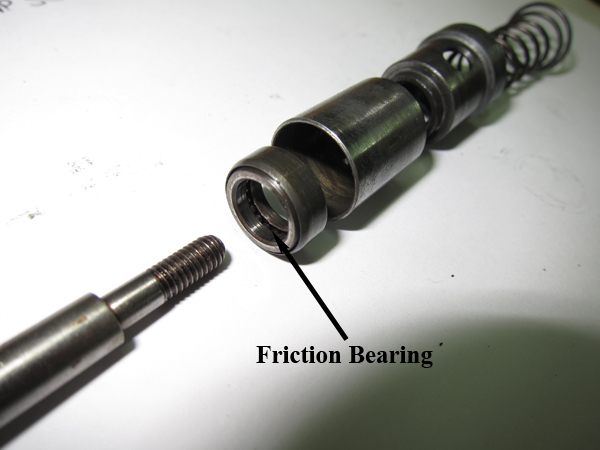
Friction bearing .
I have never found the need to have to replace this bearing.
Mostly it is the front bearing that dies first, but if I replace the front on I also replace the rear one at the same time.
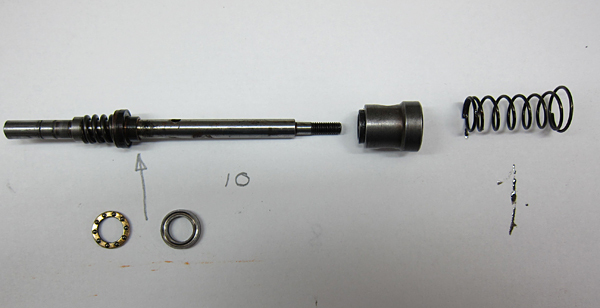
Friction bearing opened up
When the hand piece is re assembled, watch out that the spring on the right goes in as shown in the picture.

Just for interest.
There is no need to disassemble the drive shaft.
I only did so to see how the whole thing is put together.
Favorite and forget.