Do you generally darken the recessed areas of your goods before showing or do you prefer to polish everything and let the client decide whether to continue polishing or let the patina develop? Thanks!
1 Like
While most pieces are highly polished when I make them, even if they are later textured, I intend for the low spots to develop a patina and the high spots to stay polished. This will only happen as long a the owner doesn’t use a tarnish remover over the entire piece. I am always happy to re-polish a piece, but I don’t take out the dings or dents as they are like scars and probably have a story behind them. Once in a while I will make the design choice to patina a piece when I first make it, usually with LOS…Rob
1 Like
My jewelry leaves the shop with a hi-polish. Dad told me and I assume he told Rob the job wasn’t done until it was polished. I always tell people to wear their jewelry. Every time you pull on a sweater or a shirt you polish your bracelets and rings a little. Every time you put on a jacket you polish your pins and pendants a little. The low spots will darken and the high spots will gleam.
Don
Hi,
i love the warm burnished nature that polished sterling silver takes on naturally over time…
julie
Depends entirely on the piece. Sometimes a texture or dimensional element just doesn’t show up properly unless it’s emphasized with patina, but sometimes it does and the patina can be too much. Plus some people just don’t like it, they want all shine all the time.
I recently made these earrings and couldn’t make up my mind whether to add patina or not.
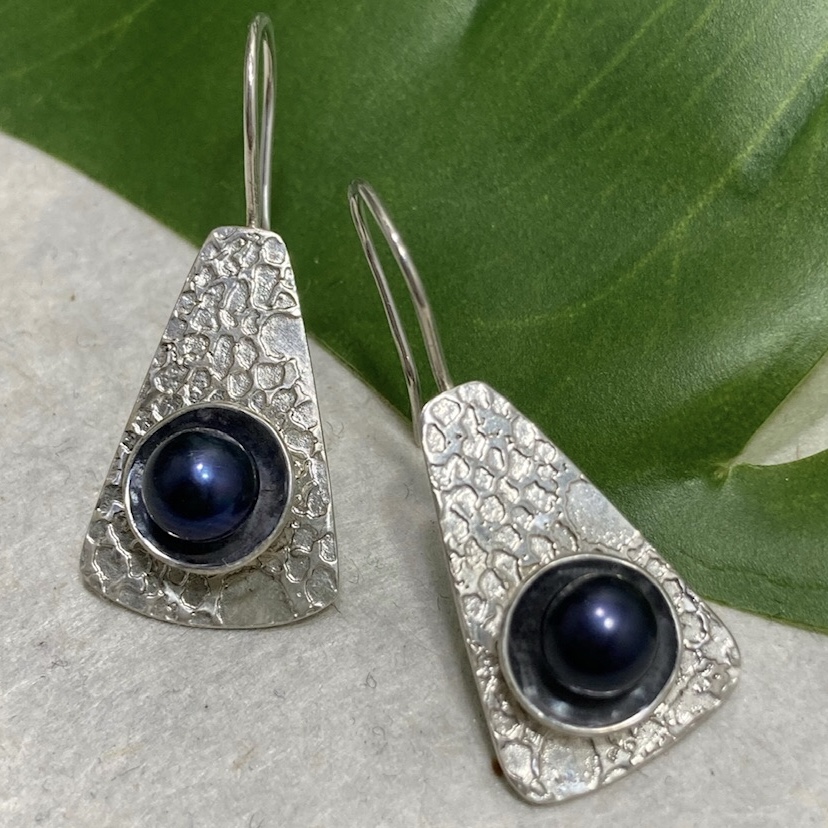
That etched texture is certainly capable of standing on its own… but I do like the look of patina. I mentioned my dithering in the listing and left it up to the customer whether they wanted the patina. They just sold and the customer asked for the patina, and I’m so glad they did! The black patina actually makes the blue-purple tones in the pearls much more visible. I’ve got more of the pearls so this will definitely guide my hand the next time I work with them.

3 Likes
Nice! How did you secure the pearls?..Rob
1 Like
In a process derived entirely from ferreting through the Orchid archives, in fact! I took two smaller gauge wires, twisted them tightly, then rolled them between two anvils to narrow them up a little (to just barely fit into the pearl with a little force but not enough to risk breaking it) and smooth the sides just a little, but still leaving grooves spiraling up. I soldered that into the little dish, trimmed and filed it until it was exactly the length of the hole in the pearl, then coated the post with just a drop of jeweler’s epoxy before putting the pearl on.
I’ve seen people use smooth wire for this, but given my previous experiences with epoxies I wasn’t about to risk that. All epoxies, no matter how high quality, are going to let go of smooth metal under some conditions. Maybe time, maybe impact, maybe temperature fluctuations, maybe a combination. But it WILL let go. The spiral grooves in the post should serve to lock it in place even if the epoxy ceases to be bonded to the surface of the metal. In an ideal world I would have the drill hole in the pearl grooved too, and have holes all the way through the post for the epoxy to flow through… but doing all that gets into levels of miniaturization that I’m certainly not capable of, and is probably more than is actually necessary. But I guarandamntee if I could do that that pearl would never ever EVER come loose! 
1 Like
Good solution. I have only mounted pearls a couple times. Each time I drew wire to be a snug fit into the 1/2 hole in the pearl. Cut, solder and finish the post and then went around the post with wire cutters to burr it up. Pearl cement or epoxy after that and, as far as I now, they have all held. Thanks for sharing…Rob
Two other ways to groove a post so the glue gets better purchase.
- Flatten a length of wire to the proper width then twist it, creating a helix. Mark Wooding’s “Rolling Wire-strip Calculator” helps with this.
https://www.distorted.org.uk/dep-ui/rolling.html - Thread the post.
3 Likes
Brilliant gads I love the simplicity👍🏻
GREAT example of how patina can make elements pop! The polished edge around the pearls really does make them stand out against the texture.
Well… Hmmm. You. must change your clothes a lot! 
As I said a year ago in August our Dad taught me that it wasn’t done until it was polished. I am experimenting now with different finishing techniques. The one rule I have is the finish has to be maintainable by the purchaser. For instance, ammonia does neat things to the appearance of copper but I don’t know if it will wear away over time and reveal the bright copper underneath. Time to experiment. I like the distressed look of Old Pawn jewelry and I have tried to develop that look. It’s much harder than it would seem. No matter how I try to make “Wear” look random it always looks intentional.
As I get ready for my fall shows I’ll stick mostly with what I know and cautiously tread off into new ground with my finishes.
Don Meixner
1 Like
Beautiful both ways! Did you actually etch the metal or stamp it? I’ve never tried etching but would love to learn; do you know of a good online resource for pattern etching? Thanks, Bruce