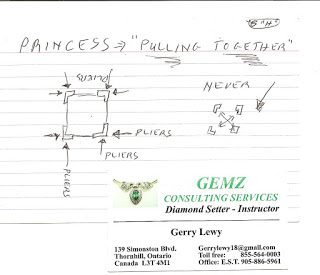
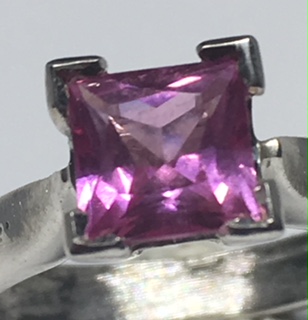
This style of setting is aptly named “Princess Setting”.
"Every Princess, is high-maintenance!" The ‘maintenance’ is the need to follow the many & exacting rules in setting an expensive stone, without any chance of breakage!
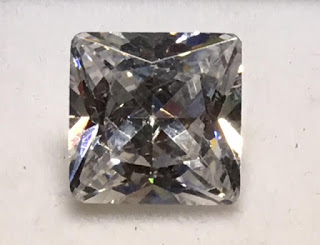
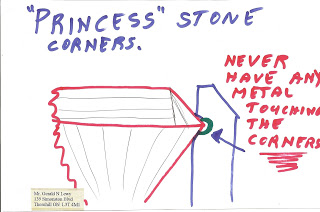
The most delicate section of this ‘4-cornered’ stone are the four (4) corners! Even while travelling & training, the students were amazed just how simple this setting can be.
The “Scale of Difficulty” on this type of setting is: 7/10.
(I might have duplicated some photographs from a previous essay on Princes stone a while ago!)
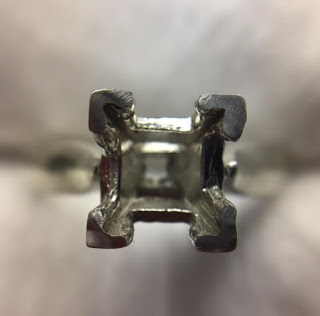
Where are the ‘very delicate’ areas? They are the 4-corners, I would be lax in saying: "Being exact in this profession is an understatement & it’s very demanding 100% of the time!
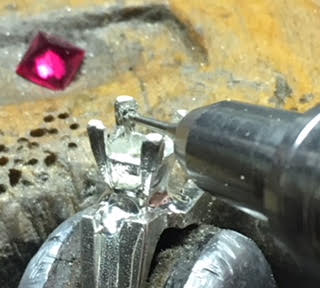
BTW, as this is only a very well used & very delicate Cubic Zirconia, it shows many aberrations from previous setting jobs. If this stone came to me, either I’d 100% refuse it, or have the client sign that they saw, noted and then examined the many ‘facet & inclusion’ defects.
I would first widen each of the four ‘vee’ shaped prongs/claws, I need the space to access the handpiece to get in between the four posts.
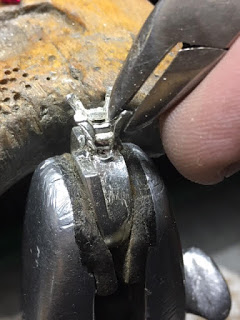
I would first ‘level off’ all of the 'four posts’ (for a better word) with a sanding disk of ’ Medium ’ grit of a " Snap-On " Emery-wheel ! I need to know just exactly where the metal is on the tip of the claws. In casting some of the claw edges sometimes get ‘rounded’ off and it gets a tad difficult to discern where the metal-edges are! I still do this today, as I have to be a very ‘careful’ setter.:>)

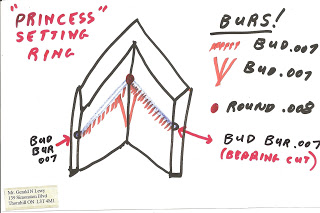
To literally ‘save’ each stone from being literally broken upon contact, is to drill a hole into the contact or joining of the ‘vee-shaped’ posts. I’d use a round shaped bur of #008. This is exactly where the stone-point will be resting, but not touching any metal!
I know of a very true story, and it came from my own setting bench:
A client came to me and she was so angered, she ‘gave’ a Princess stone with two shoulder stones of .50cts EACH and as well as a Center stone of 1.25 Carat Princess stone. The ‘setter’ just drilled a hole for the 4-corners for each stone and as well as the center prongs. BUT nothing else!!!
The center stone got damaged AND as well as one shoulder stone got all four corners broken . The setter blamed my new client for giving him broken stones. All three stones were examined prior to giving it to the setter and the company to where he worked. All he did was to drill out for the corners & no side, girdle-cuts in the metal.
That company where the setter worked had to pay full costs of complete re-faceting on all two stones, then repay for the reduced stone weight on both of the repaired Princess!
Moral of this story, there are absolutely ‘no shortcuts’ are permitted when doing expensive Diamond Setting!
The starting point is 33% from the top of the claw to the base. anything higher is my ‘creative filing and cleaning areas’.
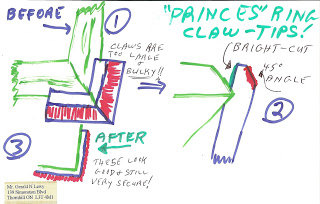
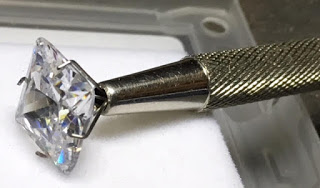
To set a Princess stone is to have only the top, or the tip of the ‘vee’ shaped claw exposed.
Here is the ‘head’ of the same ring! It’s like a ‘Before & After’ shot!
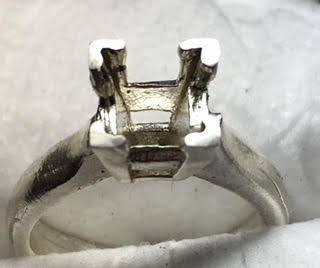
NEVER, NEVER bring in the “FOUR, cornered-claws” together, why so? This is because you will be having the ‘inside of the claws’ start to touch the corners of the stone…resulting will be a very expensive repair bill.