This ring has ONLY 128 diamonds! I decided to write this essay explaining how this ring came to being set. There are many rules to follow! I feel that the following photographs are easy to follow and I will guide you through this detailed “preparation for diamond setting” process!
I initially estimated what the best effect will be, the decision is to use the largest in the center! Then using different sizes and work towards the smallest at the end of the ‘allowed cutting space’.
Never use even numbers, the unwritten law is to use “odd numbers”, why? I have no idea,
but it looks nicer with seven.
I am not going to discuss the graver cutting process. This essay is only explaining how the preparation of the setting of the stones actually starts.
"Scale of Difficulty" on this setting is rated at a definite 8+ of 10!
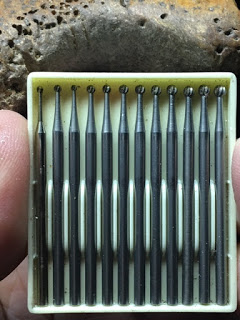
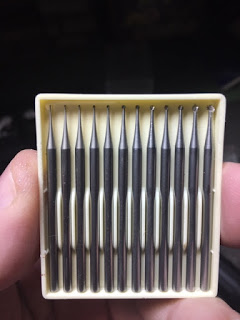
What tools did I use;
Twist drill of 1.0 mm & .80 mm. This was depending on the size of the stones!
Onglette graver #1 that was shaped to Bright-Cut on one side only!
Bead Raiser that was originally an Onglette #1, but greatly modified!
Flat Graver #40. I used this basically for all of the Bright-Cutting that was needed!
Bead Burnisher I used only size #11.
Round Burs: As I had about 7-8 different sizes of diamonds to contend with, I was constantly changing from one size of ‘round’ bur to another!
Experience needed for this preparation is about 3 YEARS, plus learning how to use a graver.
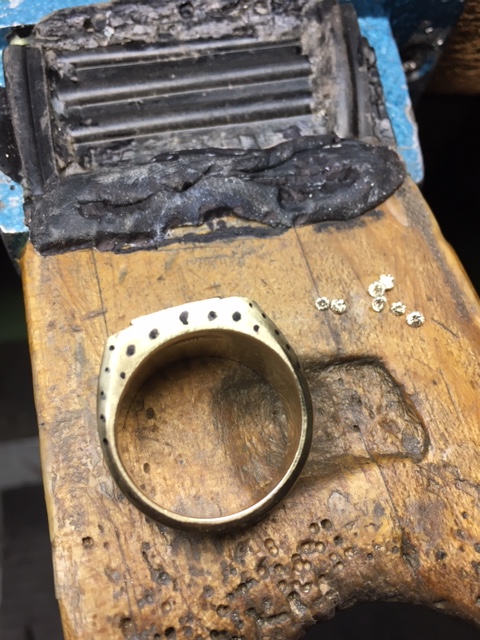
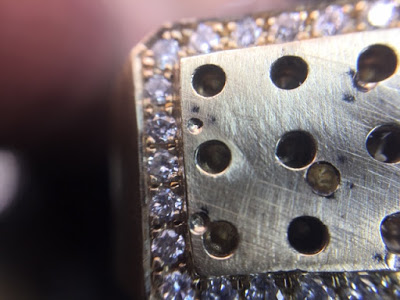
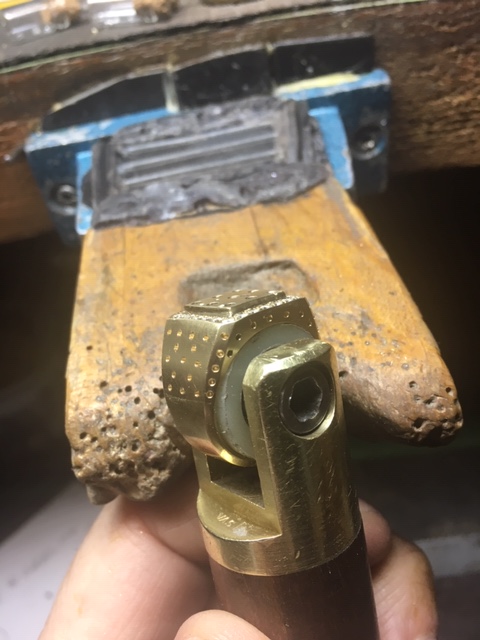
I just carefully estimated where all of the drilling of the holes will be, using an ink marker!
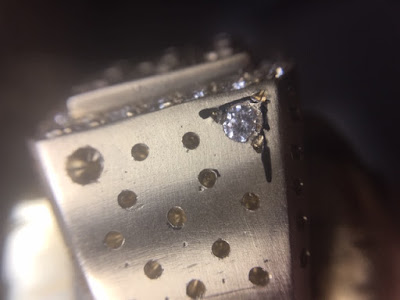
Oh my gosh!! There are some pin-holes and one that deep one is 1.5 mm’s in depth. These holes must be soldered before any setting can start. (I cleaned any unwanted casting remains.)
I “guess-estimated” where the stones will be set on the shank-side. I used the largest two diamonds for the corners, as this will give a good “visual effect”. Largest at the top and smallest at the bottom row.
This will give a “tapered effect” as the ring is tapering towards the bottom.
I used a small round bur to not only mark where the twist drill will be used but also making an indentation in the metal, so the drill won’t slide around and then ruining the surface!!!
Need I say how important it is to “lay out your diamonds” ahead of time? BTW, I used a little oil to keep the stones stationary on this pallet. The diamonds were all ‘Table’ down!
This “oiling” was my idea as I can now move the pallet then not worry if the ‘selected stones’ won’t move around if I touched it by accident…
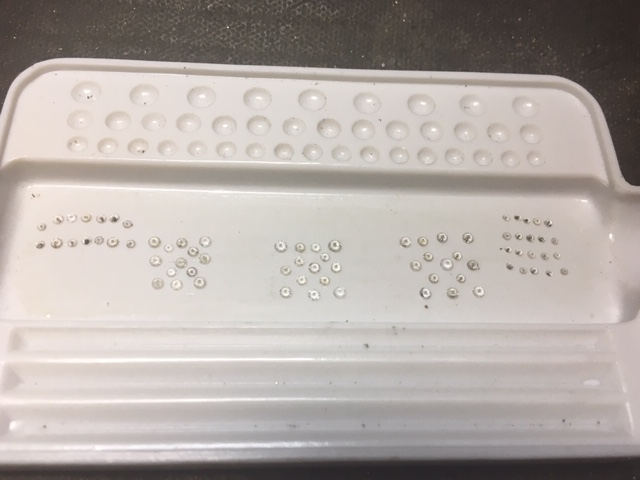
On the left, are the 7 diamonds that we just discussed. The next (from the left) are the two shank-sides, I even selected another “group of 13” larger set of stones, if it was needed!
On the far right are for the “four, side-corner” stones . I’m dealing now with 7-8 different sizes of diamonds to use in this ring.
"Picking & Choosing" was a great challenge, many times I’d replace one size for the other. This quite a common occurrence, don’t be frustrated if this happens to you!!!
But I’m not finished in the selection, as I found I needed even smaller stones to fill up the spaces on the metal for the “shank-side”.
When finished, there will be having 25 diamonds , these little stones are about 1.25 mm’s in size
I’m using a very large twist drill just for this demonstration. You can see how to make this drill sharp, if not, many problems will definitely occur for you!!!

Now the drilling is about to commence . I must be very careful in many ways, not to let the twist drill run all over the metal and make sure the twist drill is actually cutting the metal. If not, I’d use an “Emery, Snap-on Wheel”, using a “Medium” grit to resharpen the twist-drill.
When you are drilling you mustn’t let the steel drill overheat or the drill will bind and break.
Keep lubricating the twist-drill constantly! (I can’t overstate this, as this is so darned important).
You can see here where I marked the surface of the shank-side . You can barely see where the end of the corner-cutting will finish at the same spot.
Many times you are thinking is ‘three steps’ ahead of the setting process. I find this so important as each time I just sit back and get my thoughts together and then ponder how this ring will finally look!

I drilled at the corner with two of the largest diamonds. I marked on the metal exactly where the beads will be formed & created. How important is this? It’s just so unbelievably important!!
Here you can see the three beads holding the diamond . This is giving the setter ample opportunity for the next step…That is for the graver-cutting for the corners.
You can now see how much space I now have. In each available space I inserted one of the very smallest diamond, these stones are about 0.005 points in size.
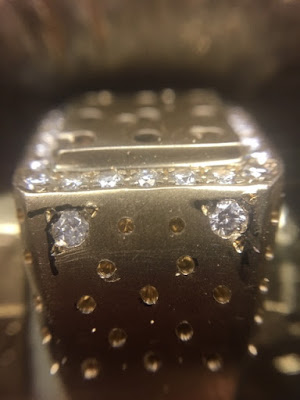
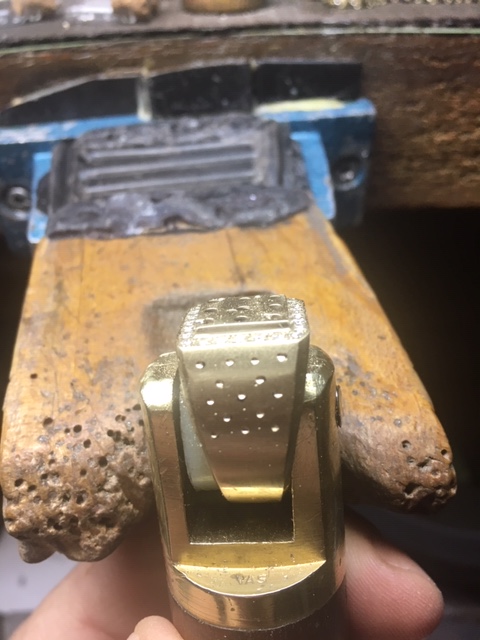
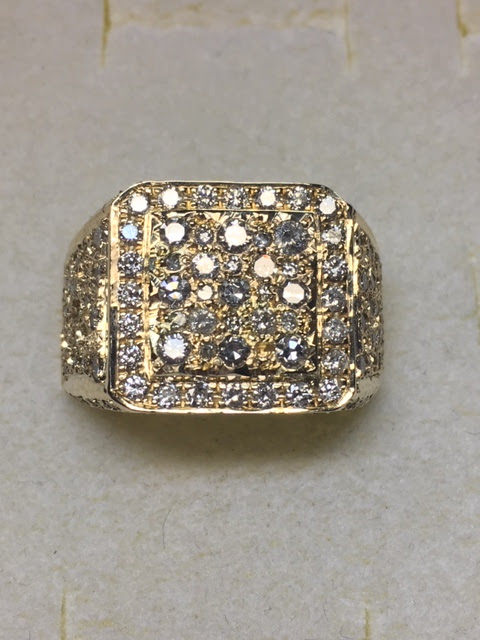
This photograph was taken prior to any Rhodium plating , hence the yellow colour of the 10 karat gold. (Yes, one 1.0 mm stone fell out, but it got put back in after the photograph was taken.) Can you find that empty space?..:>)
On the side of the 'raised plate’ , I decided not to leave any metal untouched. I even placed the ring on an angle and Bright-Cut the vertical (raised) sides. This wasn’t easy, as I didn’t want to ruin any beads on the lower level.
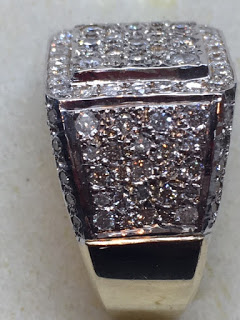
None of these diamonds were 100% clean in colour why? Everyone of them were 'breakouts", that is buying old rings and removing all of the diamonds. My customer paid a very cheap price for all.
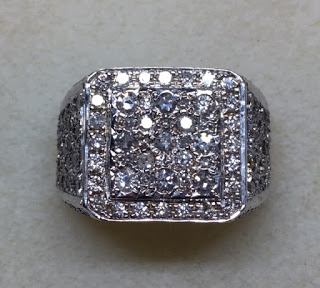
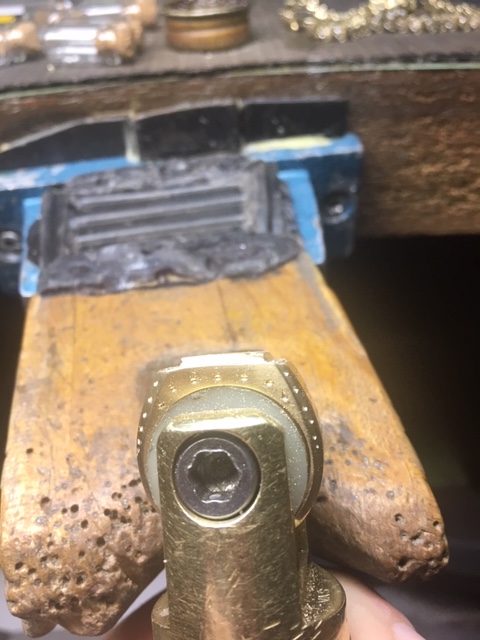
In holding the ring on its side wasn’t at all easy, it was almost difficult . My Bright-Cutting was not an easy process, but it finally got done!
How many hours in the actual setting process? I estimated at least 10+ hours in total. This was not including the ‘stone layout’ prior to any drilling of the holes and placement of the big to smallest diamonds. I enjoy this delicate process, while not having any interruptions; no radio or phone calls.