Before you sit down and attempt to copy some of my Bright-Cutting projects, there is one big problem. How many weeks, months or maybe years, have you been ‘practicing’ using a graver?
In this interesting essay on 'practicing’ , you will surely find out what my formative years were on the bench and what it involved. I’ve prepared a list of mini-topics you should be very concerned with.
This ‘Scale of Difficulty’ is about a "7.5 out of 10!"
-
What metal should I practice on? For these basic learnings processes, I’d stay with silver, as this is an easy metal to work with and very forgiving if you make a little mistake. Brass is too darned hard to cut and navigate around the beads, not to mention trying to Bright-Cut. “OUCH!”
-
How am I to hold the ‘demo-sample’? You can hold this item at any angle you need, just remember your fingers must be able to move the graver of your choice. I prefer to have my graver as near as possible to the edge of the ‘wooden stick’ as I need 100% access to the metal for cutting.
-
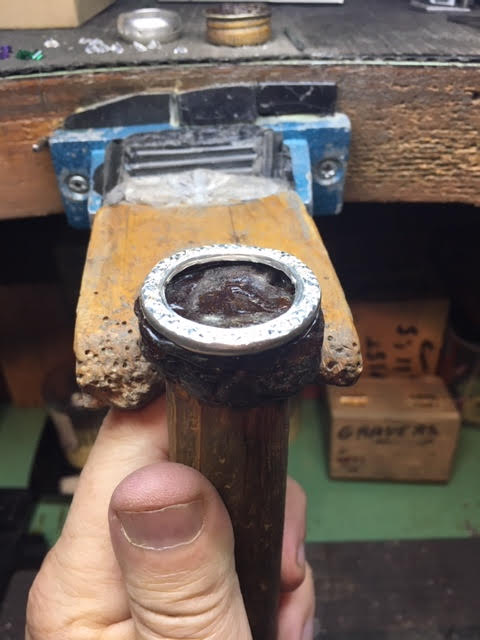
What clamps should I use and why? I use a shellac stick that will hold ‘securely’ any item that I need to be easy to hold for many hours and not to move.
3-a) The ’ pin vise ’ is too cumbersome for long setting periods, as it is quite heavy @ 191.3gm’s just
to keep lifting it against the bench-peg. My fingers & hand must not have any need to 'climb over the pin vise’ , just to gain access to the ‘demo-piece’.
3-b) The screw on the side can be so very irritating just to navigate while doing some Bright-cutting. It just interferes ( ouch!) with my right-hand when holding my gravers. The little (holding) pins can destroy or mark some on the side metal…:>(
My fingers can wrap around the wooden stick with the greatest of ease, as I have now no other protruding piece of metal (tightening turning screw) hurting my fingers. The wooden shellac stick (my preference) weighs only 62.1 gm’s.
When the shellac is heated and the melted “Flake Shellac” semi-liquifies and it literally sticks and then hardens to your ‘demo-practice’ item. To remove the shellac, I drop the slightly heated item into 'Methyl Hydrate". After 1/2 hour, all of the shellac is dissolved into the solution. So easy to use!!!
-
What tools should I use & why? As shown below, I’d stay with the Onglette & Flat gravers !
-
Ergonomics & why is this so important? Always sit in a chair that has armrests. During the long engraving & cutting sessions, your arms do get tired and your elbow can rest on that attached arm-rest even while continuing your Bright-Cutting.
-
What magnifying “Opti-Visor” lens should I wear? I use two lenses, #5 & a #7 , depending on the intensity of your Bright-Cutting!!!
-
When should I do my practicing; morning or afternoon? I start my “setting” mornings off at 8:00 a.m.and slacken off by 2-3:00 p.m. The brain actually gets tired from the intense cutting & very ‘creative’ thinking.
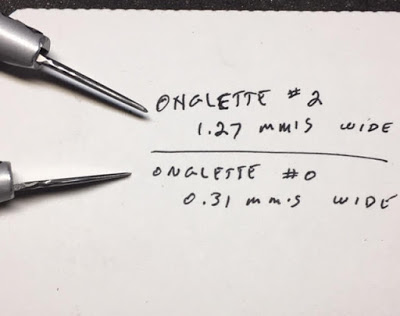
What are the basic selection of gravers to use; these can be very useful in other engraving situations. I prefer only 2, Onglette gravers ; #1 & #2, plus my favourite Flat graver #40.
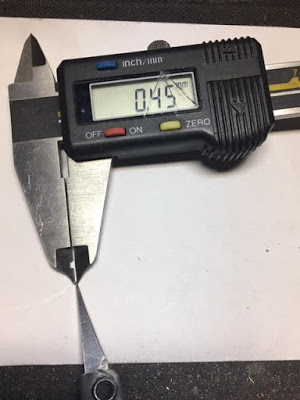
The thickness of the cutting section of this graver is quite narrow, it’s a mere 0.45mm’s.
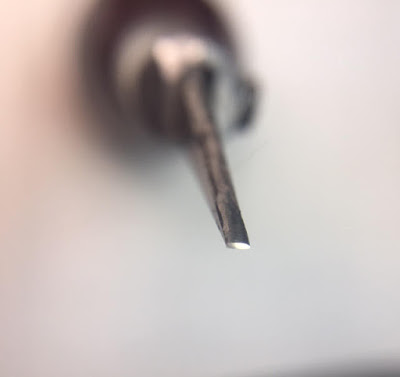
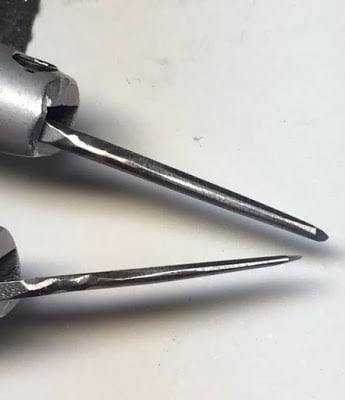
Here are my two gravers that I used here , as you can see you have just one decision to make which graver to use? In my opinion, I’d stay with the thin graver, as it has a greater opportunity in carving very delicate areas.
Now you can observe the greatly modified & extensively trimmed Onglette #1. I keep my “Bench-Grinder” and “Oil-Stone” working non-stop, as I’m refining the cutting edge of my gravers continually.
I use my Burnishing Tool, but what size? My answer will be a burnishing tool that is just a size larger than the bead you are wanting for ‘round off’!
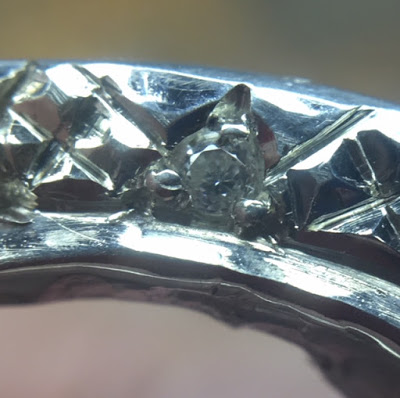
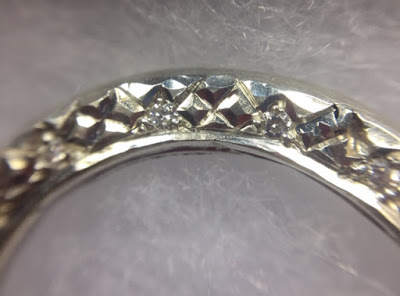
As I am now dealing with engraving in very tight spaces up close photo’s show all kinds of some “unnecessary” cuts. The width of the engraving area shown here is 3.75mm’s by 2.19mm’s.
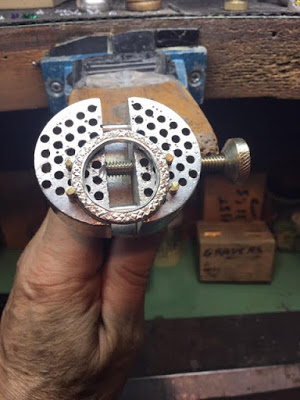
Inside of each square, I used my (very thin) Onglette #1! I cut two cross-lines…thus making each square now with 4 mini-squares! This #1 graver is only 0.31mm’s in width as this allows the greatest of ease in the delicate cutting…Nice pattern? I leave no surface areas untouched by my flat graver!
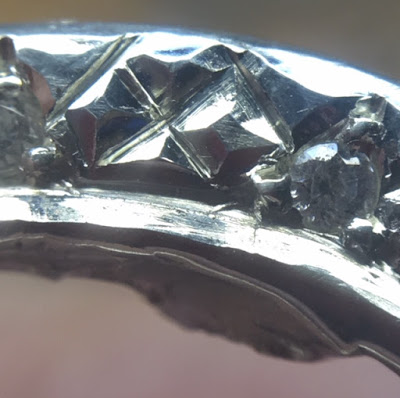
As you can now see there are no flat areas remaining that need to be faceted with your Flat graver. I even faceted the very tip of the mini-new squares. Every top of those new ‘square tips’ must have a reflecting surface.
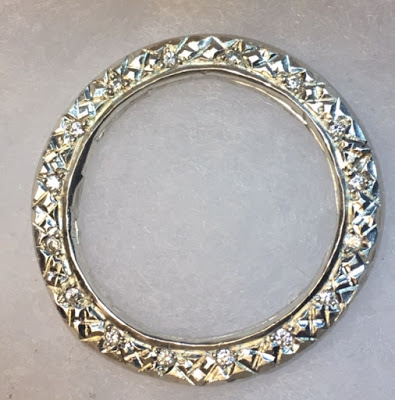
From a distance of only a few feet , the ‘observer’ cannot just tell how many gemstones there are in the silver circle. That alone is the main reason for all of this creative Bright-cutting. (You might need some sunglasses under the direct sunlight just to see the multitude of cuttings)… :>)
If anyone says that this ‘cutting session’ is difficult this might be a little true. After a few intense cutting sessions, this exercise will become easy and be like ‘second-nature’ to you!
In my next group of demo-essays , I’ll be further discussing how to grind & further modify the graver to allow such easy cutting just like being shown above.
BTW, in all of Toronto and the multitude of Diamond Setters, there are not too many who can execute this kind of creative Bright-Cutting, pity!
