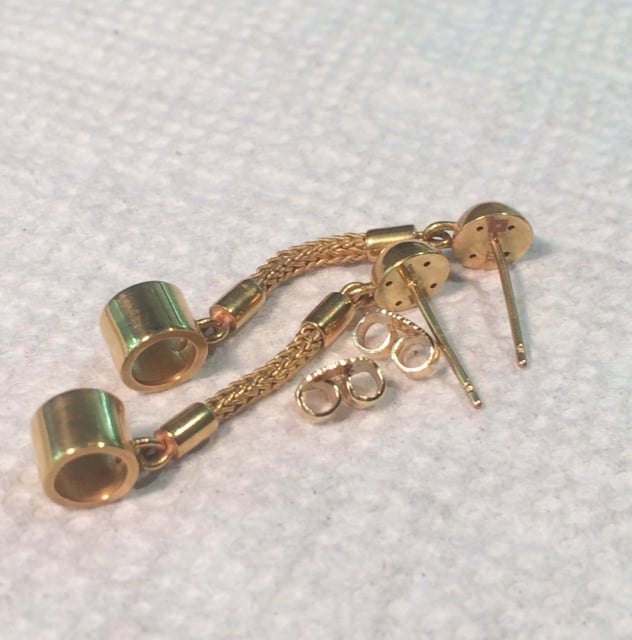
Any ideas or help on how to make this groove, so that the clasp
catches in it, would be greatly appreciated.
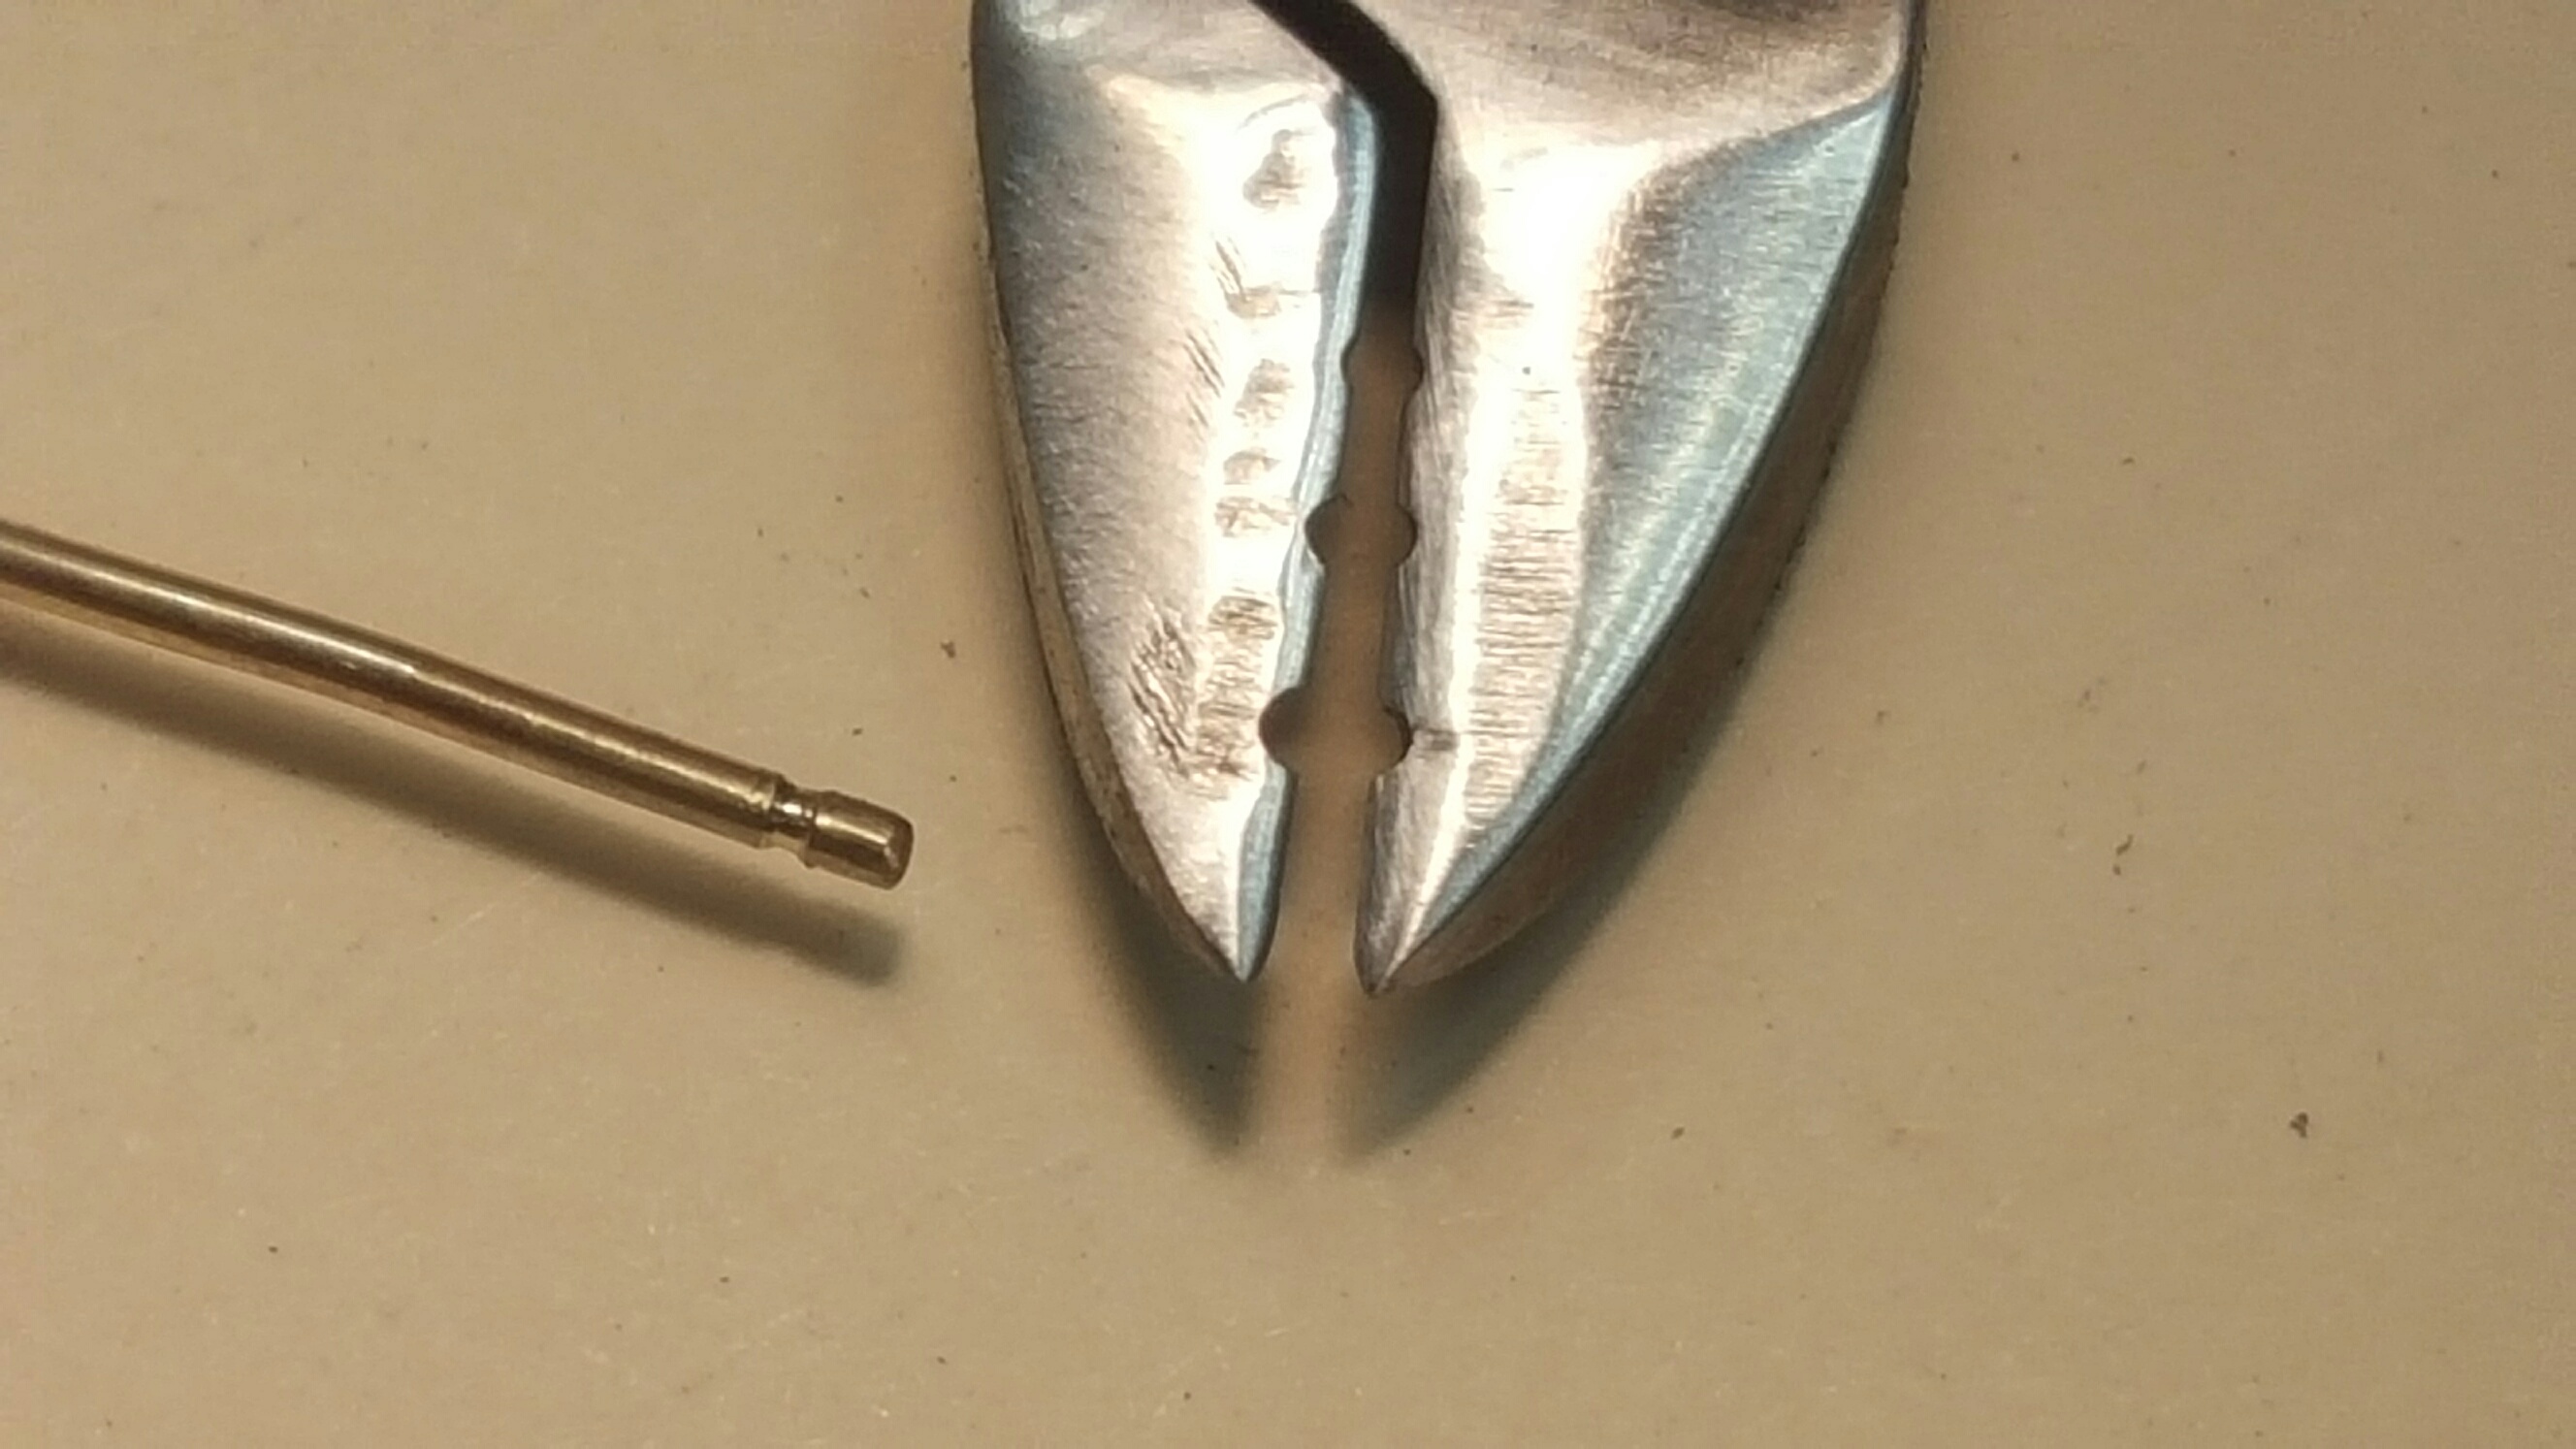
Rather than needle nose, I use round nose pliers (both jaws are
tapered cones, round cross sections tapering to a point. Make sure
the jaws are clean, without nicks or scars. Preferably pretty smooth
or even polished, though that’s not absolutely necessary. Choose a
point on the jaws where the diameter of each jaw is slightly less
than the diameter of the loops on the friction clasps, so the notch
will be a decent fit for the shape of that portion of the clasps
that need to fit into the grooves on the post. Now, grasp the posts
with that portion of the plier jaws and GENTLY squeeze, to produce
slight dents in the post. Rotate the posts 90 degrees, and do it
again. Rotate 45 degrees, repeat, then again and again, so you get
multiple dents all around the post. Now go over these, or as much as
possible, between them, smoothing out the ridges between the dents.
doesn’t need to be perfect, just roughly in the right place. Once
you’ve established these dents, now gently holding the jaws just,
rotate the posts so the jaws burnish the groove, smoothing the
individual dents into a continuous groove. what you can end up with
is virtually identical to the commercially made posts, where the
groove is put in by a linear burnisher rolling along the post.
You have to be careful in the burnishing step to hold the post
loosly enough so the jaws burnish around it, rather that gripping it
and then twisting the post.
You might also wish to twist the post to work harden it (though that
may not be very effective in high karat gold like 21K), but you
should do that seperately from making the groove. If, after you’re
done making the groove, the outside little bit ends up slightly bend,
you can easily enough bend it back in line with the rest of the post.
Then round off the outer end of the post, and make sure the friction
back fits. It should click into the notch, but should not be so tight
as to require much force, especially to push on, since the high
karat posts will be fairly soft. A little drop of oil on the friction
cluch will help that too.