Good morning!!
I have a question and wondered if anyone could help,
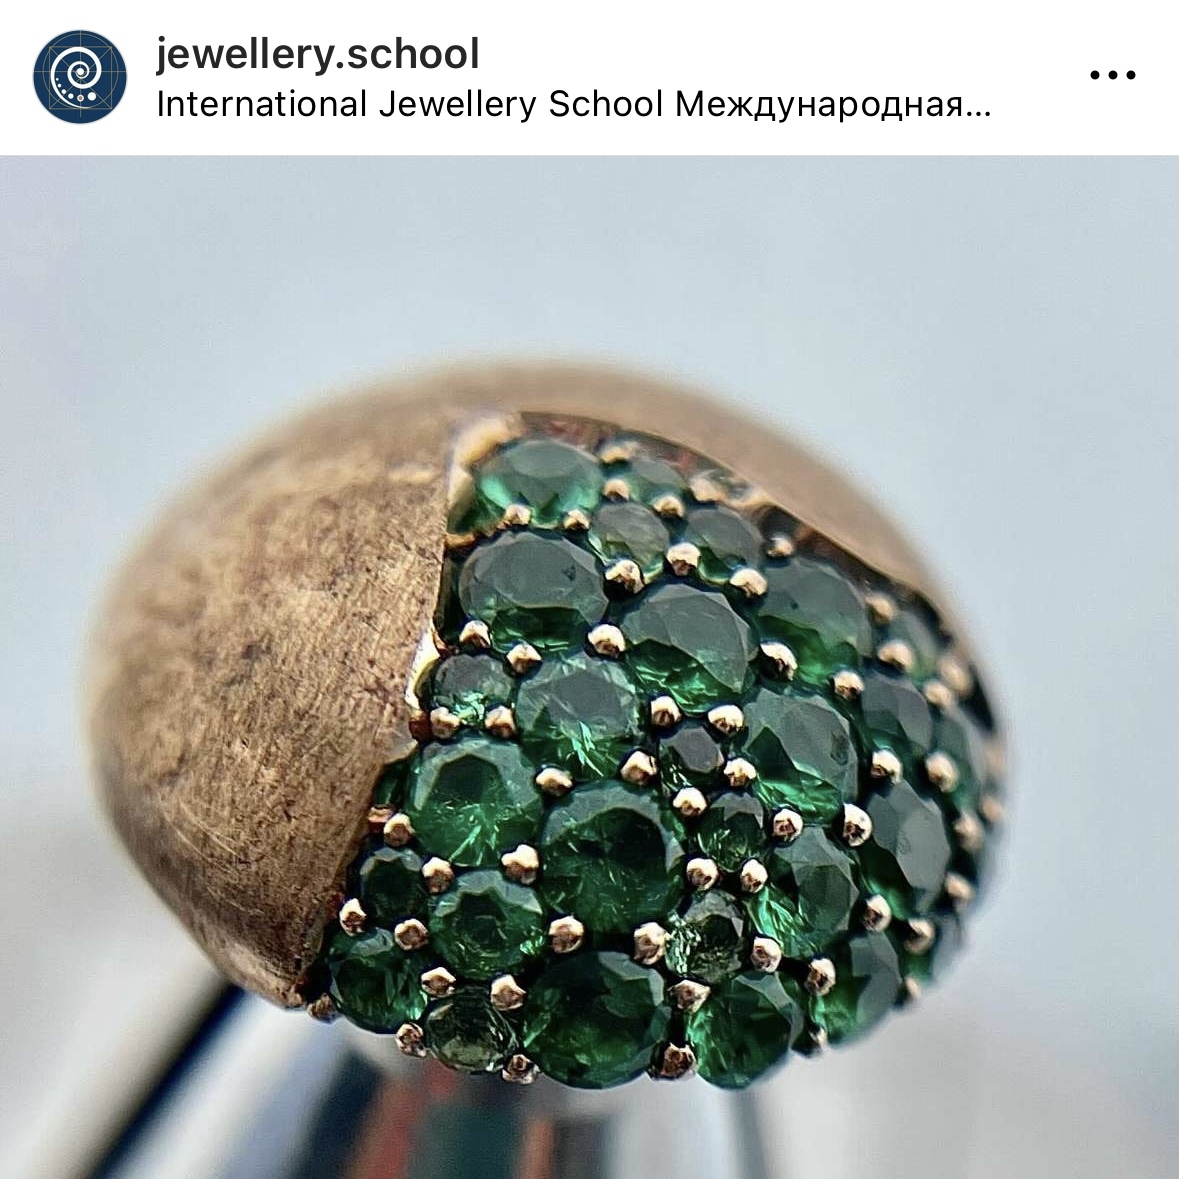
I have attached an image below of the type of setting I’d like to do, I have attempted this setting a few times with a grain tool but when I have done it I can’t see how the stones would be held securely, would the stones have to be set really quite deep to allow the grains to be domed over the top, would the grain tool need to be smaller, the same size or larger than the “ prongs “
Any advice based on this type of setting would be really appreciated, thanks in advance guys x
2 Likes
Pavé is relatively simple, but also somewhat advanced in that it uses some basic skills with a hand engraver.
Stones are laid out so that they nearly touch, the the seats are then drilled and cut to an equal (as in the tables should be at the same height), leaving you seats with enough depth that the remaining metal is above the girdles.
This is where the hand engraver comes in. You gradually cut into the remaining “walls” between your stones, without cutting that metal away.
Your goal here is to start at the narrowest part of those walls, and cut, and gently push that metal towards the thicker areas, where your stones come together.
This is called “raising a bead”. The metal is firmly but gently cut and pushed so that this metal forms a solid clump at the junctions of the gemstones.
This raised metal is then formed into a round ball by working it with your beading tools, first toward the junction of the stones, and then pushing this metal bead down and rounding into a nice round bead, that captures the pavilions of the stones at this junction.
There will usually be some areas of metal you will wish to clean up and cut away with a sharp and well polished graver, to give you that perfect pavé effect.
Above is a simplified description.
This same general look can be achieved by carving in wax, but leaving enough metal at your stone junctions, to be formed into a bead with that same downward working of your beading tools.
I hope this helps.
Im pretty sure that there are pretty exact drawings and descriptions posted here by Jerry Lewy.
He would have given you drawings and specifics.
edit: sorry about the typos. My big fingers and tiny phone keyboards make for a very bad combination…
Thanks for your explanation, I understand for the post part pave and have successfully set stones in a line etc but more concerned with creating the style which is in the picture, whereas in a line you’d split the metal left over and push them over and then grain ( sorry for my bad terminology) with this style is it just the graining that is holding them down? Instead of just rounding off the top of the post, is it actually pushed down to bludge the metal to hold the stones? ( sorry again for my terminology I’m not sure how else to explain it )
Thanks
Hi,
check out gerardi_setting_school on Instagram
there are great video shorts that reveal stone setting twchniques
julie
1 Like
Hi,
also check out jewellery_school account on instagram
i circled a video that shows pave up close
julie
2 Likes