In this new essay #115 on “Pave’ setting Rubies & Blue Sapphires”. I started with the drilling of the holes in the wax form then using this as a guide, I transferred the wax into metal. I then went further to show YOU just how detailed this procedure can be. There are 29 photographs and 13 pages in this essay! ENJOY & LEARN!
***Gerry Lewy ***

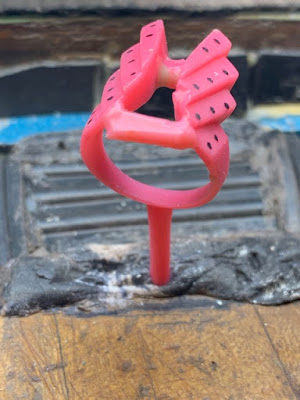
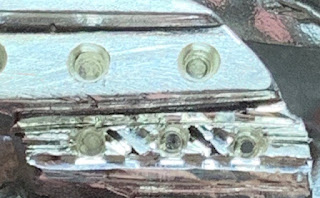
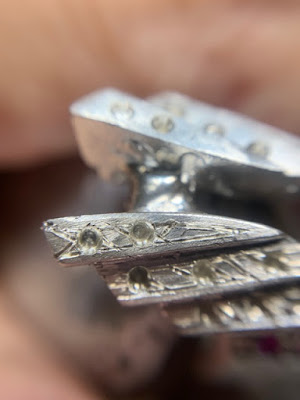
When I saw this little ‘metal sample’ at my caster’s office, I thought it could have some possibilities in making an essay. My guess was correct, here it is!
I asked him to just inject a wax and let me do the rest! There were some irregularities in the way it was given to me. There were no holes drilled and not knowing how many stones that will be used or just where I had to drill them. Here is the process!
The “Difficulty Scale” is nearly 9 out of 10.
How much experience is required? At least 3 years of graver usage!
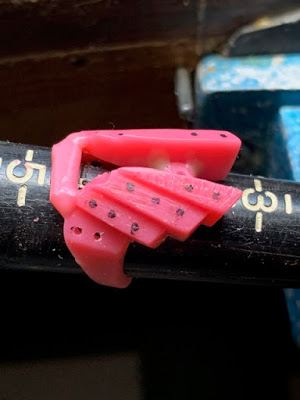
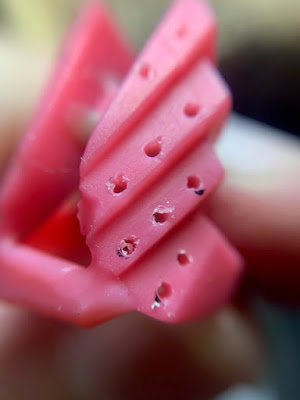
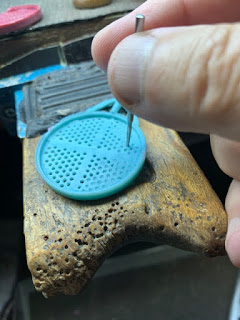
I initially marked where I thought each hole should be and marked them with a felt-tipped pen. If
I drilled a hole out of line. I’d use my heating wax-pen and filled it in. I did this many times just to get the holes in the center of each section . With my wax-file, I’d clean off the surface until it looked acceptable for the metal setting process.
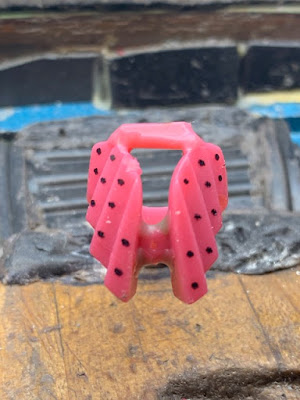
The following 8 photographs are showing you how each step was finished & then ready for metal casting!
This “extra sprue” was only a temporary situation, as I wanted to have ample amount of silver to get to the other side of this large ring, while in casting.
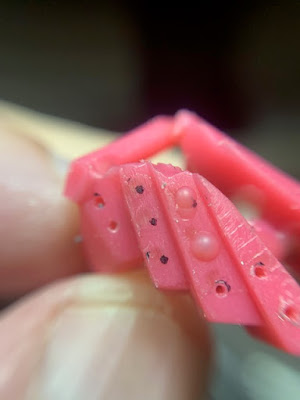
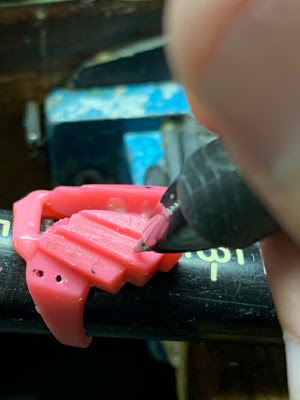
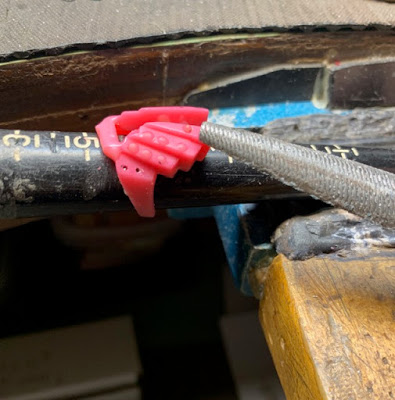
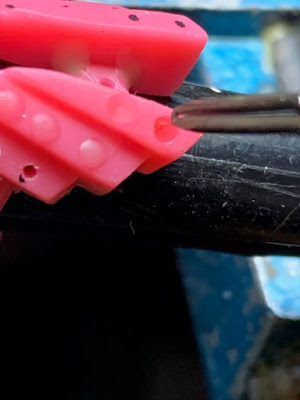
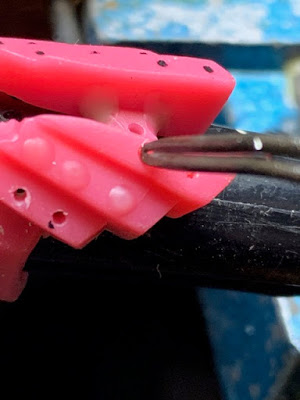
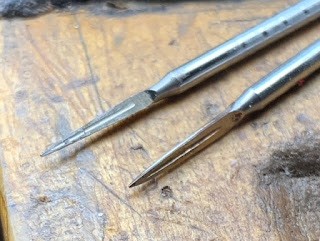
This wax is now ready for using the hand-drilling of holes. Never use your Flex-Shaft handpiece!
(I’m borrowing two pictures from another essay, just to show you how this ‘wax-drilling’ is done!)
These little 3-tooth blades are ultra-sharp, be very careful in how it’s held in your fingers!
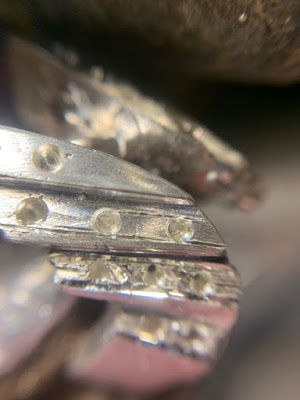
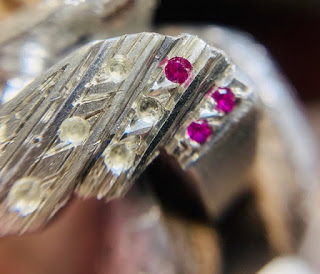
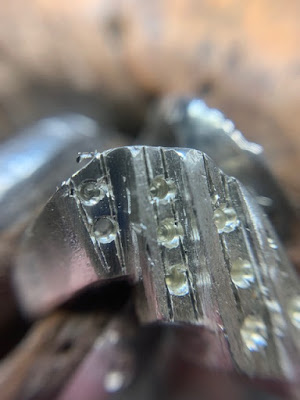
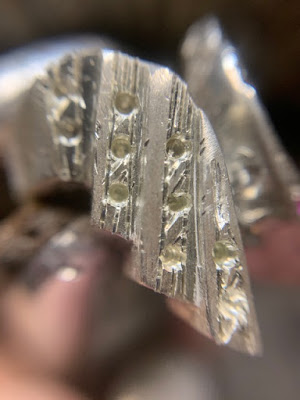
Here are my 13, 1.5 mm Rubies on the “center & right” side. The five on the left measure @ 1.75mm’s, I always have ‘extra, just in case’.

I never drill the holes to the exact size at first. I will leave that to when the stones are going to be set. Why not now?
I might have one or two stones differ in sizes, even if they are classified as "1.5mm’s’. they could measure 1.48 or even 1.47 mm’s. My round bur will #014 (1.40mm’s) for now!
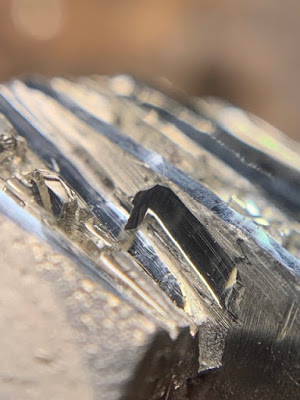
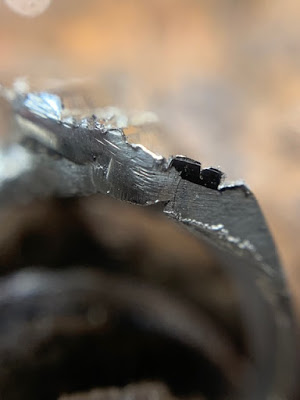
I’m using a “Knife-edge”, Onglette #1, to start the first line of cutting. This line is to guide me to carve the deeper cut until I have gone three times into the metal.
Once I have cut to the proper depth , I will THEN use my Flat graver #40 and carve a series of lines just where the Onglette #1 went first.
Here you can see the initial cutting process, starting from the top section and looking downward you can see how this process finishes!
Those little triangles (that I carved) will be the ‘beads’ further along this process. This is an interesting process, isn’t it!..:>)
If I find that space in between the two stones is too wide, I’ll make a double Bright-Cut, as shown.
I prefer to have every space Bright-Cut with no gaps, anywhere! I learned this rule 60 years ago!
These are the minimum selection of setting tools & burs that I use for this demo. I haven’t ‘hidden’ any other tools from you. What you see, is just what I use!!!

These are the only burs that I will be using, just to set each stone. One round bur is near the size of the stone, an “Under-Cutting” bur aka 156C to carve a seat inside each of the new beads .
A smaller 156C bur (#013) is used, in case the larger (#014) 156C bur won’t do what I need…:>(
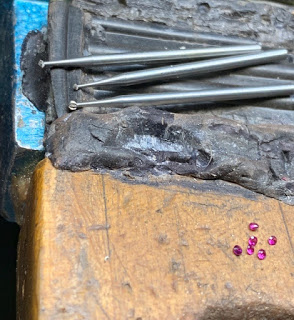
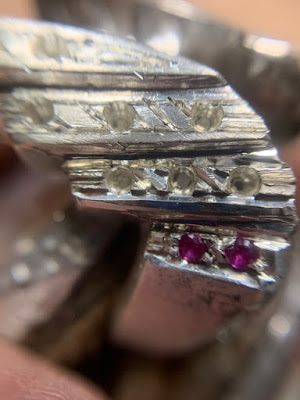
There is a need for 10 Rubies for this one side, as I am short 1-2 more stones, I’d rather have enough to complete this one section.
I haven’t drilled through the metal! This ring is so very thick I might just break the 1mm. ‘twist-drill’ in the drilling process, and I don’t want this to happen, do I?..:>(
I just drilled deep enough to clear the Culet for each stone.
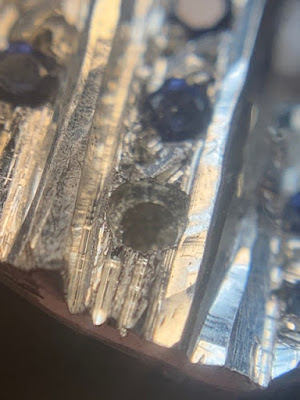
In this photograph, I attempted to show just where each 156C cut is taking place. ( Sorry for the poor focusing, this picture took me some time to prepare, but you get the idea, agree?.:>)
The stone will be situated ‘underneath’ the new bead.
There must be NO FLAT SURFACES ANYWHERE.
The cutting being shown is too shallow and further ‘deeper’ cutting is now required!
In this picture, you can see a little curl of metal from the Ongellete, “Knife-Edge” graver making an outline in the metal. This particular graver is only 0.22mm’s in width!
The ‘rough-cutting’ process is now ready for the final “Bright-Cutting” segment of this exercise.
I’m even Bright-Cutting a side of each plate/section , why this? It’s because no other process in cleaning will give such a clean ‘mirror-like’ cut!
I’m now using a Flat Graver #40 that is with a highly polished surface. I need to make just ONE continuous cut and ONLY ONE CUT.
If you do this a few times, there will be faceting along the upright side and it doesn’t look nice!.:>(
Much practicing is needed in just doing this ‘not-so-simple’ process!
To give the end of each plate a nice finish, I will use my Flat graver and just clean each section!
(I will do this anywhere that’s needed!)
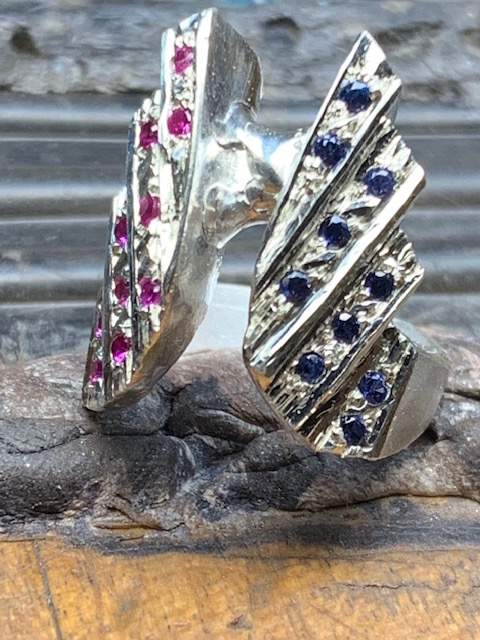
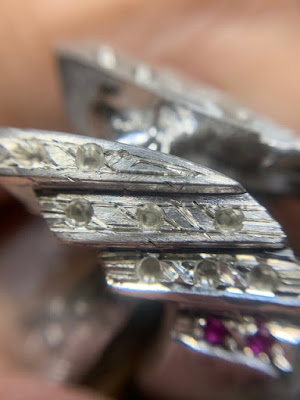
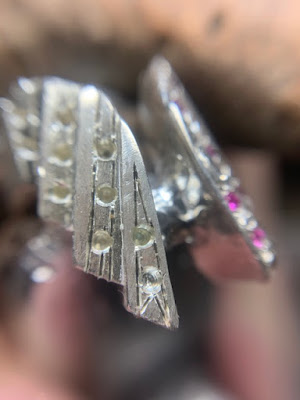
*Here are some different views on this ring:*
As this is only a ‘demonstration’ ring, this ring will never be for sale, or recycled!
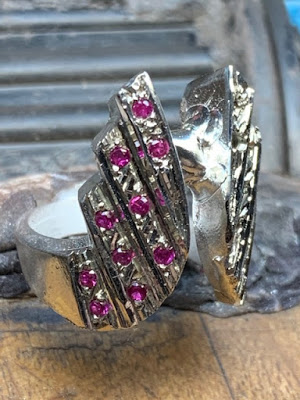
I used Blue-Sapphires on the remaining side as I didn’t have enough Rubies.
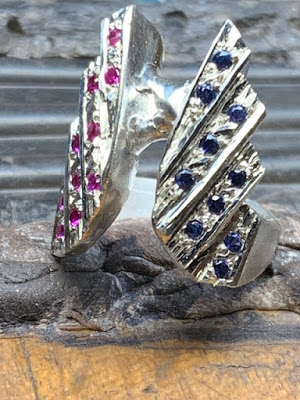
Now there you have it, DONE. How long did this process take? I have no idea on the number of hours, but I tried to make it look ‘almost’ simple, which it isn’t.