That chain is just delicious! Nice tip on the needle in a dowel, that fixes a problem I’ve been up against making tiny rings.
-Micah
That chain is just delicious! Nice tip on the needle in a dowel, that fixes a problem I’ve been up against making tiny rings.
-Micah
Gorgeous combination of chasing and repousse with granulation, I love it!
Wow, gorgeous work! I’m glad I’m not the only one who gets lost for hours in granulation land.
I’m at that point in my work where, besides the beads, a lot of my work is flatter than I’d like, and chasing & repousse are next on the list of skills I need to learn. I’m looking for a class in c&r that will teach me just enough to accent my work, but not be so comprehensive that I have to make it my entire focus to be worthwhile.
Always more to learn…
-Micah
Thank you Micah. Your necklaces are gorgeous.
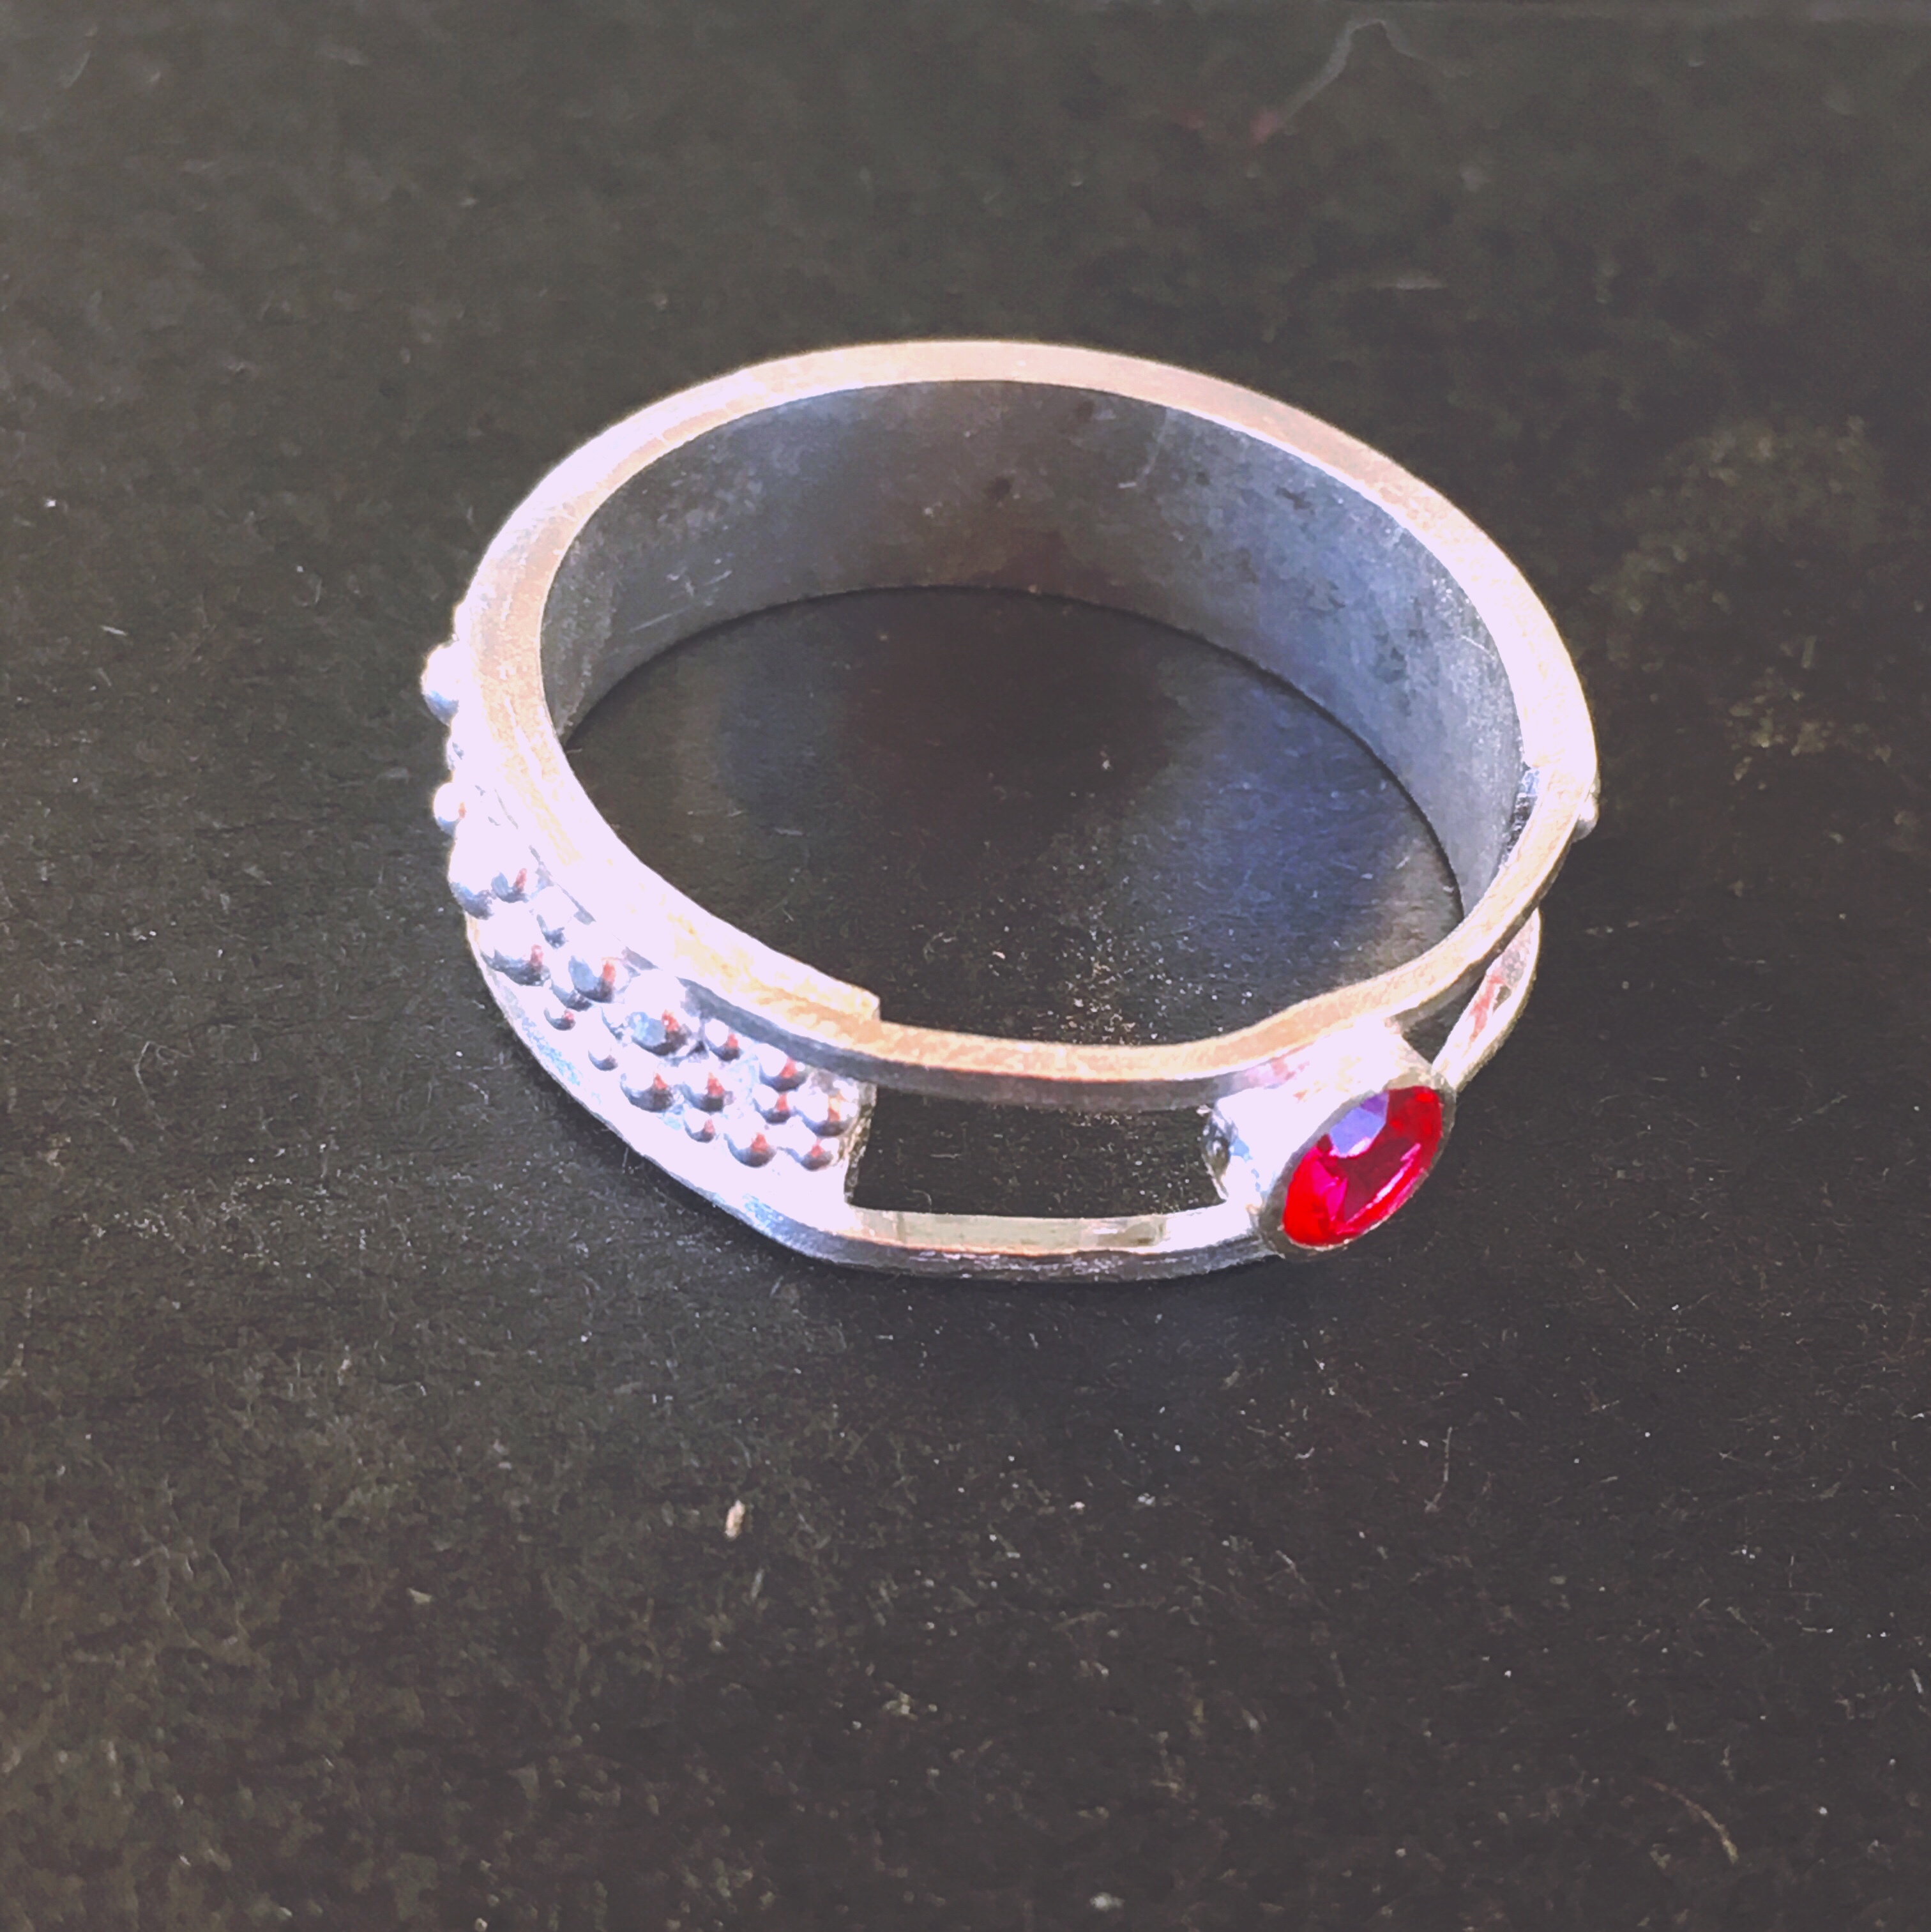
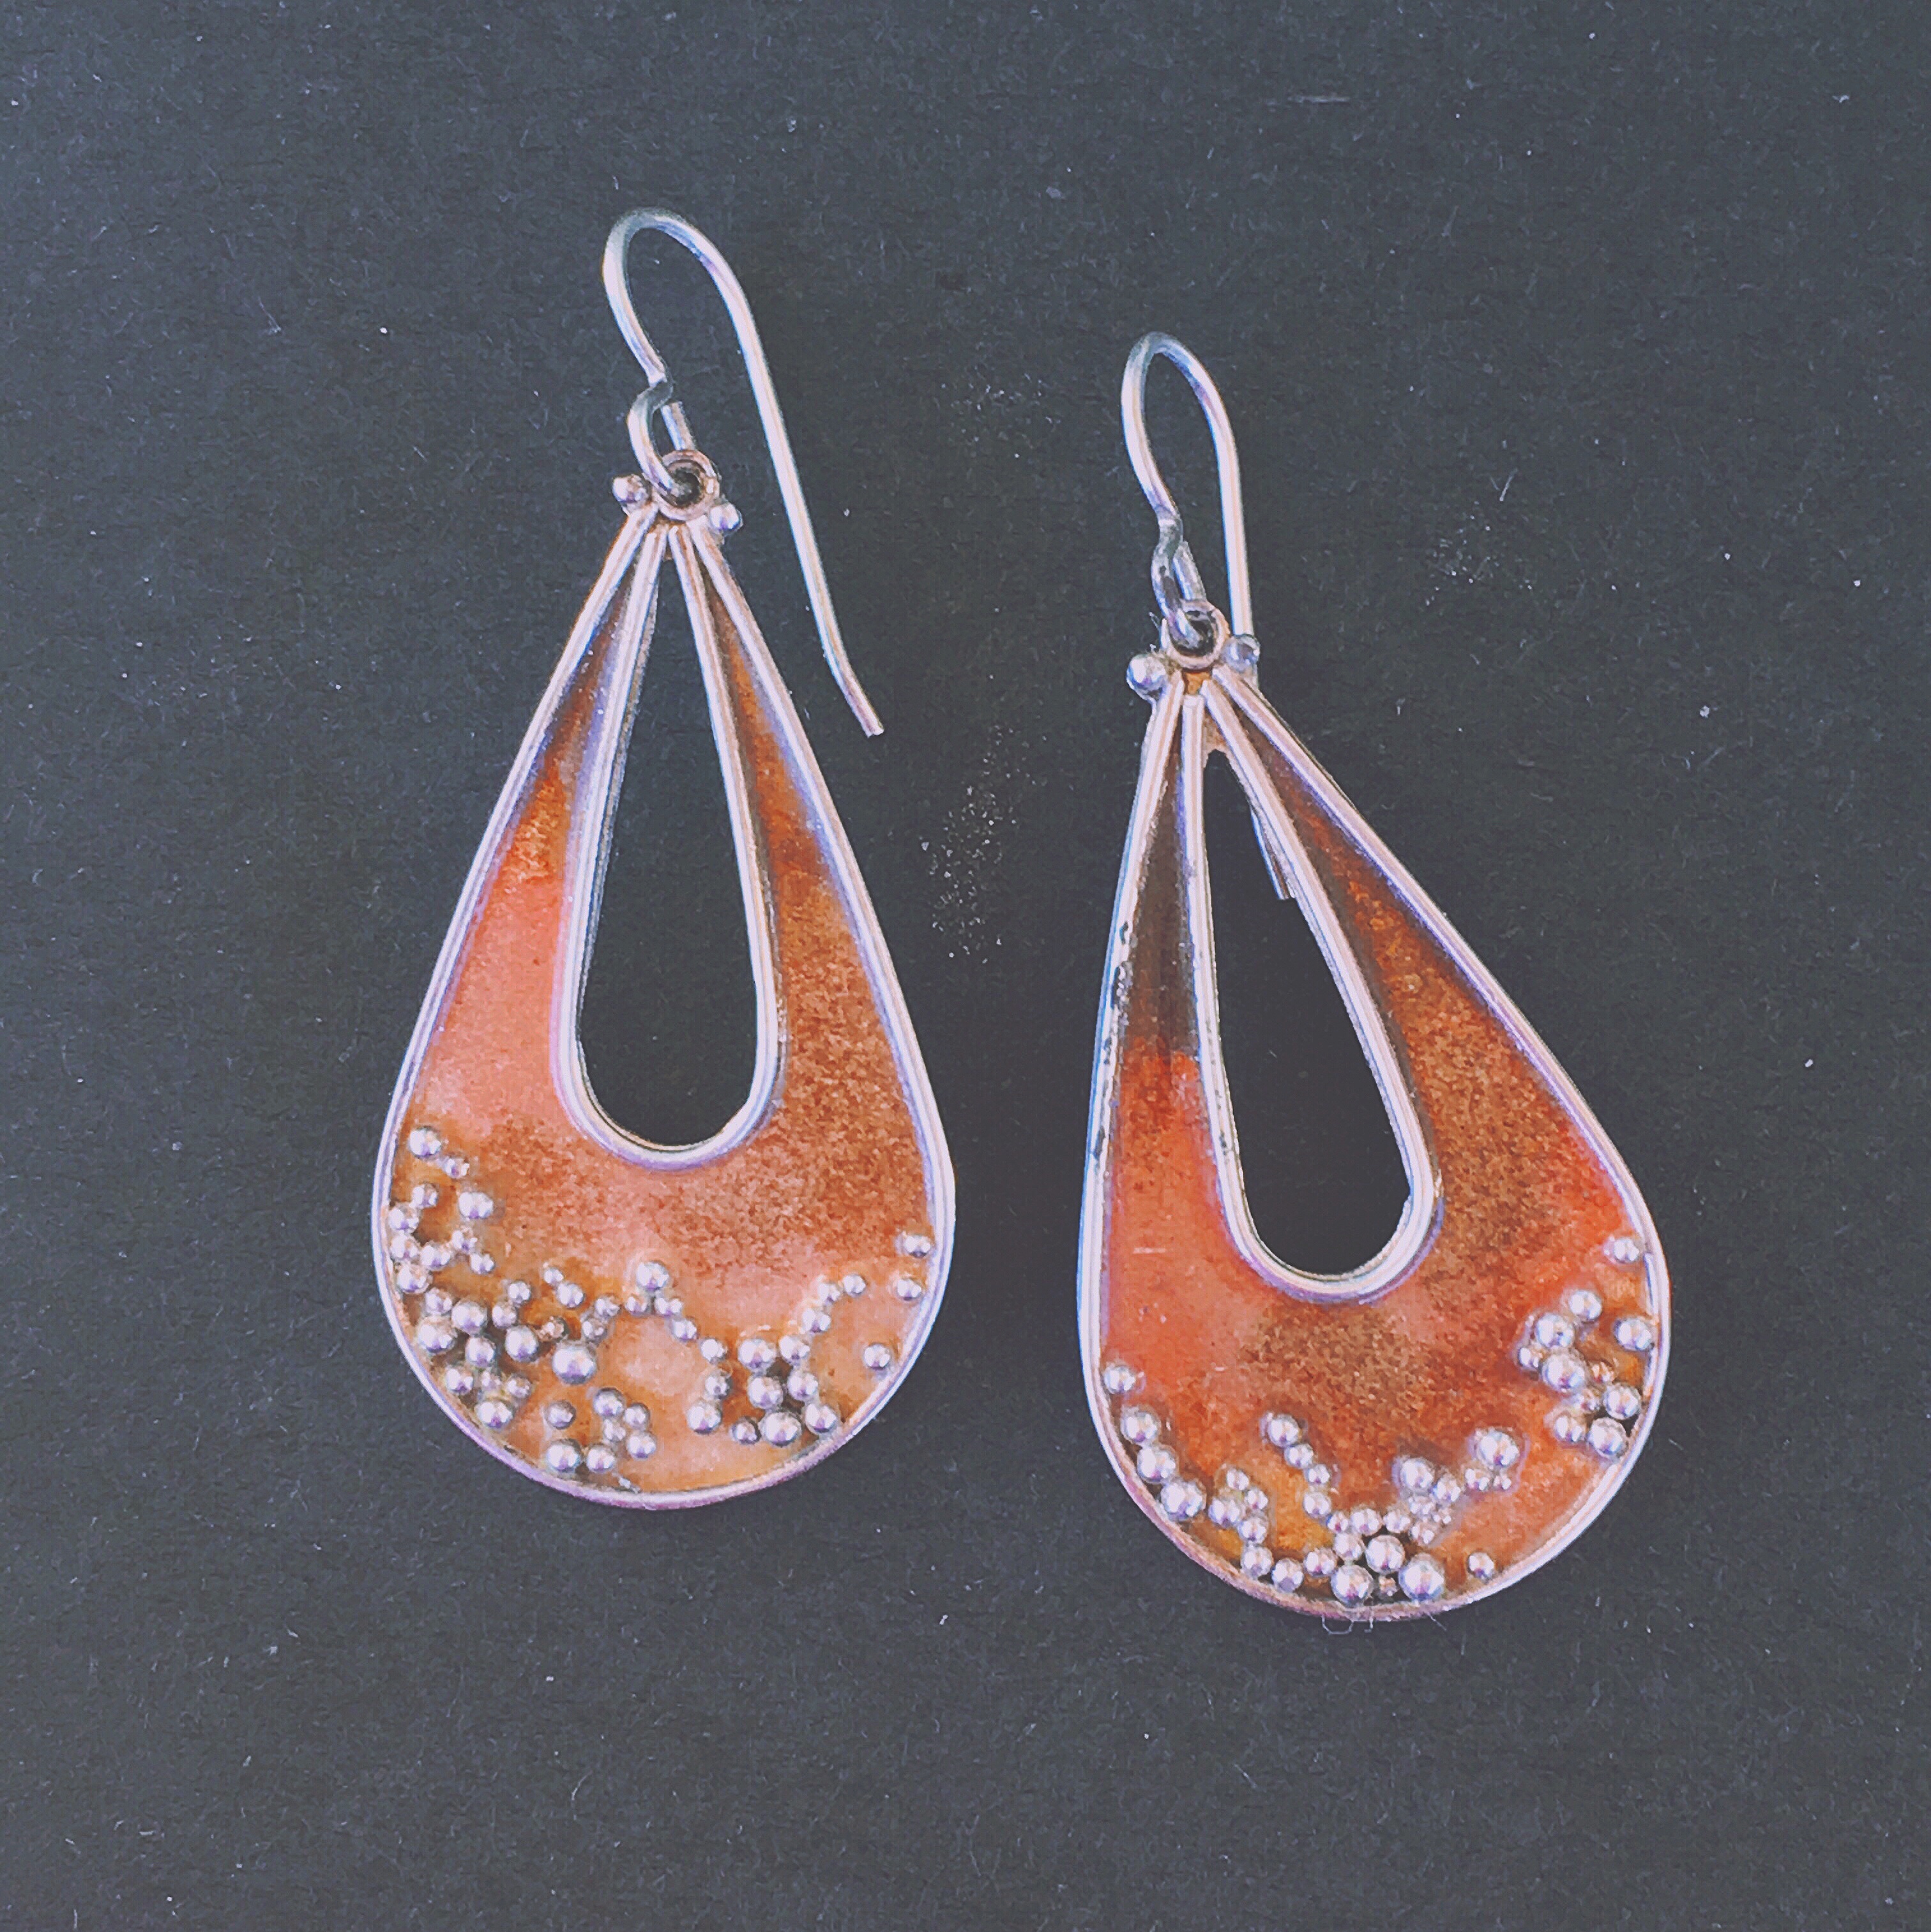
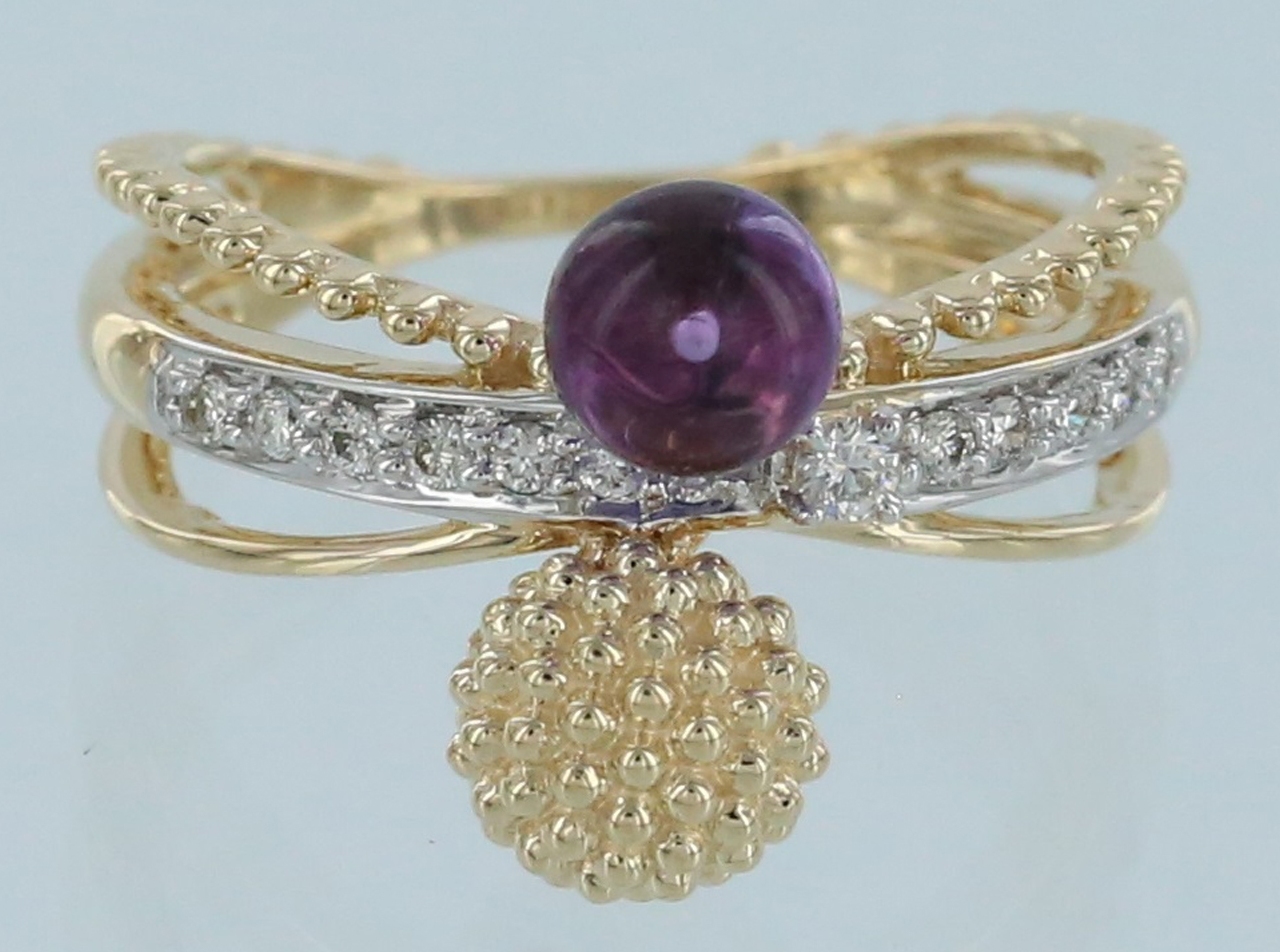
These are all argentium silver, one pair of earrings has 22ky gold, and copper mokume, and the ring is set with a lab-grown ruby.
I took a class with Ronda Coryell doing argentium where she showed some granulation and I’ve been in love since. My personal preference in design is using mixed sizes of granules, the organic look works well with the earrings giving them a touch of individuality while still matching.
Some of the issues I’ve run across doing granulation are getting the sizes consistent when I want them to be the same size. I actually started using a hole puncher on scrap pieces as long as the scrap was flat the granules end up being the same size.
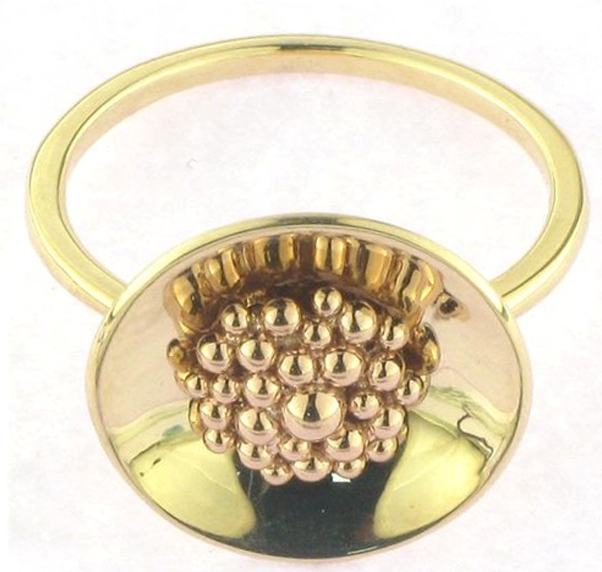
I’d love to hear how others deal with curved surfaces, I fired the ring multiple times, just worked in sections, and I’d much rather find another way.

After this thread, I’m definitely taking better pictures from now on! And trying gold granulation, this is exciting.
Hi Salvor,
Nice work! Ronda is a great instructor and fabricator. She and I sat next to each other back in 2000 for Kent Raible’s granulation class. She already worked in 22k granulation at the time and wanted to see how the 18K was done. I was always amazed at her speed. She would get to class early and have a piece half finished before the morning even started!
When it comes to curved surfaces, it can sometimes depend on the size of the granule. If they are large, the granules may want to roll (even when heated) in which case you’ll have to proceed as you’ve done; doing one section at a time. However, if the granules are moderate to pretty small, you can apply them in sections, letting the glue dry before turning it further, and then fire it all at once. I still get nervous sometimes doing this as I’ve had the rare occasion where a granule or two will still decide to move when the surface becomes liquid, but as I mentioned, it is rare. In the case of your ring (again depending a bit on granule size), the other option is to lay it on it’s side and build them up, then fire it all at once. This works for granules that can be moderately decent in size, but for the really large ones that gravity will pull, you just have to do it one curve at a time as previously mentioned. Good luck and nice work! 
Thanks, I really enjoy making the beads! I’d like to get into gold more, but I need to build up my budget (and courage!) first!
Salvor,
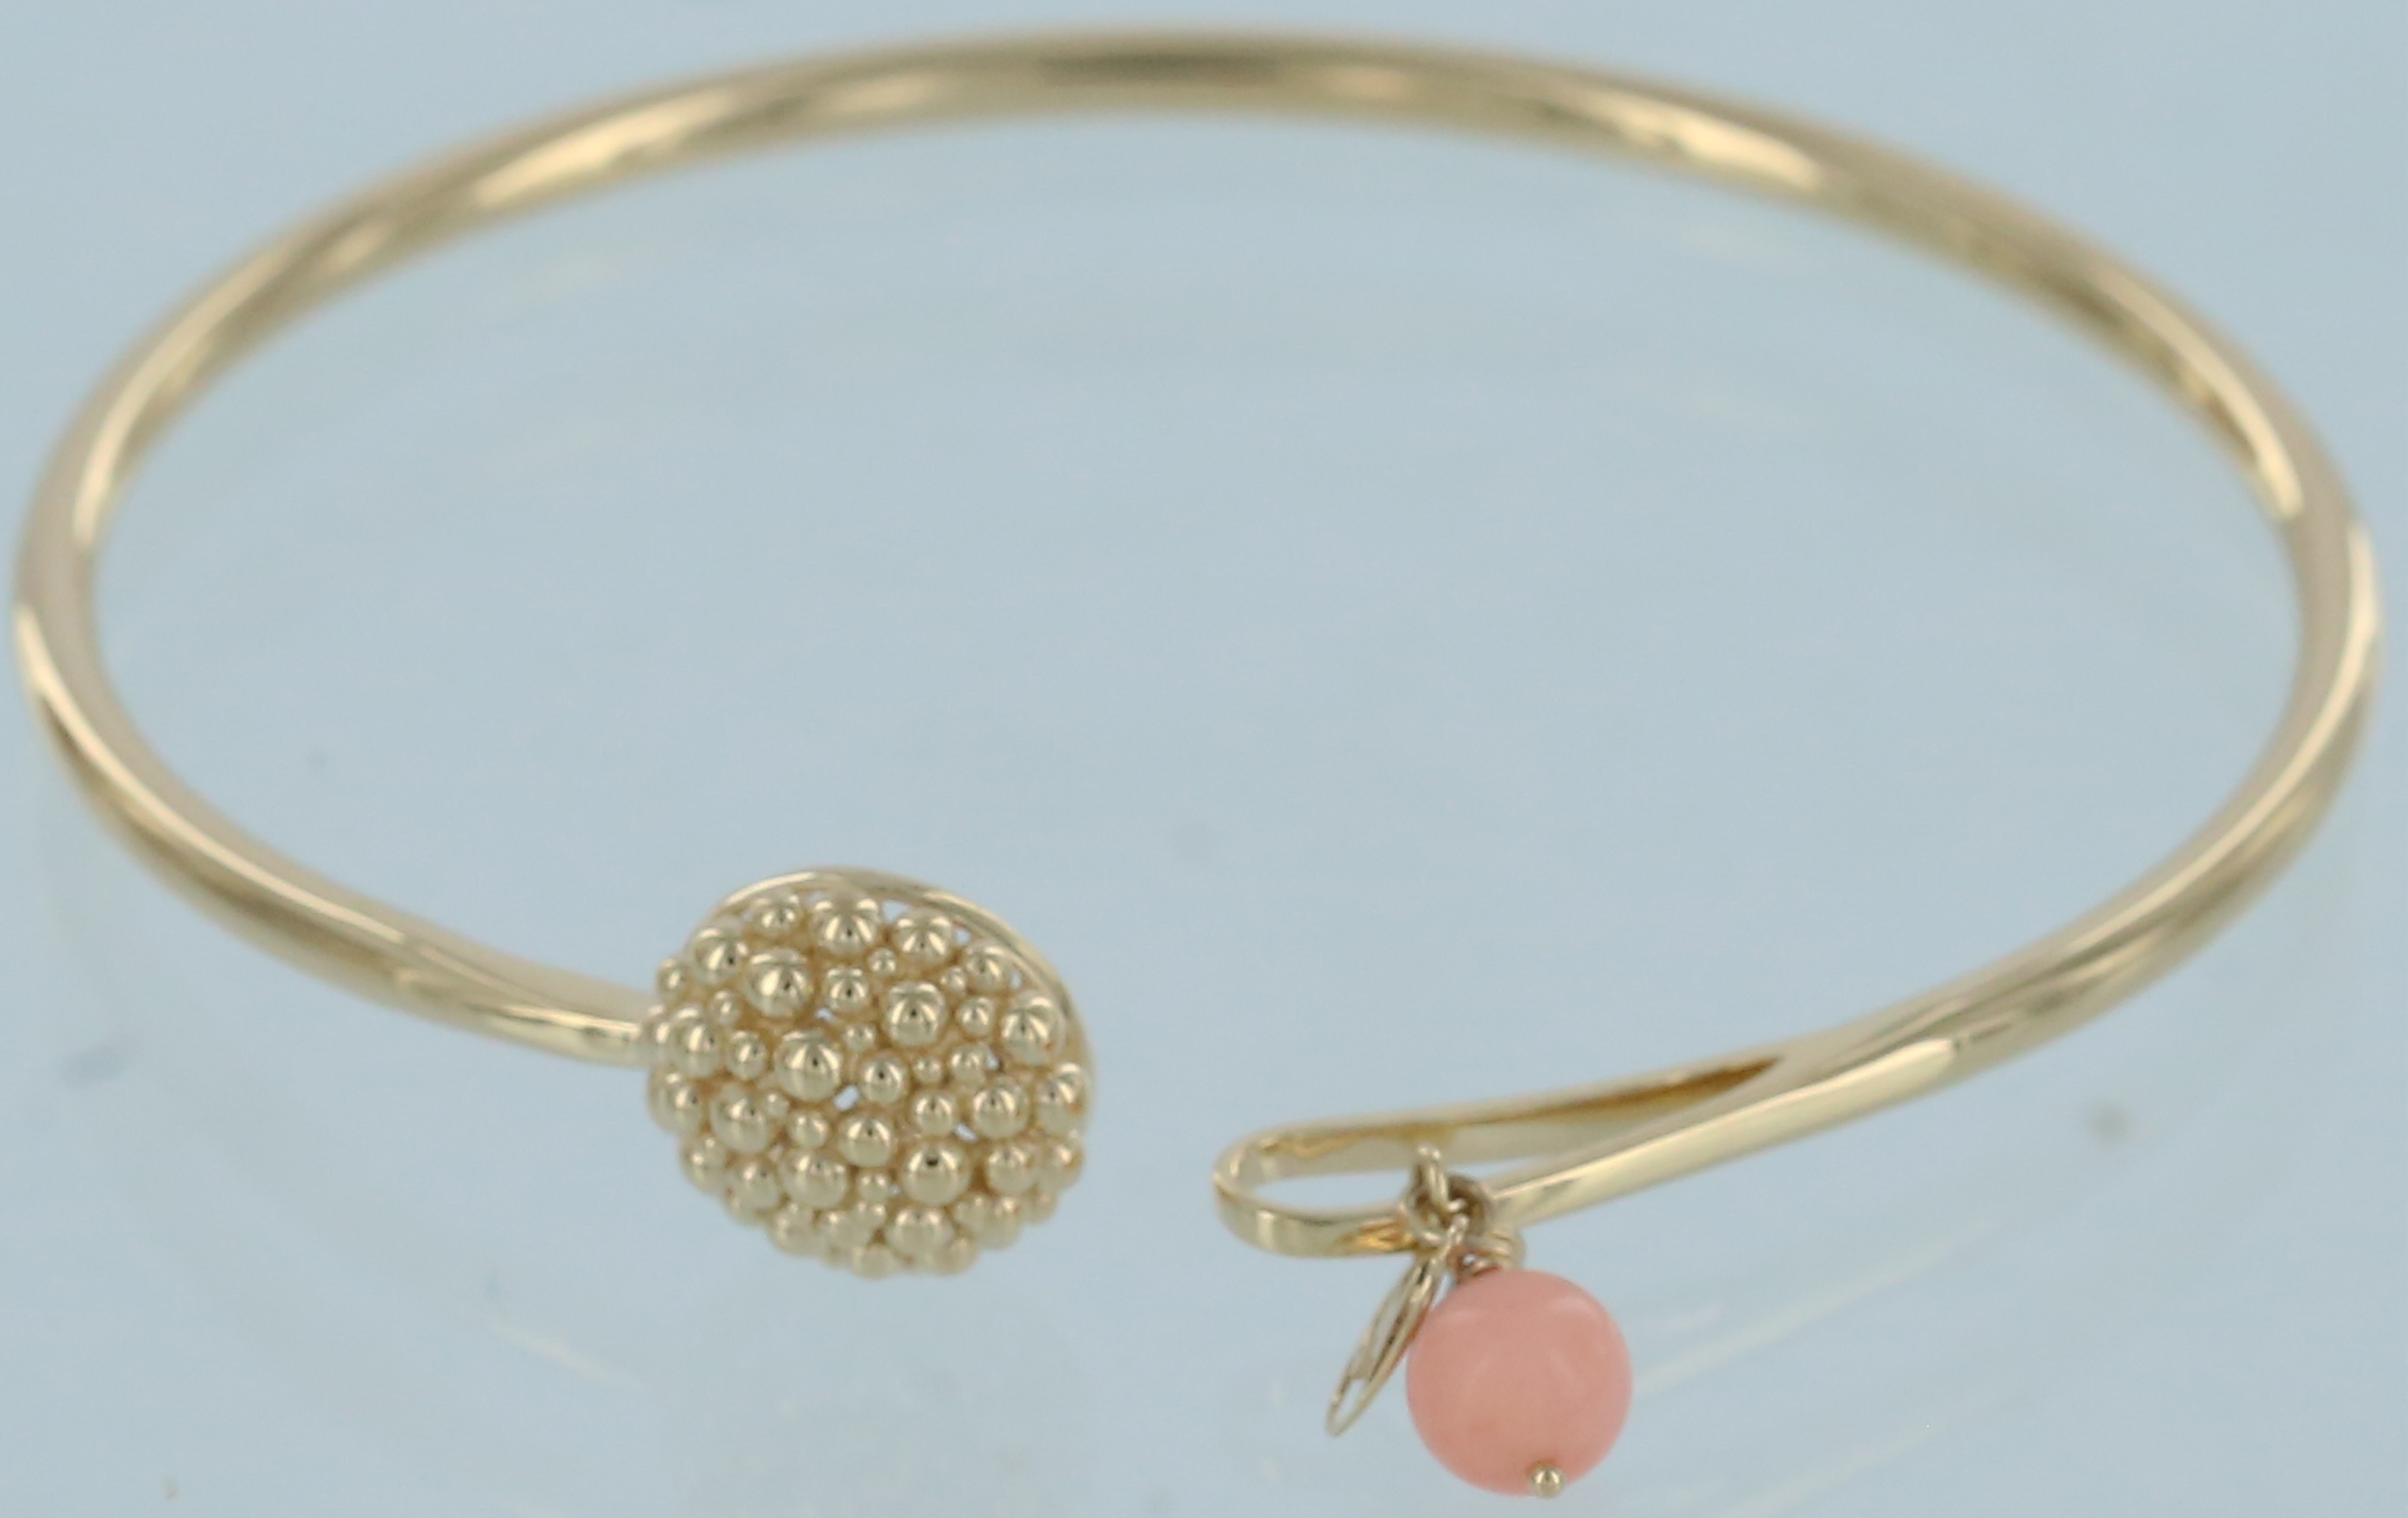
I really like the way the flow of the granules accentuates the watery quality of the mokume gane, nice combination!
I’ve done a number of rings granulated all the way around, although I think I am using smaller granules than you do. I put the ring on a dowel that I can rest across a cup horizontally, and then place the granules bit by bit, letting them dry a day before I turn the dowel and place the next grouping. It takes a few days to place them all, and they need to be really dry before firing.
To fire, I have found that if I go in hot and fast from the outside of the ring, turning it pretty quickly around in the flame a few times, then back off to fuse, it usually works well. I set the ring on its side, like yours is pictured, and I have my charcoal block on a turntable, so I can spin the ring while I hold the flame on it.
Ronda teaches it this way in her classes, that you have to be really bold and just shove that fire right at the piece to start. That might make the granules swell out a bit as the flux expands, but the intense heat also sucks them back into place (usually). If you go in slowly or heat the ring too gradually, or from the inside, the granules will fly off completely. Once the piece starts to glow a little, you can back off and fuse it the rest of the way more carefully.
The granules around the equator of the smaller beads on my agate necklace above were done this way, placed gradually and then fired all at once. It’s scary at first, but it’s possible and so cool when you make it work.
-Micah
We are going to close up this contest by the end of the day today. If you are considering participating, please do so.
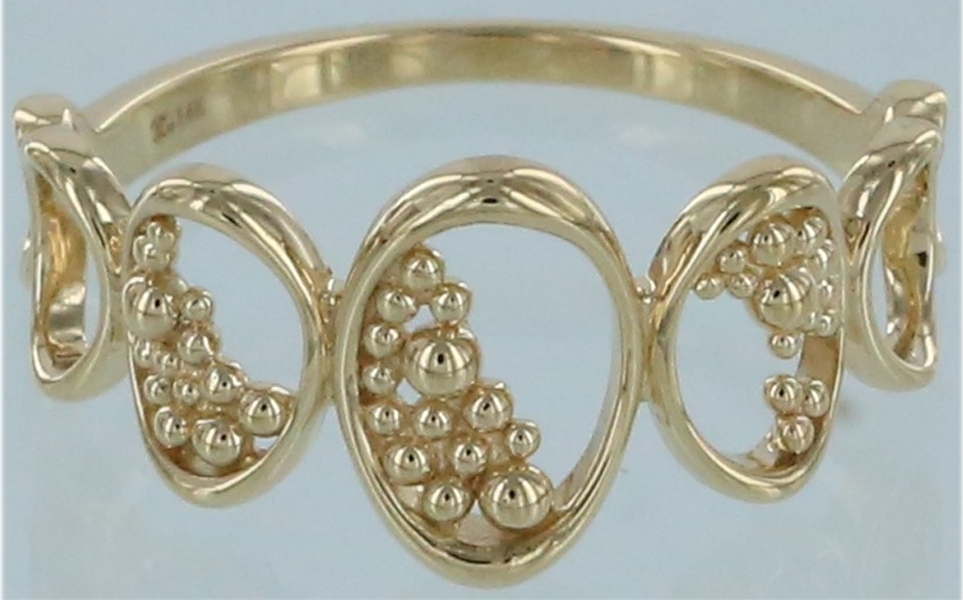
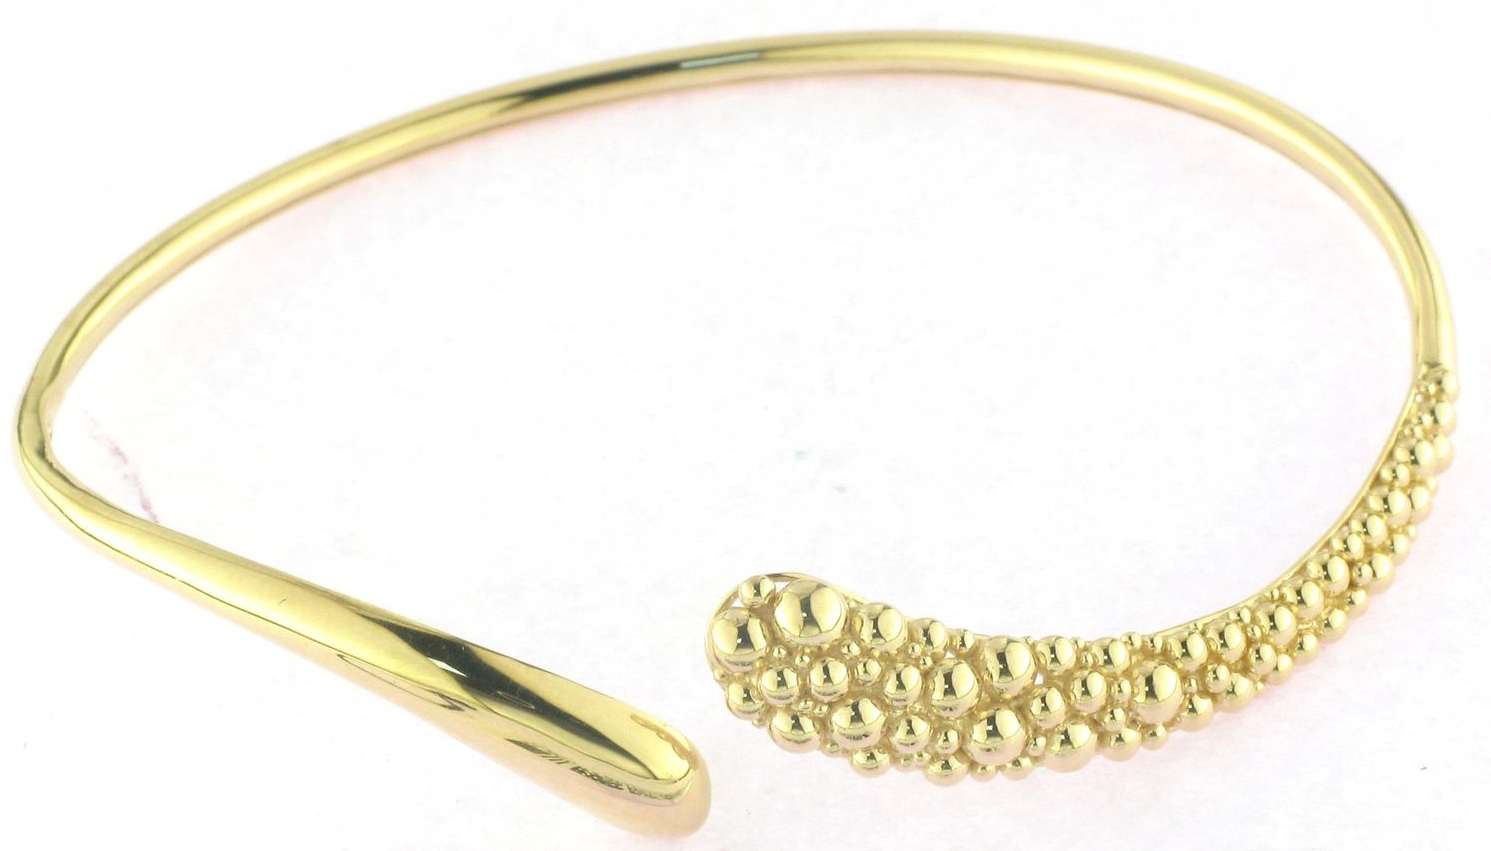
We have used the Granules in 14Kt Jewellery products. There is a size
gradation in granules blended with Studded and Plain designs in order to
provide a new look to the Jewellery. The tiny granules were soldered
together to achieve the indented shapes. It has been used in Finger rings,
Bangles and Pendants.
 [image:
Inline image 1]
Thanks and Regards,
K.Karthikeyan
interesting use! very pretty! contemporary!
Julie
Thank you, Julie.
OK all - this contest is now closed. We will be back in touch shortly with announcements on winners and instructions for prize redemption!
Oh. I feel so bad that it is closed. When is the next context?
Thanks for the tips, I’ll have to try that next time. I definitely doing more rings soon.
Good tip about letting them dry for a day, I’ll try that next time. Are you using anything in particular to hold them down? I’ve been using the lovely saliva method.
Thank you, Margaret… your work is gorgeous! I love your work and beautiful granulation skills.
Salvor,
I use My-T-Flux from Rio, it is really sticky when it dries, so I think that is key. I paint a light layer of the flux all over the piece, let it dry, and then use a little more flux on my paintbrush to pick up and position the granules. Then dry again, and fire. The flux helps the fusing, and also balls up and dances around when it’s at fusing temp, which helps me know how the process is going. It’s important to get a really even layer, the metal has to be super clean so the flux sheets over it when you paint it on. Spit helps here- I lick the pieces before I flux them, and that seems to change the surface tension somehow. Yum!
-Micah
Like a few others I would have entered this contest. I learned granulation a few years ago at the Y in Manhattan and after a few pieces took it in a much more modern direction. But I don’t have a good photo available and just had eye surgery which upset my schedule and what I could accomplish this month.
I hope future contests will allow more time than just a few weeks.
Mary P