I have been investing quite a bit of money in building up my workbench with tools, supplies and equipment. About ready to melt and pour, and have this question about a steel mold I purchased off Rio G.
Description
This steel mold allows you to easily create six sizes of ingots from your metal scraps. Manufactured in England by Durston, the mold is precisely made with top-of-the-line quality steel and built to last a lifetime.
Do I need to season / prep this mold before pouring molten sterling s or gold? What do I need to do before my first use of this mold, if anything? Let’s say I am pouring 18kt gold, if that matters.
GRAPHITE FLASKS
Also, I have graphite flasks for melts. Do I need to do anything with those before first melt?
I have the same Durston mold. I don’t use it a lot, but when I do, I pour a little 3 in 1 oil into the mold that I am using and wipe it around with my finger. I preheat it as I am melting my metal by placing the crucible right next to the mold. Good luck pouring into the thin molds, I have never had much success due to the cohesive nature of melted silver. If I want a thinner ingot, I use an enclosed wire or sheet mold. You can get a lot of real precise ingots using delft clay or petrobond and the molds sold by Delft or you can make your own from wood. I am not sure what kind of flask you have, but it should be precoated with borax prior to using it the first time. I like using smaller ceramic crucibles on a wire whip handle. You can melt up to 50 grams in them. Start small until you get the feel for what you are doing. Create a fireproof space and have a fire extinguisher nearby. I place a 2’X2’ square of tile backer on my bench first to work on and place a large sheet of copper across the back of the area just in case I get a little crazy with the torch. Get some ventilation going or open a window and have a pair of tongs nearby to remove the ingot from the mold. You will also need an old pair of baking mitts to handle the hot ingot mold depending on its style. You should add a little borax to your melt once it gets plastic. I use a restaurant salt shaker for this. Once your melt is liquid, stir it with a graphite rod to make sure that it is mixed well. You might find a stray piece of something other than silver or gold as you are stirring. This would be especially true if you are melting old findings. I have found steel springs this way that I missed when I processed the scrap. Add new metal to old to account for the solder content in your scrap, but try to remove as much solder as you can by cutting out solder joints. You need a torch with a lot of heat. Don’t assume that your bench torch will do the job. Also, the heat reflected back from the melt can damage your torch tip depending on how it is made. Look at the Paige Tool website for more on this subject. Once you have an ingot, file or grind off any flashing and sharp spots. I usually sand the entire thing on an expansion lapidary wheel. Then forge the ingot on all sides with a ball or chisel hammer going in the same direction on each side. Anneal and then roll draw or whatever you plan on doing. Anneal often. I think that I still have a PDF on my website about how I do all of this. Keep in mind that this is my way, it might not be everyone’s way. I am not a metallurgist, I just do what works for me. Good luck…Rob
Following is a link to pictures of my casting area. The current crucible probably has 100 pours on it and it is still in very nice shape. You can’t see the fire extinguisher in the picture, but it is there…Rob
Hi,
i forgot to mention about preparing/ glazing the crucible with a flux coating before first use.
i heat the crucible with the torch, and then sprinkle casting clux in it, a little at a time, continuing to heat the crusible until the flux has fused/ glazed over the whole interior surface including the pour spout.
there are probably many posts in the archives about this procedure for you to peruse…have fun!
I looked at the one where she melts a button of gold on a charcoal black and rolls it into sheet. The finished product looks pretty defective, no?.. The link picture is two gold buttons on a scale.
Not just the streaky pattern. Also cracks and pitting. See the second or two after she shows the large flat streaky pieces on her hand. There are two squares of gold on silver. Very defective looking gold sheet. She’s going to be rolling it out a lot afterwards, so maybe the defects get ‘smeared out’ and look OK in the end. But important for beginners to understand that’s not the way to make sheet if you’re going to be using it for regular use…
The technique she show for creating doublee is exactly what world famous artist Harold O’Connor uses for his fabulous work. Try it sometime - the less than perfect coverage is part of the artistry. It is also the way that Alex Boyd uses for his gold applications. Depending on how much gold you want on the surface and how you fuse it, you can get a perfect coverage or you can just order it as bi-metal from DHFell.
Hi Judy!
I was not referring at all to double making or coverage :-). The short video showed only the pouring of a button and rolling it into sheet. In such a method, the impurities are on the top of the button and consequently get spread over the surface of the resulting sheet, thus producing defective sheet. There are many ways to use defective sheet, but that is beyond the scope of my post :-).
i revisited this instagram post by @therealtonyadavidson
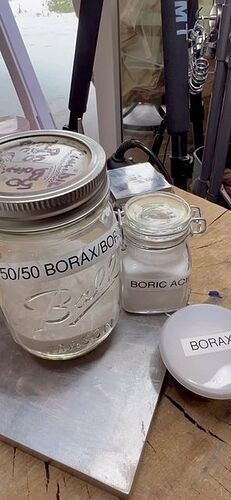
she mentions using a 50/50 mix of borax (20mule team) and boric acid to glaze this crucible…i did not see powder flurrying about when heated…which happens to me…
and then i recalled reading something about borax recently in the Erhard Brepohl book “The theory and practice of goldsmithing”
Brepohl mentioned 2 types:
decahydrate Na2B4O7.10 H2O
(10 water molecules)
pentahydrate Na2B4O7.5 H2O
(5 water molecules)
he mentioned that the pentahydrate, if heated slowly to 721C, the hydrated water is driven off and the solid becomes anhydrous borax…which does not “puff up”… this loose powder is not suited as a casting flux because it is a light powder and is easily blown away by the torch”
i wonder if 20 mule team is the decahydrate version…i need to research…interesting…i experience my borax being easily blown away…it is quite messy…i cannot find info on which my current borax is…
does anyone have experience with these two boraxes…?
here is the link to tonya’s reel on glazing a crucible
All borax will fly around. You have to head the object well, so when you sprinkle borax, it sticks, and then slowly move the flame from a good distance, closer, until the borax is hot enough that it isn’t going to go all over the place from the force of the flame moving hot air around.