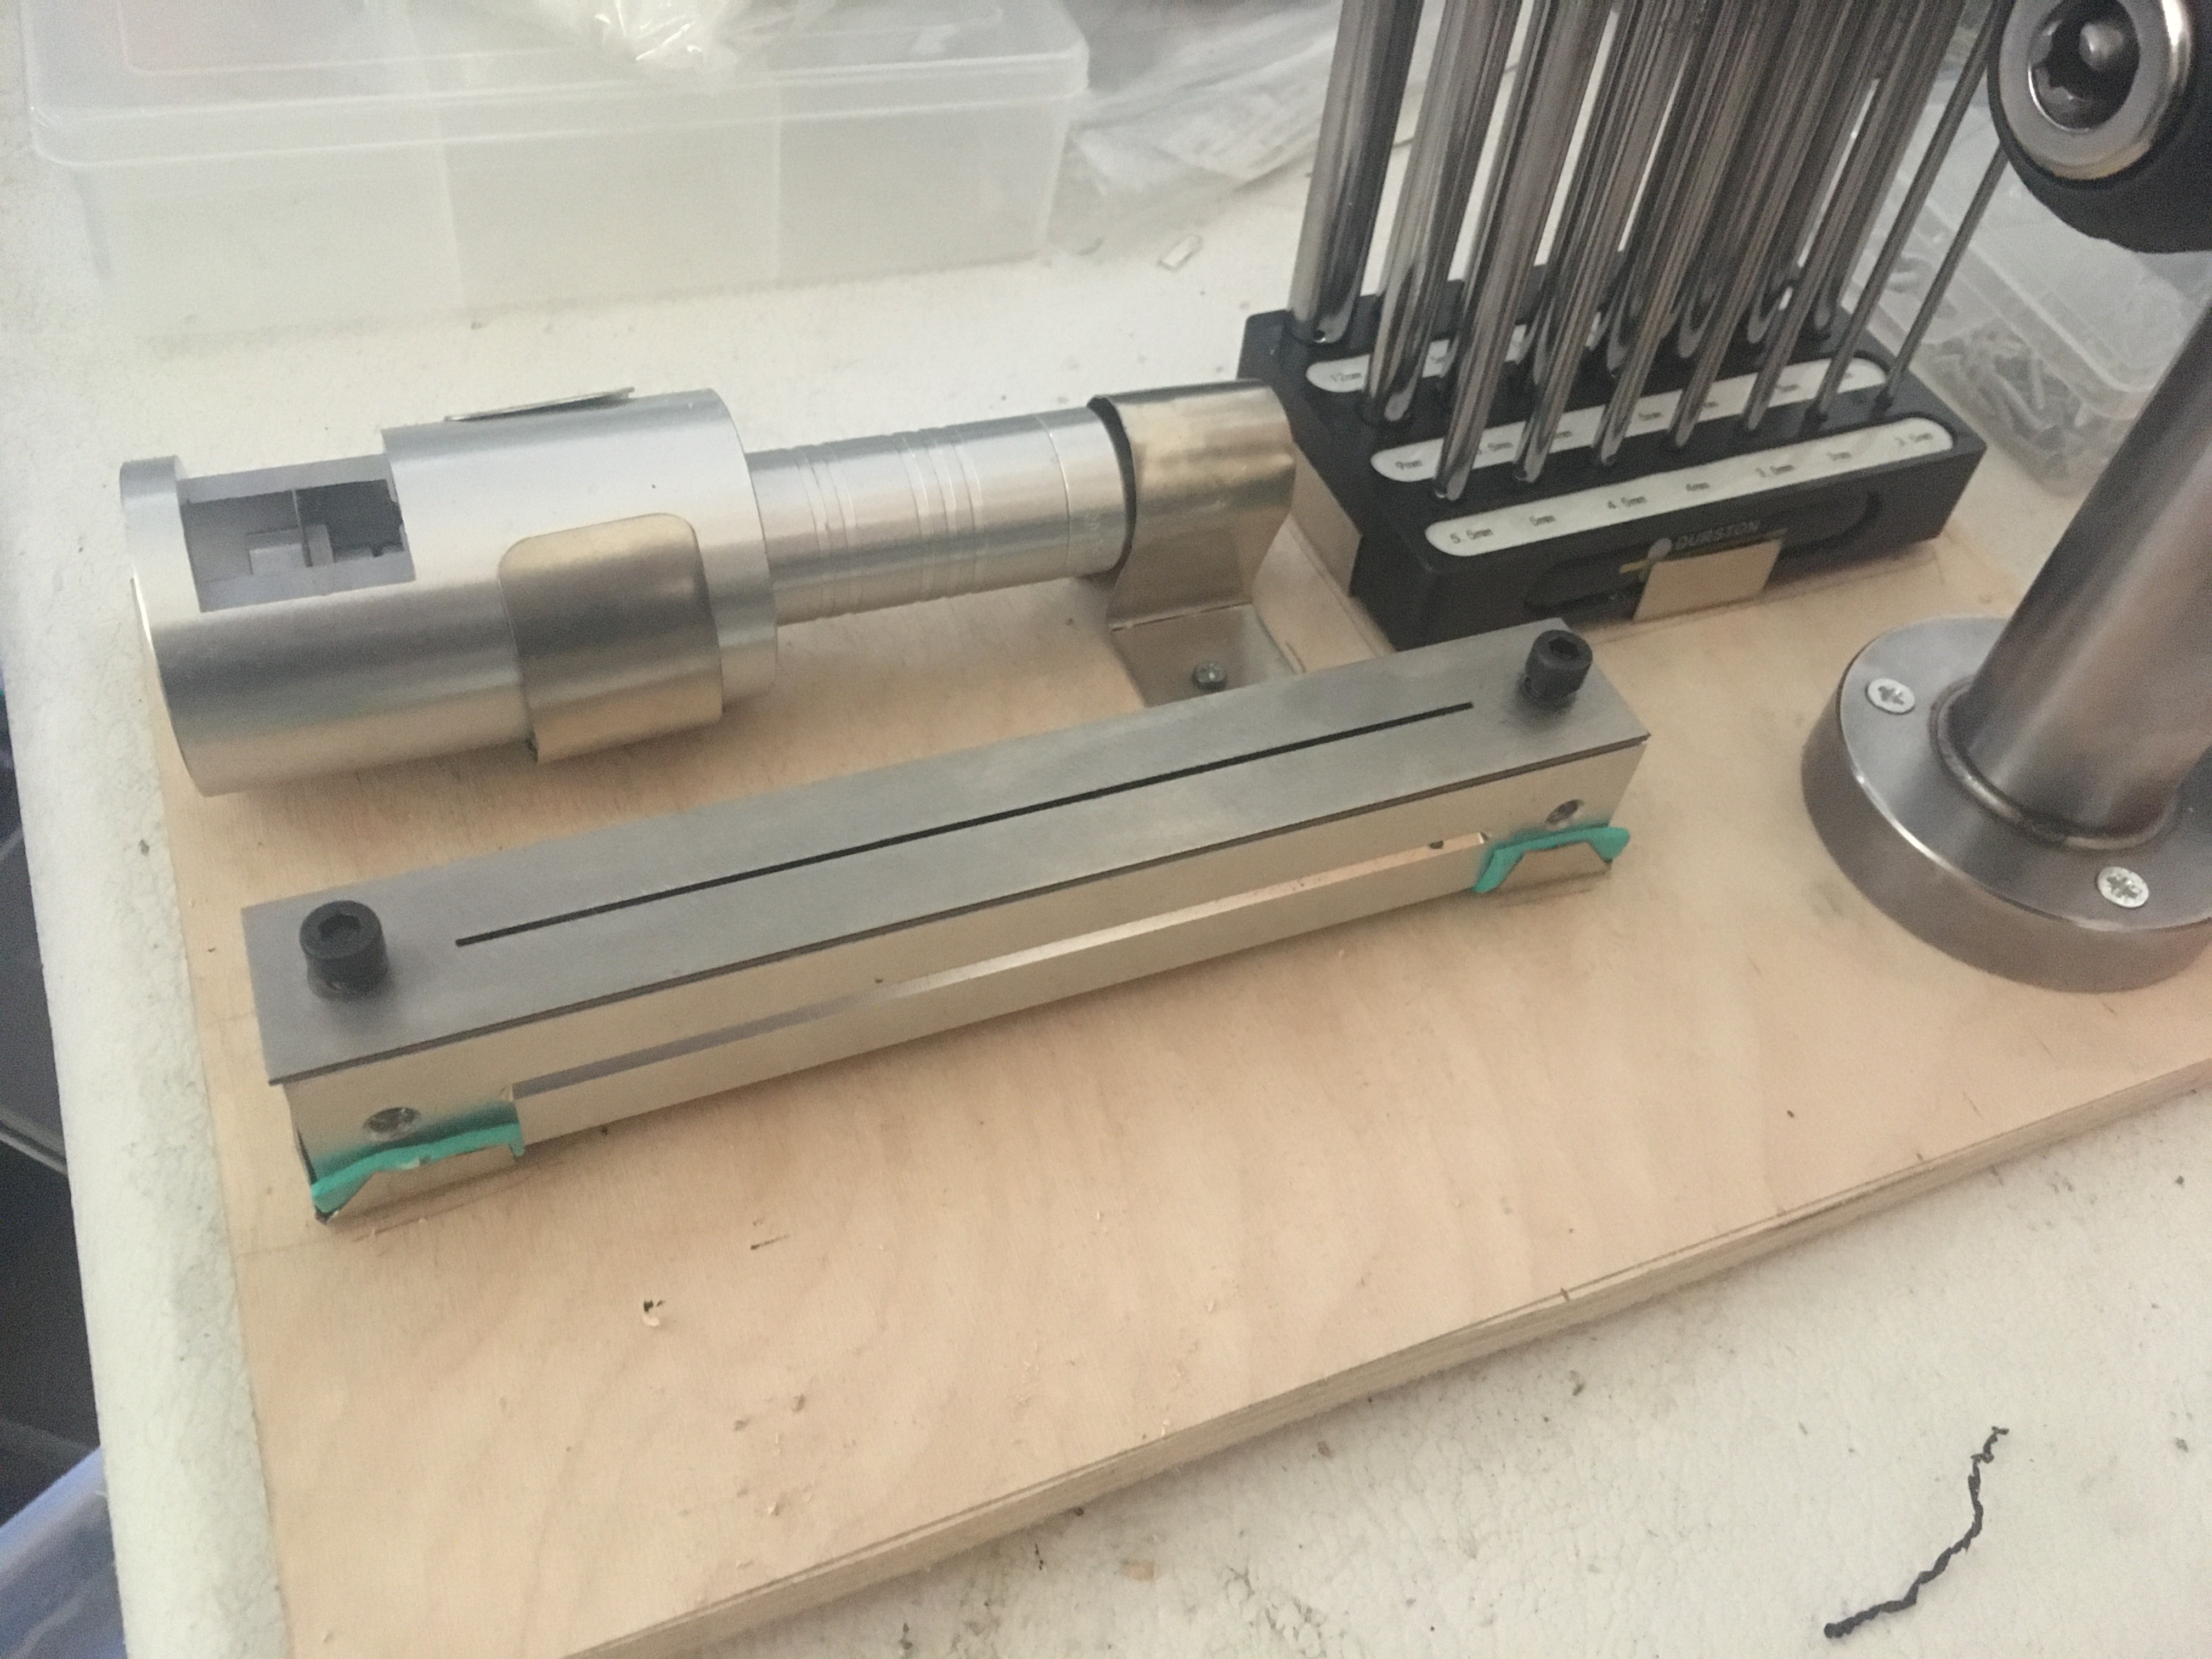
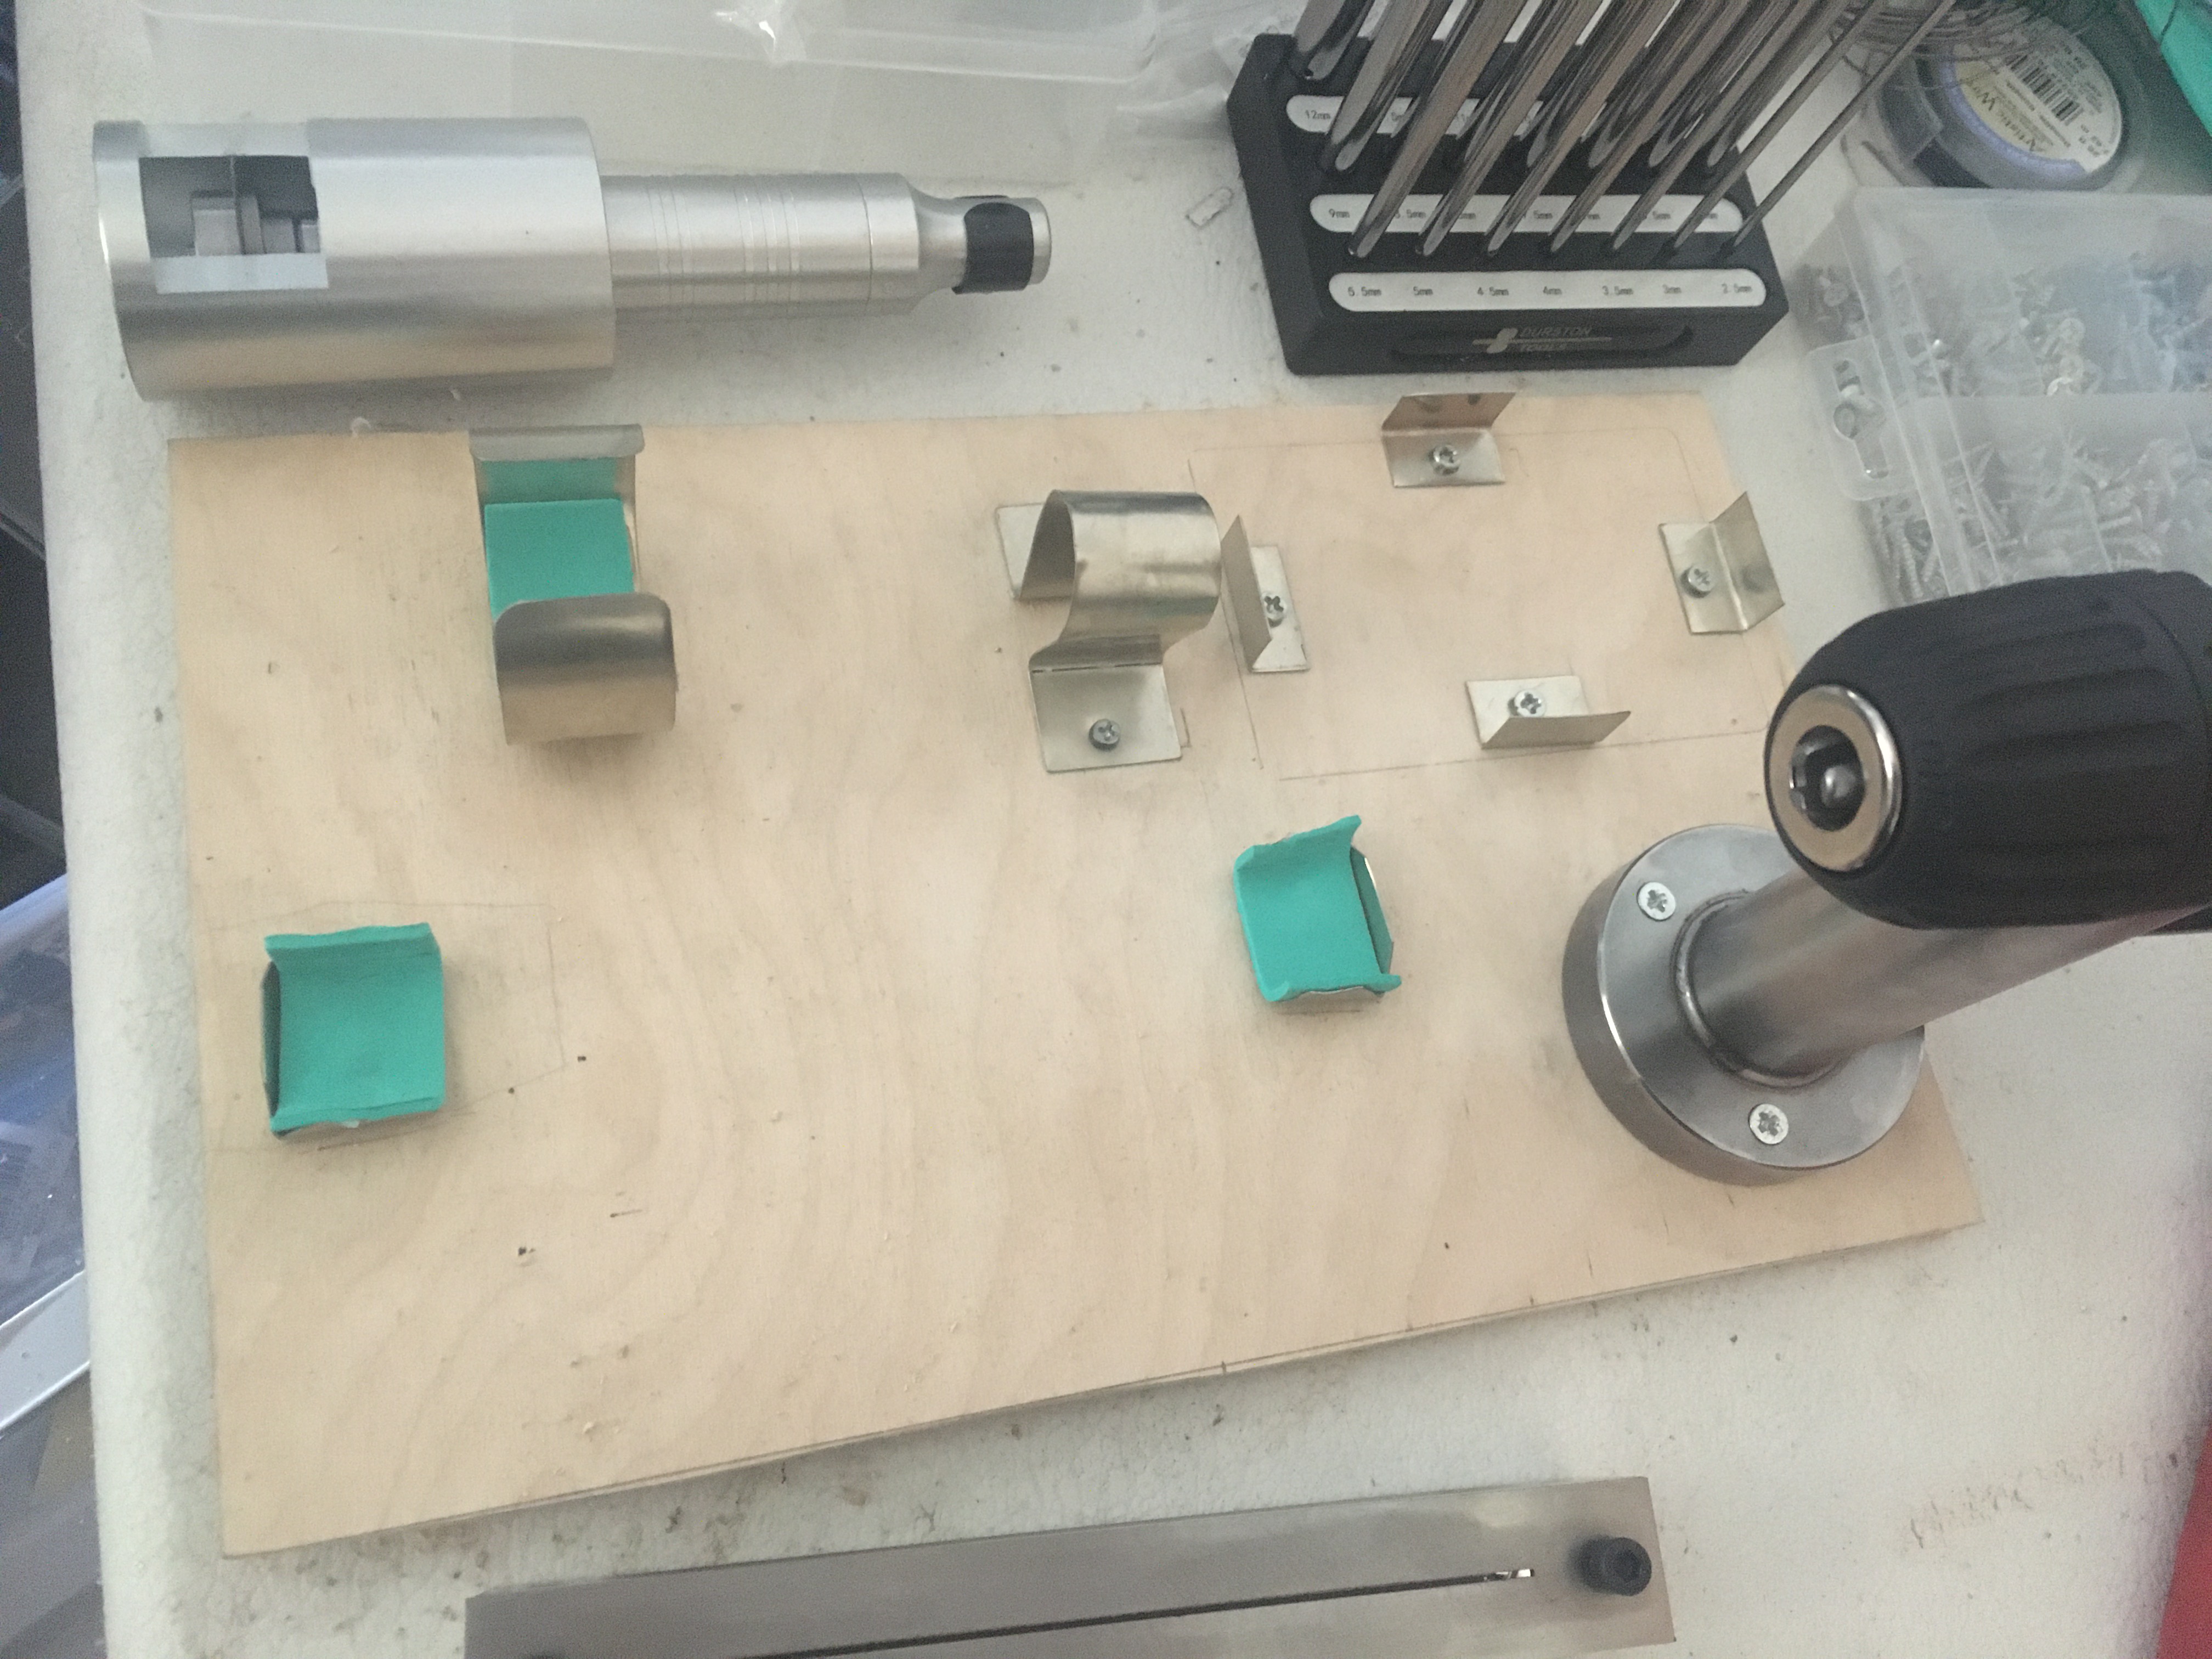
Got this for giftmas and I am in love after one day using it! The jump rings come out perfect, not a burr in sight, and the blade is so sharp I can’t feel when it bites into the wire. Everything is made from heavy, solid metal- even the block for organizing the mandrels! I expected that to be plastic. To keep everything safe and organized, I made this board with padded brackets. I’ve got a quick-change handpiece for general use, so the h30 can stay permanently mounted in the guide- although I’m going to add a label on the board reminding me to check the alignment and mounting screw before each use just to be safe.
I was already a fan of making handmade chains, and the other thing that occurred to me is that this is perfect for making coiled endcaps for leather cord etc. Can’t wait to find out all of the other fun things I can do with it!
Durston makes good stuff. I own several pieces of their equipment, but I haven’t bought a jump ringer from them or others who make them. Maybe this year…Rob
The one I had really chewed up the jump rings (brand doesn’t matter).
A kind Orchidean pointed out that all these tools share a common defect - the cutting wheel turns the wrong direction when used left-handed. Sure enough, switching hands cured the problem.
I saw a T-shirt slogan “Everyone is born right-handed, only the gifted overcome it.” For the ‘gifted’ among us, cut with your right hand…
I just purchased the Durston complete jump ringer from Otto Frei because was advertised as being able to cut coils of 24ga wire. I figured I was good as I only need 22ga, but so far no luck. After burning through yards and yards of copper write I determined that the top plate is too heavy for the thinner wire. It compresses the coil so you end up with a smashed spiral with a groove where the blade nicked it. All of the demo videos show 18ga (or maybe 20), and I was wondering if anyone out there has had any luck with thinner gauge wire. I figured out that I can make a jig out of a dowel for the 10mm mandrel that is just the right size to support the weight of the top plate with 22ga wire, but it’s too thick to work with the 9.5mm mandrel and the next size down wooden dowel size I have is too thin, so I end up with the collapsed coil. It seems like it needs some kind of adjustable spring mechanism to hold the coil upright when cutting variable sized coils of thinner wire. FWIW, I contacted Durston directly asking for advice on how to use the tool with thinner wire and they responded with “trial and error”. So much for customer service. Still waiting to hear back from Otto Frei. TIA for any suggestions.
I’ve had some success but I definitely have more chewed up rings in those thinner-gauge batches than when I’m working with 22ga or thicker. Tbh I call it the cost of doing business and melt them down for doing granulation.
One thing I’ve considered to correct exactly the issues you’ve observed is placing bits of dowel both before and after the coiled completely fill the channel, and either tightening the plate down against them, or using some sort of very thin washer to manage the height of the plate so it’s at the correct height against the top of the coil but not squishing and deforming it.
As for the issue of finding dowels that fit precisely, I have a couple of ideas (though I will stipulate that these are purely theoretical and I have not tested them yet): first, sand down the dowel to fit. It’s some work, but to get a clean cut batch it should be worth it (and I think one dowel should work for multiple batches). Second, I’ve seen sets of “telescoping rods” which are actually tubes made from copper or brass and sold in hobby shops or on Amazon. They’re smaller than the selection of wooden dowels I usually see, and it seems like they come in a closer assortment too (less difference from one size to the next). They’d most likely be sacrificed for each batch, but they’re cheap and you’d get a couple batches per foot of cheap tube, so it’s not a lot to invest. You could even drill a hole in them, wind the wire directly on, and pop it right into the coil holder in one piece the whole way through.
I know it’s frustrating, but it seems to me (and I’ll always be the first to say I’m still a bit of a n00b) like a lot of this trade is always going to be trial and error even with the clearest, most detailed instructions.
Why do people create a problem that is already solved by the jump ringer? The steel mandrels upon which you wind the coils are not hardened. (Or at least, in the original jump ringer, they weren’t. I dont know about the Durston. But there is no reason for them to be hardened) They are soft steel.
Leave the coil on that mandrel when you put it in the cutting fixture. The blade will nick that mandrel, but its a narrow channel that won’t impair its use to wind subsequent coils. You just then have to orient subsequent coils so that groove youve cut stays on top. If you look at the oval jump ringer in the original version, the oval mandrels already have a groove built in… And the circular saw blades are standard machinists blades, actually optimized for cutting mild steel. Just use usual cutting oil or lube.
For the thinner gage wire, a lot will depend on temper. But to put it the way I have heard so many times before “Don’t go all Conan on it.”
If you want to hedge your bet with a sacrificial wood core, I’d use something like bass wood which you can get at hobby and model shops. If the dimension is off you can turn it down using sandpaper and a flex shaft or drill press depending on diameter.
go to a hobby shop and buy dowels smaller than needed. Wrap the dowel in a sheet of paper tightly until it is the size you need… A bit of spray adhesive will seal it without the bulk. after a few cuts, you can toss it and make another one.
In none of the instructions I read nor videos I watched (produced by Durston) were the mandrels left in when inserting into the cutter. None. Zero. Zip. You’re supposed to snip the ends and remove it from the mandrel. But thanks anyway for trying.
One thing I’ve considered to correct exactly the issues you’ve observed is placing bits of dowel both before and after the coiled completely fill the channel, and either tightening the plate down against them, or using some sort of very thin washer to manage the height of the plate so it’s at the correct height against the top of the coil but not squishing and deforming it.<<
I came up with the solution after I sent the email, thinking along these lines (I actually dreamed this and woke up to it).
What I did was make a short 22ga coil of copper wire and then tape it with masking tape before taking it off the mandrel (I was using non-annealed copper wire, which was pretty bouncy). I got out my Jett Set and filled the center of the coil, and let it harden. Then I took the tape off and put it at the opposite end of the coil I wanted to cut, gently screwing the top plate down. No wooden dowels needed!
The current model does have hardened steel mandrels. And the blades they include, while definitely nice, do not last forever. In fact the blades can be damaged if they’re not mounted right and run up against the steel guide plate or the soft aluminum handpiece housing. The kit’s instructions specifically say it is unsuitable for cutting hard metals like steel, titanium, etc. I doubt these blades would successfully- and more to the point safely- complete one cut the way you describe. That’s not how this tool is designed to be used, and people go along with that because we prefer out fingers to remain attached and functional and the tools we invest in to remain similarly intact and functional. Least that’s my rationale.
Mary, as I mentioned in my post, my experience has been with the Original Jump Ringer design, invented by Ray Grossman. It was copied by Pepe tools, a cheaper knockoff of the original, but improved over time. The Durston version is much more recent. My Jump ringer (Grossman version) is over 30 years old, predating online videos. I dont know what Durston specifies, but at the time I first used one in the 80s, everyone I knew was leaving the mandrels in the coil for cutting. Supporting the coil makes much sense, keeping the coil from crushing, or the rings from shifting position as its cut free. I dont know about later versions, but with mine, the round mandrels are stainless steel (the oval ones are cast bronze), allowing you to anneal the coil still on the mandrel if you wish. Everyone I remember using one quickly figured out that the coil clamping fixture could not hold thinner wire coils stable enough, and had to have the mandrels left in. Since the bronze oval mandrels had a grove already in them for blade clearance, I dont think anyone I knew had second thoughts about leaving mandrels in. It seemed simple enough to orient a coil for cutting so any prior grooving of the mandrel was where the new cut would be, so only one groove would develop on the mandrel. The groove is narrow enough it has no effect on future coils wound on the mandrel.
Cheers
Peter Rowe
while the wooden dowel will work, for years, I’ve wrapped my coil in masking tape. It stabilizes the coil just fine. However, you have goo to deal with. so I use bur life on the blade and and on the top of the coil prior to cutting. It holds the coil pieces nicely after cutting. I have the original Grossman jump ringer. judy hoch
I wanted to come back to this because I’ve started using the masking tape and haven’t had a single miscut since. Also I don’t have any issue with adhesive residue- possibly because I got some very cheap masking tape from Amazon that barely sticks to anything except itself, but it works brilliantly for this. Blue painters tape might be another excellent option.with the coil taped I have successfully cut 2mm ID rings from 22g solder-filled wire which is far softer than regular sterling of the same gauge, even if the sterling is annealed.