Hello Everyone,
I’m new to the forum, have lurked for a few years but I’ve taken the plunge in deciding to be a professional jeweller and so thought i’d sign up properly.
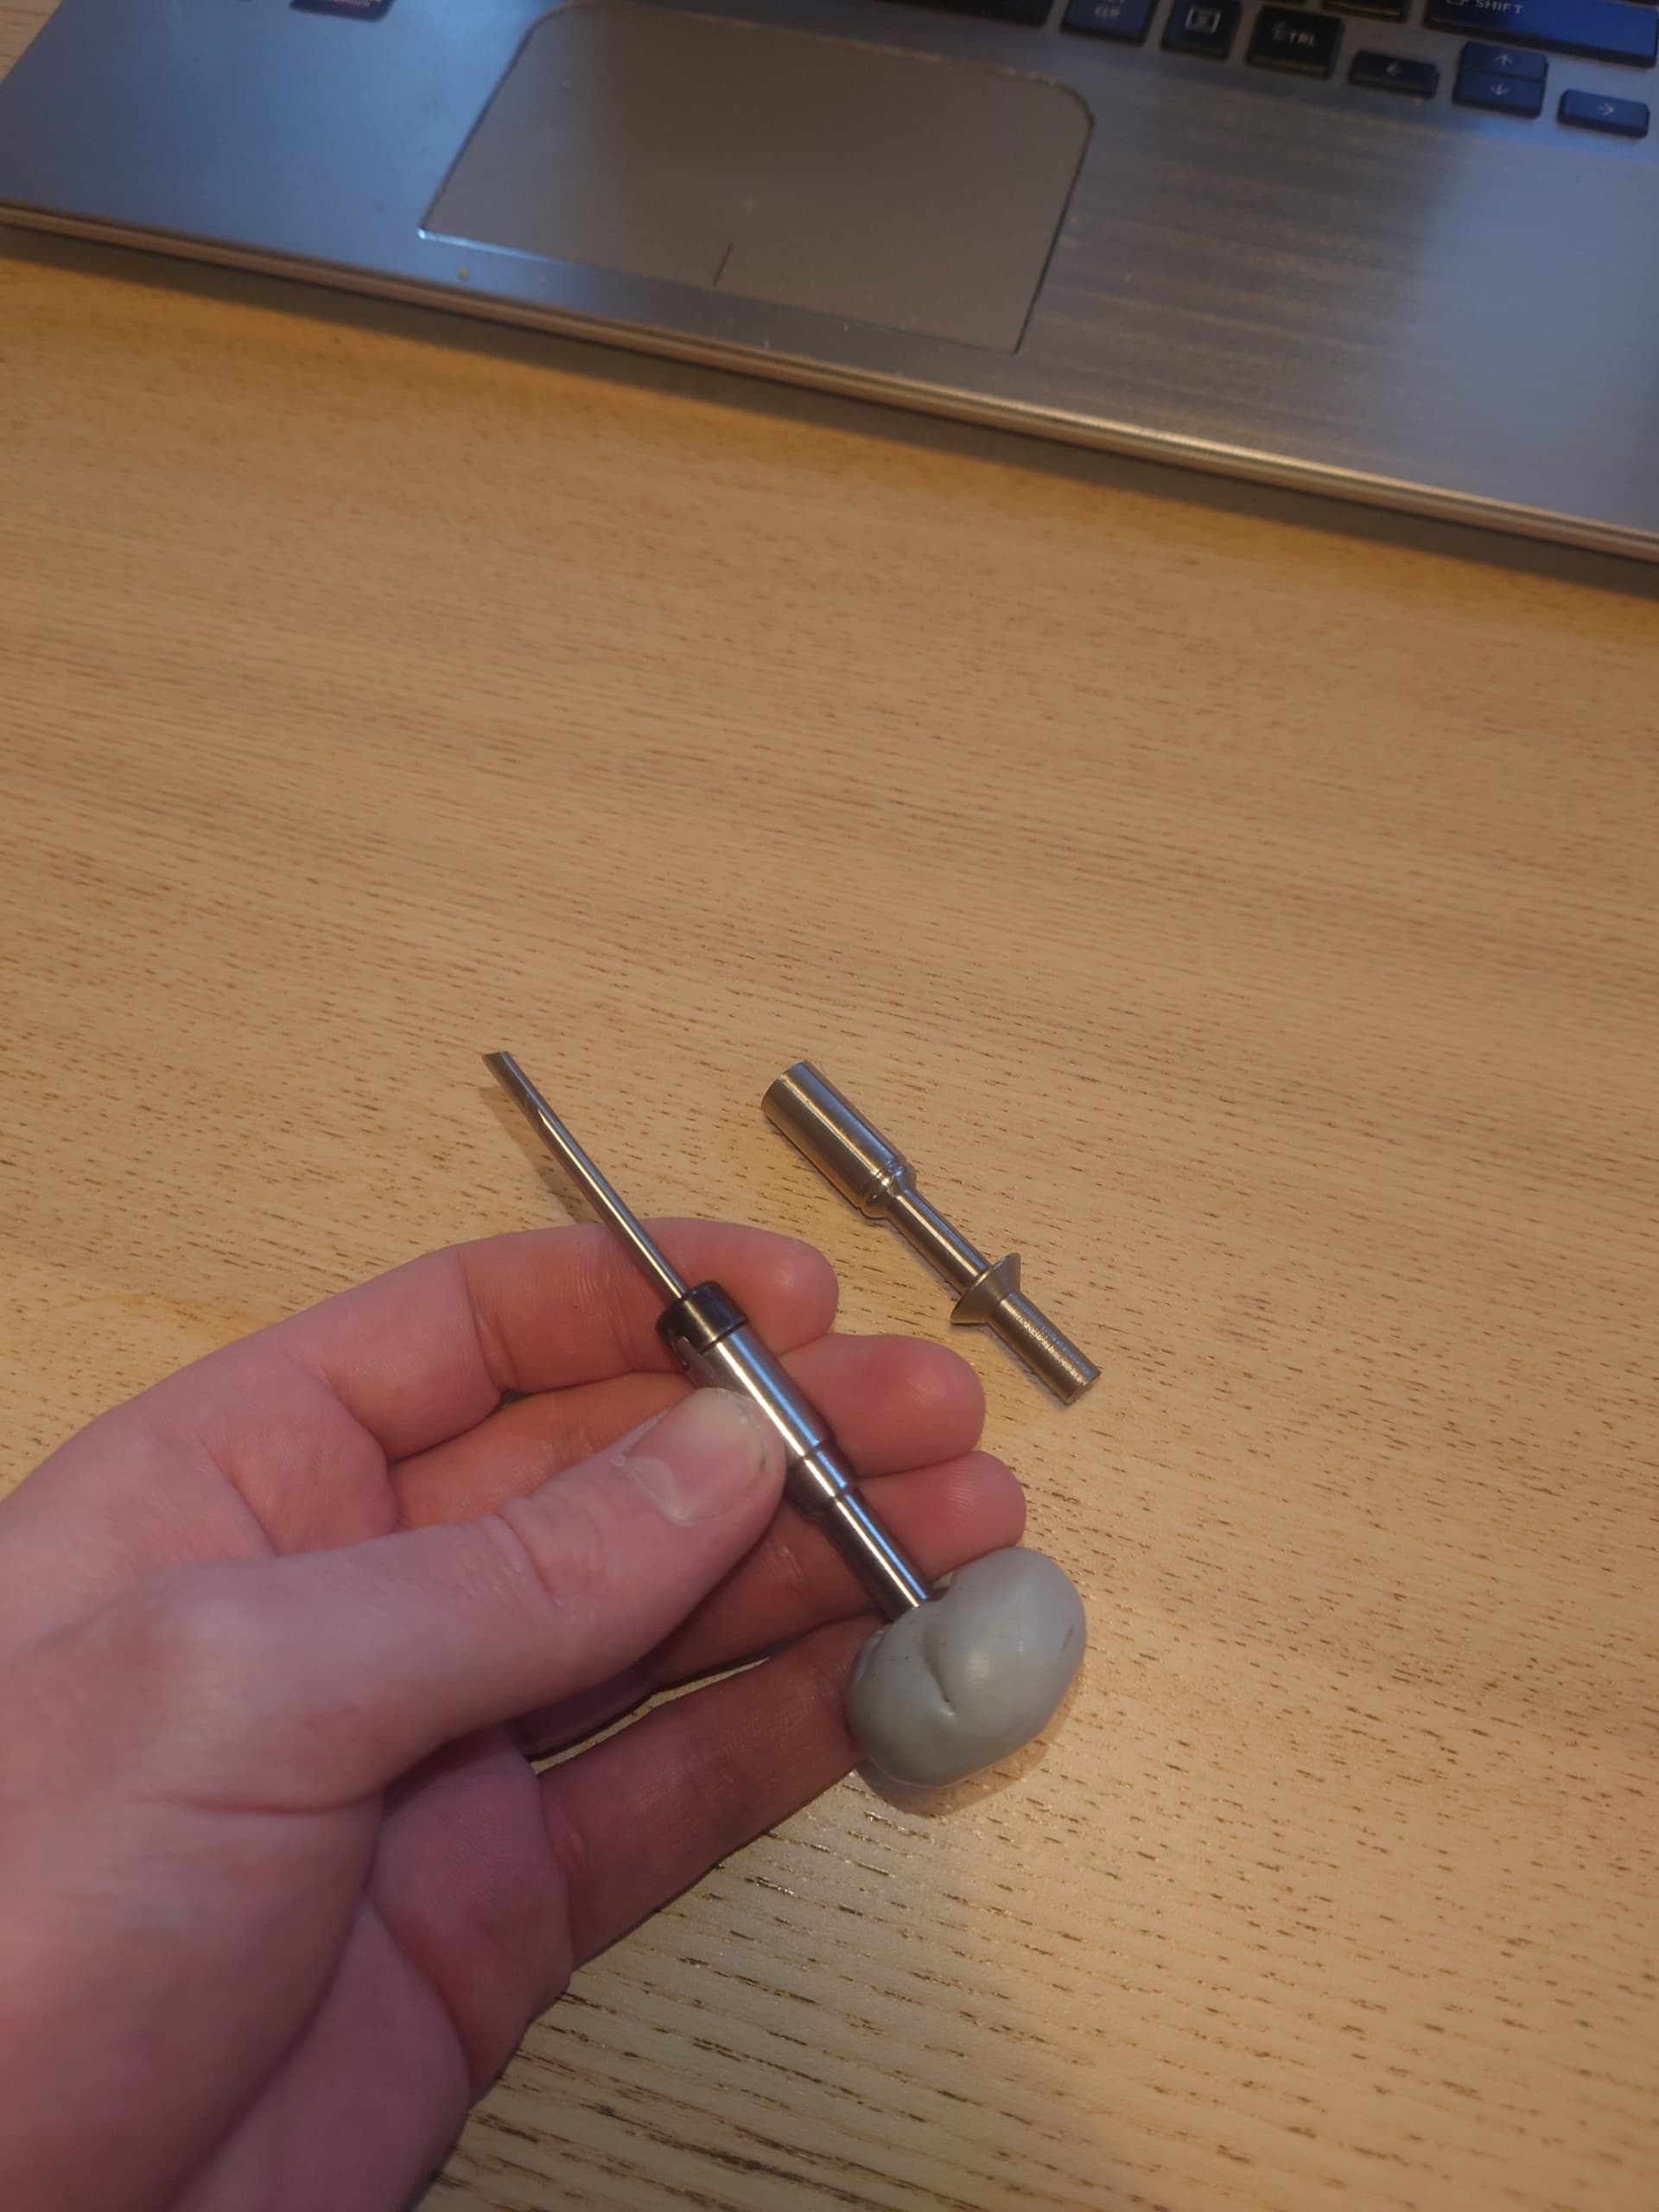
I thought I’d say hello and show you a picture of the engravers vise I made last year. I couldn’t afford a good one, and I hate buying cheap tools so I decided to make my own. I’m an amateur machinist and have access to a lathe and mill so I did it for fun. It wasn’t a great economic decision as the process took about 6 months!
Next up is a pneumatic engraver and a load of engraving tools. I’m also planning to build a faceting machine and then will learn to facet my own stones.
Thanks for all the advise you didn’t know you’d already given me. Online forums are what I love most about the internet.
Alex
6 Likes
Please keep us posted on your progress. I did a lot of research on pneumatic engravers and settled on Steve Lindsay’s Air Graver. His tools are pieces of art. That being said, unless you already engrave, it would serve you well to learn to hand engrave first. At least in the Lindsay system, almost all the tooling that you buy for hand engraving can be used with the pneumatic engraver. There are many videos online that show you how to make your own pneumatic engraver. I would still look at Steve’s gravers and sharpening system if you decide to go this way. Good luck…Rob
2 Likes
Hi rob
I’m going to be making a Lindsay style graver. I like the elegance of that particular mechanism, but using GRS quick change collets. The collets aren’t crazy expensive to buy and I really can’t be bothered to make a load of them so I don’t mind basing my system around those.
I’ll probably make a load of sharpening templates too. To start I’ve just been grinding my own gravers freehand under a microscope with a diamond wheel, but I like the idea of the repeatability of the template system. Either that or I’ll make something akin to a grs style powerhone fixture.
I’m learning hand push and hammer and chisel first, I’ve made a couple of graver handles to take the same grs collets. The idea is I’ll be able to use the same gravers either hand push or with power. I mostly want to use them for stone setting and surface texturing or patterning. The first stones I’ve set I’ve done with a hammer and tiny chisel/punches and I’ve really enjoyed working that way under the microscope. I don’t know how far down the engraving rabbit hole I’ll go.
Here are the push graver holders, one doesn’t yet have a handle, the other has a thermolock one but I will upgrade it to pear wood when I get a chance.
4 Likes
Sounds like a plan. Keep us posted on your progress…Rob
3 Likes
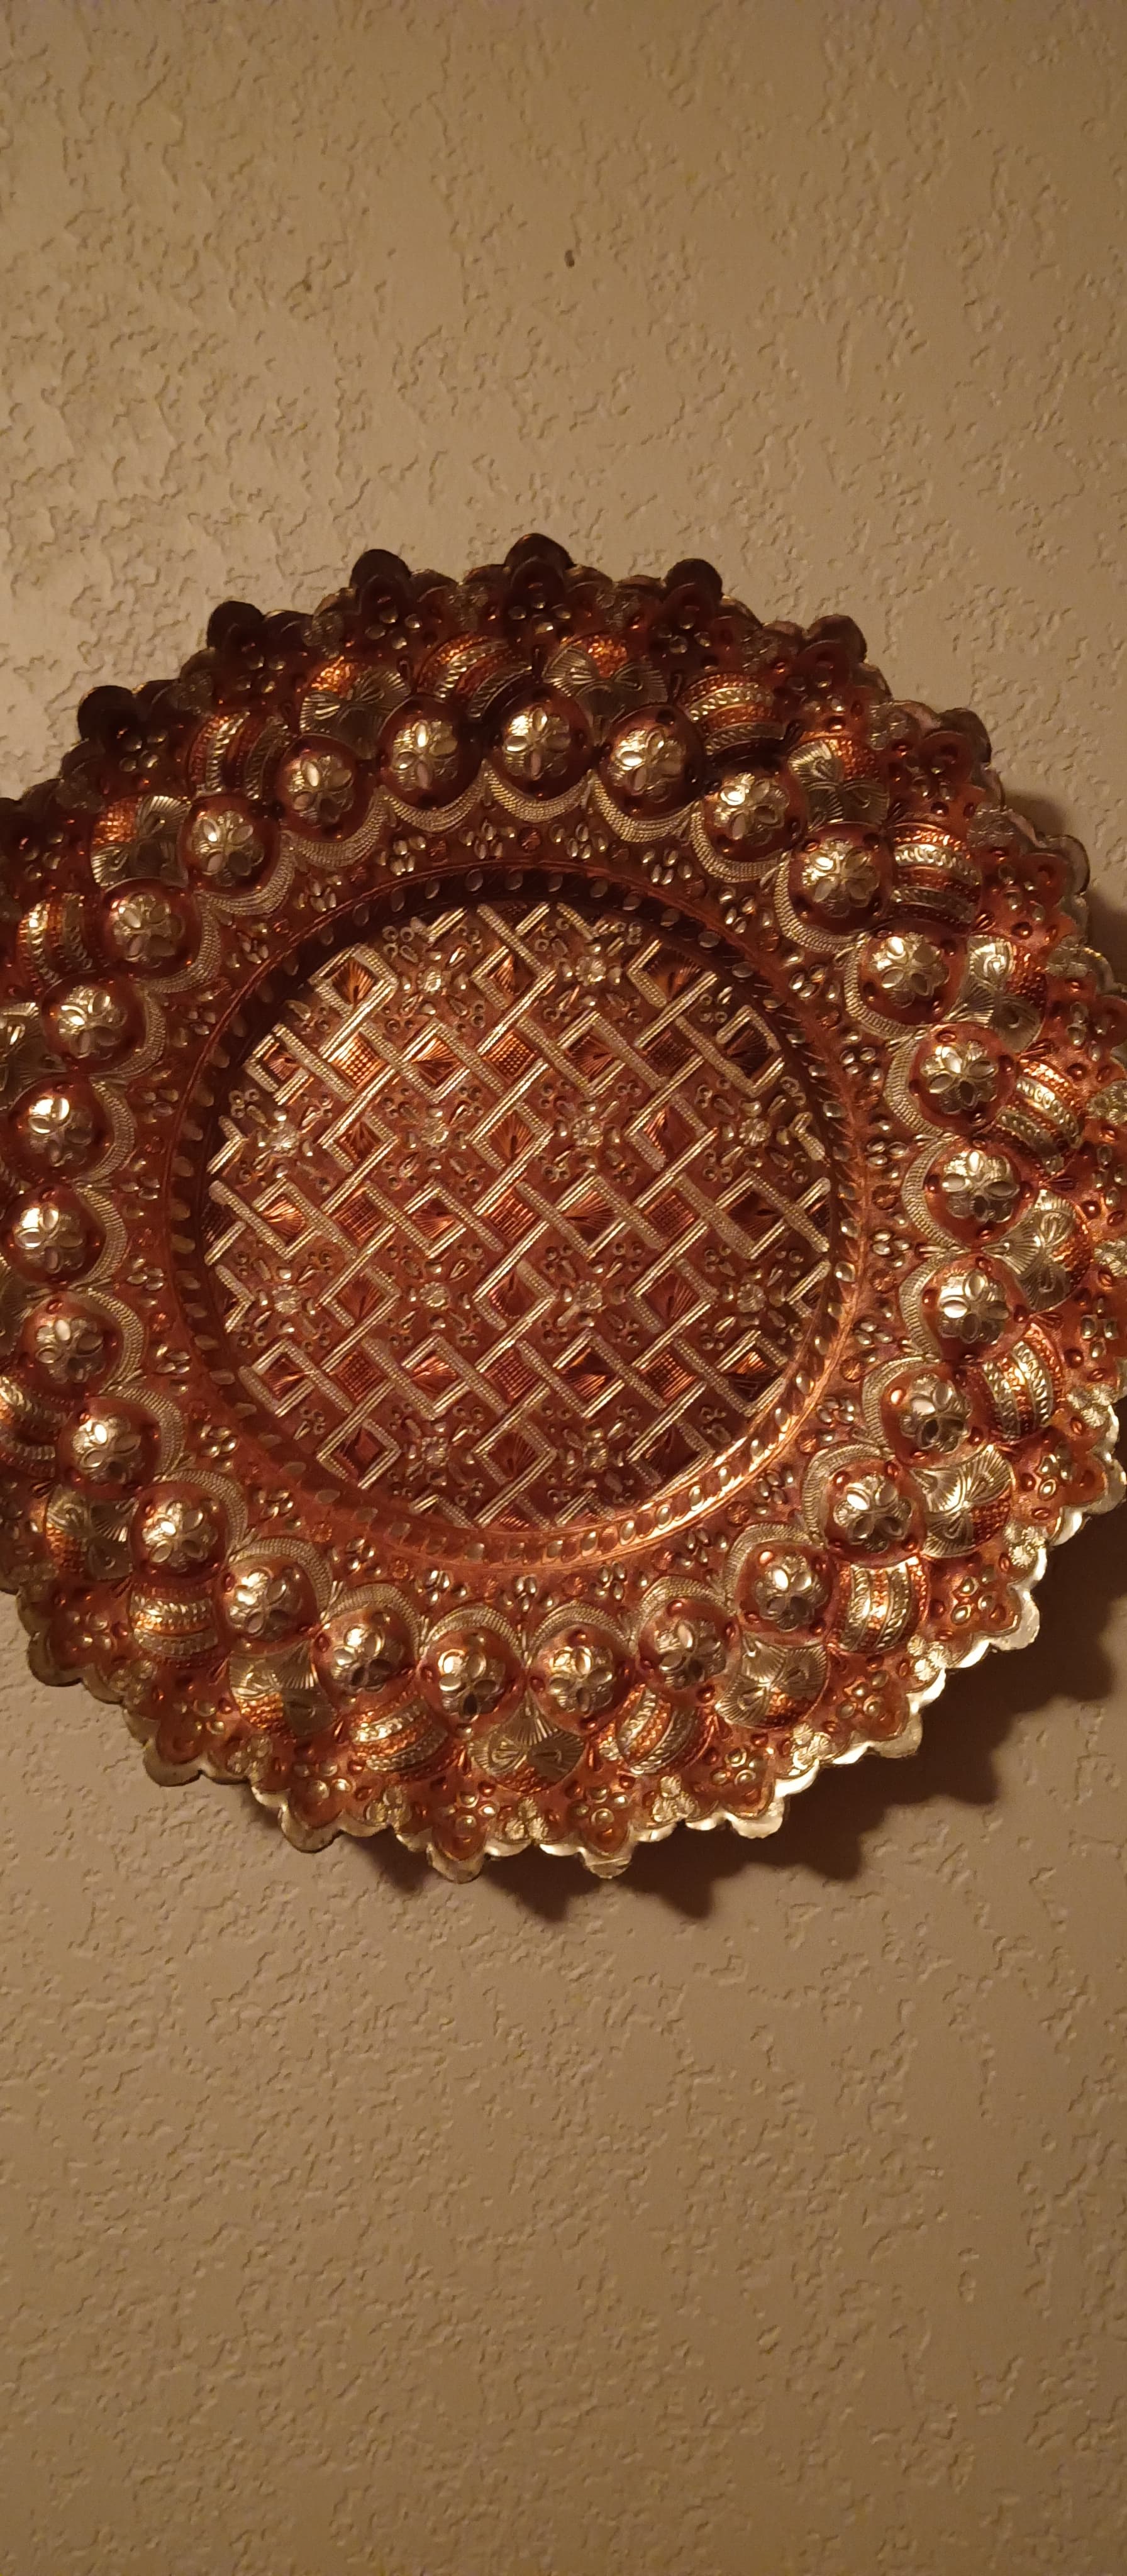
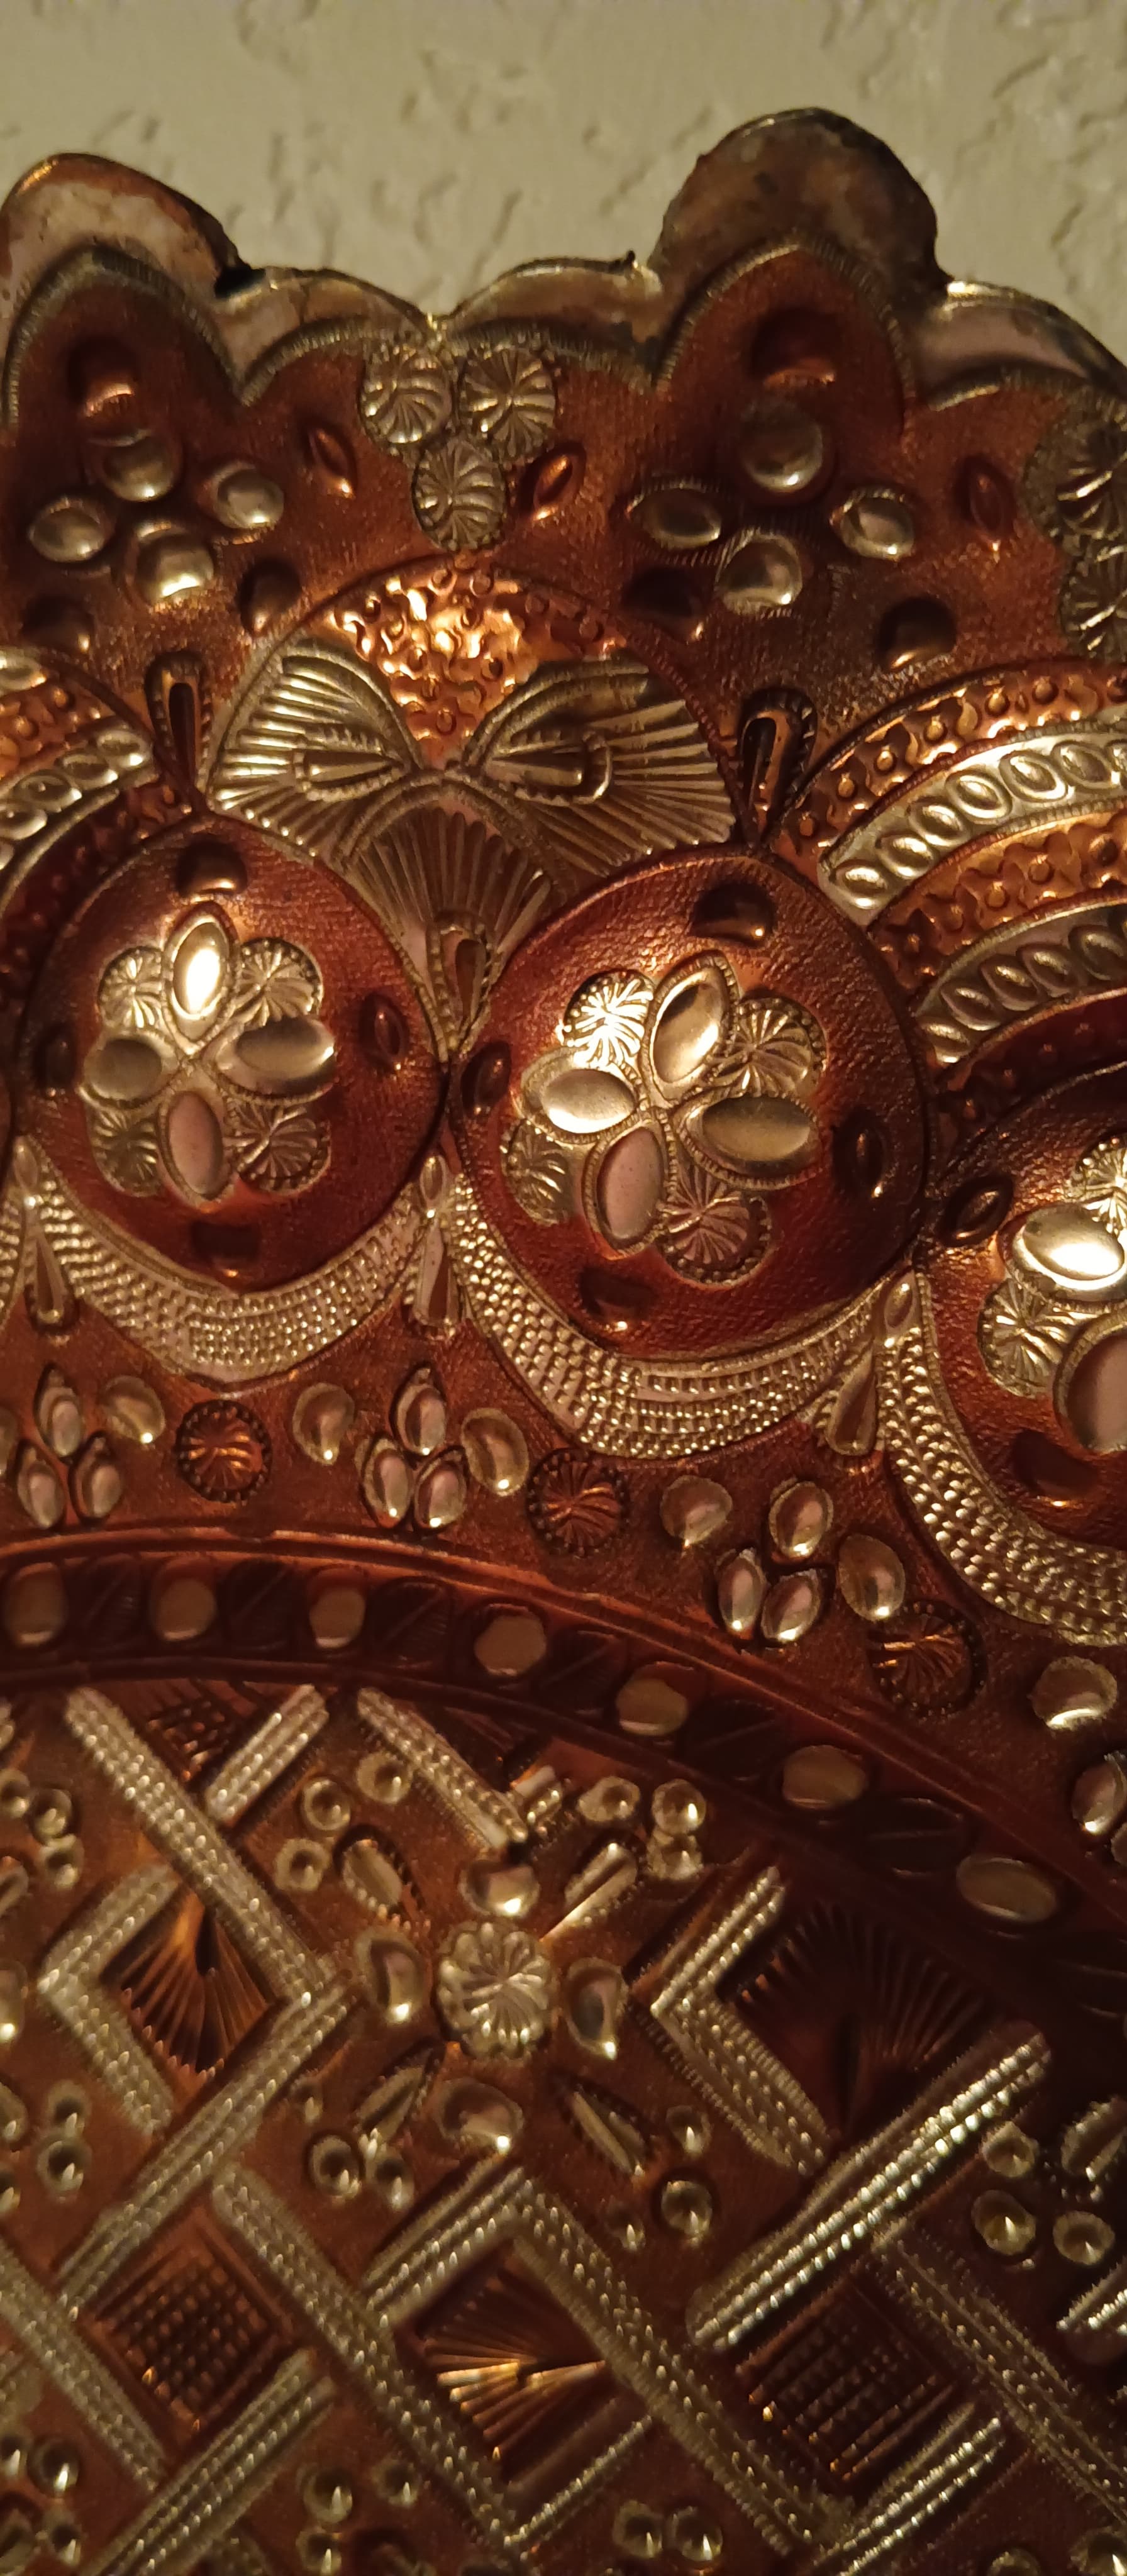
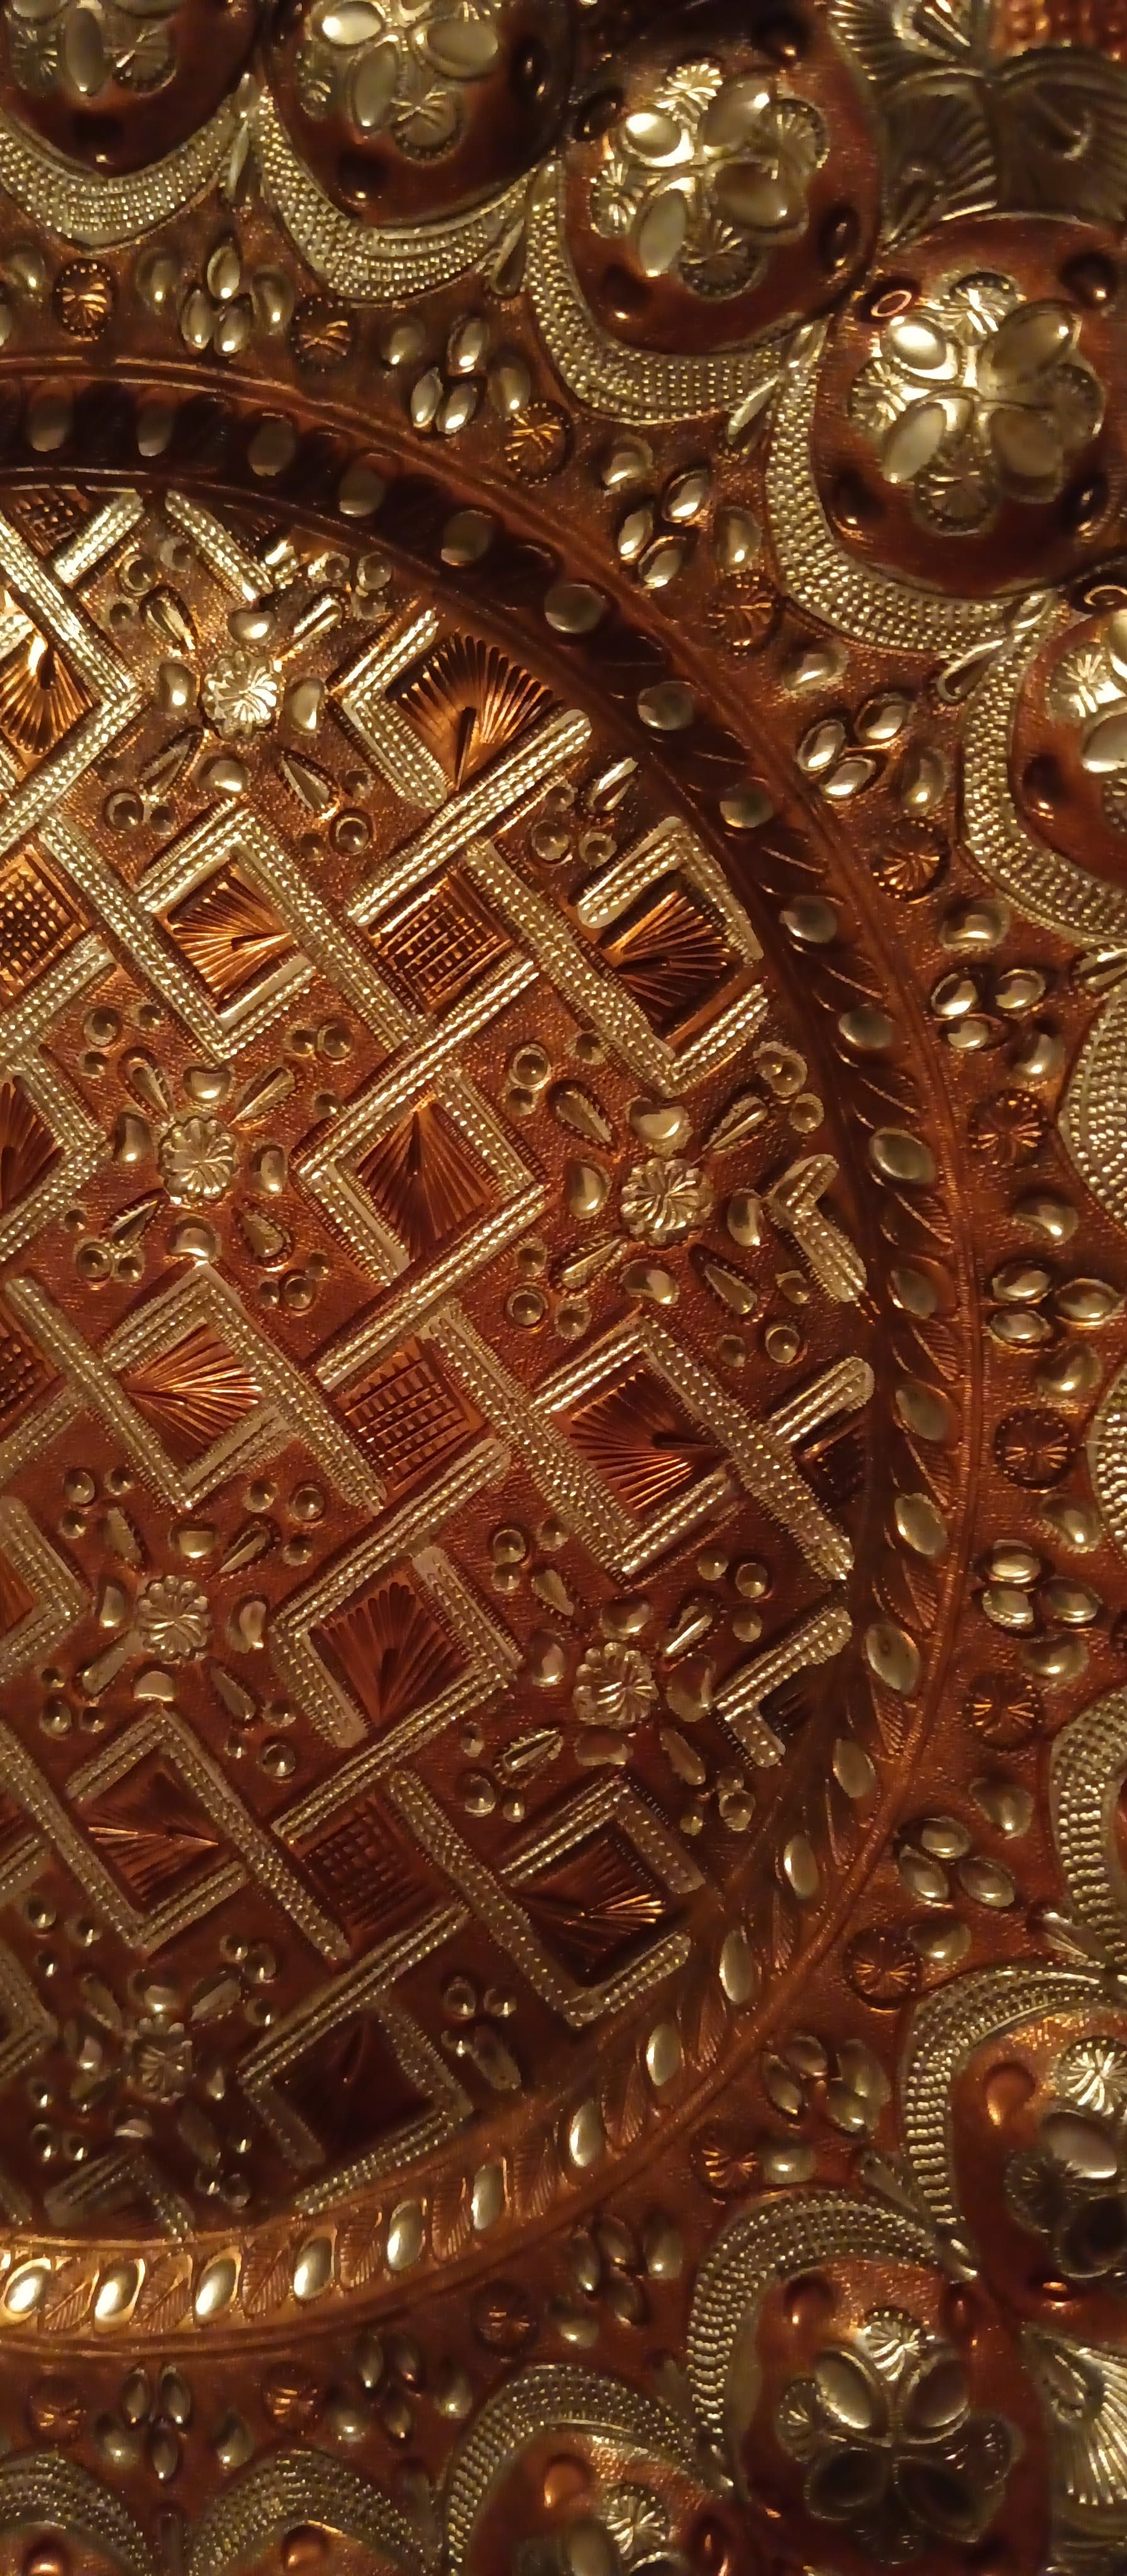
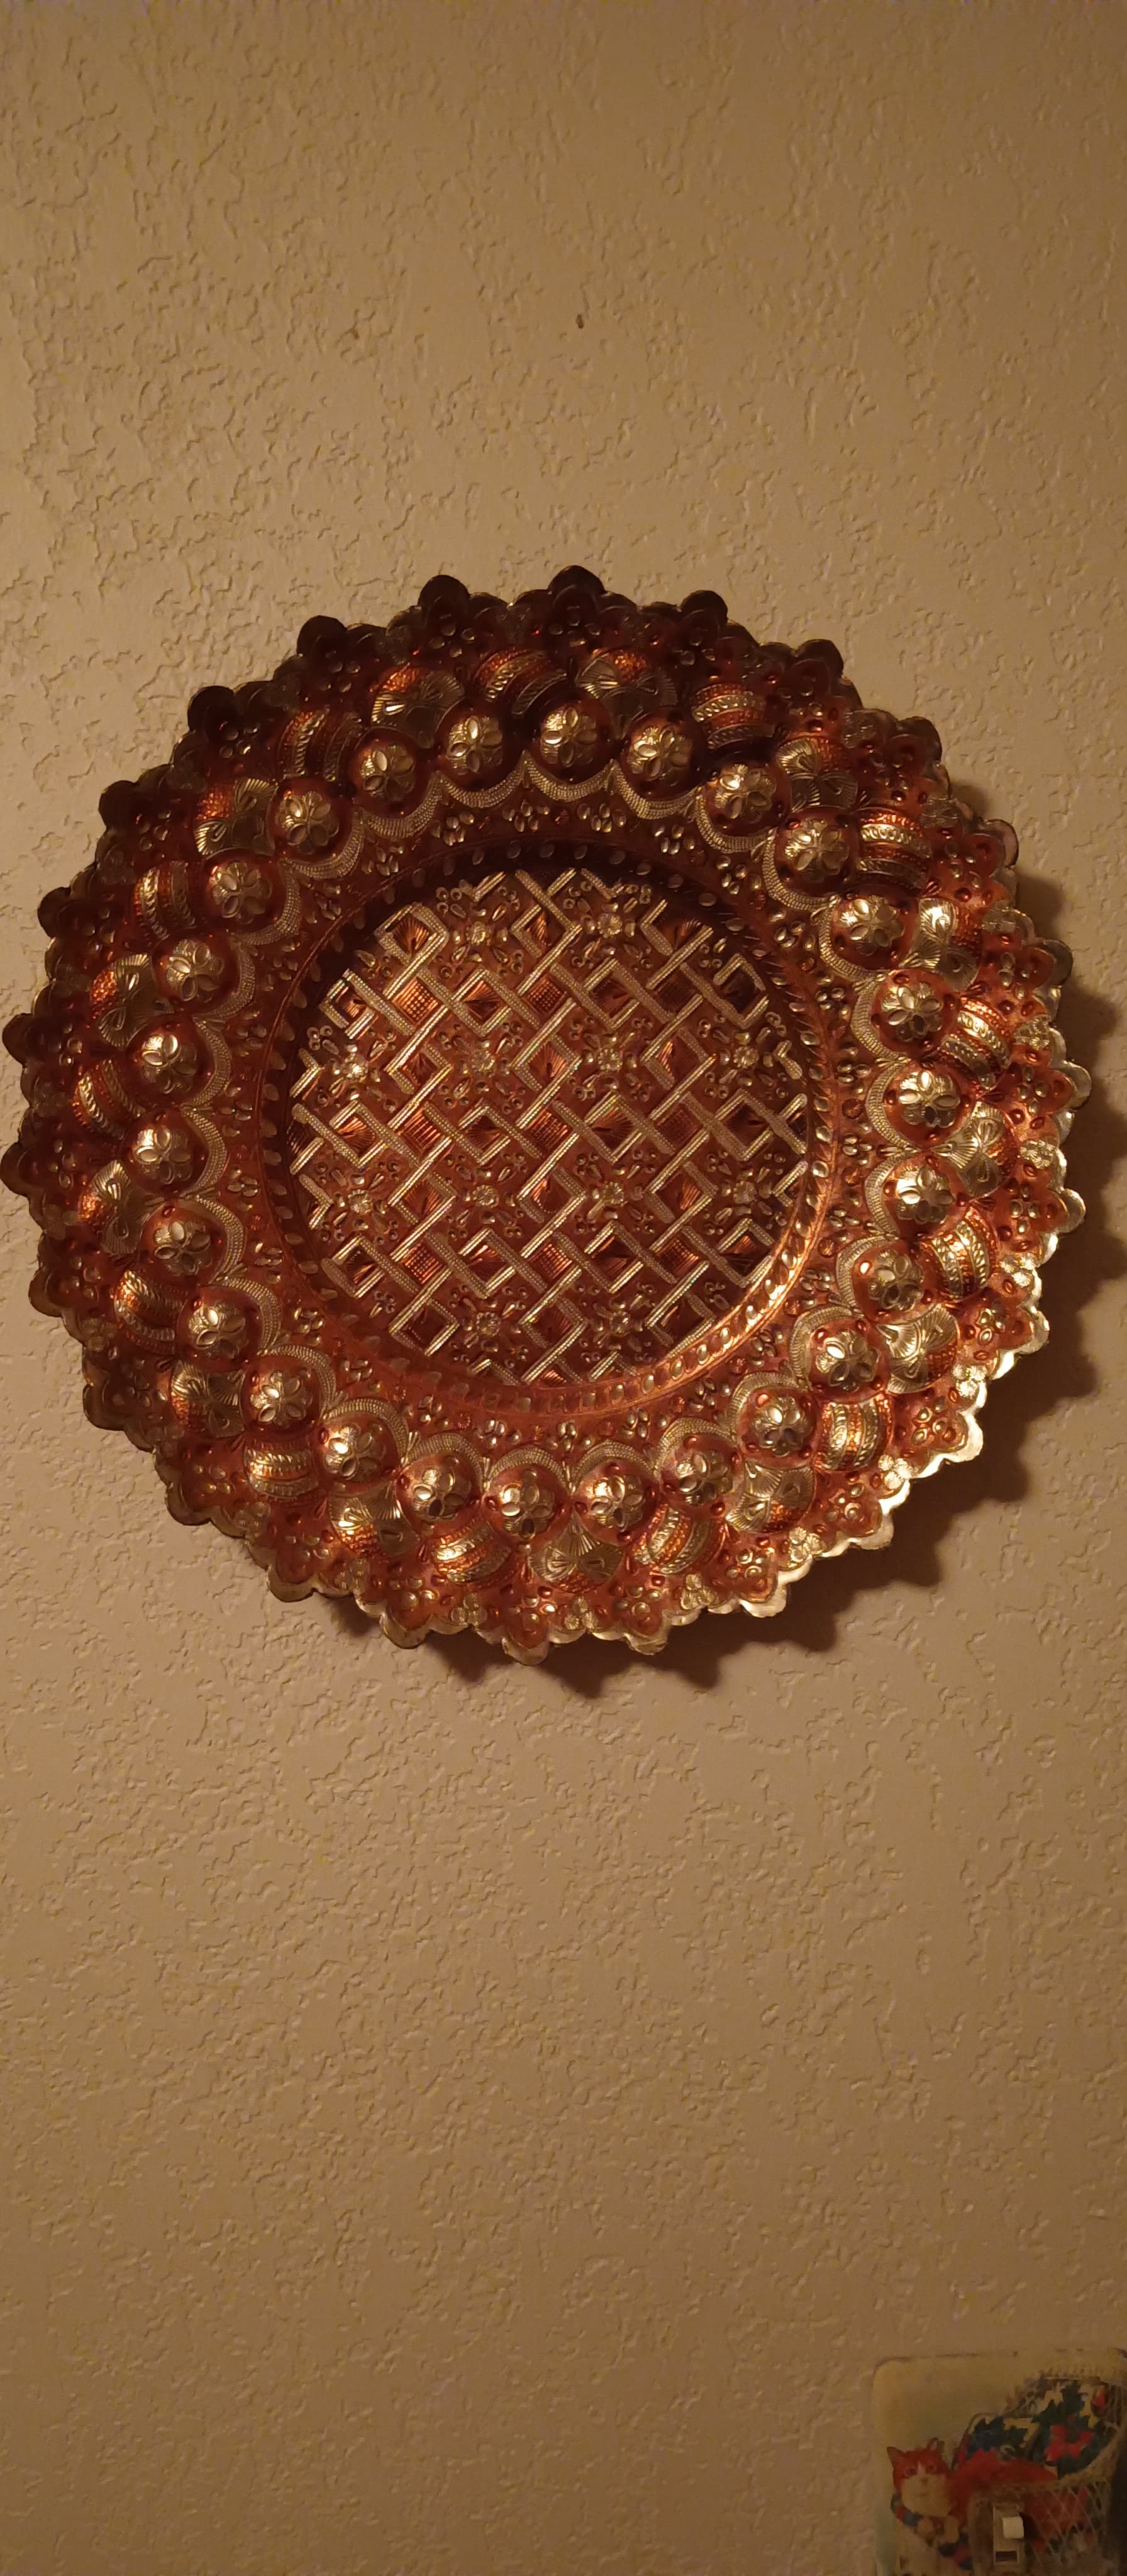
I would like to post some pics of a piece I picked up in my travels, a piece that that shows off the abilities of the artist. Engraving, chasing are just part of this piece. Just the initial layout is mind boggling. To be so accomplished in the creation of a piece of art of this caliber WOW!!!
How many techniques can you name that we’re employed in major his piece?
Steven
2 Likes
In making this piece.
Thanks Steven
Hi,
I wonder what technique was used to add the contrast metal…
julie
I’m thinking silver or tin, leaning more towards silver.
Sorry @wldlzrd1 you asked what technique
I would say plating by electric, anode cathode and using a block out on the parts you don’t want plated. Or chemical plating .
Steven
That engraving vice looks absolutely amazing! I am one of those who couldn’t initially afford a GRS ball, so I picked one up from AliExpress for really cheap. I’ve made it work ‘ok’ for me, but you sure get what you pay for!
As far as engraving machines, I built my own too. Cost $100 in parts, and works pretty well. It’s a modified d/c tire inflator, hooked up to a speed controller and a simple power supply. All contained in an ammo case. I built it based on plans from 2 people, whose YouTube channels I’ll look up and post as a reply to this comment.
I’ll see if I can find some photos too.
Cheers!
(Also, if you’re looking to make a second one of those vices to send to someone to try out, I know a guy who would be interested 
1 Like
Above is the link to the first guy I saw make a homemade engraving machine, and below is more of the guide I followed (it’s 3 parts).
Part 1:
Part 2:
Part 3:
3 Likes