if you are looking for information on melting metal, casting ingots, casting flux, forging metal, annealing metal, rolling metal, drawing metal, metal stresses, metal porosity, metal grain structure, all about metallurgy, etc in a very easy to understand, technically illustrative form…
this is a great book, i highly recommend
i found answers to all the questions i had, and more that i didnt even think to ask…
more importantly, for me, it explained the interconnectedness of it all…how the dominos fall, so to speak…
Hi Jeff,
I have read it a few times! I forget things, then go back to refresh my memory!
I was talking to someone who was saying definitively to air cool the ingot before quenching…my understanding was to quench as soon as possible while not too fast to avoid thermal shock…
but i could not recall the “whys”…so i started to search the forum…eventually i recalled my Brepohl book and went to read up on the subject there…
i figured i would make this post…to remind myself in the future!
haha
looks like it’s a great book that brings everything together in one place… I found most of what I wanted to know online and printed out the references… takes a lot of clicks to find the best sources…
also agree that with a thick ingot, thermal shock is an issue…quenching temperatures can be a bit tricky depending on the composition and thickness of the ingot. Rapid cooling despite the high thermal conductivity of silver and gold still will leave a microcrystalline gradient with the surface structure being more fine grained the the inside. coarse grained structures are more prone to cracking. I haven’t found that to be a major problem… rolling and annealing will make the internal structure of the metal more uniform… you have to anneal repeatedly anyway to avoid work hardening and cracking.
Has anyone experienced cracking when rolling an ingot?
Preventing ingots from cracking while rolling them is an eternal struggle for many, if not most of us. I’ve got my process of how to make cracks happen less often, but I’ve never been able to completely eliminate them.
I used to have this problem as well in the past but since I’ve started using an open mould I only get cracks when I tend to get careless. I suppose that the ingots are better structurally since the hot material doesn’t have to travel the same distance as in a closed mould and can “settle into position” at a higher temperature.
I first read this book in 2005 when I started my jeweler journey, and I can confirm that it is headache inducing! Sooooooo much very deep and detailed information, that, as a beginner, was only able to be digested in small (like, 4 or 5 pages at the most) doses.
Incredible book, and along with Oppi Untract’s jewelry concepts and technology, makes for quite the jewelry making powerhouse of information!
The below book is often mentioned along with the Brepohl book as a definitive source on metallurgy…
…being a book lover, and always thirsty for knowledge, i just ordered this book…hopefully it will not be too similar…but i am sure i will learn new things and love it!
haven’t’ had much trouble with cracking… some, yes but not catastrophic… I think I let the ingot cool within the mold until I could take the mould apart using kitchen gloves and channel lock pliers…before quenching and pickling…if it seemed too stiff with rolling, I’d reanneal after a couple of cranks of the rolling mill.
I think that it starts with the casting process. Make sure that the mold is coated with oil that you heat until it smokes or coat it with a reducing flame. The ingot needs to be hot before the pour. I heat mine with my big torch first then keep it warm with a butane torch while melting the metal. I also keep the mold close to the crucible so that the heat melting the metal spills on to the mold. Once everything is up to temperature, do a quick pour and then keep the flame on the opening of the mold for a bit. I pop the ingot out and then place it on my anvil and let it cool slowly. If I get impatient, I place a thick steel 20 ton press spacer on top. Once it is cool, I sand the ingot to remove all the sharp bits of flashing. Then I give it a good forging using a heavy hammer. I always forge in the same direction on all four surfaces. I don’t know why, but I read it somewhere a long time ago. This can be hard on the fingers. Roll in little bites annealing often. I don’t generally get a lot of cracking. I do once in a while get a porosity spot in the middle. There is little that you can do about them, so I just drill them out like a dentist drilling a cavity. I don’t ever quench when the ingot is hot, I let it cool on my anvil. Once I get to the thickness that I want, I will pickle after the last anneal. At this point I will sometimes get a small blister. This usually happens at 18 gauge or thinner. The blisters can be lightly rolled out. If I am making sheet, I will sand, remove firescale and polish the entire sheet before I cut it up. This is easier than polishing the smaller pieces one at a time. It also helps to find any blemishes. I mark these areas with a scribe so that I can avoid using them. Once in a while I have purposefully allowed the edges to crack and then incorporate this texture into the piece. This is usually when I use the cracked sheet as backing for a piece of lapidary. When I get done I always promise to stop recycling scrape and just buy sheet. This lasts until the next time that I need sheet in size that I don’t have. Lots of fun…Rob
Following is a link to two pictures. One is an ingot that I recently poured. It has been squared up and rolled out to 14 gauge. I will take it down to 18 gauge, sand, remove firescale and polish. It looks pretty clean with no edge cracks. I did do the melt in my new electric melting furnace and it was a larger pour, at least for me. I think about 3.5 ounces. These may be factors in edge cracking. The second picture is just anecdotal. I managed to break my bezel roller. It was probably 40+ years old and I am too embarrassed to tell you how. I decided to see if I could make one out of a 3/8" carriage bolt. I wanted both a roller but also a roller shaped bezel pusher. I tried it out yesterday and it works well for both purposes…Rob
My late colleague, Sigrid Schneider, an Austrian goldsmith, said The Brepohl was their goldmsithing text book at the University of Applied Arts in Vienna. Sigrid would have been 67 this year, so it was probably 45 years ago when she was in the program there.
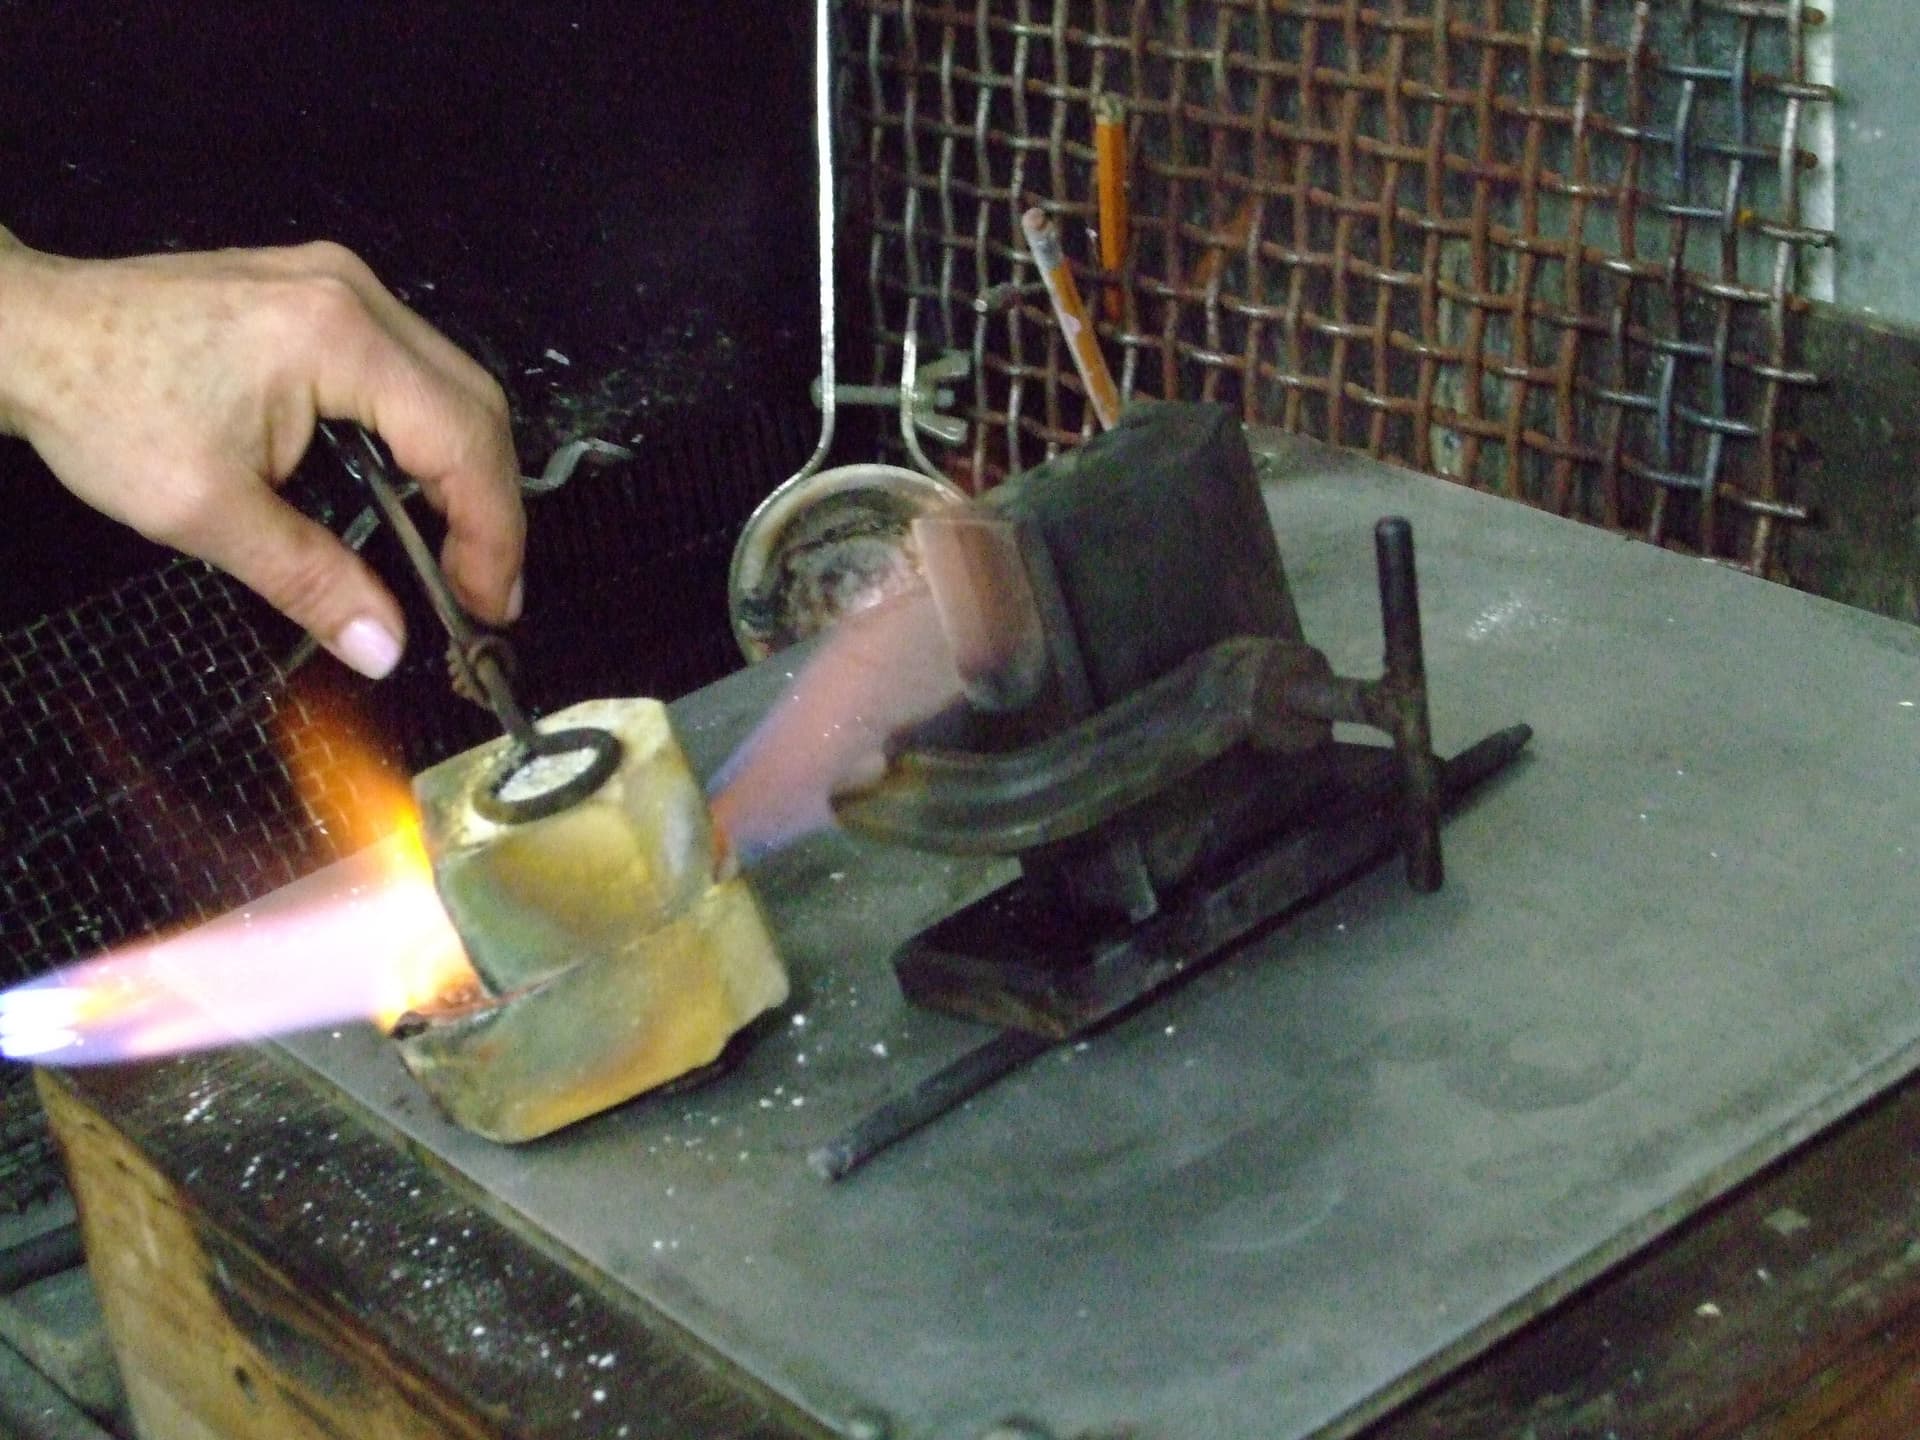
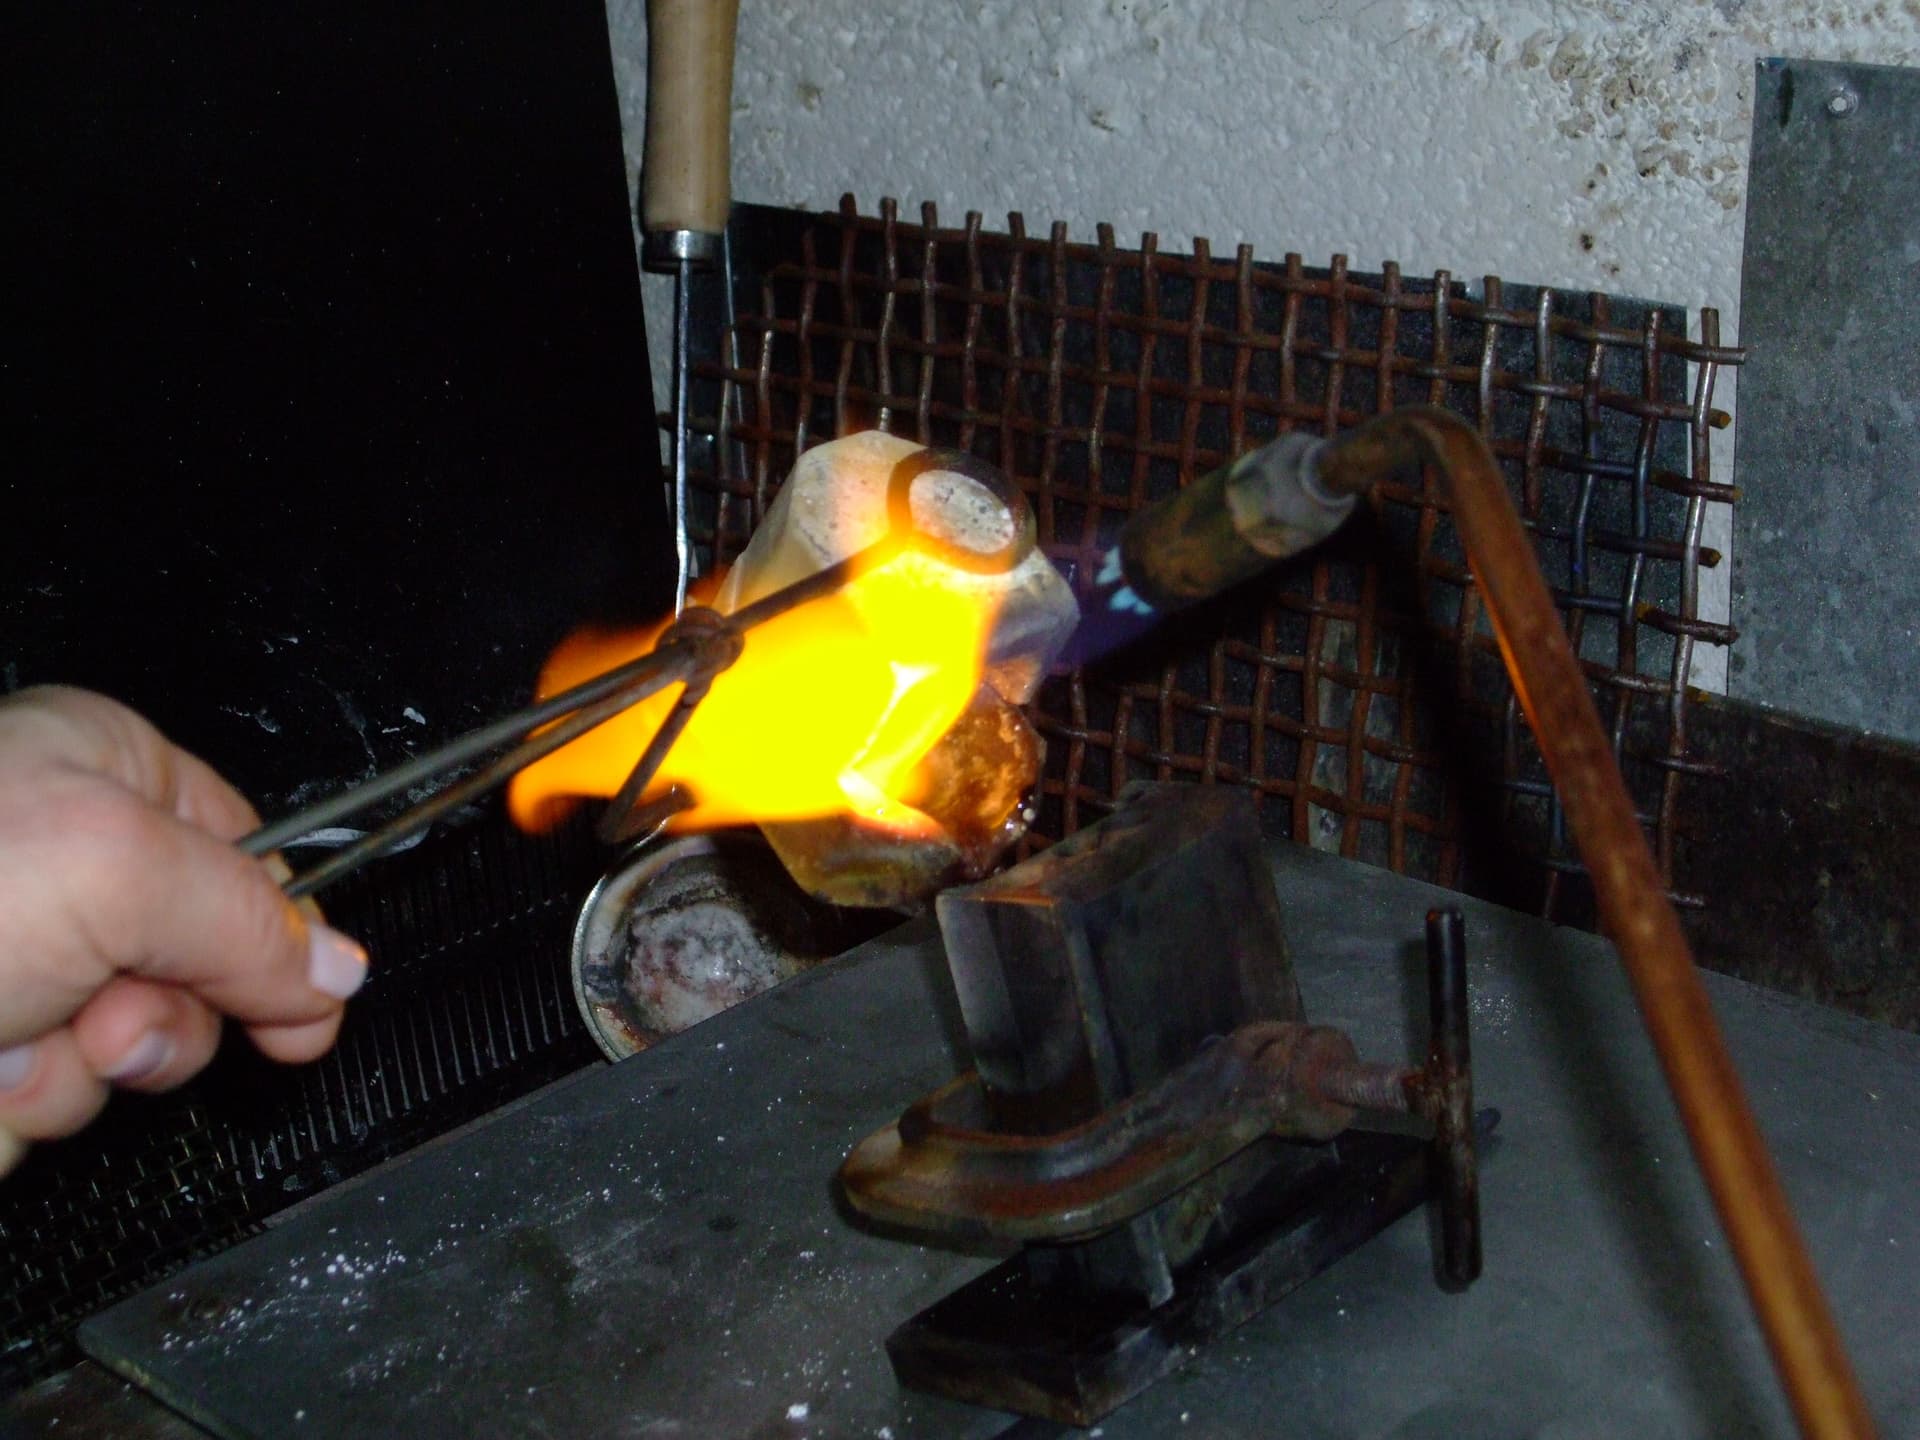
I keep the mould very hot but not visibly hot as in glowing very dull red…smoking hot if using oil, paraffin or vaseline… it’s the fine dust carbon residue that does it. the metal is superheated… runny liquid a couple of hundred degrees or a little more above melting point… it make for an easy quick pour and will fill the mould without internal bubbles or other defects. I have to use two torches… one for the mold and another for the metal… once the desired temperatures are achieved you have to work fast to avoid excessive cooling.
So here is some info on pouring ingots and making sheet and wire that is from an article that I wrote for the MJSA Journal a few years ago.
Why should we all master the art of making sheet, wire and rod by hand when we can buy it already made from suppliers?
I always insist that my new students learn to do this. I believe that one of the greatest hurdles for newbies is fear. Fear of ruining something by melting it. The fastest way to get over this is to just jump in and just start melting stuff. Also in the process of making metal stock students learn the most about the working properties of metals and learn an intimate feel for the metals that you can only get from melting and forming it from scratch.
When my sweetie Timothy Green and I were apprentices in the trade one of our first jobs was to pour ingots and make wire, sizing stock, tubing, and sheet from scrap and casting grain in silver, gold and platinum. All three metals and their various alloys feel and work differently.
Here’s a basic primer on doing this.
There are various types ingot molds you can use. Open metal molds, closed and clamped metal molds are the most common. One can also use a charcoal block with a trough carved into it or also make a delft clay mold. The last two are useful if you want to make a specific size or shape to pour and they don’t need to be pre heated. We usually use a closed and clamped mold for gold and silver. For platinum we just melt it on a platinum block.
I always coat my metal mold with oil and heat it up before poring. Much like seasoning a cast iron frying pan. Pouring into a cold or damp mold is dangerous and can lead to metal exploding out from it as well as cold and partial pours. Under a good exhaust fan I heat my mold until all of the oil is burned off and no longer smoking. This takes longer than you’d think so I always go to the bathroom before I do it:-). I like to slightly tip my mold toward the side that I will be pouring from so that it makes it easier to hit the opening at the top. You should be able to feel the heat radiating off of the mold with your hand by holding it a few inches away.
When satisfied that the mold is hot enough, I start to melt my metal. With the exception of platinum I always use borax on my metal as I am melting it. When melting alloyed metals such as sterling and different karats of gold it is very important to not burn the metal. If you see sparks on the metal you’ve got it too hot and are likely burning out the alloys. I like to use my casting torch with a rosebud tip and not too hot of a flame. Too much oxygen=oxidation. You don’t want that. Never ever wear open toed shoes or flip flops when doing this. I like to see my metal melted to the point that when I gently shake the crucible the metal is not just a thick honey like blob but more splashy like water. While holding the pouring lip of the crucible next to the opening at the top of the mold I keep the flame on the metal and then do a very quick pour. Do not hesitate during the pour or you’ll have two shorter ingots instead of one. If you screw up and miss the mold or have a bad pour, no problem. Relax. Just melt it all down and do it again. Nobody gets stuff perfect the first time. After 6-10 tries you’ll be an expert.
Once you’ve mastered pouring an ingot it’s time to pickle and clean the ingot to get any traces of flux off of it and remove any flanges with a file.
Next comes forging. This keeps the ingot from cracking at the edges while rolling. You’ll want to forge it with a slightly heavier hammer that has a very lightly domed face. I like to use a light weight sledge hammer with a polished face. Hammer all four sides of your sheet or rod. I fully hammer each surface at least 4 times. After forging anneal, pickle, clean and dry your ingot and you are ready to roll it out.
While rolling I like to reduce my rolls in 1/10 mm increments. The smaller the bites you take out the less it will want to distort and curl. When rolling bar stock I turn the bar 45 degrees after each roll. With plate stock I like to flip it over after each roll. When rolling plate stock roll in one direction. If you feel you need to cross roll you must anneal the metal before you do this.
Thanks for this detailed explanation, Rob, and thanks for your article, too, Jo…I haven’t done any melting yet…I got one of those electric melting furnaces so I wouldn’t have to juggle a crucible, a torch and flux and fool with the mold at the same time. The crucible in the melting furnace has a small narrow opening and is, as I’m sure you both know, made of graphite, which produces a reducing environment. What I’m wondering is whether I need to play a torch flame over the crucible while pouring or if the small opening and graphite crucible produce enough reduction that I don’t have to worry about the slight exposure to air as I pour.
Rob, I hadn’t thought of using the small butane torch sitting near the ingot mold to keep it heated! That’s a great idea. I suppose that right at the moment of pouring I could pick that up and play the flame over the crucible…what do you think? -royjohn
royjohn…Keeping everything hot is the name of the game. The crucible, if hot enough and big enough (think mass) should retain enough heat to allow you to pour if you do it quickly. You can always do it over if the pour starts to solidify before you get it in the mold. When this happens it looks like you are trying to pour mud. I don’t see any problem with playing a flame on the pour stream, but that is a lot to have going on and it may slow you down. Tipping the mold a bit is a lot of help. It gives you a more direct target and I think it allows air to be displaced more easily. Practice your moves first. The best thing is to just do it and then figure out what to change based on the results. Good luck…Rob