This one is for our friend Debbie. (You don’t have to avoid the more
traditional ways of making jewelry because of a lack of equipment.)
I long avoided getting into centrifugal casting or vacuuming casting
because I assumed it was incredibly energy consumptive. Like almost
every day in life, at least according to my redheaded wife who
reliably points out my flaws, my assumptions are wrong just about
100% of the time. I also hated the idea of paying 600 to 1000 dollars
for a small kiln when basically all a kiln can be is about 5 to 10
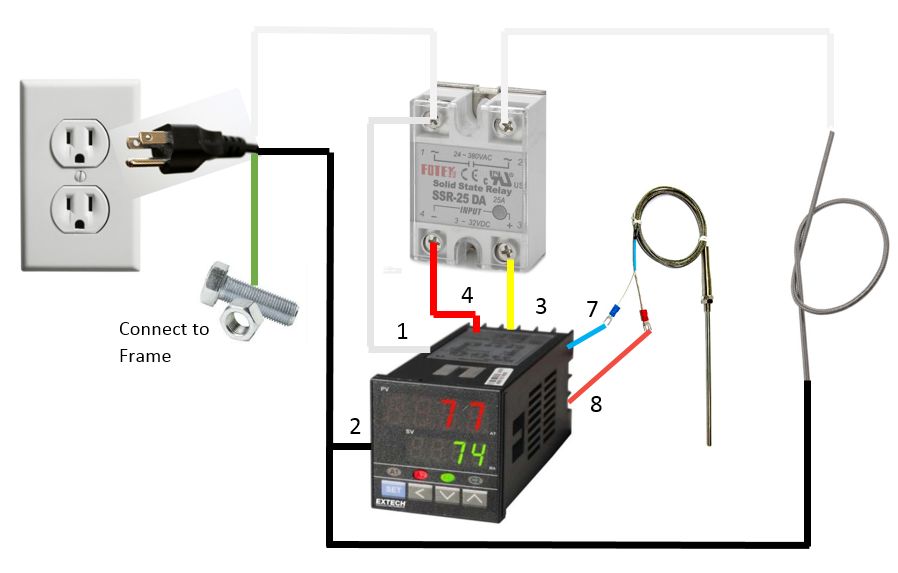
dollars worth of element (wire with resistance), a P.I.D.
temperature controller (can be bought for about 25 to 40 dollars),
and a relay of some kind (a solid state relay is about 7 to 12
dollars. You would also need to build a frame and buy insulation, but
this can still be inexpensive.
I avoided vacuum and centrifugal casting because I pictured a 240
volt mammoth of a kiln sucking 20 amps of current for 5 hours while
the trolls of Florida and Power and Light danced around their
triumphant fires, mocking me.
Then I found out an engineering student posted an instructable.com
project that proves that you only need 700 watts (about 6 amps of
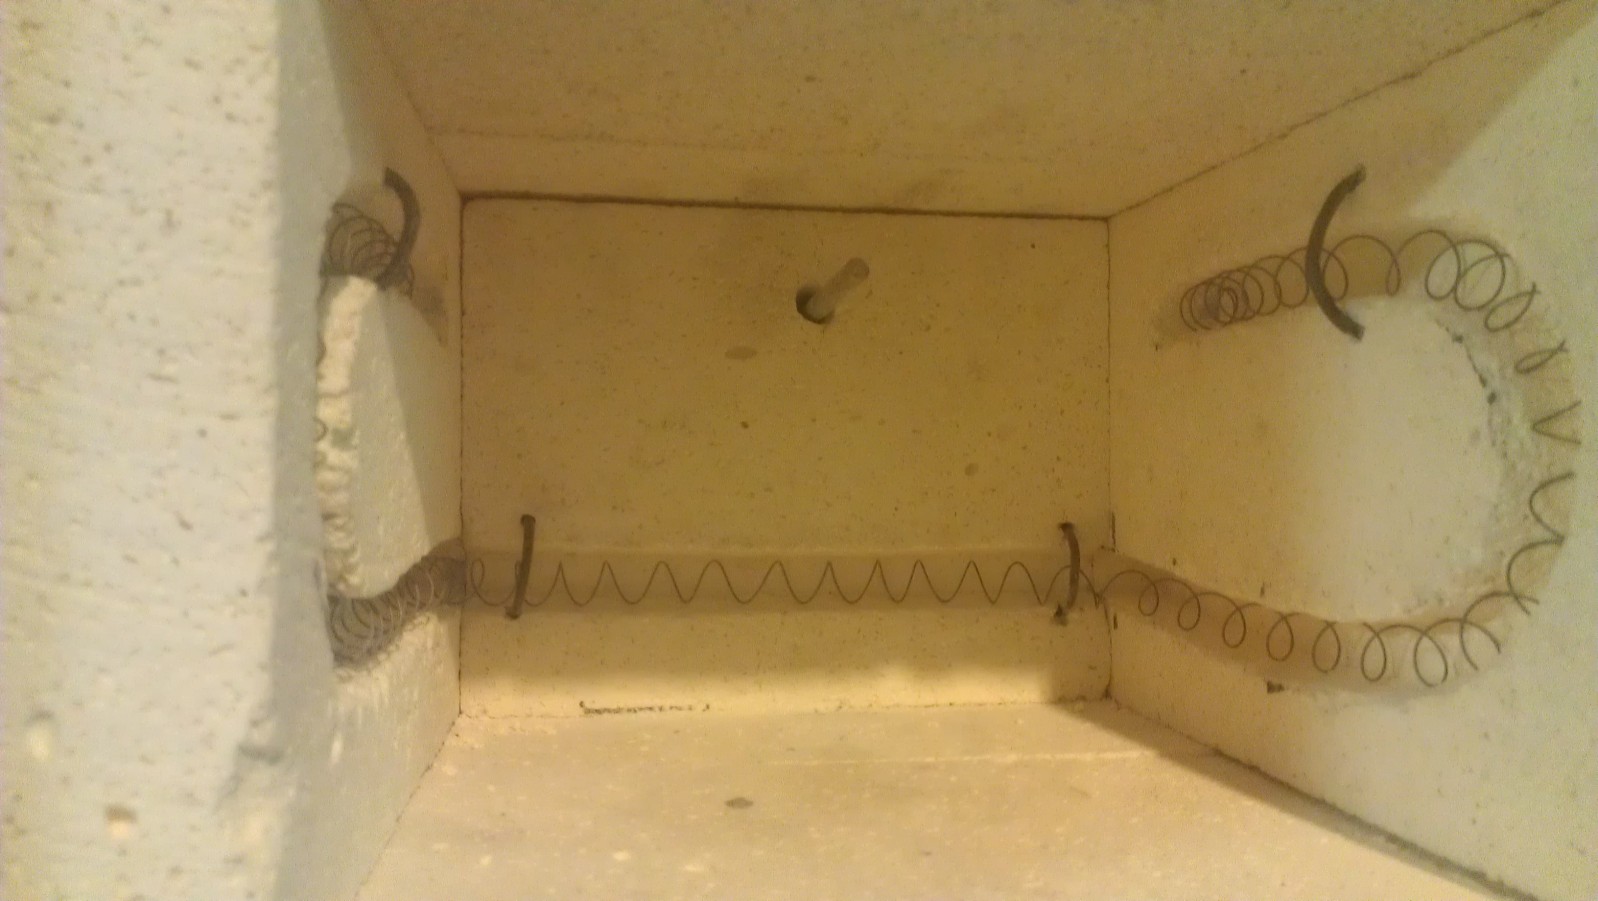
current) running through about 20 ohms of resistance in Kanthal wire
to make a small kiln made of only six 9 inch long insulated fire
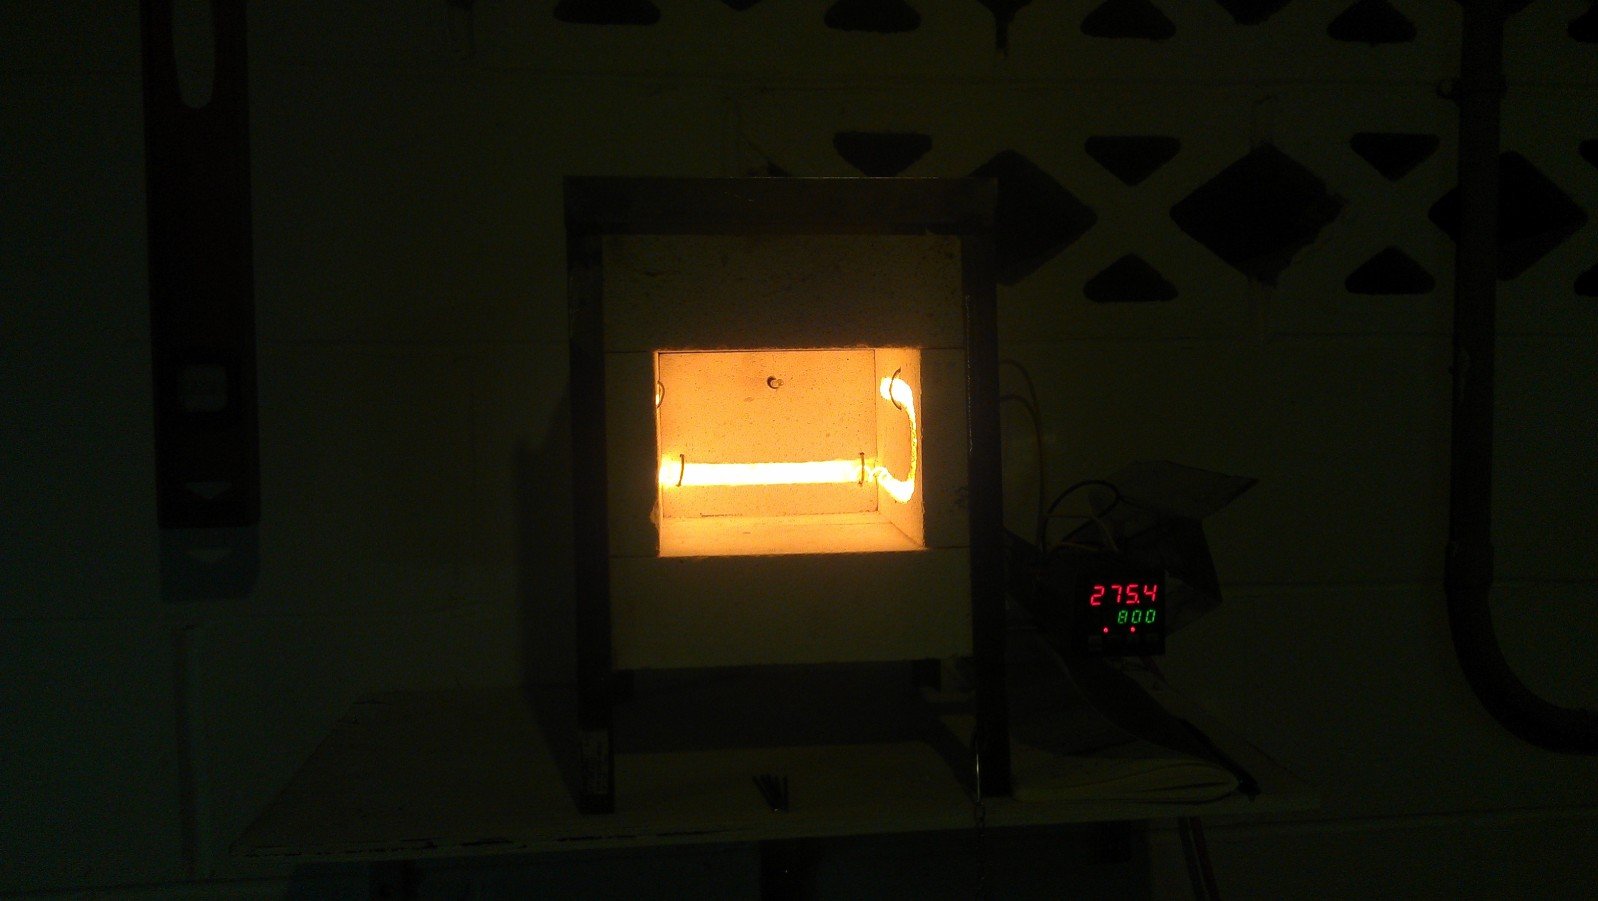
bricks. A small burnout oven made of only 6 firebricks easily gets up
to about 1400 degrees with this set up.
In short, I used the same idea, but wound my Kanthal A-1 wire to
about 16.5 ohms which pulls 7.27 amps. This about 872.4 watts which
is more than enough for a very small well insulated kiln. You could
always go with higher wattage since the P.I.D. temperature controller
will turn the heat off when you are reaching the temperature you
program.
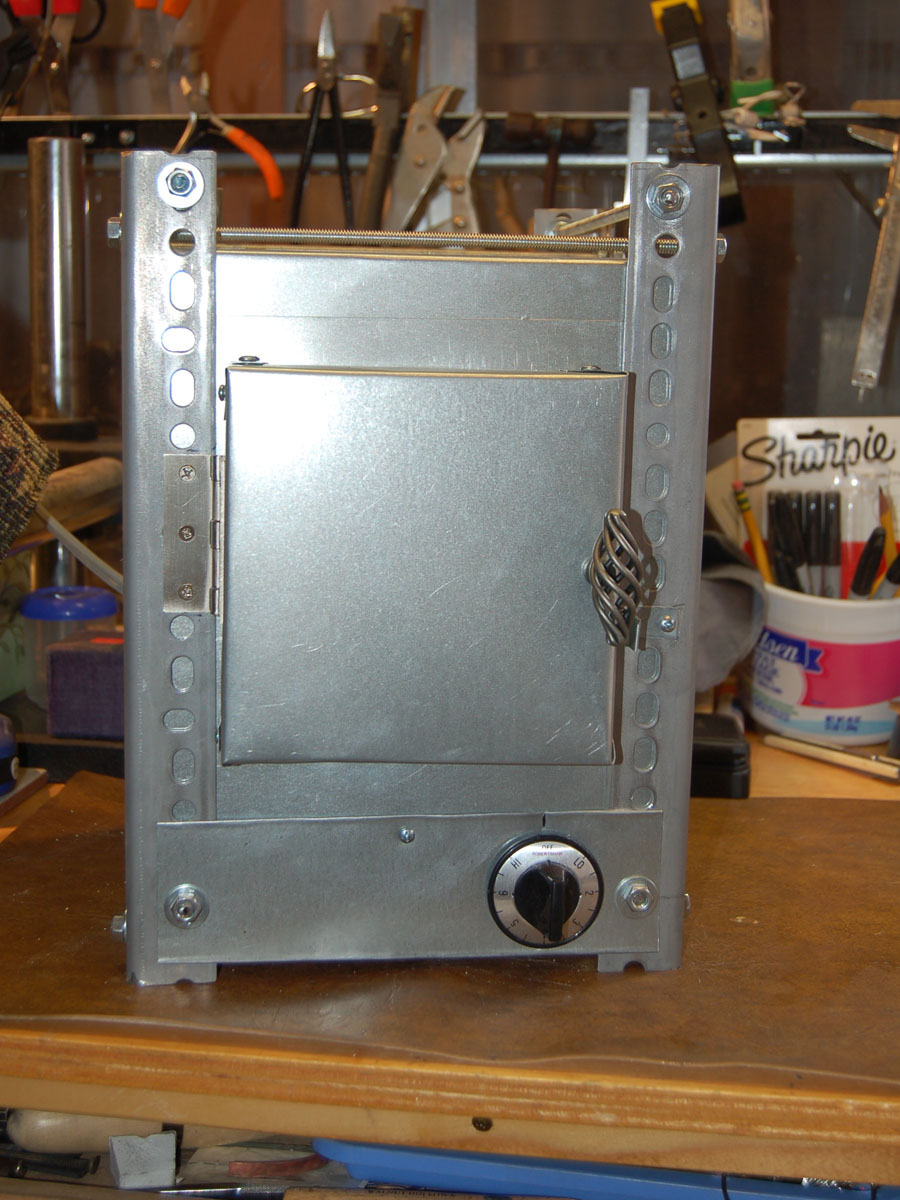
I probably spent only 100 dollars building this burnout oven and
have extra Kanthal wire to wind up another 5 element replacements
when it needs replacing. I think the only downside of this DIY
burnout oven is that since it’s made of soft fire bricks, even with
my welded up frame housing the bricks, the door that is made of these
bricks will begin to wear down and wear out. But these bricks only
cost 4 dollars. Stay safe if you build this and make sure you
understand basic wiring and how electricity works. Make sure you use
high temperature hookup wire for connecting your elements to the rest
of your wiring. Also use heat sinks and if you have one, and a laser
temperature reader to check how hot things/walls/etc, are getting
when your kiln is on.
Here is the instructables project for more
Credit goes to the original 2 people who created the instructables
projects. I will be happy to answer questions if anyone is
interested.
Of course, build at your own risk and never leave one unattended
while plugged in.
If you purchase a P.I.D., make sure you get one that works for a
Solid State Relay. I recommend Auber P. I. D.'s. And for the solid
state relay, I recommend Fotek.
Read about P.I.D’s and solid state relay projects for a few weeks
before you start your build, it will make your project easy.


Knowledge will set you free.
Have fun,
Rick