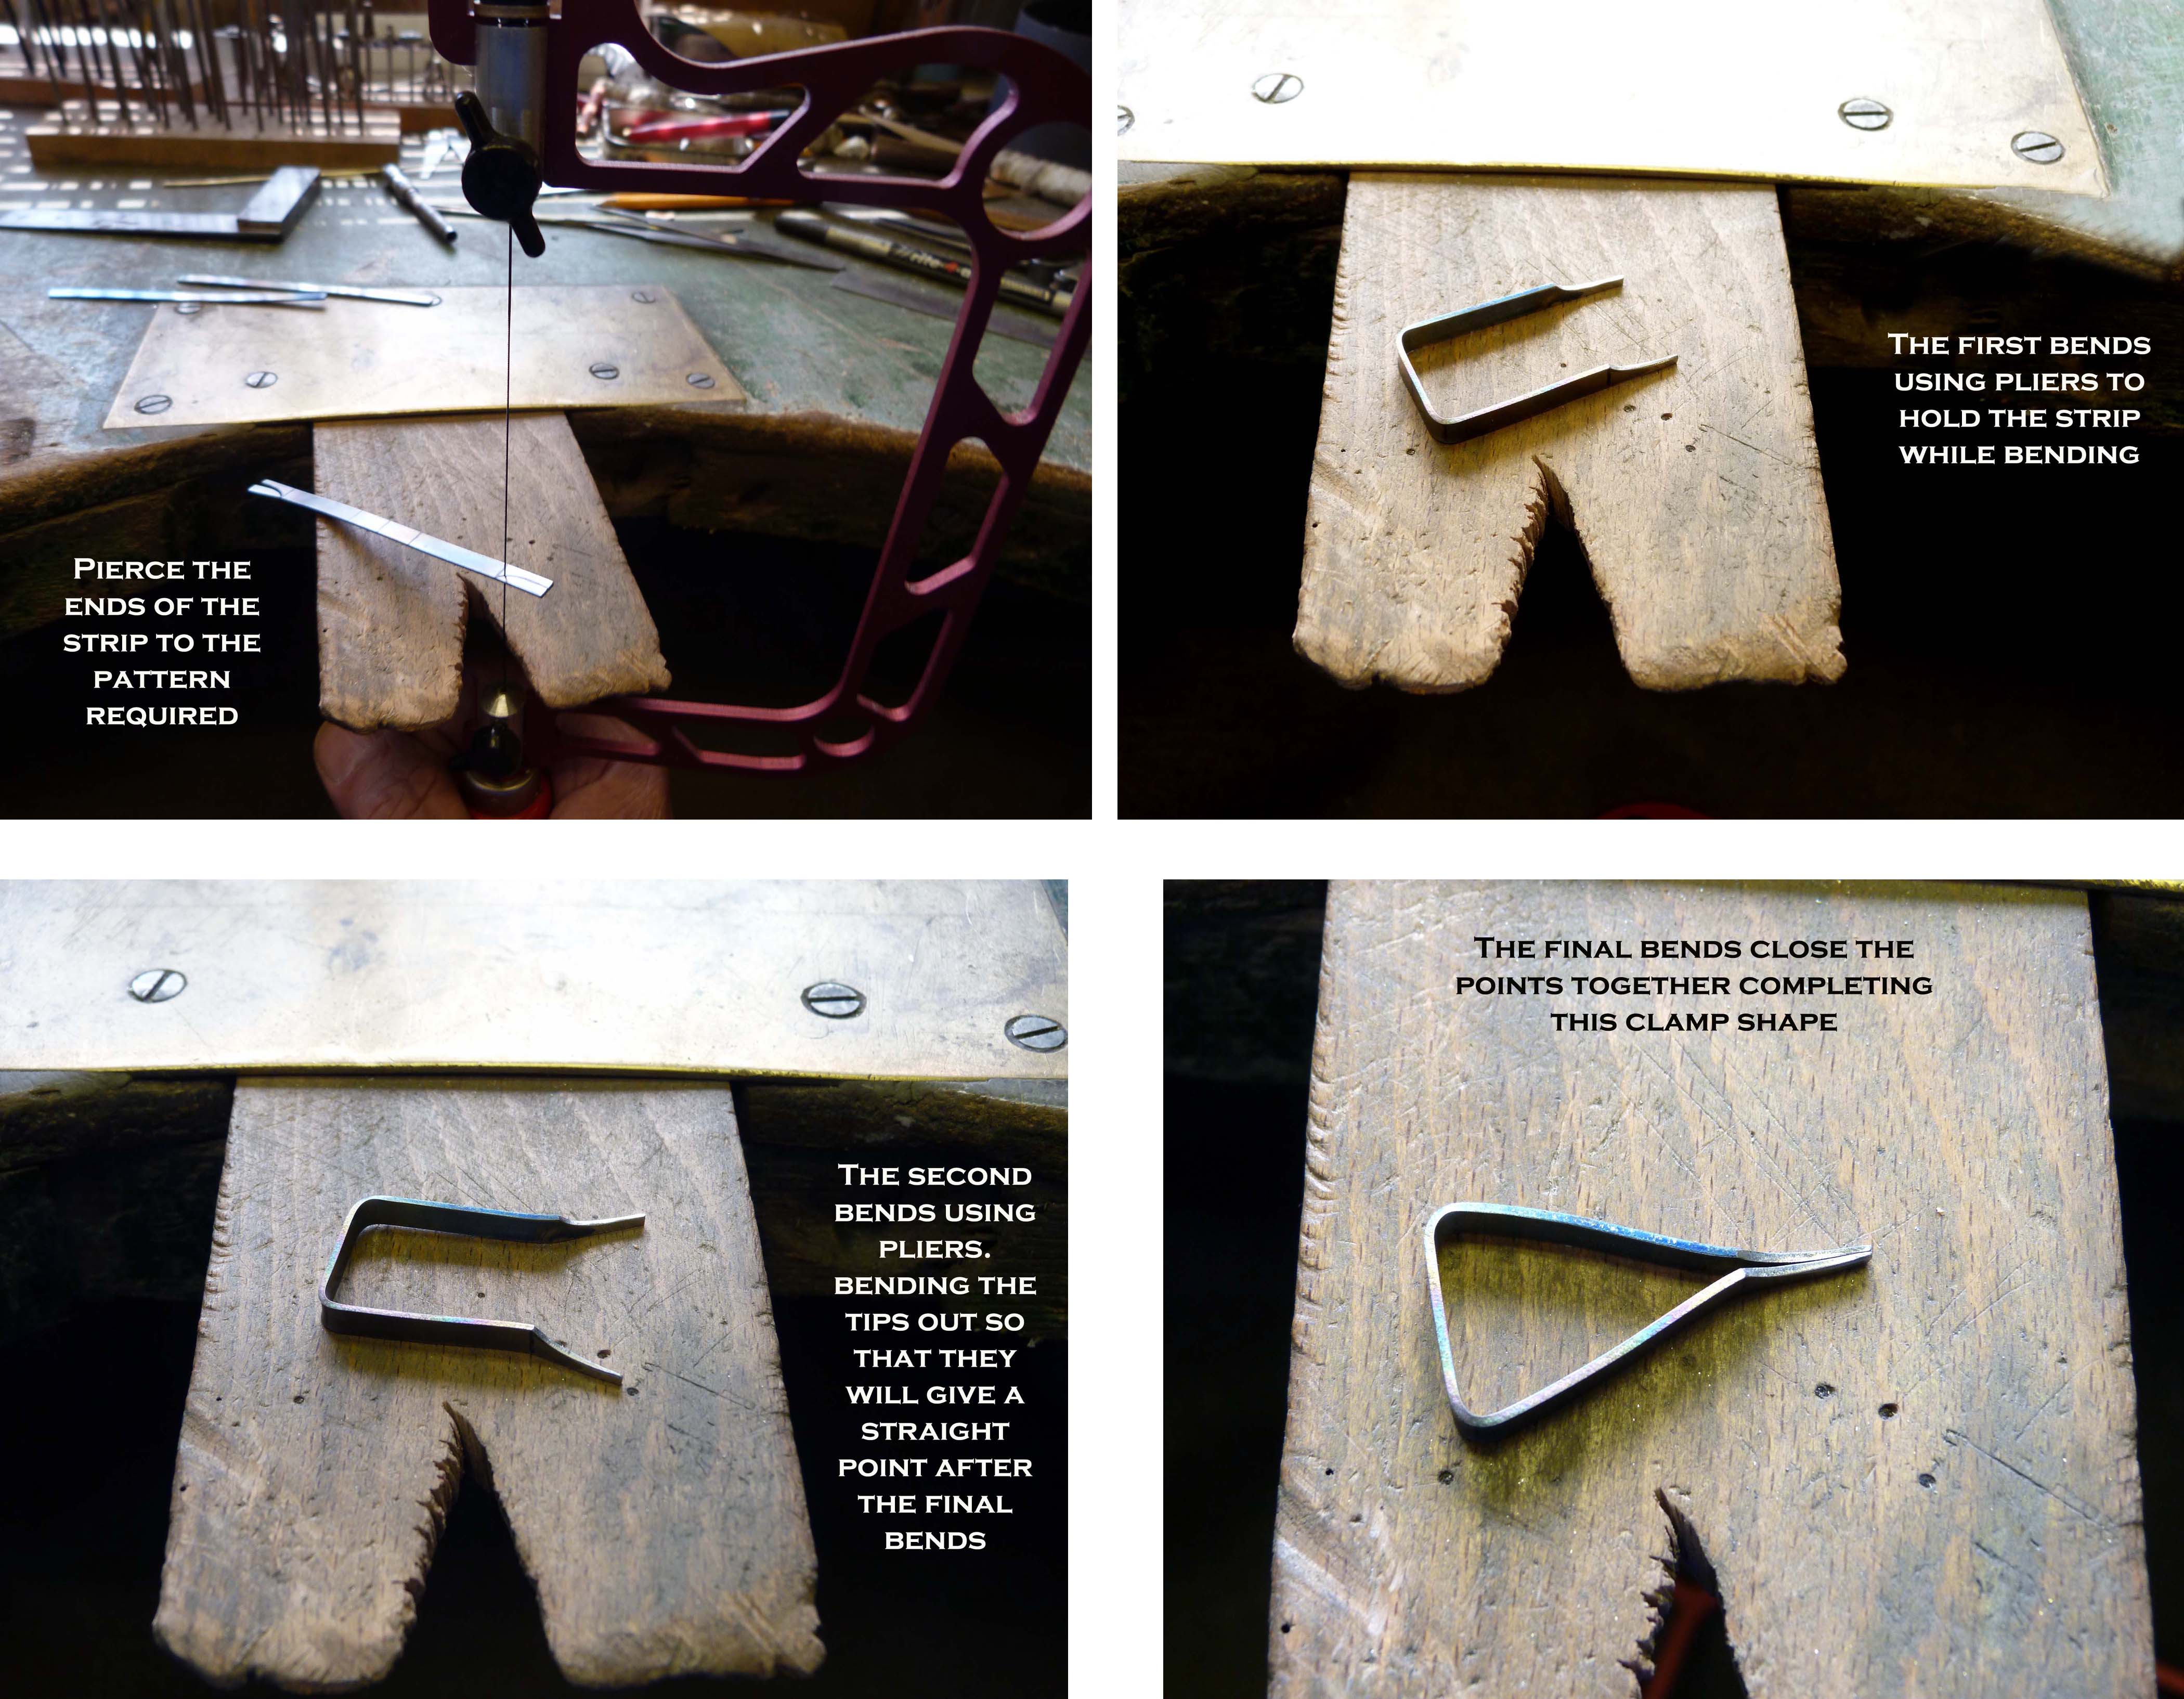
I’m making copper rivets out of die-punched circles and 14 ga wire. I’ve been using a third hand, setting each rivet up with wire in the third hand, head on the solder block, flux, heat, add a ball of solder and heat until it flows. Then start on the next rivet. Hoping for a more streamlined way to do it, I’m experimenting with laying out several heads, melting solder on them, then using tweezers to hold the wire in place & heat until solder flows again.
After only about 10 tries, it’s kind of hit or miss whether the solder, stem, head, and heat meet in the right place. Hoping someone here can help shortcut my learning curve. Should I melt the solder on the wire or the head before joining them? I’m using Battern’s flux with denatured alcohol, firing it & letting it rise & subside before adding the solder to the head. Anybody have any better ideas, aside from buying a half dozen additional third-hands?
Note From Ganoksin Staff:
Looking for a third hand tool for your jewelry projects? We recommend:
I’m confused about why you’re soldering rivets. Are they merely decorative rivet heads rather than functional rivets? Or are you creating rivets by soldering wires into the washers?
Rivets ought to be made by upsetting the wire and shaping the head with a rivet set.
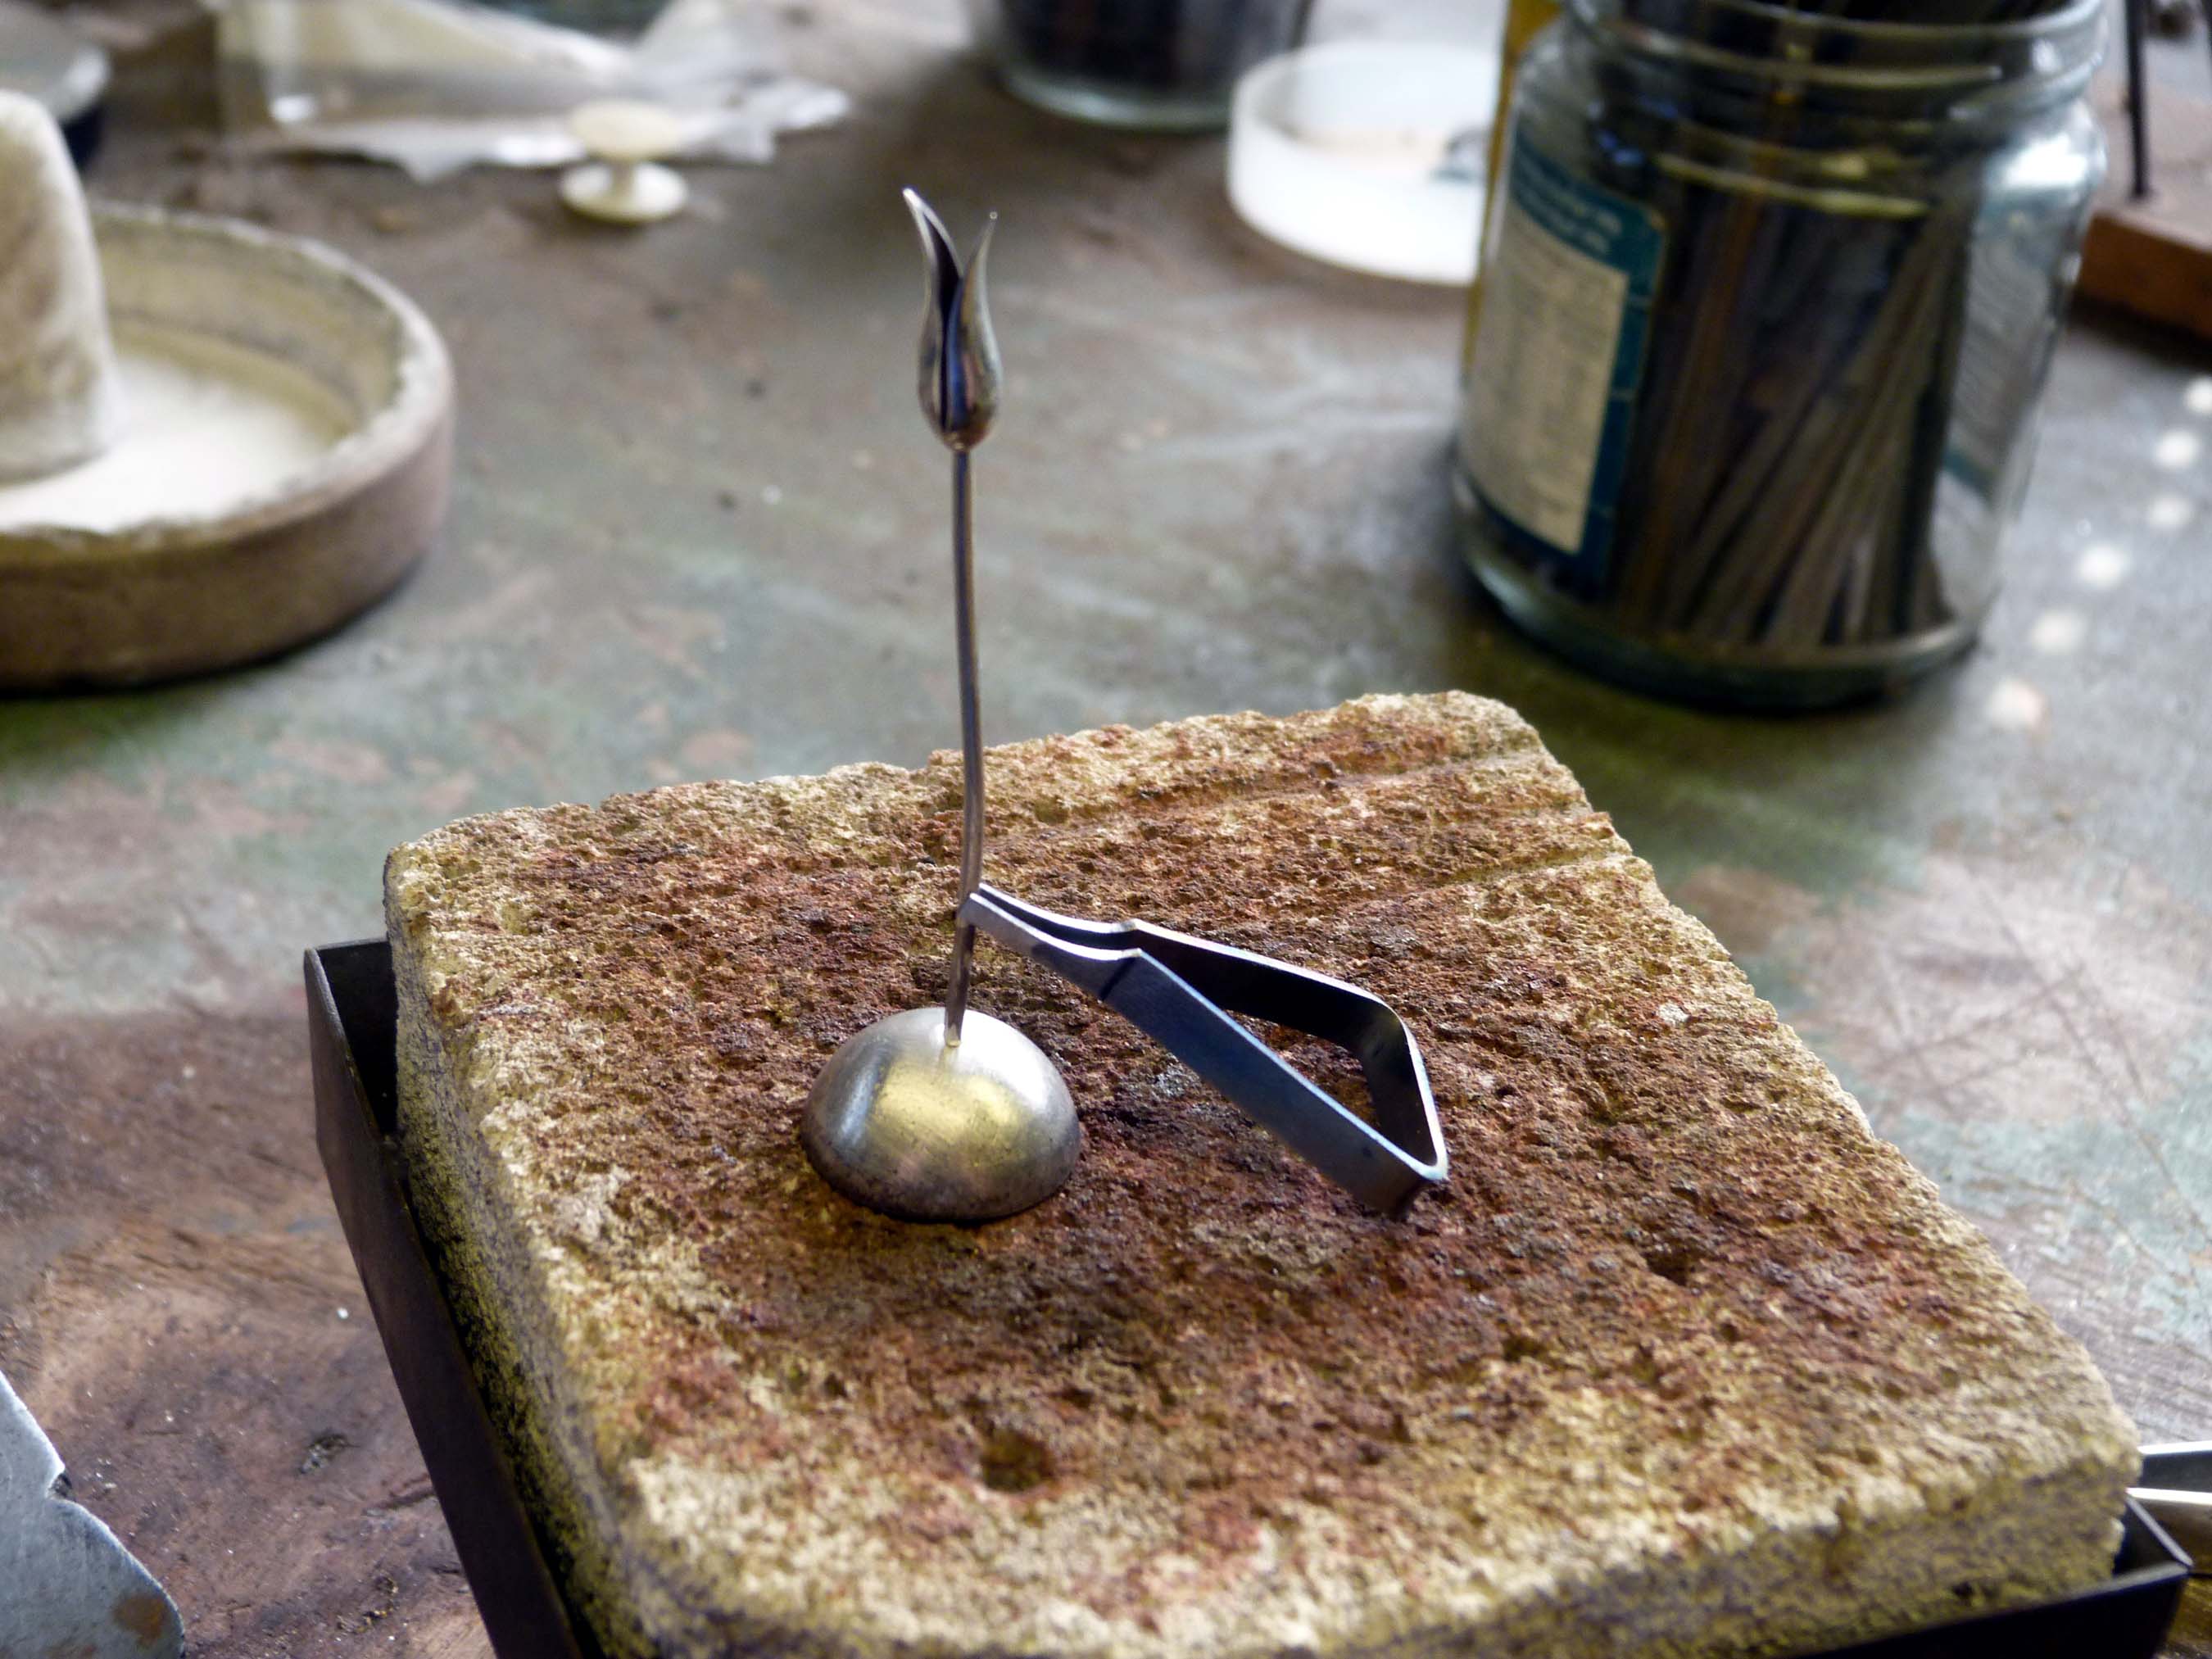
Titanium soldering clamps are an awesome idea. I have some titanium wire I got for a similar purpose. Will try this tonight. It’s just what I was looking for! Thanks!
Elliot, assuming the bracelet in the photo is to be worn like a bangle, and assuming the rivet is what holds this bangle bracelet together, will you elaborate on why forming the head from the rivet itself is better than soldering the head on the rivet?
But on second thought, rivet failure hardly matters if that’s vitreous enamel, because it would be a delicate wear item anyway. If the plan for enamel damage repair is to reflow the enamel, then the rivet would have to be removed. Is there a trick to riveting an enameled item?
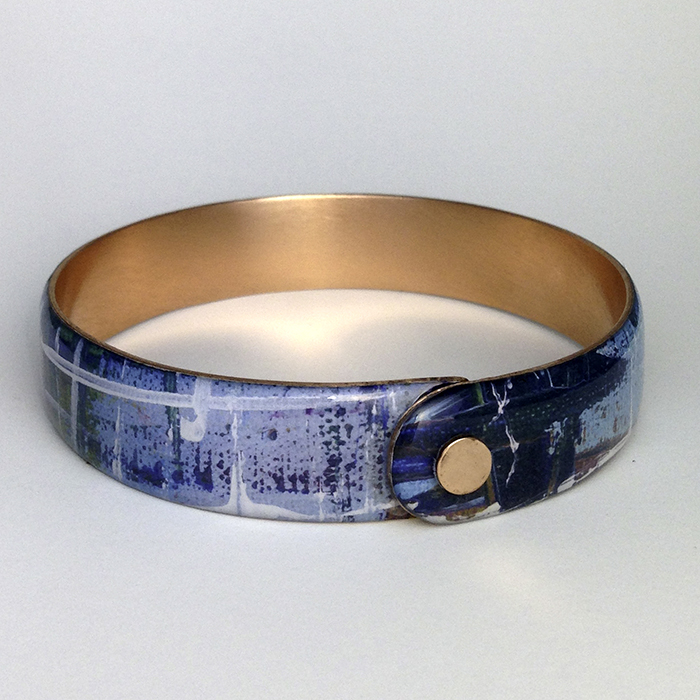
It’s not vitreous enamel. It’s resin. It may scuff but it won’t chip. These are modestly priced, which is why I need to squeeze steps, time, and effort out of the process. So far, rivet failure hasn’t been an issue. Setting the rivet too tight causes the resin to split but if I can remember to quit hammering when the job is done, they turn out beautifully.
I tried the titanium clip idea and found it still too finicky. I’ve settled on a half dozen pair of cross locking tweezers. $2/pair from Widget Supply. Setting great results. Thanks, everyone!
Hi there
This seems to me a very similar procedure to attaching posts to stud earrings, which I do a lot of. My studs are also modestly priced so I tend to make them in batches. I line up the fronts face down on the soldering block, flux them all and then heat to boil up the flux before adding a solder paillon to each one. This avoids the solder jumping off. I have a pile of earring posts and use a pair of tweezers with a piece of binding wire around them a few times about a centimetre or so from the end that slips up and down to secure the post in the jaws of the tweezers. (I guess you could also use locking tweezers but I don’t really like them). Once set up like this I just keep adding a new post to the tweezers and move on up the row. Hope this helps.
By the way I really like your resin bracelet!
Brilliant! DIY locking tweezers using binding wire. You’re right – my situation is like soldering on gigantic earring posts. And thanks for the vote of confidence for my bracelets.
Rivets can be made in any number ways. More accurately, rivet HEADS can be made in a variety of ways. I often pre-make one side of the rivet, most often the decorative side. Could be a ball, a half ball, a shape, a disc or a tube set stone.
This is what I believe the OP was speaking about. Rivets may most often be made by upsetting both sides, but there’s absolutely room for riffing on the basic principles and process of using rivets.
If speed for production is what you’re after I have a slick trick. Get the soft siderite board. Make a channel that is depth of where you want to solder the disc onto the post. Then space out by an inch or inch and a half shallow wells to just hold the posts. The post lines need only be enough to keep them in place and not rolling. I use the copper solder from Rio Grande. It won’t look like the copper but if its on the back, who cares, it won’t be seen. Place a small clip of the round wire solder at the point to be soldered. Then when you have a bunch all set up to do the soldering, work with your torch in one hand and a solder pick in the other. The pick you use to push the post into the disc as the solder melts. Practice. Before long you will be doing mass quantities.
I came up with a similar type method when I solder copper jump rings on my hand forged and forged copper Christmas ornaments. I can do almost a hundred jump rings to ornaments in an afternoon.
If you have more copper working questions, just ask. I learned speed, and broke all the rules to come up with ways to do production.
A brazed joint is a point of failure in a rivet. A head upset from the same stock is much stronger. Though in this application it’s unlikely that there will be enough force to pop the solder joint.
That said, given the design and the materials you should consider using compression rivets, also called speedy or rapid rivets. They come in two parts and are set with a set of swages either in a press or with a mallet. You can get them in brass in a variety of lengths. Here’s a link to one manufacturer’s website.
Not suspect, just not as strong as a rivet made from a single piece of metal. There’s a reason that the rivets that hold the plates of bridges and skyscrapers together are swaged from a single billet.
But for this bracelet a brazed head is certainly strong enough as there are minimal stresses applied while wearing it.
But I think using compression rivets would be quicker for this application and certainly strong enough. If Mr. Holman wants to continue using solid rivets it would save him the most time to buy solid copper rivets in bulk. Here’s one supplier:
I don’t have anything to contribute on rivet making, but they’re beautiful bracelets. Have you ever thought of modifying them so that they have a (good quality) inexpensive quartz watch on them? I think they used to call it a wristlet, but it might expand your sales.
I have always used ‘nail head’ rivets, i.e., rivets made by 1. melting a ball on one end and, 2. lubricating the rivet wire and inserting it in a drawplate hole (using an old one, because the process can distort the hole), and 3. planishing the ball down to resemble the disc shape you are using. Copper is a helluva heat sink, making it a little harder to solder than silver, using silver solder or the copper colored soldered from Rio. So melting one end of the rivet wire makes, not only a slightly stronger rivet head, but a much more efficient process. Since you are not making a decorative rivet head, it seems logical to try an integral rivet head rather than trying to solder it on. Also, depending on what your price point is for these bracelets, your time must be calculated in. . . what’s your time worth? If these are truly low-end bracelets, I like the idea of the compression rivets Elliot Nesterman mentioned. Quick and clean process.
McMaster -Carr also carries them: McMaster-Carr
Hmm, I’m not sure what you’re explaining regarding the tweezers and binding wire and was wondering if you had a photo showing this? It’s not you, it’s me. I guess I literally have to have that picture to see what you mean. Thanks, if you can. But if not, maybe the light bulb will come on for me . Thanks.
@bobbiebenton71
Wrap wire around the handle of the tweezers where they are wide, and tighten the wire in order to hold something securely in the tweezers without having to hold the tweezers together with your fingers.
Then you can slide the wire to where the tweezers are more narrow in order to release whatever the tweezers are holding. Thus, you have created locking tweezers.