Jo Haemer said " I’m hard wired for Alzheimer’s
and Dementia. It usually begins when we turn 80 in our family. So I only
have 15 years left to share what I know."
Indeed, I am on the same trajectory and completely coincidentally I was busy compiling a record of some work that I have done for the same reason.
There are many occasions when I look at work that I have done and I can’t actually remember every step.
So many years ago, I became a compulsive photographer of my work – and I find the photo’s sort of form a memory hard drive.
This is a 30 picture post.
Firstly, the design is not mine, but used with permission from Gary Drostle.
He is an amazing artist and you can check out his work at http://www.drostle.com
My version used somewhat different techniques and materials.

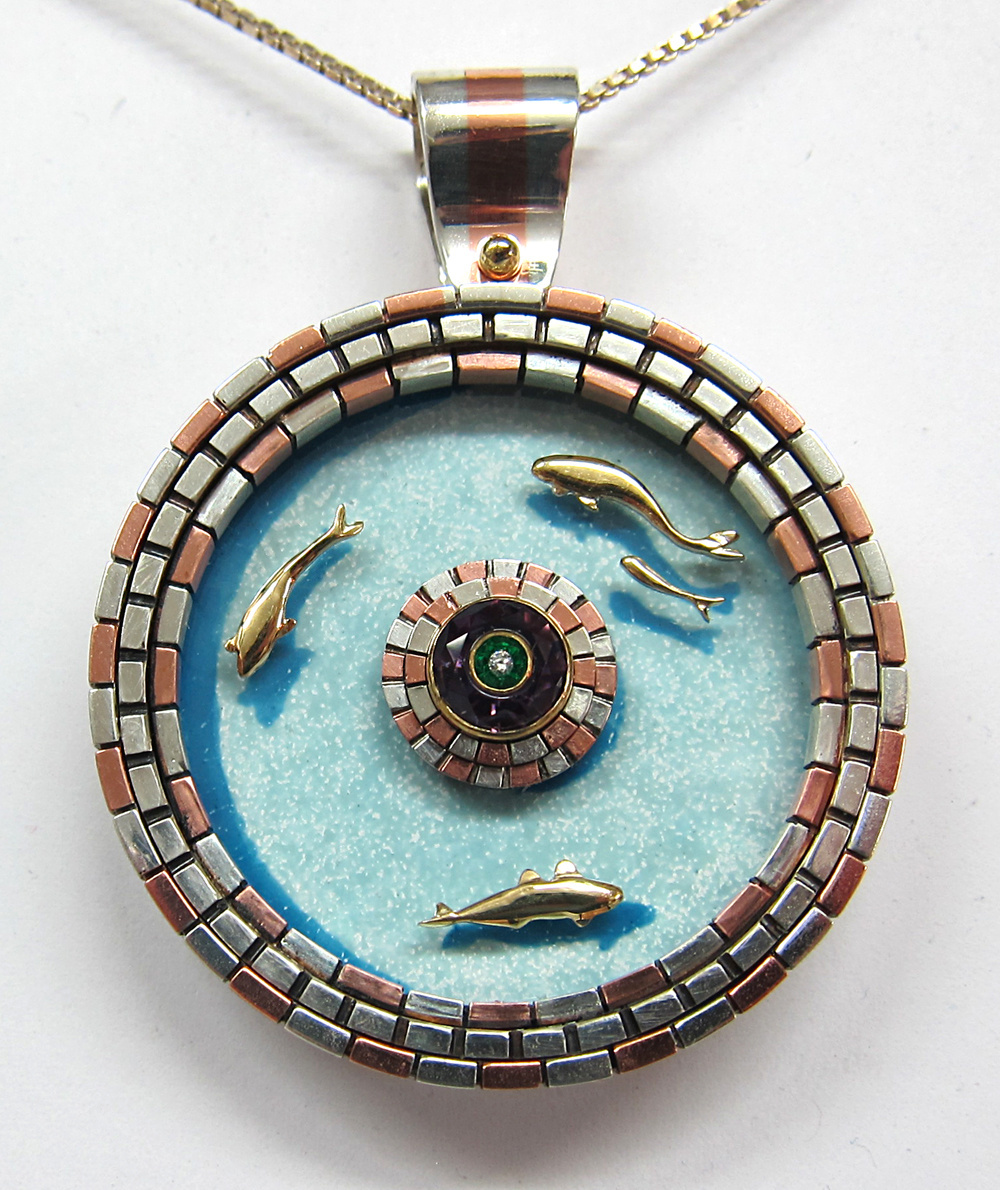
First, a post of the finished product.
It is 41 mm (1.6 inches) in diameter.
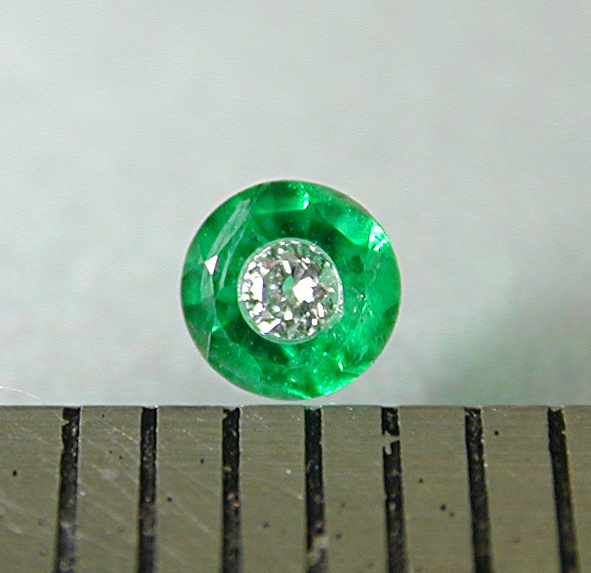
The center stone was part of a experimental gem set technique that I was messing with.
First I drilled out a 3 mm Sandawana emerald just so that a one pointer diamond would fit in.
Then I laminated it into the emeralds using Hxytal resin.
I used a needle under a microscope so that the resin just wet around the diamonds girdle.
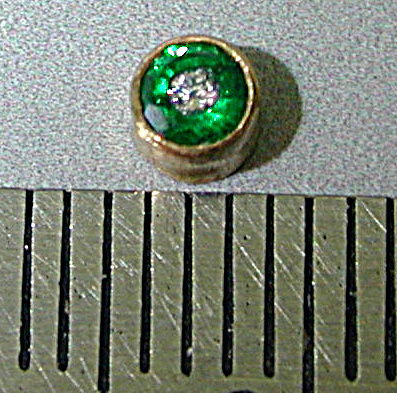
Then I set the emerald into an 18ct gold tube
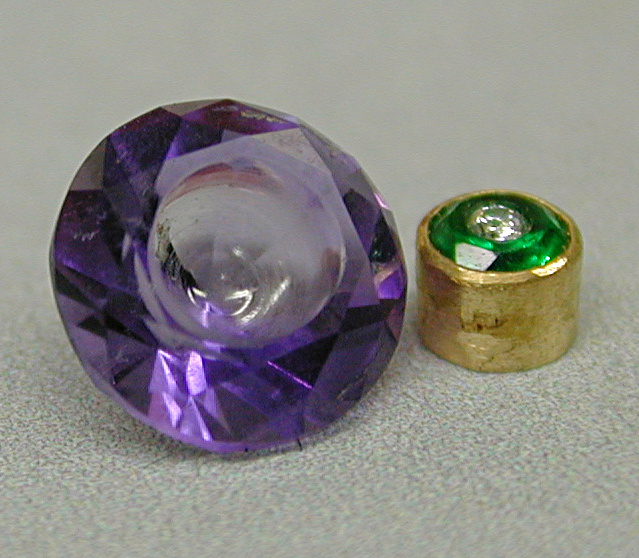
Then I cut an amethyst into a brilliant cut and drilled a cup shape where the gold tube fitted in.
I use a wooden dowel stick that is mounted on a hanging motor mandrel with 1200 grit then 50,000 grit diamond powder to polish the cup.
I drill and polish the cup before I finish the table of the stone so that there are no chips left from the diamond burr.
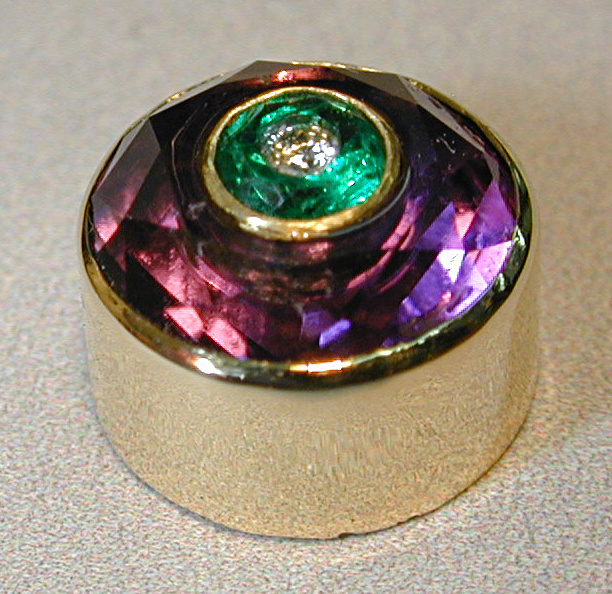
This tube was made to fit quite tight and then wet with resin and left for five days to harden.
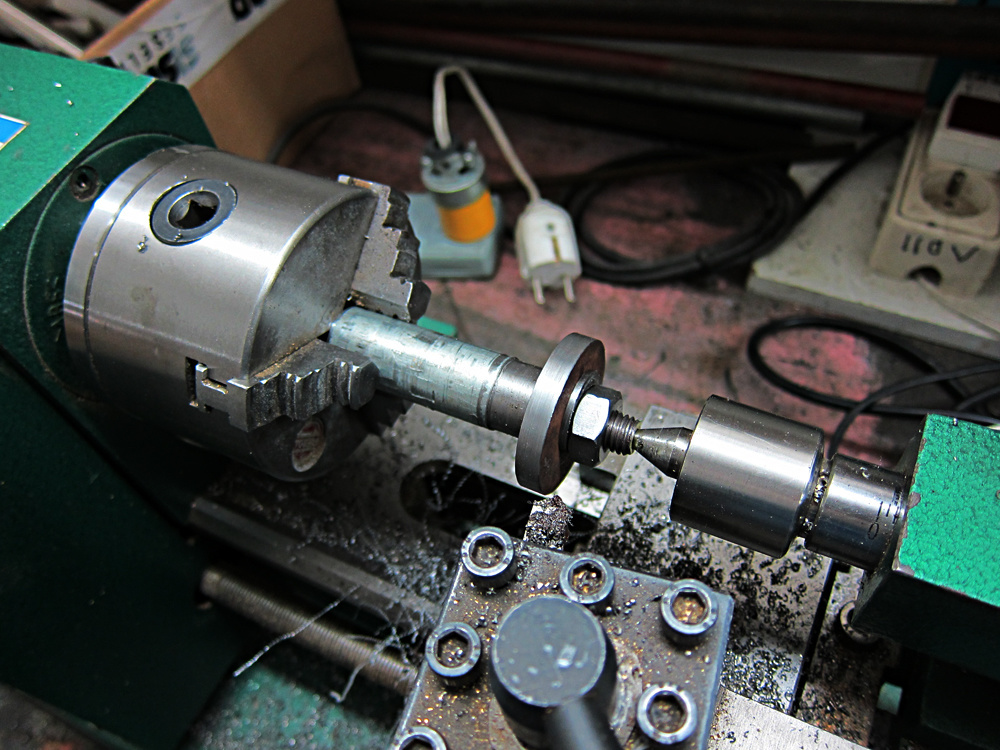
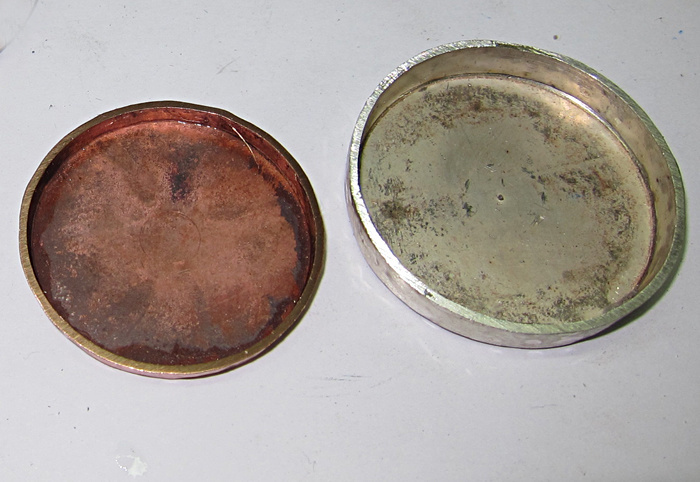
The first thing to do is to make a cup in silver for the’ pond’.
I dislike working with IT solder so I decide to form the cup using a blank I turn on my lathe.
So I turned a die blank on my lathe.

Actually, two.
Here is the 1.2 mm thick silver plate, the rough first blank and the rear part.

Then I fit it into my vice and start tapping and bending the silver over the iron front.
I tap it forward until about here and then anneal it.
Because the brass ring holds the back of the pond, it remains nice and flat.
And eventually it forms very nicely over the die.
Also, at the time I thought I was going to enamel the floor of the pond directly to the bottom, but that proved to be inefficient, because there is no guarantee that the enamel paint comes out good.
So the enamel and painting was shifted to a separate plate.

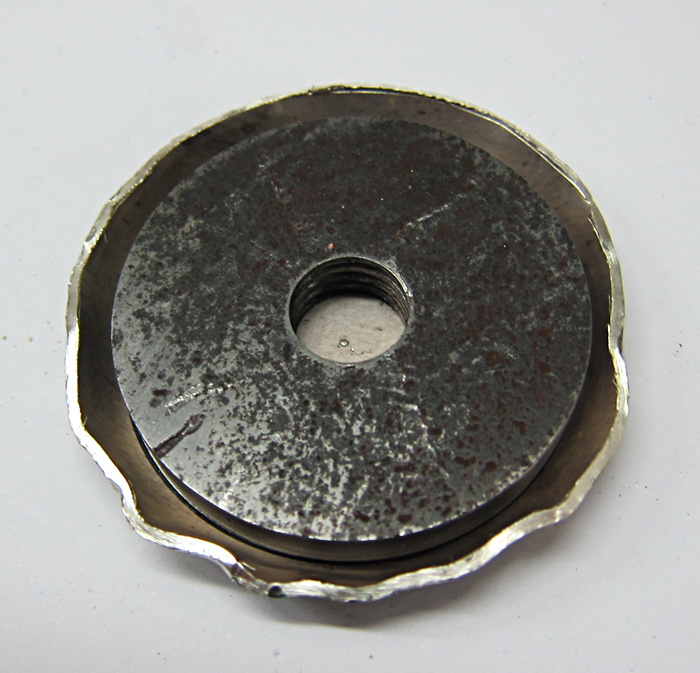
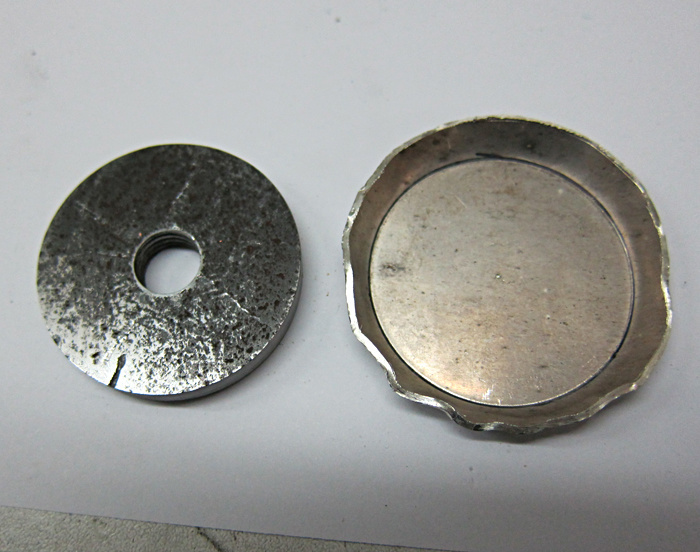
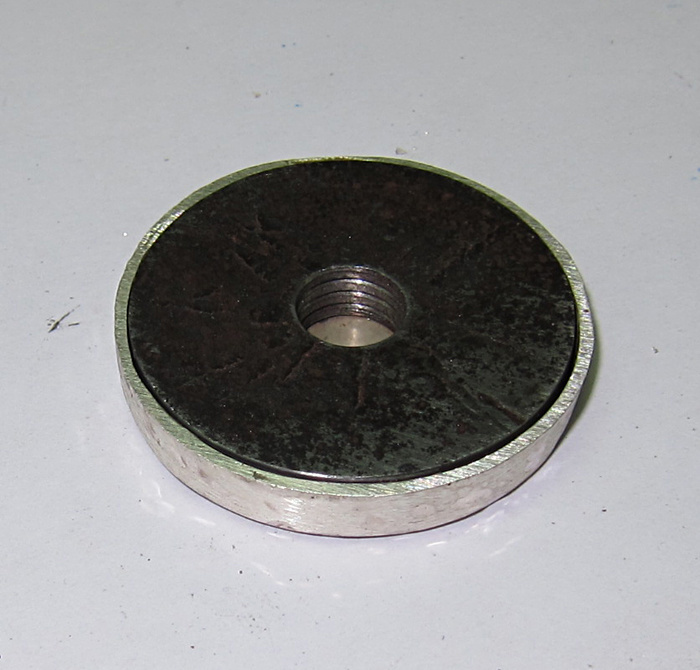
So I made another slightly smaller die and when the cup was formed over it, it would fit snugly into the first cup.
Like this.
This cup now was an easy way that I could make blank ‘canvasses’ for enameling the floor of the pond on.

All the copper and silver worked was done like this.
Firstly I solder this strips of various sizes together.
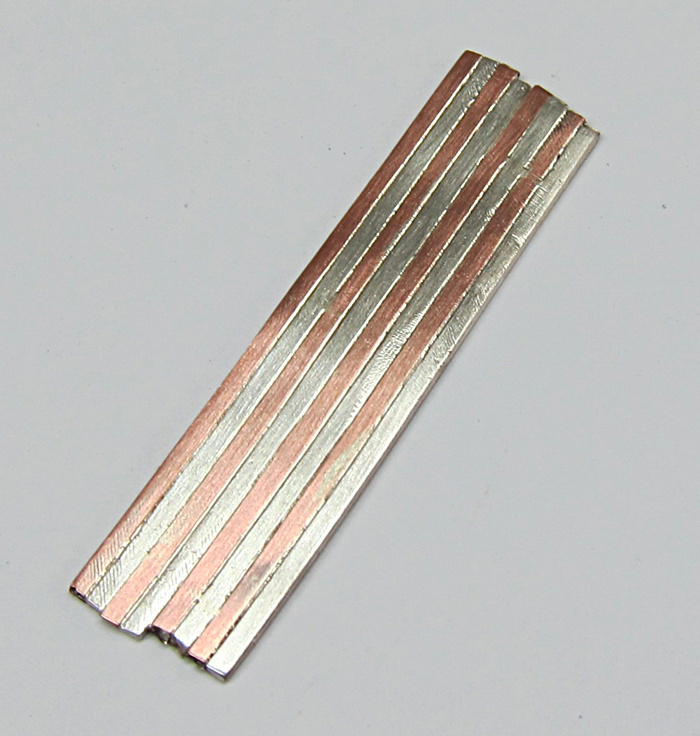
Then I roll the ‘plate’ a bit to flatten everything.
Then I cut the various strips and form them into the different circles that were needed.

For instance, the outside ‘paving’ was made so that is fitted nicely and then soldered.

Here is a view of the back.
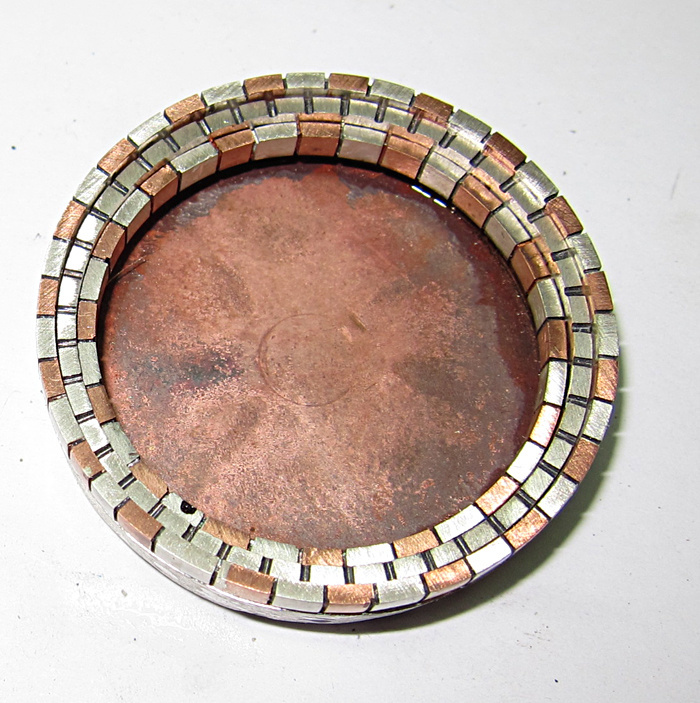
The next ring is just silver that I have made notches in and the blackened with Liver of Sulphur
The inner ring is filed thinner so as to create a step into the pond.
Then the glass goes in.
And the middle and inner ring lie on the glass that is fitted on top of the enamel painting.
Make perfect sense so far right?

I decided that laying glass on top of the enamel would give it a more 3D look and depth.
So I cut some glass the right shape and drilled a 10 mm hole in it.
If you ever need thin glass, a good source is a picture frame.
They generally use 1.5 mm glass and it’s dirt cheap.
One of my major missions in life it to transfer a design onto metal.
I have done transfer paper, decals, carbon paper, printed paper to name a few.
I finally worked out the correct sequence.
Print your design out on a piece of tracing paper.
Use a print shop, because they use a thicker toner than do the office machines, although they also can work.
Put your design on a piece of pre sanded metal face first and use an earbud that is whetted with acetone and lightly wet the tracing paper.
The acetone causes the toner of the printer to liquefy and thus it adheres to the metal when you remove the tracing paper.
Viola! the design is transferred.
Of course, the day after I finally got the transfer method right, a buddy of mine walks into my workshop and says that that is how all the engravers do it.
Talk about reinventing the wheel.
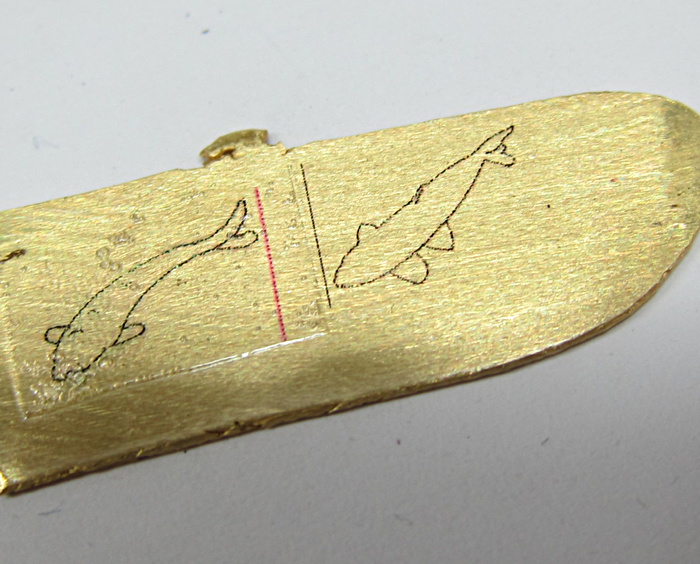
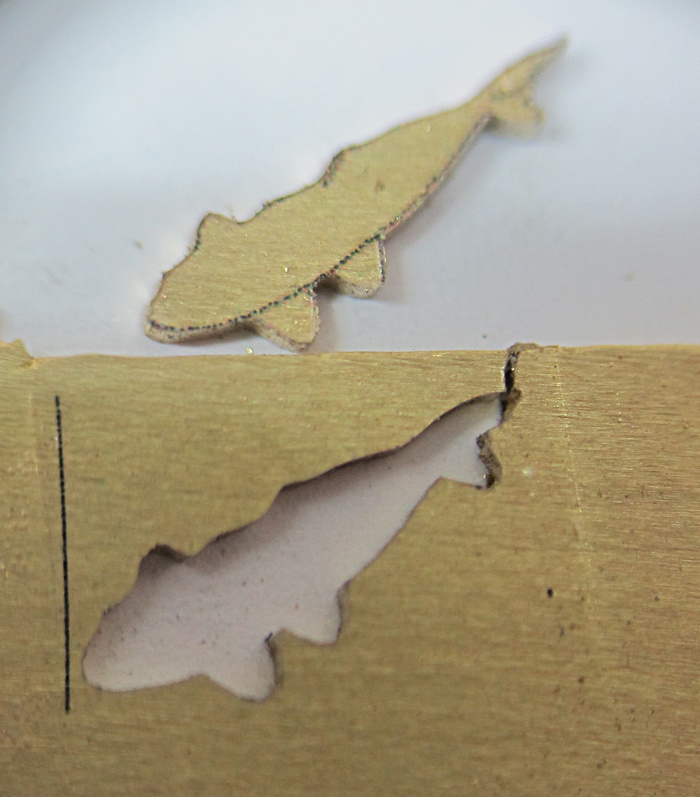
Anyway, I use a 0.7 mm thick piece of 18ct gold and then I pierce the fish out using a No 8/0 blade and file them round and finish the sides off.

Here is a picture of the fish lying on top of the undrilled glass, working on the fish positioning and shadow fall.
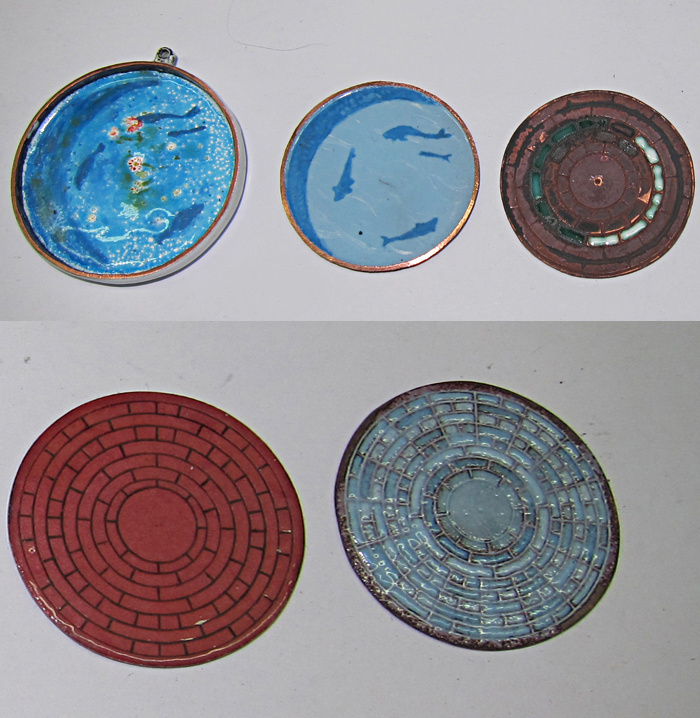
I made many attempts at a reasonable background, these are the ones I bothered making a photo of.
The others were too wrecked to photograph
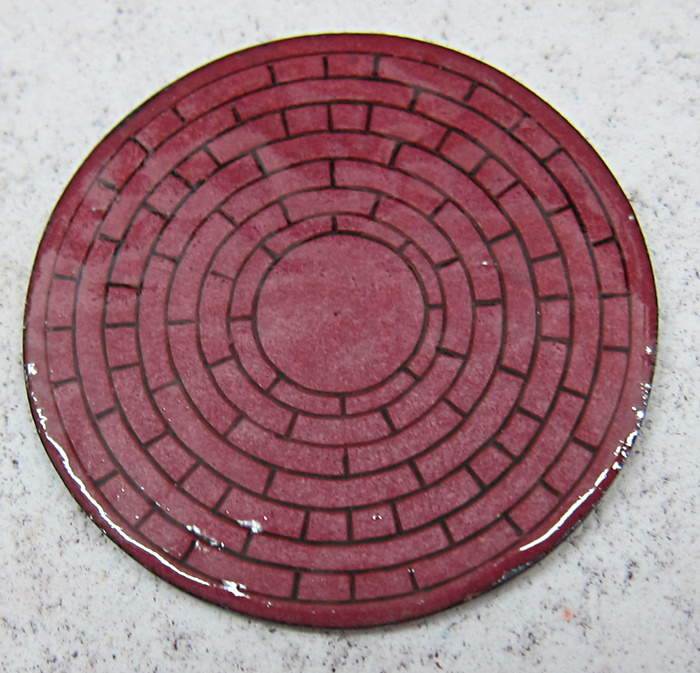
One background that came out quite nice for what it’s worth, was this one.
But it didn’t show the shadows of the fish at all.
Still, I quite liked the effect, because it looks like a tile mosaic.
First it is engraved, then fired with black and then all the little squares are packed quite high and fired just ---- so.
Just before gloss over occurs, to give a tile rough/matt affect.
This one on the same idea.
I like the way the copper went a brick kind of colour.
First I engrave the lines out, then I fire some finely powdered enamel in the engraved lines.
Then I fire a clear coat on top.
I would have stoned the face and then fired it again if I had not discarded it.
Still, these are techniques I will store for future investigation when my second childhood comes around.
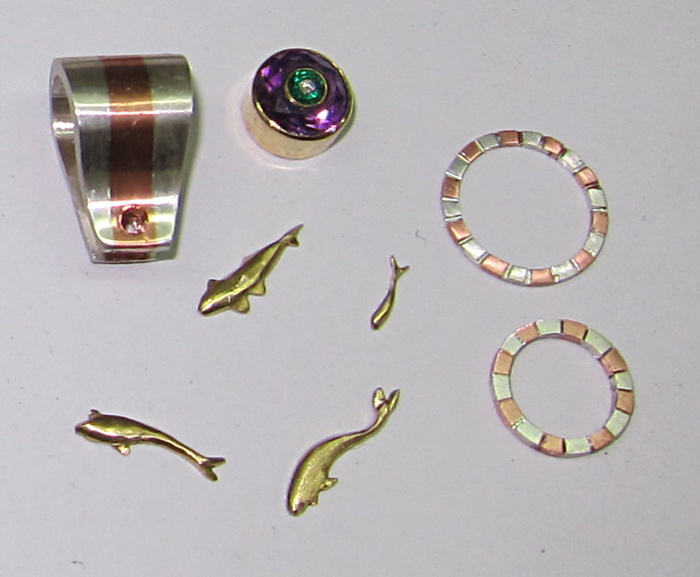
Anyway, so here are all the exterior components.
The center rings and bail were made as were the outside mosaic was made…
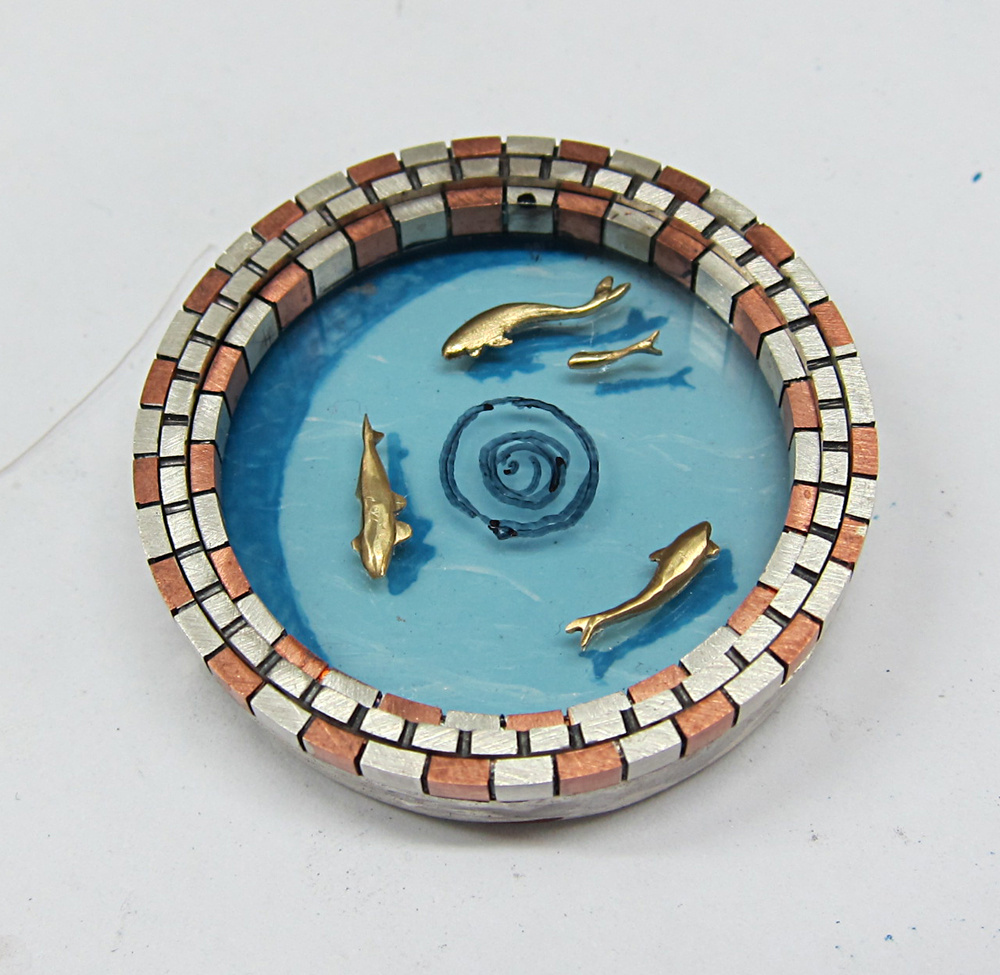
So I enameled a mix of blues for the background and then I used painting enamels from Thompson to fill in the shadows.
I like Thompson’s because they give you the actual oxide colours so you can vary the intensity and viscosity and fineness of the paint.
I use pine oil as a carrying agent.
I like it because stays open for a medium amount of time and leaves little residue when it burns off----and it smells nice.
The others paints that I use is WG Ball from the UK. These are pre-mixed so they tend to settle but they still very good.

So here are all the individual components before assembly.
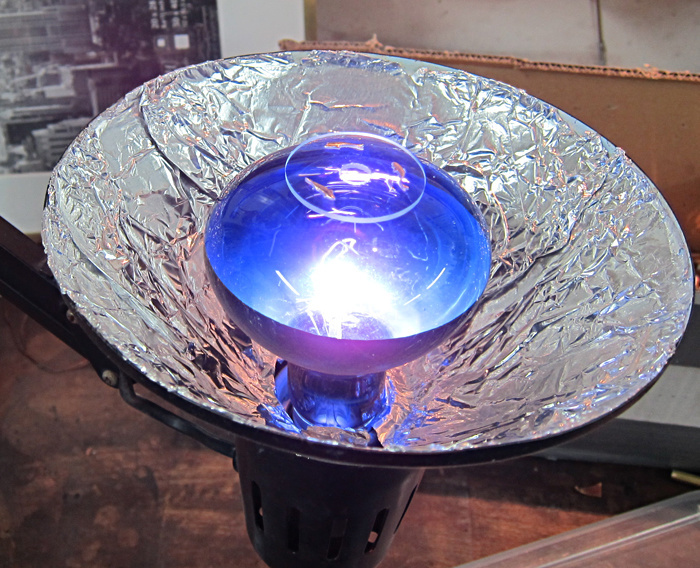
The fish and center stone are attached with a UV light curing acrylate adhesive.
As was the center part of the glass.
I take great care while the resin cures, because should they shift during curing, the fish cannot be removed without destroying them.
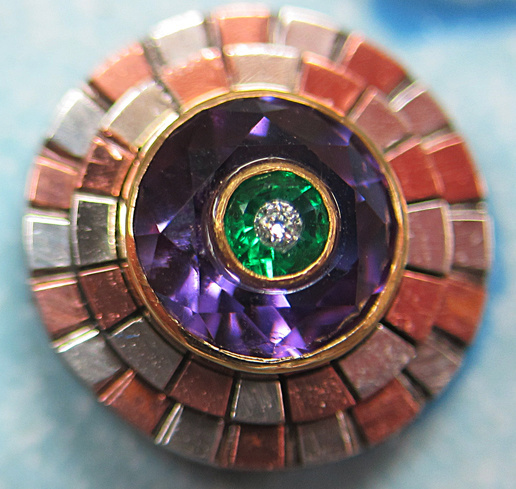
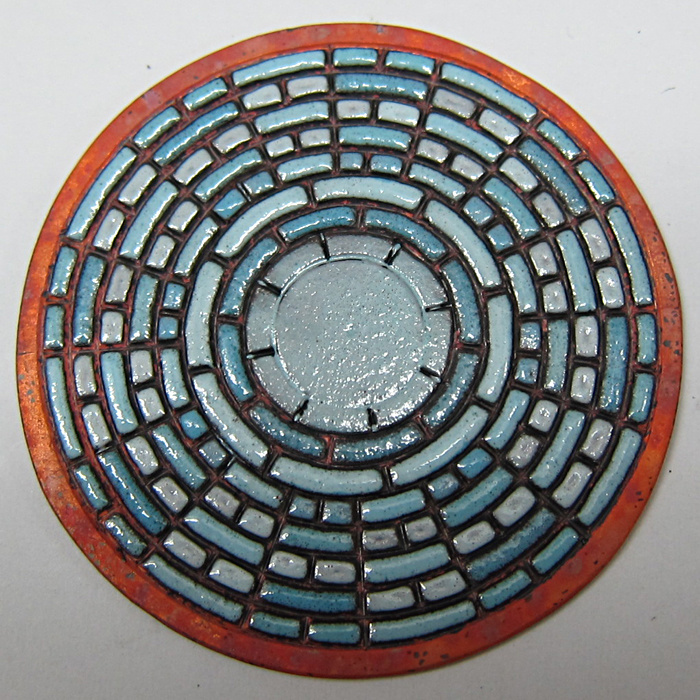
Close up of the center.
The two inner rings are pavé into the outer ring.
So now I have the construction of this pendant on record.